1
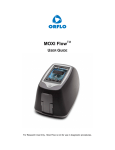
MOXI FlowTM USER GUIDE For Research Use Only. Moxi Flow is not for use in diagnostic procedures. The information in this document is subject to change without notice and should not be construed as a commitment by ORFLO Technologies, a DBA of E.I. Spectra, LLC. Neither Orflo Technologies nor any of its affiliated corporations assumes responsibility for any errors that may appear in this document. This manual is believed to be complete and accurate at the time of publication. In no event shall Orflo Technologies or any of its affiliated corporations be liable for incidental or consequential damages in connection with or arising from the use of this manual. © 2013 ORFLO Technologies, a DBA of E.I. Spectra, LLC. All rights reserved. Rev. 1.0.0, 06/2013 The ORFLO symbol and Moxi Flow are trademarks of E.I Spectra, LLC, registered in the U.S. and other countries. Windows, Windows XP, Windows Vista, Windows 7, and Windows 8 are trademarks of Microsoft Corporation, registered in the U.S. and other countries. Mac and Mac OS are trademarks of Apple Corporation, registered in the U.S. and other countries. Bluetooth and the Bluetooth logos are registered trademarks of Bluetooth SIG, Inc., registered in the U.S. and other countries. Accutase is a registered trademark of Innovative Cell Technologies. TÜV SÜD and the TÜV SÜD symbol are registered trademarks of TÜV SÜD Aktiengesellschaft. Contents Introduction ................................................................................................................................ 1 About the User Guide................................................................................................................. 1 Conventions Used in the User Guide ......................................................................................... 1 Safety Precautions ..................................................................................................................... 2 General Safety ....................................................................................................................... 2 Laser Safety ........................................................................................................................... 2 Biological Safety ..................................................................................................................... 3 Moxi FlowTM System Overview ................................................................................................... 4 Moxi FlowTM Accessories ........................................................................................................... 5 Getting Started ........................................................................................................................... 6 General Guidelines .................................................................................................................... 6 Materials Required ..................................................................................................................... 7 Using the Moxi FlowTM ............................................................................................................... 7 Settings .................................................................................................................................. 7 Running a Test ....................................................................................................................... 7 Managing the Data ................................................................................................................. 8 Retrieving and Deleting Data .................................................................................................10 Moxi FlowTM Help...................................................................................................................11 Connecting to Moxi FlowTM via USB ......................................................................................12 Instrument Firmware and Software Upgrades........................................................................12 Updating Moxi FlowTM Firmware via USB ..............................................................................12 Moxi FlowTM Apps ..................................................................................................................13 Troubleshooting ........................................................................................................................14 Maintenance and Storage .........................................................................................................16 Specifications for the Moxi FlowTM.............................................................................................17 Ordering Information .................................................................................................................18 Technical Service ......................................................................................................................18 Warranty ...................................................................................................................................18 Introduction The ORFLO Moxi FlowTM is a portable, micro-flow cytometer that utilizes a disposable, thin-film cassette and a combination of a 532nm laser, precision optics, analog and digital hardware, and proprietary software to perform automated particle counting and analysis functions.. It combines the gold standard Coulter Principle with micro-flow cytometry to deliver highly accurate and repeatable results in less than 10 seconds per test. The Moxi FlowTM performs very accurate cell counts and quantitative assessments of cell health, apoptosis, and cell cycle. The system is portable making it ideal for use in a hood or multiple lab locations. Test results are displayed in the form of histograms and scatter plots. The Moxi FlowTM can store up to 2GB of data and, if desired, the data may be downloaded to a PC or Mac via USB connectivity via a Bluetooth wireless connection. The system is intended for research use only and has been tested with cell types that are representative of those commonly used. It is not intended for use in medical diagnostic procedures. About the User Guide The Moxi FlowTM User Guide provides detailed information for operating, maintaining, and troubleshooting the Moxi FlowTM system. The user guide does not include instructions for using the optional Moxi Flow Analysis Software. For more information on this product, please visit www.orflo.com. Similarly, the user guide does not include information on preparing samples prior to running them in the Moxi FlowTM. For more information on this topic, please visit www.orflo.com. Conventions Used in the User Guide WARNING Alerts you to a situation that may cause injury to the user. CAUTION Alerts you to a situation that may cause damage to the system, loss of data, or incorrect results. NOTE Indicates additional related information that may be helpful to the user. Moxi Flow User Guide Page 1 Safety Precautions The Moxi FlowTM has integrated safety features that are designed for the protection of the user. Use the Moxi FlowTM only as directed in this guide. Please review and understand the safety instructions below before operating the system. General Safety WARNING To avoid the danger of electric shock: Prior to use, verify that the USB cable and USB charging adapter are plugged securely into a properly grounded AC power outlet. Verify that the connection between the USB cable and the instrument is secure and the AC power in your location is within the specifications for the instrument (see page 17). Do not immerse the instrument, USB cable, or USB power adapter in liquid or allow liquid to enter the instrument. Do not attempt to disassemble or service the Moxi FlowTM. The instrument has no user serviceable parts. All service must be performed by ORFLO Technologies. WARNING To avoid the danger of fire or explosion, do not use the Moxi FlowTM with flammable or explosive liquids. Laser Safety WARNING The Moxi FlowTM is a Class I laser product. The system contains a Class IIIb laser that operates at 532 nm. Direct exposure to laser radiation is harmful. The following guidelines should be followed to avoid exposure: An interlock on the upper door prevents the laser from operating when the door is open. Do not attempt to defeat the interlock and run a test with the door open. Do not operate the Moxi FlowTM if there is any damage to the instrument’s enclosure. Moxi Flow User Guide Page 2 Biological Safety WARNING Biological samples have the potential to transmit harmful or fatal disease. The following guidelines should be followed to minimize the risk of exposure to biohazardous materials. Handle all biological samples as if they are capable of transmitting harmful infections. Wear appropriate personal protective equipment (PPE) including clothing, eyewear, and gloves. Do not pipette by mouth. Dispose of biological waste in accordance with all applicable local, state, and federal regulations. Moxi Flow User Guide Page 3 Moxi FlowTM System Overview The Moxi FlowTM Kit includes the Moxi FlowTM instrument, USB Cable, Power Adapter (US and EU versions only), USB Flash Drive with User Guide and one pack of 25 Cassettes. USB Cable Port Touch Screen Display Power/Reset Button Lower Door Upper Door Test 2 Fill Port Test 1 Fill Port Disposable Test Cassette Moxi Flow User Guide Page 4 Component Function Touch Screen Display Allows user to interface with the instrument by pressing on icons and targets. Displays all information needed for operation and analysis of results. Power/Reset Button Turns instrument on and off. Resets the unit when pressed and held for >5 seconds. Lower Door Manually opened and closed by user to allow insertion of a test cassette. Upper Door Manually opened and closed by user to allow loading of a test sample. Door must be closed prior to running a test. USB Cable Port Connects instrument to USB cable. Cassette Disposable used for loading samples. Each cassette contains two fill ports thereby allowing for two tests to be run per cassette. Moxi FlowTM Accessories Power Adapter (US style) Power Adapter (EU style) USB Cable USB Flash Drive with User Manual Moxi Flow User Guide Page 5 Part Function USB Cable Connects instrument to PC/Mac or power adapter Power Adapter, US Style (US kit only) Connects USB cable to a 110 VAC outlet Power Adaptor, EU Style (EU kit only) Connects USB cable to a 220 VAC outlet USB Flash Drive Contains Moxi FlowTM User Guide Getting Started The Moxi FlowTM is shipped in a condition ready for initial use. To begin, plug the USB Cable into the instrument at one end (mini-USB). Plug the opposite end of the USB Cable (standard USB) into the Power Adapter. Plug the Power Adapter into an AC outlet that matches the rating of the Power Adapter. CAUTION Use only an Orflo supplied USB Cable and Power Adapter. Use of other products may result in inaccurate test results or damage to the instrument. NOTE Tests should only be performed with the instrument powered by an AC source. Although the instrument has an internal, rechargeable battery, Orflo strongly recommends that tests not be run on battery power alone. General Guidelines The Moxi FlowTM system is used with Moxi Type MFM and Type MFS Cassettes. Refer to the Specifications section for information on the operating ranges for the system. The sample volume for a test should be 50 µL. If necessary, prepare dilutions of the sample using ORFLO Diluent (Cat. No. MXA006) or a diluent that is compatible with the characteristics of the cells or beads. The diluent used should not cause changes in the cell size and should have sufficient conductivity to enable operation of the instrument. Water, hypotonic, or hypertonic solutions are not acceptable diluents. Moxi Flow User Guide Page 6 Materials Required Cell or bead sample (diluted and dissociated, if necessary); 50 µL minimum. Pipette and appropriately sized pipette tips Using the Moxi FlowTM Settings Press the Power Button to turn on the instrument. Set the date and time by pressing the Settings icon on the main menu of the Moxi FlowTM. Then use the arrow keys and follow the instructions displayed on the screen. Running a Test 1. If necessary, dilute a cell or bead suspension with ORFLO Diluent or an appropriate diluent so that the cell concentration is within the operating range of the cassette being used (Type MF-M: 1x10⁴ to 1.75x10⁶ cells/mL, Type MF-S: 1x10⁴ to 2x10⁶ beads/mL). For Type MF-M cassettes, a dilution of 1:5 to 1:20 is recommended for most mammalian cell lines, but the appropriate dilution will depend on cell type and seeding density. Type MF-S cassettes will typically require no to 1:2 dilution depending on cell type and seeding density. The volume required for an accurate count is approximately 50 µL. 2. Turn the instrument on by pressing the power button and the Home screen will be displayed. Select a test type by pressing one of the icons displayed on the screen. NOTE: The instrument must be plugged in to an AC source to run a test. Tests should not be run on battery power alone. Moxi Flow User Guide Page 7 3. Open the Upper and Lower Doors. Insert a test cassette and close both Doors. The Moxi FlowTM will automatically perform a calibration step and then prompt the user to load a sample when complete. 4. Open the Upper Door and pipette a 50 µL sample into the fill port of the cassette (either test 1 or test 2, depending on which end of the cassette was inserted into the instrument) and close the Upper Door. 5. The Moxi FlowTM will begin the test and the results will be complete in approximately 8 seconds. The results will then automatically be displayed on the screen. Managing the Data 1. The results of a test are initially displayed as a scatter plot. The results of a Viability Count (PI) test are shown as an example. Live cell and dead cell counts are displayed below the graph. Live cell % is reported in the yellow box above the graph. The gating can be manually adjusted by pressing the blue or red dots and dragging them to the desired position. Live and dead cell counts will update automatically. 2. Press the Histo icon to view the results in the form of a histogram. Press the up and down arrows to the right of the graph to increase or decrease the vertical scale. Press the Dot Plot icon to return to the scatter plot. Moxi Flow User Guide Page 8 3. Press the blue square icon at the lower right corner of the graph to overlay histogram curves on the scatter plot. Press the blue square icon again to remove the overlay curves. 4. Press the Delete icon at any time to permanently delete the results of the test. 5. Press the Done icon to save the results and return to the Home screen. Moxi Flow User Guide Page 9 Retrieving and Deleting Data 1. To open a saved test, press the Saved Data icon on the Home screen. 2. Icons for up to nine saved tests will be displayed on the screen. Press the appropriate icon for the test of interest or press the Page Up or Page Down icon to view more test results. Press the Done icon to close the test results and return to the saved results screen. 3. Press the Delete All icon to permanently delete the results of all saved tests. 4. Press the Close icon to return to the Home screen. Moxi Flow User Guide Page 10 Moxi FlowTM Help 1. For help with operation of the Moxi FlowTM, press the Help icon on the Home screen. Visual instructions for inserting a cassette will be presented. 2. Press the Next icon to view the next visual instruction that demonstrates how to pipette a sample into the cassette. 3. Press the Next icon to proceed to the next instruction screen or press the Previous icon to return to the previous screen. 4. Press the Done icon to exit the help screens and return to the Home screen. For additional help, see the Troubleshooting table (page 12). Moxi Flow User Guide Page 11 Connecting to Moxi FlowTM via USB 1. Unplug the USB Cable from the Moxi FlowTM Power Adaptor. 2. Plug the wide end of the USB Cable into your computer’s USB port. 3. Plug the small end of the cable into the back of the Moxi FlowTM. 4. Make sure the Moxi FlowTM is powered on and wait for it to appear as a disk (or flash) drive in your computer’s file system (Windows Explorer for PC’s or Finder for Mac). Note: Upon power-up, the Moxi FlowTM will display a notification on the home screen that it is “Exporting files to disk”. The Moxi FlowTM disk will be mounted to (appear as a drive on) the computer following completion of this file export process. 5. Open the Moxi FlowTM drive folder and copy the files to your computer (drag and drop or copy and paste) Instrument Firmware and Software Upgrades This User Guide describes OS version 1.0 of the Moxi FlowTM firmware. The firmware may be updated periodically. For information on the most up-to-date firmware, visit the ORFLO Technologies website at www.orflo.com. Register your instrument in order to receive notification about relevant firmware upgrades. Updating Moxi FlowTM Firmware via USB The Moxi FlowTM firmware can be updated through a USB connection. For this method of update, the user must connect the Moxi FlowTM to the computer’s USB port via the provided USB cable. Unplug the power adapter to expose the USB connector for the computer. Next, the user needs to put the Moxi FlowTM into a firmware update mode. This can be done in either of the following two ways: With the unit powered off, quickly press the power/reset button four times. When successful, the white Moxi FlowTM screen will display with text under the Moxi FlowTM logo that indicates the system is in firmware update mode. If unsuccessful, turn the power off and retry. Moxi Flow User Guide Page 12 Moxi FlowTM Apps Moxi FlowTM applications can be entered from touching the Apps icon on the home screen. Included applications in version 1.0 are: Clock Programmable timer (with sound notification) Restore – restores unit to factory settings Loader – Puts unit is Firmware/OS loader mode Off – powers the unit off. Moxi Flow User Guide Page 13 Troubleshooting Symptom Cause Corrective Action Questionable concentration Concentration of cell/bead sample is too high or too low Make sure concentration of cell or bead sample is within recommended guidelines. Refer to General Guidelines section. Wrong diluent Use a diluent that is compatible with cells being counted. ORFLO Diluent (Cat No. MXA006) or equivalent. Cell clumping Ensure the cells are in a single-cell suspension. Break clumps by pipetting up and down with a standard pipette. ORFLO recommends Accutase or equivalent. Wrong diluent Use a diluent that is compatible with cells being counted. ORFLO Diluent (Cat No. MXA006) or equivalent. Questionable cell diameter Cell clumping Peak of interest indistinct Cell/Bead concentration too low Ensure the cells are in a single-cell suspension. Break clumps by pipetting up and down with a standard pipette. ORFLO recommends Accutase or equivalent. Try running the cell sample at a higher concentration. Refer to Managing the Data section for instructions on adjusting the Y-axis. Cells not viable Instrument stops responding Internal firmware issue due to instrument malfunction or high level of external interference Reset instrument by pressing and holding the power button for at least 5 seconds. If problem persists, return instrument for service. Battery will not fully charge Battery is faulty or has surpassed its service life Return instrument for battery replacement Insufficient fluid (<50 µL) Adjust pipette to ensure sufficient volume for the test. For improperly calibrated pipettes, this might require a setting >50 µL Cells/beads too large Make certain that the particle type is within the specified size range of the cassettes being used Highly/strongly aggregated cells clogging filter and blocking flow Try breaking apart cells using pipette trituration and/or protease treatment. Incomplete Test Moxi Flow User Guide Page 14 Error/Warning Messages Corrective Action Cause Lost start Sample volume too small or air bubble in test cassette Make sure sample volume is at least 50 µL. Pipette more carefully to avoid causing bubbles. Lost sensor - detect Cassette not properly inserted into cell counter Do not remove cassette from Moxi Flow before completion of test cycle. Ensure cassette is properly inserted. Warning High Concentration Concentration of cell or bead sample is too high Make sure concentration of cell or bead sample is within recommended guidelines. Refer to General Guidelines section. Start open Stop open Start/stop short Electrode short Issue detected upon test cassette insertion Reinsert the same cassette (opposite side) or a different cassette. If problem persists, return instrument for service. Used cassette Previously used sensor detected Do not reuse sensors. Low battery Battery needs to be recharged Use instrument with AC power or recharge instrument for a minimum of 4 hours. Disk full Instrument has exceeded maximum storage capacity of ~500 histograms Delete histograms or download to computer. Disk now full After histogram is recorded and saved, there is no more space on the disk drive Delete files. Unhandled exception Internal firmware issue due to instrument malfunction or high level of external interference Clear error by turning instrument off and then on again. Remove cell counter from sources of external interference. If problem persists, return instrument for service. SPI timeout Instrument malfunction If problem persists, return instrument for service. Corrupt filesys Instrument malfunction If problem persists, return instrument for service. Defaults loaded Instrument has detected corruption or new version of firmware and reset all settings to factory defaults If problem persists, return instrument for service. Sensor malfunction Use new sensor. Small Particle Mode selected User touched the black “Small Particle Mode <8 µm” box to start the test. Re-run test touching the main part of the start screen. User rescaled test Tests can only be rescaled immediately after the run. If it is immediately after a run, the user can cycle through the scale ranges by pressing the scale range icon (see “Managing your data” section) Type S cassette run on Moxi Flow Firmware 3.5 or earlier Upgrade Moxi Flow system firmware to v3.6 or later False start TM False stop Incorrect x-axis scale range Moxi Flow User Guide Page 15 Maintenance and Storage Storage Store the Moxi FlowTM and Moxi cassettes at room temperature in a dry environment. For best results, cassettes should be used within one year of purchase. Avoid prolonged exposure to ultraviolet light as it may degrade the touch screen display or discolor the external surfaces of the instrument. Charging the Battery The Moxi FlowTM contains a 3.7 V lithium ion battery which can be charged for approximately 500 cycles. The battery may be charged at any time in the discharge cycle and can be charged continuously without damage, using a PC/Mac or the power adapter. Refer to the Installation section for information on how to charge the battery. CAUTION: To prevent battery damage, use ONLY an Orflo supplied power adapter or the USB port of a computer. The battery life is about 2 to 5 years depending on use. Lithium ion batteries discharge even if they are not in use. To prevent battery damage from self-discharge, charge the battery at least once every two months. Cleaning/Sanitizing The Moxi FlowTM is NOT autoclavable. Extreme heat will damage the battery, touch screen display, and other electronic components. The external surfaces of the Moxi FlowTM body and touch screen display can be sanitized by wiping with a soft, nonabrasive cloth moistened with 70% isopropyl alcohol (IPA) or 70% ethanol. Do not clean the instrument with any more aggressive solutions. CAUTION: When sanitizing, make certain that no liquid enters any internal cavities of the instrument. This could result in damage the instrument. Maintenance There is no routine maintenance required for the Moxi FlowTM. In addition, there are no user serviceable parts. Instrument repairs must be carried out by authorized personnel only. Moxi Flow User Guide Page 16 Specifications for the Moxi FlowTM System Performance Detection Channels: Laser Wavelength: Number of PMT’s: Optical Detection Range: Particle Size Detection: Display: Resolution: Data Storage: Connectivity: Data Output Format: Pre-Programmed Tests: Open Platform? Printer Capable? 2 (1 color, 1 size) 532 nm 1 590/40 nm (e.g. R-PE) Impedimetric (Coulter Principle) 480 x 320 color touchscreen 1200 histogram bins 2 Gb (full histograms and scatter plot data) USB on-the-go FCS 3.1 Viability, Apoptosis, CD4+ T Cell, Size Histogram, PMT Histogram, MOXI-PLEX Bead Assays (multiplexed) Yes, 2-Parameter (requires R-PE reporter) Yes (wireless Bluetooth printing) Cassette Performance Preferred Sample Type: Effective Diameter - Size Range: Cell Volume (fL): Measurement Time: Concentration: Sample Volume (µL): Type MFS Beads 3 - 15µm 14 - 1800 ~8 seconds Software PC or Mac compatible; requires Windows XP, Windows Vista, Windows 7, or Mac OS X operating system (v 10.6 or greater) Moxi Flow Firmware (OS) Version 1.0 Dimensions Length: Width: Height: Weight: 8.0 in. (20.3 cm) 4.5 in. (11.4 cm) 4.5 in. (11.4 cm) 2.75 lbs (680 g) Electrical Specifications Internal Battery: AC Power Adapters: (US and EU types) Rechargeable 3.7 V, 4500 mAh lithium ion Input: 100-240 VAC (50/60 Hz), 0.2 A Output: 5 VDC, 1 A 4 6 Type MFM Cell Preparations 4 - 20µm 34 - 4200 ~5 seconds 4 6 1x10 - 2x10 beads/mL 1x10 - 1.75x10 cells/mL 50 50 Operating Environmental Conditions Temperature: 15-30°C Maximum Relative Humidity: 20-80% (non-condensing) Moxi Flow User Guide Page 17 Ordering Information This section lists catalog numbers for the Moxi Flow Automated Cell Counter and related products. You can purchase Orflo products through a regional distributor or on-line at www.orflo.com. See the Technical Assistance section for information about contacting Orflo. Product Description Cat. No. Quantity/Pack Technical Service For technical service, contact ORFLO Technologies at 855-TRY-MOXI (855-879-6694) or email us at [email protected]. Warranty What is Covered By Your Warranty ORFLO Technologies (“ORFLO”) warrants its products will meet their applicable specifications when used in accordance with their published instructions.* The ORFLO product warranty is a “bumper to bumper” warranty on your ORFLO automated cell analysis product for the term of the warranty. This includes all electrical parts, mechanical parts, batteries, displays, materials and workmanship. Our warranty also covers the materials and workmanship of our Cassettes and accessory products. * Please ensure that you have the latest version of the product user guides. The most current version are found on our website at www.orflo.com How Long is Your Warranty Your ORFLO products are covered for a period of one (1) year from the original date of purchase from ORFLO or an approved sales distributor.* You may purchase, for an additional fee, an extended warranty for your Orflo cell analysis product for two (2) or four (4) years from the date of purchase. The extended warranty extends the duration of your warranty coverage from the date of original purchase from ORFLO or an approved sales distributor, but does not alter, change, or otherwise add to the coverage described here. * In accordance with EU requirements, our standard product warranties remain in effect for two (2) years in EU countries. What is Not Covered by Your Warranty The following exclusions apply to your ORFLO warranty: Damage resulting from misuse, abuse, or accidents Damage resulting from failure to follow the proper operating instructions contained in the User Guide Damage resulting from failure to use an ORFLO USB cable and power adapter. Moxi Flow User Guide Page 18 Damage resulting from unauthorized, non-ORFLO repair or improper tampering with the product Damage resulting from fire, flood, or “Acts of God” beyond the control of ORFLO Technologies What To Do If You Think You Have a Warranty Issue Please contact ORFLO promptly at 1-855-TRY-MOXI (855-879-6694) or send an email to [email protected] to describe the issue you are experiencing. Please be prepared to supply your name, contact information, the serial number of your product, and the original purchase date of the unit. If your issue remains unresolved after consulting with one of our technicians, ORFLO will provide a Returned Material Authorization (RMA) number and you will be asked to ship your product back to us at: ORFLO Technologies Attn: Warranty Returns (RMA#: XXXX) 130 Airport Circle Hailey, ID 83333 An ORFLO technician will promptly examine your product to determine if the issue is covered under the ORFLO warranty. If it is, we will decide to either repair it or replace it at no cost to you, including shipping. Repair or replacement will be done as expediently as possible to ensure minimum disruption to your laboratory. Express or Implied Warranties and Other Legal Stuff ORFLO Technologies makes no other warranty, express or implied. There is no warranty or merchantability or fitness for a particular purpose. The warranty provided herein and the data, specifications, and descriptions of ORFLO products appearing in ORFLO’s product literature may not be altered except by expressed written agreement signed by an officer of ORFLO Technologies. Representations, oral or written, which are inconsistent with this warranty or such publications are not authorized and if given, should not be relied upon. ORFLO Technologies shall not be liable for consequential, incidental, special or other damages resulting from economic loss or property damage sustained by any customer from the use of its products. Moxi Flow User Guide Page 19 Moxi Flow User Guide Page 20