1
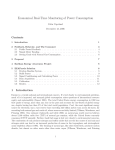
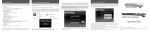
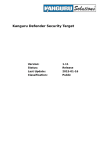
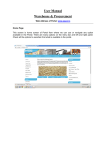
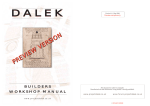
Guide to Kanguru Defender - Hardware Encrypted Flash Drive
Delivery
The Kanguru Defender hardware encrypted flash drive is delivered in a box and is
accompanied by a mini CD (labelled ‘Kanguru Drivers & Manuals CD) a neck strap, a
USB port extension cable and a warranty form.
The CD in fact only contains a user manual and an electronic copy of the warranty
form and so does not need to be run unless the documentation is required. This
paper provides an abridged version of the user manual.
Setup
1. Ensure that the write protect switch that is on the side of the Defender is switched
to open (towards the USB connector end).
2. Connect the Defender to your computer’s USB port either directly or using the
extension lead provided if the port is not easily accessible.
3. The Defender Manager application should start automatically (this can take a few
minutes whilst your computer recognises the new hardware and launches the
application). Once the computer has found the Defender it will ask you if you would
like to reboot (see Figure 1). Leave the Defender attached to the USB port and
select yes.
Figure 1.
4. When the computer has rebooted, open ‘My Computer’ on the Desktop screen
and double click on the Kanguru Defender CD Drive. The ‘Kanguru Defender
Manager Setup Wizard’ will automatically launch (see Figure 2).
Figure 2
5. Follow the instructions that are shown on the Setup Wizard:
¾ Select next.
¾ Enter a password of at least eight characters, re-type it to confirm it.*
¾ Select ‘Apply’ and then ‘Next’ to continue. The Password Wizard will set
‘Security Parameters’ you then select ‘Finish’.
¾ A Log-in screen will then auto-launch and requires the password to be
entered and ‘Login’ selected. This will launch a ‘Secure Partition’.
¾ On entering the password, a new drive will be opened called ‘Security’ and a
small icon will appear on your bottom toolbar near your clock. This is the
Kanguru Defender Manager (see Figure 3).
*
The password that you choose should be strong but memorable as the security of the data that you will
be storing on the flash drive is only as strong as the password that you use. Fore guidance on selecting
a strong but memorable password please see
http://campus.leeds.ac.uk/isms/guidelines/passwords.htm.
Figure 3
Use
To use the Defender click on the ‘Folders Tab’ in the ‘Security window’ and simply
drag folders or files from folders from your other drives and copy them into the
‘Security’ drive.
The ‘Security drive’ is treated just like any other drive on your computer and has the
same functionality; create new folders, copy, delete etc.
Once you have finished close the ‘Security window’.
Disconnection
Disconnection of the Defender requires two actions - If you disconnect the device
without following these steps your data could be lost:
¾ First you must ‘unmount it’. To do this you need to left click on the Kanguru
Defender Manager icon and select the first option; ‘Unmount Kanguru
Defender’. This will unmount the ‘Secure Partition’.
¾ Then you must safely remove hardware. To do this, double click on the
safely remove hardware icon next to the Kanguru Defender Manager icon
(displays a green arrow). Select stop in the window that opens, select
‘Kanguru Defender USB Device’ in the second window that opens then okay.
¾ It is then safe to remove the Defender from the USB port.
Further Use
Each time you connect the Defender to a computer which it has previously been
associated with (as described in ‘Setup’) the Kanguru Defender Manager will
automatically launch and request the password.
Warnings
1. If you enter your password incorrectly 7 times all of your data will be erased along
with the password. You will be warned about this course of action at the 6th entry
of the incorrect password.
2. If you use the ‘Reset to factory settings’ button that appears on the ‘Login screen’
you will loose all of your data and the password will have to be reset as described
in #5 of ‘Setup’ (above).
Note
Although the Kanguru Defender has been tested with various versions of Windows
and with different desktop images at the University, it is possible that a message may
appear on the screen which is not addressed in the guide. If this occurs and you are
not sure of the action to take, please contact Kevin Darley, IT Security Co-ordinator,
University of Leeds, for advice on 0113 343 1118, or 07795 961650.