1
Mouse 2007 but worked with a much wider variety of webcams. The download for the Camera Mouse
2008 Installer was almost 44 MB. This caused problems for folks with slow or unreliable
connections. By restricting the host computer to Windows Vista or Windows XP (with Service
Pack 2 or Service Pack 3 installed), we were able to lower the size of the Camera Mouse 2009
Installer to 5 MB. Camera Mouse 2010 and now Camera Mouse 2011 are designed to work with
Windows 7 as well as Window Vista and Windows XP and with the 64 bit versions of the
operating systems as well as with the 32 bit versions.
HARDWARE
To run Camera Mouse 2011 you will need a computer with Windows 7 or Windows Vista or
Windows XP (with Service Pack 2 or Service Pack 3) and a webcam. We use a Logitech HD
Pro Webcam C910 ($99.99 full retail as of April 2011) or a Microsoft LifeCam Cinema ($79.99
full retail) for development. Just about any good quality webcam should do, including most
built-in webcams. The less expensive webcams can produce noisier images, which Camera
Mouse can have a difficult time tracking.
BEFORE USING CAMERA MOUSE 2011
Before using Camera Mouse 2011 you should install the webcam according to the instructions
from the manufacturer. Be sure to install the driver software for the webcam that comes with the
webcam on CD or the latest driver that is downloaded from the manufacturer’s website. Do not
try to use a generic Windows camera driver. If you can, test to make sure the webcam works.
GETTING STARTED WITH CAMERA MOUSE 2011
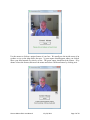
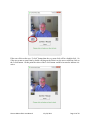
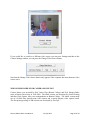
Place the webcam above or below your monitor so it is pointing at you. Start up Camera Mouse
2011 by double-clicking on the shortcut icon on your desktop. You should see a window with a
video screen that contains your face, like looking at yourself in the mirror.
Camera Mouse 2011 User Manual
July 24, 2011
Page 2 of 24