1
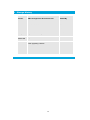
Users’ Manual
IP Hardware Decoder
User Manual
1U Rack Mounted Version
Page 11
Version 1.3/b NETIPHW2
6 March 2008
Cobham Surveillance
Domo Products
11 Manor Court, Barnes Wallis Road, Segensworth,
Specifications subject to change without
notice
Hampshire,
PO15 5TH, England
T: +44 (0)1489 566 750
F: +44 (0)1489 880 538
1
1
2
3
4
5
5.1
6
6.1
7
7.1
7.2
7.3
7.4
7.5
7.6
7.7
7.8
7.9
7.10
8
8.1
8.2
8.3
9
9.1
9.2
9.3
Table of Contents
Table of Contents .......................................................................................... 2
Change History .............................................................................................. 3
About this Manual.......................................................................................... 4
Introduction.................................................................................................... 5
Warranty and Support ................................................................................... 6
Warranty Cover ............................................................................................... 6
Safety, Compliance and Approvals .............................................................. 7
Safe Operating Procedures ............................................................................. 7
Getting Started and Basic Operation ........................................................... 8
Which Model Do I Have ................................................................................... 8
Controls ........................................................................................................... 8
Indicators ......................................................................................................... 9
IP Decoder Connections .................................................................................. 9
Installation Notes ........................................................................................... 15
Network Requirements .................................................................................. 15
Initial IP Setup ............................................................................................... 16
Powering on the System ................................................................................ 17
Using the Browser Controller ......................................................................... 18
Playing a Stream ........................................................................................ 19
Advanced Operation.................................................................................... 23
Setting up Network Interfaces ........................................................................ 23
Decoder Options............................................................................................ 25
Licence Upgrades.......................................................................................... 27
Connector Pin Outs ..................................................................................... 29
Power - 4-pin 0B LEMO Socket ..................................................................... 29
Audio - 5-pin 0B LEMO Socket ...................................................................... 29
RS232 Control / Data - 3-pin 0B LEMO Socket.............................................. 29
2
2
Change History
Version
Main Changes from Previous Version
Edited By
v1.0
Initial Release
FS
v1.1
Modified for IP Decoder v1.0
FS
v1.2
Additional comments
MB
V1.3wip
Updated Pictures & updated Audio connector
NMcS
V1.3
NETIPHW2
Updated and customised for NETIPHW2
FS
V1.3/b
Added comment about restoring defaults
when upgrading a license
FS
3
3
About this Manual
This manual describes the operation of the domo IP Hardware Decoder
Product. The manual is divided into three main sections.
•
Getting started and basic operation
This section describes to users how to deploy and use a domo IP Hardware
Decoder.
•
Advanced operation
This section describes the operation of the system in more detail,
concentrating particularly on how to change advanced parameters.
•
Technical reference
This section provides technical specification and control protocol data and
will be of interest to those integrating the IP Hardware Decoder into larger
systems.
4
4
Introduction
The domo IP Hardware Decoder is a professional digital video decoder
designed to receive multicast audio/video streams from Ethernet networks
and output decoded video in composite and S-Video formats, as well as
stereo audio. The IP decoder is designed to be used with domo
NETSTREAM and other domo streaming video products such as the CRX
Central Receiver.
The domo IP Hardware Decoder (NETIPHW2) is a 19’’ Rack product that
incorporates two video decoders into a single chassis. The unit is designed
to receive streaming video services from Ethernet networks and decode
these back to video for connection to monitoring equipment in control room
facilities. The IP Hardware Decoder incorporates low delay decoding
technology as well as optional AES decryption for security.
The NETIPHW2 decoder has two physical Decoder cards fitted. At first
release each decoder supports one channel of decoding. However, in the
future, as an upgrade, it will be possible for each Decoder card to decode
two channels of video. This will enable one NETIPHW2 to decode and
output up to 4 Video / Audio services.
The IP Hardware decoder complements the domo SOLO4 and SOLO2
product range, which enable the user to build wireless digital microwave
video systems. The standard domo SOLO4 and SOLO2
Encoder/Transmitter and Receiver/Decoder products have been designed
to provide rugged point-to-point links for high quality full frame rate video,
and audio, even in non line of sight and urban environments.
5
5
5.1
Warranty and Support
Warranty Cover
domo offers a 12 month standard product warranty. During this period,
should the customer encounter a fault with the equipment we recommend
the following course of action:
•
Check the support section of the website for information on that product and
any software/firmware upgrades. If fault persists;
•
Call our support line and report the fault. If fault persists and you are
informed to return the product please obtain an RMA number from the domo
support department, and ship the equipment with the RMA number
displayed and a description of the fault. Please email the support section
the airway bill/consignment number for tracking purposes.
•
If you have extended warranty provisions then domo will send an immediate
advance replacement to you. Under most circumstances this must be
returned once the fault item is repaired.
Depending on the nature of the fault domo endeavour to repair the
equipment and return it to the customer within 14 days of the item arriving at
our workshops.
Obviously it is impossible to cater for all types of faults and to manage 100%
replacement part availability, and delays are sometimes inevitable. This is
why domo recommend that its customers take out an extended warranty
(which includes advanced replacement of faulty items), and/or hold a basic
level of spare parts, which can be held by domo on the customer’s behalf.
Please contact domo for details of packages that can be tailored to meet
your individual needs, whether they are service availability, technical
training, local geographic support or dedicated spares holdings.
6
6
6.1
Safety, Compliance and Approvals
Safe Operating Procedures
•
Ensure that the power supply arrangements are adequate to meet the
stated requirements of each SOLO4 or SOLO2 product.
•
Operate within the environmental limits specified for the product.
•
Do not subject the indoor equipment to splashing or dripping liquids.
•
Only authorized, trained personnel should open the product. There are no
functions that required the User to gain access to the interior of the product.
7
7
Getting Started and Basic Operation
7.1
Which Model Do I Have
IP decoder units are marked with the new style domo product labels as
shown below. The product code is at the bottom left of the label, and the
serial number is in the middle.
domo
Made in the UK
Serial number
NETIPHW2
CE
The domo product code can be referenced in the table below.
Product Code
Product
Accompanying items
NETIPHW2
2 channel IP
Cables:
Hardware
2 * audio 2m (CA0183)
decoder
2* Control 3m (CA0001)
2* BNC Video (CA0006)
DC Power 2m (CA0023)
Note: It is assumed the customer will supply CAT5 RJ45 Ethernet cables
and S-Video cables, if connecting to an S-Video monitor.
The NETIPHW2 decoder has two physical Decoder cards fitted. At first
release each decoder supports one channel of decoding. However, in the
future, as an upgrade, it will be possible for each Decoder card to decode
two channels of video.
7.2
Controls
There are no physical controls on the IP Decoder, as the unit is controlled
from a standard web browser running on a PC or laptop.
If the IP address of neither Ethernet port is known, first follow the procedure described in the section ‘Initial
IP Set-up’.
8
7.3
Indicators
There are 4 LEDs on an IP Hardware Decoder. The LEDs are labelled on
the diagram below and have the following meaning:
LED
Colour
Meaning / Use
Power LED 1
Green
Will light 2 seconds after applying power. Indicates power is on and
FPGA for channel 1 is booted.
Power LED 2
Green
Will light 2 seconds after applying power. Indicates power is on and
FPGA for channel 2 is booted.
Status LED 1
Green
Flashing: Indicates equipment booting (approx 45 seconds)
Solid: Indicates channel 1 service is selected and is decoding.
Off: Indicates no service selected for channel 1
Status LED 2
Green
Flashing: Indicates equipment booting (approx 45 seconds)
Solid: Indicates channel 2 service is selected and is decoding.
Off: Indicates no service selected for channel 2
7.4
IP Decoder Connections
This section describes how to connect the domo IP Decoder NETIPHW2
product.
The picture below shows the front and back view of the domo IP Decoder
NETIPHW2 enclosure
Power LED
Status LED
Decoder Card 1
Decoder Card 2
9
The top-level functional block diagram is shown below
12V
IN
2 sets
AV Out
3 x RS232
2 x RJ45 Ethernet
IP Decoder 1
(D810 PCB)
2 sets
AV Out
3 x RS232
2 x RJ45 Ethernet
IP Decoder 2
(D810 PCB)
2 LEDs
Channel 1
2 LEDs
Channel 2
10
Each of the two domo IP Decoders should be connected as shown below.
CRX
IP Streamer
CRX
IP Streamer
CRX
IP Streamer
Network
Power Supply
CH 1 AV
Monitoring/
Recording
CH 2 AV
Monitoring/
Recording
CH1 PTZ
CH2 PTZ
The web browser controller can be plugged into the main network instead of the Control port.
11
RS232
Control for
Dual
Decoder
Setup / LAN / WAN Connection [RJ45 Ethernet labelled MAIN]
Connect this Ethernet port to a compatible 100Base-TX network that carries
domo IP Insertion Nodes streams. Use of 10Base-T networks for video
streaming is not recommended. This port should also be used for initial unit
setup if required (see Initial IP Setup section).
Connector
Signal
RJ45 socket
10Base-T / 100Base-TX, single or full-duplex,
auto-negotiation, auto MDI/MDIX feature for
automatic cross-over of Ethernet cables
Control Connection [RJ45 Ethernet labelled AUX]
Connect this Ethernet port to a PC or laptop that runs one of the supported
web browsers. The unit can also be controlled from the other Ethernet port,
by connecting the controlling computer to the main network.
Connector
Signal
RJ45 socket
10Base-T / 100Base-TX, single or full-duplex,
auto-negotiation, auto MDI/MDIX feature for
automatic cross-over of Ethernet cables
Composite Video Output Connection [Labelled Composite Video]
Connect the video output lead to the BNC connector labelled ‘Composite
Video Ch1’ on the IP Decoder and to the chosen video display device.
Connector
Signal
Video BNC
75 ohm composite video output, PAL or NTSC,
depending on incoming video stream
Typically the video display device will be a high quality monitor.
12
S-Video Output Connection [Labelled S-Video]
Connect an S-Video lead to the connector labelled ‘S-VIDEO’ on the IP
Decoder and to the chosen video display device.
Connector
Signal
S-Video
S-Video output, PAL or NTSC, depending on
incoming video stream
Typically the video display device will be a high quality monitor.
Audio OUTPUT Connection [Labelled Audio]
Push the LEMO connector into the socket labelled ‘AUDIO’, taking care to
align the connectors and connect the chosen audio output device.
Connector
Signal
Audio Plugs
Line level, 12dBu clip level, low impedance
source (20 ohm)
Typically the audio output device will be monitoring speakers.
Data / PTZ Connection [Labelled Aux]
The IP Decoder features a bi-directional DATA port, typically for use with
PTZ controllers. The RS-232 data is carried transparently across the
network between IP Insertion Nodes/Central Receivers and IP Decoders.
Connector
Signal
RS232 socket
Standard RS232 signal levels, RX, TX and
ground only.
Setup Connection [Labelled RS232 Control]
This port is used to give the unit a temporary IP address, in case the current
unit address is unknown See Initial IP Setup section.
Connector
Signal
RS232 socket
Standard RS232 signal levels, RX, TX and
ground only.
13
DC Power [Labelled DC Input]
The SOLO2/SOLO4 IP Decoder is powered from a nominal 12V DC supply.
As standard domo supply an AC to DC converter, terminated with a LEMO
connector on the DC power output. Push the LEMO plug into the socket
labelled ‘12V’, taking care to align the connectors. Connect the AC adapter
block to your local mains electricity supply, noting the mains supply
requirements detailed on the adapter.
The 12V DC input has the following characteristics.
•
Input Voltage Range – 10V to 18V, reverse voltage protected.
•
Current Draw – 1.5A at 12V
domo can supply optional bare DC power leads, for connection or
hardwiring to other DC sources. The domo part number is CABDC3
14
7.5
Installation Notes
The domo IP Hardware Decoder is a professional digital video decoder
designed to receive multicast audio/video streams from Ethernet networks
and output decoded video in composite and S-Video formats, as well as
stereo audio. The IP decoder is designed to be used with domo
NETSTREAM and other domo streaming video products such as the IP
Insertion Node and CRX Central Receiver. The NET IP Hardware decoder
is optionally equipped with two channels allowing it to decode two video
services simultaneously.
The domo SOLO2/SOLO4 IP Decoder is designed to be mounted in an
equipment rack or shelter and must not be exposed to the elements. The
receiver is not splash resistant, nor waterproof, so it should not be exposed
to moisture.
The IP Decoder is self-cooling; however it should be mounted in a ventilated
environment. Forced air cooling is not required. Adequate clearance on
either side the receiver (5cm) should be allowed for ventilation. In a 19inch
rack mounted environment domo recommends leaving 1U clearance above
and below the NETIPHW2 unit to ensure the unit does not overheat.
7.6
Network Requirements
The IP Hardware decoder should be connected to an Ethernet network with
the following characteristics.
Capacity
The network should have sufficient capacity to support the streaming of
video services.
Each domo video service occupies between 600kb/s and 4.8MB/s
depending on mode. Typical occupation is 2.4Mb/s. Therefore the network
must have sufficient capacity to support these services and also any other
data on the network.
Protocols
The network should support multicast UDP streaming protocols. Any
firewalls or routers should be programmed to allow multicasts through.
Multicasting on General Purpose Networks and WANs
Streaming on Local Area Networks does not usually present problems,
especially if the number of streams is proportioned to the network capacity,
and only layer 1 switches, and/or a single layer 2/3 switch are in use.
However, when multicasting on large networks with multiple streamers and
routers, care should be taken to avoid re-multicasting packets and creating a
sort of feedback loop where the all the network capacity is instantly used up.
By choosing the right TTL value for multicast packets and setting up routers
correctly, multicasting on larger LANs and WANs is possible.
Contact your IT department or the domo technical support for more details
on these subjects.
15
7.7
Initial IP Setup
This step is only required if the IP address of the unit is not known. This
procedure allows the user to give a temporary IP address to the Ethernet
port marked Main. This port can then be used to access the unit’s browser
interface and do a complete setup.
1) Connect the Ethernet port marked Main to the same network as the PC
used as controller. Alternatively, connect the PC directly to the port. The
IP decoder Ethernet ports feature MDI/MDIX automatic cable crossover, supported by most modern PC’s. This makes it unnecessary to
use a crossover Ethernet cable in most cases.
2) Connect a domo serial port control cable to the port marked RS232
Control. Connect the other end to the control PC.
3) On the PC, start a terminal program such as TeraTerm. Set the serial
port parameters as follows:
Baud Rate:
9600
Data:
8 bit
Parity:
None
Stop bit:
1
Flow Control:
None
4) Power on the system as described in the next section. If the terminal is
setup correctly, boot messages will be printed on the terminal window.
Wait until the boot procedure is complete, and messages are no longer
printed.
5) About one minute after the unit has booted, it will print the following:
“INIT: no more processes left in this runlevel”
6) At this point, start pressing the Enter button on the PC keyboard, until
the following message is printed: “New IP address? [type Yes]”
7) Type Yes, ensuring that the ‘Y’ is uppercase, and ‘es’ is lowercase.
Press Enter.
8) The following message will be printed: “Please enter new IP address,
then press Enter”. Enter a valid IP address and press Enter.
9) If the address is accepted, the message “New IP address has been
set” will be printed. Otherwise an error message will be printed. The
netmask is automatically set to 255.255.255.0.
10) The unit can now be accessed via a web browser running on the control
PC (assuming the PC is on the same subnet) by using the address that
has just been entered.
The IP address that has just been set is temporary, and will be lost when the unit
is powered off. To make any permanent settings, use the browser interface.
16
7.8
Powering on the System
All external connection to the IP Hardware Decoder products should be
made, as described in the previous sections, before proceeding to power on
the system.
On powering the IP Hardware Decoder, the system will boot in approx. 45
seconds, although a blue screen will be visible on the video outputs within a
few seconds of applying power.
The LED’s on the unit’s front panel show the progress of the boot sequence.
There are two LED’s for each decoder card fitted in the unit.
Refer to section 7.3 for meaning of LED’s.
17
7.9
Using the Browser Controller
Each channel within the IP Hardware Decoder is controlled from a standard
web browser running on the user’s PC or laptop. In order to access the IP
Decoder’s browser interface, the first step is to make sure the PC or laptop
is on the same subnet as the IP Decoder.
The default IP address for each IP Decoder card is set up at the factory
according to customer’s system requirements. Details of the addresses are
included in the documentation.
The following connection example assumes the IP address is 192.168.2.40.
To connect to this port, the user’s computer should be set to an address on
the same subnet, for example 192.168.2.1, with a mask value of
255.255.255.0. After setting these values, the connection can be tested by
sending a ping to the IP Decoder from the user’s computer. If the ping is
successful, connection via the browser can be attempted.
In the browser window, type the following in the URL bar: 192.168.2.40. The
controller’s main page should appear as shown below. When a link is
clicked, the user will be asked to login.
The username is admin, the password is vegemite.
If the IP Insertion Node and IP Decoder settings are left to their defaults, it
should now be possible to play a stream. Select the View Streams link in the
controller, and a list of available streams should appear.
18
7.10 Playing a Stream
Clicking on the View Stream link on the main page will show the Stream List.
The actual view depends on how many streams are visible on the network.
The image below shows three available streams.
19
To play a stream, the first step is to scan the required multicast to see how
many services it carries. Click on the Scan button, and within two or three
seconds a list of available services will appear.
If the streamer has RS232 link capabilities (like the domo IP Insertion Node or Central Receiver) the link
between the streamer and the IP Decoder will be automatically established at this point.
20
Any services found in the stream will be displayed as shown below. The
number of available services should be between one and four, depending
on the streamer used.
If no services appear in the list or if the list appears to be incomplete, click on Exit Stream, and
then click on Scan Stream again. This should solve most scanning problems.
21
To play a stream, simply click the relevant Play button. The page will change
to:
To stop playing the stream, click the stop button.
22
8
8.1
Advanced Operation
Setting up Network Interfaces
IMPORTANT: Most web browsers keep copies of pages cached in memory. These pages may be out of
date and show the wrong information. To ensure the page being displayed on a browser screen is a
current page, click CTRL+F5 on the PC keyboard to force a page reload. The refresh button on the
browser does NOT force a reload.
To access the Network Setup page, click on the “Set up Network Interfaces”
link in the main browser page. The following page will appear:
23
LAN/WAN Port Settings
If the network used for multicast streaming has a DHCP server, turn on the
DHCP Control feature. The unit will automatically acquire an IP address for
its SETUP/LAN/WAN port. The Control Port will not be affected.
After selecting the DHCP on radio button and clicking on “Apply values”, the
three IP parameters related to the LAN/WAN/SETUP Port will display as
“Updating…”. The browser page will automatically refresh after one minute,
and will show the new IP parameters given to the unit.
If a DHCP server is not in use, give the LAN/WAN port a suitable IP
address, netmask and default gateway.
If the LAN/WAN port is used to control the IP Decoder, the browser will lose
its connection to the unit when the IP address is changed. Enter the new IP
Decoder address in the browser to re-connect. If the address was assigned
by DHCP it will not be known, therefore the control PC must be connected
to the Control port to discover the new IP address.
If the DHCP server is likely to give the LAN/WAN port an address that is on the same subnet as the control
port, the control port address should be changed first. The two Ethernet ports must be on different subnets.
Control Port Settings
When changing the control port address, bear in mind that the browser will
loose its connection to the unit, as it will still be trying to connect to the old
address. To reconnect to the unit, type the new Control port address in the
browser.
N. B. The Control port IP address must be on a different subnet from the
LAN/WAN port. See warning above.
Multicast Announcements IP Address
This is a common IP address is used by all IP Nodes to announce what
multicast streams are available. IP Decoders scan this address to build the
list of available streams displayed on the Stream List page.
If a large number of IP Nodes are in use, it may become useful to subdivide
the multicasts into groups by using different Announcement addresses for
each group. Otherwise this address can be left to its default setting.
RS232 Data over IP
The IP Decoder can automatically establish a transparent RS232 over IP
connection to the remote CRX or IP Insertion Node. This option can be used
to enable or disable the automatic connection.
If this option is enabled, a connection will be established when the Scan
button is clicked on a multicast. The connection will be between the IP
Decoder and the remote unit whose stream is being scanned. The
connection will only be closed when the Stop Scanning button is clicked, or
a new multicast is scanned.
24
8.2
Decoder Options
To access this page, click on the Setup Decoder link in the main page. The
following page will appear:
Restore Defaults
This setting should be used when a new licence is applied to the unit, or
when unexplained behaviour occurs. Select ‘Yes’, then click ‘Apply’. Once
applied, the setting will automatically return to ‘No’.
25
Descrambling Mode
Click on the radio button corresponding to the required AES mode. If a new key is
required, type in the new key. Click on Apply values when done.
If the setting returns to ‘Off’, then the unit is not licensed for the chosen descrambling method.
Playback Buffer Level
This option controls the buffering level for video playback. The higher the buffering
level used, the higher the video playback delay will be.
On congested networks it will become necessary to select a higher buffer level to
avoid break ups in the video playback. To keep video delay to a minimum, select
the lowest buffer level that gives a reliable video playback.
26
8.3
Licence Upgrades
It is possible to add features the domo IP Decoder by purchasing additional
licenses. The license will be sent in the form of a small text file that can be
uploaded directly to the unit. Each licence file is locked to a particular decoder
card. To purchase a license for a specific card, the electronic serial number for that
card should be sent to domo.
To add additional features, it is sometimes necessary to do a software upgrade as well as a license
upgrade. In such cases perform the software upgrade first, and then apply the new license.
The product NETIPHW2 contains two different decoder cards, and each card is licensed separately. To
upgrade both cards in a unit, two Electronic Serial Numbers must be obtained, and two licences
purchased.
Obtaining the Electronic Serial Number
•
•
•
•
From the main browser page, select System, the page shown below will
appear.
Right-click on the serial number and select ‘Save Link As…’
Save the file to a suitable location. If saving multiple files, add a
meaningful extension to the file name, such as the serial number itself.
Send the serial number file or files to domo, preferably via email.
27
Upgrading the License
Once a new license file is obtained from domo, it can be sent to the decoder card.
• From the System page, click ‘Browse’.
• Navigate to the directory where the license file has been saved, select the
file and click ‘Open’.
• The license file path and filename should appear in the License file dialog
box.
• Click on ‘Send File’.
• A message will appear to tell the user whether the file has been accepted
or not.
• License upgrades will not take effect until the ‘Restore Defaults’
function is applied. See the “Decoder Options” section for further details.
If the license file is not accepted, make sure it is intended for the unit it was sent to.
This can be done by opening the license file in a text editor, and making sure the
serial number in the file matches the unit’s serial number.
28
9
9.1
9.2
9.3
Connector Pin Outs
Power - 4-pin 0B LEMO Socket
Pin No
Function
1
12 V
2
12 V
3
GND
4
GND
Audio - 5-pin 0B LEMO Socket
Pin No
Function
1
N/C
2
N/C
3
GND
4
Audio Out +
5
Audio Out -
RS232 Control / Data - 3-pin 0B LEMO Socket
Pin No
Function
1
TX
2
RX
3
GND
29
Cobham Surveillance
Domo Products
11 Manor Court, Barnes Wallis Road, Segensworth,
Hampshire, PO15 5TH, England
30
T: +44 (0)1489 566 750
F: +44 (0)1489 880 538