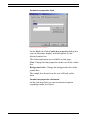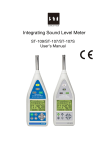
1
SATO Label Gallery TruePro
GalleryForm
SATO International Pte Ltd
English Edition
Version SI-040603-06
Copyright © 2004-2005 SATO International Pte Ltd
All rights reserved.
This software is based in part on the work of the Independent JPEG Group.
Contents
Contents
1. Introduction
1-1
1.1 About GalleryForm .......................................................1-1
1.2 About this Manual.........................................................1-2
1.2.1 Conventions used in this Manual...........................1-2
2. Overview
2-1
2.1 Starting GalleryForm.....................................................2-1
2.2 Toolbars .......................................................................2-2
2.2.1 Toolbox................................................................2-2
2.2.2 Object tool............................................................2-3
2.2.3 Align tool.............................................................2-4
2.2.4 Text tool...............................................................2-4
2.2.5 Variable tool.........................................................2-4
2.2.6 Color Palette.........................................................2-5
2.2.7 Database Tool.......................................................2-5
2.3 Shortcuts ......................................................................2-6
2.4 Status bar......................................................................2-7
2.5 Objects .........................................................................2-7
2.5.1 Frame...................................................................2-7
2.5.2 Text......................................................................2-8
2.5.3 Picture..................................................................2-8
2.5.4 Button ..................................................................2-8
2.5.5 Edit field ..............................................................2-8
2.5.6 Memo field ...........................................................2-8
2.5.7 Combo .................................................................2-9
2.5.8 Listbox.................................................................2-9
2.5.9 Table ....................................................................2-9
2.5.10 Database Navigator...............................................2-9
2.5.11 Database Search....................................................2-9
2.5.12 Preview ..............................................................2-10
3. Reference
3-1
3.1 File menu......................................................................3-1
3.1.1 New Blank Form ..................................................3-1
3.1.2 New Form from Label...........................................3-1
GalleryForm User's Manual
i
Contents
3.1.3 Open ....................................................................3-6
3.1.4 Close....................................................................3-6
3.1.5 Save.....................................................................3-6
3.1.6 Save As................................................................3-6
3.1.7 Form properties ....................................................3-6
3.1.8 List of Files ........................................................ 3-13
3.1.9 Exit .................................................................... 3-13
3.2 Edit menu ................................................................... 3-13
3.2.1 Undo.................................................................. 3-13
3.2.2 Redo .................................................................. 3-14
3.2.3 Cut..................................................................... 3-14
3.2.4 Copy.................................................................. 3-15
3.2.5 Paste .................................................................. 3-15
3.2.6 Select all ............................................................ 3-15
3.2.7 Delete ................................................................ 3-15
3.2.8 Popup menu ....................................................... 3-16
3.3 Design menu............................................................... 3-16
3.3.1 Run.................................................................... 3-16
3.3.2 Attach label file .................................................. 3-16
3.3.3 Unattach Label File............................................. 3-18
3.3.4 Tab order............................................................ 3-18
3.3.5 Refresh window.................................................. 3-18
3.4 View menu................................................................. 3-19
3.4.1 Toolbox.............................................................. 3-19
3.4.2 Design tool......................................................... 3-19
3.4.3 Align tool........................................................... 3-19
3.4.4 Text tool............................................................. 3-19
3.4.5 Variable tool....................................................... 3-19
3.4.6 Color palette....................................................... 3-19
3.4.7 Database Tool..................................................... 3-20
3.5 Object menu ............................................................... 3-20
3.5.1 Select ................................................................. 3-20
3.5.2 Frame................................................................. 3-21
3.5.3 Text ................................................................... 3-23
3.5.4 Picture................................................................ 3-27
3.5.5 Button................................................................ 3-30
3.5.6 Edit field ............................................................ 3-40
3.5.7 Memo field ......................................................... 3-41
3.5.8 Combo ............................................................... 3-41
3.5.9 Listbox............................................................... 3-41
3.5.10 Table.................................................................. 3-41
3.5.11 Database Navigator............................................. 3-41
3.5.12 Database Search ................................................. 3-41
ii
GalleryForm User's Manual
Contents
3.5.13 Preview ..............................................................3-41
3.6 Data menu ..................................................................3-41
3.6.1 Variables ............................................................3-41
3.6.2 Database Access Functions..................................3-41
3.6.3 Database wizard..................................................3-41
3.7 Transformations menu.................................................3-41
3.7.1 Align..................................................................3-41
3.7.2 Size ....................................................................3-41
3.7.3 To front..............................................................3-41
3.7.4 To back ..............................................................3-41
3.8 Options menu..............................................................3-41
3.8.1 Snap to grid ........................................................3-41
3.8.2 Display grid ........................................................3-41
3.8.3 Properties ...........................................................3-41
3.9 Tools menu.................................................................3-41
3.10 Help menu ..................................................................3-41
3.10.1 Contents .............................................................3-41
3.10.2 Label Gallery on the web ....................................3-41
3.10.3 About.................................................................3-41
3.10.4 Missing Help Topic.............................................3-41
4. How to...
4-41
4.1
4.2
4.3
4.4
4.5
4.6
Attach a label to the form?...........................................4-41
How to connect objects on form with variables?...........4-41
How do I use a database?.............................................4-41
How can I print two or more different labels?...............4-41
How do I quickly design and test a form?.....................4-41
How do I print the label which file name is read from
database? ....................................................................4-41
4.7 How do I unattach the label?........................................4-41
4.8 How do I set the order in which the data is entered (tab
order)?........................................................................4-41
4.9 How do I align objects on a form? ...............................4-41
4.10 How do I change the size of multiple objects at the same
time? ..........................................................................4-41
4.11 How can I use button to ..............................................4-41
4.11.1 ... start printing?..................................................4-41
4.11.2 ... send GalleryCommands to Label Gallery?........4-41
4.11.3 ... set a value to variable? ....................................4-41
4.11.4 ... open another form? .........................................4-41
4.11.5 ... start another application? .................................4-41
4.11.6 ... close a form?...................................................4-41
4.11.7 ... execute multiple actions at once?.....................4-41
GalleryForm User's Manual
iii
Contents
5. Glossary of Terms
iv
5-OO
GalleryForm User's Manual
Chapter 1: Introduction
1. Introduction
1.1 About GalleryForm
GalleryForm is a software package that helps you create
forms for entering data and printing labels. Using
GalleryForm you can easily design any form with none
programming skills required. GalleryForm runs under 32bit Microsoft Windows operating system.
The basic idea of the GalleryForm is to simplify entering
variable data on the labels. First you have to design the
label in Label Gallery using the variables of prompted or
database type for the variable fields on the label. Then
you can use the GalleryForm to create the simple user
interface to fill in the variable data needed to print a label.
This way the user cannot accidentally modify the label,
and entering the data is greatly simplified. The process of
printing labels is still performed by Label Gallery (using
DDE), although the user sees only the form.
The way of designing forms is very user friendly and
flexible. Forms can include different fixed (text, pictures)
or variable objects (edit fields, memo fields) and action
buttons, which are used to start some sort of action (e.g.
print, or change the form).
The forms have two modes: the design mode and the run
mode. In design mode you can create and design forms
and in the run mode you can enter data and print labels.
GalleryForm has the logic that supports default values.
This logic speeds up the work and prevents printing
labels with incorrect contents.
GalleryForm User's Manual
1-1
Chapter 1: Introduction
The DDE (Dynamic Data Exchange) function sends the
entered data to the basic program Label Gallery that
manages the entire printing process.
1.2 About this Manual
Your User Manual is composed of four main sections:
• Introduction
• Reference
• Examples
Introduction
By reading this chapter, you will learn how to start
GalleryForm and what the are basic elements of the
GalleryForm window.
Reference
This chapter describes in detail all of the commands and
dialog boxes used in GalleryForm menus.
Examples
Chapter describes examples that are enclosed to the
GalleryForm.
1.2.1 Conventions used in this Manual
Text that appears in bold letters refers to the names of the
menus, buttons and other 'clickable' things like OK
button.
Text that appears in italic refers to the options and
confirming actions - like Read only.
Text enclosed in brackets refers to keys from the PC
keyboard like <Enter>.
Variables are enclosed in square brackets like [variable].
1-2
GalleryForm User's Manual
Chapter 2: Overview
2. Overview
2.1 Starting GalleryForm
By reading this chapter, you will learn how to start
GalleryForm and what are the basic elements of the
GalleryForm window.
Start GalleryForm by clicking the GalleryForm icon in
the Start menu. The title picture for GalleryForm will be
displayed first and then GalleryForm window will
appear:
GalleryForm main window
GalleryForm User's Manual
2-1
Chapter 2: Overview
The main elements of the window are title bar (displays
GalleryForm version and the name of the active file),
toolbars and status bar.
2.2 Toolbars
There are several toolbars available in GalleryForm. You
can hide/show them by choosing the corresponding
command in View menu.
They are fully movable and can be placed anywhere on
the screen. They can be docked within GalleryForm main
window or floating outside the main window.
2.2.1 Toolbox
The Toolbox is a row of buttons at the top of the main
window, which represent application commands for
opening and saving files, cutting to clipboard, etc.
Clicking one of the buttons is a quick alternative to
choosing a command from the menu. Buttons on the
toolbar are activated and deactivated according to the
state of the application.
Button
2-2
Action
Menu Equivalent
Create a new form
File - New
Create a new form from
existing label with Wizard
File - New From
Locate and open a form file
File - Open
Save a form file
File - Save
Attach label file
Design – Attach
label file
Variables
Data – Variables
Cut to Clipboard
Edit - Cut
Copy to Clipboard
Edit - Copy
GalleryForm User's Manual
Chapter 2: Overview
Paste from Clipboard
Edit - Paste
Undo previous action
Edit - Undo
Reverse an undo
Edit - Redo
Run
Design - Run
Send selected objects to front
Transformations To Front
Send selected objects to back
Transformations To Back
2.2.2 Object tool
Object tool provides shortcuts for placing objects on the
form. Most of them have a small button with arrow next
to the icon. Use it to quickly create either fixed form
element or form element connected to a selected variable.
The following commands are available:
Button
GalleryForm User's Manual
Action
Menu Equivalent
Select
Object - Select
Frame
Object - Frame
Text
Object - Text
Picture
Object - Picture
Button
Object - Button
Edit field
Object - Edit field
Memo field
Object - Memo field
Combo
Object - Combo
Listbox
Object - Listbox
Table
Object - Table
Database
Navigator
Object - Database
Navigator
Database
Search
Object - Database
Search
Preview
Object – Preview
2-3
Chapter 2: Overview
2.2.3 Align tool
Align tool provides shortcuts for aligning selected objects
in relation to each other or to the form.
Button
Action
Align Tops
Align Bottoms
Align Left Sides
Align Right Sides
Align Vertical Centers
Align Horizontal Centers
Equally space horizontal
Equally space vertical
If you hold <CTRL> while clicking on buttons in align
tool, objects are aligned relative to form instead to each
other.
See also:
Transformations - Align
2.2.4 Text tool
Text tool provides a standard shortcuts for changing font
properties of the text in selected objects. In the drop down
lists you can select the type of font and its size.
Additional buttons select the text to be bold, italic or
underlined.
See also:
Text dialog box
2.2.5 Variable tool
Variable tool can be used as quick method of defining
new form variables. As far as defining a variable is
concerned, it has the same function as the command
Variables in Data menu.
It can be also used to have a glance of all form-defined
variables and all variables from attached label file.
2-4
GalleryForm User's Manual
Chapter 2: Overview
If you want to find out which variable is connected to a
specific element, you could select that form element and
look at Variable Toolbar. The variable name will be
displayed here.
Click this icon to add new form variable.
Click this icon to edit the currently selected form
variable.
Click this icon to remove the currently selected
form variable. You cannot remove the variable if it
is still used on the form with some element.
Please note, you cannot edit/remove label-defined
variables that GalleryForm acquired from label file, when
you attached it to the form.
2.2.6 Color Palette
Color Palette is used to quickly select a custom color for
form elements. First select the form element and then
click the appropriate color button in the palette.
You can use the default Windows colors but also mix
your own ones.
2.2.7 Database Tool
Database tool can be used as quick method of defining
new connections to the databases. As far as defining a
connection to the database is concerned, it has the same
function as the command Database Access in Data menu.
It can be also used to have a glance of all connected
databases.
If you want to find out which database is connected to a
specific element, you could select that form element and
look at Database Toolbar. The database name will be
displayed here.
Click this icon to make connection to new
database.
Click this icon and use Database Wizard to make
connection to new database.
Click this icon to edit the currently selected
database connection.
GalleryForm User's Manual
2-5
Chapter 2: Overview
Click this icon to remove the currently selected
database connection. You cannot remove the
database connection if it is still used on the form
with some element.
2.3 Shortcuts
Delete - deletes selected object
Shift + Delete - Cut
Ctrl + Insert - Copy
Shift + Insert - Paste
Alt + Backspace - Undo
Alt + Shift + Backspace - Redo
Ctrl + A - Align
Ctrl + X - Cut
Ctrl + C - Copy
Ctrl + V - Paste
Ctrl + Z - Undo
Ctrl + Y - Redo
Ctrl + N - New
Ctrl + O - Open
Ctrl + S - Save
Ctrl + F9 - Run form
Ctrl + G - Snap to grid
Ctrl + Tab - Leave the database table
Alt + F4 - Exit
Ctrl + move object with mouse - parallel moving of the
object by main axes only
Ctrl + cursor keys - fine tuning the position of the
object, move it in very small steps
Shift + cursor keys - fine tuning the dimensions of the
object, resize width and height in very small steps
Turning mouse wheel - scrolls the form up and down
2-6
GalleryForm User's Manual
Chapter 2: Overview
Shift + turning mouse wheel - scrolls the form left and
right
Enter (or F2) with any label element will open dialog
box with its properties.
2.4 Status bar
Status bar shows information and messages at the bottom
of the window that helps you use GalleryForm.
Status bar information:
Modified: Indicates whether the form has been modified
since the last time the file was saved (blank if the file has
not been modified).
Current position: (84, 29): Current position of the mouse
cursor. The start of the coordinate system is the upper left
corner of the form.
D:\GalleryForm\Labels\Access.lbl: Label file attached to
the form (blank if the label file is not attached).
2.5 Objects
Objects are the building blocks of forms. You design a
form by adding objects to form. The following is a list of
all objects:
2.5.1 Frame
Use this object to display a frame or a box on the form.
Frames are used to logically group a set of elements on
the form.
See also:
GalleryForm User's Manual
2-7
Chapter 2: Overview
2.5.2 Text
Use this object to display any text you want. You can also
connect it with a variable. In this case it is used as a
display for a variable value. This value can not be edited.
See also:
2.5.3 Picture
Use the picture object to add graphic to the form. The
following formats are supported: BMP, GIF, WMF, PCX
and JPEG. Pictures have to use RGB colors.
See also:
2.5.4 Button
Use a button object to start some sort of an action. The
following actions can be assigned to the button:
• Print label
• Set variable value
• Chain form
• Execute command
• Quit
See also:
2.5.5 Edit field
Use edit field to enter and print values for various
variables, defined in SATO Label Gallery Plusgram.
See also:
2.5.6 Memo field
Memo field is used to enter values for multi-line
variables in Label Gallery.
See also:
2-8
GalleryForm User's Manual
Chapter 2: Overview
2.5.7 Combo
The combo box is basically the list box that has only one
line visible. You can display all the options by clicking
on the down arrow on the right side of combo box and
then select the desired one.
See also:
2.5.8 Listbox
Use the listbox object to display a scrollable list of items
that you can select but can not directly modify.
See also:
2.5.9 Table
Use this object to select variable label data directly from
a database.
See also:
2.5.10 Database Navigator
Use this object to navigate through the records of some
database. The following buttons are available: the first
record, previous record, next record, the last record.
See also:
2.5.11 Database Search
Use this object to give the user the facility to search for a
particular field in the database.
See also:
GalleryForm User's Manual
2-9
Chapter 2: Overview
2.5.12 Preview
Use this object to create a true preview of the label. It can
be freely resized on the form and will always present the
layout of the attached label with variables set to the
currently assigned values.
See also:
2-10
GalleryForm User's Manual
Chapter 3: Reference
3. Reference
3.1 File menu
Use the File menu to open, save and close new or existing
forms.
File menu
3.1.1 New Blank Form
Choosing New Blank form command from File menu
opens a new, empty, untitled form. Clicking in the
button in the toolbox has the same effect.
GalleryForm will prompt you to name this untitled
document when closed or saved.
3.1.2 New Form from Label
Choose the New Form from label command from File
menu to create a generic new form based on a existing
form file. You can use the shortcut button
in the
toolbox. Form settings as button preferences, font sizes
and colors, position of the elements are copied from
existing form.
GalleryForm User's Manual
3-1
Chapter 3: Reference
The New From Wizard enables you to quickly and easily
define the form parameters. When the Wizard is finished,
it will leave you with a form based on selected predefined form format. You can further modify the form
layout or use it as-is. This is a great shortcut for designing
quick forms with basic functionality.
Note, the Wizard will create table elements only for the
database(s) in the label file that do not have any filter
created.
New Form Wizard: Starting
New Form Wizard: Starting
On the starting screen of New Form Wizard you will
learn what tasks will be completed. Wizard will
comfortable guide you through each required step. The
result of the Wizard will be a quickly designed working
form.
3-2
GalleryForm User's Manual
Chapter 3: Reference
New Form Wizard: Selecting the label file
New From Wizard: Selecting the label file
First you must select the label file, on which the form will
base on. This label file hast to be created in Label
Gallery, and should contain some variable fields.
This file will be "attached" to the form.
Select the appropriate label file and click Next to
continue with the Wizard.
New Form Wizard: Selecting the template file
New Form Wizard: Selecting the template file
GalleryForm User's Manual
3-3
Chapter 3: Reference
In this step you have to choose the template file on which
the new form will be based. Template files are ordinary
form files. The wizard will only look up the object
settings from this file and will not copy the whole
objects. Some of these settings include font types, button
sizes, colors… So by selecting different templates, you
can change the look of your new form.
New Form Wizard: Arranging the fields
New Form Wizard: Arranging the fields
Here you choose how the fields will be arranged on the
new form. You can choose between Vertically and
Horizontally.
Click the Next button to continue with the wizard.
If you selected Vertically, another page appears, asking
you about position of the field captions (these are
descriptions for each field).
3-4
GalleryForm User's Manual
Chapter 3: Reference
New Form Wizard: Position of the field captions
New Form Wizard: Completing the process
New Form Wizard: Completing the process
All information required by the Wizard have been
entered. You can review the changes you have made. If
you are not satisfied with the settings, click Back to
return to previous step of the Wizard. Click Finish to
GalleryForm User's Manual
3-5
Chapter 3: Reference
close the Wizard and create a new form based on
parameters you entered.
Using the form, Wizard has created, you can already print
your labels. But you would probably want to further
modify it to better suit your needs.
3.1.3 Open
Choose Open command to display the Open File dialog
box and load an existing form file into GalleryForm. You
can also use the shortcut button
in the toolbox.
3.1.4 Close
This Close command closes the currently opened form. If
you have modified the form in any way and have not
saved the changes, GalleryForm will ask you to save the
form.
If the document has not been named yet, the application
will also ask you for the name (Save As).
3.1.5 Save
Choose Save command to store the active file using its
current name. Clicking on the
button on the toolbox
has the same effect.
If you try saving a file that has not been previously saved,
GalleryForm starts the Save As command, where you can
enter the new file name.
3.1.6 Save As
The Save As command allows you to save a document
with a new name or a new location. The command
displays the Save File As dialog box. You can enter the
new file name, including the drive and directory.
3.1.7 Form properties
The Form properties dialog box is also shown you
double click the form. Here you can set various formrelated options.
Dialog box has several pages (tabs),
3-6
GalleryForm User's Manual
Chapter 3: Reference
Form tab
Form properties: Form tab
On the Form tab of the Form properties dialog box you
can see which label file is attached to form and attach a
new label to the active form. To do this, just click the
Browse button, which will open the Open file dialog box
where you can find the proper label.
The File Creation Information provides information,
which version of application was used to create the form.
Program and file version information are useful to better
diagnose problems the user can experience with his form.
See also:
GalleryForm User's Manual
3-7
Chapter 3: Reference
Window tab
Form properties: Window tab
On the Window tab you can change the window caption
and state of the GalleryForm window. Note, these options
apply to the run mode of GalleryForm, not to the design
mode.
Enter new caption of the window in Caption edit field.
Options for the Window State are:
• Maximized: Enlarges the active form to
maximize to the screen.
• Normal: Sets the designed size of the form.
The form can be predefined for a specific type of
platform, where it will be used. The platform type can be
selected for new form only. The possible choices are:
• Windows: The normal size of the form. You can
adjust the form height and weight according to
your needs.
• Windows CE.NET, Pocket PC 2002, Pocket
PC, HPC 2000, HPC Pro, Palm-size PC,
Falcon: The form has the dimensions that fit on
display of the selected Windows CE device.
GalleryForm has built-in information about the
selected device's display settings.
3-8
GalleryForm User's Manual
Chapter 3: Reference
If you have selected one of the possible Windows CE
selections for the Platform, the Advanced button becomes
available. Click it to open the Direct Print Properties
dialog box, where you can specify the default print
settings for the form, when it is used on Pocket PC
device. The dialog box has the same functionality as print
selection dialog box on Pocket PC device. You can select
the port, where the printer is connected to, and port
properties. The available ports are COM port, LASP
(IrDA) port, TCP/IP port, Bluetooth, JOB file and JOB
TCP/IP. The first four are self-explanatory ports, for
more information about the last two ones refer to the
description of Distributed printing functionality.
The settings you set here will be accepted as default,
when the form is opened in Pocket GalleryForm, but can
be changed any time.
Background tab
Form properties: Background tab
Use the Background page of the Form properties dialog
box to customize the background of the active form.
Background can be in single continuous color, or a
picture.
GalleryForm User's Manual
3-9
Chapter 3: Reference
Description tab
Form properties: Description tab
On this tab you can write a brief description of the current
form. If you press <F1> while the form is running, this
description is then displayed in a window.
Distributed Printing tab
GalleryForm provides additional printing method. Apart
from the regular printing to the local or networkconnected printers it is possible to enable true network
printing. In this mode GalleryForm does not use SATO
Label Gallery Plus application directly to print the labels
but creates a batch command .JOB file, containing
necessary commands to describe the current print
operation.
3-10
GalleryForm User's Manual
Chapter 3: Reference
Form properties: Distributed printing
Tick the Distributed printing option to enable this
method of label printing. Further configuration options
will display.
The .JOB file can then be either dropped on a specified
network folder or sent to the server application over
TCP/IP network protocol.
To store the generated .JOB file to some folder, select the
Save commands to .JOB file option. If you do not want
to use a fixed filename, you can let GalleryForm generate
filename on-the-fly based on your requirements. Click the
Advanced button for details.
To communicate with the label printing server and send
the commands over network communication, select the
Send commands via TCP/IP protocol option. Set the
Host name (you can enter IP number) and Port of the
computer running printing server (GalleryWatch
application). The Welcome message is used for security
reasons. If the specified message equals the one on the
printing server, you will gain access to the server. If not,
connection to the server will be denied.
Advanced button
Fixed file name option lets you define a .JOB filename
that will be used every time, action is started. Click the
GalleryForm User's Manual
3-11
Chapter 3: Reference
button with three dots to browse to the existing file you
want to use.
Variable file name option lets you define a variable
filename that will be generated separately for each
printing process.
First select the folder name, where the file should be
stored. Click the button with three dots to browse to the
appropriate folder. Then choose the components which
will be used to contruct the filename. You can select
from:
Computer name
User name
Date
Time
Variable
You can change the order of appearance of individual
components. For this click the up/down arrow on the
right. Tick all the components you want to include in the
filename. If some of the components is not selected, it
won't be used.
Custom file name option lets you create your own
filename mask. To include the variable components in the
filename, enter them as displayed in the upper table. For
Computer name use %1, for User name use %2 etc. To
include some variable in the filename, insert colon in
front of the variable name like :variable. Any other
characters will be applied as they are written.
Advanced tab
In majority of cases you do not want the end-user to be
able to modify forms. One method to prevent it is running
the form by double-clicking its shortcut. This will start
the form directly in the RUN mode, where no changes
can be done. But the user can bypass it by manually
opening the form file in GalleryForm.
When Form locked option is selected the form can't be
changed (edited). This is useful if you want to protect the
form from accidental changes. The form can be password
protected. You need to validate password (write it again)
3-12
GalleryForm User's Manual
Chapter 3: Reference
to enable it. Only the user who is familiar with the
password can unlock the form and edit it. For all others
the form is available in print-only mode and they cannot
make any modifications to it.
When you have locked the form a small lock icon will
appear in the upper left corner of the form, indicating
this. At this time you can only run the form. To unlock it
you need to open Form properties from File menu or
double click the form. If it is password protected, you
need to specify the correct password.
3.1.8 List of Files
At the end of the file menu there is the list of most
recently used forms. Clicking the name opens the
appropriate file as if you would select this file with Open
command.
3.1.9 Exit
Choose Exit command to close the open form and then
close GalleryForm.
If you exit GalleryForm before saving your changes,
GalleryForm asks you if you want to save them.
3.2 Edit menu
Use commands from the Edit menu to manipulate objects
at design time.
Edit menu
3.2.1 Undo
Choose Undo command to undo your most recent actions
and to return to previous design steps.
GalleryForm User's Manual
3-13
Chapter 3: Reference
Undo can reinsert any objects you delete, delete any
objects you insert, replace any objects you overwrite, or
move them back to their prior position.
You can undo multiple successive actions by choosing
Undo repeatedly. This undoes your changes by "stepping
back" through your actions and reverting them to their
previous state.
You can undo the last 10 actions.
The Undo command can be also activated by clicking the
shortcut button
located in the toolbox.
See also:
3.2.2 Redo
Choose Redo command to reverse the effects of your
most recent undo.
Clicking the shortcut button
same effect.
in the toolbox has the
See also:
3.2.3 Cut
Choose Cut command to remove selected objects from
their current position and place them on the Clipboard.
Cut replaces the current Clipboard contents with the
selected item.
To insert the contents of the Clipboard later, choose the
Paste command.
The Cut command can be also activated by clicking the
shortcut button
on the Toolbox.
See also:
3-14
GalleryForm User's Manual
Chapter 3: Reference
3.2.4 Copy
Choose Copy command to place a copy of the selected
objects on the Clipboard and leave the original
untouched. Copy replaces the current Clipboard contents
with the selected items.
To paste the contents on the Clipboard elsewhere, choose
Paste command.
The Copy command can be also activated by clicking the
shortcut button
on the Toolbox
See also:
3.2.5 Paste
Choose Paste command to insert the contents of the
Clipboard into the active form. The objects are inserted
on the top left side of the form.
You can paste the current contents of the Clipboard as
many times as you like until you cut or copy a new item
onto the Clipboard.
The Paste command can be also activated by clicking the
shortcut button
on the Toolbox.
See also:
3.2.6 Select all
Choose Select All to select all objects on the active form.
3.2.7 Delete
Choose Delete command to remove the selected object
from the form without placing a copy on the Clipboard.
Even though you cannot paste the deleted text, you can
restore it by immediately choosing Edit - Undo
command.
GalleryForm User's Manual
3-15
Chapter 3: Reference
Delete is useful if you want to remove an item but you do
not want to overwrite the contents of the Clipboard.
3.2.8 Popup menu
A special pop-up menu is displayed if you click the right
mouse button. Its content depends on the position of your
click (object, form space…).
The pop-up menu contains the most used commands, so
that they are quickly available. There is no other
difference between this command and the command with
the same name chosen from menu.
3.3 Design menu
Use the Design menu to put the active form in run mode,
to attach label files and to refresh window.
Design menu
3.3.1 Run
Choose the Run command to put the form in the run
mode. You can also use the shortcut button
in the
toolbox or use keyboard shortcut <Ctrl>+<F9>.
The run mode is used to see, how the form will behave,
when executed. You can test all the buttons, edit, and
combo boxes, and see in general if everything works as
expected.
To return back to the design mode press <Ctrl>+<F9>.
This keyboard shortcut combination is used to easily
switch between design and run modes.
3.3.2 Attach label file
Choose Attach Label File command to attach a label file
to the active form. You can also double click on the label
3-16
GalleryForm User's Manual
Chapter 3: Reference
file name in the status bar for the same effect or click the
shortcut button
in the toolbar.
Current form will be connected to the selected label file
and will supply values to variables defined on the label.
Make sure, that the label file is setup correctly (the
correct printer is selected, the label and page sizes are
correct…) and that it has defined variable objects.
GalleryForm can assign values to prompted or database
variables on the label.
Note, if you changed the label file, after it was attached to
the form, you must attach it again in order for
GalleryForm to properly read the new label file and new
variables in it.
When the label file has been correctly attached, the
Attach report dialog box is displayed, showing you the
variables in the label file that can be controlled within
GalleryForm.
Attach report dialog box
Note that GalleryForm always adds the form variable
[Quantity], which can be used to control the quantity of
printed labels.
If you select the Show database variables option, then
variables that have their source in database are also
shown and used by form. These variables must also be set
by form if you want them to be printed. GalleryForm now
takes control over them and if they are not set within
GalleryForm, they will be empty and not printed. Label
GalleryForm User's Manual
3-17
Chapter 3: Reference
Gallery no longer takes care that variables get their value
from the database.
3.3.3 Unattach Label File
Choose Unattach Label File command to un-attach the
label file from the form. The form is no longer connected
to the label file and has no longer access to the variables
on the label. You can use this command when you want
to maintain the functionality of the form, but you no
longer want to print labels attached to the form.
3.3.4 Tab order
With the Design - Tab order command you can specify
the tab order of the objects on the form. This is the order
in which the objects are selected, when you press the
<Tab> button. Focus will be assigned from one to another
element in the order set in this dialog box.
Tab Order dialog box
Use Up and Down arrow to move the selected object up
or down in the list.
3.3.5 Refresh window
Choose Refresh window command to refresh the
GalleryForm window. This command is useful if some
parts of the window are not correctly displayed. It will
draw all form objects once again.
3-18
GalleryForm User's Manual
Chapter 3: Reference
3.4 View menu
Use the View menu to display or hide different elements
of the GalleryForm environment.
View menu
3.4.1 Toolbox
Choose the View - Toolbox command to hide or display
Toolbox.
3.4.2 Design tool
Choose the View - Design tool command to hide or
display Object tool.
3.4.3 Align tool
Choose the View - Align tool command to display or
hide Align tool.
3.4.4 Text tool
Choose View - Text tool command to display or hide
Text tool.
3.4.5 Variable tool
Choose View - Variable tool command to display or
hide Variable tool.
3.4.6 Color palette
Choose View - Color palette command to display or
hide Color palette.
GalleryForm User's Manual
3-19
Chapter 3: Reference
3.4.7 Database Tool
Choose View - Database Tool command to display or
hide Database Tool.
3.5 Object menu
Use commands from the Object menu to add different
objects to the active form.
Object menu
3.5.1 Select
Choose Select command to cancel any other command
from the Object menu. You can also click on the shortcut
button
in the Object tool or use keyboard shortcut
<Alt>+0.
If you for example choose the Text command and decide
that you don't want to insert a text object, choose select
command to cancel the text command.
This command is otherwise active most of the time and
allows you to select the objects on the form and change
their properties by selecting the appropriate command.
To select an object, simply click on it. To select more
than one object, hold <Shift> while clicking. You can
also drag a rectangle around the objects to select all of
them. The rectangle does not have to enclose all of them,
it is enough that it only touches the objects you want to
select.
3-20
GalleryForm User's Manual
Chapter 3: Reference
You can move selected objects to another position by
dragging them, or resize them, by selecting object's
handles and dragging them in the desired direction.
Using the keyboard to select objects
You can also use keyboard shortcuts to select move and
resize objects.
Cursor keys: Selects new object that is Up (down, left,
right) from the one already selected.
Ctrl + Cursor keys: Moves the currently selected object
in the direction of the pressed cursor key.
Shift + Cursor Keys: Resizes the selected object.
3.5.2 Frame
Choose Frame command to put a rectangle on the form.
Clicking the shortcut button
in the Object tool or
using keyboard shortcut <Alt>+1 has the same effect.
Then you must click on the form, where you want the
frame inserted. If you click once, the frame is inserted in
a default size. You can click once and hold the left mouse
button, then drag in the desired direction to resize the
frame. All frame options can be reviewed and changed in
the frame properties dialog box, accessed by double click
on the frame element.
Dialog box has two pages (tabs). Each one is described
separately.
GalleryForm User's Manual
3-21
Chapter 3: Reference
Frame properties: Style
Frame properties: Style
With Line width option you can select how thick (thin)
will be the border of the frame.
Color of the frame can be set with the Color button.
Frame can be either filled with specified color, or not,
depending on the Filled option.
You can also choose between different frame styles.
You may want to experiment with different options to get
the result you want.
3-22
GalleryForm User's Manual
Chapter 3: Reference
Frame properties: Appearance
Frame properties: Appearance
The Appearance tab is used to fine-tune the element's
position and size. The measurement unit used here is dot
(pixel). The origin of coordinate system is upper left
corner of the form.
3.5.3 Text
Choose Text command to put text on the form. Clicking
the shortcut button
in the Object tool or using
keyboard shortcut <Alt>+2 has the same effect.
Click on the form, where you want the text inserted. The
Text properties dialog box is displayed allowing you to
set the properties for the text object. This dialog box is
also displayed when you double click on the text object.
Dialog box has four pages (tabs). Each one is described
separately.
GalleryForm User's Manual
3-23
Chapter 3: Reference
Text properties: Contents
Text properties: Contents tab
On the Contents tab of the Text properties dialog Box
you can set the Contents Provider of the text element. It
can either be a fixed value or value set by some variable.
Fixed: Contains the text that will be displayed for the text
object. It will be a fixed text, applicable to form headline
or element's captions.
Variable value: Connects the text object to a variable.
The source of the variable can be a label file, or it is
locally defined on the form. You can select the variable in
the list below. New local variable can be defined by
clicking the New button and existing can be edited by
clicking the Edit button. Note, you can only change
properties of the form-defined variables, Label Gallery
variables from the label file can only be reviewed.
Database field value: Connects the text objext to a
database field. Before you can use database fields, a
database must be connected to the form. You can use any
of already existing connections or create a new one.
When you have a database available in form, choose the
appropriate field name from the table. The contents of
this field will be used with the text element.
3-24
GalleryForm User's Manual
Chapter 3: Reference
Text properties: Style
On this tab you can set display and font options for the
text object.
Text properties: Style tab
Font button: Allows you to select different font for the
text object.
Background color button: Changes the background color
of the text object.
Transparent color checkbox: Hides background color of
the text object when selected. Text background will be
transparent, see-through.
Best fit: If this option is selected, then text size
automatically changes to fill the text box.
GalleryForm User's Manual
3-25
Chapter 3: Reference
Text properties: Alignment
Text properties: Alignment tab
On the Alignment tab of the Text properties dialog box
you can customize the alignment of the text within the
text box.
Options for the horizontal alignment are:
• Left: Align the text to the left edge of the text
object.
• Center: Align the text to the horizontal center of
the text object.
• Right: Align the text to the right edge of the text
object.
Options for the vertical alignment are:
• Top: Align the text to the top edge of the text
object.
• Vertical center: Align the text to the vertical
center of the text object.
• Bottom: Align the text to the bottom edge of the
text object.
You can also adjust alignment for multi-line text to left,
right or center. This adjustment is made according to text
left and right limits.
3-26
GalleryForm User's Manual
Chapter 3: Reference
Text properties: Appearance
The Appearance tab is used to fine-tune the element's
position and size. The measurement unit used here is dot
(pixel). The origin of coordinate system is upper left
corner of the form.
3.5.4 Picture
The Picture command adds a picture to the form. You
can also use the shortcut button
in the Object tool or
use keyboard shortcut <Alt>+3.
After selecting the command, click the form, where you
want the picture inserted, and the Open graphics file
dialog box will appear. Browse to the graphics file, which
contains the picture you want to insert. GalleryForm
imports graphics in .BMP, .WMF, .PCX, .GIF and .JPEG
formats.
The Picture properties dialog box is displayed when you
double click the graphics object, or select Edit command
from pop-up menu. Use this dialog box to set various
picture options.
Picture properties: Contents
Picture properties: Contents tab
In the contents tab you can select the Contents Provider
of your graphics element. It can either be a fixed value or
value set by some variable.
GalleryForm User's Manual
3-27
Chapter 3: Reference
Fixed: Select the file name containing of the graphics.
The graphics image will be the same for all labels. This
method of obtaining picture is directly from known data
source on the disk. You have to know the picture
filename and location of the folder where it is stored, then
you can use "..." button to browse to this file.
Variable value: Connects the graphics object to a
variable. This variable will set the file name containing
the graphics. The source of the variable can be a label
file, or it is locally defined on the form. In this scenario
the name of the picture is stored inside a variable. The
value for the variable (in this case it is filename of the
picture) can be assigned to variable in many ways: it can
be entered in data field, selected from drop-down list,
imported from database... With every new value of the
variable new graphics is displayed on-screen. You can
select the variable in the list below. New local variable
can be defined by clicking the New button and existing
can be edited by clicking the Edit button. Note, you can
only change properties of the form-defined variables,
Label Gallery variables from the label file can only be
reviewed.
Database field value: Connects the picture object to a
database field. Before you can use database fields, a
database must be connected to the form. You can use any
of already existing connections or create a new one.
When you have a database available in form, choose the
appropriate field name from the table. The contents of
this field will be used to provide the Picture element with
information about the location and filename of the image
that should be used with it.
3-28
GalleryForm User's Manual
Chapter 3: Reference
Picture properties: Detailed
Picture properties: Detailed Tab
If you are using variable graphics (some variable
determines the exact file location of the image), you can
use the resizing of the inserted picture in on of three
possible ways:
- Original size: the size and proportions of the
picture are preserved and dimensions are
exactly the same as in the original picture.
- Proportional: the picture is proportionally
resized, either reduced or enlarged, to fit the
picture-box you have drawn.
- Full (designed size): the picture is adjusted to
fit the picture-box you have drawn, proportions
of the picture can be distorted.
Use the 1:1 button to resize the picture back to its
original size (if you have changed dimensions of the
picture). The width and height information about the
image size in this tab is for information purpose only.
Picture properties: Appearance
The Appearance tab is used to fine-tune the element's
position and size. The measurement unit used here is dot
(pixel). The origin of coordinate system is upper left
corner of the form.
GalleryForm User's Manual
3-29
Chapter 3: Reference
Anchoring point: Here you can set which corner of
object bounding box is used for positioning the object on
the form. This is the corner where the element is pinned
on the form. The option is useful for variable graphics
that no not fully occupy the designed frame, but
proportionally resize to the frame. The alignment of the
image within the frame can be set with the anchoring
point.
3.5.5 Button
The Button command adds a button to the form. You can
also use the shortcut button
in the Object tool. or use
keyboard shortcut <Alt>+4.
The Button properties dialog box is displayed allowing
you to change the properties of the button. This dialog
box is also displayed when you double click on the button
object.
The Button properties dialog box has several pages
(tabs). Each page is described separately.
Button properties: Text
Button properties: Text tab
On this tab you can customize the display of the selected
button. Use the and (&) character to define a keyboard
3-30
GalleryForm User's Manual
Chapter 3: Reference
shortcut for this button. Whenever user will press the
combination of <Alt>+character following the &
character, the button will be pressed.
Text field: Text on the button object. If a letter is
preceded with the "&" sign, you can use key combination
<Alt> + "that letter" as a shortcut to click this button.
Button properties: Actions
Button properties: Actions tab
On the Actions tab of the Button properties dialog box
you can assign actions to the selected button. Whenever
the form is in run mode clicking that button will start
running the actions listed here: print labels, or execute a
custom GalleryCommand, or perform any other action
that is defined.
Each action has four properties:
Enable property Each action can be enabled or
disabled. Only enabled actions will be
processed, disabled ones are ignored.
GalleryForm User's Manual
Action type
Action type determines which type of
action is defined.
Details
Detail information about the action
are displayed here so you can find out
what this particular action does with
3-31
Chapter 3: Reference
one quick glance over it.
Condition
property
Condition is a VBScript expression
that returns a Boolean value (True or
False). It is evaluated at run time just
before action is to be executed. If the
condition returns True then this
particular action is executed. If the
result is False, the action will be
skipped.
You can specify what action will be started when the user
clicks the button. Double click the button in design mode
to open its properties and go to Action tab. By clicking
the Add button you can select appropriate action from
Action properties dialog box that is shown. This is how a
new action is added to the list. To edit existing action,
select it and click the Edit button. The Delete button
removes selected action from list. Using buttons with
arrows on the right, you can adjust the processing order
of the actions. When the button is clicked in run-time
mode, actions are executed in order as they appear in list.
If you want to print any other label and not the one that is
currently attached to the form, then select the Use other
label(s) option and provide tje label file name. If you
want to print several other labels, separate their filenames
with semicolons. In this case the selected labels will be
printed instead of the label that is attached to the form.
You can also enter variable names here preceded by
colons (:VariableName). In run-time mode this
variable's value will be used as the source of the label
name(s). This is how you can at print time specify
directly on the form which labels should be printed. You
can even have a database in which the label names are
stored together with the data that must be printed on a
label.
Note, the label(s) you select here must be compatible
with the attached label. All labels have to have the same
variables defined (with the same names and data types).
See also:
Action properties dialog box
3-32
GalleryForm User's Manual
Chapter 3: Reference
Action properties dialog box
In this dialog you can select which action do you want to
occur, when the button is clicked. Select the action from
the list on the left and specify options for that action on
the right side of dialog box.
Note, different actions have different options.
The Condition is a Visual Basic Script boolean
expression. Only two results are possible (True and
False). Use this option to enable current action only when
some term is met. The action will be started if condition
returns True as the result of the expression.
Action properties dialog box
Set printer action
GalleryForm User's Manual
Selects a different printer to which
the label will be printed. This
setting will override the printer
setting that was set directly on the
label. You can use a fixed printed
name (select the name of the printer
from the list of installed printers on
your system), or select a variable
that contains printer's name. This
action is useful, if you want to print
one label file to several different
printers without need for changing
3-33
Chapter 3: Reference
of the label file.
Send custom
commands action
You can also include variables in
the commands. Just type in the
variable name and precede it with
colon character (for example,
:[variable]). When the button is
clicked and actions will start, the
variable's value will be used.
You can enter the custom
commands in the provided memo
field. It will be sufficient for simple
scripts. But if you need to construct
more complex script, click the Edit
button to start Expression Builder.
For more information on usage of
GalleryCommands please refer to
SATO Label Gallery Plus online
help or printed documentation.
Print label action
This action prints label attached to
the form. You have several
possibilities to select the quantity of
labels to be printed. There are Basic
and Advanced tabs for this
command that can be set for the
same action.
Basic tab contains most commonly
used printing parameters.
If the Fixed radio button is selected
then the number entered in edit field
defines how many labels will be
printed.
If Unlimited is selected, the
maximum quantity of labels
supported by the current printer will
be printed. Be careful and do not
create an infinite loop, when label
production would not end. This
options is generally used with
database files, where unlimited
would be translated to: print the
3-34
GalleryForm User's Manual
Chapter 3: Reference
whole database.
If Variable Quantity is selected,
then some variable field on the label
(either prompted variable or
database-connected variable) will
set the quantity of labels to be
printed. In most cases this will be
some field from the database and
this way semi-automated printing
can be achieved.
If the From variable radio button is
selected, then the value of the
selected variable defines the
quantity of labels that are going to
be printed.
If desired, you can also enter
number of labels that are skipped on
page. This number can also be
Fixed or obtained From variable.
This is applicable when printing
sheets of labels (mostly for laser
and inkjet printers) and some of the
labels in the beginning of the sheet
are already used.
Advanced tab contains controls for
Identical label copies and the
Number of labels sets. Both can be
either fixed or acquire values from
some variable. The first one sets the
number of label copies you want to
use with every printed label. The
latter one instructs how many times
the printing process should be
repeated. Label set is an expression
for one print action.
For example, if you set Number of
Labels to 5 in the Basic tab and
Number of labels sets to 3 in the
Advanced tab, the printing of 5
labels will be repeated three times,
resulting in 15 printed labels.
GalleryForm User's Manual
3-35
Chapter 3: Reference
Run job action
Runs a specified JOB file with
Label Gallery. You can set a fixed
JOB name or let some variable
define it. The JOB file is a plain text
file containing GalleryCommands
for controlling Label Gallery. This
option is very similar to Send
custom commands above, with
only difference that is uses already
prepared text file with
GalleryCommands. Take a look at
the sample JOB file provided with
Label Gallery in the
Samples\Labels folder.
Set variable action
Sets a value to the selected variable.
Open
Executes specified program when
document/program the button is clicked. This should be
action
a path and name of the executable
program (with .EXE extension).
You can also select a variable that
contains the full path and name to
the selected program name. The
action will produce no result if you
would enter the document name that
it associated with requested
application, you have to use
executable filename. For example,
to open MS Word document
SAMPLE.DOC, it is not sufficient
to enter it as the program name.
You should use the full name to the
application and provide document
name as a parameter. Enclose the
whole text to parenthesis. This is
how the resulting command should
look like: "C:\Program
Files\Microsoft
Office\Office\Winword.exe C:\My
Documents\SAMPLE.DOC".
Open some other
Loads a new form. Type in the form
form action
filename along with the full path or
3-36
GalleryForm User's Manual
Chapter 3: Reference
click Browse button to search the
right one. You can also select which
variable will contain new form's
name. When the button is clicked in
run mode, the currently opened
form will be closed and new one
will open. If you have more forms
linked together, you can select the
option Previously opened form to
return to the previously opened
form file. The result would be the
same as if you would click Back
button in your Internet Explorer
while browsing the internet. The
history of opened forms is
remembered, and you can go back
several levels deep.
Quit action
Quits the form. It the form was
started as a stand-alone application
this command will close the
program. If the form was started
from design-mode, the run-mode
will stop and you will return to
design-mode.
VBScript action
The action will have the possibility
to use all standard VBScript
functionality. In addition the script
will also be able to get and set
values of the variables and to read
and write to/from the serial port.
You can use Expression Builder to
write your scripts.
If you want to verify the syntax of
you script, click the button Check
script. You will be notified if there
is any syntax error in the script.
GalleryForm User's Manual
3-37
Chapter 3: Reference
Button properties: Style
Button properties: Style tab
Select the font properties for the button text. Click the
Font button to access the list of fonts installed on the
system.
Button properties: Colors
Each button can use custom-designed colors. The default
colors are set to standard Windows-look with grey
shades. But colors can be designed with bright vivid
colors to make the forms less formal and more colorful.
All together four colours can be set:
Color
The default color of the button.
Down color
The color of the button, when it is
pressed down.
Light color
The color of the frame around the
button, but only on top and left side. It
helps achieve 3D effect.
Shadow color
The color of the frame around the
button, but only on bottom and right
side. It is the color of the shade below
button and helps achieve 3D effect.
Light and shadow colors change their positions, when the
button is clicked.
3-38
GalleryForm User's Manual
Chapter 3: Reference
Button properties: Picture
Button properties: Picture tab
As an option, button can also contain a picture. Use the
Picture tab of the Button properties dialog box to specify
which picture you would like to see inside selected
button.
Filename checkbox: When checked, enables you to
define picture for the button.
Browse button: Opens the dialog box so you can easily
find file with the desired picture.
Picture is aligned according to the option selected in
Position section:
• Bottom: Position picture to the bottom of the
button (below text)
• Left: Position picture to the left of the text.
• Right: Position picture to the right of the text.
• Top: Position picture to the top of the button
(above text).
Original size checkbox: If the option is selected, it
disables resizing of the picture. The image will be
inserted on the button in its original size.
GalleryForm User's Manual
3-39
Chapter 3: Reference
Button properties: Advanced
On the Advanced tab you can set advanced options of the
button element.
Button properties: Advanced tab
Hint: Text that you enter here, will be shows on the
screen as the tooltip, if the mouse is placed on top of the
button for around two seconds. That option is useful, for
describing the use and purpose of the button to the user.
Default: If selected, button has default property set. This
means, that if you press <ENTER> key anywhere on the
form, it will be interpreted as clicking this button. Only
one button on the form can have set a Default button.
Button properties: Appearance
The Appearance tab is used to fine-tune the element's
position and size. The measurement unit used here is dot
(pixel). The origin of coordinate system is upper left
corner of the form.
3.5.6 Edit field
The Edit field command adds edit field to the form. You
can also use the shortcut button
in the Object tool or
use keyboard shortcut <Alt>+5. Click on the form, where
you want the edit field to appear.
3-40
GalleryForm User's Manual
Chapter 3: Reference
Edit field is one way of setting the variables with their
values. You can enter some data and this data will be
assigned to the specified variable.
To specify the properties of the edit field object, double
click it. The Edit properties dialog box appears. It has
several pages (tabs). Each tab is described separately.
Edit field properties: Contents
Edit field properties: Contents tab
On the Contents page of the Edit field properties dialog
box you can connect selected edit field with a label (label
has to be attached to the active form) or form variable.
This means, that the variable will get assigned the value
specified in this field before printing begins.
You can select the variable in the list below. New local
variable can be defined by clicking the New button and
existing can be edited by clicking the Edit button. Note,
you can only change properties of the form-defined
variables, Label Gallery variables from the label file can
only be reviewed.
You can connect the edit field with some field from a
database table. In this case database values will be used
with it. When the database is connected to the form in
read/write mode, you are able to modify the database
values.
GalleryForm User's Manual
3-41
Chapter 3: Reference
If the database connection is not made yet, you will have
to take care of it before the database fields can be used. If
database connection is already available in form, you can
select it in Database combo box, then select the
appropriate field in the Field combo box. Values from
this database field will be used as input for the element.
To redirect them to variable fields defined on the label,
choose the appropriate variable in the Variable combo
box.
Edit field properties: Detailed
Edit field properties: Detailed tab
After you have selected variable you can change its
properties in Detailed tab:
• Field type: Specify field type of the variable
(numeric or any). Numeric will let you enter
numeric digits only, while Any will let you
enter any type of characters.
• Length: Specify variable length, and whether
it's length is fixed or not. It the length is fixed,
that exact number of characters will have to be
entered.
Note that the default values are equal to those of the
connected variable. You can change them, however Label
Gallery may not print the labels correctly.
3-42
GalleryForm User's Manual
Chapter 3: Reference
For example: If you have a [barcode] variable on the
label, that must be numeric and 12 characters long, and
you enter "abc" for the value of that variable, Label
Gallery will stop with an error when printing that label.
This limitation applies only to variables defined in the
label file. Form-defined variables can be changed without
any precautions.
Edit field properties: Style
Edit field properties: Style tab
Use the Style tab of the Edit field properties dialog box
to customize display and font options for the edit field.
The following buttons are available on this page:
Font: Changes the font properties of the text of the edit
field.
Background color: Changes the background color of the
edit field.
The sample box shows how the text will be look like on
the form.
GalleryForm User's Manual
3-43
Chapter 3: Reference
Edit field properties: Misc
Edit fields properties: Misc tab
Choose the Misc tab of the Edit field properties dialog
box to define whether you want to enable resetting of the
edit field value after the label is printed.
Enable check box: Value in the edit field is erased after
the label is printed.
Force Defaults check box: Default value (as it is defined
for the variable) is set as default for the edit field value
after each label print.
Note that Force defaults check box is enabled only if
Enable check box is checked.
Hint: Text that you enter here, will be shown on the
screen as tooltip, if the mouse is placed over the object
for around two seconds. That option is useful, because
you can describe the use and purpose of the object to the
user.
Read only: is available only when the element is
connected to some database field. If it is enabled, the
connected database field will not be updated with the data
the user has entered. If you want to enable the updating of
the table, disable Read only option here, but also in the
definition of connection to the database.
3-44
GalleryForm User's Manual
Chapter 3: Reference
Edit field properties: Appearance
The Appearance tab is used to fine-tune the element's
position and size. The measurement unit used here is dot
(pixel). The origin of coordinate system is upper left
corner of the form.
3.5.7 Memo field
Choose Memo field command to put memo field on the
form. You can also click the shortcut button
in the
Object tool or use keyboard shortcut <Alt>+6.
Memo field is similar to the edit field, except that memo
field can contain multiple lines.
If you double click on the memo field you can change
properties for the memo field. The Memo properties
dialog box is displayed.
Dialog box has several pages (tabs).
Memo field properties: Contents
Memo field properties: Contents tab
On the Contents page of the Memo field properties
dialog box you can connect selected edit field with a label
variable (label has to be attached to the active form). This
means, that the variable will get assigned the value
specified in this field before printing begins.
GalleryForm User's Manual
3-45
Chapter 3: Reference
You can select the variable in the list below. New local
variable can be defined by clicking the New button and
existing can be edited by clicking the Edit button. Note,
you can only change properties of the form-defined
variables, Label Gallery variables from the label file can
only be reviewed.
You can connect the memo field with some field from a
database table. In this case database values will be used
with it. When the database is connected to the form in
read/write mode, you are able to modify the database
values.
If the database connection is not made yet, you will have
to take care of it before the database fields can be used. If
database connection is already available in form, you can
select it in Database combo box, then select the
appropriate field in the Field combo box. Values from
this database field will be used as input for the element.
To redirect them to variable fields defined on the label,
choose the appropriate variable in the Variable combo
box.
Memo field properties: Detailed
Memo field properties: Detailed tab
After you have selected variable you can change its
properties in Detailed tab.
3-46
GalleryForm User's Manual
Chapter 3: Reference
Field type: Specify field type of the variable (numeric or
any).
Length: Specify variable length, and whether it's length is
fixed or not.
Note that the default values are equal to those of the
connected variable. You can change them, however Label
Gallery may not print the labels correctly.
For example: If you have a [barcode] variable on the
label, that must be numeric and 12 characters long, and
you enter "abc" for the value of that variable, Label
Gallery will stop with an error when printing that label.
This limitation applies only to variables defined in the
label file. Form-defined variables can be changed without
any precautions.
Memo field properties: Style
Memo field properties: Style tab
On the Style tab of the Memo properties dialog box you
can customize display and font options for the memo
field.
The following buttons are available on this page:
Font: Changes the font properties of the text of the memo
field.
Background color: Changes the background color of the
memo field.
GalleryForm User's Manual
3-47
Chapter 3: Reference
The sample box shows how the text will look on the
form.
Memo field properties: Advanced tab
On the Advanced tab you can set advanced options
regarding memo object.
Memo field properties: Advanced tab
Hint: Text that you enter here, will be shows on the
screen as tooltip, if the mouse is placed for around two
seconds over the object. That option is useful, because
you can describe the use and purpose of the object to the
user.
Read only: is available only when the element is
connected to some database field. If it is enabled, the
connected database field will not be updated with the data
the user has entered. If you want to enable the updating of
the table, disable Read only option here, but also in the
definition of connection to the database.
Memo field properties: Appearance
The Appearance tab is used to fine-tune the element's
position and size. The measurement unit used here is dot
(pixel). The origin of coordinate system is upper left
corner of the form.
3-48
GalleryForm User's Manual
Chapter 3: Reference
3.5.8 Combo
Command Combo adds combo box to the form. You can
also use the shortcut button
in the Object tool or use
keyboard shortcut <Alt>+7.
Combo box allows you to select one of the predefined
values and set the specified variable to that value.
If you double click on the combo box object you can
change its properties. The Combo properties dialog box
is displayed.
Dialog box has several pages (tabs).
Combo box properties: Contents
Combo box properties: Contents
On the Contents tab of the Combo box properties dialog
box you can connect combo box with a variable or
database field you want to change.
You can select the variable in the list below. New local
variable can be defined by clicking the New button and
existing can be edited by clicking the Edit button. Note,
you can only change properties of the form-defined
variables, Label Gallery variables from the label file can
only be reviewed.
You can connect the combo box with some field from a
database table. In this case database values will be used
with it. When the database is connected to the form in
GalleryForm User's Manual
3-49
Chapter 3: Reference
read/write mode, you are able to modify the database
values.
If the database connection is not made yet, you will have
to take care of it before the database fields can be used. If
database connection is already available in form, you can
select it in Database combo box, then select the
appropriate field in the Field combo box. Values from
this database field will be used as input for the element.
To redirect them to variable fields defined on the label,
choose the appropriate variable in the Variable combo
box.
Combo box properties: Values
Combo box properties: Values
On the Values tab all possible pre-defined values that
Combo Box can provide are edited. Click Edit button to
specify which values should be available in the combo
box. The list of values can be a fixed list, or variable list
with values from a database or auto-generated list of
available printers or filenames in specific location.
Click Delete button to delete the currently selected value
from the list. Note, if you have auto-generated list of
values (printer names, database values, list of filenames)
this action will break the automation facility. The list will
become normal custom values list.
3-50
GalleryForm User's Manual
Chapter 3: Reference
Move up arrow: Move the selected value up the list. The
list shows how the values will be displayed when the
form is running.
Move down arrow: Move the selected value down the list.
If you change the order of appearance of the entries in the
auto-generated lsit (list of printers, files...) the list will no
longer be auto-generated, but will become ordinary list
with values for the element.
More:
Edit items
Edit items
Use this dialog box to specify the list of available values
in the element. The list can be auto-generated or the user
can enter his own values.
These are the options:
Use names of
The list will be auto-filled with all
installed printers printers that are available on the
system. It will be automatically
refreshed every time the form is used.
Use database
The list will be filled with the value of
values
the selected database field. If there is
no database connected on the form,
you will first have to prepare it in
Database Access dialog box from
Data menu.
GalleryForm User's Manual
Use file names
The list will be filled with filenames
in the selected folder. You can specify
the file mask you want to use. Display
of file extensions is disabled by
default, but can be enabled, if you
need the extension as well.
Use custom
values
You can make a list of your own data
values. Enter the values every one in
its own line.
3-51
Chapter 3: Reference
Combo box properties: Style
Combo box properties: Style tab
On the Style tab of the Combo box properties dialog box
you can customize display and font options for the
selected combo box.
The following buttons are available on this page:
Font: Change the font properties of the text of the combo
box.
Background color: Change the background color of the
combo box.
The sample box shows how the text will look on the
form.
Combo box properties: Advanced
On the Advanced tab you can set advanced options
regarding combo box object.
3-52
GalleryForm User's Manual
Chapter 3: Reference
Combo box properties: Advanced tab
Allow input in run mode: If this option is selected, you
can type modify the box's contents when the form is
running. You can add new values to the combo box. If the
option is disabled, only a pre-defined values can be
selected, the user can not use his own.
Read only: is available only when the element is
connected to some database field. If it is enabled, the
connected database field will not be updated with the data
the user has entered. If you want to enable the updating of
the table, disable Read only option here, but also in the
definition of connection to the database.
Hint: Text that you enter here, will be shown on the
screen as tooltip, if the mouse is placed for around two
seconds over the object. That option is useful, because
you can describe the use and purpose of the object to the
user.
Combo box properties: Appearance
The Appearance tab is used to fine-tune the element's
position and size. The measurement unit used here is dot
(pixel). The origin of coordinate system is upper left
corner of the form.
GalleryForm User's Manual
3-53
Chapter 3: Reference
3.5.9 Listbox
Command Listbox adds combo box to the form. You can
also use the shortcut button
in the Object tool or use
keyboard shortcut <Alt>+8.
List box works very similar to the combo box except, that
values are not in a form of a drop down list, but all
options are always visible on the form. If there are too
many values and all do not fit in the listbox, a vertical
scroll bar appears.
If you double click on the listbox object you can change
its properties. The Listbox properties dialog box is
displayed.
Dialog box has two pages (tabs).
Listbox propertis: Contents
Listbox properties: Contents tab
On the Contents tab of the Listbox properties dialog box
box you can connect list box with a label variable or
datbase field you want to update or modify.
You can select the variable in the list below. New local
variable can be defined by clicking the New button and
existing can be edited by clicking the Edit button. Note,
you can only change properties of the form-defined
variables, Label Gallery variables from the label file can
only be reviewed.
3-54
GalleryForm User's Manual
Chapter 3: Reference
You can connect the list box with some field from a
database table. In this case database values will be used
with it. When the database is connected to the form in
read/write mode, you are able to modify the database
values.
If the database connection is not made yet, you will have
to take care of it before the database fields can be used. If
database connection is already available in form, you can
select it in Database combo box, then select the
appropriate field in the Field combo box. Values from
this database field will be used as input for the element.
To redirect them to variable fields defined on the label,
choose the appropriate variable in the Variable combo
box.
Listbox properties: Values
Listbox properties: Contents
On the Values tab all possible pre-defined values that list
box can provide are be edited. Click Edit button to
specify which values should be available in the combo
box. The list of values can be a fixed list, or variable list
with values from a database or auto-generated list of
available printers or filenames in specific location.
Click Delete button to delete the currently selected value
from the list. Note, if you have auto-generated list of
values (printer names, database values, list of filenames)
GalleryForm User's Manual
3-55
Chapter 3: Reference
this action will break the automation facility. The list will
become normal custom values list.
Move up arrow: Move the selected value up the list. The
list shows how the values will be displayed when the
form is running.
Move down arrow: Move the selected value down the list.
If you change the order of appearance of the entries in the
auto-generated lsit (list of printers, files...) the list will no
longer be auto-generated, but will become ordinary list
with values for the element.
More:
Edit items
Listbox properties: Style
Listbox properties: Style tab
On the Style tab of the Listbox properties dialog box you
can customize display and font options for the selected
listbox.
The following buttons are available on this page:
Font: Change the font properties of the text of the
listbox.
Background color: Change the background color of the
listbox.
3-56
GalleryForm User's Manual
Chapter 3: Reference
The sample box shows how the text will look on the
form.
Listbox properties: Advanced
On the Advanced tab you can set advanced options
regarding listbox object.
Listbox properties: Advanced tab
Read only: is available only when the element is
connected to some database field. If it is enabled, the
connected database field will not be updated with the data
the user has entered. If you want to enable the updating of
the table, disable Read only option here, but also in the
definition of connection to the database.
Hint: Text that you enter here, will be shown on the
screen as tooltip, if the mouse is placed for around two
seconds over the object. That option is useful, because
you can describe the use and purpose of the object to the
user.
Listbox properties: Appearance
The Appearance tab is used to fine-tune the element's
position and size. The measurement unit used here is dot
(pixel). The origin of coordinate system is upper left
corner of the form.
GalleryForm User's Manual
3-57
Chapter 3: Reference
3.5.10 Table
Choose Table command to add table grid to the form.
You can also use the shortcut button
in the Object
tool or keyboard shortcut <Alt>+9.
Click on the form, where you want the table inserted.
Table grid allows you to use the database to set the values
of specific variables. During the runtime, you can select a
record in database and field values in that record will be
assigned to the variables.
This is very useful, if the information you want on the
label is stored in a database. You can just select the
product name from the table grid and all other values
(such as: product serial number, type of product,
productions date…) are set automatically from the
database.
If you double click the database grid, the Table
properties dialog box is displayed in which you can
change the properties for the database grid.
Dialog box has several pages (tabs).
Table properties: Database
Table properties: Database tab
3-58
GalleryForm User's Manual
Chapter 3: Reference
On this tab you can specify the database table you want to
be mapped to the Table form element.
Select one of already created database connections in the
list. The major data about the selected connection will be
displayed below the combo box. You will learn which
Driver Type is used, what kind of Database it is and
which Table from the database is used.
If the list of database connections is empty and only the
option "<none>" is available, you will first have to create
a link to the database. Click Edit button.
Table properties: Columns
Table properties: Columns tab
This tab is used to connect the fields in the database to
variables on the form (either form-defined variables, or
label-defined variables). The main purpose of
GalleryForm application is to assign values to variables
that exist on the label defined in SATO Label Gallery
Plus. If you want to use values from database fields on
your label, you have to make a proper connection
between fields and variables in this dialog box. Only this
GalleryForm User's Manual
3-59
Chapter 3: Reference
way will the values be correctly transferred to Label
Gallery.
The left part of the screen contains all fields from the
database. The list might not contain all database fields,
but only the one you want to use on the form. First the
name of the field is displayed, followed by minus sign
and then the form/label variable. If the field is not
connected to any variable, then <not connected> syntax is
used.
To connect some field with a variable, click it, then
choose appropriate Variable from the combo box on the
right side of the dialog box.
Width is used to define the column width this field will
occupy. The width can be also modified in run-mode by
visually resizing the columns.
Visible: This option defines if the selected field is visible
in the table or not. Even if it is not visible, you can still
connect it to some variable, but the user will not be aware
of it.
Read only: if the field is set as read-only, the database
field will not be updated with a possible new value. The
values from the database can be used, but not changed. If
you want to be able to change the database values, then
disable this flag. Each database field has its individual
read-only setting.
Two additional sections are defined for every field in the
database, they are Title and Data.
Field title and field data can have separately defined
layout. Different Alignment, Font and Color can be
defined them.
Additionally a Caption can be defined for title of the
field. By default names of the fields will be displayed in
the first line of the table. You can change these Captions
for every field.
Table properties: Master Detail Connection
In this tab you can make advanced lookup connections
between database tables. The functionality of this tab
allows you to display only the records in the database that
comply to a defined filter rule. An indexed field from the
3-60
GalleryForm User's Manual
Chapter 3: Reference
database (that contains desired records) is joined with the
field in a master database (that contains conditions to be
met) and this linkage determines the rule.
Enable master detail connection: tick this option to
enable table linking and lookup connections. All the other
options in the tab will then become active.
Index: Select the indexed field here that should be used
for linking with the field from the parent master table.
The fields you want to join in a link have to be indexed.
The fields are used from the selected table; it is the
database table used with this form Table element.
Master database: Select the parent master database here.
The selected record in the master database will determine
the parameters for the query and thus influence on the
records displayed in the selected table.
Detail fields: This box contains the list of indexed fields
in the selected database. The order of their appearance in
the list is important. If you want to join more fields
together with appropriate master parent fields, you must
start from the top of the list. To join the fourth field in the
list, all previous three fields have to be joined before the
fourth one.
Master fields: This is the list of fields available in the
parent master table. For the query connection to work this
field has to have the same data structure as the selected
Detail field in the left box. Click Add button to make the
connection.
Joined fields: The list of all joined fields is available
here. If you want to delete some connection, select it,
then click Delete button. All used fields will be returned
to the boxes with fields above. To remove all created
connections between fields, click Clear button.
GalleryForm User's Manual
3-61
Chapter 3: Reference
Table properties: Master Detail Connection tab
Here is most likely usage of the Master Detail
Connection functionality. There are three database tables
that contain information about customers, orders and
items that you want to use on the form. Using Master
Detail Connections allows you to construct linked tables
which data changes according to the selection in the
parent table.
CUSTOMERS
The table contains a list of all
customers with the IDs of their orders.
ORDERS
The table contains a list of all orders
that the customers have made. The
orders contain the IDs of the items
they include.
ITEMS
The table contains information about
the items.
All three tables need to be positioned in the form. The
first table form element has to be connected to
CUSTOMERS database table (this is done in the
3-62
GalleryForm User's Manual
Chapter 3: Reference
Database tab) and Master Detail Connection is disabled
on it.
The second table on the form is connected to ORDERS
database table (this is done in the Database tab). The table
with Customers is the parent table for the Orders table.
They will have to be linked together. Connect the
ORDER_ID field from the CUSTOMERS database with
the ORDER_ID field in the ORDERS database. This link
will ensure that only the Orders for the customer selected
in the first table will be shown in the second one.
Then connect the third form table element to the ITEMS
database table. The Orders table is a parent for the Items
table. They too will have to be linked together. This will
ensure that only items from the selected Order (from the
second database) will be shown in this third database
table.
The result of all this preparations is the following. The
user selects the customer in the first table (Customers),
the second table (Orders) is automatically refreshed and
displays only orders that the selected customer has
performed. When the user selects the appropriate order
from the second table, the third table (Items) is
automatically refreshed and displays only the items the
selected user has order in the selected order.
Table properties: Advanced
On the Advanced tab you can set advanced options
regarding table object.
GalleryForm User's Manual
3-63
Chapter 3: Reference
Table properties dialog box - Advanced tab
If you want to be able to enter and edit data in the
database at run-time, clear the Read only check box. Any
changes you make in the table grid will also be
immediately updated in the database file. Note, that you
have to clear read only flag also in the connection options
to this database. But if you would like to limit the enduser of the form to only selecting of pre-defined values in
the database, this option should be selected.
Exact seek option allows you to specify, how the seek
option of the table finds the values. When selected, an
exact match in the table must be found. Otherwise partial
match will also find the proper record. This option is only
accessible, if your database table has defined some index.
Show seek controls option will enable the controls for
record search through the database and possibility to use
a filter functionality. This is an advanced option, but very
usable for locating records in larger databases. This
option is also available as a separate form element
Database Search.
Show database navigator option will enable the
navigator controls to the end-user. These are buttons for
easier navigation thru the table:
First record
Prior record
3-64
GalleryForm User's Manual
Chapter 3: Reference
Next record
Last record
Insert record
Delete record
Post edit
Refresh data
This option is also available as a separate form element
Database Navigator.
If you want to be able to choose and print multiple
records from the table at the same time, you must enable
the option Allow selection of multiple rows. If this option
is not selected, you can only select one record (row) in a
table.
Show status line: This option will enable the status line
in your database table, where some useful options will be
displayed. Disable it, if you are short on space on your
form.
Hint: Text that you enter here, will be shows on the
screen as tooltip, if the mouse is placed for around two
seconds over the object. That option is useful, because
you can describe the use and purpose of the object to the
user.
Table properties: Appearance
The Appearance tab is used to fine-tune the element's
position and size. The measurement unit used here is dot
(pixel). The origin of coordinate system is upper left
corner of the form.
3.5.11 Database Navigator
Choose Database Navigator command to add the
navigator to the form. You can also use the shortcut
button
in the Object tool or keyboard shortcut
<Alt>+A.
Click on the form, where you want the navigator inserted.
Database Navigator allows you to navigate throught the
database records. These are buttons for easier navigation
thru the table:
GalleryForm User's Manual
3-65
Chapter 3: Reference
First record
Prior record
Next record
Last record
Insert record
Delete record
Post edit
Refresh data
Note, when you use the navigator it will change the
current records for all form elements that are connected to
the same database table as the Database Navigator.
Dialog box has two tabs.
Database Navigator: Database
On this tab you can specify the database table you want to
be mapped to the Database Navigator form element.
Select one of already created database connections in the
list. The major data about the selected connection will be
displayed below the combo box. You will learn which
Driver Type is used, what kind of Database it is and
which Table from the database is used.
If the list of database connections is empty and only the
option "<none>" is available, you will first have to create
a link to the database. Click Edit button.
Database Navigator: Appearance
The Appearance tab is used to fine-tune the element's
position and size. The measurement unit used here is dot
(pixel). The origin of coordinate system is upper left
corner of the form.
If you want the Database Navigator to be flat on the form
surface, tick Flat option. If you want it to be raised from
the background in a 3D look, disable the option.
3-66
GalleryForm User's Manual
Chapter 3: Reference
3.5.12 Database Search
Choose Database Search command to add the search
control to the form. You can also use the shortcut button
in the Object tool or keyboard shortcut <Alt>+B.
Click on the form, where you want the search control
inserted. Database Seach will give you the possibility to
find certain record in the database or to limit the available
records only to those that comply to the defined filter.
This is an advanced option, but very usable for locating
records in larger databases.
Note, when you use the search control it will change the
current records for all form elements that are connected to
the same database table as the Database Search.
Dialog box has two tabs.
Database Search: Database
On this tab you can specify the database table you want to
be mapped to the Database Navigator form element.
Select one of already created database connections in the
list. The major data about the selected connection will be
displayed below the combo box. You will learn which
Driver Type is used, what kind of Database it is and
which Table from the database is used.
If the list of database connections is empty and only the
option "<none>" is available, you will first have to create
a link to the database. Click Edit button.
Exact seek option allows you to specify, how the seek
option of the table finds the values. When selected, an
exact match in the table must be found. Otherwise partial
match will also find the proper record. This option is only
accessible, if the field you are searchin in has defined an
index.
Database Search: Style
On this tab you can the font options for the search
element. This font will be used in the components of the
Database Search element.
GalleryForm User's Manual
3-67
Chapter 3: Reference
Database Search: Appearance
The Appearance tab is used to fine-tune the element's
position and size. The measurement unit used here is dot
(pixel). The origin of coordinate system is upper left
corner of the form.
If you want to enable filter functionality to the user, tick
the option Show filter buttons. This will show two
additional buttons in Database Search. They are active
when form is run and give the user the possibility to
create his own filter rule(s). The user will then be able to
search only through the records compying to the defined
condition.
More:
Filter functionality
3.5.13 Preview
Choose Preview command to add a true label preview to
the form. You can also use the shortcut button
in the
Object tool or keyboard shortcut <Alt>+C.
Click on the form, where you want the preview element
inserted. You can freely resize the preview element to
suit your form design.
Preview will show the actual label layout according to the
variable's values you have entered or selected from the
database table.
Preview properties: Appearance
The Appearance tab is used to fine-tune the element's
position and size. The measurement unit used here is dot
(pixel). The origin of coordinate system is upper left
corner of the form.
The Border control allows you to set the border around
the preview element. Tick Show border to show the
border. Click Border color... button to change the border
color.
3.6 Data menu
Use commands from this menu to manage properties of
variable on the form and connections to the databases.
3-68
GalleryForm User's Manual
Chapter 3: Reference
Data menu
3.6.1 Variables
Choose Variables command to display the variables used
in current form or click the shortcut button
in the
toolbar. There are four types of variables:
Prompt variables that are defined in a label
file.
GalleryForm will reads these variables from the
label file and show them in the list. The main
purpose of GalleryForm is to let user set these
variables in the most easier way.
Database variables that are defined in a label
file.
GalleryForm will read these variables from the
label file and show them in the list. The main
purpose of GalleryForm is to let user set these
variables in the most easier way.
Variables that are defined in GalleryForm.
These variables are local to GalleryForm and are
not included in the label file. You can use these
variables on the form and in the actions.
Internal GalleryForm variables.
These variables are local to GalleryForm and are
not included in the label file. You can use these
variables on the form and in the actions.
GalleryForm User's Manual
3-69
Chapter 3: Reference
Variables dialog box in GalleryForm
Note that variable Quantity is inserted by GalleryForm
and does not exist in Label Gallery label file. By setting
this variable you can easily control the quantity of printed
labels.
In the Variables dialog box the list of the variables used
in label file is displayed. If you have changed the label
file, after it was attached to the form, you must re-attach
it in order for GalleryForm to find the new variables and
properly update the list of variables and their properties.
You can add a new local variable by clicking the Add
button. Selected (local) variable is deleted by clicking the
Delete button.
By clicking the Edit button the information about
selected variable definition in label file is displayed in the
Variable dialog box.
When the option Show internal variables is selected the
list of variables is expanded with internal variables. They
get their values automatically by system or GalleryForm.
Only ticked internal variables will be available on the
form, all other can not be used with the elements. This
functionality provides an useful method to restrict usage
of only selected variables and not all of them.
3-70
GalleryForm User's Manual
Chapter 3: Reference
To sort the variables in the list, click the field caption the
variables should be sorted by. Clicking the same caption
will toggle ascending/descending sort order. If you have
visible internal variables, caption in this field will toggle
selection/deselection of all internal variables. Clicking
this caption while pressing Ctrl key will invert the
selection.
Internal variables
Internal variables are filled automatically by the software
and you do not have any influence on them. They cannot
be edited and modified, but only used on the form. Their
value is updated for every printed label.
Internal variables are represented with the icon so they
can be easily distinguished from the other types of
variables.
The list of available internal variables:
ComputerName
Contains the information about
the computer name of a PC
computer where labels are
processed, as specified from
Windows system.
Date
Contains the current system
date.
GalleryForm User's Manual
DefaultPrinterName
Contains the name of the default
printer on the system.
FormName
Contains the name of the form
file that is currently used.
LabelName
Contains full name of the
current label, including the path
to the file.
LabelPrinterName
Contains the name of the printer
that is used on the label.
ShortFormName
Contains the name of the form
file without the path. Only
filename with the extension
OFF is available.
ShortLabelName
Contains the name of the label
without the path. Only filename
3-71
Chapter 3: Reference
with the extension LBL is
available.
SystemUserName
Contains the name of the system
Windows user that is logged in
and is running the application.
Time
Contains the current system
time.
UserName
Contains the name of the Label
Gallery user that is logged in
and is using the application.
This variable has some value
only when you have enabled
user management in the
software.
Variable dialog box
Variable dialog box
In this dialog box you can view and edit the variable
definition. You can only change variable properties of
those defined in GalleryForm. If variable is defined and
acquired from label file, you can not make any
modifications. If the variable properties have to be
changed, you will have to do it in Label Gallery. When
you will re-open the form file, GalleryForm will
automatically update the variable settings.
Name: Variable name
3-72
GalleryForm User's Manual
Chapter 3: Reference
Length: The length of the variable (maximal number of
characters allowed for variable's value)
Numeric: Variable type is numeric. Only numbers can be
entered. If this option is not enabled, any character can be
entered for the value.
Fixed length: Variable's length is fixed. You have to
enter exactly the number of characters as specified for the
length.
Default value: Default value of the variable.
Value required: The value for this variable must be
specified in order for printing to start. The variable
cannot be left empty.
3.6.2 Database Access Functions
This dialog box is used to define the connections to
different databases. The fields defined in the databases
can be used with different elements on the form. The list
of already defined connections to databases is available
on the left side. You can create new connection using two
methods. Available are buttons Wizard and New. The
first one will start Database Wizard that will help you
connect to the database. The second button will open
dialog box that will allow you to directly change the
properties for the database.
Use the button Edit to change properties of already
connected database.
Use the button Delete to remove the connection to some
database from form file. Make sure that no element is
connected to database field, otherwise you will not be
able to remove it.
Database Access
This dialog box is used to manually define the connection
to the database you want to use on the form.
Name
Driver Type
GalleryForm User's Manual
Enter the name of the database you want
to use to identify the connection. You
can leave it empty and database name
will be used for this field.
Click the Define button to select the
database driver you want to use for your
3-73
Chapter 3: Reference
database.
Database
If you use desktop database which data
is stored in the file on the disk (Paradox,
dBase, Excel...), you can browse to the
file and the connection to the data will
be established without the need for
driver type selection.
If you have enterprise database (SQL,
Oracle...) you will have to define the
database together with driver type and
this field does not apply to you.
Table
Choose the table from the database you
want to use. Desktop database have only
one table, enterprise databases can have
more than one table.
This option is valid for dekstop
databases only. For enterprise databases
the table selection is done at the same
time as driver type selection.
Index used for If some fields is indexed, you can search
seek
for some data in this field much faster, if
it would not be. Apart from faster
searching, the indexed fields be viewed
in ordered way (ascending or
descending).
If you often need to search for some
record in the database it is recommended
to create an index upon this field.
Filter
If you want to limit the data that is
displayed to the user, create a filter.
Only records complying to the rules set
in the filter can be used.
Filter will let you define query options
that will be applied to this database by
default. With larger databases it can be
very useful to limit the number of
displayed record. The end-user can
quicker find his record(s) this way.
Filters defined in database properties are
stored with the form file for future use
3-74
GalleryForm User's Manual
Chapter 3: Reference
Read-only
If table is read-only, you cannot change
its contents. If you want to be able to
update tables in your designed form,
disable this option.
This is a master switch for the database.
Every form element that is connected to
fields from this database has its own
read-only option.
More:
Database dialog box
Filter functionality
Database dialog box
The Database dialog box is used when you want to
manually set properties for the database used on the label.
For Database connection type you select the type of the
database that is available on your system. There are three
connection modes available in Label Gallery software.
Text driver
There is the driver TEXT. It allows
you to connect to the plain text files
that contain data you want to use on
the label.
The data can be either separated by
some common character (comma,
semicolon, tab...) or the columns of
data must have fixed widths.
BDE drivers
Borland Database Engine drivers can
be used for connection to desktop
databases (Paradox, dBase...) or
enterprise databases (MS SQL,
Oracle, Informix, Intrbase...). The
desktop drivers are installed with
Label Gallery software, the enterprise
drivers are available as separate install
from the CD-ROM.
The disadvantage of BDE drivers is
that they do not support Unicode
databases very well.
GalleryForm User's Manual
3-75
Chapter 3: Reference
OLE DB drivers
Use OLE DB drivers to directly
connect to SQL Server, MS Access,
Excel, Oracle and similar databases.
You should also use these drivers
when connecting to your ODBC data
sources.
OLE DB is modern technology to
connect to different databases and can
work perfectly with Unicode-enabled
databases.
It is recommended to use these drivers
for connections to your databases.
The Database Connection definitions section changes
accordingly to the selected Database connection type. For
file oriented desktop databases (Paradox, dBase...) you
usually have the option to browse to the database file and
then open it directly.
For other databases you have to define the database
connection string or alias. The alias can be defined in
ODBC administrator for ODBC drivers, can be defined in
BDE Administrator for BDE drivers, or can be defined in
the database properties for the OLE DB provider.
It all depends on the type of the database. For more
information refer to the help files of these external thirdparty applications.
If the connection to the database requires you to enter
User name or Password, you have an option to provide
them in the appropriate edit fields. If you do not enter the
password here, but it is required, you will be prompted
for it later at design or print time, when the data will have
to be acquired from the database.
Show system tables: if you enable this option system
tables will also be shown in the list of tables. When you
need to use the data from system tables, tick this option.
Automatic browse for tables is checked by default. The
application will automatically browse for all the tables in
the database and offer them to you. However, this
operation can take quite a lot of time on some database
3-76
GalleryForm User's Manual
Chapter 3: Reference
types (for example ORACLE database using ODBC
driver). If you find out, that it takes too much time, unselect this option. Then you will have to enter table name
manually.
Test connection: Click this button to test the connection
to the defined database. You will be notified about
possible problems.
Filter functionality
Filter can be very useful in situations where you are
dealing with larger tables and would like to limit the view
of the table data. You can set a user-defined conditions to
the table and only record that comply to them are
displayed. Each field can be used in the condition using
the following operators:
=
equal
<>
not equal
>
greater
>=
greater or equal
<
smaller
<=
smaller or equal
The field's value is compared to the entered value. You
can also link the filter with a variable value. Tables on the
form can be updated interactively as soon as filter
variable has a new value. The user can control in realtime which records are displayed in the table (complying
to the filter) and which not.
Two or more conditions can be used to build a more
complex condition. They are bind together using AND
and OR operators.
AND
all conditions must be true in order to
display the record
OR
only one condition must be true in order to
display the record
Click Add button to apply the new condition to the list.
Click Delete button to delete the currently selected
condition.
GalleryForm User's Manual
3-77
Chapter 3: Reference
If Case sensitive option is enabled only the exact value
you have entered will be searched for in the database. For
example, "Mary" will not be the same as "mary" or
"MaRy" or "MARY".
If Partial compare option is enabled you can search by
only a part of the field value. For example, if you enter
"Ma*" for value of the condition, it will be valid for
"Mary", "Marianne", "Marusha" etc. Note the asterisk
character at the end of the condition value. It represents
any possible combination of characters.
When Show seek controls option is enabled in the
element, two filter-related icons are accessible from the
table in run-mode. The first one
is used to set user
filter properties and the other one
is used to remove
them from the table.
If you add the filter in the DESIGN mode on the form,
such filter is stored with the form and is applied every
time the form is run. The user cannot remove such filter.
If the user adds some custom filter in RUN mode, such
filter is not stored with the form. It is active only for as
long as the form is running. When the form is closed, the
filter is discarded and is not applied at next form run.
Fields dialog box
When you are using database connected to the form, this
dialog is used to change the codepage setting for each
individual field from the database. The default setting is
Default that instructs the software to apply the system
default codepage settings for the field in the table. But
you can set every field to its own setting. For example,
the first field can contain data in Chinese language, the
second in German and the third in Hebrew. The encoding
field lets you specify how the data is stored in the fields.
None is the default setting. UTF-8 and UTF-16 are two
modes of Unicode encoding. If you have Unicode
database, you do not have to change anything, Label
Gallery will auto-detect the type. But if use the database
that is not Unicode-aware and you still use Unicode data,
you have to encode Unicode data into such database
using UTF-8 or UTF-16 encoding. In this case you need
to select the used encoding in here.
3-78
GalleryForm User's Manual
Chapter 3: Reference
Edit button lets you change the codepage setting for the
selected field. If you want to change all the fields at once,
use Apply to all button and all fields will be formatted as
the selected one.
3.6.3 Database wizard
Database wizard lets you specify the source database for
the table in an easy step by step procedure. Click the
Wizard button in Database Access Functions dialog box
or click the Wizard button
in the Database Tool.
The Database Wizard offers you a quick and easy method
to make database table available to the form elements.
When the Wizard is finished, it will leave you with readymade connection. You can further modify the table layout
and properties or use it as-is. This is a great shortcut for
designing quick connectivity to data in database tables.
Database Wizard: Starting
Database Wizard: Starting
On the starting screen of Database Wizard you will learn
what tasks will be completed. Wizard will comfortable
guide you through each required step. The result of the
Wizard will be a quickly connectivity to a database table.
GalleryForm User's Manual
3-79
Chapter 3: Reference
Database Wizard: Selecting the database file
Database Wizard: Selecting the database file
First you must select the database file, which has stored
the appropriate data, you would like to connect to.
Wizard can work with dBase, Paradox, MS Access and
MS Excel data structures. If you have any other type of
database, you will have to make a manual connection to
the database and not use the Wizard.
Select the database file and click Next to continue with
the Wizard.
Database Wizard: Field usage
Now you can select how the database fields should be
used on the form. The Wizard can help you make a table
(I want a table) or edit field element connected with each
database field (I want an edit field for each field).
If you do not want the Wizard to do anything with the
fields, choose I will specify fields' usage later. In this
case the connection to the database will be made, but no
fields will be used on the form.
Database Wizard: Additional objects
If you have specified that the Wizard should create a
table element connected to the database, this table will
also contain a search control and database navigator. But
if you have selected that you need an edit field for each
3-80
GalleryForm User's Manual
Chapter 3: Reference
database field, you have the option to select additional
objects that can be positioned on the form as well.
Search control
For more information refer to topic
Database Search.
Database
Navigator
For more information refer to topic
Database Navigator.
Database Wizard: Selecting the fields
Database Wizard: Selecting the fields
In this step you have to choose which fields will be used
on the form. Available table fields are shown in the left
list, the right list displays the fields that will be used.
Click the arrow buttons to select fields.
Move selected field to the right side and use
it on the table.
Move all fields to the right side and use them
on the table.
Move all fields back to the left side and do
not use them on the table.
Move selected field back to the left side and
do not use it on the table.
GalleryForm User's Manual
3-81
Chapter 3: Reference
Fields on the right side can be ordered. The first in the list
will be the leftmost in the table element, the last in the list
will be the rightmost in the table. Use up
and down
arrows to change the order of fields.
Database Wizard: Field connections to variables
Database Wizard: Field donnections to variables
Here you have to make a connections between database
fields and variables on the form. The purpose of this
connection is to let GalleryForm know to which variable
it has to assign a value read from the database table. If
you are using the same variable's names as the names of
the fields, GalleryForm will make the connections
automatically. Variables and fields with the same names
will be connected together. If the names are not the same,
you will have to make connections yourself. First select
field name from the left side and appropriate variable
name from the right side, then click Add button to make a
connection.
Delete button will delete the currently selected
connection from the bottom list.
Clear button will clear all defined connections.
Click the Next button to continue with the wizard.
3-82
GalleryForm User's Manual
Chapter 3: Reference
Database Wizard: Completing the process
Database Wizard: Completing the process
All information required by the Wizard have been
entered. You can review the changes you have made. If
you are not satisfied with the settings, click Back to
return to previous step of the Wizard. Click Finish to
close the Wizard and create a new table connectivity
based on parameters you entered.
3.7 Transformations menu
Use commands from this menu to align objects on the
active form relative to each other, or to set the order o
objects if they overlap each other.
Transformations menu
3.7.1 Align
Choose Transformations - Align command to align
objects to each other. The Alignment dialog box is
shown.
GalleryForm User's Manual
3-83
Chapter 3: Reference
Alignment dialog box
In this dialog box you can choose, how the selected
objects will align in relation to each other.
The Horizontal alignment options align objects along
their right edges, left edges, or midline.
The Vertical alignment options align objects along their
top edges, bottom edges, or midline.
The options for horizontal or vertical alignment are:
None
Does not change the alignment of
the object
Left
Lines up the left edges of the
selected objects (horizontal only)
Centers
Lines up the centers of the selected
objects
Right
Lines up the right edges of the
selected objects (horizontal only)
Top
Lines up the top edges of the
selected objects (vertical only)
Bottom
Lines up the bottom edges of the
selected objects (vertical only)
Sapce equally
Aligns objects so, that distance
between them are equal.
If Align to form is selected, elements will be aligned
relatively to the form and not to each other.
Objects are always aligned to first selected object.
3-84
GalleryForm User's Manual
Chapter 3: Reference
3.7.2 Size
With Transformations - Size command you can change
the size of many selected objects so, that all objects are
equally wide or high. The Size dialog box is shown.
Size dialog box
You can choose to adjust the width or height of selected
objects.
No change
Size of selected objects will not be
changed.
Shrinnk to
smallest
Size of selected objects will be shrunk
to match the size of the smallest
selected object.
Grow to largest
Size of selected object will be
enlarged to match the size of the
largest selected object.
3.7.3 To front
Command To Front sends selected objects to front. You
can use the keyboard shortcut <Ctrl>+<PgUp>. This
command only makes sense if several objects overlap
each other.
3.7.4 To back
Command To Back sends selected objects to back. You
can use the keyboard shortcut <Ctrl>+<PgDn>.This
command only makes sense if several objects overlap
each other.
GalleryForm User's Manual
3-85
Chapter 3: Reference
3.8 Options menu
Use the Options menu to view and change form and
environment settings. The Properties command leads to
a dialog box containing two tabbed pages that group
related options.
Options menu
3.8.1 Snap to grid
When this option is selected, objects will be snapped to
defined grid. Enabling this option will cause the elements
to jump from one position to another, based on the grid
settings. This option is useful, when creating tabularshaped forms.
See also:
3.8.2 Display grid
When this option is selected, grid will be displayed on the
form. Dots on the form will represent grid locations.
See also:
3.8.3 Properties
Choose Options - Properties command to display the
Properties dialog box in which you can set various
program options.
Dialog box has two pages (tabs).
3-86
GalleryForm User's Manual
Chapter 3: Reference
Paths Page
GalleryForm Properties: Paths tab
On the Paths tab of the GalleryForm Properties dialog
box you can specify the default locations of form, label,
graphic, and database files. When browsing for these
files, GalleryForm will start in specified folders.
Form designer tab
GalleryForm Properties: Form designer tab
GalleryForm User's Manual
3-87
Chapter 3: Reference
On the Form designer page of the GalleryForm
Properties dialog box you can set the grid preferences
that makes it easier to design forms.
Display grid: Makes the dots that show the form grid
visible.
Snap to grid: Automatically aligns objects on the form
with the nearest gridline. You cannot place a component
"in between" gridlines.
Grid size X: Sets grid spacing in pixels along the x-axis.
Specify a higher number to increase grid spacing.
Grid size Y: Sets grid spacing in pixels along the y-axis.
Specify a higher number to increase grid spacing.
3.9 Tools menu
In this menu you can quickly start other programs from
SATO Label Gallery TruePro.
Tools menu
Label Gallery Plus
Start Label Gallery Plus - program for designing and
printing labels.
GalleryData
Start GalleryData - database manager and editor.
GalleryWatch
Start GalleryWatch - a program that can automatically
trigger label production when certain events occur.
GalleryMemMaster
Start GalleryMemMaster - printer memory card manager.
3.10 Help menu
Use the Help menu to access the online Help system,
which displays in a special Help window.
3-88
GalleryForm User's Manual
Chapter 3: Reference
Help menu
3.10.1 Contents
Choose Contents command to open the help file. The
online help provides a comprehensive screen that
summarizes the contents of the Help system.
Each of the headings on the contents screen is an
expanding list. When you click the highlighted
underlined text, it displays additional help topics about
the topic.
3.10.2 Label Gallery on the web
Open Label Gallery web site (www.satoworldwide.com)
in your current web browser.
3.10.3 About
Choose About command to display the About
GalleryForm dialog box showing version, user name,
serial number and copyright information.
3.10.4 Missing Help Topic
The Help topic associated with the currently selected
request is unfortunately not available in on-line help at
this time. Label Gallery help is in constant process of
upgrade and the new version of Label Gallery software
with updated help files might already be available for
download on the internet.
Please visit Label Gallery website at
http://www.satoworldwide.com and verify if the upgrade
of Label Gallery software is available.
GalleryForm User's Manual
3-89
Chapter 4: How to...
4. How to...
4.1 Attach a label to the form?
From the Design menu choose command Attach label
file.
You must then provide the label file name and click on
Open button.
Now all prompted variables that exist in a label file are
available on the form as well. These variables can now be
connected with specific objects on the form. If you
choose so, you can also specify the values for database
variables.
The best idea is probably to use Form from label wizard.
4.2 How to connect objects on form with variables?
Double click the object on the form (text, edit box,
table...). Go to Contents tab and there select Variable
value as contents for the element. Then select the
appropriate variable from the list below and click OK to
confirm the setting.
If there are no variables available in the list, attach some
label to the form first or define the variables in
GalleryForm.
4.3 How do I use a database?
The database is connected using command Database
Access in Data menu.
For desktop databases (Paradox, dBase, MS Access...)
use the database Wizard to simplify the connection
GalleryForm User's Manual
4-1
Chapter 4: How to...
process. For enterprise databases (SQL, Oracle...) you
will have to make connection yourself.
Once the database is available in GalleryForm, its fields
can be used with any form element. On the Contents tab
of the element select Database field value for the
contents, then select appropriate field in the bottom part
of the dialog box.
4.4 How can I print two or more different labels?
Add a button to the form, and set the option Use other
label in Button properties dialog box on Actions tab.
You can enter multiple label file names and separate them
with semicolons.
4.5 How do I quickly design and test a form?
From the File menu choose command New Form from
Label and select the label, that will be printed from the
form.
Start the form - command Design - Run
Enter all the necessary data values and then click the
Print button to start print process.
4.6 How do I print the label which file name is read
from database?
Attach a label to the form. This is required to obtain the
variable names from the label.
Make a connection to a database that stores the necessary
data. Then add a database table to the form and associate
it with the connected database. This table has also a field
that contains the information which label should be
printed.
Connect all the fields (columns) in the table element with
the proper label variables, this can be done in the tab
Columns.
Add button to the form and add the Print label action in
the Actions tab. In this tab you also have to enable the
option Use other label(s). This option will let you specify
4-2
GalleryForm User's Manual
Chapter 4: How to...
the label name that should be used with each record in the
database. Here enter the field name that contains label
name and preceed it with colon character (:).
When you select a record in the table, the proper label
will be opened (as specified in the database) and the field
values will be assigned to the label variables.
If you want to use this functionality, all label files have to
have defined the same variables. All variable names have
to be the same in all labels.
4.7 How do I unattach the label?
Chose command Design - Unattach label. After this
command is executed, the form will no longer be
connected to the label. This is useful for the forms that
are not used directly for label production (main menus,
database editing forms etc.).
When you select the command Unattach label, all
elements connected to label variables will lost this
connection and become fixed elements.
4.8 How do I set the order in which the data is entered
(tab order)?
Select the command Tab order from the Design menu.
4.9 How do I align objects on a form?
Select all objects that you want to align (hold shift if you
want to select more than one) and choose command
Transformations - Align.
The same alignment commands are available in Align
Toolbar. By default it is located on the right side of the
working window).
4.10 How do I change the size of multiple objects at the
same time?
Select all objects that you want to resize (hold shift if you
want to select more than one) and choose command
Transformations - Size.
GalleryForm User's Manual
4-3
Chapter 4: How to...
4.11 How can I use button to ...
4.11.1 ... start printing?
Add the Print label action in the Actions tab of the
Button properties dialog box.
4.11.2 ... send GalleryCommands to Label Gallery?
Add the Send custom commands action on the Actions
tab in the Button properties dialog box and enter the
commands that you want to execute in the edit box to the
right.
For more information see Label Gallery documentation chapter GalleryCommands.
4.11.3 ... set a value to variable?
Add the Set variable action on the Actions tab in the
Button properties dialog box. Choose the variable name
from the list and its value in the edit box.
4.11.4 ... open another form?
Add the Open some other form action on the Actions tab
in the Button properties dialog box.
4.11.5 ... start another application?
Add the Open document/program action on the Actions
tab in the Button properties dialog box.
4.11.6 ... close a form?
Add the Quit action on the Actions tab in the Button
properties dialog box.
4.11.7 ... execute multiple actions at once?
Add all the actions that you want to execute in the Button
properties dialog box on the Actions tab. Actions are
executed in the order they appear in a list.
4-4
GalleryForm User's Manual
Chapter 5: Glossary of Terms
5. Glossary of Terms
attach
The label file must be attached to the form. This means,
that GalleryForm will use this label file to print the
labels. The labels printed will look like defined in this
file.
design mode
GalleryForm can run in two modes: run and design. In
the design mode, you can create or change the form.
form
The user interface that enables the user to enter or select
desired data for variable elements on the label. It can be
also used for simplified printing of fixed labels. The form
is created in the GalleryForm program.
label
A label designed in SATO Label Gallery Program and
saved into a .LBL file format.
New From wizard
A special wizard, that creates a simple form based on
existing form and label file.
run mode
In the run mode, you can enter the data in the form and
use the buttons to perform the specified actions such as
print the label and other.
GalleryForm User's Manual
5-A
Chapter 5: Glossary of Terms
variable
A variable used in Label Gallery to provide the values for
label objects that change from label to label.
5-B
GalleryForm User's Manual