1
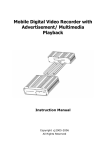
Eye3-VTracker – In Car Video System Specifications
h)
Eye3-VTracker GPS Functionality
Eye3-VTracker GPS features are available only when the system is ordered with GPS. The GPS
connection port is located on the rear of the Docking Station. To enable the GPS features, a GPS
antenna (either generic or provided along with GPS unit) needs to be connected to the GPS port.
Once connected, and placed outside the vehicle facing towards the sky, the GPS unit is activated.
GPS data appearing on the screen is limited to the following:
i. N for Longitude
ii. W for Latitude
iii. Vehicle Speed
i)
Additionally, GPS also tracks the values of the GPS (N, W and Speed) which is embedded on the video.
This information can be translated using any mapping software to display the true location of the
vehicle. (Mapping software needs to be purchased separately and is not provided with the Eye3VTracker unit).
Eye3-VTracker PTZ Functionality
The Eye3-VTracker can support PTZ (Pan/Tilt/Zoom) cameras and control via the IR Remote
control via the RS-485/RS422 port located on the rear of the Docking Station.
j)
a) All 4 or 8 channels can have PTZ cameras
b) Supports 16 protocols; which include Pelco-D, Pelco-P, DSCP, FastDome, PIH 1016, PIH 1017
and Pelco06 to Pelco15. If a corresponding protocol is not found in this list, please contact us
directly. We can provide technical support to add the missing protocol if PTZ details are
provided.
Eye3-VTracker Mini-LED Display
On most occasions the Eye3-VTracker unit is installed either in the overhead panel or underneath
the driver seat. In both instances the unit is not visible to the driver. Eye3-VTracker Mini-LED
Display is installed on the dash-board of the vehicle, providing bus driver information related to the
vitals of the Eye3-VTracker Unit. The unit consists of red and green LED’s for Power, HDD, Record,
Video Loss, Audio Loss and Alarm. The unit is always visible to the driver and is able to provide
customers advanced notice if the system is not functioning properly.
4.
Playback Management
The Eye3-VTracker has a very simple and easy to use Playback Management System. The system
plays back recordings in 2 ways:
a)
b)
4.1
View list of recordings, select the date/time of recording and Press START
View list of Events in the Event Folder and Select Event to be played. The system will play the
pre-event recording (up to 15 seconds) and then the post-recording (up to 300 seconds).
Play Recordings
a)
The system allows users to enter specific dates for the playback. The oldest record time is a
quick reference for the oldest recording available on the unit. Enter the date and time using the
handheld IR Controller and press START.\
This document contains proprietary and copyrighted information subject to change without notice. The information
in this document shall not be duplicated, used, or disclosed in whole or in part outside of Eye3Data © 2006 - 2011.
Any distribution of this material without the written consent of Eye3Data is strictly prohibited.