1
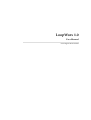
LoopWorx 1.0
User Manual
Acon Digital Media GmbH
LoopWorx User Manual
Copyright © 2008 Acon Digital Media GmbH
All rights reserved. No parts of this work may be reproduced in any form or by any means - graphic, electronic, or
mechanical, including photocopying, recording, taping, or information storage and retrieval systems - without the
written permission of the publisher.
Products that are referred to in this document may be either trademarks and/or registered trademarks of the respective
owners. The publisher and the author make no claim to these trademarks.
While every precaution has been taken in the preparation of this document, the publisher and the author assume no
responsibility for errors or omissions, or for damages resulting from the use of information contained in this document
or from the use of programs and source code that may accompany it. In no event shall the publisher and the author be
liable for any loss of profit or any other commercial damage caused or alleged to have been caused directly or
indirectly by this document.
Table of Contents
I
Table of Contents
Part I Introduction
3
1 System Requirements
................................................................................................................................... 3
Part II Working with LoopWorx
3
1 Program User Interface
................................................................................................................................... 4
2 Procedure
................................................................................................................................... 5
3 Using Help
................................................................................................................................... 5
4 Exiting the Program
................................................................................................................................... 5
Part III Creating Songs
6
1 Using the Loop Library
................................................................................................................................... 6
2 Prelistening Sound
...................................................................................................................................
Clips
7
3 Using your own Sound
...................................................................................................................................
Clips
7
4 Using the Drum Computer
................................................................................................................................... 7
Setting the Rhythm ......................................................................................................................................................... 8
Selecting Different Instruments
......................................................................................................................................................... 9
5 Inserting Sound...................................................................................................................................
Clips into Tracks
10
Using the Snap Feature
......................................................................................................................................................... 10
6 Changing the Tempo
................................................................................................................................... 11
7 Adjusting the Volume
................................................................................................................................... 11
For all Tracks
......................................................................................................................................................... 11
For each Audio Track
.........................................................................................................................................................
Separately
12
8 Playing Songs ................................................................................................................................... 12
Playing a Selection as.........................................................................................................................................................
a Loop
13
Solo or Muted Audio.........................................................................................................................................................
Tracks
14
Part IV Voice Recording from Microphone
14
1 Adjusting the Recording
...................................................................................................................................
Volume
14
2 Starting Recording
................................................................................................................................... 16
3 Stopping Recording
................................................................................................................................... 16
Part V Editing Audio Tracks
17
1 Zooming the Track
...................................................................................................................................
View
17
2 Extending or Shortening
...................................................................................................................................
Clips
17
3 Moving Track Contents
................................................................................................................................... 18
Moving Individual Sound
.........................................................................................................................................................
Clips
18
Moving Multiple Sound
.........................................................................................................................................................
Clips
19
Moving Groups of Clips
......................................................................................................................................................... 19
4 Cutting, Copying
...................................................................................................................................
and Pasting Sound Clips
20
5 Undoing / Redoing
...................................................................................................................................
Editing
22
Copyright © 2008 Acon Digital Media GmbH
II
LoopWorx User Manual
6 Deleting Sound ...................................................................................................................................
Clips
22
7 Opening and Saving
...................................................................................................................................
Songs
22
8 Exporting Songs...................................................................................................................................
as Audio Files
23
24
Part VI Using Audio Effects
1 Using Master Effects
................................................................................................................................... 24
2 Using Track Effects
................................................................................................................................... 25
3 Editing Effects ................................................................................................................................... 25
4 Saving Custom Settings
................................................................................................................................... 26
29
Part VII Configuring Settings
1 Specifying Audio
...................................................................................................................................
Input and Output Devices
29
30
Index
Copyright © 2008 Acon Digital Media GmbH
Introduction
1
Introduction
LoopWorx turns your computer into a recording studio and gives your fancy full scope
with 8 tracks, various audio effects and nearly a thousand samples from the Hip Hop,
Dance and Rock genres.
Create your own compositions, sing live to your songs on the PC and enable your
friends to download your songs directly to the MP3 player.
Now go for it and let`s get it,
The Acon Digital Media team
1.1
System Requirements
To run the LoopWorx software, you need a PC that meets the following minimum
requirements:
§
§
§
§
§
§
§
2
Intel or AMD processor with 700 MHz or more (1.1 GHz recommended)
At least 128 MB of RAM
At least 10 GB of available hard disk space
Monitor resolution of at least 800 x 600
AGP video card with 8 MB of memory
16-bit sound card and speakers
CD-ROM or DVD-ROM drive
Working with LoopWorx
To run LoopWorx directly, double-click the corresponding desktop icon.
Fig.: Desktop icon. Color and text may vary between the LoopWorx editions (Hip Hop, Dance,
and Rock)
As an alternative, you can run the program from the Windows Start menu. For this,
select Start | Programs | Acon Digital Media | LoopWorx | LoopWorx (Hip Hop, Dance, or
Rock).
!
The actual Start menu path may vary depending on the Windows version used
and the display design selected.
Copyright © 2008 Acon Digital Media GmbH
3
4
LoopWorx User Manual
2.1
Program User Interface
After the program starts up, the LoopWorx user interface is displayed. It is divided into
several sections.
Fig.: LoopWorx user interface
The title bar appears at the top of the first section. Below the title bar, you see the menu
bar and the toolbar below containing the quick start buttons to access the most relevant
functions directly. On the left, the individual track controls are placed and continued to
the right. A vertical dotted line in the track section indicates the current playback
position of the song.
The lower left section contains the Master Section where you can configure global
settings, i.e. settings for all tracks simultaneously. The Loop Browser at the bottom right
allows you to select and pre-playback sound clips.
To show or hide additional components, select Toolbars from the View menu. You can
show or hide the default toolbars and the Transport toolbar by checking or unchecking
the appropriate checkboxes with a mouse click.
Copyright © 2008 Acon Digital Media GmbH
Working with LoopWorx
Fig.: Showing additional components
2.2
Procedure
When working with LookWorx, you create your own songs by using either the sound
clips included in the program or your own audio clips that you can place in the
individual audio tracks to successively build up your song. Use the drum computer to
create the basic rhythm. You can even sing to your songs in real-time using a
microphone. Finally, you can export your composition as a ready-made music file to
listen on your MP3 player.
2.3
Using Help
For more information on the program, you can select the Help menu at any time.
Fig.: Using help
The LoopWorx Help is then displayed.
2.4
Exiting the Program
If you want to exit LoopWorx after successful completion, select File from the menu bar
and click Exit.
Copyright © 2008 Acon Digital Media GmbH
5
6
LoopWorx User Manual
Fig.: Exit command
3
Creating Songs
You can create your songs simply by assigning sound clips to the individual audio
tracks. For that, you can either use sound clips already included in the program or your
own audio clips. Additionally, you can record your voice to act as an effect or use the
software to record your singing in real-time while playing your song. The voice
recording is automatically included in the selected audio track as a separate sound clip.
3.1
Using the Loop Library
To enable you to start working immediately, some sound clips are already included in
LoopWorx. These clips can be found in the Loop Library, i.e. the music library. There are
sounds, tones and sound effects that you can use in your song as appropriate. The Loop
Library is always displayed first in the Loop Browser section with the sound clips
arranged in sound folders.
Fig.: Library sound clips
To open a sound folder, just double-click the folder. The name of this sound folder is
Copyright © 2008 Acon Digital Media GmbH
Creating Songs
7
then displayed in the upper input box, the folder content is shown in the content section
below.
To move back up the folder tree, just click the button with the folder icon in the right
corner of the Loop Browser.
Fig.: Folder icon
3.2
Prelistening Sound Clips
It is also possible to prelisten to the clips stored in the sound folders. In the Loop
Browser section, place the cursor on the sound file. Click to select the clip, and hold the
left mouse button pressed on the selected clip. Until you release the mouse button, the
selected clip is played and you can listen to it through your speakers or any other audio
output device.
Fig.: Pre-playback of sound clips
3.3
Using your own Sound Clips
In addition to sound clips already included, you can use your own clips in your song. In
the Loop Browser, select the folder on your hard disk and then select the sound clip you
want to insert into a particular track.
3.4
Using the Drum Computer
In addition to sound clips you insert into your track, you can use rhythm effects from the
built-in Drum Computer and configure the basic rhythm as appropriate.
First create an audio track for the Drum Computer track and select it with a mouse click.
Then select Insert | Drum Computer Loop from the menu bar. A placeholder called Drum
Computer is inserted into the selected audio track.
Copyright © 2008 Acon Digital Media GmbH
8
LoopWorx User Manual
Fig.: Drum Computer placeholder inserted
Now double-click the Drum Computer placeholder inserted into the audio track. This
takes you to the Drum Computer dialog window to configure your rhythm.
3.4.1
Setting the Rhythm
In the Drum Computer dialog window, you can use eight tracks to set the basic rhythm.
On the left, the selected percussion instruments are listed. To the right of the percussion
instruments, the corresponding rhythm tracks are represented as 4 measures, each with
8 measure buttons.
Fig.: Drum Computer dialog window
Now select a percussion instrument and click any of the round measure buttons to set
the instrument. A grey measure button indicates that the corresponding instrument is
not yet set. On the other hand, a red measure button indicates that the instrument is set.
To play the rhythm, click the Play button at the bottom. The 4 measures are played as a
loop. You can now use the measure buttons to add more instruments which are then
played as well. To stop the Drum Computer, click the Stop button at the bottom.
Copyright © 2008 Acon Digital Media GmbH
Creating Songs
3.4.2
9
Selecting Different Instruments
It is also possible to change the percussion instruments. To do this in a track, click the
percussion instrument on the left directly. In doing so, the cursor changes to a hand with
a pointing finger. Then the Load Sound window opens.
Fig.: Load Sound dialog window
Now you can select a new instrument from the list. To listen to an instrument, clicking
the corresponding list item once. By double-clicking a list item, the corresponding
percussion instrument is applied to the Drum Computer track.
After you have finished your rhythm, click the Close button in the Drum Computer
dialog window. Your rhythm is then displayed in the audio track previously selected in
LoopWorx with the checked measure buttons shown as small black rectangles.
Fig.: Drum Computer rhythm in audio track
Copyright © 2008 Acon Digital Media GmbH
10
LoopWorx User Manual
3.5
Inserting Sound Clips into Tracks
To insert a sound clip into an audio track, select the clip from the content section of the
Loop Browser, hold the left mouse button down and move the cursor to the audio track
you want. When you release the left mouse button, the clip is automatically inserted. In
doing so, the audio track to insert the sound clip is light-coloured.
Fig.: Selected light-coloured audio track with insertion position
While inserting, the cursor shows an additional small icon that looks like a plus sign.
When you release the left mouse button, the clip is automatically inserted into the
selected track.
3.5.1
Using the Snap Feature
You can also simplify inserting sound clips into the tracks by using the Snap feature. In
the Master section, you can specify the positions in the audio track to set the snap points.
For this, select an option from the Snap list box.
Abb.: Positionshilfe
There are four options available: the Quarters, Eights and Sixteenths snap points and the
“No Snap” option which means that you can arrange the clips as appropriate.
Copyright © 2008 Acon Digital Media GmbH
Creating Songs
3.6
11
Changing the Tempo
The software also allows you to change the playback rate of your song. To set the BPM
(Beats Per Minute) value, use the Tempo list box in the Master section. By selecting a
higher number, your song is played at a higher rate. By selecting a lower number, the
song is played at a lower rate.
Fig.: Changing the tempo in LoopWorx
!
3.7
BPM refers to the playback rate of a particular composition. BPM means “Beats
Per Minute” and determines the number of quarter-notes per minute.
Adjusting the Volume
There are two ways to adjust the volume of your song during playback. You can either
adjust the volume for the whole song, i.e. for all tracks simultaneously, or the volume for
each audio track in the song separately.
3.7.1
For all Tracks
During playback, you can adjust the volume for the whole song in the Master Section. To
do so, move the slider up and down, respectively.
Copyright © 2008 Acon Digital Media GmbH
12
LoopWorx User Manual
Fig.: Global volume control
Place the cursor on the slider, then press and hold the left mouse button. Now you can
move the slider with the mouse. When you release the left mouse button, the slider is
fixed at the current position.
3.7.2
For each Audio Track Separately
You can use the round button in the control section of a particular audio track in a song
to adjust the volume of that particular track to a higher or lower value.
Fig.: Audio track volume control
Place the cursor on the button, then press and hold the left mouse button. Now move the
cursor clockwise or anticlockwise to change the volume. When you release the left
mouse button, the current value is fixed for further use. Below the button, the numerical
value of the volume is also indicated in dB (decibel).
3.8
Playing Songs
If you want to play your compositions, use the control bar below the menu bar in the
upper section.
Fig.: Control bar
As an alternative, you can select the Audio menu from the menu bar. The icons displayed
in the menu that opens are similar to the control bar icons.
Copyright © 2008 Acon Digital Media GmbH
Creating Songs
13
Fig.: Audio menu
3.8.1
Playing a Selection as a Loop
To play your song, you can select any part of your song to be played as a loop during
pre-playback. For that, place the cursor where you want the loop to begin and click the
left mouse button once. The start position is then indicated with a dotted line. Now
move the cursor to the right where you want the loop to end and right-click.
Fig.: Loop selection
The loop selection is thus set. The corresponding part of the audio track is
light-coloured. When you click the Play button from the control bar, only this loop
selection is played. To stop the loop playback, click the Stop button from the control bar.
To remove the loop selection, simply click in any audio track.
!
Please keep in mind that the playback position depends on the Snap option
selected in the Master Section. If you want to use any playback position without
Copyright © 2008 Acon Digital Media GmbH
14
LoopWorx User Manual
limitation, you must select the No snap option.
3.8.2
Solo or Muted Audio Tracks
It is also possible to play audio tracks separately (solo). Only the content of the selected
audio track is played during playback. To select this audio track, click the S button in the
control section.
Fig.: Track set to solo playback
Moreover, you can mute audio tracks separately. In this case, only the content of the
audio tracks not selected is played. However, the playback does not include the muted
audio track. To mute a particular track, click the M button in the control section.
Fig.: Track muted
4
Voice Recording from Microphone
You can also add your singing and voice effects to your songs. Using LoopWorx, you
can record your voice in real-time with your song. You just need to connect a
microphone to your PC.
4.1
Adjusting the Recording Volume
Before you start, you should check the recording volume control. Open the Windows
volume control. Select Start | Accessories | Entertainment| Volume Control from the Start
menu. The Windows volume control opens.
Now select Properties from the Options menu. Please make sure that the Adjust volume for
option is set to Recording. Then click OK.
Copyright © 2008 Acon Digital Media GmbH
Voice Recording from Microphone
15
Fig.: Volume control properties in Windows
Now you should check the Select checkbox below the Microphone slider to enable the
microphone input. Then select Options | Exit from the volume control menu to close the
volume control.
Copyright © 2008 Acon Digital Media GmbH
16
LoopWorx User Manual
Fig.: Microphone volume control
4.2
Starting Recording
Select an audio track, take the microphone and click the round white-red button to start
recording. The recording starts. In the selected audio track, you can see a
reddish-coloured clip (marked as ‘Recording’). Now you must speak or sing your song
text.
Fig.: Recording in audio track
4.3
Stopping Recording
To stop recording after the voice recording is completed, select Audio | Stop from the
menu bar or Stop from the control bar.
After recording, your voice recordings are not lost, so you do not need to record them
Copyright © 2008 Acon Digital Media GmbH
Voice Recording from Microphone
17
again. Your voice files are saved in the My Documents \ My Music folder using the file
prefix Recording... and consecutive numbers.
!
The voice recordings are saved with the Wave (*.wav) format.
From now on, you can use these recordings in other songs.
5
Editing Audio Tracks
After you have created your song and added your voice, you can proceed with editing
the song using the LoopWorx editing tools. For example, you can adjust transitions and
even clip lengths.
5.1
Zooming the Track View
Changing the audio track view may be helpful. You can either zoom in the view to show
more track details or zoom out. To change the view, select View from the menu bar.
Select the Zoom In menu item to zoom in the view and the Zoom Out item to zoom out
the view.
Fig.: Changing the view
Use the View All menu item to show the whole audio track content.
5.2
Extending or Shortening Clips
When you have added a sound clip, you can change its playback length. By extending
the playback length of the clip, it is converted to a loop. By shortening the sound clip,
however, the clip is stopped at that position where you set the new clip end.
Copyright © 2008 Acon Digital Media GmbH
18
LoopWorx User Manual
Select the desired clip from the audio track in order that its title bar is light green
coloured. Now move the cursor to the end of the clip. The cursor icon changes to a
horizontal double-headed arrow. Press and hold the left mouse button. When you move
the cursor to the left or to the right, the sound clip is shortened or extended.
Fig.: Changing clip length
When you release the left mouse button, the clip length is fixed. In addition, when you
extend the clip you can see that the repeating sequences are always coloured alternately
light and dark.
!
5.3
Usually, you should try to always extend or shorten sound clip by a full
measure.
Moving Track Contents
Sometimes you have to move sound clips. Here you can not only move clips forward or
backward in an audio track, but move it from one track to another.
5.3.1
Moving Individual Sound Clips
To move an individual clip, select it with the mouse and place the cursor on the clip.
Press and hold the left mouse button. The cursor changes to a crosshair with arrows, the
move cursor. Now you can move the selected clip by dragging the mouse.
Fig.: Moving sound clip
Copyright © 2008 Acon Digital Media GmbH
Editing Audio Tracks
19
When you move the mouse to the left or to the right, the clip moves forward or
backward in an audio track. By moving the mouse up or down, you move the sound clip
from one track to another. When you release the left mouse button, the track is fixed at
the selected position.
!
5.3.2
Please note the Snap feature settings in the Master section which are useful
when moving.
Moving Multiple Sound Clips
If you want to move multiple clips at the same time, hold down the CTRL key while
selecting the files with the mouse. Then place the cursor on one of the selected clips,
then press and hold the left mouse button. The cursor changes to the crosshair with
arrows and you can move all selected clips with the mouse.
Fig.: Multiple clips selected (two audio tracks at the top)
When you release the left mouse button, all clips are fixed at their new positions.
5.3.3
Moving Groups of Clips
In addition, you can move full track contents as a whole. For example, it’s the ideal
option for inserting a prelude into your song.
Place the cursor on a blank spot in the audio track, then press and hold the left mouse
button. By now dragging the mouse, you draw a white-dotted frame around the clips. Be
sure to include all clips you want to select in that frame. When all clips are selected,
release the mouse button. Place the cursor on one of the selected clips, then press and
hold down the left mouse button again. Now you can move the selected sound clips
with the mouse.
Copyright © 2008 Acon Digital Media GmbH
20
LoopWorx User Manual
Fig.: Groups of track contents selected
When you release the mouse button, all clips are fixed at their new positions.
5.4
Cutting, Copying and Pasting Sound Clips
In some cases, you might want to use the same sound clip at multiple positions. For that,
you should use the Copy, Cut and Paste commands.
To select your sound clip from an audio track, first click it. The clip is thus selected and
the clip’s title bar is light green coloured.
Fig.: Copying a clip
Now you can copy the clip retaining the selected clip at its position. For that, select Edit |
Copy from the menu bar.
Cutting the clip to paste it to another position is different. You must select Edit | Cut
from the menu bar. The selected sound clip is removed from its current position.
Copyright © 2008 Acon Digital Media GmbH
Editing Audio Tracks
Fig.: Cutting a clip
To paste the clip, select the new insertion position with the mouse by clicking the audio
track position you want. As a useful feature, the insertion position is indicated with the
playback position (the vertical dotted line). Now select Edit | Paste from the menu bar.
Abb.: Einfügen wählen
The clip is pasted to the selected position. You can also paste the clip that you have
copied or cut to other positions. Select another insertion position, and then select Edit |
Paste from the menu bar.
Copyright © 2008 Acon Digital Media GmbH
21
22
LoopWorx User Manual
5.5
Undoing / Redoing Editing
If you want to cancel an operation - you might have pasted a clip to the wrong position,
for example - you can undo that operation.
Abb.: Bearbeitungsschritt widerrufen
Select Edit | Undo from the menu bar. In this way, the last editing step is undone. To
redo the step undone previously, select Edit | Redo from the menu bar.
5.6
Deleting Sound Clips
If a sound clip is no longer needed, you can remove this clip from an audio track
completely. Select the clip with a mouse click and then press the DEL key. The clip is
then deleted.
5.7
Opening and Saving Songs
You can save the compositions you created with LoopWorx. In this operation, the
arrangement of the individual sound clips contained in the audio tracks is saved to a
file.
To save your arrangement, select File | Save - or File | Save As - from the menu bar.
Copyright © 2008 Acon Digital Media GmbH
Editing Audio Tracks
23
Fig.: Save command selected
The Save - or Save As - dialog box opens. Now browse to the folder where you want to
save your composition. Enter a file name in the File name input box, and then click the
Save button.
Similarly, you can open the compositions you created. Select File | Open from the menu
bar. Then browse to the folder where your song files are located and click the Open
button. The individual clips are then loaded into the audio tracks.
!
5.8
You must not delete any sound clip or move it on the hard disk. Otherwise, the
song file will not load the clips properly.
Exporting Songs as Audio Files
If you want to save your song as a ready-made music file to load it to your MP3 player,
you must use a different approach.
Select File | Export Project as Audio File... from the menu bar. The Save As dialog box
opens. Enter a song name in the File name input box and select the output format that
you want your song to be saved as from the File type list box (e.g., Ogg Vorbis file with *.
ogg extension or MP3 file with *.mp3 extension).
To generate and save the music file, click the Save button. A coloured progress bar
appears to indicate the export progress.
Copyright © 2008 Acon Digital Media GmbH
24
LoopWorx User Manual
Fig.: Song saved as music file
In addition to the music format, you can select other settings by clicking the Options...
button at the bottom. A dialog box opens where you can configure additional settings
for the selected music format.
Fig.: Additional settings for music format
6
Using Audio Effects
You can also add audio effects to your songs. You can select audio effects for the whole
song which are then applied to all audio tracks. However, you can also configure audio
effects for each audio track individually.
6.1
Using Master Effects
To apply audio effects to your whole song, you must use the master effects. Go to the
Master Section in the lower left corner of the user interface. Then click the small icon
next to Effects.
Copyright © 2008 Acon Digital Media GmbH
Using Audio Effects
25
Fig.: Using master effects
The Edit Effects dialog window opens to configure the required settings.
6.2
Using Track Effects
To apply audio effects only to one track, you must use the track effects. Go to the audio
track you want and click the small icon that shows a rectangle.
Fig.: Using track effects
The same Edit Effects dialog window opens to configure the required settings.
6.3
Editing Effects
The Edit Effects dialog window contains two lists. The available effects you can use are
listed on the right. The effects currently in use are listed on the left.
On the right, select an effect you want to use, and then click the << Add effect button. The
effect is moved to the list on the left.
Fig.: Audio effects
Select the effect from the list on the left and click the Edit settings... button at the bottom.
The Edit Effect Settings dialog box opens. To configure the settings for the selected effect,
use the Preset list box
Copyright © 2008 Acon Digital Media GmbH
26
LoopWorx User Manual
!
By the way: you can select multiple effects simulaneously and apply them to an
individual audio track or to the whole song.
Fig.: Effect settings
Click OK to apply the setting.
6.4
Saving Custom Settings
In addition, you can customise a preset effect as appropriate. For that, select a preset
effect in the Edit Effect Settings dialog window and customise it using the controls,
buttons and switches at the bottom.
Copyright © 2008 Acon Digital Media GmbH
Using Audio Effects
27
Fig.: Customising effects
To apply the settings, you must save the custom effect with a unique name. In the Edit
Effect Settings window, click the Add... button. . The Add Preset input box opens. Enter a
unique name for the effect. Click the Add button to apply the name.
Fig.: Name of custom effect
The effect with your custom settings is added to the Preset list. Here, preset effects and
custom effects are well-defined.
The preset effects are indicated with the [ROM] prefix, whereas the custom effect names
are preceded with the [User] prefix.
Copyright © 2008 Acon Digital Media GmbH
28
LoopWorx User Manual
Fig.: Custom and preset effects
You can also remove custom effects from the list. For that, click the Remove button in the
Edit Effect Settings window. The custom effects are then listed in the Remove Preset dialog
box. Select the effect you want to delete from the list and click the Remove button on the
right to remove the effect.
Fig.: Deletable effects
Copyright © 2008 Acon Digital Media GmbH
Using Audio Effects
!
7
29
You can only delete effects with the [User] prefix. Preset effects with the [ROM]
prefix cannot be deleted.
Configuring Settings
LoopWorx is carefully programmed in order that you do not need to configure a vast
number of settings before creating songs. However, if you have installed multiple audio
input and output devices, you can specify the devices to be used by LoopWorx.
7.1
Specifying Audio Input and Output Devices
For the audio devices used by LoopWorx for audio playback and recording, refer to the
device settings. Here you can check for the audio input and output device to be used for
your songs.
To open the device settings, select Options | Device Settings from the menu bar. The
corresponding dialog box to select recording device and playback device opens.
Fig.: Selecting audio input and output device
If you have a sound card installed on your PC, you will use the microphone input as
your input device and the sound card’s speaker output with the connected speakers as
your output device. To do so, select your sound card in both the Recording device and
the Playback device lists.
It is also possible to select different input and output devices. If you have connected a
microphone to your sound card, select the sound card as your input device. If you have
additionally connected a headset to your PC via USB port to listen to your songs, select
the USB port to which the headset is connected as your output device.
Click the OK button to apply the settings.
Copyright © 2008 Acon Digital Media GmbH
30
LoopWorx User Manual
-A-
-M-
Audio Files
exporting
Audio Input and Output Device
23
29
Configure Settings
Configuring
29
audio input and output device
Copy
Creating Songs
Cut
29
20
6
20
-D-
changing instruments
22
7
9
-EEditing Effects
Editing Tracks
Effect
25
17
presets
Effects
26
24
25
24
25
5
23
editing
master
track
Exiting LoopWorx
Exporting Audio Files
-HHelp
using
5
-IIntroduction
3
-LLoops
prelistening
using
using your own
LoopWorx
Master Effects
Muting
24
14
-O-
-C-
Deleting Sound Clips
Drum Computer
5
4
3
procedure
user interface
working with
Index
7
6
7
Opening Song Files
22
-PPaste
Playing
20
12
13
7
selection as loop
Prelistening
Presets
26
effect
-RRecording
14
14
22
adjusting level
from microphone
Redo
Requirements
3
System
-SSaving Effect Presets
Saving Song Files
Settings
26
22
configuring
Snap
Soloing
Song Files
29
10
14
opening
saving
Sound Clips
22
22
changing the length
deleting
inserting
moving
snap
System Requirements
17
22
10
18
10
3
Copyright © 2008 Acon Digital Media GmbH
Index
-TTempo
changing
Track Effects
Tracks
11
25
editing
mute
solo
zooming
17
14
14
17
-UUndo
22
-VVolume
adjusting
master volume
track volume
11
11
12
-ZZooming
Copyright © 2008 Acon Digital Media GmbH
17
31