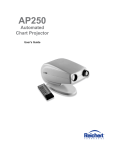
1
Foresee PHP® Preferential Hyperacuity Perimeter Users Guide ©2010 (10/2010) Reichert, Inc. All rights reserved. Reichert is a registered trademark of Reichert, Inc. Reichert and Foresee PHP are registered trademarks of Reichert, Inc. Preferential Hyperacuity Perimeter is a trademark of Reichert, Inc. All other trademarks used in this document are the property of their respective owners. The information contained in this document was accurate at time of publication. Specifications subject to change without notice. Reichert, Inc. reserves the right to make changes in the product described in this manual without notice and without incorporating those changes in any products already sold. Federal law restricts this device to sale by or on the order of a physician. ISO 9001/13485 Certified – Reichert products are designed and manufactured under quality processes meeting ISO 9001/13485 requirements. No part of this publication may be reproduced, stored in a retrieval system, or transmitted in any form or by any means, electronic, mechanical, recording, or otherwise, without the prior written permission of Reichert, Inc. Patents USA Patents 6,656,131, 7,220,00 and 7,275,830. Australia Patent 2002210874. Other Patents pending. 2 P/N 900F006-101 Rev. D Contents Symbols and Safety Information .....................................................................................5 Warnings & Cautions ........................................................................................................6 Introduction........................................................................................................................7 1. Getting Started Site Preparation Requirements ............................................................................12 Foresee PHP Device Components ......................................................................13 Terms, Acronyms, and Abbreviations. .................................................................16 Unpacking and Assembling the Foresee PHP Device. ........................................17 Starting Up the Foresee PHP Device...................................................................17 Screen Features .............................................................................................17 Foresee PHP Taskbar ..........................................................................................18 Initial Configuration of the Foresee PHP Device..................................................19 Shutting Down the Foresee PHP Device .............................................................19 Darkening the Foresee PHP Screen ....................................................................19 Calibration Monitoring...........................................................................................20 2. Running the Foresee PHP Test Positioning the Patient..........................................................................................23 Starting the Foresee PHP Test ............................................................................24 Select Patient .......................................................................................................25 Selecting an Existing Patient..........................................................................25 Editing Patient Information .............................................................................26 Adding a New Patient ...........................................................................................27 Selecting Eye to Test............................................................................................28 Performing the Tutorial .........................................................................................28 Stationary Test ...............................................................................................31 Flashing Signal Section..................................................................................32 Qualifying the Patient .....................................................................................33 Incomplete Test ..............................................................................................34 Performing the PHP Test – First Eye ...................................................................35 Completing the First Eye ................................................................................35 Selecting Other Eye to Test ...........................................................................36 Performing the PHP Test – Other Eye .................................................................37 Incomplete Test ..............................................................................................37 3. Saving and Viewing Test Results Overview...............................................................................................................38 Viewing Test Results ............................................................................................38 Changing from Detailed Test Results to Test History Screen..............................38 Printed Test Results Details .................................................................................38 Test Results Data .................................................................................................39 Title Section....................................................................................................39 Results Section...............................................................................................40 Examination History Section ..........................................................................41 Hyperacuity Deviation Map Section ...............................................................42 Hyperacuity Defect Clusters Section..............................................................43 Clinic Details Section......................................................................................44 Test Details Section........................................................................................45 Test History Data..................................................................................................46 History of Hyperacuity Deviation Maps Section .............................................46 History of Result Parameters Section ............................................................47 Saving Test Results .............................................................................................48 Printing Test Results ............................................................................................48 To Print Results for a Specific Eye.................................................................49 Print Setup......................................................................................................49 P/N 900F006-101 Rev. D 3 Contents (continued) 4. Searching Test Results Searching Test Results Using the Foresee PHP Search Parameters................. 50 Search Results Screen Buttons ........................................................................... 53 Exporting Test Results ......................................................................................... 54 Selecting Test Results for Export................................................................... 58 Exporting Detailed Raw Data......................................................................... 58 5. Using the Advanced Options Using the System Information Option .................................................................. 59 The ‘About’ Section .............................................................................................. 60 The Foresee PHP System Diagnosis Option....................................................... 61 Performing the Foresee PHP System Diagnosis........................................... 61 The Calibration Checkup Option.......................................................................... 68 Accessing the Database Tools Option........................................................... 68 Manual Backup and Restore................................................................................ 69 Backing Up the Database .............................................................................. 69 Restoring the Database ................................................................................. 70 Automatic Backup ................................................................................................ 71 Viewing Backup Status Details ............................................................................ 72 Copying to Backup/Local Disks ........................................................................... 72 To Copy Tests to a Backup Disk ................................................................... 72 To Copy Tests from Backup Disk to Local Disk............................................. 73 Selecting Backup Options.............................................................................. 74 Automatic Backup Option .............................................................................. 74 Initializing a New Backup Disk ............................................................................. 74 Cleaning Test Results from the Local Disk .......................................................... 75 Using the Recovery Feature ................................................................................ 76 Adding and Editing Clinical Details. ..................................................................... 77 ® 6. The Microsoft Windows Environment Overview .............................................................................................................. 78 ® Switching to the Microsoft Windows................................................................... 78 Switching to Foresee PHP Mode ......................................................................... 78 Checking the Touch Screen Calibration .............................................................. 79 Calibrating the Touch Screen ........................................................................ 79 Installing Software Updates ................................................................................. 79 7. Maintenance and Troubleshooting Maintenance......................................................................................................... 80 Replacing Power Entry Unit Fuses ...................................................................... 80 Troubleshooting ................................................................................................... 81 Error Recovery Message ............................................................................... 81 Service Information ........................................................................................ 81 Monitor Power Management................................................................................ 82 8. Appendix Technical Specifications ...................................................................................... 83 Instrument Specifications ..................................................................................... 84 Environmental Specifications............................................................................... 84 Test Specifications ............................................................................................... 85 Standards Compliance......................................................................................... 85 ® Embedded Microsoft Windows License Location .............................................. 85 Disposal ............................................................................................................... 85 List of Foresee PHP Device Box Contents and Replaceable Parts .................... 86 9. Terms, Conditions and Warranty ............................................................................. 87 10. End User Software License Agreement................................................................. 88 4 P/N 900F006-101 Rev. D Symbols & Safety Information The following symbols appear in this manual: Guidance for Application: Refer to the operating instructions. The symbol is intended to alert the operator to the presence of important operation or maintenance instructions in the documents accompanying the device. CAUTION: Risk of electrical shock due to the presence of uninsulated high voltage inside the device. Do not remove the covers. Type BF: Indicates this is a Type B product with a Type BF applied part: the patient stylus used to touch the screen. Tip: Important information that will make it easier to perform a task. Note: Comment that indicates important information. Fuse Symbol: Indicates presence of a fuse. The following notes include important safety information: There are no user serviceable parts inside the Foresee PHP device. Disassembly of the device beyond the extent required to replace the printer paper, replace the thermal printer or replace fuses as described in this user manual, present a possible electrical shock hazard and will VOID the warranty. External Printer: If you are using an external printer, position it at least 5 ft (1.5 m) from the patient. Replacement Parts and Accessories: Use only approved replacement parts and accessories as specified in the maintenance section of this user manual. Power Cord: Use the power cord provided or an approved, grounded power cord only. P/N 900F006-101 Rev. D 5 Warnings & Cautions Reichert, Inc. (Reichert) is not responsible for the safety and reliability of this instrument when: • Assembly, disassembly, repair, or modification is made by unauthorized dealers or persons. • Instrument is not used in accordance with this User’s Guide. WARNING: AN INSTRUCTION THAT DRAWS ATTENTION TO RISK OF INJURY OR DEATH. WARNING: ANY REPAIR OR SERVICE TO THE FORESEE PHP MUST BE PERFORMED BY EXPERIENCED PERSONNEL OR DEALERS THAT ARE TRAINED BY REICHERT SO THAT CORRECT OPERATION OF THE FORESEE PHP IS MAINTAINED. WARNING: THIS INSTRUMENT IS NOT SUITABLE FOR USE IN THE PRESENCE OF FLAMMABLE ANESTHETIC MIXTURES, SUCH AS OXYGEN OR NITROUS OXIDE. CAUTION: AN INSTRUCTION THAT DRAWS ATTENTION TO THE RISK OF DAMAGE TO THE PRODUCT. CAUTION: DO NOT USE SOLVENTS OR STRONG CLEANING SOLUTIONS ON ANY PART OF THIS INSTRUMENT AS DAMAGE TO THE UNIT MAY OCCUR. REFER TO MAINTENANCE SECTION FOR DETAILED CLEANING INSTRUCTION. CAUTION: USE OF AMMONIA BASED CLEANERS ON THE LIQUID CRYSTAL DISPLAY (LCD) MAY CAUSE DAMAGE TO THE DISPLAY. REFER TO MAINTENANCE SECTION FOR DETAILED CLEANING INSTRUCTION. CAUTION: THIS INSTRUMENT IS NOT SUITABLE FOR USE IN THE PRESENCE OF FLAMMABLE ANESTHETIC MIXTURES SUCH AS OXYGEN OR NITROUS OXIDE. CAUTION: PORTABLE AND MOBILE RF COMMUNICATIONS EQUIPMENT CAN AFFECT MEDICAL ELECTRICAL EQUIPMENT. CAUTION: THE INTERNAL CIRCUITRY OF THE INSTRUMENT CONTAINS ELECTROSTATIC DISCHARGE SENSITIVE DEVICES (ESDS) THAT MAY BE SENSITIVE TO STATIC CHARGES PRODUCED BY THE HUMAN BODY. DO NOT REMOVE THE COVERS WITHOUT TAKING PROPER ESD PRECAUTIONS. CAUTION: MEDICAL ELECTRONIC EQUIPMENT NEEDS SPECIAL PRECAUTIONS REGARDING EMC AND NEEDS TO BE INSTALLED AND PUT INTO SERVICE ACCORDING TO THE EMC INFORMATION PROVIDED IN THE ACCOMPANYING DOCUMENTS. CAUTION: THIS INSTRUMENT IS NOT TO BE USED NEAR HIGH-FREQUENCY EMITTING SURGICAL EQUIPMENT. 6 P/N 900F006-101 Rev. D Introduction Congratulations on your purchase of the Reichert Foresee PHP® (Preferential Hyperacuity Perimeter). The Foresee PHP is a visual field analyzer used for monitoring and early detection of changes in macular function. Foresee PHP Features The key features of the Foresee PHP system are: • • • • • Full macular field testing of 14° X 14°. Automated analysis. Visual field mapping. Statistically significant correlation with stereo-color fundus photography and fluorescein angiography. Software upgrade capability for future applications. Foresee PHP Benefits The key benefits of the Foresee PHP system are: • • • • • • Structured tutorial - reduced technician dependency. Technician-free test operation. Easy-to-use by the patient. Test history presentation - enables long term tracking of AMD. Rapid testing. Ergonomically improved solutions (chin rest, home base). This User’s Guide is designed as a training and reference manual. We recommend you carefully read and follow the steps in this guide to ensure optimum performance from your new instrument. Please retain this guide for future reference and to share with other users. Additional copies can be obtained from your authorized Reichert, Inc. dealer or contact our Customer Service department directly at: Tel: 716-686-4500 Fax: 716-686-4555 E-mail: [email protected] Indications for Use The Foresee PHP is intended for use in the detection and characterization of central and paracentral metamorphopsia (visual distortion) in patients with age-related macular degeneration, as an aid in monitoring progression of disease factors causing metamorphopsia including but not limited to choroidal neovascularization (CNV). It is intended to be used in the office of a licensed eye care practitioner in patients with stable fixation. P/N 900F006-101 Rev. D 7 Introduction (continued) Foresee PHP Technology Foresee PHP technology is based on the well-studied visual phenomenon of hyperacuity. Hyperacuity (also termed "Vernier acuity") is defined as the ability to perceive a minute difference in the relative spatial localization of two or more visual stimuli (refer to Figure 0-1). The hyperacuity threshold may be as low as 3 to 6 seconds of arc, which is approximately 10 times better than the resolution ability (around 30-60 seconds of arc) in the fovea. The hyperacuity stimuli are highly resistant to retinal image degradation, and thus suitable for assessing retinal function in patients with opaque media as well. Figure 0-1: Hyperacuity Diagram When a dot-deviation signal is projected to a healthy retina, it stimulates a collinear set of retinal receptive fields. Specialized neuronal circuits in the visual cortex process this information, leading to the perception of a straight dot-deviation signal. When retinal pigment epithelium (RPE) elevation occurs, both in the case of when drusen are present as in intermediate AMD, and often to a more significant degree when CNV develops, a geometric shift in photoreceptor location might occur. As a result, an object image that stimulates certain photoreceptor fields when presented to a normal retina stimulates different ones when RPE is elevated. Therefore, linear signals might be perceived as distorted or misaligned (refer to Figure 0-2). Figure 0-2: Normal Retina vs. AMD with Photoreceptor Elevation 8 P/N 900F006-101 Rev. D Introduction (continued) Note: Figure 0-2 illustrates a simplified scheme of photoreceptor architecture. In the normal retina, illustrated on the left, the two dots in the projected line activate photoreceptor fields 2 and 6. This data is processed by the visual cortex and perceived as a straight line. However when the same line is projected on a retina with an AMD lesion, as illustrated in the diagram on the right (in Figure 0-2), the geometrical shift of the photoreceptors caused by retinal pigment epithelium [RPE] elevation, causes activation of photoreceptors 2 and 7, instead of 2 and 6. Consequently, one of the dots is perceived as if it shifted to another location in the visual field and the line appears distorted. How the Foresee PHP Test Works 1. The Foresee PHP test consists of a series of dot deviation signals (white dots on a black background for maximum contrast) flashed at predefined intervals, across the central 14° of the patient’s macular visual field. 2. Projection of a dot deviation signal on a retinal lesion can cause the patient to perceive distortion, scotoma, and/or blurring of part of the line. 3. The patient is asked to report any abnormalities in the dot-deviation signal by touching the screen at the location of the abnormality with the stylus. Existing visual field defects can be identified should the dot-deviation signal be positioned on a lesion. 4. During the course of the test, artificial distortions that imitate distortions similar to those seen by patients with AMD related macular lesions, are flashed. These artificial distortions act as both a quantifying measure and a reliability measure. The patient’s responses to these distortions are evaluated to identify AMD lesions and to judge test reliability. 5. The Foresee PHP system consists of a screen-based application that runs on the Foresee PHP device. The patient’s responses are recorded and analyzed by a pre-designed algorithm. 6. Following the analysis, the resulting output indicates whether progression of AMD is suspected or not. P/N 900F006-101 Rev. D 9 Introduction (continued) Foresee PHP Test Results A test result on initial examination that was outside normal limits cannot serve as the baseline examination. It is recommended to re-test the patient within 1-2 weeks. This may overcome learning effects inherent to visual field testing. Biomicroscopy is also recommended to rule out retinal pathologies. A test result that remains outside normal limits on re-testing, excludes that eye from further monitoring with the Foresee PHP. A baseline examination (a result that is within normal limits and reliable) is the cornerstone for interpreting test results. Subsequent examinations should always be compared to a previous baseline examination. Test results that indicate a change from the baseline, indicating a visual field defect that is outside normal limits, probably indicates the presence of wet AMD. It is also important to take into consideration the p-value on the report, which indicates the percentage of dry AMD patients who may have a visual field defect that is outside normal limits. Other pathologies or improper testing can also cause a visual field defect that is outside normal limits. Other pathologies that may cause visual defects include: AMD-related: Geographic Atrophy, Pigment Epithelial Detachment, Drusenoid PED, Scar. Vascular: Vein Occlusion, Diabetic Retinopathy, Artery Occlusion. Central Nervous Determine if the Test Results are Reliable If a test report is outside normal limits, the next step in making the diagnosis is to determine if the test is reliable. To do so: Review the reliability indices and the overall test reliability. Retest an eye that demonstrated a visual field defect that is outside normal limits. If both eyes showed results that were outside normal limits on the same examination day, this indicates poor reliability. There is a low likelihood that wet AMD has developed in both eyes simultaneously. The more experienced the technician and the patient, the better the results. If the technician or the patient is relatively new to the Foresee PHP, take this into consideration when reviewing the test results. 10 P/N 900F006-101 Rev. D Introduction (continued) Determine if there is Another Pathology Causing the Defect If a test result is unreliable, determine if there is another pathology that may have caused the visual field defect. To do so: 1. Check if the p-value is <10% or <5%. Although wet AMD may be present, some patients in this group are expected to be negative for wet AMD. 2. Perform a comprehensive biomicroscopy exam to search for other pathologies that may cause abnormal Foresee PHP results. Remember, the Foresee PHP test is a subjective test for the diagnosis of wet AMD. A test result that is outside normal limits may be an early indicator of progression to the more serious form of AMD. You should apply your expertise to determine if further diagnostic measures and/or referral are appropriate. P/N 900F006-101 Rev. D 11 1. Getting Started Great care has been taken to deliver your new Foresee PHP to you safely. The container and packaging was specially designed to transport this unit. Please retain the packaging if future transportation is required. Site Preparation Requirements Before unpacking and initializing the Foresee PHP device, the following site preparations must be completed: • Power outlet (100-240 VAC). • Table 30” depth and 40” width (76 X 101.5 cm). • Two chairs, one height adjustable without armrests for the patient and one for the examiner (of any type). • Room conditions: The room must be quiet. There must be no direct source of light on the screen and no back reflection. • It is strongly recommended that you use a surge suppressor of the type used for a standard PC. 12 P/N 900F006-101 Rev. D 1. Getting Started (continued) Foresee PHP Device Components This section introduces the Foresee PHP device components. Figure 1-1: Foresee PHP Device # Description 1 Chin Rest 2* Foresee Keyboard 3 Removable Storage Device Compartment 4 Accessories Compartment 5 Accessories Tray 6 Touch Screen 7 On/Off Switch 8 Slide Handle 9 Stylus 10 Home Base * In some Foresee configurations the keyboard and mouse may come as Separate units instead of the Trackball Keyboard. Table 1-1: Foresee PHP Device Components P/N 900F006-101 Rev. D 13 1. Getting Started (continued) Figure 1-2: Foresee PHP Back View # Description 1 Power Cable Connector 2 LAN Port 3 USB Ports 4 COM Port 5 Mouse and Keyboard Connector 6 Removable HD Housing 7 Fan Table 1-2: Foresee PHP Device Components 14 P/N 900F006-101 Rev. D 1. Getting Started (continued) Figure 1-3: Backup Disk and Export Disk Figure 1-4: Backup Cover # Description 1 Backup Removable Storage Disk (Flash Drive) 2 Removable Storage Disk Cover 3 Export Removable Storage Disk (Flash Drive) 4 Removable Storage Disk Access Door Table 1-3: Backup Disk and Cover Components Note: When installing the flash drives in the Foresee PHP for the first time, the drive letters that are established are D: for the Backup Disk (left) and E: for the Export Disk (right). However, after the disk has been initiated in either the Backup or the Export location, that drive letter remains with its flash drive. For the future, it may be helpful to label either Backup or Export (D: or E:) on the flash drive. Additionally, when the Foresee PHP is shipped from the manufacturer, the Backup flash disk is identified with a red dot sticker installed onto the top of the flash disk. P/N 900F006-101 Rev. D 15 1. Getting Started (continued) Terms, Acronyms, and Abbreviations Term or Acronym Description AD The acronym for Artificial Distortion. Artificial distortion generated by the system appears on the flashed line during the Foresee PHP test. AMD The acronym for Age-related Macular Degeneration. CNV The acronym for Choroidal Neovascularization. Flash Drive USB-based memory storage device. Examiner The technician trained to perform the Foresee PHP test. PC Personal computer. PHP The acronym for the computerized Preferential Hyperacuity Perimeter. Test A test can be of one or two eyes (each eye once). Table 1-4: Terms, Acronyms, and Abbreviations 16 P/N 900F006-101 Rev. D 1. Getting Started (continued) Unpacking & Assembling the Foresee PHP Device 1. Remove the Box Contents List from the packing box (refer to List of Foresee PHP Device Box Contents and Replaceable Parts, page 86.) 2. Take the accessories out of the box. 3. It is recommended that you save all packing material for future re-packing. CAUTION: The device weighs approximately 33lb/15kg. To prevent injury, lift it carefully, with sufficient assistance. 4. Assemble the Foresee PHP using the Installation Instructions found in the packing box. Starting Up the Foresee PHP Device 1. Place the assembled Foresee PHP device on a dedicated table. 2. Connect the keyboard (and mouse if applicable) into their connectors. 3. Verify the Backup and Export Removable Storage Disks are installed in the Removable Disk Compartment (comes pre-installed). 4. Plug the electric cord into a power supply socket. 5. Locate the power switch on the right side of the device and turn on the device. The device boots up and opens to the Foresee PHP Main Menu screen. Screen Features Button Description Start button – Initiates the Foresee PHP tutorial and test sequence. Search button - Opens the Search results screen and enables you to search for Foresee PHP tests saved on the Local disk. Examiner Guide button - Runs the “Examiner Guide” flash video. This instructs the examiner on how to operate the Foresee PHP device and how to prepare patients to take the Foresee PHP test. Options button - Opens the Options screen, which contains the following buttons: System Information button. Database Tools button. Clinic Details button. Switch to Windows button. ® Shut Down - Shuts down the device, or to switch to Microsoft Windows environment. Dim Screen button - Darkens the screen. P/N 900F006-101 Rev. D 17 1. Getting Started (continued) Foresee PHP Taskbar The Foresee PHP Taskbar is a toolbar that appears at the top of every Foresee PHP screen, except for the Test and Tutorial screens. The Taskbar provides graphical indications for essential status information (e.g., the calibration check status, date and time, etc.), and provides a shortcut for performing common operations by clicking the taskbar items (e.g., checking the screen calibration when required, adjusting date and time, etc.). The items that appear on the taskbar, from right-to-left, are: Icon Description The Clock displays the date and time using the current local settings. Calibration Status Indicator: The Calibration icon displays an image indicating the status of the calibration checkup. The possible icons and their corresponding tool tips are: Last calibration check valid, no alert needed. Tool tip: "The screen calibration checkup is okay". Last calibration check valid, alert is needed. Tool tip: "A screen calibration checkup must be performed within 2 days". Last calibration check failed, or checkup is overdue. Tool tip: "The screen calibration is invalid and must be checked", or "The screen calibration checkup is overdue and must be performed." Backup Status Indicator Green: All tests are backed up. Red: One or more tests do not have a backup. To correct this situation, check that your backup disk is plugged in. Make sure that the backup disk is not full. If it is full, replace the backup disk with a flash drive. Be sure to initialize the new backup flash drive. If your backup disk is plugged in and has enough free space, click the Database Tools button, and change the automatic backup settings. Network Status Indicator Green: Network is connected. Red: Network is disconnected. Input Language Indicator: The Input Language icon displays a two-letter code indicating the current input language. Dim Screen button - Darkens the screen. 18 P/N 900F006-101 Rev. D 1. Getting Started (continued) Initial Configuration of the Foresee PHP Device Initial configuration of the device includes: • Setting the date. • Setting the time. • Setting the input language (default: English). • Selecting a printer (default printer: the external printer supplied with the device). To configure any of these settings, you must switch to the Microsoft® Windows environment and use the appropriate Windows tool. To switch, refer to Switching to the Microsoft® Windows Environment, page 78. Shutting Down the Foresee PHP Device As a matter of safety and to extend the life of the device, you are advised to shut down the Foresee PHP device at the end of each working day. To shut down the Foresee PHP device: 1. From the Foresee PHP Main Menu screen, click Shut Down. The Shut Down dialog box opens and prompts you to select whether you want to shut down the device, or want to switch to the Microsoft® Windows environment. 2. Click Shut Down to shut down the Foresee PHP device or click Cancel to cancel shut down of the Foresee PHP device. 3. When shut down is complete, use the on/off switch to turn the device off. 4. Click Switch to Windows to switch to the Microsoft® Windows environment (For detailed instructions, refer to Switching to the Microsoft® Windows Environment, page 78). Darkening the Foresee PHP Screen • • From the Foresee PHP Main Menu screen, click Dim Screen to darken the screen. To reactivate the Foresee PHP Main Menu screen, click Back to Foresee. P/N 900F006-101 Rev. D 19 1. Getting Started (continued) Calibration Monitoring Foresee PHP has an integrated touch-screen calibration monitoring system. At regular intervals, this system monitors the calibration status of the Foresee PHP touch screen and alerts you if a calibration checkup is required. The date and results of the last calibration checkup (either “failed” or “passed”) determine the calibration status, in light of the following system parameters: Checkup frequency (30 days): The maximal time allowed between calibration checkups. Alert frequency (1 day): Alerts appear once a day, when the system needs to alert you. Prior notice interval (2 days): Alerts appear two days prior to reaching the maximal time allowed between checkups. There are four different statuses: The calibration is invalid. This means the last known calibration checkup failed. The calibration is overdue. This means the last checkup was performed more than 30 days ago. The calibration is due soon. This means the next checkup is due in two days (or, in other words, the last checkup was performed 30 – 2 = 28 days ago). Calibration is okay. An alert appears (refer to Figure 1-5) when any of the first three statuses exist. When an alert appears, you have two options: Click Remind Later. This closes the alert dialog box and the system will send the alert again in one day. Click Check Now. This opens the Calibration Checkup dialog box, which enables you to perform a calibration checkup, and if required, calibrate the screen. To perform a screen calibration checkup (refer to Figure 1-6), perform the following: From the Options/System Information screen, click Calibration Checkup. Select “Start a calibration checkup” from the Touch Screen Calibration screen. Note: If the calibration status is Invalid or Overdue, the system prevents you from performing a test until you check the calibration and make it valid again. If you click Start when the calibration status is not valid, the system displays an alert dialog box. Note: In addition, failing because of a touch-screen calibration problem, the calibration checkup might fail due to inaccurate marking. If the checkup fails, attempt the calibration check once more. Note: If the “Start a calibration checkup” fails two times, the screen will prompt you to “Calibrate screen”. Until this is performed, the system prevents you from performing a test. 20 P/N 900F006-101 Rev. D 1. Getting Started (continued) Figure: 1-5: Touch Screen Calibration Alert Dialog Box Figure 1-6: Touch Screen Calibration Checkup Dialog Box P/N 900F006-101 Rev. D 21 1. Getting Started (continued) However, if the checkup fails more than twice, the system suspects that the touch-screen is, indeed, not calibrated. Therefore, in case of repeated failure of the calibration test, an additional option, Calibrate screen, is available (refer to Figure 1-7). Clicking Calibrate screen invokes the touch-screen calibration application. Use this application to re-calibrate your screen. Figure 1-7: Touch Screen Calibration Checkup Dialog Box with the “Calibrate screen” Option 22 P/N 900F006-101 Rev. D 2. Running the Foresee PHP Test Positioning the Patient 1. Help the patient sit as close as possible to the table. 2. Place the stylus and home base in the correct position, based on the patients dominant hand. Right handed patients – Stylus in the right hand, home base on the left side. Left handed patients – Stylus in the left hand, home base on the right side. 3. Occlude the patient’s non-tested eye. 4. Instruct the patient to place their dominant hand, holding the stylus, on the home base. The other hand can rest comfortably on the table. 5. Ask the patient to rest their chin gently in the chin rest. Adjust the patient so they can easily see both the top and bottom of the screen. Adjust chin rest, table height, and chair height accordingly. Note: The screen of the Foresee PHP device is lower than the patient’s face and therefore the chin rest should be tilted slightly downward. Note: Most patients can perform the Foresee PHP test with their own glasses. However, you may use the PHP trial frame to provide near distance correction for patients with bifocals. P/N 900F006-101 Rev. D 23 2. Running the Foresee PHP Test (continued) Starting the Foresee PHP Test After the device has been turned on, the Main Menu screen appears. Figure 2-1: Main Menu Screen Click Start (Refer to Figure 2-1). The Patient Information Selection screen opens. Figure 2-2: Select Patient Screen 24 P/N 900F006-101 Rev. D 2. Running the Foresee PHP Test (continued) Select Patient In the Select Patient screen, you can select an existing patient or add a new patient to the system (Refer to Figure 2-2). Selecting an Existing Patient The List of patients area in the Select Patient screen displays a list of patients who exist in the system (refer to Figure 2-2). 1. Locate a patient from this list. Tip: To facilitate your search, you can narrow the list by typing the patient's last name, first name, or ID. For example typing "co" in the field above the list will display only patients whose last name, first name, or ID starts with the letters "co". 2. Select the patient's name and click Next -or- double-click the patient's name. The Patient Information screen opens (Refer to Figure 2-3). Figure 2-3: Patient Information Screen P/N 900F006-101 Rev. D 25 2. Running the Foresee PHP Test (continued) Editing Patient Information To edit a patient's details: 1. In the Patient Information screen or in the New Patient Screen, click Edit Patient. The Edit Patient screen opens (Refer to Figure 2-4). All fields are editable. Figure 2-4: Edit Patient Screen 2. Type additional patient information, or modify the existing information. 3. Click OK. The patient information is updated and all previous tests are updated accordingly. Tip: Click Cancel to discard all changes. 26 P/N 900F006-101 Rev. D 2. Running the Foresee PHP Test (continued) Adding a New Patient 1. In the Select Patient screen, click Add New Patient -or- Click Next without selecting a patient from the List of patients (Refer to Figure 2-2). 2. The New Patient screen opens (Refer to Figure 2-5). Figure 2-5: New Patient Screen 3. Enter the following patient information: • • • • • • ID – Must be 4 - 15 characters long. Last Name First Name Middle Name – (Optional) Date of Birth – (Optional) Gender – (Optional) Note: The patient’s ID is a unique patient identifier, unlike the other patient information fields. Therefore, although there may be multiple patients with the same name in the system, each patient is assigned a unique ID. 4. Click Next to proceed to the Test screen. P/N 900F006-101 Rev. D 27 2. Running the Foresee PHP Test (continued) Selecting Eye to Test Note: Make sure that the patient’s non-tested eye is occluded. Figure 2-6: Select Eye to Test Screen • Click either Right Eye or Left Eye (refer to Figure 2-6). Note: You can skip the tutorial by clearing the “Tutorial and test pre-qualification” checkbox. However, it is highly recommended for all patients to perform the tutorial. Performing the Tutorial Purpose of the tutorial: • • • • 28 Introduce the patient to the various tasks to be performed during the actual test. Train the patient to identify distortions and to mark them on the touch screen, using the stylus. Teach the patient to always return the hand to the home base after marking distortions. Successfully teach the patient to perform the test without any assistance. P/N 900F006-101 Rev. D 2. Running the Foresee PHP Test (continued) The tutorial consists of a stationary signal section and a flashing signal section. Definitions Fixaton Target: Distortions: Stationary Signal: Home Base: A white dot in the center of the screen that the patient should fixate on during testing. Curved locations on a straight Stationary Signal that the patient identifies during the test. A dotted signal line with distortions that appears on the screen during testing to enable the patient to identify the distortions. The triangular pad the patient places their hand on after marking a distortion. The tutorial was designed to teach the patient to mark distortions accurately. Whenever the patient marks the location of a distortion on the screen, a white dot appears on the screen. The distance between this white dot and the actual distortion is calculated. Only when the patient marks the distortion accurately (and a beep is heard) and the distance calculated is small, does the stationary signal disappear. The signal disappearing indicates to the examiner that the patient performed the task correctly and, after ensuring that the patient’s hand is located on the home base, the examiner can continue the tutorial by pressing the space bar. If, however, the stationary signal did not disappear, pressing the space bar will not trigger the next signal. In such a case, the examiner should instruct the patient to mark the distortion again, this time being more careful to mark it accurately and return their hand to the home base. Note: If the patient cannot identify or mark the distortions presented in the stationary signals, the patient should be disqualified from performing the test. Note: The first few times that a patient attempts to mark the screen, the patient might not be able to estimate their distance from the screen or they might be afraid to touch the screen with enough pressure to actually mark on the screen. If the patient touches the screen and the white dot fails to appear or the beep is not heard, instruct the patient to press harder when touching the screen. Explain to the patient that this is a touch screen and there is no problem touching it with the stylus. Note: The patient’s hand must return to the home base following the marking of each signal. This indicates that the patient completed marking the distortions and assures that the patient’s hand is not obstructing the screen. Note: If there is more than one distortion, the patient must mark all distortions accurately in order to make the signal disappear and to enable the examiner to continue the tutorial. P/N 900F006-101 Rev. D 29 2. Running the Foresee PHP Test (continued) When the tutorial begins, the following banner appears: Figure 2-7: Tutorial Screen – Initial Banner Note: The banner appears to remind the examiner that the space bar should be used during the tutorial. Note, the space bar is used ONLY during the tutorial, and not during the actual test. To continue: Press the space bar. 30 P/N 900F006-101 Rev. D 2. Running the Foresee PHP Test (continued) Figure 2-8: Stationary Signal Screens Tutorial – Stationary Test Explain to the patient what they will see during the tutorial: the Fixation Target, the Stationary Signal (dotted signal line), and Distortions. Ask them to point where the distortions of the Stationary line are located on the screen using the stylus. 1. Instruct the patient to use the stylus to touch the screen and to mark the location where the distortions appear. 2. Instruct the patient to return their hand to the home base after marking the screen. 3. Encourage the patient to do their best and that if they do not see distortions the test may include stationary signals without distortions. 4. Explain to the patient that they can use as much time as necessary to mark the distortions. 5. If the distortions are not marked accurately and the signal did not disappear, instruct the patient to mark the distortions again as accurately as possible. To continue to the next signal: Wait until the patient’s hand is returned to the home base and press the spacebar. Note: To abort the tutorial at any time press the “Esc” key on the keyboard. You are prompted to confirm that you want to abort the tutorial. Click “Yes” to abort the tutorial. The screen will then go to the Main Menu screen. P/N 900F006-101 Rev. D 31 2. Running the Foresee PHP Test (continued) Tutorial - Flashing Signal Section After the stationary signal section of the tutorial is complete, the following banner appears. Figure 2-9: Flashing Signal Banner Screen The banner indicates that the flashing signal section of the tutorial is beginning and reminds you to instruct the patient to notice the distorted areas on the flashing lines, and mark them after they disappear from the screen. The flashing signal section of the tutorial tests the patient’s perception. This means that the patient may see different distortions than you do. Because of this, the patient should not be corrected during this section of the tutorial. This section of the tutorial is the same as the actual test and enables the patient to practice marking distortions before actually taking the test. Press the space bar. The banner drops and the first signal flashes. For the flashing signal section of the tutorial: 1. Explain to the patient that the flashing signals appear on the screen for a very short time. 2. Instruct the patient to mark the area on the screen where the distortion flashed after it no longer appears on the screen. 3. Remind the patient to return their hand to the home base after marking the distortions. 4. Inform the patient that: 32 • If the patient sees more than one distortion on the flashing line, they should mark each distortion. • If the patient did not see any distortion on the flashing line, they should not mark anything and the patient’s hand can remain on the home base. P/N 900F006-101 Rev. D 2. Running the Foresee PHP Test (continued) 5. Do not correct the patient. Due to the patient’s clinical condition, the patient may see distortions that do not exist on the signal and might fail to see distortions that exist on the signal. To continue to the next signal: Wait until the patient’s hand is returned to the home base and press the space bar. Pressing the space bar while the patient’s hand is off the home base will not trigger the next signal. Tutorial - Qualifying the Patient After the tutorial is complete, the Patient Qualification screen appears (Refer to Figure 2-10). Note: If the Incomplete Tutorial screen appears instead of the Patient Qualification screen, this indicates that the tutorial has been terminated by the system and that the test should be performed again. Figure 2-10: Patient Qualification Screen P/N 900F006-101 Rev. D 33 2. Running the Foresee PHP Test (continued) At this point, it is your responsibility to decide whether or not the patient is qualified to take the Foresee PHP test. This decision should be made based on the patient’s performance of the tutorial. If, to the best of your judgment, the patient understood how to perform the test, then qualify the patient and begin the test. To qualify the patient and begin the test: • Click Start Test. To disqualify the patient: • Click Quit. You are returned to the Main Menu screen, shown in Figure 2-1. Tutorial - Incomplete Test The Foresee PHP device analyzes the patient’s responses and performance throughout the tutorial. If the system identifies that the patient was unable to perform the necessary tasks required for the PHP test, it terminates the tutorial with the Tutorial Terminated screen (Figure 2-11). Under normal testing conditions the Tutorial does not terminate the test and it is up to the examiner to decide whether or not the patient is able to take the test. Figure 2-11: Incomplete Tutorial Screen Tip: If you feel that the patient needs further practice, consider rerunning the tutorial. To return to the Main Menu screen: • 34 Click Next. P/N 900F006-101 Rev. D 2. Running the Foresee PHP Test (continued) Performing the PHP Test – First eye After the patient has successfully completed the tutorial, the patient immediately begins the test. The Foresee PHP test consists of flashing signals with distortions. As in the tutorial, the patient should mark the perceived distortions after they disappear from the screen. The test is operated by the patient and does NOT require you to press the space bar to trigger signals. In the test, the system automatically flashes a new signal after the patient’s hand has been returned to the home base. If the patient’s hand remains on the home base for a certain length of time, the system automatically triggers the next signal. For example, this can occur if the patient does not perceive any distortions for a certain interval. Note: It is recommended that you watch the patient for the first few signals to make sure the patient is marking distortions and returning their hand to the home base. Make sure to encourage the patient, but do not correct the patient at any time during the test. Due to the patient’s clinical condition, the patient may see distortions that do not exist on the signal and might fail to see distortions that exist on the signal. To abort the test at any time: • Press Esc. You are prompted to confirm that you want to abort the test. Click Yes to abort the test, after which you are returned to the Main Menu screen, shown in Figure 2-1. Completing the First Eye When the system finishes testing the first eye, the Test Completed screen opens. Figure 2-12: Test completed screen P/N 900F006-101 Rev. D 35 2. Running the Foresee PHP Test (continued) After testing of the first eye is complete the screen indicates if the other eye would like to be tested (Refer to Figure 2-13). Selecting Other Eye to Test Figure 2-13: Select eye screen View test results for the first tested eye: Click Skip to view the results of the tested eye, without testing the other, untested, eye. The Test Results screen appears. 36 P/N 900F006-101 Rev. D 2. Running the Foresee PHP Test (continued) Performing the PHP Test – Other Eye To test the other eye, perform the following: 1. 2. 3. 4. Occlude the eye that has already been tested. Click either Right Eye or Left Eye to test the eye that has not yet been tested (you can only select the untested eye in this screen). The test is run for the selected eye. Enable the patient to take the test. When the test is complete, the Test Completed screen appears. Click Next to view the test results. Performing the PHP Test - Incomplete Test The Foresee PHP device analyzes the patient’s responses and performance throughout the test. If the system identifies that the patient is not performing the test correctly and the results are meaningless, the test is automatically aborted and the Incomplete Test screen appears. Figure 2-14: Incomplete Test Screen A description of the problem detected by the system appears at the bottom of the screen. To return to the Main Menu screen, click Next. P/N 900F006-101 Rev. D 37 3. Saving and Viewing Test Results Overview The Foresee PHP device enables you to view test results in the following ways: • After completing the test for one or both eyes. • By searching the Foresee PHP device’s local disk (refer to Searching Test Results, page 50). • After exporting PHP test results to a private user’s standard PC. Viewing Test Results The Foresee PHP application provides you with two ways to view test results: • • After completing the test for one eye. After completing the test for both eyes. You can view the test results of one eye by clicking Skip when asked whether to test the other eye following the test completion screen. Otherwise, the Test Results screen opens automatically after you complete the second eye. Changing from Detailed Test Results report screen to the Tests History report screen: To change the display from the Test Results page to the Tests History page, click the History button: To toggle back to the Test Results page, press the Current Test button. Printed Test Results Details The following sections describe and explain what you see on a Foresee PHP test results report. The report is consisted of 2 pages: • Test Results page • Test History page Note: Reichert, Inc. is not offering and does not offer advice or instruction in the diagnostic interpretation of Foresee PHP test results. It is the clinician's responsibility to make diagnostic interpretations of Foresee PHP test results. Note: The printed version of the test results do not have the same visual layout as what appears on the PHP screen. The data is the same, however, it is positioned differently on the page of the printed version. 38 P/N 900F006-101 Rev. D 3. Saving and Viewing Test Results (continued) Test Results Data The Test Results section is displayed in the following screens. The following table identifies and describes the fields in each of the sections. The table may provide a sample value for a given field. Test Results - Title Section Figure 3-1: Test Results - Title Section Patient Details The following information appears in the Patient’s Details section: Patient’s name – Name of patient including the patient’s first name, middle name, and last name (e.g., John F Smith). ID – Unique patient identification number (e.g., Social Security number). Date of Birth - Patient’ s birth date in the format mm/dd/yyyy (e.g., 8/7/1938). Gender - Patient’s gender, male or female. Eye – The patient’s examined eye (Right Eye, Left Eye). Test No. – Unique test number. Test Date - Date that the first Foresee PHP test for the specified patient was administered in the format mm/dd/yyyy (e.g., 4/17/2006). Test Duration - Total duration time of test execution in the format mm:ss (e.g., 04:11 min). P/N 900F006-101 Rev. D 39 3. Saving and Viewing Test Results (continued) Test Results - Results Section Figure 3-2: Test Results - Results Section Results Within Normal Limits means that similar visual field findings are found in the normal population of intermediate AMD patients (dry AMD) in the normative database. Note, that in a small percentage of cases, CNV patients may produce test results of a visual field that is within normal. Outside Normal Limits means that similar visual field findings are found in the population of CNV patients (wet AMD) in the normative database. If the deviation is outside normal limits, a “p” value is given. For example; p < 10% means that the visual field defect in this test is found among 10% of the intermediate AMD population. This information may help you decide what measures you will take in further evaluating this case. Categories for p values are: p < 10%, p < 5%, p < 1%. Reliable indicates if the overall test performance is reliable. It can be either YES or NO. The test is reliable only if both reliability indices (refer to below) are reliable. When at least one of the indices is unreliable, the test is to be considered as unreliable. Baseline Test: Indicates whether a baseline examination (a test that is within normal limits and reliable) is available. Without a baseline examination, monitoring of an eye and indication of change can not be made. Reliability Indices: These indices determine the reliability of the examination. There are two indices: False Negative Errors: This index indicates the frequency with which the patient failed to respond to stimuli expected to be visible. False Positive Errors: This index indicates the frequency with which the patient responded to stimuli that could not have been seen. Each of the above indices can be either Reliable or Unreliable, as indicated using a bar chart for each index. This bar chart also provides a measure for the level of reliability. If the black triangle indicator points to the blue part of the bar, the index is reliable. If it points to the black part, it is unreliable. 40 P/N 900F006-101 Rev. D 3. Saving and Viewing Test Results (continued) Test Results – Examination History Section Figure 3-3: Test Results - Examination History Section Examination History Chart This chart assists in tracking and monitoring patient results over time. Patient monitoring can begin only after a baseline examination is available (marked with two concentric circles). Each test can also be marked as reliable or unreliable. P/N 900F006-101 Rev. D 41 3. Saving and Viewing Test Results (continued) Test Results – Hyperacuity Deviation Map Section Figure 3-4: Test Results - Hyperacuity Deviation Map Section Hyperacuity Deviation Map A plot of all visual field hyperacuity disturbances (tested with test parameters detailed in "test parameters"). The cross in the center represents the fixation point (which is not necessarily the fovea). Each point in the map has a color corresponding to the level of disturbance at this point. A metamorphopsia scale legend is provided; darker colors correspond to larger disturbances. This map may contain zero, one, or more areas of hyperacuity defect clusters. These areas reflect some degree of retinal abnormality that may be due to Drusen, CNV, atrophy, or others. The analysis defines areas that are suspected as being related to AMD. Such areas are called Hyperacuity Defect Clusters. 42 P/N 900F006-101 Rev. D 3. Saving and Viewing Test Results (continued) Test Results – Hyperacuity Defect Clusters Section Figure 3-5: Test Results - Hyperacuity Defect Clusters Section Hyperacuity Defect Clusters Table The larger four areas that were defined as Hyperacuity defect cluster are described in 3 tables – one table per cluster. The tables lists the following properties for each hyperacuity cluster: Cluster #: Cluster number. Clusters are displayed from largest to smallest in size. Cluster Consistency: The higher the value, the higher the likelihood that this visual field defect is real and does not reflect an artifact. This cluster consistency reflects how unlikely the possibility is that this defect was caused by random scattering of abnormal responses. Area: Total area in square degrees (a certain factor times the number of (colored) pixels within the boundaries of the cluster. Integrated Intensity: (volume) – (The intensity is analogous to the volume if we look at the cluster as a mountain on a topographical map). The intensity is a summation over all individual cluster pixel scores (expressed by pixel color) and is analogous to the visual field defect intensity. Estimated Location: Presumes the anatomical location of the zone on the retina. P/N 900F006-101 Rev. D 43 3. Saving and Viewing Test Results (continued) Test Results – Clinic Details Section Figure 3-6: Test Results - General Clinic Details The following information appears in the Clinic Details section: Clinic name – Name of the clinic where the Foresee PHP test was given (e.g., John Doe Clinic). Street address – Street address of the clinic (e.g., 123 Broadway Blvd.). City, State, Zip Code – City, country and zip code of the clinic (e.g., San Francisco CA 97125). Phone number – Phone number of the clinic (e.g., (585) 555-5858). Fax number – Fax number of the clinic (e.g., (585) 555-5858). Email – Email address of the clinic (e.g., [email protected]). 44 P/N 900F006-101 Rev. D 3. Saving and Viewing Test Results (continued) Test Results –Test Details Section Figure 3-7: Test Results –Test Details Test Parameters Horizontal Stimuli: The number of horizontal stimuli. Total Integrated Intensity: Displays the progression in time of the integrated intensity over all clusters in the test. Total Area: Displays the progression in time of the total areas (area of all clusters in the test) in square degrees of six discrete levels (“heights”) along up to 4 time points. The legend shows schematic cluster and its corresponding Level Area 1 up to Level Area 6. The bottom line for example, corresponding to area A1, is the progression of the area’s contained within the first cluster color level, i.e. the total cluster area. The forth line shows the area progression in the 4th color level. The number of levels in the legend dynamically corresponds to the number of levels in the displays maps. Comments: Comments regarding recommendations of subsequent steps and testing for patient management. Comments based on test results and baseline protocol. Vertical Stimuli: The number of vertical stimuli. P-Value: The chart is very similar to the one shown on the history part of the first report page. Numbers of Clusters: The number of Clusters in the data. P/N 900F006-101 Rev. D 45 3. Saving and Viewing Test Results (continued) Test History Data The Test Results section is displayed in the following screens. The following table identifies and describes the fields in each of the sections. The table may provide a sample value for a given field. Test History – History of Hyperacuity Deviation Maps Sections Figure 3-8: Test History - History of Hyperacuity Deviation Maps Sections History of Hyperacuity Deviation Maps Title: Patient name, ID, tested eye. Maps: Up to 4 Hyperacuity deviation maps are displayed: The “current map” (identical to the one displayed in the main page) and up to three maps of preceding tests. The maps are lined from early on the left to current on the right. If there are less than 4 maps, the remaining maps will be denoted as “N/A”. Only maps of completed tests are displayed. 46 P/N 900F006-101 Rev. D 3. Saving and Viewing Test Results (continued) Test History – History of Result Parameters Sections Figure 3-9: Test History - History of Result Parameters Sections History of Results Parameters History Charts: The charts show the progression along time of three test parameters: pValue, Total Area, and Total Integrated Intensity. If there is no relevant historical data, (e.g. if the historical tests have no clusters, or if they were created with previous Foresee PHP versions), an empty chart will be displayed. P-Value: The chart is very similar to the one shown on the history part of the first report page. Total Area: Displays the progression in time of the total areas (area of all clusters in the test) in square degrees of six discrete levels (“heights”) along up to 4 time points. The legend shows schematic cluster and its corresponding Level Area 1 up to Level Area 6. The bottom line for example, corresponding to area A1, is the progression of the area’s contained within the first cluster color level, i.e. the total cluster area. The forth line shows the area progression in the 4’th color level. The number of levels in the legend dynamically corresponds to the number of levels in the displays maps. Total Integrated Intensity: Displays the progression in time of the integrated intensity over all clusters in the test. P/N 900F006-101 Rev. D 47 3. Saving and Viewing Test Results (continued) Saving Test Results To save the test results: • Click the Save button. A progress bar indicates that the save operation is running. The progress bar disappears when the saving operation is completed. A single save operation saves the test results for both eyes, if both eyes were tested. • It is highly recommended to always save patient’s results for future analysis and follow up. • In case you try to close the test report and return to the main menu without saving, you’ll be reminded and asked if you want to save these results. Printing Test Results Foresee PHP is supplied with an external color printer to enable you to print copies of the test results. Note: Only printers specified by Reichert are compatible with the Foresee PHP software. The PHP is supplied with the following printer drivers. It is suggested that you use only these printers with the PHP, or the data may not print or print properly. • HP Deskjet 2300 Series • HP Deskjet 2400 Series • HP Deskjet 2500 Series • HP Deskjet 2600 Series • Cannon 1700 • Cannon 3300 • Cannon 4300 The PHP device provides you with the following two options to print test results: • • 48 From the Test Results screen. From the Search Results screen. P/N 900F006-101 Rev. D 3. Saving and Viewing Test Results (continued) To print test results for a specific eye: In the Test Results screen or the Search Results screen, select the eye (Left or Right) for which you want to print the results. 1. Click the arrow next to the Print button. A menu pops up. 2. Select one of the following: • Print Current View Figure 3-10: Printing Options This option will print the current screen data (either the Test Results, or the Test History) on one single page. • Print Current Test and History This option will print the detailed Test Results and the Test History report on 2 pages. Print Setup To change the printer: 1. 2. 3. In the Test Results screen, or after you have selected a report to view in the Search Results screen, click Print Setup. The Print Setup dialog box opens (Refer to Figure 3-11). The selected default printer appears in the Printer field. To select a different printer to print the PHP reports, select a printer from the Printer dropdown list. Click OK to save your preferences, or Cancel to discard your changes. If you click OK, these printing preferences will apply to subsequent printing of test results. Note: Unless a printer is connected to the PHP it will not be displayed in the drop down list. Figure 3-11 : Print Setup Dialog Box P/N 900F006-101 Rev. D 49 4. Searching Test Results Searching Test Results Using the Foresee PHP Search Parameters The Foresee PHP application enables you to search and retrieve PHP test results saved to the local disk. You can search using the following search parameters: • • • • All Tests – Retrieves an unfiltered list of all tests stored on the local disk. Test Date – Enter the time period (e.g., from 07/13/2002 to 01/23/2005) of the test. Patient – Enter the patient’s details for which to search. Test number – The Foresee PHP automatically assigns a unique 12-digit number to each test. To search for test results: 1. In the Foresee PHP Main Menu screen, click Search. The Search screen opens. Figure 4-1: Search Screen 2. • • • • • 50 Click the radio button (on/off indicated with/without a dot in a circle) next to the desired search category and where appropriate, enter the data you wish to search for, as follows: To view an unfiltered list of all tests, select All Tests. To search for tests by date, select Test Date, and from the drop-down lists, select a From and To date. To search for a test by its test number, select Test Number and enter the 12-digit test number. To search for a test based on a patient’s details, select Patient, and enter patient information in one or more of the following fields: First name: Enter all or part of the patient’s first name. Last name: Enter all or part of the patient’s last name. ID: Enter all or part of the patient’s ID. Eye: Check the relevant box (right or left) -or- Click List of Patients. The dialog box opens. Select a patient from the list. P/N 900F006-101 Rev. D 4. Searching Test Results (continued) Note: If you select to search according to the patient’s first name, last name, or ID, you can fill in only the beginning of the field and the search engine will retrieve all patients that meet this criteria. For example, if you enter the letter J in the First name field, all patients whose first name begins with a J will be displayed. The search engine is case insensitive – typing a lower-case j or typing an upper-case J return the same search results. Clicking OK displays the patient’s details in the Patient fields. Figure 4-2: List of Patients Dialog Box Note: In the List of Patients popup dialog box, you can either select a patient from the list, or type the first name, last name, or ID of the desired patient to narrow down the number of patients that appear in the list. 3. Click Search. The Foresee PHP device search engine opens the Search Results screen to the page and line entry of the requested test results (refer to Figures 4-2 and 4-3). 4. Use the page scroll direction arrows or the Up and Down arrows on the keyboard to navigate to the test results you need. 5. Click the Details button or press Enter to display the details of the selected patient. 6. Select the desired test by one of the following: • Selecting the Details button at the bottom of the screen. • Double clicking on one of the fields of the desired record. P/N 900F006-101 Rev. D 51 4. Searching Test Results (continued) Figure 4-3: Search Results Screen The Search Results screen contains the following information: • • • • • • • • • First name: Patient’s first name. Middle name: Patient’s middle name. Last name: Patient’s last name. Eye: Indicates the tested eye. Patient ID: Patient’s identification number. Test date: Date patient took the test. Result: Detection of possible CNV: Within normal limits/Outside normal limits. Year of Birth: Patient’s year of birth. Test Number: The test's unique identifier assigned by the Foresee PHP system. In the status line at the bottom of the screen, the following information is displayed: • • 52 Tests Found – Displays the number of test records retrieved by the search. Search Criteria – Displays the selected Search parameters. P/N 900F006-101 Rev. D 4. Searching Test Results (continued) Search Results Screen Buttons The information in the following table describes the function of each button on the bottom of the Search Results screen. Button Description The List and Details buttons toggle the Search Results screen between a list of test results and details of one selected test. The ‘List’ button is enabled when the detailed test results display. The Details button displays the test results for the selected test. The Details button is enabled only when displaying the list. Click Edit Patient to modify the details of the patient whose test is selected. Click Print to print the selected test results. Click Print Setup to set up your printing preferences. Click Export to Export the test results to a file in one of the following formats: mht, jpg or bmp. Click New Search to reopen the Search screen and perform a new search. Note, that the previous search criteria are valid until you replace them. Click Close to close the Search results screen and return to the main menu. In the Search Results screen, if you are in the List view, click Previous to select the previous test record on the search results list. If you are in the Test Details view, clicking Previous displays the test results for the test you selected prior to your selection of the current test results. In the Search Results screen, if you are in the List view, click Next to select the test record that follows the current record. If you are in the Test Details view, click Next to display the results for the test that immediately follows the current record. P/N 900F006-101 Rev. D 53 4. Searching Test Results (continued) Exporting Test Results Foresee PHP enables you to export PHP test results to a local disk drive, a network drive, or to a removable storage device. For example, you can use the “Export” flash drive connected to your Foresee PHP device to export a selection of test results to a PC. After exporting, you can unplug it from the device and plug it into the USB port of a PC where the results can be viewed. Since the exported files are stored in standard formats, there is no need for a dedicated viewer in which to view these results. To export Foresee PHP test results: 1. Click the arrow next to the Export button. A menu pops up: 2. Click Export Test. The following Export dialog box opens: Figure 4-4: Export Dialog Box 54 P/N 900F006-101 Rev. D 4. Searching Test Results (continued) 3. In the Export Tests area of the Export dialog box, select the radio button next to one of the following Export Range options: • All: Select this radio button to export all the tests stored on the Foresee PHP device’s local disk to the removable disk. • Selected Tests: Select this radio button to export the selected tests to the removable disk. 4. If you need to export the History data, check the Include test history data check box. • If the selected format for export is .mht, the additional history page will be appended to the existing data at the bottom of the .mht page. If this file will be printed, two pages will be created. • If the selected format for export is .bmp or .jpg, two separate .bmp/.jpg pages will be created having “part 1” and “part 2” in the file name correspondingly. 5. If you want to exclude the patient details in the exported file(s), clear the Include patient details check box (by default, tests are exported with patient details). Using this option will result in non-significant file names to the exported files. 6. If you do not want to overwrite files of tests that might already be on the export disk, uncheck the Overwrite existing files check box. (By default, if a test is already on the removable export disk, it will be overwritten.) 7. From the File format drop-down list, select the format in which you want to export the results. Options are: .mht (default), .bmp, or .jpg. • • • .mht – HTML-like format, with embedded images. Files in this format can be opened using Internet Explorer (version 5 or above). .bmp – Bitmap format. .jpg – Standard compressed image format. P/N 900F006-101 Rev. D 55 4. Searching Test Results (continued) 8. In the Export Folder area, enter the export folder in the field or click the Browse button next to the field and from the Browse For Folder dialog box, select the destination folder for the tests you are exporting. Figure 4-5: “Browse For Folder” Dialog Box Note: Although you can export test results to the local disk (C:), it is highly recommended that you do not. This drive is used by the system, and storing test results on it may cause the system to malfunction. If you select this drive and click OK, a warning dialog box opens and notifies you that this selection is not recommended. You have the option to ignore the warning and continue, or to go back and select a different drive. It is best to export test results to a different drive, preferably a network drive or the removable storage device. Note: You cannot export Foresee PHP test results to a removable backup flash drive. 9. Select the desired export folder and click OK. The specified test results (or all test results) are copied from the Local disk to the selected folder. 56 P/N 900F006-101 Rev. D 4. Searching Test Results (continued) Figure 4-6: Exporting Tests in Progress Dialog Box 10. When export completes, click Close. The Exporting Tests dialog box closes. 11. From the Search Results screen, click Close. The Search Results screen closes and returns to the Main Menu screen. Before you attempt to export Foresee PHP test results to your removable disk, verify that it is not the backup disk and that it has enough free space. If you attempt to export to a backup disk, you will receive an error message. Note: Other error messages you may receive during test export are: • Failed to copy to disk (disk is full or write-protected). • Test file not found. • Failed to exclude patient details. P/N 900F006-101 Rev. D 57 4. Searching Test Results (continued) Selecting Test Results for Export Each row in the Search Results list represents a single test result. To select test results for export: Click the blue rectangle to the left of the desired test results. The selected test result row is highlighted in dark blue. Note: To select a sequence of test results, click the blue rectangle to the left of the first test of the sequence. Then scroll and click the blue rectangle to the left of the last test results in the sequence while pressing the Shift key. The block containing all selected test results will be highlighted in dark blue. If you want to select several test results that are not necessarily sequential, select the first one by clicking the blue rectangle to the left of this test result. Then select additional tests by clicking the test’s corresponding blue rectangle, while pressing the Ctrl (control) key. All selected test results will be highlighted in dark blue. To unselect a test result, press Esc. Exporting Detailed Raw Data If you need to export the raw data on which the reports are based: • Click Export History Summary Sheet. A .csv file will be exported to the selected destiny. It will contain raw data, available by any spreadsheet application (e.g. MS Excel). 58 P/N 900F006-101 Rev. D 5. Using the Advanced Options This chapter includes: • • Using the System Information Option Accessing the Database Tools Option Using the System Information Option The Foresee PHP device provides you with the functionality to view the System Information via the Options screen (Refer to figure 5-1). The System Information screen enables you to refer to the following Foresee PHP system information: • • • About – Provides information about the Foresee PHP application version, Windows version, and OS (operating system) runtime revision. System Diagnosis – Performs system diagnostic tests, e.g., Printer Checkup, Flash Drive checkup, Touch Screen calibration test, etc. Calibration Checkup - Touch Screen calibration test. To use the System Information option: 1. From the Foresee PHP Main Menu screen, click Options. 2. The Options screen opens. Figure 5-1: Options Screen P/N 900F006-101 Rev. D 59 5. Using the Advanced Options (continued) 3. From the Options screen, click System Information. The System Information screen opens. Figure 5-2: System Information Screen The 'About' Section The About section of the System Information screen displays the product name, the Foresee PHP application version, the Microsoft® Windows version, and the OS runtime revision (This number identifies the revision number of the specific embedded OS. Only technical support personnel may need this information. Refer to Figure 5-2 and 5-3). Figure 5-3: Foresee PHP Device Version Information 60 P/N 900F006-101 Rev. D 5. Using the Advanced Options (continued) The Foresee PHP System Diagnosis Option The Foresee PHP application enables you to run system diagnosis checks on the Foresee PHP device. After you run the diagnosis checks, you can save the diagnosis results report to a log file, which in case of technical problems should be sent to Customer Support. In addition to many internal unit tests, the Foresee PHP performs automatically during the system diagnostics. You can manually run the following system diagnosis checks: • • • • • Removable storage diagnosis Print diagnosis Touch Screen calibration diagnosis Audio diagnosis Home Base diagnosis Performing the Foresee PHP System Diagnosis To perform the system diagnosis: In the System Information screen, click System Diagnosis (Refer to Figure 5-2). The software first checks the status of removable disks. The System Diagnosis - Removable Disks dialog box opens. Note: If the device is set up as recommended, you should see two removable disks connected, one of them labeled “Backup”. Plug in any removable disks if they are not connected. If none of the connected removable disks is a backup disk, initialize it as a backup disk (refer to Initializing a New Backup Disk, pg 74). Tip: By examining the Removable Disks table, you can check the remaining disk space for both removable disks. If a removable disk is almost full, it is recommended that you replace it. Remember that after replacing the removable backup disk, you must initialize the new disk. P/N 900F006-101 Rev. D 61 5. Using the Advanced Options (continued) Figure 5-4: System Diagnosis Dialog Box 1. Click Next. The System Diagnosis: Printing dialog box opens -or- click Abort to leave the system diagnosis at this time without getting the result. Figure 5-5: System Diagnosis – Printing Dialog Box 62 P/N 900F006-101 Rev. D 5. Using the Advanced Options (continued) 2. Click Skip if you do not want to run the Printout diagnosis and skip to the next step in the System Diagnosis check. -or- Click Print Test Page. The System Diagnosis option prints a sample test page. After printing the test page, you will be asked whether the page was printed successfully or not. You can click the Print Setup button to setup your printing preferences -or- Click Abort to leave the system diagnosis at this time without getting the result. Note: The sample test page might take some time to print. 3. Click Next. The Touch Screen Calibration dialog box opens. -or- Click Abort to leave the system diagnosis at this time without getting the result. Figure 5-6: Touch Screen Calibration Dialog Box 4. Click Skip if you do not want to run the Touch Screen calibration diagnosis and skip to the next step, Audio Diagnosis. -or- Click Abort to leave the system diagnosis at this time without getting the result. -or- Click Test Calibration. The Touch Screen calibration process opens. Following the on-screen instructions, use the Foresee PHP stylus to touch the center of the four targets as they appear on the screen. P/N 900F006-101 Rev. D 63 5. Using the Advanced Options (continued) 5. Click Next. The System Diagnosis: Audio dialog box opens. Figure 5-7: Audio Diagnosis Dialog Box Note: Click Abort to leave the system diagnosis at this time without getting the result. 6. Click Beep Test. The device emits an audible beep. 7. Did you hear the beep? Select the Yes or No radio button. 8. Click Sound Test. The device speakers play a stereo audio test. 9. Did you hear the sound? Select the Yes or No radio button. 10. Click Next. The System Diagnosis: Home Base dialog box opens. 64 P/N 900F006-101 Rev. D 5. Using the Advanced Options (continued) Figure 5-8: Home Base Dialog Box Note: Click Abort to leave the system diagnosis at this time without getting the result. Click Skip at any time to skip this diagnosis. 11. Make sure that your hand is not on the home base, then click Start Test. The Home Base state should be Released. 12. Follow the instructions and place your hand on the home base. The Home Base state should change to Pressed. 13. According to the instructions, lift your hand from the home base and click Check release. The Home Base state should return to Released. P/N 900F006-101 Rev. D 65 5. Using the Advanced Options (continued) 14. Click Next. The System Diagnosis Final Report dialog box opens. Figure 5-9: System Diagnosis Final Report Dialog Box Note: Each line of the System Diagnosis Final Report contains a status icon. Status icons can indicate: • Errors • Warnings • Information • Notes The diagnosis ID number is a label that you can provide to Customer Support to identify types of problems. The Description column provides details and the Resolution column provides instructions to address the problem, e.g., "Installation problem, call customer support." 15. Click Save. The Save As dialog box opens. 66 P/N 900F006-101 Rev. D 5. Using the Advanced Options (continued) Figure 5-10: Save Diagnosis Dialog Box 16. Select the folder to which you want to save the diagnosis report. 17. Enter a filename in the field. -or- Use the default filename: ForeseeDiag-[time stamp].zip 18. Click OK. The System Diagnosis report saves to the selected folder. Note: The System Diagnosis output file is a detailed system status report for use only by Reichert personnel. Although you can export test results to the local disk (C:), it is highly recommended that you do not. This drive is used by the system, and storing the diagnosis report on it may cause the system to malfunction. If you select the local drive (C:) and click Save, a warning dialog opens and warns you not to save the report to the local drive (C:). You then have the option to ignore the warning and continue, or to go back and select a different drive. It is best to export test results to a different drive, preferably a network drive or a removable storage device. P/N 900F006-101 Rev. D 67 5. Using the Advanced Options (continued) The Calibration Checkup Option To check the calibration of the touch screen: • Click Calibration Checkup. The Touch Screen Calibration dialog box will appear. You will be prompted to mark targets on the monitor that will validate the touch screen calibration. Accessing the Database Tools Option The Database Manager option enables you to: • Backup and restore your database. • View and monitor backup status details. • Copy tests to local or backup disks. • Select backup options. For example, you can select the option to overwrite old tests if the Backup disk is full. • Initialize a new Backup disk. • Clean (delete) tests stored on your local disk drive. To access the Database Tools: • From the Options screen, click Database Tools. The Database Tools screen opens. Figure 5-11: Database Tools Screen 68 P/N 900F006-101 Rev. D 5. Using the Advanced Options (continued) Manual Backup and Restore Use this option to manually backup or restore selected tests or all tests. The last backup date is presented. Note, a warning is displayed if you have not manually backed up your data for more than 14 days (and the text will change color from green to red). It is recommended to make a periodical backup copy for protection against loss of data due to a malfunction or accident. Backing Up the Database To backup your data: 1. In the Database Tools screen, click Backup Database. The Manual Backup dialog box opens. In this dialog box, you can choose which tests to backup and the destination for the backup file. Figure 5-12: Manual Backup Dialog Box 2. In the Tests to Backup section, click the All Tests radio button to backup all tests (the default state) –or– click the Test Date radio button, then enter a range of dates in the From and the To fields to backup tests from a specific range of dates. 3. In the Backup Destination section, enter the destination of the backup file in the Backup File field. 4. In the Backup Description field, you can enter a description of this set of tests. 5. Click Backup. The following screen opens displaying the progress of the backup. P/N 900F006-101 Rev. D 69 5. Using the Advanced Options (continued) Figure 5-13: Backup Database Screen 6. Click Stop to stop the backup process. 7. Click Close to close the screen when the backup process is complete. Restoring the Database Use the Restore Database option to restore previously backed up tests. To restore the database: 1. In the Database Tools screen, click Restore Database. The Restore Database dialog box opens. Figure 5-14: Restore Database Dialog Box 2. Click the Browse 3. Click Restore. The following window opens. 70 button to search for the backup file. P/N 900F006-101 Rev. D 5. Using the Advanced Options (continued) Figure 5-15: Restore Database Finish Dialog Box 4. Click Stop to stop the restore process. 5. Click Close to close the screen when the restore completes. Automatic Backup To create an automatic backup: • In the Database Tools screen, click Automatic Backup. The Automatic Backup screen opens. Figure 5-16: Automatic Backup Screen P/N 900F006-101 Rev. D 71 5. Using the Advanced Options (continued) Viewing Backup Status Details You can view the following Backup Status details: • • • • • The number of tests stored on the local disk but not on the backup disk. The number of tests stored on the backup disk but not on the local disk. How much of the backup disk is used, in terms of the number of tests backed up and the number of kilobytes of space used. How much of the backup disk is available, in terms of how many more tests can be stored and many kilobytes of free space are available. A message that indicates whether the backup disk is: Plugged or Unplugged. Copying to Backup/Local Disks The Foresee PHP device uses a removable storage disk for backup storage. Each regular test requires approximately 50KB. Therefore, a removable storage disk of 128MB will hold approximately 2500 Foresee PHP tests. After a removable storage disk is plugged in and initialized as a backup disk, backup occurs automatically by default. Note: The backup removable storage disk supplied with the device is already initialized to be a backup disk. When the backup disk is full, you can replace it with an empty removable storage disk that was initialized as a backup disk (refer to Initializing a New Backup Disk, page 74). It is highly recommended that you store a full set of backup disks in a secure location. In case of a full backup disk or a disconnected backup disk, the appropriate message will appear in the Save dialog box. It is possible that tests saved to the local disk are not backed up to the removable storage disk. The field Tests stored on the Local disk, but not on the Backup disk indicates the number of tests not backed up to the removable storage backup disk. It is strongly recommended that you back up such tests, using the following procedure. To copy tests to a Backup disk: 1. Read the Backup Status notice message to verify that the removable storage disk is plugged into the USB port. If it is not, plug it in now. 2. In the Backup Status area, click Copy to Backup Disk. 72 P/N 900F006-101 Rev. D 5. Using the Advanced Options (continued) The Foresee PHP application automatically selects all saved tests not yet backed up and copies them to the backup removable storage disk. While copying, the Copy to Backup Disk progress bar appears. Figure 5-17: Copy to Backup Disk Progress Bar Note: If the Copy to Backup disk fails, an error message appears in the Copy to Backup progress bar (refer to Figure 5-17). 3. Click Close. The Database Manager screen closes and returns to the Options screen. It is possible that tests stored on the Backup disk are not saved to the Local disk. The field Tests stored on the Backup disk, but not on the Local disk (refer to Figure 5-16, page 71) indicates the number of tests not saved locally. To save these tests to the Local disk, use the following procedure. To copy tests from Backup disk to Local disk: 1. From the Backup Status area, click Copy to Local Disk. The Foresee PHP application automatically selects from the removable storage disk all tests not stored on the local disk. The Copy to Local Disk progress bar is displayed as the tests are copied from the backup disk to the local disk. P/N 900F006-101 Rev. D 73 5. Using the Advanced Options (continued) Figure 5-18: Copy to Local Disk Progress Bar 2. Click Close. The Database Tools screen closes and returns to the Options screen. Selecting Backup Options You can enable and disable the following backup disk settings: • Automatically backup test results when saving tests (recommended). • Overwrite old tests as needed (not recommended). • Do not overwrite tests (clear disk manually or initialize a new Backup Disk). Automatic Backup Option When its checkbox is selected, Automatically backup a test when saving, it means that when you save a test result, it is copied automatically to the backup removable storage disk. It is selected by default. When the target backup removable storage is full, a warning message is displayed. If this happens, plug in a new removable disk and initialize it as a backup disk (refer to Initializing a New Backup Disk, page 74). Clear the check box to disable automatic backup. In this case, you must back up test results manually using the Copy to Backup Disk button (refer to Copying to Backup/Local Disks, page 72). Initializing a New Backup Disk Before using a new backup storage disk, you must initialize it. The Foresee PHP application provides you with a database tool that enables you to initialize a new backup disk. To initialize a new Backup disk: 1. 74 Insert the new backup storage disk into the backup storage compartment’s USB connector. P/N 900F006-101 Rev. D 5. Using the Advanced Options (continued) 2. From the Database Tools pane, choose the automatic Backup option and click Initialize Backup Disk. The Foresee PHP application initializes the new Backup disk for use and displays the following message. Figure 5-19: Backup Disk Initialized Successfully Message Note: If you attempt to initialize more than one removable backup disk, the Foresee PHP application will recognize the last disk initialized only. You cannot initialize more than one and use them interchangeably. In case you remove an initialized disk from the device and then plug it back in and attempt to initialize it, you receive a message indicating that this backup disk is already initialized. Cleaning Test Results from the Local Disk This option will permanently delete all test results from the device’s local disk. This operation is irreversible, and therefore should be used only in very rare cases (e.g., when instructed to do so by customer support). Do not use this option unless you are perfectly sure it is necessary. If you are forced to clean the database, it is highly recommended to manually backup any test results you want to retain before performing this operation. After you click Clean Local Disk, Foresee PHP permanently deletes the test results from the local disk. To delete test results from the local disk: be specific according to “clean” screens: 1. From the Database Tools screen, click Clean Database. A confirmation dialog box opens, indicating that the deletion is permanent. 2. Click Yes. P/N 900F006-101 Rev. D 75 5. Using the Advanced Options (continued) A second confirmation dialog box opens, reminding you that this operation is irreversible. 3. 4. Click Yes. When the cleaning operation is complete, a dialog box opens, indicating that all tests were deleted and prompting you to restart the application. Click OK to restart the Foresee PHP application. Using the Recovery Feature The recovery feature provides a mechanism for preventing loss of test data due to unexpected errors (e.g. after power failure). In such cases, during next system startup you will be prompted with a corresponding message allowing you to load the recovered test(s): Figure 5-20: Test Recovery Message If you choose to load the test(s) each recovered test will be displayed on screen, and you will have to save the test (same as you do for any other test when it ends). If you choose not to load the test(s) and will click the Close button, you will always be able to do this later, through the Recovery button in the Options/Database screen: This button will be enabled only when the system will contain files for recovery. Pressing this button will pop up the Test Recovery Screen. 76 P/N 900F006-101 Rev. D 5. Using the Advanced Options (continued) Figure 5-21: Test Recovery Message To recover a test file from the list: 1. Select the desired test from the list by clicking it. 2. Click Load. The selected test file will be recovered and its test report will be displayed. Click Save to save the file. The recovered test file will be removed from the tests for recovery list. To delete a test file from the list: 1. Select the desired test from the list by clicking it. 2. Click Delete. The selected test file will be deleted and will be removed from the tests for recovery list. Adding and Editing Clinic Details The Foresee PHP application enables you to insert your clinic details, which will appear on both the screen and printouts. The clinic details can consist of up to six lines of free text. To add/edit Clinic Details: 1. From the Options screen, click Clinic Details. 2. Fill in the clinic details and click OK to save them. P/N 900F006-101 Rev. D 77 ® 6. The Microsoft Windows Environment Overview The Foresee PHP device operates in two modes: the Foresee PHP mode and the Microsoft® Windows environment. In the default Foresee PHP mode you can perform all Foresee PHP functions except certain maintenance operations, which are available only in the Microsoft® Windows environment. These maintenance operations include standard Windows functions like setting the time and date, but also include functions specific to Foresee PHP, such as configuring printers and others options described in this chapter. Note: Most maintenance operations require you to be logged-in with a user account having administrator privileges. To use its full capabilities, the Foresee PHP application also requires you to be logged-in with a user account having administrator privileges. If you or a system administrator adds new user accounts to the system, it is recommended to grant them administrator privileges. Switching to the Microsoft® Windows Environment In the Foresee PHP Main Menu screen, click Shut Down, then click the Switch to Windows button (refer to Shutting Down the Foresee PHP Device, page 19). – or – from the Foresee PHP Main Menu screen, click the Options button to navigate to the Options screen, then click the Switch to Windows button. (Refer to Foresee PHP Screen Features, page 17). Switching to Foresee PHP Mode When you switch to the Microsoft® Windows environment, the Foresee PHP Control Panel launches automatically when the device restarts. Figure 6-1: Foresee PHP Control Panel 78 P/N 900F006-101 Rev. D ® 6. The Microsoft Windows Environment (continued) To switch back to Foresee PHP mode: 1. In the Microsoft® Windows environment, go to the Foresee PHP Control Panel. Tip: If the Foresee PHP was accidentally closed, you can reopen it as follows: a. Click the Windows Start menu. b. Open the All Programs panel. c. Click the Foresee PHP Control Panel icon in the applications list. The Foresee control panel opens. 2. Click the Switch to Foresee PHP link. The Switch to Foresee PHP dialog opens. 3. Click Yes to switch and restart the device, or No to cancel switching. When you click Yes, the device will restart and enter Foresee PHP mode. Checking the Touch Screen Calibration Choose this option to check the screen calibration. Click the Calibration Check link to start the calibration check. For full details, refer to Calibration Monitoring, page 20. Calibrating the Touch Screen Click the Calibrate the Touch Screen link to start the touch screen calibration. For full details, refer to Calibration Monitoring, page 20. Installing Software Updates Software updates for the Foresee PHP software will be provided in the form of a standard executable file that automates installation. In order to install a given update, switch to the Microsoft® Windows environment, and use Windows Explorer to find, select and run the executable file. Note: When installing software updates, always use the default path and names. P/N 900F006-101 Rev. D 79 7. Maintenance and Troubleshooting Maintenance This section describes maintenance activities you perform periodically and maintenance activities you can perform, and may be instructed to perform by Customer Support. They include: • • • • • Cleaning and Covering the Foresee PHP Monitor Cleaning the Home Base, Chin Rest, and Stylus Replacing the Hard Drive Replacing the Home Base Replacing Power Entry Unit Fuses Cleaning the Covering on the Foresee PHP Monitor Any standard glass cleaner can be used to clean the touchscreen monitor, but avoid products containing ammonia. Always spray the glass cleaner on the cloth or towel and then clean the touchscreen. Cover the touchscreen monitor with the custom dust cover to protect the unit. Warning: DO NOT place dust cover on instrument until the instrument is completely turned off. Cleaning the Home Base, Chin Rest, and Stylus It is recommended to disinfect the Home Base Pad, Chin Rest, and Stylus between users with 70% alcohol. Replacing the Hard Drive The hard drive is a user replaceable part. It should only be replaced when customer support advises you to do so. When customer support advises you to change the hard drive, they will send you a replacement hard drive with replacement instructions. Replacing the Home Base The Home Base is a user replaceable part. It should be replaced only when customer support advises you to do so. When customer support advises you to change the Home Base, they will send you a replacement part with replacement instructions. Replacing Power Entry Unit Fuses Always turn the device power off and disconnect the power cable from the power entry before working with the power entry unit and fuses. The power entry unit has two fuses. Either or both may burn out. When a fuse burns out, replace it as follows. To replace a power entry unit fuse: 1. Shut down the device and turn it off. 2. Disconnect the power cable from the power entry. 3. Press down the small handle in the center of the fuse holder. The fuse drawer pops out slightly. 80 P/N 900F006-101 Rev. D 7. Maintenance and Troubleshooting (continued) Fuse Holder Figure 7-1: Power Entry Unit Fuse Holder 4. 5. Pull the fuse drawer out completely and remove it from the device. Replace the blown fuse with a spare fuse from the accessories bag and push the drawer firmly back in place. Troubleshooting In the following section, the error recovery procedure for the Foresee PHP device is described. Error Recovery Message When you receive the following unexpected error message, follow the instructions written in the Error Recovery dialog box. Figure 7-1: Error Recovery Dialog Box Service Information SERVICE OR REPAIR ARE TO BE PERFORMED BY QUALIFIED, AUTHORIZED PERSONNEL ONLY. The Home Base, hard drive, and fuses are the only userserviceable parts in the device. Disassembly of the device beyond the extent required to replace the Home Base, hard drive, or fuses, as described in this manual, presents a possible electrical shock hazard and will void the warranty. All repairs on products under warranty must be performed or approved at an authorized service location. Unauthorized repairs will void the warranty. Products out of warranty should be repaired at an authorized service location or by other qualified electronics personnel. P/N 900F006-101 Rev. D 81 7. Maintenance and Troubleshooting (continued) Technical Assistance Information If you have a device problem you cannot resolve, call your authorized distributor for assistance. Monitor Power Management The Foresee PHP device monitor shuts down after idling for 20 minutes. Reactivate the monitor by moving the mouse, pressing any key or by touching the Touch Screen. 82 P/N 900F006-101 Rev. D 8. Appendix This appendix includes: • • • • Technical Specifications Standards Compliance Embedded Microsoft® Windows License Location List of Foresee PHP Device Box Contents and Replaceable Parts Technical Specifications Note: Specifications are subject to change. P/N 900F006-101 Rev. D 83 8. Appendix (continued) Instrument Specifications Specification Description Stimulus: Dot Deviation signal flashed over macular loci. Area of Field tested: Central visual field – 14°. Mode of operation: Assisted tutorial followed by an automated patient driven test. Data storage, backup, and transfer: Results stored on a hard drive. Dedicated USB memory stick for automatic results backup. Removable USB memory stick for results export and SW upgrades. Results export format: HTML, JPEG, BMP. Device ready for office networking. Printer: An external Inkjet printer supplied. Dimensions: Device: 20" (51 cm) width x 12" (30.5 cm) depth x 12" (30.5 cm) height. Chin rest and hand switch assembly: 16" (40.5 cm) width x 16" (40.5 cm) depth x 8" (20 cm) height (when the chin rest is at the lowest position). Overall system weight: 40lbs (18kg). Electrical: 100-240 V, 50/60 Hz, 1A max. IEC-320 standard power inlet connector for worldwide use. Environmental Specifications Operating Conditions • Operating temperature: +59°F to +95°F (+15°C to +35°C) • Operating humidity: 10% to 90% non-condensing Storage and Shipping Conditions • Storage temperature: -4°F to +120°F (-20°C to +60°C) • Storage humidity: 0% to 95% non-condensing 84 P/N 900F006-101 Rev. D 8. Appendix (continued) Test Specifications • • • • • • • • • • • Visual Field: 14° vertical x 14° horizontal Flash Duration: 160 milliseconds Test Format: White on black, maximum contrast Presentation Order: Pseudo-Random Signal: 14° lines composed of 27 units Unit Size: 0.3° Gap: 0.2° Signal Resolution: 0.75° Includes Artificial Distortions Fixation: White on black, 0.35° radial Mean Background Illumination: 1CCFT Standards Compliance 93/42/EEC Medical Device Directive respectively, as amended by deviation 2007/47/EC. Authorized European Community Representative Andreas Herdy Reichert Instruments GmBh Hubertusstrasse 2 D-82229 Seefeld Germany Reichert is committed to supporting the Waste Electrical and Electronics Equipment (WEEE) regulations. At the end of the device useful life, contact your local distributor for disposal. CSA C22.2 No. 601.1-M90 (Canada) + UL2601-1 (US) Embedded Microsoft® Windows License Location Each Foresee PHP instrument is supplied with an Embedded Microsoft® Windows license. The license label is affixed to the floor inside the removable storage device tray. To access it, open the removable storage access door (refer to Figure 1-4, page 15, for an illustration). Disposal This product does not generate any environmentally hazardous residues. At the end of the product life, follow the local laws and ordinances regarding proper disposal of this equipment. P/N 900F006-101 Rev. D 85 8. Appendix (continued) List of Foresee PHP Device Box Contents and Replaceable Parts Description Part Number Qty Foresee PHP Instrument 900F004 1 HD 3.5" with Win. XPE and Foresee PHP SW (current version) 900S012 1 Installation Guide 600D040 1 Home Base Assembly 900S036 1 Chin Rest Sub Assembly 900S039 1 Foresee Keyboard 100K002 1 Optical Mouse 100U001 1 Mouse Adapter USB – PS2 (optional) 300C001 1 Foresee Stylus 100L003 1 North American Grounded Power Cord 400P014 1 Foresee Trial Frame 900K003 1 100D001 2 Fuse for Power Entry (T 2.5A 250V) 300F001 2 Allen Key M3 300A003 1 USB Printer Cable 400D007 1 Flash Memory Drive Note: Located inside the PHP device. 86 P/N 900F006-101 Rev. D 9. Terms, Conditions, and Warranty This product is warranted by Reichert, Inc. against defective material and workmanship under normal use for a period of one year from the date of invoice to the original purchaser. (An authorized dealer shall not be considered an original purchaser.) Under this warranty, Reichert’s sole obligation is to repair or replace the defective part or product at Reichert’s discretion. This warranty applies to new products and does not apply to a product that has been tampered with, altered in any way, misused, damaged by accident or negligence, or which has had the serial number removed, altered or effaced. Nor shall this warranty be extended to a product installed or operated in a manner not in accordance with the applicable Reichert instruction manual, nor to a product which has been sold, serviced, installed or repaired other than by a Reichert factory, Technical Service Center, or authorized Reichert Dealer. Lamps, bulbs, charts, cards and other expendable items are not covered by this warranty. All claims under this warranty must be in writing and directed to the Reichert factory, Technical Service Center, or authorized instrument dealer making the original sale and must be accompanied by a copy of the purchaser’s invoice. This warranty is in lieu of all other warranties implied or expressed. All implied warranties of merchantability or fitness for a particular use are hereby disclaimed. No representative or other person is authorized to make any other obligations for Reichert. Reichert shall not be liable for any special, incidental, or consequent damages for any negligence, breach of warranty, strict liability or any other damages resulting from or relating to design, manufacture, sale, use or handling of the product. PATENT WARRANTY If notified promptly in writing of any action brought against the purchaser based on a claim that the instrument infringes a U.S. Patent, Reichert will defend such action at its expense and will pay costs and damages awarded in any such action, provided that Reichert shall have sole control of the defense of any such action with information and assistance (at Reichert’s expense) for such defense, and of all negotiation for the settlement and compromise thereof. PRODUCT CHANGES Reichert reserves the right to make changes in design or to make additions to or improvements in its products without obligation to add such to products previously manufactured. CLAIMS FOR SHORTAGES We use extreme care in selection, checking, rechecking and packing to eliminate the possibility of error. If any shipping errors are discovered: 1. Carefully go through the packing materials to be sure nothing was inadvertently overlooked when the unit was unpacked. 2. Call the dealer you purchased the product from and report the shortage. The materials are packed at the factory and none should be missing if the box has never been opened. 3. Claims must be filed within 30 days of purchase. CLAIMS FOR DAMAGES IN TRANSIT Our shipping responsibility ceases with the safe delivery in good condition to the transportation company. Claims for loss or damage in transit should be made promptly and directly to the transportation company. If, upon delivery, the outside of the packing case shows evidence of rough handling or damage, the transportation company’s agent should be requested to make a “Received in Bad Order” notation on the delivery receipt. If within 48 hours of delivery, concealed damage is noted upon unpacking the shipment and no exterior evidence of rough handling is apparent, the transportation company should be requested to make out a “Bad Order” report. This procedure is necessary in order for the dealer to maintain the right of recovery from the carrier. P/N 900F006-101 Rev. D 87 10. End User Software License Agreement End User Software License Agreement CAREFULLY READ THE FOLLOWING TERMS AND CONDITIONS BEFORE USING THIS PRODUCT. IT CONTAINS SOFTWARE, THE USE OF WHICH IS LICENSED BY REICHERT, INC. TO YOU, THE ORIGINAL END USER, FOR YOUR USE ONLY AS SET FORTH BELOW. IF YOU DO NOT AGREE TO THE TERMS AND CONDITIONS OF THIS AGREEMENT, DO NOT USE THE SOFTWARE. USING ANY PART OF THE SOFTWARE INDICATES THAT YOU ACCEPT THESE TERMS. Software included with this product that are not products of Reichert, Inc. are licensed to you by the software provider. Refer to the license contained in the provider’s product for the terms of use before using such products. LICENSE: Reichert, Inc. grants you a nonexclusive license to use the accompanying software program(s) (the “Software”) subject to the terms and restrictions set forth in this License Agreement. You are not permitted to lease or rent (except under separate mutually agreeable terms set forth in writing), distribute or sublicense the Software or to use the Software in a time-sharing arrangement or in any other unauthorized manner. Further, no license is granted to you in the human readable code of the Software (source code). Except as provided below, this License Agreement does not grant you any rights to patents, copyrights, trade secrets, trademarks, or any other rights in respect to the Software. Notwithstanding any other provision of this License Agreement, this License Agreement shall not be deemed to apply to the Windows® software or any other applications software licensed to you by third parties that is included on the same media as Reichert, Inc. Software (“Other Software”) if the Other Software provides that the use of the Other Software is subject to the terms and conditions of the third party’s license agreement. NO ASSIGNMENT; NO REVERSE ENGINEERING: You may transfer the Software and this License Agreement to another party if the other party agrees in writing to accept the terms and conditions of this License Agreement. If you transfer the Software, you must at the same time either transfer all copies of the Software as well as the supporting documentation to the same party or destroy any such materials not transferred. Except as set forth above, you may not transfer or assign the Software or your rights under this License Agreement. Modification, reverse engineering, reverse compiling, or disassembly of the Software is expressly prohibited. However, if you are a European Union (“EU”) resident, information necessary to achieve interoperability of the Software with other programs within the meaning of the EU Directive on the Legal Protection of Computer Programs is available to you from Reichert, Inc. upon written request. EXPORT RESTRICTIONS: You agree that you will not export or re-export the Software or accompanying documentation (or any copies thereof) or any products utilizing the Software or such documentation in violation of any applicable laws or regulations of the United States or the country in which you obtained them. TRADE SECRETS; TITLE: You acknowledge and agree that the structure, sequence and organization of the Software are the valuable trade secrets of Reichert, Inc. and its suppliers. You agree to hold such trade secrets in confidence. You further acknowledge and agree that ownership of, and title to, the Software and all subsequent copies thereof regardless of the form or media are held by Reichert, Inc. and its suppliers. 88 P/N 900F006-101 Rev. D 10. End User Software License Agreement (continued) TERM AND TERMINATION: This License Agreement is effective until terminated. You may terminate it at any time by destroying the Software and documentation together with all copies and merged portions in any form. It will also terminate immediately if you fail to comply with any term or condition of this License Agreement. Upon such termination you agree to destroy the Software and documentation, together with all copies. GOVERNING LAW: This License Agreement shall be governed by the laws of New York State excluding their conflicts of law principles. The United Nations Convention on Contracts for the International Sale of Goods (1980) is hereby excluded in its entirety from application to this License Agreement. LIMITED WARRANTY; LIMITATION OF LIABILITY: All warranties and limitations of liability applicable to the Software are as stated on the Limited Warranty Card or in the product manual accompanying the Software. Such warranties and limitations of liability are incorporated herein in their entirety by this reference. SEVERABILITY: In the event any provision of this License Agreement is found to be invalid, illegal or unenforceable, the validity, legality and enforceability of any of the remaining provisions shall not in any way be affected or impaired and a valid, legal and enforceable provision of similar intent and economic impact shall be substituted there for. ENTIRE AGREEMENT: This License Agreement sets forth the entire understanding and agreement between you and Reichert, Inc., supersedes all prior agreements, whether written or oral, with respect to the Software, and may be amended only in writing signed by both parties. P/N 900F006-101 Rev. D 89 Notes This page left intentionally blank. 90 P/N 900F006-101 Rev. D Notes This page left intentionally blank. P/N 900F006-101 Rev. D 91 Reichert, Inc. 3362 Walden Ave Depew, NY 14043 USA Toll Free: 888-849-8955 Phone: 716-686-4500 Fax: 716-686-4545 Email: [email protected] www.reichert.com Reichert GmbH Hubertstrasse 2 D-82229 Seefeld Germany Tel: +49 8152 993530 Fax: +49 8152 993535 ISO-9001/13485 Registered 900F006-101 Rev. D October 2010 92 P/N 900F006-101 Rev. D