1
ProView 2.2x User’s Guide
__________________________________________________________
MODEM (for dial-up connections): You need a Hayes compatible (AT) Modem that supports a data rate of
9600 baud (this means almost any commonly-available modem). The modem can be external or internal. It
must be assigned to COM Port 1, 2, 3 or 4.
!
Some PCs have been supplied with so-called “WinModems” or “SoftModems”, which are not true
hardware modems and will not work with ProView for communication with a ProControl system. A
true Hayes-compatible hardware modem is an inexpensive investment in reliable communications.
SERIAL PORT REDIRECTOR (for Ethernet and cellular data connections): An Internet Protocol (IP)
connection is used to connect to your ProControl unit, and IP is also used to provide outgoing email and text
messaging capability for status and alarm reporting (please note that fax reporting is not available with this
version). Third party software is required to create a virtual serial port (COM port 1, 2, 3, or 4) on your
computer for connection to the static IP addess of the ProControl over the internet. Please refer to either the
Ethernet or Cellular Data Quick Start Guide as applicable for more details.
How to Install ProView
1. Close all open programs before beginning the ProView installation procedure. Close any task bars for
software packages like Microsoft Office that may be lurking at the edge of your screen. If a ProView
installation fails, it is almost always the result of having other programs open at the time of installation.
Certain programs, when included in the Windows Startup group, may cause the ProView installation to
fail, and must be removed temporarily from the Startup group prior to installing ProView.
2. Go to our website at www.eosresearch.com, click on the ProView tab at the top, then under Downloads at
the bottom of the page click on ProView_2.2xx.exe to download the executable to your computer (be sure
to make note of the save location).
3. Go to the location of the saved file, double click on it to start the installation.
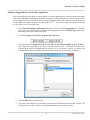
4. The ProView installation program will begin and will guide you through the rest of the installation
process.
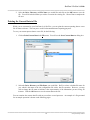
You will also be provided with configuration files (or site files) for every ProControl unit you need to access.
At a minimum, you will have a configuration file with a “.pvs” extension and one with a “.not” extension
(these are normally supplied pre-configured for you by EOS or your system integrator). Using Windows
Explorer, copy these site files to the folder in which your ProView software was installed for ease of access.
Depending on your site configuration, you may have other files included along with the two standard site
files. The files will have the extensions of .pid or .pvg. You must copy these files to the ProView folder as
well.
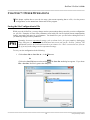
When the installation is complete, you will see the ProView program group and icon. We recommend
making a shortcut to ProView that you can then move to your Windows desktop. Right-click on the ProView
turtle icon in the program group, then click on Create Shortcut. Drag your new shortcut to a prominent
position on your Windows desktop.
__________________________________________________________
2
8100\pv220man\pv220man