1
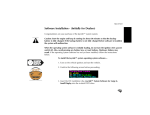
The ASSISTment System assists students in learning and gives teachers assessments of their students’ progress. A collaboration amongst: Worcester Polytechnic Institute Carnegie Mellon University Worcester Public Schools Sponsors: National Science Foundation United States Department of Education The Spencer Foundation Office of Naval Research The United States Army The Massachusetts Technology Transfer Center Table of Contents Introduction .................................................................................................................................................................i Getting Started ......................................................................................................................................................... xii Finding Data about your Students ........................................................................................................................... xxi Building your own Content .................................................................................................................................... xxxi Suggestions for Classroom Use ............................................................................................................................... xlii Introduction Introduction Letter to Teachers .......................................................................................................................................................i Fact Sheet on the ASSISTment Project ................................................................................................................... ii Sample ASSISTment Problems................................................................................................................................... iii ASSISTment #4686................................................................................................................................................. iii ASSISTment #78 .................................................................................................................................................... vii Letter to Teachers Dear Teacher, Welcome to the ASSISTment System. We have designed this binder to help you gain a clearer understanding of the content and to provide written instructions on how to get yourself and your students using the system. For more up to date details on the ASSISTment System, please visit our information webpage at http://teacherwiki.assistment.org. You can use the Fact Sheet on the next page to share information on the System with your administration, other teachers, or parents. Finally, in this section, we have added a few examples of individual ASSISTment questions with the tutoring visible. We hope that this will give you a clear understanding of the structure of an ASSISTment. In this binder, we have instructions for accessing student data and setting up teacher and student accounts. We have also included a section on using the ASSISTment System that gives a few examples of how the system has been used by teachers. We have created the ASSISTment System as a tool for teachers to use. Each school has its own unique set of needs and goals that can be facilitated by the ASSISTment System. The ideas provided here are just the tip of the iceberg on how you can use the system to improve student learning at your school. If you have any comments or questions we would love to hear from you. You can contact us by e-mail at [email protected]. If you have comments on an individual ASSISTment question be sure to include the ASSISTment number or use the comments on the question button within the system. This is the ASSISTment number Click the comment button to give us any feedback. We look forward to hearing about how you use the system. Sincerely, Neil Heffernan Cristina Heffernan Co-creator & Associate Professor of Computer Science at WPI Co-creator & Chief Professional Development Coordinator 2008 Edition i Fact Sheet on the ASSISTment Project http://www.assistment.org What is the ASSISTment System? The ASSISTment System is a web-based tutoring program for 4th to 10th grade mathematics. The word “ASSISTment” blends tutoring “assistance” with “assessment” reporting to teachers. This gives teachers fine grained reporting on roughly 90 skills that the system tracks per grade level. More generally, the system is a great tool to help achieve the US Dept of Education’s goal of turning education research into an evidence-based science, as the system is able to do large-scale studies of what constitute effective educational practice. What is the goal? No Child Left Behind legislation urges schools and teachers to use formative assessment information to inform their classroom instruction. The dilemma is that every minute spent testing is a minute taken away from instruction. The ASSISTment System solves this problem by tutoring students on items they get wrong, thus providing integrated assisting of students while they are being assessed. Teachers can use this detailed assessment data to adjust their classroom instruction and pacing. How is it used? Math teachers assign problem sets to their students to do on the computer and students are tutored on the items they get wrong. Teachers log on to the System and study detailed reports about their students’ difficulties and strengths. Teachers can use content already developed at WPI or write their own content. Who is using it? In 2007-08 just over 4,000 students used the system mostly near Worcester, MA and Pittsburgh, PA. We have scalability results that suggest we should be able to scale up nicely with the 11 servers we have in place so that we can support every classroom in the state of Massachusetts. What do we know about its effectiveness? 1. What do we know about its effectiveness as an assessment system? In Razzaq et al. (2005)1 we showed we can predict a student’s MCAS score with a high degree of reliability. 2. What do we know about its effectiveness as an instructional assisting system? In the same Razzaq et al. (2005), we showed that students were reliably learning from the ASSISTment system. 3. What do we know about the effectiveness of the system to study the learning that is taking place outside of class? We have found that the ASSISTment system can track individual skills being learned inside of classrooms, thus opening the door to using the system to study any classroom intervention, as teachers like to use the system with their students. 1 Who built the ASSISTments? In 2003, Neil Heffernan and Ken Koedinger conceived of the idea of the ASSISTment System and received funding from the US Dept of Education to get started. This idea was successful, in part, due to prior funding from the Office of Naval Research to build tools to make it more cost effective to build intelligent tutoring systems. In 2004, Heffernan was funded by a National Science Foundation CAREER grant to extend the ASSISTment System from 8th grade up to 10th grade. Over 30 students at WPI and several full time staff at CMU helped make it all happen. Contact Professor Neil Heffernan at WPI 508-831-5569 for more information at [email protected]. This paper and dozens of others can be found at the publications page of our website at www.assistment.org/about/publications 2008 Edition ii Sample ASSISTment Problems ASSISTment #4686 This is an ASSISTment as it shows up for a student. The ASSISTment number is in the upper right hand corner. It is used as a reference through the system and is important to keep track of. Next to the number is the name. If the ASSISTment question came from the MCAS test, details of its origin will be shown in the name. This ASSISTment is number 4468 and it was number 19 on the 2003 8th grade MCAS. The student types their answer to the problem in the box at the bottom and then clicks on “Submit Answer.” If it is correct it will be marked correct in the teacher reports and they will go on to then next problem. If not, the problem will be marked incorrect in the teachers report and be broken down into steps for the student. If they have no idea what to do they can go directly to “Break this problem into steps” but if they do this, it will be marked incorrect in the teacher’s reports. On the following pages, we will give you a “tour” of what the student sees when they either get the problem wrong or click on “Break this problem into steps. This problem also demonstrates how we tag ASSISTment main problems and their scaffolding problems to help assess what skills students are lacking. The State of Massachusetts tagged this problem as a geometry problem because it involves congruent triangles. However, with close examination one will notice that a student needs to understand perimeter (a measurement skill), equation solving and substitution (both skills in patterns, relations and algebra), and congruence (a geometry skill). As you see the scaffolding questions for these problems, you will see how each one addresses one of the skills involved in the main problem. This is ASSISTment number 4468 This button will initiate the tutoring and mark the student wrong on the teachers report. This is the ASSISTment title, this ASSISTment is number 19 from the 2003 8th grade MCAS. In this problem students need to know: Type answers in this box 2008 Edition Geometry, to understand what congruent triangles mean Measurement, what perimeter means and how to apply it Click here to Submit answer Patterns Relations and Algebra, to know how to solve an equation and substitute a value of x back into an expression iii If the student gets the problem wrong, the system breaks the problem into steps. In this example, you can see that the student submitted the wrong answer, 2x, so the original question box turns red and they are told “Sorry, that is incorrect. Let’s move on and figure out why!” If the student has problems with the first scaffolding question they can click on “Show me hint 1 of 3” to see the first of three hints. We have shown all the hints for the second scaffolding question as an example. Note that the last hint always gives the answer. You can see the incorrect answer 2x was typed into the submit box for the original question. The box around the original question turns red when the student gets the problem wrong. This is the first scaffolding question. It deals with congruence a skill in Geometry. 2008 Edition iv Once the student gets the first scaffolding question right, they move on to the next one automatically. In the last scaffolding question, the student is asked the original question again. Once again, if they cannot get the correct answer they can ask for hints to help move them through the problem. The box around the previous scaffolding question is green indicating they got it correct. This is the second scaffolding question. It deals with perimeter a skill in Measurement. These are the three hints a student can request one at a time. The last hint always shows the answer, this way the student can move on to the next scaffolding question. Use of this “bottom out hint” is reported in the teacher’s item report. This is a buggy message. Notice the student selected ½*x(2x) which is an attempt to use the formula for area. The message is designed to respond directly to the incorrect answer selected. 2008 Edition v This is the third scaffolding question. It deals with solving an equation a skill in Patterns Relations and Algebra. The last scaffolding question returns to the original problem in order to see if the student can put all the pieces together. The skill needed to find the final answer is substitution from Patterns Relations and Algebra since the student just found that x is 5 and now needs to find 2x. 2008 Edition vi ASSISTment #78 This example ASSISTment is number 78 and is problem number 9 from the 2003 MCAS test. The reporting category on the MCAS was Data Analysis, Statistics and Probability, however; with closer inspection it can be seen that it is also the skill of finding the percent of a number, a skill from the Number Sense and Operation strand. In this problem students need to know: Data Analysis, Statistics, and Probability, to understand how to read the venn diagram Number Sense, to find the percent of 900 2008 Edition vii This is the first scaffolding question. It deals with reading a venn diagram a skill in Data Analysis, Statistics, and Probability. Here is the first scaffolding question with and without the hints opened up. 2008 Edition viii This is the second scaffolding question. It deals with reading a venn diagram a skill in Data Analysis, Statistics, and Probability. 2008 Edition ix This is the third and final scaffolding question. In order to solve this last step a student must find 27% percent of 900 this is a skill from the Number Sense strand. 2008 Edition x 2008 Edition xi Getting Started Getting Started Getting Started as a Teacher .................................................................................................................................... xii Creating a Teacher Account ................................................................................................................................. xii Creating a new school ...................................................................................................................................... xii Creating a new district...................................................................................................................................... xii Creating a user................................................................................................................................................. xiii Creating a Class.................................................................................................................................................... xiv Selecting the Curriculum ..................................................................................................................................... xvi Getting Started as a Students ................................................................................................................................. xvii Creating a Student Account................................................................................................................................ xvii Login Names .................................................................................................................................................. xviii Enroll in a Class .................................................................................................................................................. xviii Changing Schools ................................................................................................................................................. xix Getting Started as a Teacher Creating a Teacher Account 1. Open your web browser and navigate to the ASSISTment System main page (www.assistment.org). 2. Click on “Sign up” at the top of the page. 3. Select “Teacher” from the first dropdown menu, and the name of your school from the second. 4. If your school is not on the list, you can add it to the list by clicking the “Create a new one” link. Creating a new school 1. Type in the name of your school (not the district name). 2. Select your district from the list. If your district is not on the list, you can add it to the list by clicking the “Can’t find your district?” link. Creating a new district 1. Fill in the district name in the middle box and select your state from the dropdown box. 2. Select “save.” 2008 Edition xii 3. Now that your school and district are chosen, select your school from the dropdown list. You may need to click on refresh (F5) to load the new school information onto your current page. Creating a user 1. Enter the display name you wish to use. This is the name that your students will see when selecting your class. Use Mr. Smith instead of John Smith if you do not want your students to see your first name. Keep in mind, students may get confused if there are two Mr. Smiths in your school. 2. Enter the e-mail address you wish to use. This e-mail will be used for password resets. It is recommended that you use your school e-mail address, if available. If you do not have an e-mail address, select “I don’t have an email address” which will take you to a page to create a free e-mail account with Google mail. 3. Enter your first name, middle name, and last name. If you do not have a middle name, leave that field blank. 4. Select your time zone from the dropdown list. 2008 Edition xiii 5. Enter the password that you wish to use. Making this an easy password is recommended, and it is unwise to use one of your common personal passwords or the password of your e-mail account, as you may wish to share this password with colleagues. 6. Re-enter the password to confirm it. This ensures that you did not make a mistake entering your password the first time. 7. Click on “Sign up.” After signing up, a page is displayed where you can check your information and, if needed, edit the information by selecting “Edit Profile.” Creating a Class 1. When you log in as a teacher, you will be brought to the following page: 2008 Edition xiv 2. From this page, click on “Assess.” 3. Select “New Class.” You will see the following: 4. Select the number of classes you teach in the grade level, and then select the grade level from the dropdown menu. 5. Enter the name of your class. A descriptive name is a good idea, such as the grade level, the period, and the year. 6. Select the access restrictions on the class from the dropdown menu. Options include: “Anyone can enroll in the class” or “Must wait for teacher approval.” 7. Click Save. Students enroll in your class after they create their student accounts. 8. If you teach another grade level, you can repeat this process for the other grade. 2008 Edition xv Selecting the Curriculum Currently, ASSISTment System assigns the curriculum to a class based upon the grade level of the class. We have separate curriculums for 6th, 7th, and 8th grade as well as curriculum for 9th and 10th grade. Select “Assignments” to see the list of problem sets in the particular curriculum. 2008 Edition xvi Getting Started as a Students Creating a Student Account 1. Log on to the Internet. Go to www.assistment.org and click on “Sign up.” 2. Select “Student” from the “Select a type” dropdown menu. 3. Select the name of your school from the “Select a school” dropdown menu. An example is shown below: School: ASSISTment School Name: George Edward Boole Birth date: March 14, 1994 Notice that George has selected “Student” and his school, and he has filled in the information about his birthday and name. He has also typed in a password and retyped it to confirm it. 2008 Edition xvii When George is done filling in the information, he should click on the “Sign up” button. A new page will load that will show the information the student has entered as well as their new login. The student must write your login in a safe place. Once the student enrolls in a teacher’s class, their login will be listed under Roster. Login Names Notice how the login name is created: georgeeb0314 (first name)(middle name initial)(last name initial)(month of birth date)(day of month) (george)(e)(b)(03)(14) Enroll in a Class At this time, it is a good idea to have your students enroll in your class. 1. Click on the “Tutor” button on the top of the page. A new page will load. If the student has not enrolled in a class, a red sections says “You are not enrolled in any classes; you can enroll by selecting a class below.” If your student is already enrolled in one class, have them still follow the same instructions below. 2. Click on “Enroll in a class.” 3. Click on the plus sign and then click on the class you wish to enroll in. After selecting a class, select a section to join. 4. Click on “Done joining classes” to return to the previous page. For our student, George Boole, he will join Alan M. Turing’s 4th Period 8th Grade class. First hit the downward arrow, and then click on the blue section over Alan Turing’s name. 2008 Edition xviii Once this is selected, a new page will load that will show that you are now enrolled in this class. If you need to enroll in multiple classes, you can repeat this process for each class. To start working with the curriculum assigned for the class, select the “Show Assignments” link. Changing Schools If you are a student who has changed schools (or a teacher who has a transfer student in their class), do not panic. You can still use your old ASSISTment account if you can remember the user ID and password. 1. Log in. 2. Click on the “Account” tab. 3. Let’s click the edit profile link. 2008 Edition xix 4. Use the dropdown box next to school to select the new school. 5. After you have done this, you can follow the steps for enrolling in classes. If you can’t remember your user ID and password, you will need to make a new account. 2008 Edition xx Finding Data about your Students Finding Data about your Students Overview.................................................................................................................................................................. xxi Toggle Settings ....................................................................................................................................................... xxii Roster .................................................................................................................................................................... xxiii Assignments .......................................................................................................................................................... xxiv Item Report ............................................................................................................................................................ xxv Report ................................................................................................................................................................... xxvii Summary...............................................................................................................................................................xxviii Skill Report.............................................................................................................................................................. xxx Overview When you log in to ASSISTments after creating your classes, you should see a screen similar to the one below. This is a listing of all of your active classes that are currently active in the System. The following selection options appear for each class: Toggle Settings – Allows you to decide if you want students to see their own item reports or look at their grades. It also allows you to turn anonymity on or off on all of your reports. Roster – Lists all the students in the class and allows you to change student passwords. Assignments – Shows the assignments in the curriculum corresponding to the grade level of this class. Item Report – Shows the student’s average score for the problem set and results from each individual ASSISTment in the problem set. In addition, if the student got the question wrong, the Item Report shows the incorrect response. There is a link to each ASSISTment in the problem set. Report – Shows who has started and/or finished any problem set that has been started by the class and provides a link to the item report for each of these problem sets. Summary – Shows the number of problems done, number correct, percent correct, total hints used, expected MCAS score, and Proficiency Level. 2008 Edition xxi Toggle Settings The toggles allows you to “toggle” back and forth between settings. If you want students to see their own item reports and grades when logged in to their accounts check those boxes. If you want to show any report anonymously then click on that toggle before showing the reports. Select save after making any changes. Unclick the box to hide the tutor settings. Click on Toggle Settings to see the Tutor Settings check boxes. Click again to hide them. This student has Show Item report and Show grade turned on. If you do not want your students to have these links available then just unclick the toggle. You can see an example of the student’s individual item report in the report section of this manual. 2008 Edition xxii Roster The roster page shows the students enrolled in the class and the user name associated with each student. Keep a printout of this page in case students forget their login name. There are three links connected to each student’s name: Reset Password – Resets the student’s password to a password of your choosing. Progress – Tracks the student’s progress in each assignment in the curriculum. This progress page is printable, and is helpful for parent-teacher conferences. Trash Can – Removes the student from the class. 2008 Edition xxiii Assignments The assignments page shows the assignments in the curriculum for a class. The assignments are numbered in the order they appear to the students. Below each assignment is the class progress on the assignment: not started, in progress, or complete. There are nine links connected to each problem set: Progress – Opens a view of the status of each student on the assignment (not started, in progress, complete). Press progress again to close this view. Print – Gives the option of printing the selected problem set. Preview – Experience a problem set as a student would see it, but no score is recorded. Item Report – Gives a detailed report on the student’s progress for that problem set. Summary – A summary of the student’s performance on the problem set, with their predicted MCAS score and their level of deviation from an average student. Set due date – Set a due date for the problem set. Grades – Shows the grades for each student on a given problem set. Also allows you to change the grade of students for individual problem sets. Drag – Allows you to rearrange the order of problem sets within the curriculum. Trash Can – Deletes a problem set from the curriculum. 2008 Edition xxiv Item Report The item report shows the information on each student for each ASSISTment question in a problem set: The first drop down box allows you to select the class you wish to look at, the second drop down box lets you select the class section, and the third drop down box lets you select the assignment. When you select the problem set, the progress and scoring data for your class on that problem set is displayed. In the first column will be the name of the student followed by their average on the entire problem set. The top row shows the ASSISTment problem number. Selecting this brings up a preview of the ASSISTment problem. The percent beneath the ASSISTment number shows the percent of the class who got the problem right. Looking for low percentage problems can help identify areas in which the class is weak. 2008 Edition xxv For each ASSISTment problem, the student’s given answer is shown weather it is right or wrong. There is a green check mark if it is correct. There is a red x if it is incorrect. A box highlighted in yellow means the student has reached the last hint in the ASSISTment a certain number of times. An open circle means the student hasn’t begun the problem set. A half circle means the student has started, but not completed the problem set. If the toggle is turned on each student can see their own item report. In this example Albert Einstein has started Accentuate the Negative: Investigation 1- 6 items. He got to a bottom out hint once on item 12251 and needed two hints in 12252. He finished three items getting one correct. He started reading 1274 but never selected an answer. He has not started 12276 or 12277. He can also compare his results to the rest of his class. All of this information is also shown in the teacher item report above including his average and the class average. 2008 Edition xxvi Report The Class Report allows you to easily see how the entire class is performing on each problem set. The first dropdown box allows you to select a class. The second allows you to select a section of the class. The first column is a list of the students in the class. The first row shows important information about what the student has accomplished. The name of the problem set done by at least one student in the class or section selected. Clicking on the name will take you to the item report. The date on which most students worked on this problem set. The percent correct for class and section selected. A link to print the whole problem set. 2008 Edition xxvii The following is a key for the symbols you will see: The percent correct is given for any student that has finished the problem set. The half circle is given if the student has started, but has not completed, the problem set. The open circle is given if the student has not started the problem set. Summary The summary page shows the overall scores for each student in a class, either on all problem sets or on individual problem set. The dropdown boxes allow you to choose the class, section and problem sets. The different colored highlights in the table refer to the following: Dark blue means that the value is two standard deviations above normal. Light blue corresponds to one standard deviation above average White denotes less than one standard deviation away from average (either above or below). Orange indicates one standard deviation below average. Dark orange represents two standard deviations below normal. Note: A dark blue highlight could be good or bad. For example, a student that is highlighted in dark blue for average score and MCAS score is very well off, but a student with a dark blue highlight in hints used means that the student uses more hints than they should be using and may need additional help or motivation. The “Original questions” column covers the questions in the chosen problem set. The “All questions” column covers the questions from the “Original questions” column, in addition to the scaffolding questions the students are given if an ASSISTment is answered incorrectly. This allows teachers to see how students respond to the hints given for the problem. In the “Original questions” column, the sub-columns include the number of questions in the problem set that the student has answered, the number of questions completed, the number of questions correct, the percent correct, a predicted MCAS score, and the proficiency (performance) level corresponding to the MCAS score. MCAS prediction is most accurate when looking at all problem sets. In the “All questions” column, the students’ 2008 Edition xxviii overall performance with the scaffolding questions are factored in, along with the total number of questions answered, number correct, percent correct, and total hints used. This column only differs from the “Original questions” column if the problem set includes scaffolding questions. 2008 Edition xxix Skill Report The first column in the skill report shows the different strands of math that apply to a problem set. Click the first column to organize the data based on the five strands. The second column displays the learning standards that the problem set meets. Click on the column to organize the data based on the 39 different mathematical standards. The third column displays the type of problem that the problem set has been tagged. Some examples include: Multiplication, Fractions, and Rounding. The fourth column is the Skill Meter, a visual representation of how well the class is performing in that certain skill. The fifth column displays the percentage of students who answered the questions correctly for that skill. Click on this column to organize the data based on the percentage correct (arranged from highest percentage to lowest). The next column shows the number of students who have completed a problem for that certain skill. The final column displays the number of students who got a problem correct for that certain skill. 2008 Edition xxx Building your own Content Building your own Content Overview of the builder .........................................................................................................................................xxxii Creating a Quick Sequence ...................................................................................................................................xxxiii Creating an ASSISTment ...................................................................................................................................... xxxvii Overview of the builder ASSISTment questions are created in the Builder. Select Build on your ASSISTment screen and then select ASSISTments. From here you can either edit an existing ASSISTment by placing its number in the box and clicking on Edit or you can “Create New ASSISTment” to build one from scratch. We will begin our tutorial of the builder by showing how to build a quick sequence. Start by clicking on “Create New Quick-Sequence.” Click here to get to the builder. Type in your ASSISTment number and then Preview, Edit or make a copy of the ASSISTment question. Click these links to create new ASSISTments or to create new quick sequences. These are the ASSISTments built by this teacher Mr. Turing. 2008 Edition xxxii Creating a Quick Sequence The quick builder is a tool that allows teachers to make quick assignments. Click on directions to get a quick description of the different options available. This is the title for your problem set. The default name includes the date so you can easily find your new problem set. 2008 Edition The Settings section allows you to set your preferred settings for all of the ASSISTments. Once you do this you can still go in and change the settings on all or a few of the questions you are building. This is where you type in the title and text for question 1. You can also make changes to the settings just for question1 here. xxxiii Some teachers use quick built problem sets to quiz their students on lectures at the end of class. Some use it to quickly connect the ASSISTments to homework assigned out of the book. To do this they just type in Page 12 #4 for example so the student can find the question in the book and then input the answer, students input their answers online at home and the teacher gets a report before school starts. In either case the problem set is easy to build and the reports show up instantly once the student had finished their work. There are endless possibilities for how to use this feature. We have provided different modes depending on your needs. They are organized by Problem Options: Test Mode – students get one attempt and are given the message “We will not tell you if you are right or wrong.” Answer is accessible – in this mode a student who cannot work out the problem on their own will be given the answer at the end. Answer is inaccessible – in this mode the student who cannot work out the problem will never be given the answer. For Answer accessible and answer inaccessible, you have two options “a” or “b”: a) Finish after a selected number of tries, or b) Try as many times as the student wishes. The final choice you can make is to select the answer type: 2008 Edition Ungraded open response – the student types anything using their keyboard and you can grade these afterwards. Multiple choice – the first answer you type will be the correct one. Then type enter between each other choice option. We do not suggest you use A, B, C, D etc since we randomize the answers so the first answer is not always correct. Fill in – the student must type exactly what you typed. Algebra – the student can type anything that is mathematically equivalent to what you typed. For example if you type in 4/5 a student who types in .8 will still get the problem correct. The same is true for .45 and 0.45 or x + 3 and 3 +x. xxxiv The problem set is titled “Addition and Multiplication. Directions and Settings are closed. Question 1 is algebra so a student could submit +14 as an answer. The answer is accessible-A, so the student gets a chosen number of attempts. In this case 3 is selected. The explanation will be given to a student after all 3 attempts have been tried. Question 2 is ungraded open response. The student can type a response to the question. It is automatically in Test Mode since there is no way to know if it is right or wrong. Question 2 is multiple choice. The answer is 96 and the other choices are given on different lines. This question is also inaccessible-B so the student can attempt it an unlimited amount of times. This is not recommended since they may never be able to exit. However, with multiple choice questions, this is not as much of a problem. Once you have written your test (see above) you need to select which class you want to load this problem set into. To do this click on “Assign to” and then click create. You will see your new problem set and it will automatically be loaded into your class You do not need to fill in all of the questions. If it is empty an ASSISTment will not be built. Click on “Assign to” to select the class you want the problem set in. Click Create to make the problem set and load in into your class. 2008 Edition xxxv When you click on Create, the screen goes to the Problem Set builder. This page shows the title of your Problem set and all the new ASSISTments you just created in the quick assign. You can edit your ASSISTments and the Problem Set from here. Next time you click on Problem Sets in the Build section you will see a list of all the problem sets you have built. In order to return to this problem set it helps to know the Problem set number which is found in the URL. This is the Problem set number. You can print or preview the problem set from here. If all your ASSISTments are not showing up when you preview click on “flush cache. Click on the name to change it. Here are the three ASSISTments we built in the quick builder above. You can print and preview them as well as Edit them by following the directions for building ASSISTments below. These are the ASSISTment numbers you just built. If you have an ASSISTment number you can add that ASSISTment to this problem set by clicking on “Add assistment”. In the next section we will describe how to build and edit ASSISTments. This may be helpful if you want to go back after using the quick builder and make changes. 2008 Edition xxxvi Creating an ASSISTment Main Problem You write a Main Problem. You can input a second Main Problem too. Answer: Choose from Fill In, Algebra , Multiple Choice, Ungraded Open Response Each Answer is either Right or Wrong (and can write a message that will be displayed to a student when they type or select a common wrong answer, we call this message a “buggy message”) Tutoring Strategy(s): Choose from “Hints” or “Scaffold” Strategy type “Hints” Add Hints Strategy type “Scaffold” You can add multiple scaffold questions Question: Just like a regular ASSISTment a scaffolding question starts with a question. Answer: Choose from Fill In, Algebra , Multiple Choice, Ungraded Open Response Each Answer is either right or wrong. You can still write a buggy message. Tutoring Strategy(s): Choose from Hints (typical choice) or Scaffold (it is not recommended to put a scaffold in a scaffold.) On the next page you will see an image of the Main Problem page for the two triangles problem # 4468 that we showed earlier in this document. In the following pages you will see how you can move through the builder to build all the different parts of that ASSISTment. 2008 Edition xxxvii Click here to name the ASSISTment Keep track of and navigate to different parts of the ASSISTment by using the navigation bar. Select a problem type: Fill in, Algebra, Multiple choice or ungraded open response. Type in the contents of the problem body. Be sure to “Save the Problem Body.” Click on the pen to edit the hints. Click on the drag to change the order. Click on the trash to remove the answer. Type in the answer and any buggy messages here. Select the strategy you want to use; hints or scaffolding questions. One ASSISTment can have multiple strategies. When an ASSISTment has Scaffolding, it is broken down into more specific questions. Each of these questions has hints. Typically the last question is the original question asked over again. When an ASSISTment uses the hint strategy, the student can either try again or ask or hints when they get the problem wrong. 2008 Edition xxxviii Editing the Strategy If you choose to have scaffolding questions they will be listed on this page. This page will show when you click on the scaffold strategy button on the menu bar. It will also come up when you initiate a new scaffolding strategy for the main problem. Notice there are 4 scaffolding questions for this ASSISTment and that each has hint strategies. Click on the scaffolding strategy bar to see this page with a list of the scaffolding questions. 1 2 3 Scaffolding questions can be rearranged by using the drag button. They can be deleted by clicking on the trash-can. 2008 Edition 4 If you click on the pencil you will go to the page to build and make edits to the scaffolding question. Clicking on the scaffolding question in the menu will also take you to the editing page. In this example there are 4 scaffolding questions. xxxix Editing a Scaffolding Question Most people do not name the Scaffolding question. They just leave it as the first few words in the question In this example we are editing the first scaffolding question. If the scaffolding question refers to an image in the original question be sure to upload it again. This way the student will not need to scroll up. Select the hint strategy for a scaffolding question. It is very confusing to have a scaffolding strategy for a scaffolding question. 2008 Edition xl Editing Hints Preview the scaffolding question’s “Problem Text” If you click on a bar that is a hint strategy you will arrive at a page like this. Add new hints and edit existing hints here. Using the drag button can change the order of the hints. Hints can be deleted by clicking on the trash. 2008 Edition xli Suggestions for Classroom Use Suggestions for Classroom Use Ideas from a – 7th Grade Math Teacher in an Urban School .................................................................................. xliii Responding to an Individual Problem in an ASSISTment Problem Set ............................................................... xliii Teacher Observations and Report .................................................................................................................. xliii ASSISTment Worksheets ......................................................................................................................................... xlv The ASSISTments Correction Worksheet ............................................................................................................ xlv The ASSISTment Worksheet ................................................................................................................................ xlv Record Sheet ....................................................................................................................................................... xlv There are many case studies to read from at http://teacherwiki.assistment.org/cases. Here is an example of a real world case. Ideas from a – 7th Grade Math Teacher in an Urban School Responding to an Individual Problem in an ASSISTment Problem Set Overview 1. Students complete a problem set on the computer. 2. Study the item report from the problem set to find one problem to deal with. 3. Discuss the problem in class. Teacher Observations and Report Day 1 Today in the lab, my students were practicing 8th grade MCAS problems. I chose a problem set that corresponded with the unit we had just finished. It was nice to know that while they were practicing, they were all getting help from the system when they needed it. When they had all finished the problem set, I printed out the item report and looked for something interesting to bring up in class. I can never cover everything in the item report, but I do like to go over something the next day so the students know I am paying attention to their work and see the connection between class and the ASSISTment lab. Many times, I look for the problem with the lowest number of correct answers, but this time, something else caught my eye. You can see the problem in Figure 1. ASSISTment number 836 Which is closest to 0.816 * 0.211 A. 0.16 B. 1.6 C. 16 D. 160 Figure 1 Now my students did well on this problem, 72% got it correct and the rest of the students selected 1.6 instead of .16. However, we had been discussing estimation a lot in my class and I know I had a lot of reluctant estimators. This was a class of kids who liked to work it all out and find the exact answer. Since I had just stopped using the ASSISTment worksheets, I wanted to see if I could analyze my students’ work. It turned out everyone had done a great job organizing their work and I could easily find their work for ASSISTment 836. You can see the results of the 18 students in my class who did this problem in Figure 2. 2008 Edition xliii 7 students Got the problem correct and used estimation 6 students got the problem correct and worked it all out 5 student selected the incorrect answer of 1.6 Figure 2 Day 2 I know a discussion of using estimation for this problem would help 11 of my students. However, I did not have a lot of time to devote to this topic in class. So I decided to make an overhead of their work and share it with them in class that week. You can see what I showed them and the questions I asked in Figure 3. Figure 3 Conclusion I really liked bringing in the data I find on the ASSISTments to the students. In this exchange, I was able to respond to the work my students did on their paper. This helps them know that I value tidy work. In addressing this problem, I wanted to emphasize that I am not just looking for the right answer, but I also want them to think mathematically in order to make the right choices. Day 1: Gave MCAS practice Day 2: Responded quickly in class to something I saw in the item report and on their work. 2008 Edition xliv ASSISTment Worksheets The following are some very helpful worksheets to use in conjunction with the ASSISTments system. The ASSISTments Correction Worksheet The correction worksheet is where students review the problems they got wrong. The student is asked to record the problem set and ASSISTment number to make it easier for the teacher to counter reference poor scores on a certain item with the students’ work. The student records why they got the problem wrong and then proceeds to show all the steps necessary to find the correct solution in the spaces provided. Below is the actual corrections worksheet for you to copy and use and some examples of student work using that worksheet. The ASSISTment Worksheet The ASSISTment worksheet is where students can record their work while doing a problem set. They simply write their name, the date, and the name of the problem set in the spaces provided. They can then go through the problem set and record their work for each number in the boxes. Record Sheet The record sheet is for recording which problem sets a student has done and their percent correct. This record sheet can be stapled to a folder for the students to keep track of their work. The final column is left blank for teach comments/notes. . 2008 Edition xlv ASSISTment Corrections: Name__________________________________________ In the space below, complete the sentence started and in the large space provided, record the complete solution to any problem you got wrong on the ASSISTments. Be sure to record the problem set and the ASSISTment number. Continue on notebook paper with the next problems. Problem Set: ASSISTment number: I got this question wrong because … Solution: Problem Set: ASSISTment number: I got this question wrong because … Solution: 2008 Edition xlvi Here are some examples of worksheets filled out by actual students in response to ASSISTment number 27844. ASSISTment #27844: Example worksheets filled out by students: 2008 Edition xlvii 2008 Edition xlviii ASSISTment Worksheet Student Name Date Problem Set Name Number:____________________ Number:____________________ Number:____________________ Number:____________________ Number:____________________ Number:____________________ Number:____________________ Number:____________________ Number:____________________ 2008 Edition xlix Record Sheet ASSISTment 2008 Edition Score: correct/total = % Comments l