1
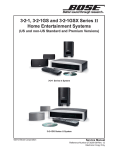
Performance Stopwatch User
Manual
Table of Contents
Valid for ACS100 ACS110 software version 4.01+
Performance Stopwatch Controls & Indicators ...................................................6
1. Turning on and off ...........................................................................................8
1.1: Turning Device On .....................................................................................8
1.2: Turning Device Off.....................................................................................8
1.3: Low Battery ...............................................................................................8
1.4: Resetting the Device .................................................................................9
1.5: Display Layout and Information ..............................................................10
2. Watch Mode ..................................................................................................11
2.1: Watch Mode............................................................................................11
2.2: Selecting Watch Mode ............................................................................11
2.3: Using the Watch Mode ...........................................................................11
2.4: Splits ........................................................................................................12
2.5: Stopping a Timer .....................................................................................12
2.6: Measuring Efficiency of an athlete for a given stroke ............................12
2.6: Using efficiency measurements ..............................................................13
2.7: DPS, SWOLF and Stroke Index Definitions:.................................................13
3. Race Mode .....................................................................................................14
3.1: Race Mode ..............................................................................................14
3.2: Selecting the Race Type ..........................................................................14
3.3: Selecting the Race Modes of Operation..................................................15
3.3.1: Normal Race Mode ..............................................................................15
3.3.2: Over Top Race Mode ............................................................................15
3.3.3: Starter Modes ......................................................................................15
3.4: Race Operation........................................................................................16
3.5: Aborting a Race .......................................................................................16
3.6: False Start ................................................................................................16
Performance Stopwatch User Manual
Page 1
3.7: Finishing a race ....................................................................................... 17
3.8: Sprint Mode ............................................................................................ 17
4. Interval Mode................................................................................................ 18
4.1: Interval Mode ......................................................................................... 18
4.2: Selecting Interval Mode .......................................................................... 18
4.3: Selecting Interval Time & Settings .......................................................... 18
4.4: Interval Mode Operation ........................................................................ 18
4.5: Appropriate Intervals and Parameters ................................................... 19
4.6: Seconds Modulus Mode ......................................................................... 19
4.7: Pause Function........................................................................................ 20
5. Pace Mode .................................................................................................... 21
5.1: Pace Mode .............................................................................................. 21
5.2: Selecting Pace Mode............................................................................... 21
5.3: Selecting Target Set time ........................................................................ 21
5.4: Adjusting Start Interval time................................................................... 21
5.5: Max Swimmers per lane ......................................................................... 21
5.6: Commencement of a pace interval ........................................................ 22
5.7: Race Pacing Mode................................................................................... 22
5.8: In Water Start Pacing Session ................................................................. 22
5.9: Timing selected swimmers per time cycle.............................................. 23
6. Speed Mode (Running and Swimming) ......................................................... 23
6.1: Speed Mode ............................................................................................ 23
6.2: Selecting Speed Mode ............................................................................ 23
6.3: Timing an Athlete.................................................................................... 24
6.4: Distance Per Stroke / stride .................................................................... 24
6.5: Synchronizing Pace Clocks ...................................................................... 24
Performance Stopwatch User Manual
Page 2
7. Splits Mode ....................................................................................................24
7.1: Splits Mode..............................................................................................24
7.2: Selecting Splits Mode ..............................................................................25
7.3: Split Lap Selection and Format................................................................25
7.4: Selecting Right Watch or Left Watch Splits .............................................25
8. Graph Mode...................................................................................................25
8.1: Graph Mode ............................................................................................25
8.2: Selecting Split Graph Mode .....................................................................26
8.3: Split Graph Scale......................................................................................26
8.4: Split Graph Mode ....................................................................................26
9 Pace Test mode ..............................................................................................26
9.1: Pace Test Mode .......................................................................................26
9.2: Using Pace Test .......................................................................................27
10 Beep Test mode ............................................................................................27
10.1: Beep Test Mode ....................................................................................27
10.2: Beep Test Operation .............................................................................28
10.3: Setup for Beep Tests .............................................................................28
11. Group mode.................................................................................................28
11.1: Group Mode ..........................................................................................28
11.2: Selecting Group Mode ..........................................................................29
12. Updating Firmware ......................................................................................29
13. FM Radio Mode ...........................................................................................30
13.1: FM Radio Mode .....................................................................................30
13.2: Selecting the FM Radio..........................................................................30
13.3: Using the FM Radio ...............................................................................30
14. Setup Mode .................................................................................................31
Performance Stopwatch User Manual
Page 3
14.1: Setup Mode .......................................................................................... 31
14.2: Selecting Setup Mode ........................................................................... 31
14.3: Multiple Squad usage ........................................................................... 31
14.4: Starts Mode .......................................................................................... 31
14.5: Pool Lane Type ...................................................................................... 31
14.6: Course Type .......................................................................................... 32
14.7: Beep Type ............................................................................................. 32
Either beeps or a spoken “Eight – nine – Go!” sound can be used in Interval
and pace modes (left button start). You can select here what sound you
prefer. ............................................................................................................ 32
14.8 PTst Stp .................................................................................................. 32
14.9: Start Interval (Start Spacing)................................................................. 32
14.10: Channel ............................................................................................... 33
15. Talk Feature................................................................................................. 34
15.1: Talk Feature .......................................................................................... 34
15.2: Using the Talk Feature .......................................................................... 34
15.3: The “Hail” Feature (Boatswains whistle) .............................................. 35
16. Additional Functions and Features ............................................................. 35
16.1: Additional Functions and Features ....................................................... 35
16.2: Clear Screen and Recall Functions ........................................................ 35
16.3: Headphones & Volume Control ............................................................ 35
16.4: Reaction Compensation Value.............................................................. 36
16.5: Undoing the Last Split ........................................................................... 36
16.6: Scrolling Through Splits ........................................................................ 36
17. Tips & Suggestions ...................................................................................... 37
17.1: Hints for Outdoor Use........................................................................... 37
Performance Stopwatch User Manual
Page 4
18. Fault Finding & System Setup ......................................................................37
18.1: Default Settings .....................................................................................37
19. Charging the Battery....................................................................................38
20. Caring for Your AutoCoach Device ..............................................................39
20.1: Storage ..................................................................................................39
20.2: Handling ................................................................................................39
20.3: Resetting ...............................................................................................39
Performance Stopwatch User Manual
Page 5
Performance Stopwatch Controls &
Indicators
Note: There are three types of button presses on buttons ① and ②. A “Short
Press” is a single press generally lasting less than 0.5 seconds. A “Long Press” is a
single press generally lasting more than 0.5 Seconds duration. A “Double Press”
consists of two single presses in quick succession.
① – Right Button
- Right Lane Watch Start/Split/Stop
- ON/OFF button (when Unlock is also pressed)
② – Left Button
- Left Lane Watch Start/Split/Stop
- ON/OFF button (when Unlock is also pressed)
Performance Stopwatch User Manual
Page 6
③ – Unlock Button
- required to use Menu and Select Dial functions
④ – Press to Talk Button (PTT)
- activates talk feature
⑤ – Microphone
⑥ – Headphone Socket
DO NOT PLUG IN SPEAKER UNIT USB CABLE!!!
⑦ – Mini USB Port
⑧ – Select Dial
⑨ – Volume/Menu Dial - when rotated clockwise past full volume
the device will speak aloud all times
⑩ – Left LED Indicator
- flashes when Left Lane Stopwatch is active
- flashes when device is transmitting audio
⑪ – Right LED Indicator
- flashes when Left Lane Stopwatch is active
- flashes when device is receiving audio
⑫ – Charging Indicator
- lit when device is charging
- no lit after fully charged
⑬ – Screen
⑭ – Strap attach point
⑮ – Advanced Stopwatch speaker
Performance Stopwatch User Manual
Page 7
1. Turning on and off
1.1: Turning Device On
To turn on the device, hold down the Unlock
Button ③ (left side button) and either the Right
top Button ① or the Left top Button ②. The
device will turn on. The device will resume the last
state it was in before it was turned off. If you have
a name registered in your device, it will be
displayed on this power-on screen.
1.2: Turning Device Off
To turn off the device, hold down the Unlock
Button ③ (the left side button) and either the
Right top Button ① or the Left top Button ②.
The device will warn the user that it will turn off
by announcing “Shutdown”. If you continue to
hold the buttons down, the device will turn off
while simultaneously announcing “Off”. The unit
will automatically turn off after approximately 45
minutes of inactivity.
1.3: Low Battery
When the battery level gets too low, a “Low
Battery” icon will be displayed along with an
announcement “Flat Battery”. Soon following the
device will announce “Off” while shutting down.
It is recommended to recharge the device to
prevent any loss of data.
Performance Stopwatch User Manual
Page 8
1.4: Resetting the Device
The unit can be reset to factory defaults holding
down the Right Button ① and Left Button ②
simultaneously until the top two LED indicators
momentarily flash ( between 4 and 10 seconds,
depending on the model and hardware version)
When the two buttons are held down, the device
announces “Rebooting!” to warn the user that the
device will soon be reset. The boot screen displays
the software build date and model number of the
device.
Performance Stopwatch User Manual
Page 9
1.5: Display Layout and Information
The standard display layout
is shown on the right. This is
the default display of the
Stopwatch.
The top line shows the
current battery level on the
left side and the current
time on the right side. When
a stopwatch is started, the
top line will be replaced with
the appropriate running
timers on the top.
The upper section of the middle area is the right lane stopwatch. This is where the
active timer and recorded results will always be displayed in the large font. The
small font times are the recorded split times or speed.
The bottom section of the middle area is the left lane stopwatch area. The display
of the active time, split times, and results are the same as the right lane
stopwatch. If measured, stroke rate and distance per stroke can also be seen here.
The bottom line displays the current mode and settings. The current mode is
shown in the bottom left and the mode settings are shown in the middle and/or
right side.
On color Stopwatches, the display is automatically dimmed after 90 seconds from
last use, in order to conserve display and battery life. On B&W Stopwatches, the
backlight is turned off instead. Pressing any button will re-activate display /
backlight display, usually the Unlock Button is pressed for this purpose.
Performance Stopwatch User Manual
Page 10
2. Watch Mode
2.1: Watch Mode
Watch mode is the main mode where the
Stopwatch functions like a stopwatch. The
Stopwatch has two separate stopwatches
that can be started simultaneously or used
independently.
2.2: Selecting Watch Mode
When the device is on and no stopwatches are active, hold the Unlock Button ③
(Left side button) and rotate the Menu Dial ⑨ (top left button) until the screen
displays Watch in the lower left corner.
2.3: Using the Watch Mode
The Advanced Stopwatch has two separate stopwatches that can be started
simultaneously or used independently of each other. Traditional stopwatches
have a single timer controlled by two separate buttons where the Stopwatch has
two separate stopwatches that are both controlled by a single independent
button each.
The timer on the display counts to a maximum of
9h59m59s9 (9 hours, 59 minutes, 59.9 seconds).
Although this time is rounded to 0.1 seconds, the
stopwatch is actually being timed with a resolution
of 1/1024th of a second. When the right lane Watch
is not active, short press the Right top Button ① or
to immediately reset and start the right lane Watch.
This is similar for the left lane Watch with the Left
Button ②. The top status line will disappear and be
replaced with an upward counting cumulative timer
on the top on the right or left hand side.
When there are no active timers running, both stopwatches can be started
simultaneously by long pressing the Right top Button ①. The timers for the
stopwatches will be displayed on the top of the screen.
Performance Stopwatch User Manual
Page 11
2.4: Splits
When any timers are running, short press the top button to record a split time for the
corresponding stopwatch. While displaying the split times, the device will update the
display to show both incremental and cumulative splits.
The cumulative split time will be displayed in the larger font; the incremental split
times will be displayed scrolling from right to left as they are entered. During normal
use, the most four recent incremental splits will be seen listed. To view a past split
that has scrolled off the left of the display, rotate the top right button clockwise to
move all splits to the right. When a timer is stopped, a final split time will be
generated. The watch mode records a maximum of 60 splits per stopwatch.
2.5: Stopping a Timer
When a stopwatch is active, a long press on the corresponding button stops the
stopwatch. Upon stopping, the cumulative time(s) is displayed on the large font
display area. To manually clear the display, long press the Left top Button ②. To
recall the results after the display has been cleared, press the Unlock Button ③.
2.6: Measuring Efficiency of an athlete for a given stroke
Once the lap time and stroke-rate for an athlete have been determined, various
efficiency indexes can be automatically calculated and displayed. Firstly, to
measure a swimmer’s stroke rate while timing, short press the top Left Button
② at the instances a stroke cycle begins (e.g. hand entry). And then repeat 2
more presses at every stroke measuring point. As stroke rates usually vary each
lap, we recommend measuring stroke rate in the mid=swimming segment of each
lap. Stroke rates can be taken each lap for multi lap races and later recalled and
displayed. The Stopwatch will calculate the average stroke rate from the two
stroke cycles and use this reading in the stroke efficiency calculations.
The main efficiency index is called Stroke Index, and is the product of distance per
stroke (M) and athlete velocity (M/S). In addition the SWOLF rating (stroke cycle
count added to the lap time) and Distance Per Stroke are all displayed and
recorded on the Stopwatch. Best accuracy can be obtained when using “Speed”
mode as it uses data from the swim phase and excludes dive component of each
lap. If you take a stroke rate this will exclude the use of the left stopwatch for lap
timing.
Performance Stopwatch User Manual
Page 12
2.6: Using efficiency measurements
For elite freestyle swimmers Stroke Indexes can be as high as 5.5, but for junior
and smaller athletes readings may be 3 or 4. Indexes should not be used to
compare dis-similar athletes or between sprint and distance events. SI is best use
as an individual figure of merit and as a
84%
08:15.23
measure of individual progress.
1 28s79
2.3 60.7
Stroke indexes will be more accurate at L
A
long course pools, as they have a greater
P
percentage per lap in the swim phase. SWOLF 57
DPS 1.5
S
Stronger kicking will result in improved
S
T
indexes, but may not be maintained over
I
R
longer distances. Athletes with longer
Watch
50M
R.20
arms should have higher efficiency, all
other things being equal. Slower strokes such as Breaststroke will have lower
indexes (typically 1 to 3). Please note the past 200 swims recorded in Speed,
Watch, Group or Race modes are ready to be downloaded by connection of a
computer to the USB port, including all efficiency indexes.
2.7: DPS, SWOLF and Stroke Index Definitions:
Stroke: - A STROKE is a complete arm cycle for the given swim style. E.g. in
freestyle a stroke includes both arm pulls.
Stroke Rate:- Is the number of strokes per minute calculated in the swim phase
of the lap.
DPS:- Distance per stroke is the distance in meters covered per swim cycle. This is
relevant only in the swim phase, not dive or turns.
SWOLF:- The swimming Golf score is defined as calculated stroke count add time
in seconds. Stroke count is computed from the stroke rate in the swim phase of a
lap. Lower SWOLF scores indicate improved efficiency, and most pool gadgets
define SWOLF for just 25M pools. 50M SWOLF will be a little more than double
the 25M reading, as a greater proportion of the lap is in the swim phase.
Performance Stopwatch User Manual
Page 13
3. Race Mode
3.1: Race Mode
Race mode is the mode that can be used to simulate races. This mode is similar
to the stopwatch mode except that it includes special functions designed
specifically for races. In this mode, the Stopwatch can allow users to effortlessly
start races. The sounds and times recorded can also be conveyed with the wireless
connections of an AutoCoach LED Sign and an AutoCoach Wireless Speaker Hub.
These features allow the user to easily start and time a race with minimal effort.
3.2: Selecting the Race Type
When the device is on and no stopwatches
are active, hold the Unlock Button ③ (the
side left button) and rotate the Menu
Dial ⑨ (top right button) until the screen
displays Race in the lower left corner. The
bottom right corner of the screen is the
race mode. There are five race modes
available to choose.
1) “Single” mode means no intermediate splits will be recorded only a single
time will be recorded. The stopwatch will be stopped as soon as the
corresponding button has been short pressed.
2) “Splits” mode allows the user to record split times. The operations to
record a split or stop the stopwatch are the same as Watch mode (short
and long press respectively).
3) “Aths” mode uses a gun noise rather than a start beep and is used for
athletics track and field races.
4) “Dstnce” mode uses give cumulative times and is suitable for longer
events, using a gun start sound.
Performance Stopwatch User Manual
Page 14
3.3: Selecting the Race Modes of Operation
In addition to the five race types, there are five race meet modes available. These
are selected under the “Setup” menu, as they are not commonly changed. When
in the Setup menu, rotate the upper left button to find the starting method, and
twist the upper right button till the desired mode is shown.
3.3.1: Normal Race Mode
In Normal race mode, exit whistles are generated at race completion (Single and
Splits race types only). In addition to the race start signals, the watch also times
two lanes. This is default setting for race mode.
3.3.2: Over Top Race Mode
In Ovr Top race mode, exit whistles are not generated at race completion (any
race type). In addition to the race start signals, the watch also times two lanes.
This is race mode is used for race meets where more events can be raced in a
given time, but requires the swimmers to remain in the water holding onto a lane
rope whilst the next race is started, then exiting the pool whilst the race is in
progress.
3.3.3: Starter Modes
In STR Top and Str Normal modes, the watch only generates the start signals and
does not perform timing functions. These modes are commonly used by race
officials who act independently from race timing people. A special starter mode is
Str Man, this mode allows officials to start without blowing the whistle and
announcing “take your marks” themselves. The left top button will announce
“take your marks”, the right top button will generate the Start signal, everything
else is according to the following explanation.
Performance Stopwatch User Manual
Page 15
3.4: Race Operation
To sound the starting whistle, short
press the Left top Button ②. For
backstroke races, a second short
press will sound the second whistle.
A short press on the Right top
Button ① will sound “Take Your
Marks” and a following press on the
Right top Button will sound the
start beep and start both
stopwatches.
83%
Race
Normal
Splits
Short press
“L”button
83%
17:14:39
^-Whistle
Marks-^
3.5: Aborting a Race
If any ready signals have been
sounded but the race has not
started, the race can still be
aborted. A long press with the Left
top Button ② will generate the
message “Stand Down” and abort
the race.
Normal
Splits
Short press
“R”button
83%
17:14:44
^-Abort
Race-^
17:14:40
Marks-^
Race
Race
3.6: False Start
L
A
P
Performance Stopwatch User Manual
Long press
“L”button
83%
^-Whistle
Ready !
For races where only a single athlete
is timed, after stopping the desired
stopwatch, a subsequent long press
on the same button will abort the
other timer and not display its
result.
After a race has been started, a
double press on the Right top
Button will stop the race and start
the “false Start” alarm sound.
17:14:37
Race Normal
Splits
Long press
“L”button
83%
17:14:50
On Marks !
L
A
P
Normal
Splits
Short press
“R”button
0.1
0.1
False Started !
Race Normal
Double press
“R”button
1
1
Race
Stood Down !
Normal
Splits
Page 16
Splits
3.7: Finishing a race
After a race has concluded, use a long press on the Left top button to signal the
swimmers to exit the pool or move to the “over the top” position of the lane. This
operation also saves the last race result file for use in importing into race
management recording software.
3.8: Sprint Mode
Sprint mode is for track and field,
1) Left press signals “On your Marks!”
2) Right Press signals “Set!”
3) Second right press makes a starters Gun sound and start the race.
3.9: Distance/Horn Mode
“Distance” and “Horn” mode are special modes that are included for the use of
conducting races with many people such as open water swimming or triathlons.
These two modes operate very similarly to the “Splits” mode. The main
differences are the starting announcements and the way the times are recorded.
Similar to “Splits” mode, a short press with the Left top Button ② will sound the
starting whistle. Unlike the “Splits” mode, a short press with the Right top Button
① will sound “On Your Marks” (instead of “Take Your Marks”). After the “On Your
Marks” announcement, a consequent short press on the Right top Button ① will
sound the starting signal. The starting signal for “Distance” mode is a starting gun
while the starting signal for “Horn” mode is a horn.
Unlike “Splits” mode, “Distance” or “Horn” mode does not assume an individual
is swimming laps in a pool. Instead it assumes that there are many people
swimming and display times and data respectively. In the special modes, a short
press on a top Button while timing will display the cumulative time and the
position of that time. Although only the cumulative times are displayed, the time
differences are also recorded and can be viewed in Splits mode.
Performance Stopwatch User Manual
Page 17
4. Interval Mode
4.1: Interval Mode
Interval mode is a mode which can help the coach conduct interval training. With
this mode, users can easily start interval training by simply pressing a top button.
The Stopwatch also eliminates the need to constantly do mental arithmetic before
conveying the time to a certain swimmer. When athletes need to have a periodic
rest during sets, then it is suggested to use Pace mode instead. Interval mode is
best for shorter intervals.
4.2: Selecting Interval Mode
When the device is on and no stopwatches
are active, hold the Unlock Button ③ (left
side button) and rotate the Menu Dial ⑨
top left button until the screen displays
Interval in the lower left corner.
4.3: Selecting Interval Time & Settings
To set the interval time, hold the Unlock
Button ③ and rotate the Select Dial ⑧ (top right button) to the desired interval
duration. A special mode that can also be selected is the Seconds Modulus mode,
indicated by a “[10]” (see section 4.6 for further details).
4.4: Interval Mode Operation
There are 2 basic types of interval training, beep starts and race starts. One of two
different interval training modes can be selected according to the type of interval
training desired.
To start a set with race starts, short press the Right top Button ① five seconds
prior to commence the interval. The announcement “Take Your Marks” and then
will sound the starting signal. These will repeat at every interval until the user
stops the set by long pressing the Right Button ①. To prevent athletes from
trying to anticipate the start beep timing, there is a randomized time delay
between the “Take Your Marks” announcement and the starting signal.
Performance Stopwatch User Manual
Page 18
To start a set with beep starts, short press the Left top Button ② 5 seconds prior
to the commencement of the interval.
The first 2 beeps are lower in pitch and arrive in 1 second intervals before the final
higher pitched start beep.
4.5: Appropriate Intervals and Parameters
The appropriate interval time will be deducted displaying the actual time.
The display uses the first split time to set the maximum limit for a valid time.
If the user tries to take a split time before the next interval should have started,
the button press will be ignored.
4.6: Seconds Modulus Mode
By pressing the side left button and turning the top right button anti clockwise
to it furthest point will indicate [10] interval.
There is a special interval mode that allows
for more versatility while conducting interval
training. Unlike the usual mode where an
athlete’s actual time is recorded, the mode
only records the last two digits of the time
that would have been recorded (e.g. 34.2
seconds would be recorded as 4.2; 29.6
seconds would be recorded as 9.6). It is
assumed that the athlete should know how
fast he/she should be. This mode is used when you have many athletes and only
one Stopwatch, and allows you to get times for many athletes.
Performance Stopwatch User Manual
Page 19
4.7: Pause Function
While conducting interval training, the user
can pause the training by long pressing Left
top Button ②. This feature allows coaches to
let their athletes rest during a set or be briefed
by the Coach. While paused, the timer will still
continue running; however, the start beeps or
the start announcements will be replaced by
soft, muffled beeps that signal at every
interval length from the Stopwatch as a
reference for the Coach. These reference beeps will only be played from the
Stopwatch. To recommence the beeps by long pressing the Left top Button ②.
Performance Stopwatch User Manual
Page 20
5. Pace Mode
5.1: Pace Mode
Pace mode is a mode where the user can help
athletes train at a target time cycle with
periodic recovery or at a target race pace.
5.2: Selecting Pace Mode
When the device is on and no stopwatches are active, hold the Unlock Button ③
(left side button) and rotate the Menu Dial ⑨ (top left button) until the screen
displays Pace in the lower left corner.
5.3: Selecting Target Set time
Rotate the Select Dial ⑧ (top right button)
until the desired target set time is displayed.
5.4: Adjusting Start Interval time
To set your time interval cycle, rotate the
Menu Dial ⑨ (Top left button) until the
desired set time is displayed. When a cycle
time is specified, on the top status line the
maximum number of swimmers per lane and valid time range is displayed. The
start interval is adjusted between 5 seconds to 20 Seconds by holding the Unlock
Button ③ (Left side button) and rotating the Select Dial ⑧ (top right button)
5.5: Max Swimmers per lane
The maximum number of swimmers per lane
in pace mode is set by holding in the
“unlock” button and rotating the right dial.
The top status line display the time spacing (
set in the setup menu ) and the number of
swimmers starting per lane. This setting is
used to eliminate unnecessary beeping and
enhance the valid range of lap times in Pace modes.
Performance Stopwatch User Manual
Page 21
5.6: Commencement of a pace interval
To commence the pace interval use the top left button for beep intervals or the
top right button for the race start intervals. The appropriate interval time will be
deducted displaying the actual time.
5.7: Race Pacing Mode
Pacing over a race distance with a preset
lap time can be done by setting the Cycle
time “Cont”. The target Lap time can be
adjusted by tenths of seconds by holding
the Unlock Button ③ (left side button)
and rotating the Select Dial ⑧ (Top right
button). This mode is used for one athlete
per lane and beeps commence two
seconds prior to each preset lap.
Like Interval mode, short pressing the Right top Button ① automatically starts
the swim with a dive entry start announcement. In order to compensate for the
first lap being faster due to a dive start, the Lap#1 time (see Setup mode) is
subtracted for the first lap split only.
After the athlete commences at the designated pace, warning beeps will signal
the start of the next interval. When the athlete touches the wall, the user should
press the corresponding button to record the actual lap/split time. These
recorded times can be reviewed and compared with the target lap times for
analysis.
5.8: In Water Start Pacing Session
Like Interval mode, pressing the Left top Button ② starts the “ready” beeps
followed by the higher pitched starting beep. The first lap in this mode is not
compensated, as no dive entry is assumed. These are the only differences
between the two modes, all other operations and features are the same.
Performance Stopwatch User Manual
Page 22
5.9: Timing selected swimmers per time cycle
A long press on the left button will set the display to immediately skip to the first
swimmer on the next time cycle.
6. Speed Mode (Running and Swimming)
6.1: Speed Mode
Speed mode is the mode where the coach can monitor an athlete’s speed over
specific sections in a given course. These sections are broken down according to
the specified course length. The common course types are 25m (short course) and
50m (long course). For athletics there is also a 400M length, designed for the 84M
straights and the 116M ends of an athletics track. The 25Y, 25M & 33.3Y short
course setting splits a lap at the 15m point and the end point. The long course
pools are taking 4 splits a lap at the 15m, pool centerline, 15m before end and
pool end. This will always indicate velocity in meters per second over the four
given sections of each lap.
Commence by pressing the top right button. The lap indication is displayed as 1.1
where the first number indicates the lap number and the second number
represents the split section. For a long course, this means “2.4” would be the 4th
section (35m to 50m) of the 2nd lap. These intermediate split points are generally
indicated by lane rope color markings. The course settings can be found in the
Setup mode (see section 14.5 for further instructions).
6.2: Selecting Speed Mode
When the device is on and no
stopwatches are active, hold the
Unlock Button ③ and rotate the Menu
Dial ⑨ until the screen displays Speed
in the lower left corner. The course
setting is shown in the bottom middle
and the Reaction Compensation Value
is shown on the bottom right.
Performance Stopwatch User Manual
Page 23
6.3: Timing an Athlete
To start the stopwatch, short press the Right Button ① (same as Watch mode).
Lap 1.1, shown in red, indicates the 1st split of the 1st lap has commenced. Once
the swimmer’s head passes the 15m mark, another short press on the Right
Button ① advances the lap counter to Lap 1.2. The scrolling number section
above the cumulative split time shows the speed split in meters per second (m/s).
This speed is an indication for the “Start” phase of the race. After the athlete
completes the second section and his/her head passes the next section split
marker, another press of the Right Button ① advances the Lap Counter to Lap
1.3 (for 50Y, 55Y & 50M) or Lap 2.1 (for 25Y, 33Y & 25M).
6.4: Distance Per Stroke / stride
At the completion of each lap, if the stroke rate has been measured, the
Distance per stroke will be calculated and displayed. For 50Y, 55Y & 50M pools
setup, the last 35M of each lap time is used to calculate DPS more accurately
than as described in Watch Mode. For 25Y, 33Y & 25M pools, the last 10M split
time is used for the calculation.
6.5: Synchronizing Pace Clocks
When the watch is not active, a long press on the Left Button will reset any LED
displays when used in “Pace Clock” mode for synchronizing to an existing pace
clock. Note: Before synchronizing, please operate at least one race start in race
mode, in order to set the internal clocks in the LED displays to that of the
Stopwatch time and date.
7. Splits Mode
7.1: Splits Mode
Splits mode is the mode where coaches can review data and results from the
previously timed race or set. Many sorts of useful information can be reviewed such
as split times, stroke rate, swim speed, and distance per stroke. This can be very useful
as it can provide detailed information that would usually be much harder to obtain.
Additionally, data and results can be reviewed for both the right lane and left lane
Watches.
Performance Stopwatch User Manual
Page 24
7.2: Selecting Splits Mode
When the device is on and no stopwatches are
active, hold the Unlock Button ③ and rotate
the Menu Dial ⑨ top left button until the
screen displays Splits in the bottom left
corner. All 60 splits times from both
stopwatches can be reviewed, showing the
incremental and cumulative split times. If
recorded, the stroke rates and distance per
stroke can also be reviewed.
7.3: Split Lap Selection and Format
To scroll through the split times from one stopwatch, rotate the Select Dial ⑧. To
scroll down the list, rotate the Select Dial ⑧ clockwise. To scroll up the list, rotate
the Select Dial ⑧ anticlockwise. The times display on the far most right are the
cumulative split times. The times inside the brackets are the lap times. Lap numbers
are indicated and the value right next to the lap number is the swim speed. If
recorded, the stroke rate is indicated by “Rate” and the distance per stroke by “DPS.”
7.4: Selecting Right Watch or Left Watch Splits
To switch between right lane and left lane results, short press the button for the
corresponding stopwatch. To select the right lane Watch results, short press Right
Button ①. To select the left lane Watch results, short press Left Button ②.
8. Graph Mode
8.1: Graph Mode
Graph mode is a mode that makes it easier to quickly analyze data by graphically
displaying the results from the previously timed race or set. Instead of having to
look at numbers and search for the fastest and slowest split times, users can
quickly and easily access the information they have obtained. The relative
information about a race or set can quickly be conveyed to the user saving time
and energy allowing for more efficient coaching.
Performance Stopwatch User Manual
Page 25
8.2: Selecting Split Graph Mode
When the device is on and no stopwatches
are active, hold the Unlock Button ③ and
rotate the Menu Dial ⑨ until the screen
displays two times in the bottom left corner.
The bottom right corner should display an “R”
or an “L” indicating Right and Left
respectively.
8.3: Split Graph Scale
The two numbers shown in the lower left corner are the minimum and maximum
split times previously recorded. The bar graph is scaled with maximum +10% and
minimum -10% of these times as upper and lower vertical axis limits. Each bar
shown represents each of the split times recorded with the left most bar being
the first split time and the right most bar being the last split time. If only one lap
was timed and recorded, no graph is displayed as it conveys no useful data.
8.4: Split Graph Mode
To scroll through the different types of graphs, hold the Unlock Button ③ and
rotate the Select Dial ⑧. From anticlockwise to clockwise, the graphs are split
times and speed, split time only, and speed only. If no speed data was recorded,
the speed data is not displayed. The maximum and minimum speeds recorded (in
meters per second) are displayed at the top of the display.
9 Pace Test mode
9.1: Pace Test Mode
Pace Test mode is similar in operation to
Pace mode but the time cycle is reduced
each cycle. This mode is commonly used as
a standardized fitness or endurance test
that allows swimmers performance to be
monitored periodically. Like Pace mode,
Performance Stopwatch User Manual
Page 26
other watches in Group mode can expand this mode for multiple devices. In this
mode, the lap number and swimmers lane position are announced 2 seconds prior
to each starting signal, so athletes know what level they are on. So “4.3” means
the fourth repeat for the third swimmer in the lane.
9.2: Using Pace Test
When used with the LED display, the lap number and current time cycle are
displayed. Athletes simply swim till they can no longer keep up with the beeps,
and record what level they achieved. Some clubs call this test “king of the hill”.
Used for freestyle, typically starts at 1:30 reducing by 1 second each cycle. Form
strokes may start at a longer cycle time. Normally, time splits etc. are not used,
allowing the coach to encourage and observe the athletes. Pace test mode will
automatically stop when the Cycle time reduces down to the Set time, unless
manually stopped by the watch operator with a long press right button. To reduce
annoying beeps, set max swimmers per lane to your max swimmers present in
any lane in the pace mode window first. Make sure no other Stopwatches you
may have are in use in order to avoid prematurely stopping the set!
10 Beep Test mode
10.1: Beep Test Mode
Beep Test mode is the standard 20 Meter
shuttle run test used for dry land fitness
evaluation. AutoCoach supports four
modes – AIS (Australian Institute of Sport)
and BNCF (British National Coaches
Federation), WP10 and WP20 are
designed for water polo pool configuration fitness tests. The calculated VO2Max
levels the ACS100 Watch displays are only valid for the AIS mode, and are of
little value below approx. level 5. To change between the two Beep tests, hold
the Unlock Button ③ and rotate the Select Dial ⑧.
Performance Stopwatch User Manual
Page 27
10.2: Beep Test Operation
The Beep Test Level spoken or displayed is the last level completed, and when a
“split” is taken after an athlete has failed to complete the run in time for the
next beep, the Watch records the prior lap run as this was the highest successful
run completed. The “Lap” number recorded is the Athlete number that has
pulled out of the test. If you provide number cards to the athletes, advise them
to take the next consecutive number when they drop out of the test, allowing
you to later record Names to their performance levels reached. The Left and
Right Buttons allow two distinct groups to be recorded (e.g. male and female).
10.3: Setup for Beep Tests
Place markers 20M apart on level ground, allowing 5M further for deceleration.
Running must be “Start-Stop” not continuous, with each athlete coming to a
complete stop and not running till the next starting beep. Ensure they are
warmed up and have shoelaces tightened before starting the test, and allow
suitable space for the numbers participating. A maximum of two groups of 64
athletes can be tested with an ACS100. After completing level 21 (never reached
on a verified test!) the test will automatically terminate.
11. Group mode
11.1: Group Mode
Group mode is a special mode that allows multiple Stopwatches to be linked
together wirelessly. With this feature, one Stopwatch can simultaneously start up
to five additional Stopwatches. This allows for accurate timing for race events or
simply better synchronization for training procedures. Individual LED signs can
also be assigned a Group number so that it will be
synchronized with a specific Stopwatch. This
mode can also be used to add extra lanes to the
other modes (Race & Interval and Pace) that way
more than two lanes can be used.
Performance Stopwatch User Manual
Page 28
11.2: Selecting Group Mode
When the device is on and no stopwatches are active, hold the Unlock Button ③
and rotate the Menu Dial ⑨ Top Left button until the screen displays Group # (#
is any digit from 0 to 4) in the lower left corner.
12. Updating Firmware
Either as part of the installation, or as an emailed or downloaded file you can
update the firmware of an AutoCoach Device. Before upgrading, be sure to have
at least 30 percent battery level remaining and do not operate any controls or
other programs on your computer whilst the upgrade is in progress! After a
successful upgrade, the unit will then reboot. Please see the AutoCoach
Manager Firmware update guide for more details.
Performance Stopwatch User Manual
Page 29
13. FM Radio Mode
13.1: FM Radio Mode
FM Radio mode is a mode which allows the user to listen to FM radio. The audio
for the radio can also be transmitted to other devices.
13.2: Selecting the FM Radio
When the device is on and no stopwatches are active, hold the Unlock Button ③
and rotate the Menu Dial ⑨ until the screen displays FM Radio in the lower left
corner.
13.3: Using the FM Radio
The FM radio requires an external antenna,
thus headphones are necessary to use this
mode. If no headphones are plugged in, “Plug
in Phones!” will be displayed on the screen.
The top of the display shows the volume level
and also the signal strength. To change radio
frequency, rotate the Select Dial ⑧ until the
desired station is selected. To adjust the
volume, rotate the Menu Dial ⑨ until the
desired volume is set.
Performance Stopwatch User Manual
Page 30
14. Setup Mode
14.1: Setup Mode
Setup mode is a mode where the user can change many various settings. Each
AutoCoach device has a network ID unique to an organization. This allows
different organizations to simultaneously use AutoCoach equipment in the same
area without interfering with each other. This ID number can be seen in the
bottom right corner of this mode.
14.2: Selecting Setup Mode
When the device is on and no stopwatches are active, hold the Unlock Button ③
and rotate the Menu Dial ⑨ until the screen displays Setup in the lower left
corner.
14.3: Multiple Squad usage
If you wish to have multiple squads using different systems at the same venue
simultaneously, please set each squad to a different channel at least 3 channels
apart.
14.4: Starts Mode
The Race starting method is selected here
(Ovr Top, Normal, Str Nor, Str Top, Str Man )
as per description in Race Mode. Select the
desired method and save it by long press on
the Right Button ① until the device
announces “Store” indicating that the
setting has been saved.
72%
18:26:11
Lanes 987654321
Squad
2
Starts Normal
Channel 12
Day
Thu
Starting Method
Setup
NET: 0103
14.5: Pool Lane Type
The system can be setup for 4 types of lane numbering. To change the lane
numbering, rotate the Menu Dial ⑨ until Lanes is selected, then rotate the Select
Dial ⑧until the desired lane numbering type and long press the Right top Button
① until the device announces “Store.”
Performance Stopwatch User Manual
Page 31
14.6: Course Type
The course type setting determines the length
of distance used to calculate speed and
distance per stroke. To change the course type,
rotate the Menu Dial ⑨ until Course is
selected, then rotate the Select Dial ⑧until
the desired course type and long press the
Right Button ① until the device announces
“Store.” The system can be setup up for 25y,
25m, 33.3y 50y, 55y & 50m pools. There are
also 100m and 400m athletics track options.
14.7: Beep Type
Either beeps or a spoken “Eight – nine – Go!” sound can be used in
Interval and pace modes (left button start). You can select here what
sound you prefer.
14.8 PTst Stp
Here we select the decrease in interval for each level in pace test mode. Steps
from 0.5 up to 5 seconds can be selected. E.g. at 2 seconds step size, starting at
1:30 pace test, the next 100 will be at 1:28, then 1:26 etc.
14.9: Start Interval (Start Spacing)
The time spacing between swimmers
departing in pace and pace test mode is set
here. Usually for 25M pools set to 5S, for 50M
pools set to 10S. After adjusting with the right
dial press the Right Button till “Store” is
announced.
Performance Stopwatch User Manual
Page 32
14.10: Channel
On the rare occasion that other wireless signals
such as WiFi and Bluetooth interfere with any
AutoCoach network, the wireless channel used
for communication can be changed. To change
the channel, rotate the Menu Dial ⑨ until
Channel is selected, then rotate the Select Dial
⑧until the desired course type and long press
the Right Button ① until the device announces
“Store.” The Default Channel is Channel 15 and
should be suitable for most environments.
Performance Stopwatch User Manual
Page 33
15. Talk Feature
15.1: Talk Feature
The Talk feature is a special function that
allows the user to transmit audio. This
feature allows users to communicate
with any other device in the system. The
user can also choose the specific device
or person they wish to communicate
with. This useful feature can be used in at
any time in any mode there is always a
channel for communication.
15.2: Using the Talk Feature
Press the Press to Talk button (PTT) ④
to activate the talk feature. When the PTT
button ④ is held, “PTT” will appear in
the bottom left corner indicating that the
talk feature is active. The bottom right of
the screen shows the target audience
(see below for more details). When the
Stopwatch is receiving audio from
another device, the top status line
displays the signal strength and the
device ID of the transmitting device.
• - All All devices
• Speakers
All speakers
• Watches
All Stopwatches
• Athletes
All athletes
• Lane #1-#2
Corresponding lane
• Athlete #0-#16
Corresponding individual athlete
Performance Stopwatch User Manual
Page 34
15.3: The “Hail” Feature (Boatswains whistle)
Pressing the buttons on each side at the same time makes the Watch transmit
an alert whistle to contact users holding other AutoCoach stopwatches.
16. Additional Functions and Features
16.1: Additional Functions and Features
The Stopwatch comes with many additional features. These features are only
included in certain modes. The data recorded from using these features will be
recorded throughout all the modes and can be saved for future references.
16.2: Clear Screen and Recall Functions
After timing a race or set, the results are displayed on the screen. These results
will be cleared from the screen after approximately 12 seconds. The user can
manually clear the screen by long pressing the Left Button ②. To recall previous
results not shown on the screen, press the Unlock Button ③. These functions
can be used in any mode with timing capabilities.
16.3: Headphones & Volume Control
The Stopwatch also comes with
an input for headphones. When
headphones are attached, the
Stopwatch will read out mode
selections, settings, and times
recorded. This allows coaches to
focus their attention on their
athletes rather than their
stopwatches. The headphones
work for all modes.
The volume can be adjusted by rotating the Menu Dial ⑨. The Stopwatch will
generate a beep sound indicating the current volume level. This works whether
or not headphones are used. This feature is available in any mode where turning
the Menu Dial ⑨ has no other function.
Performance Stopwatch User Manual
Page 35
16.4: Reaction Compensation Value
Timing with traditional stopwatches is
usually out of time with official timings due
to human reaction delays. Generally, human
reactions take place around 0.18 to 0.24
seconds after the stimulus was received by
the person. The Reaction Compensation
Value will adjust the time at which the
stopwatch starts timing. This means if the
Reaction Compensation Value was set at 0.22, the stopwatch will start timing at
0.22 seconds instead of starting from 0.00 seconds. This will make stopwatch
times closer to the times recorded by an automated system. If the user can
anticipate the start of the timing (e.g. being the starter), no compensation is
necessary.
In Watch and Speed mode, the Reaction Compensation Value is located in the
bottom right corner. The Reaction Compensation Value in the format “R .##” can
be adjusted by pressing Unlock ③ and rotating the Select Dial ⑧ only when
there are no active operations (no timers or talk functions running). The reaction
time can be set from 0 to 0.4 seconds.
16.5: Undoing the Last Split
In Watch and Race modes, the last split can be “undone” by a double press on the
corresponding knob button. This “undo” operation can only be used when the
timers are stopped. When a timer is running, this feature will function as stopping
a watch without recording the last split. This feature can be useful in many ways
such as missing the end of a race and the watch is still running.
16.6: Scrolling Through Splits
In Watch, Speed, Interval, and Race modes, the splits recorded can be quickly
reviewed without having to switch modes. When there are no active stopwatches,
rotate the Right Button ① to browse through the splits. For a more detailed analysis
of results, switch to Splits or Graph mode.
Performance Stopwatch User Manual
Page 36
17. Tips & Suggestions
17.1: Hints for Outdoor Use
If the AutoCoach system is used at an outdoor pool, bright sunlight may make it
difficult to see or read the devices. Like many handheld devices with a color
display (e.g. mobile phones), the Stopwatch can be hard to read in bright sunlight
also. To relieve this problem, use headphones with the Stopwatch to receive
audio feedback allowing easy use without looking at the screen.
It is recommended that the ACS250 SmartDisplay be used during outdoor use as
it is more easily read in bright sunlight than the Color version Stopwatch. For
outdoor pools operation during daytime, we recommend you use the ACS110
Black and White Stopwatch for improved visibility. Using LED displays, in order to
maximize visibility please position the ACS250 SmartDisplay so that the sun is
behind the unit. The SmartDisplay has a Brightness adjustment, and for indoor
use where possible, setting the brightness below 5 will more than double battery
life.
It is also recommended that the SmartSpeaker be used during outdoor use as it
can provide audio feedback if it becomes too hard to see or read the other
devices. The Speaker can be set to “timing” mode so eliminating the need for
anyone to look at the Stopwatch or SmartDisplay.
18. Fault Finding & System Setup
18.1: Default Settings
If you are unable to get your watch to communicate to other AutoCoach devices,
firstly set each unit to the factory defaults as described in 1.3. If still unable to
communicate, please check the firmware versions are all the same, and that the
network IDs are the same. By using AutoCoach Manager and plugging in your
device, you can use the “ver” command to list all software version and settings.
Please contact AutoCoach support if still unable to operate correctly.
Performance Stopwatch User Manual
Page 37
19. Charging the Battery
The Stopwatch can be recharged with the supplied AC Adapter (5V 1000mA USB
socket) or by connecting the device to a PC or MAC via the supplied Mini USB
cable.
From 0% battery level, charging usually completes within 3 hours. It is
recommended to recharge when the battery level is below 30% to ensure there
is enough power for a day’s use.
DO NOT USE THE ACS320 or ACS300 charge cable to charge the Stopwatch! This
cable may fit into the headphone socket but may cause damage!
Only use the supplied mini USB cable and insert into the socket on the right front
side of the Watch.
Performance Stopwatch User Manual
Page 38
20. Caring for Your AutoCoach Device
20.1: Storage
Like a mobile phone or mp3 player, do not store in hot or humid places (i.e.
besides the pool). Like most electronic devices, the Stopwatch is NOT
WATERPROOF. The supplied lanyard or wrist strap can help prevent dropping the
device in the water. Immediately wipe any water off the unit in order to protect
it from water damage. If accidentally dropped into water, IMMEDIATELY RETURN
to AUTOCOACH for repair. Leaving a water damaged unit for a few days before
repair may result in the circuit boards becoming corroded and un-repairable,
whereas prompt return may be an inexpensive cleaning and moisture treatment.
20.2: Handling
DO NOT place the Stopwatch with the display facing down on any hard surface as
this could scratch the screen. Keep in a carrying case or soft pouch for best
protection. A soft cloth may be used to wipe the screen if it requires any cleaning.
20.3: Resetting
If the program fails to respond or the device will not turn on, try performing a
reset as describes in section 1.4. Please report any problems or errors
encountered so that a solution may be found.
Performance Stopwatch User Manual
Page 39