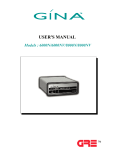
1
USER'S MANUAL Models : 6000N-5/6000NV-5/8000N-5/8000NV-5 GINA 6000N-5,6000NV-5,8000N-5, & 8000NV-5 User’s Manual TABLE OF CONTENTS GENERAL INFORMATION Introduction GINA Models GINA 6000N-5 / 8000NV-5 GINA 8000N-5 / 8000NV-5 System Requirements Spread Spectrum Technology Advantages of Spread Spectrum Technology Definitions of Terms FCC Requirements FCC Statement Customer Support Product Returns Safety Considerations 1-1 1-1 1-1 1-1 1-1 1-2 1-2 1-2 1-3 1-5 1-6 1-6 1-6 1-7 GINA MODELS 6000N-5, 6000NV-5, 8000N-5, & 8000NV-5 Overview Operation GINA Programming Overview General Operation Front Panel Rear Panel Setup Mode Repeater Setup Getting Started Point-to-Mulitpoint Without Repeater Point-to-Multipoint With Repeater Channel Frequency Table Voice Operation (Models 6000NV-5 and 8000NV-5 Only) 2-1 2-1 2-1 2-1 2-3 2-3 2-3 2-4 2-4 2-6 2-6 2-7 2-9 2-12 Command Set Specifications 6000N-5/6000NV-5 8000N-5/8000NV-5 3-1 3-7 3-7 3-9 Limited Warranty General Warranty Limitations 4-1 4-1 4-1 APPENDIX A: RS-232 Configuration Data APPENDIX B: Using an External Antenna with GINA APPENDIX C: System Block Diagram APPENDIX D: The ASCII Character Set A-1 B-1 C-1 D-1 i-1 ©2001 GRE America, Inc. All rights reserved. This material is the property of GRE America, Inc. Copying or reproducing this material is strictly prohibited. All violators shall be prosecuted to the fullest extent of the law. 3/01 (rev. 3) GINA User’s Manual ACCESSORY NOTES Instructions for EIA 442 / RS-232 Full Duplex Converter (12-4002) Instructions for EIA485 / RS-232 Half Duplex Converter (12-4003) ANTENNA NOTES 2.4 GHz Patch Antenna (30-0033) 900 MHz Omni Directional Magnetic Mount Mobile Antenna (30-0034) 900 MHz Omni Directional Antenna (30-0035) 900 MHz Yagi Antenna (30-0036) 2.4 GHz Linear Antenna (30-0037) 2.4 GHz Omni Directional Antenna (30-0038) 2.4 GHz Parabolic Dish Antenna (30-0050) APPLICATION NOTES World-Wide Applications Application Note 7100: Connection of GINA 6000N-5/8000N-5 to a Model 170 Traffic Controller Application Note 7104: Configuration of GINA RJ22 Jack Application Note 7111: Basic GINA Testing Procedures Application Note 7113: How Far Will It Go? Application Note 7117: Connection of GINA to Allen Bradley Series 5 PLC Application Note 7118: GINA Software Repeater Polling Active Path Reassignment PRODUCT NOTE Technical Information Note 7106 QUICK SETUP NOTE Windows® HyperTerminal quick setup guide i-2 ©2001 GRE America, Inc. All rights reserved. This material is the property of GRE America, Inc. Copying or reproducing this material is strictly prohibited. All violators shall be prosecuted to the fullest extent of the law. 3/01 (rev. 3) General Information GINA User’s Manual General Information Introduction This document is the User’s Manual for the GINA transceiver Models : 6000N-5,6000NV-5,8000N-5 and 8000NV-5. NOTE: Read this manual completely before you try to use any GINA product. GINA 6000N-5 / 6000NV-5 Model 6000N-5 is a standard GINA transceiver. Model 6000NV-5 has an additional voice handset for audio communication. GINA 6000N-5 is a stand-alone, high frequency data transceiver using spread spectrum technology. GINA 6000N-5 has a standard RS-232 serial data interface that can be driven asynchronously at rates to 38.4 K baud. GINA 6000N-5 receives and transmits data in the frequency range of 902 to 928 MHz at air speeds to 128 Kbps. GINA 6000N-5 can perform point-to-point or point-to-multipoint communication. GINA 6000N-5 contains a packet controller module with a custom communication protocol. GINA 6000N5 implements a subset of standard packet framing with a built-in Cyclic Redundancy Check (CRC). As the GINA 6000N-5 performs a CRC, if data is corrupted, GINA 6000N-5 will discard that data. To assure accurate data transmission your system (peripheral) is responsible for error verification. GINA 8000N-5 / 8000NV-5 Model 8000N-5 is a standard GINA transceiver. Model 8000NV-5 has an additional voice handset for audio communication. GINA 8000N-5 is a stand-alone, high frequency data transceiver using spread spectrum technology. GINA 8000N-5 has a standard RS-232 serial data interface that can be driven asynchronously at rates to 38.4 Kbps. GINA 8000N-5 receives and transmits data in the frequency range of 2.404 - 2.478 GHz at air speeds to 128 Kbps. GINA 8000N-5 can perform point-to-point or point-to-multipoint communication. GINA 8000N-5 contains a packet controller module with a custom communication protocol that provides communications handshaking, error detection, packet sequencing, flow control, and supports three repeaters to extend the communication range. GINA 8000N-5 implements a subset of standard packet framing with a built in Cyclic Redundancy Check (CRC). As the GINA 8000N-5 performs a CRC, if data is corrupted GINA will discard that data. To assure accurate data transmission your system (peripheral) is responsible for error verification. 1-1 © 2000 GRE America, Inc. All rights reserved. This material is the property of GRE America, Inc. Copying or reproducing this material is strictly prohibited. All violators shall be prosecuted to the fullest extent of the law. 3/01 (rev. 3) General Information GINA User’s Manual System Requirements For all GINA models, the only system requirement is an EIA232 (RS-232) peripheral or a personal computer (PC). When using a PC, any communications software package such as BitCom © , Procomm © , Crosstalk© , or Windows 95/98© Hyper Terminal mode. GINA is a highly secure spread spectrum radio. Figure 1-1. The GINA Transceiver Spread Spectrum Technology GINA uses spread spectrum technology, a technique originally developed by the U.S. military during World War II, to prevent the jamming of communications signals. Spread spectrum technology uses a narrow bandwidth radio frequency and spreads it over a wider portion of the bandwidth. Since the signal is spread out over the band, it renders narrow band jammers virtually ineffective. Additionally, the spread spectrum band can be used with low probability of interception, which is an ideal method of communication since it is ‘radio silent’ to a conventional receiver. Advantages of Spread Spectrum Technology Spread spectrum technology has many advantages. Among them are: • • System flexibility. Additions can be made easily. Interference immunity. Spread spectrum radios are immune to noise. 1-2 © 2001 GRE America, Inc. All rights reserved. This material is the property of GRE America, Inc. Copying or reproducing this material is strictly prohibited. All violators shall be prosecuted to the fullest extent of the law. 3/01 (rev. 3) General Information GINA User’s Manual • • • • Error-free communication. Automatic error detection is built into some models. Cost. Spread spectrum technology is inexpensive compared to an equivalent hard-wired installation. Data throughput. Spread spectrum technology is a transparent, real-time, point-to-point, and point-to-multipoint wireless network. Multi-channel. Spread spectrum radios have multiple channels that can be dynamically changed with software. It allows for repeaters, redundant base stations, and overlapping antenna cells. A great advantage is in the dynamic control of radio signal ‘peaks’ and ‘valleys.’ A typical spread spectrum radio signal is shown in Figure 1-2. Figure 1-2. Spread Spectrum Radio Signal A typical narrow band signal is shown in Figure 1-3. Figure 1-3. Narrow Band Radio Signal Definitions of Terms DATA INTERFACE — The asynchronous interface port provided for connectivity is a EIA-232 (RS232) standard. DIRECT SEQUENCE — Direct sequence is a technique that takes a 1-3 © 2000 GRE America, Inc. All rights reserved. This material is the property of GRE America, Inc. Copying or reproducing this material is strictly prohibited. All violators shall be prosecuted to the fullest extent of the law. 3/01 (rev. 3) General Information GINA User’s Manual narrow-band signal and spreads it over a broader portion of the radio frequency band. KEY-UP TIME — The time that a radio requires when switching from transmit to receive and vice-versa. There is no key-up time required due to an internal buffer. Except for Models 5000N38 and 7000N38, data can be received and transmitted through the RS-232 port simultaneously in a full duplex mode using TDD (time division duplex). NOTE: Key-up time and spreading code length are interrelated. In a direct sequenced technique, the spread sequence system must (in real time) attempt to match its despreading code with the incoming radio signal in order to determine the validity of the data. The longer the spreading code, the longer the receiver must search before it can determine that a valid data signal is being transmitted. SYNCHRONIZATION — Applied each time that the radio switches between transmit and receive, synchronization produces direct overhead on each transmitted message, thereby reducing radio efficiency. In applications involving very long, constant messages (such as a large file transfer), synchronization time becomes less of a deciding factor. MULTIPATH — Radio signals may take several paths to reach the intended receiver. The receiver must sort out the main path from all the ‘ghost’ images. The longer the spreading factor and/or the faster the raw data rate, the more difficult (and eventually impossible) it is to sort out the signals, resulting in a loss of robust communication. NUMBER OF CHANNELS — The number of channels varies per GINA model. Models 6000N5, and 6000NV-5 have 21 channels provided in the 902 - 928 MHz frequency range. Models 8000N-5 and 8000NV-5 have 37 channels provided in the 2.404 - 2.478 GHz frequency range. Note that the channels are overlapping and, depending on the unit separation, only one channel may be used. PROCESSING GAIN MEASUREMENTS — Since processing gain is a function of the RF bandwidth of the transmitted signal compared to the bit rate of the data, the theoretical calculation is: 10Log(Spreading Code Rate) x (Main Lobe Factor) RF Data Rate NOTE: Assuming that the RF main lobe of [sin x/]2 for direct sequence is 0.88 (main lobe factor) times the bandwidth spreading code clock rate. RANGE — The communication distance between GINA’s may vary according to environment and application. (Robustness and range are almost interchangeable terms; robustness and range vary according to the antenna system used.) 1-4 © 2001 GRE America, Inc. All rights reserved. This material is the property of GRE America, Inc. Copying or reproducing this material is strictly prohibited. All violators shall be prosecuted to the fullest extent of the law. 3/01 (rev. 3) General Information GINA User’s Manual RAW DATA RATE — Response time of data transmission/reception. The raw data rate is factory set to 128 Kbps. ROBUSTNESS — GRE America, Inc. believes that an RF link should be ‘as good as wire.’ Robustness is closely related to range. Variables for robustness and range include: • • • • • Transmitter Output Power Receiver Sensitivity Spreading Code Length Raw Data Rate Antenna Configuration NOTE: Spreading Code Length, Raw Data Rate, Robustness, and Multipath are interrelated; all terms are defined in this section. SPREADING CODE LENGTH — A shorter spreading code length results in better performance in measurable areas such as cost, actual data throughput, size, range, and robustness. A longer spreading code length reduces the possibility of unintended signal interruption and/or regulatory implications. GRE America has taken all the above criteria and used a spreading code length of 127 chip with four different codes selectable by channel. SYSTEM RESPONSE TIME — Raw data rate, reflected by transmission response time. The minimum response time is 12 msec. FCC Requirements The FCC has allocated the frequencies between 902 – 928 MHz and 2.404 and 2.478 GHz for use with spread spectrum technology and does not require the end user to obtain an FCC license to operate a GINA transceiver. NOTE: Professional installers who replace GRE-provided whip antennas with one not approved by GRE America, must obey FCC regulations concerning effective radiated power in the U.S. or the effective rules in the destination country relating to ERP. For detail specifications, refer to FCC Rules Part 15.247. 1-5 © 2000 GRE America, Inc. All rights reserved. This material is the property of GRE America, Inc. Copying or reproducing this material is strictly prohibited. All violators shall be prosecuted to the fullest extent of the law. 3/01 (rev. 3) General Information GINA User’s Manual FCC Statement This equipment has been tested and found to comply with the limits for a Class B digital device, pursuant to Part 15 of the FCC Rules. These limits are designed to provide reasonable protection against harmful interference in a residential installation. This equipment generates, uses, and can radiate radio frequency energy and, if not installed and used in accordance with the instructions, may cause harmful interference to radio communications. However, there is no guarantee that interference will not occur in a particular installation. If this equipment does cause harmful interference to radio or television reception (which can be determined by turning the equipment off and on) the user is encouraged to try to correct the interference by one or more of the following measures: • • • Re-orient or relocate the transceivers. • Consult a dealer or an experienced radio technician for help. Increase the separation between equipment and transceivers. Connect the equipment into a different outlet or circuit different from the one where the receiver is connected. Shielded cables and I/O cords must be used for this equipment to comply with relevant FCC regulations. Changes or modifications not expressly approved in writing by GRE America, Inc. may void the user’s authority to operate this equipment. Customer Support If you need answers to technical questions or require information about product updates, please contact GRE America’s Technical Support Team at: Tel: (650) 591-1400 Fax: (650) 591-2001 (800) 233-5973 (USA) Between 8:00 A.M. and 5:00 PM, Pacific Time Email : [email protected] Product Returns If, after speaking to a technical support person, it is determined that your GINA unit requires servicing, call GRE and request a RMA number for repair and return units. Write the RMA number on the outside of the ship1-6 © 2001 GRE America, Inc. All rights reserved. This material is the property of GRE America, Inc. Copying or reproducing this material is strictly prohibited. All violators shall be prosecuted to the fullest extent of the law. 3/01 (rev. 3) General Information GINA User’s Manual ping box for reference. NOTE: Units returned without an RMA number will not be accepted. For further information, please write us at: GRE America, Inc. 425 Harbor Boulevard Belmont, CA 94002 USA. Attn: Customer Support Safety Considerations For your safety, here are some things that you should do and not do: DO read this manual completely before using GINA. DO follow all instructions carefully. DO use the same caution with GINA as you would use with any electrical appliance. DO NOT try to use GINA for purposes for which it was not intended. DO NOT locate GINA in an area that does not have adequate ventilation for cooling. DO NOT use a ‘universal’ battery adapter with GINA. Only use the adapter supplied with the unit. 1-7 © 2000 GRE America, Inc. All rights reserved. This material is the property of GRE America, Inc. Copying or reproducing this material is strictly prohibited. All violators shall be prosecuted to the fullest extent of the law. 3/01 (rev. 3) GINA 6000N-5, 6000NV-5, 8000N-5, & 8000NV-5 GINA User’s Manual GINA Models 6000N-5, 6000NV-5, 8000N-5, & 8000NV-5 Overview Models 6000N-5 and 8000N-5 are standard GINA transceivers. Model 6000NV-5/8000N-5 have an additional voice handset for audio communication. GINA 6000N-5/8000N-5 are stand-alone, high frequency data transceivers using spread spectrum technology. GINA 6000N-5/8000N-5 have a standard RS-232 serial data interface that can be driven asynchronously at rates to 38.4 K baud. GINA 6000N-5 receives and transmits data in the frequency range of 902 to 928 MHz at air speeds of up to 128 Kbps. GINA 8000N-5 receives and transmits data in the frequency range of 2.404 - 2.478 GHz at air speeds to 128 Kbps. GINA 6000N-5/8000N-5 can perform point-to-point or point-to-multipoint communication. GINA 6000N-5/8000N-5 contains a packet controller module with a custom communication protocol. GINA 6000N-5/8000N-5 implements a subset of standard packet framing with a built-in Cyclic Redundancy Check (CRC). As the GINA 6000N-5/8000N-5 performs a CRC, if data is corrupted, GINA will discard that data. To assure accurate data transmission your system (peripheral) is responsible for error verification. Operation This section contains operating instructions for the GINA transceiver. GINA Programming Overview GINA is a transparent communication device. Depending on your peripheral software, GINA can be controlled to work as a point-to-point or point-to-multipoint transceiver. Figure 2-1 is a flowchart illustrating the command structure overview. 2-1 © 2001 GRE America, Inc. All rights reserved. This material is the property of GRE America, Inc. Copying or reproducing this material is strictly prohibited. All violators shall be prosecuted to the fullest extent of the law. 3/01 (rev. 3) GINA 6000N-5, 6000NV-5, 8000N-5, & 8000NV-5 GINA User’s Manual Figure 2-1. Command Structure Flowchart As illustrated in figure 2-1, there are three modes of operation: 1. SETUP MODE. The setup mode is where the parameters of GINA can be changed. There are 17 dedicated commands that may be altered to accommodate different timing application. NOTE: Any changed parameters are automatically stored in memory. 2. TRANSPARENT MODE. The transparent mode converts GINA into a mode that is completely transparent to the user. The data is immediately transmitted if the PACWAIT or PACSIZE command limits are exceeded. NOTE: To return to the setup mode from the transparent mode, press <CTRL> + <V> three times in succession. 3. PERMANENT TRANSPARENT MODE. The permanent transparent mode is similar to the transparent mode except that there is no escape character to return to the setup mode. Once in the permanent transparent mode, the only way to return to setup mode is by turning the radio off (reset). 2-2 © 2001 GRE America, Inc. All rights reserved. This material is the property of GRE America, Inc. Copying or reproducing this material is strictly prohibited. All violators shall be prosecuted to the fullest extent of the law. 3/01 (rev. 3) GINA 6000N-5, 6000NV-5, 8000N-5, & 8000NV-5 GINA User’s Manual General Operation Front Panel Indicators As shown in Figures 2-2 operating indicators and Voice option Jack located on the front panel and consist of: 1. PWR LED (Light Emitting Diode). This LED is lit when power is applied to the transceiver. 2. TX LED. Indicates that a signal is being transmitted by GINA. 3. RD LED. Indicates that a signal is being received by GINA. 4. Voice Handset Jack. Standard RJ-11 telephone jack for the GINA handset (Model 6000NV-5 and 8000NV-5 only). NOTE: GINA only operates with the handset supplied with the unit. Do not attempt to use a standard telephone handset. (4) Optional Voice Handset Jack (3) Receiver Indicator (2) Transmit Indicator (1) Power Indicator Figure 2-2. GINA Transceiver Front Panel Rear Panel As shown in Figure 2-3, the rear panel contains a power switch and three connectors, as follows: 1. The GINA antenna jack (non-standard SMA type). 2. ON/OFF toggle switch. Controls power to the transceiver. 3. RS-232 (DB9) connector. Data interface to PC or DTE equipment. 4. 12 VDC. Power connector 2-3 © 2001 GRE America, Inc. All rights reserved. This material is the property of GRE America, Inc. Copying or reproducing this material is strictly prohibited. All violators shall be prosecuted to the fullest extent of the law. 3/01 (rev. 3) GINA 6000N-5, 6000NV-5, 8000N-5, & 8000NV-5 GINA User’s Manual 5. . RSSI for Receiver Signal Strenght (5) Optional RSSI Jack (4) 12 V DC Power Supply Jack (center pole positive) (3) DB9 RS-232 Connector (2) Power ON/OFF Switch (1) Antenna Connector Reverse SMA Type Figure 2-3. GINA Transceiver Rear Panel Setup Mode When GINA is turned on, type the word GINA within 5-seconds to enter the setup mode (or, if the CONMODE command is set to “1” (transparent mode), press <CTRL> + <V> three times). Once in the setup mode, the radio responds with the following prompt: SET UP > Enter command sets NOTE: Any PC with standard communication software or a dumb terminal peripheral can be used to send ASCII commands to GINA. In addition, GINA is initially factory set at 9600 baud. The communication software must be initially set up for 9600,8,N,1. After completion, type QUIT and GINA enters either transparent mode or transparent permanent mode (depending on how CONMODE is set). If there are no changes in the parameters (commands), GINA enters one of the transparent modes 5 seconds after it has been turned on. Repeater Setup GINA can be set up to work as a dedicated repeater to extend its range. Below is a description on how to put GINA into a repeater configuration: Setting Repeater Unit 1. Set RID (Repeater ID) to the desired ID number (between 1 and 99). 2. Set ENR (Enable Repeater) 2-4 © 2001 GRE America, Inc. All rights reserved. This material is the property of GRE America, Inc. Copying or reproducing this material is strictly prohibited. All violators shall be prosecuted to the fullest extent of the law. 3/01 (rev. 3) GINA 6000N-5, 6000NV-5, 8000N-5, & 8000NV-5 GINA User’s Manual 0 = OFF 1 = Permanent mode (ENR remains enabled after power down). 2 = Temporarily ON mode (ENR disables if the power is turned off). Setting Transmitter Unit (Host) 1. Set TXID (Transmitter ID) to the desired ID number (between 1 and 99). 2. Set TXP (Transmit Path) equal to that of the RID of the Repeater ID. 3. Set RID (Repeater ID) to zero. 4. Set ENR (Enable Repeater) to zero. Setting Receiver(s) Parameters (Remote) 1. Set TXID of the remote radio different from the TXID of the Transmitter (Host) radio, 1...99. NOTE: If you do not want to receive the message from other remote units, set all the remote TXID’s the same. IMPORTANT: If the host and remote(s) TXID’s are set to the same value, neither radio will display any data. 2. If the receiver(s) is going to respond back to the transmitter through a repeater, you must set the receiver(s) as follows: a. Set TXP (Transmit Path) equal to that of the RID of the Repeater ID. b. Set RID and ENR to zero. After parameters are set, type QUIT to enter the transparent mode. 2-5 © 2001 GRE America, Inc. All rights reserved. This material is the property of GRE America, Inc. Copying or reproducing this material is strictly prohibited. All violators shall be prosecuted to the fullest extent of the law. 3/01 (rev. 3) GINA 6000N-5, 6000NV-5, 8000N-5, & 8000NV-5 GINA User’s Manual Getting Started Figures 2-4 and 2-5 illustrate quick and easy ways to setup and manipulate a point-to-multipoint application (without a repeater and using a repeater). Point-to-Multipoint Without Repeater 1. GINAs arrive factory set with default parameters. Install the GINAs, wait 5 seconds after power up, and they are ready to transfer data. 2. If parameters were changed, go into SETUP mode and enter RESET. This resets the GINA parameters back to the factory default settings. Figure 2-4. Point-to-Multipoint Without Repeater 3. If you do not want the remote(s) to receive any data being transmitted from other remote(s), give the same Transmit ID (TXID) value to all remote(s). Make sure the Host TXID is different than the Remote(s) TXID. 2-6 © 2001 GRE America, Inc. All rights reserved. This material is the property of GRE America, Inc. Copying or reproducing this material is strictly prohibited. All violators shall be prosecuted to the fullest extent of the law. 3/01 (rev. 3) GINA 6000N-5, 6000NV-5, 8000N-5, & 8000NV-5 GINA User’s Manual Point-to-Multipoint With Repeater Set the Host, Repeater and Remote GINAs as follows (refer to figure 5-5). Setting Host Unit 1. Set TXID = *1 (Transmit ID) 2. Set TXP = *99 (Transmit path) must equal RID value set in Repeater All other parameters are set to default. Setting Remote Units 1. Set TXID = *2-98. Remote TXIDs must be different from the host TXID. 2. Setting remote TXIDs with all of the same value will not allow Remotes to communicate with other remotes. 3. Setting the remote TXIDs to different values will allow remotes to intercommunicate. Note: By using matching and different values, various communication paths can be established. All communication path MUST GO THROUGH THE REPEATER. Timing considerations for the repeater unit must be resolved when programming equipment used in the application Setting Repeater Unit 1. Set RID = *99 2. Set ENR = 1 All other parameters at default values * Example values 2-7 © 2001 GRE America, Inc. All rights reserved. This material is the property of GRE America, Inc. Copying or reproducing this material is strictly prohibited. All violators shall be prosecuted to the fullest extent of the law. 3/01 (rev. 3) GINA 6000N-5, 6000NV-5, 8000N-5, & 8000NV-5 GINA User’s Manual Figure 2-5. Point-to-Multipoint With Repeater 2-8 © 2001 GRE America, Inc. All rights reserved. This material is the property of GRE America, Inc. Copying or reproducing this material is strictly prohibited. All violators shall be prosecuted to the fullest extent of the law. 3/01 (rev. 3) GINA 6000N-5, 6000NV-5, 8000N-5, & 8000NV-5 GINA User’s Manual Channel Frequency Table CHANNEL CODE SWITCH SETTINGS FOR GINA MODELS 6000N-5 AND 6000NV-5 CHANNEL FREQUENCY (MHz) PN CODE 1 905.055 1 2 906.055 2 3 907.055 3 4 908.055 4 5 909.055 2 6 910.055 3 7 911.055 4 8 912.055 1 9 913.055 3 10 914.055 4 11 915.055 1 12 916.055 2 13 917.055 4 14 918.055 1 15 919.055 2 16 920.055 3 17 921.055 1 18 922.055 2 19 923.055 3 20 924.055 4 21 925.055 2 2-9 © 2001 GRE America, Inc. All rights reserved. This material is the property of GRE America, Inc. Copying or reproducing this material is strictly prohibited. All violators shall be prosecuted to the fullest extent of the law. 3/01 (rev. 3) GINA 6000N-5, 6000NV-5, 8000N-5, & 8000NV-5 GINA User’s Manual CHANNEL CODE SWITCH SETTINGS FOR GINA MODELS 8000N-5 AND 8000NV-5 CHANNEL FREQUENCY (GHz) PLL CODE SETTING PN CODE 1 2.404 1000100000 1 2 2.406 1000101000 2 3 2.408 1000100100 3 4 2.410 1000110100 3 5 2.412 1000100010 1 6 2.414 1000101010 2 7 2.416 1000100110 3 8 2.418 1000101110 4 9 2.420 1000111110 4 10 2.422 1000101001 2 11 2.424 1000100101 3 12 2.426 1000101101 4 13 2.428 1000100011 1 14 2.430 1000101011 2 15 2.433 1000100111 3 16 2.435 1000101111 4 17 2.437 1001100000 1 18 2.439 1001101000 2 19 2.441 1001100100 3 20 2.443 1001110100 3 21 2.445 1001100010 1 22 2.447 1001101010 2 23 2.449 1001100110 3 24 2.451 1001101110 4 2-10 © 2001 GRE America, Inc. All rights reserved. This material is the property of GRE America, Inc. Copying or reproducing this material is strictly prohibited. All violators shall be prosecuted to the fullest extent of the law. 3/01 (rev. 3) GINA 6000N-5, 6000NV-5, 8000N-5, & 8000NV-5 GINA User’s Manual CHANNEL CODE SWITCH SETTINGS FOR GINA MODELS 8000N-5 AND 8000NV-5 25 2.453 1001111110 4 26 2.455 1001101001 2 27 2.457 1001100101 3 28 2.59 1001101101 4 29 2.461 1001100011 1 30 2.463 1001101011 2 31 2.465 1001100111 3 32 2.467 1001101111 4 33 2.469 1010100000 1 34 2.471 1010101000 2 35 2.473 1010100100 3 36 2.475 1010110100 3 37 2.478 1010100010 1 2-11 © 2001 GRE America, Inc. All rights reserved. This material is the property of GRE America, Inc. Copying or reproducing this material is strictly prohibited. All violators shall be prosecuted to the fullest extent of the law. 3/01 (rev. 3) GINA 6000N-5, 6000NV-5, 8000N-5, & 8000NV-5 GINA User’s Manual Voice Operation (Models 6000NV-5 and 8000NV-5 Only) NOTE: GINA only operates with the handset supplied with the unit. Do not attempt to use a standard telephone handset. On Models 6000NV and 8000NV, GINA is provided with a PTT (pressto-talk), release-to-listen handset that connects to the RJ-11 jack on the front panel. It allows a remote user to communicate with the main station. Tonal quality is adequate for communication (325 to 4000 Hz) but not telephone ‘toll grade.’ Some distortion may be noted depending on the operating environment. Using the handset is quite uncomplicated, but since GINA operates in half-duplex mode (only one person may speak at a time, as opposed to a standard telephone, which is full duplex, allowing both stations to speak simultaneously), we recommend military protocol: To speak, press the PTT switch. When you are finished speaking and expect a reply, say “over” and release the PTT button. When you are finished speaking and do not expect a reply, say “out.” 2-12 © 2001 GRE America, Inc. All rights reserved. This material is the property of GRE America, Inc. Copying or reproducing this material is strictly prohibited. All violators shall be prosecuted to the fullest extent of the law. 3/01 (rev. 3) GINA 6000N-5, 6000NV-5, 8000N-5, & 8000NV-5 GINA User’s Manual Command Set This section contains the GINA controller command set, definitions, and instructions for use. The GINA must be in the SETUP mode to change the following parameters. (1) CHANNEL SELECT Mnemonic: CHSEL=N Parameter: N=1 ... 37 Command abbreviation: CH or CS Default: CHANNEL 11 for 6000N-5/NV-5 and CHANNEL 13 FOR 8000N-5/NV-5 Example: CHSEL=13<Enter> or CS=13<Enter> Description: Selects the RF channel (frequency) that the transceiver transmits and receives. When communicating with another transceiver, both units must be set to the same channel. Depending on the time of day and local atmospheric conditions, the channel number selected can affect the unit’s range. If you are experiencing marginal reception conditions, try changing the channel until maximum performance is reached. Channel 11 for 900 MHz or Channel 13 for 2.4 GHz usually produces satisfactory results. (2) COM PORT BAUD RATE Mnemonic: COMBAUD= R,P,S,W Parameter: R=12 (1200), 24 (2400), 48 (4800), 96 (9600), 192 (192,000) and 384 (38,400) P= 0 (None), 1 (Odd) and 2 (Even) S= 1 (1 stop bit) and 2 (2 stop bit) W= 7 (7 bit word) and 8 (8 bit word) Command abbreviation: CB Default: 96 (9600 baud), 0 (none), 1 (1 stop), 8 (8 bit) Example: COMBAUD=96,0,1,8<Enter> or CB=96,0,1,8 <Enter> Description: COMBAUD sets the asynchronous link baud rate. COMBAUD is not related to the synchronous RF link (air speed) data rate set by RFBAUD. 3-1 © 2001 GRE America, Inc. All rights reserved. This material is the property of GRE America, Inc. Copying or reproducing this material is strictly prohibited. All violators shall be prosecuted to the fullest extent of the law. 3/01 (rev. 3) GINA 6000N-5, 6000NV-5, 8000N-5, & 8000NV-5 GINA User’s Manual (3) CONMODE Mnemonic: Parameter: CONMODE=V N=1 (transparent mode) N=2 (transparent- permanent mode) Command abbreviation: CONM Default N=2 (transparent- permanent mode) Example: CONMODE=2 <Enter> or CONM=2 <Enter> Description: The CONMODE command selects the mode that GINA enters immediately after the unit is powered on or QUIT is entered in setup mode. Set CONMODE=1: GINA automatically enters the TRANSPARENT mode. To leave the TRANSPARENT mode and go to the SETUP mode, press <CTRL> + <V> three times in succession. Set CONMODE=2: Automatically enters the TRANSPARENT PERMANENT mode. The only way to get out of the permanent transparent mode is to turn GINA off. (4) DEFAULT WAIT OR COLLISION WAIT TIME Mnemonic: DEFWAIT=N Parameter: N = 1 ... 255 X 10 msec Command abbreviation: DW Default: N=1 (10 msec) Example: DEFWAIT=1 <Enter> or DW=1 <Enter> Description: DEFWAIT forces the GINA control module to pause for the time specified in the argument if the transceiver sees that the channel is occupied before transmitting. GRE strongly recommends that you use a different value for each unit. If you experience missing data, try increasing the DEFWAIT time in multiples of ten until the problem is solved. If N is set at 255, GINA picks a random time interval from 10 to 680 msec to pause after each collision retry. If N is set between 1 and 254, the selected interval is fixed after each collision retry. (5) DISPLAY Mnemonic: DISP=C Parameter: Where: (A)sync= Display asynchronous port parameters (C)har= Display special characters (D)aytime= Display date/time stored in GINA (I)d= Display ID parameters (L)ink= Display link parameters (M)isc= Display miscellaneous parameters (T)iming= Display timing parameters (Z)= Display command list Command abbreviation: D Default: Not applicable Example: DISP=Z <Enter> or D=Z <Enter> 3-2 © 2001 GRE America, Inc. All rights reserved. This material is the property of GRE America, Inc. Copying or reproducing this material is strictly prohibited. All violators shall be prosecuted to the fullest extent of the law. 3/01 (rev. 3) GINA 6000N-5, 6000NV-5, 8000N-5, & 8000NV-5 GINA User’s Manual Description: DISPLAY lists the current parameter settings. (A)sync (D)ate (I)d (L)ink (M)isc (T)iming (Z) COMBAUD, ECHO and HARDFLOW SETTD RID, TXP and ENR PACSIZE and RFBAUD CHSEL DEFWAIT, PACWAIT and TXDELAY List Control Command Set (CCS) (6) ECHO Mnemonic: ECHO = N Parameter: N = 0 (OFF) or 1 (ON) Command abbreviation: E Default: 1 (ON) Example: ECHO=1 <Enter> or E=1 <Enter> Description: When ECHO is ON, characters received from the sending unit are echoed on the computer display. When ECHO is OFF, characters are not displayed. Echoing is disabled when in the transparent mode. (7) ENABLE REPEATER Mnemonic: ENR=N Parameter: N = 0...2 0 = Disable Repeater 2 = Temporary Enable Repeater 1 = Permanently enable Repeater Default: 0 (OFF) Example: ENR=0 <Enter> Description: Makes GINA a dedicated repeater. If ENR=2, the repeater function is temporarily enabled. When the power is shut off, GINA disables the repeater. If ENR=1, the repeater function is permanently enabled. When the GINA is shut off, the repeater remains enabled. (8) HARDWARE FLOW Mnemonic: HARDWARE FLOW = N Parameter: N= 0 (OFF) or 1 (ON) Command abbreviation: HF Default: 0 (OFF) Example: HARDWARE FLOW =1 <Enter> or HF=1 <Enter> Description: When HARDWARE FLOW is ON, CTS and RTS are enabled. When HARDWARE FLOW is OFF, CTS and RTS are disabled. The HARDWARE FLOW must be disabled if your peripheral does not have any RTS and CTS flow control or if it is a three wire configuration (RXD, TXD, and GND). 3-3 © 2001 GRE America, Inc. All rights reserved. This material is the property of GRE America, Inc. Copying or reproducing this material is strictly prohibited. All violators shall be prosecuted to the fullest extent of the law. 3/01 (rev. 3) GINA 6000N-5, 6000NV-5, 8000N-5, & 8000NV-5 GINA User’s Manual (9) PACKET SIZE Mnemonic: PACSIZE =N Parameter: N = 5 ... 1024 Command abbreviation: PS Default: 256 Example: PACSIZE =256 <Enter> or PS=256 <Enter> Description: PACSIZE specifies the maximum number of user data bytes contained in each packet information field. User data are characters typed at the keyboard or sent from an ASCII file. The GINA control module sends a packet when the number of characters sent from the keyboard or file reaches the number set by PACSIZE of user data bytes contained in each packet information field. (10)PACKET WAIT CAUTION: Do not change this parameter unless you are experienced in networking and packet timing. Mnemonic: Parameter: PACWAIT = V, N V = 0 (EVERY) or 1 (AFTER) N = 2 ... 250 X 2 msec Command abbreviation: PW Default: 1, 10 (AFTER, 20 msec) Example: PACWAIT =1,10<Enter> or PW=1,10 <Enter> Description: When V is set = 0 (EVERY), characters are packetized and sequenced for transmission N X 2msec. When V is set = 1 (AFTER), characters are packetized and sequenced for transmission when input from the terminal stops for N X 2 msec. (11) REPEATER ID Mnemonic: RID=N Parameter: N = 0...99 Command abbreviation: NONE Default: 0 Example: RID=10 <Enter> Description: Sets a repeater ID local radio to serve as repeater. If a repeater function is enabled by ENR, the local radio repeats any packet with Transmitter Path (TXP) equal to 10. 3-4 © 2001 GRE America, Inc. All rights reserved. This material is the property of GRE America, Inc. Copying or reproducing this material is strictly prohibited. All violators shall be prosecuted to the fullest extent of the law. 3/01 (rev. 3) GINA 6000N-5, 6000NV-5, 8000N-5, & 8000NV-5 GINA User’s Manual (12) RESET Mnemonic: RESET Command abbreviation: NONE Example: RESET Description: Resets all parameters to factory settings except for COMBAUD, RFBAUD, CHANNEL, and ID. Factory Default Settings after RESET. ABBR. DEFAULT SETTING CONM 2 DW 1 E ON Enable Repeater ENR 0 Hardware Flow HF OFF Packet Size PS 256 Packet Wait PW 1, 10 (20mSec) Repeater ID RID 0 Transmit Delay TXD 5 Transmit ID TXID 0 Transmit Path TXP 0 COMMAND Conmode Default Wait Echo (13) RF BAUD RATE CAUTION: The same RF baud rate must be used at both the sending and receiving units. Mnemonic: RFBAUD = N Parameter: N = 32 (32K), 64 (64K), 128 (128K) Command abbreviation: RF Default: 128 (128K), Example: RFBAUD = 128 <Enter> Description: RF BAUD RATE sets the radio transmission baud rate. This is not related to the asynchronous link baud rate. 3-5 © 2001 GRE America, Inc. All rights reserved. This material is the property of GRE America, Inc. Copying or reproducing this material is strictly prohibited. All violators shall be prosecuted to the fullest extent of the law. 3/01 (rev. 3) GINA 6000N-5, 6000NV-5, 8000N-5, & 8000NV-5 GINA User’s Manual (14) SET TIME AND DATE Mnemonic: SETTD = yymmddhhnnss Parameter: yy= last two digits of year mm=two digit month code, 01 - 12 dd=two digit day code, 01 - 31 hh=two digit hour code, 00 - 23 nn=two digit minute code, 00 - 59 ss=two digit second code, 00 - 59 Command abbreviation: STD Default: None set Example: STTD=950102123000<Enter> or STD=950102123000<Enter> Description: Sets the GINA internal clock in the control module. (15) TRANSMIT DELAY CAUTION: Do not change this parameter unless you are experienced in networking and packet timing. Mnemonic: TXDELAY = N Parameter: N = 3 ... 255 (X5 msec) Command abbreviation: TXD Default: 5 (25 msec) Example: TXDELAY = 5 <Enter> or TXD = 5 <Enter> Description: TXDELAY sets the GINA delay time. This is the time the control module waits before sending packet frame data. GRE America recommends that you use the default value. (16) TRANSMITTER ID Mnemonic: TXID=N Parameter: N = 0...99 Command abbreviation: TXID Default: 0 Example: TXID=1 <Enter> Description: Set Transmit ID of local GINA. Every packet that transits through a repeater has TXP as well as a TXID address. Packets that are not transmitted through a repeater have a zero address. (17) TRANSMITTER PATH Mnemonic: TXPATH=N Parameter: N = 0...99 Command abbreviation: TXP Default: 0 Example: TXPATH=10 <Enter or TXP=10 <Enter> Description: TXPATH sets the transmitter path for ‘Repeater.’ If TXPATH is set to Non-Zero, every packet sent out goes through a repeater with an ID that matches the TXP of the packet. 3-6 © 2001 GRE America, Inc. All rights reserved. This material is the property of GRE America, Inc. Copying or reproducing this material is strictly prohibited. All violators shall be prosecuted to the fullest extent of the law. 3/01 (rev. 3) GINA 6000N-5, 6000NV-5, 8000N-5, & 8000NV-5 GINA User’s Manual 6000N-5/6000NV-5 SPECIFICATIONS Adjacent Channel Rejection -40dB = 4MHz Baud Rate Asynchronous .3 to 38.4 Kbps Duplex TDD - RS-232 (DB9F) Channels 21 Programmable Control CTS, RTS Data Format 7 and 8 bits, (none, even, and odd) parity, 1 or 2 stop Dimensions (1.52”H) x (4.17”W) x (5.0”D) (38.6mm) x (105.9mm) x (127mm) Dynamic Range -100 dBm ~ -30 dBm Frequency Range 902-928 MHz Indicators PWR, TxD, RxD Modulation Bi-Phase Shift Keying (BPSK) PN 7 Stage (127 Chip) PN Rate 2 Mhz Operating Mode Point-to-MultiPoint or Point-to-Point Operating Temperature -20 to +60 Degrees C Extended Temperature Option -34 to +74 Degrees C PN Codes 4 PN Codes Sequence Varies within each channel Power Consumption 10 Watt Maximum Power Requirements 10.5 to 13.8 VDC Radio Technique Direct Sequence Spread Spectrum Range Nominal 800+ feet Range Indoor 500 to 1500+ feet Range Outdoor 12+ Miles - Direct Line-of-Site FCC Compliant Relative Humidity 0-90% Non-Condensing System Gain 120 dB Transmission Delay 30 mSec Voice Option Interface RJ22 3-7 © 2001 GRE America, Inc. All rights reserved. This material is the property of GRE America, Inc. Copying or reproducing this material is strictly prohibited. All violators shall be prosecuted to the fullest extent of the law. 3/01 (rev. 3) GINA 6000N-5, 6000NV-5, 8000N-5, & 8000NV-5 GINA User’s Manual 6000N-5/6000NV-5 SPECIFICATIONS Weight 16 oz. TRANSMITTER Carrier Frequency Stability 15KHz Power Consumption 750mA @ 12 VDC Spurious Output FCC Part 15, meets 15.245 & 15.247 Output Power 725 mW (28.6 dBm) RECEIVER Bit Error Rate 10-6 @ -92 dBm Local Oscillator Stability 15 KHz Sensitivity Threshold -100 dBm Stand-by Power 400mA @ 12 VDC Signal Acquisition Time 8 mSec Spurious Rejection -50 dBm CONTROLLER Buffer 20K Bytes Collision CSMA / CDMA CPU 80C188 Error Control CRC Flow Control CTS / RTS Packet Size 5 to 1024 Bytes Packetizing Time 18mS/1 byte, 96 mS/1024 Bytes @ 9600 bps Repeater Selectable up to 3 stations (with R-3 firmware) 3-8 © 2001 GRE America, Inc. All rights reserved. This material is the property of GRE America, Inc. Copying or reproducing this material is strictly prohibited. All violators shall be prosecuted to the fullest extent of the law. 3/01 (rev. 3) GINA 6000N-5, 6000NV-5, 8000N-5, & 8000NV-5 GINA User’s Manual 8000N-5/8000NV-5 SPECIFICATIONS Adjacent Channel Rejection -40dB = 4MHz Baud Rate Asynchronous .3 to 38.4 Kbps Duplex TDD - RS-232 (DB9F) Channels 37 Programmable Control CTS, RTS Data Format 7 and 8 bits, (none, even, and odd) parity, 1 or 2 stop Dimensions (1.52”H) x (4.17”W) x (5.0”D) (38.6mm) x (105.9mm) x (127mm) Dynamic Range -100 dBm ~ -30 dBm Frequency Range 2.404 to 2.478 Ghz Indicators PWR, TxD, RxD Modulation Bi-Phase Shift Keying (BPSK) PN 7 Stage (127 Chip) PN Rate 2 Mhz Operating Mode Point-to-Point Operating Temperature -20 to +60 Degrees C Extended Temperature Option -34 to +74 Degrees C PN Codes 4 PN Codes Sequence varies within each channel Power Consumption 10 Watt Maximum Power Requirements 10.5 to 13.8 VDC Radio Technique Direct Sequence Spread Spectrum Range Nominal 800+ feet Range Indoor 500 to 1500+ feet Range Outdoor 12+ Miles - Direct Line-of-Sight FCC Compliant Relative Humidity 0-90% Non-Condensing System Gain 119 dB Transmission Delay 30 mSec Voice Option Interface RJ22 3-9 © 2001 GRE America, Inc. All rights reserved. This material is the property of GRE America, Inc. Copying or reproducing this material is strictly prohibited. All violators shall be prosecuted to the fullest extent of the law. 3/01 (rev. 3) GINA 6000N-5, 6000NV-5, 8000N-5, & 8000NV-5 GINA User’s Manual 8000N-5/8000NV-5 SPECIFICATIONS Weight 16 oz. TRANSMITTER Carrier Frequency Stability 25 KHz Power Consumption 800mA @ 12 VDC Spurious Output FCC Part 15, meets 15.245 & 15.247 Output Power 500 mW (27 dBm) Optional Output Power 100 mW RECEIVER Bit Error Rate 10-6 @ -90 dBm Local Oscillator Stability 25 KHz Sensitivity Threshold -100 dBm Stand-by Power 450mA @ 12 VDC Signal Acquisition Time 8 mSec Spurious Rejection -50 dBm CONTROLLER Buffer 20K Bytes Collision CSMA / CDMA CPU 80C188 Error Control HDLC Flow Control X ON / X OFF and / or CTS / RTS Packet Size 5 to 1024 Bytes Packetizing Time 18mS/1 byte, 96 mS/1024 Bytes @ 9600 bps Repeater Selectable 3-10 © 2001 GRE America, Inc. All rights reserved. This material is the property of GRE America, Inc. Copying or reproducing this material is strictly prohibited. All violators shall be prosecuted to the fullest extent of the law. 3/01 (rev. 3) Troubleshooting GINA User’s Manual Warranty Introduction This section contains user information about GRE’s limited warranty. Limited Warranty General GRE America, Inc. warrants all parts of each new product to be of sound design, good material and workmanship, and will repair or exchange any parts proven to be defective under normal use at no charge for a period of 12 months from the date of sale to the end user. Defects will be corrected by GRE America. There will be no charge for labor for a period of 12 months from the date of original sale, except as provided below. Overtime premiums and/or expedited handling and shipping costs must be paid by the owner. Warranty Limitations This warranty does not apply to equipment or parts that have been subject to accident, abuse, incorrect service, alterations, service by non-authorized service personnel, misuse, or on units upon which the warranty seal has been removed, altered, or mutilated. A copy of the warranty certificate or purchase receipt must be supplied to GRE America when requesting service. Equipment must be sent to GRE America at the owner’s expense and will be returned via surface carrier at no cost to the owner. This warranty is strictly limited to the terms indicated herein, and no other warranties or remedies thereunder, express or implied, shall be binding on GRE America. 4-1 © 2001 GRE America, Inc. All rights reserved. This material is the property of GRE America, Inc. Copying or reproducing this material is strictly prohibited. All violators shall be prosecuted to the fullest extent of the law. 3/01 (rev. 3) Appendix A: RS-232 Configuration Data GINA User’s Manual Appendix A: RS-232 Configuration Data DB-9 Connector PIN 1 - Not Used 2 - RX Data 3 - TX Data 4 - Not Used 5 - Ground 5 4 3 2 1 6 -12V DC PWR 7 - RTS 8 - CTS 9 8 7 6 9 - Not Used DB-9 Connector 1 2 3 4 5 6 7 8 9 DB-25 Connector —Not Used— —Not Used— —Not Used— —Not Used— 8 3 2 20 7 6 4 5 22 DCD (Carrier) RTX (Receive Data) TXD (Transmit Data) DTR (Data Terminal Ready) GND (Signal Ground) DSR (Data Set Ready) RTS (Request to Send) CTS (Clear to Send) RI (Ring Indicator) DB-9 to DB-25 SERIAL PORT RS-232 Interface SIGNAL DESIGNATION PIN NUMBER Secondary Transmitted Data 14 DCE Transmitter Signal Element Timing 15 Secondary Received Data 16 Receiver Signal Element Timing 17 18 Secondary Request to Send 19 Data Terminal Ready 20 Signal Quality Detector 21 Ring Indicator 22 Data Signal Rate Selector 23 DTE Transmitter Signal Element Timing 24 25 PIN NUMBER SIGNAL DESIGNATION 1 Protective Ground 2 Transmitted Data 3 Received Data 4 Request to Send 5 Clear to Send 6 Data Set Ready 7 Signal Ground/Common Return 8 Received Line Signal Detector 9 + Voltage 10 – Voltage 11 12 Secondary Received Line Signal Indicator 13 Secondary Clear to Send A-1 © 2001 GRE America, Inc. All rights reserved. This material is the property of GRE America, Inc. Copying or reproducing this material is strictly prohibited. All violators shall be prosecuted to the fullest extent of the law. 3/01 (rev. 3) Appendix B: Using an External Antenna with GINA GINA User’s Manual Appendix B: Using an External Antenna with GINA Introduction This appendix contains information for users who wish to install an outside antenna to improve the transmission/reception range of GINA. GRE America recommends that a professional electrical contractor with experience in antenna installation be used to install the antenna. Users who wish to install their own antenna should follow the instructions below. CAUTION: Section 810 of the National Electrical Code, ANSI/NFPA No. 70-1994 contains the minimum legal requirements for the installation and protection of outside antennas. Consult your local building or fire department; additional requirements may exist for your location. NOTE: For additional information regarding outside protection, GRE recommends that you contact Polyphaser and refer to their application notes. Antenna Select an antenna suitable for the frequency range of your GINA. If a high gain antenna is going to be used, you must obey the FCC Part 15.247 regulation. The regulation states any professional installer may change to a different antenna and must meet the 6dBi system gain requirements. GRE offers many optional high gain antennas that are certified with FCC. Each contains our non-standard SMA connector. Three antennas are: 1. 13 dBi Directional Yagi Antenna with a 10 ft. cable. 2. 3 dBd Omnidirectional Antenna with a 10 ft. cable. 3. 3 dBd Patch Antenna with 3 ft. cable. Contact a GRE sale representative for more details. Mast/Tower Generally, the higher the antenna is mounted the greater the improvement in range. Fifteen to twenty feet is adequate for most locations. For longer distances, height may need to be increased. B-1 © 2001 GRE America, Inc. All rights reserved. This material is the property of GRE America, Inc. Copying or reproducing this material is strictly prohibited. All violators shall be prosecuted to the fullest extent of the law. 3/01 (rev. 3) Appendix B: Using an External Antenna with GINA GINA User’s Manual Grounding Make sure that the antenna system is grounded to protect against voltage surges, built up static charges, and lightning strikes: Use No. 10 AWG (5.3 mm) copper or No. 8 AWG (8.4 mm) aluminum wire or larger as a ground wire. Secure antenna lead-in and ground wires with insulated standoff insulators spaced 4-6 ft.(1.2 - 1.7 m) apart. Mount the antenna discharge unit as close as possible to where the lead-in enters the building. B-2 © 2000 GRE America, Inc. All rights reserved. This material is the property of GRE America, Inc. Copying or reproducing this material is strictly prohibited. All violators shall be prosecuted to the fullest extent of the law. 3/01 (rev. 3) Appendix C: System Block Diagram GINA User’s Manual Appendix C: System Block Diagram C-1 © 2001 GRE America, Inc. All rights reserved. This material is the property of GRE America, Inc. Copying or reproducing this material is strictly prohibited. All violators shall be prosecuted to the fullest extent of the law. 3/01 (rev. 3) Appendix D: The ASCII Character Set GINA User’s Manual Appendix D: The ASCII Character Set D-1 © 2000 GRE America, Inc. All rights reserved. This material is the property of GRE America, Inc. Copying or reproducing this material is strictly prohibited. All violators shall be prosecuted to the fullest extent of the law. 3/01 (rev. 3) Appendix D: The ASCII Character Set GINA User’s Manual D-2 © 2001 GRE America, Inc. All rights reserved. This material is the property of GRE America, Inc. Copying or reproducing this material is strictly prohibited. All violators shall be prosecuted to the fullest extent of the law. 3/01 (rev. 3) ACCESSORY NOTE INSTRUCTION FOR EIA485 / RS-232 HALF DUPLEX CONVERTER 12-4003 1) The Converter receives its power from the DSR Pin (DB9-6) on the DB-9 connector from GINA. Check to see that this pin is active with a 12 VDC output. 2) Plug the Converter into the GINA EIA/RS232 DB9 Connector. 3) The EIA/RS485 connector is a European style with screw terminals. The identification label indicates transmit, receive, and polarity. If a shielded cable is used, the shield can be connected to ground (G). Pin 4 is not used. 4) The EIA/RS485 cable must consist of one (1) twisted pair of #24 or #26 AWG wire. The transmit and receive signals are assigned to be ±5V balanced into 100 Ohms. (These lines are not terminated however.) 5) If the data is "scrambled" or otherwise distorted, change the polarity of the twisted pair (the correct polarity is very important). GRE A MERICA, Inc. 425 Harbor Blvd. Belmont, California 94002 USA phone (650) 591-1400 fax (650) 591-2001 ACCESSORY NOTE INSTRUCTIONS FOR EIA 422 / RS-232 FULL DUPLEX CONVERTER 12-4002 1) The Converter receives its power from the DSR Pin (DB9-6) on the DB-9 connector from GINA. Check to see that this pin is active with a 12 VDC output. 2) Plug the Converter into the GINA EIA/RS232 DB9 connector. 3) The EIA/RS422 connector is a European style with screw terminals. The identification label indicates transmit (output from GINA) (1 & 2), receive (input to GINA) (3&4) and polarity. If a shielded cable is used, the shield can be connected to ground (5). Pin 6 is not used. 4) The EIA/RS422 cable must consist of individual twisted pairs of #24 or #26 AWG wire. The transmit and receive signals are assigned to be ± 5V balanced into 100 Ohms. (However, these lines are not terminated.) 5) If Data is "Scrambled” or otherwise distorted, change the polarity of a twisted pair. (The correct polarity is very important.) GRE A MERICA, Inc. 425 Harbor Blvd. Belmont, California 94002 USA phone (650) 591-1400 fax (650) 591-2001 ACCESSORY NOTE 2.4 GHz PATCH ANTENNA 30-0033 Patch antennas lend themselves well to many data collection applications. They are flat and unobtrusive in most environments. Their patterns are much like a short Yagi. Directional antennas are used to provide a focus of signal strength in one direction while decreasing reception and transmission in other directions (see diagram). In control applications, they are used to aim as much energy in one direction as possible to provide a reliable communications path. Our patch antennas are in a durable ABS plastic housing. Patch antennas are most commonly wall- or ceilingmounted. The system is completely sealed to keep out the weather and to prevent unwanted detuning. Antennas feature 10’ of teflon cable with a reverse SMA connector for attachment to GINA. Polarity Frequency Gain Diameter Front to Back Bandwidth, 1.5.1 Beamwidth E-plane H-plane Connector Type Weight Mount Circular 2.404 to 2.478 GHz 3 dBi 3” x 3” >18 dB 100 MHz -3 dB 65° 75° Reverse SMA male 8 oz Double sided tape GRE A MERICA, Inc. 425 Harbor Blvd. Belmont, California 94002 phone(650) 591-1400 fax(650) 591-2001 ACCESSORY NOTE 900 MHz OMNI DIRECTIONAL MAGNETIC MOUNT MOBILE ANTENNA 30-0034 Omni directional antennas are used in land mobile applications for a variety of purposes. These antennas may be utilized as mobile or base station antennas, they are used to provide radiation of signal strength in a 360° direction (see diagram). In control applications, omni directional antennas are most commonly used in the host or base position, repeater positions, and mobile positions to radiate in more than one direction. Our omni directional magnetic mount antennas feature stainless steel radiators and permanent magnet bases for mounting on a metal surface that then becomes the ground plane for the antenna. These antennas are produced using techniques assuring long life and consistent performance. Antennas feature 10’ of teflon cable with a reverse SMA connector for attachment to GINA. Type Frequency Gain Front to Back Bandwidth, 1.5.1 Beamwidth E-plane H-plane Connector Type Height Radiator Weight Mount Style Omni 902 to 928 MHz 3 dBd N/A 64 MHz -3 dB 45° 360° Reverse SMA male 12” Stainless steel 19 oz. Magnet GRE A MERICA, Inc. 425 Harbor Blvd. Belmont, California 94002 USA phone (650) 591-1400 fax (650) 591-2001 ACCESSORY NOTE 900 MHz OMNI DIRECTIONAL ANTENNA 30-0035 Omni directional antennas are used in land mobile applications for a variety of purposes. As base station antennas, they are used to provide radiation of signal strength in a 360° direction (see diagram). In control applications, omni directional antennas are most commonly used in the host or base position (although they are also utilized in a repeater position to radiate in more than one direction). Our omni directional antennas feature PC board etched radiators, hand-crafted matching and decoupling networks, and fiberglass enclosures. They may be mounted in many ways. They are provided with hardware designed for mounting on round members such as pipes up to 2 inches in diameter. Also ceiling mounting and I-beam clamps can be used to place these antennas in the best possible locations. These antennas are produced using techniques assuring long life and consistent performance. Antennas feature 10’ of RG58 cable with a reverse SMA connector for attachment to GINA. Type Frequency Gain Front to Back Bandwidth, 1.5.1 Beamwidth E-plane H-plane Connector Type Height Enclosure Material Weight Mount Style Max. Mast Diameter Omni 902 to 928 MHz 3 dBd N/A 64 MHz -3 dB 45° 360° Reverse SMA male 30.75” Fiberglass 19 oz. Pipe clamp 2”1 GRE A MERICA, Inc. 425 Harbor Blvd. Belmont, California 94002 USA phone (650) 591-1400 fax (650) 591-2001 ACCESSORY NOTE 900 MHz YAGI ANTENNA 30-0036 Directional antennas are used in land mobile applications for a variety of purposes. As base station antennas, they are used to provide a focus of signal strength in one direction while decreasing reception and transmission in other directions (see diagram). In control applications, they are used to aim as much energy in one direction as possible to provide a reliable communications path. Our Yagi’s feature an all aluminum, welded design. The elements are welded into place in a U-channel boom to eliminate the sources or noise in Yagi’s. The feed system is completely sealed to keep out the weather and to prevent unwanted detuning. Antennas feature 10’ of RG58 cable with a reverse SMA connector for attachment to GINA. Polarity Frequency Gain Front to Back Bandwidth, 1.5.1 Beamwidth E-plane H-plane Connector Type Dimensions Weight Mount Style Max. Mast Diameter Linear 902 to 928 MHz 6 dBd 12 dB 44 MHz -3 dB 70° 100° Reverse SMA male 12” x 7” x .75” 12 oz. U-bolt 2.13” GRE A MERICA, Inc. 425 Harbor Blvd. Belmont, California 94002 USA phone (650) 591-1400 fax (650) 591-2001 ACCESSORY NOTE 2.4 GHz LINEAR ANTENNA 30-0037 Directional antennas are used in land mobile applications for a variety of purposes. As base station antennas, they are used to provide a focus of signal strength in one direction while decreasing reception and transmission in other directions (see diagram). In control applications they are used to aim as much energy in one direction as possible to provide a reliable communications path. Our linear antennas are housed in a durable PVC tubular housing. Antennas features a rugged, U-bolt type mount. The system is completely sealed to keep out the weather and to prevent unwanted detuning. Antennas feature 12 ” of RG58 cable with a ‘N’ Female connector for attachment to GINA. Polarity Frequency Gain Diameter Front to Back SWR Half Power Beamwidth Nominal Impedance Connector Type Weight Mount Max. Mast Diameter Vertical or Horizontal 2.404 to 2.478 GHz 9 dBi 3” x 18” >20 dB 1.5.1 maximum 30° 50 ohms ‘N’ Female 25 oz U-Bolt Provided 1.52 ” GRE A MERICA, Inc. 425 Harbor Blvd. Belmont, California 94002 USA phone (650) 591-1400 fax (650) 591-2001 ACCESSORY NOTE 2.4 GHz OMNI DIRECTIONAL ANTENNA 30-0038 Omni directional antennas are used in land mobile applications for a variety of purposes. As base station antennas, they are used to provide radiation of signal strength in a 360° direction (see diagram). In control applications, omni directional antennas are most commonly used in the host or base position although they are also utilized in a repeater position to radiate in more than one direction. Our omni directional antennas feature PC board etched radiators, hand-crafted matching and decoupling networks, and fiberglass enclosures. They may be mounted in many ways. They are provided with hardware designed for mounting on round members such as pipes up to 2 inches in diameter. Also ceiling mounting and I-beam clamps can be used to place these antennas in the best possible locations. These antennas are produced using techniques assuring long life and consistent performance. Antennas feature 10’ of teflon cable with a reverse SMA connector for attachment to GINA. Type Frequency Gain Front to Back Bandwidth, 1.5.1 Beamwidth E-plane H-plane Connector Type Height Enclosure Material Weight Mount Style Max. Mast Diameter Omni 2.404 to 2.478 GHz 3 dBd N/A 100 MHz -3 dB 45° 360° Reverse SMA male 13.5” Fiberglass 6 oz. Pipe clamp 2” GRE A MERICA, Inc. 425 Harbor Blvd. Belmont, California 94002 USA phone (650) 591-1400 fax (650) 591-2001 ACCESSORY NOTE 2.4 GHz PARABOLIC DISH ANTENNA 30-0050 Directional antennas are used in land mobile applications for a variety of purposes. As base station antennas, they are used to provide a focus of signal strength in one direction while decreasing reception and transmission in other directions (see diagram). In control applications they are used to aim as much energy in one direction as possible to provide a reliable communications path. Our parabolic dish antennas feature an all aluminum reflector and feed antenna. The antenna features a rugged, adjustable mount. Azimuth and elevation angles are easily varied by threaded adjustments. The feed system is completely sealed to keep out the weather and to prevent unwanted detuning. Antennas feature 10’ of RG142 cable with a reverse SMA connector for attachment to GINA. Polarity Frequency Gain Diameter Front to Back SWR Half Power Beamwidth Maximum Side Lobe Level Nominal Impedance Connector Type Weight Mount Max. Mast Diameter Vertical 2.404 to 2.478 GHz 23 dBi 2’ >25 dB 1.8.1 maximum 12.5° -17 dB 50 ohms Reverse SMA male 9 lb. Provided 2.5” GRE A MERICA, Inc. 425 Harbor Blvd. Belmont, California 94002 USA phone (650) 591-1400 fax (650) 591-2001 APPLICATION NOTE 7100 Subject: Connection of GINA 6000N-5 / 8000N-5 to a Model 170 Traffic Controller The purpose of this note is to provide interface information between GINA 6000N-5 / 8000N-5 and a Model 170 style Traffic Signal Controller. The information was provided to GRE America, Inc. by several sources and has been reported as accurate. If an interface problem should still occur after the steps in this note are taken, please contact the Applications Engineering Office of GRE America, Inc. 1. The interconnect cable between a Model 170 and GINA is depicted in Diagram No. 1. Model 170 Controller GINA L 2 K 3 N 5 M 8 H Diagram 1: Cable Configuration 2. This section demonstrates the programming of a GINA connected to a Model 170 controller operating at 1200 Kbps. This depicts a Host/Master to Remote operation. Command CHANNEL SELECT COM PORT BAUD RATE CONMODE DEFAULT WAIT DISPLAY ECHO ENABLE REPEATER HARDWARE FLOW PACKET SIZE PACKET WAIT REPEATER ID RESET Direct (No Repeater) Abbreviation Value CH= (User Selects) CB= 12,0,1,8 CONM= 2 DW= 1 D= (Display current settings) E= 0 ENR= 0 HF= 0 PS= 256 PW= 1,10 RID= 0 RESET (Resets parameters to default) RF BAUD RATE SET TIME AND DATE TRANSMIT DELAY TRANSMITTER ID TRANSMITTER PATH RF= STD= TXD= TXID= TXP= 128 (yymmddhhnnss) 5 0 0 GRE A MERICA, Inc. 425 Harbor Blvd. Belmont, California 94002 1 of 2 phone(650) 591-1400 fax(650) 591-2001 APPLICATION NOTE 7104 Subject: Configuration of GINA RJ22 Jack Please report any errors or omissions to the Applications Engineering Department of GRE America, Inc. GRE America, Inc. Attn: Applications Engineering 425 Harbor Blvd. Belmont, CA. 94002 Phone: 1-650-591-1500 Fax: 1-650-591-2001 E-mail: [email protected] The purpose of this note is to provide configuration information about the Voice Option RJ22 Jack located on the front panel of GINA.This jack can be utilized for half-duplex applications that require the transmission of FSK or AFSK data. GRE America, Inc. can supply the cable with an RJ22 plug to mate to GINA and flying leads on the other.Contact the Marketing Department for ordering information. DIAGRAM 1 GINA Front View Referring to Diagram 1, the pin-out information is as follows: Pin 1 - Yellow - Speaker High Pin 2 - Green - Microphone High Pin 3 - Red - Push-to-talk (PTT) Pin 4 - Black - Ground (GND) To transmit data Pin 3 (PTT) must be placed (shorted) to Pin 4 (GND).To receive data, this short must be removed. RJ-22 Jack The input level to Pin 2 (microphone) should be approximately 50 mV, AC coupled through a .1 mfd capacitor. The output level at Pin 1 (Speaker) is approximately 50 mV at 200 ohm. CAUTION ! GINA DUTY CYCLE IS DESIGNED FOR HALF DUPLEX OPERATION. 50% TRANSMIT / 50% RECEIVE. TO KEY TRANSMIT FOR AN EXTENDED PERIOD OF TIME WILL CAUSE DAMAGE TO GINA AND VOID WARRANTY. GRE A MERICA, Inc. 425 Harbor Blvd. Belmont, California 94002 phone (650) 591-1400 fax (650) 591-2001 APPLICATION NOTE 7111 BASIC GINA TESTING PROCEDURES RADIO TRANSMIT OUTPUT POWER TEST: Check Transmit Power with a Calibrated Power Meter and Cable with a 50 ohm “Dummy Load” Models - 6000N-5 or 8000N-5, 6000N or 8000N Non-Voice Models - Set TX delay to the maximum length and go to transparent mode and key a character. Models - 6000NV-5 or 8000NV-5, or 6000NV or 8000NV Voice Models - Key the transmitter with the Voice Option “push to talk.” Models - 5000N or 5000NV or 7000N or 7000NV Jumper Pins on DB-9: Pin 3 to Pin 8 ______________________________________________________ ACCEPTABLE RANGE : 6/10ths of a Watt to 1 Watt on a Calibrated Power Meter with a Calibrated Cable. ________________________________________________________________________ SYSTEM TEST: Attach 30 to 50 feet of RG58 cable between the antenna connections of the radios with 100 dB of attenuation in the middle of the cable at half the distance. Send characters from terminal to terminal to validate correct data. Characters can be sent by holding the key down at the keyboard by jamming a character to continuously key data; one side at a time. GRE A MERICA, Inc. 425 Harbor Blvd. Belmont, California 94002 phone (650) 591-1400 fax (650) 591-2001 APPLICATION NOTE 7113 HOW FAR WILL IT GO? An engineer's answer to an abused advertising subject. A commonly asked question by folks new to the radio (wireless) community is "How far will it go?" The answer is "That it depends." The direct range between two radio stations is dependent, mainly, on the antenna system. At frequencies in the 900 MHz region, the higher the antennas are located above the ground the better. For instance, for a 32 mile range, the antennas must be 250 feet or more at each end; for 20 miles, at least 146 feet; for 10 miles, a minimum of 83 feet. This is for rural and "flat ground" (example: The Bonneville Salt Flats)! In urban areas, the above distances will be less, perhaps by one half. If the equipment operates in the 2.4 GHz region, the range can be less than 30% of the 900 MHz signals. Other "depends" include the types of antennas used, the cable feeding the antenna, ground conductivity, etc. Other factors include the receive and transmit capability of the equipment as well as the affect of RF pollution. There are many claims of phenomenal range by manufacturers of low powered radio equipment, but this is more in theory than practice. When great distances are achieved, there is usually a catch like "Yes, but the stations are on high mountains (Pike's Peak or Mt. Everest)" or "Well, we did repeat twice to get the signal there" or, "Gee, I forgot to mention that this is a computer model and is virtually the real thing!" No matter what the advertising claim, the maximum radio range is dependent on geo-physical limitations. No amount of marketing hyperbole can change that! PLEASE CONTACT OUR EXPERT ENGINEERING STAFF AT GRE AMERICA, INC. TO ASSIST IN ANALYZING YOUR DISTANCE NEEDS GRE A MERICA, Inc. 425 Harbor Blvd. Belmont, California 94002 phone (650) 591-1400 fax (650) 591-2001 APPLICATION NOTE 7117 Subject: Connection of GINA to Allen Bradley Series 5 PLC The purpose of this note is to provide interface information between GINA and the Allen Bradley Series 5 PLC. The information was provide to GRE America, Inc. by several sources and has been reported as accurate. If an interface problem should still occur after the steps in this note are taken, please contact the Applications Engineering Office of GRE America, Inc. 1. The interconnect cable between the Allen Bradley Series 5 PLC and GINA is depicted in Diagram No.1. GINA 1 Not Used 2 RX Data Out 3 TX Data In 4 Not Used 5 Signal Grd 6 Not Used 7 RTS In 8 CTS Out 9 Not Used PLC DCD RX Data In TX Data In DTR 5 Signal Grd 6 DSR 7 RTS Out 8 CTS In 9 Not Used GINA 6000N-5/8000N-5 COMBAUD=R,0,1,8 R = the baud rate of the software and the PLC. (see note) E=0 (ECHO) HF=0 (HARDWARE FLOW) All other parameters are set to default Please report any errors or omissions to the Applications Engineering Department of GRE America, Inc. 1 2 3 4 GRE America, Inc. Attn: Application Engineering 425 Harbor Blvd. Belmont, CA 94002 Phone: 800-233-5973 Fax: 650-591-2001 E-Mail: [email protected] Diagram 1: Cable Configuration 2. The next section deals with the various settings of the GINA firmware. These settings have been tested and appear to provide the necessary parameters for the Allen Bradley Series 5 PLC. GRE A MERICA, Inc. 425 Harbor Blvd. Belmont, California 94002 phone(650)591-1400 fax(650)591-2001 APPLICATION NOTE 7118 Subject: GINA Software Repeater Polling Active Path Reassignment GINA 6000N-5 and 8000N-5 Series The GINA 6000N-5 and 8000N-5 series radios can support up to three repeater links with R-3 version firmware. To do this, the transmit path must be specified. Once this is done, the communication must travel this route. Many times it is not possible to communicate with all remote units via multiple repeaters and it is necessary to change the path when a specific remote must be addressed. If a sub-program can be included with the client's polling software, then it is possible to simply re-route the path for the last connect. An example of the sub-program could be as follows: 10 SEND CHR&(22): WAIT .2 S: SEND CHR&(22): WAIT .2S: SEND CHR&(22) ( ˆVˆVˆV puts the radio into the command mode ) 20 SEND "TXP[N,N....]" ( Sets the path of the transmitter ) 30 SEND "QUIT" ( Restores communications mode ) Now data can be sent as usual. The radio configuration must be changed to: CONM=1 ( Other settings are default ) GRE AMERICA, Inc. 425 Harbor Blvd. Belmont, California 94002 USA phone (650) 591-1400 fax (650) 591-2001 PRODUCT NOTE 7106 TECHNICAL INFORMATION NOTE THEORY Almost everyone in our “High Tech World” is familiar with radio communication in one form or another. We listen to music on the FM car radio, or to a commentary on an AM pocket radio and we watch pictures sent by radio waves to our TV sets. Industry uses it to dispatch vehicles, to send messages, or to monitor processes. Law Enforcement and Public Safety would be handicapped without it, as would Governments and their militaries. But how does it work? RADIO Radio (now called WIRELESS) is a form of electromagnetic energy, as is visible light. Because wireless signals are lower on the frequency spectrum than visible light we cannot see them, but we can use electronic equipment to detect them. Wireless signals react in similar ways to light, especially the UHF region (902-928 MHz) where GINA resides. To communicate from “here” to “there” by wireless (e.g., without an interconnecting cable) it is necessary to have a carrier convey information. In the beginning this consisted of simply “keying” the carrier on and off (this was an extension of the telegraph). Later, as we learned to transmit more complex information (voice, data, etc.) the modulation process became more complicated. Common modulation techniques are AM and FM. Amplitude modulation, or AM, means to make the carrier stronger or weaker in unison with the modulating information and frequency modulation. FM means to change the frequency of the carrier higher or lower with the modulating information. [NOTE: A change in phase of the carrier frequency also results in an FM like signal that is easier to implement, so most of what is called FM is really phase modulation.] SIDEBANDS When a carrier is modulated, the frequencies of the modulating signal will add to and subtract from the carrier frequency, setting up sidebands on either sides of the carrier. These sidebands take up space in the spectrum and many modulation techniques to conserve space are being used. This philosophy is termed Narrow Band Transmission. SPREAD SPECTRUM Recently, a modulation scheme called “Spread Spectrum” was de-classified by the military for civilian use. SS can be a very wide band type of transmission, but it uses the band in a way that, theoretically, lessens the total interference. There are various kinds of spread spectrum technologies in operation, with direct sequence modulation a more common mode of transmission. Direct sequence is a phase shift scheme, resulting in a wide band FM-like signal. The spreading is accomplished by a Pseudo-random Noise or PN code modulated on a radio carrier. Since the PN code is not totally random, it has a definite pattern. The idea is that several patterns can be interleaved in a wireless band of frequencies causing little interference. The information to be conveyed is imbedded within the PN code. GINA uses this modulating system. DEMODULATION After the wireless has been modulated, it must transmit over distance to a receiving system that reverses the modulating process. First, the modulated carrier is detected and “de-spread,” the PN code is deciphered, and then the imbedded information is validated. The GINA 6000 has an additional step. At the transmitting end, the imbedded data is assembled into “packets” plus some additional information to ensure accuracy, before it is transmitted. At the receiving end, after the imbedded information is recovered, the packets are disassembled. This packetized communication is termed modified X.25 and its purpose is to ensure accurate data transfer. The Packet Assemble and Disassemble process is referred to as “PAD.” GRE AMERICA, Inc. 425 Harbor Blvd. Belmont, California 94002 1 of 5 phone (650) 591-1400 fax (650) 591-2001 PRODUCT NOTE 7106 ANTENNA THEORY To get the carrier signal from “here” to “there” involves an antenna system. The height, type, and efficiency of this system determines the distance between transmitting and receiving stations. As mentioned, UHF wireless and light are alike is many ways, especially in propagation. They each tend to travel in a straight path called “line of sight” but because the wireless signal is at a lower frequency, it bends some and will go a bit farther than light. This increase at 900 MHz is approximately 1.18 times the line of sight distance. Because we live on a rounded world, the line of sight distance will vary with height Above Ground Level or AGL. At 6 feet AGL, line of sight is about 3 miles. At 10 feet AGL, it is about 3.9 miles. At 25 feet AGL, the line of sight is about 6 miles but the UHF wireless distance is around 7 miles. The formula for calculating antenna height or distance is: H=(DxD)/2, or : D= sq rt.(2H). H=feet, D=miles. 6 FRESNEL ZONE Another consideration with wireless is keeping the lower .6 Fresnel Zone in the clear to prevent echoes or multipath from reducing the received signal. Multipath is to wireless as “ghosting” is to TV. The lower part of the .6 Fresnel Zone is like a “sag” or widening of the radio beam at the middle of the path. Its width (900 MHz) is about 44 feet at 2.5 miles for a 5 mile link and about 72 feet at 7 miles for a 14 mile link. The lower .6 Fresnel Zone, as well as the radio center line between the antennas, must clear all obstacles for best results. The antenna AGL is about 97 feet at each end of a 14 mile unobstructed path over “flat” ground. The 900 MHz formula for calculating the lower 1st Fresnel Zone is: F1=72.1 x sq. rt. (dxd / 2fd) where: F1=1st Fresnel Zone radius in feet, d=midway distance in miles, and f= frequency in GHz. Then .6F=(F1x.6). SPACE ATTENUATION Wireless signals get weaker as the distance increases. In the 900 MHz region, the attenuation is -96 dBm for the first mile and increases by -6 dBm each time the distance doubles. 2 miles would equal -102 dBm, 4 miles would equal -108 dBm, 8 miles would equal -114 dBm, and 16 miles would equal -120 dBm. These numbers are important in determining how strong the received signal will be and if a proposed link is practical. DECIBELS The term dB is a logarithmic ratio that compares (in this case) two power levels. An easy way to appreciate the magnitude of the ratio is to remember that a loss of 1 dB equals a loss of .2 (x.8 of the whole); a loss of 3 dB equals .5 (x.5 of the whole); a loss of 6 dB equals .75 (x .25 of the whole); and a loss of 10 dB equals .9 (x .1 of the whole). An increase is the reciprocal. 1 dB equals times 1.25; 3 dB equals times 2; 6 dB equals times 4; and 10 dB equals times 10. The term dBm is the same ratio but related to .001 watt. An example: the 1 watt transmitter output power of GINA is the same as +30 dBm. [By definition .001 watt is “0” dBm, then .01 watt (x10) is +10 dBm, .1 watt (x10 again) is + 20 dBm and I watt (x10 again) is +30 dBm. To multiply using logarithms, one must add.] ANTENNA TYPES The next step is to design the antenna system. There are many options in choosing a proper antenna and a very common external array is a 50 ohm, Yagi-Uda or simply Yagi. The Yagi is a directional antenna that has a relatively wide transmitting and receiving angle. It can be mounted for either vertical or horizontal polarity and is offered with several gain figures. The higher the gain, the narrower the angle. Another popular antenna is a panel type used mostly with Cellular systems. Then, there are times when it is necessary to install a non-directional or omnidirectional antenna. These also come in various gains, with the 6 dB a good choice. A gain limit is given by the FCC to reduce range and interference. This limit is termed Effective Isotropic Radiated Power or EIRP and the value will be +36 dBm or about 4 watts. It means the total power level in dBm of the radio (+30 dBm) plus the antenna gain (+6 dBm) must not exceed +36 dBm, so the antenna gain figure will be important in meeting the EIRP technical requirement. GRE AMERICA, Inc. 425 Harbor Blvd. Belmont, California 94002 2 of 5 phone (650) 591-1400 fax (650) 591-2001 PRODUCT NOTE 7106 COAXIAL CABLE How the connection from the antenna to GINA is accomplished can be as important as the antenna. If much of the wireless signal is lost before it reaches the antenna, or the radio, the system won't work well. The transmission line of coaxial cable must be chosen to match the 50 ohm antenna impedance and to limit the losses due to the cable length. A reasonable choice for up to 100 feet of cable is Belden 9913 with a loss figure of about 4.5 dB/100 ft. [NOTE: The loss in dB is linear with distance, so the drop for 50 ft would be 2.25 dB.] DATA QUALITY GINA needs -95 dBm of “clean” received signal to provide a minimum Bit Error Rate of 1 error out of 1,000,000 bits sent. It is wise to have some “insurance” or fade margin, so the design signal strength at the radio will be -80 dBm allowing 15 dB of extra margin. SYSTEM CALCULATIONS By putting all of these calculations together, it is possible to determine the viability of a wireless link before installing the equipment. The process is simply to add the gains, subtract the losses with the goal being a received signal better than -80 dBm. Example: Suppose that it is necessary to send data 5 miles over a “flat” terrain. The AGL of the receive and transmit antenna should be between 45 and 50 feet for best results. [NOTE: A lower 15 ft AGL can work but signal losses and ground reflections do occur that will reduce the overall performance.] GINA's transmitter RF power is +30 dBm. The receive and transmit antennas each have a gain of +6 dBi. By adding those numbers the total system gains +42 dB. Five miles of space loss is approximately -110 dB with 2.7 dB of coaxial cable losses (60 feet) at each of the transit and received ends, the total loss is about -116 dB (rounded up). Then -116 dB and +42 dB combined will equal -74 dB which is the calculated received signal strength. This -74 dBm is a stronger signal by 6 dB than the minimum design -80 dBm signal, four times better, and the path will work very well (when dealing with minus numbers, less is higher). If the AGL is lowered to 15 feet at each end, then an obstruction loss of at least 10 dB will occur. Now the received signal is - 84 dBm or about 60% weaker than the design minimum. The system still works but it is more susceptible to interference and fade. SITE There are some important details that must be considered before the antenna is installed. Check the proposed antenna site for other radio transmitting antennas; the GINA antenna must be as far as possible from them. If the antenna is a directional antenna, Yagi or panel type, it must be pointed away from any other transmitting antennas. If an omnidirectional antenna is used, it should be mounted above or below the field of other transmitting antennas. Stay away from locations that are sites for TV stations, RADAR stations, paging systems, all high powered, pulsing modes of RF energy, and other spread spectrum systems. Taking these precautions can save a lot of time and effort. The external antenna parts are vulnerable to many problems and they must be installed for easy repair. If the antenna system fails, the wireless system fails! INSTALLATION TIPS If it is necessary to provide a tower to elevate the antenna, then the structure must safely support the weight of any service personnel. When a mast is used, it is desirable that the top be reachable with a self standing ladder for antenna orientation. Lightning protection is very important and the National Electrical Code and/or the local building codes should be consulted for proper grounding procedures, especially on tall buildings. Consider a coaxial cable lightning arrestor as well as an antenna that GRE AMERICA, Inc. 425 Harbor Blvd. Belmont, California 94002 3 of 5 phone (650) 591-1400 fax (650) 591-2001 PRODUCT NOTE 7106 has a grounded matching network for added protection. [NOTE: The PolyPhaser Corp. offers an excellent application guide regarding lightning protection.] The antenna is usually mounted by “U” bolts, with polarization either vertical or horizontal. Vertical is typical for wireless, although sometimes horizontal is used to reduce interference. Either will work, but the polarity must be the same at each end of the link for successful operation. Point the antenna as near as possible toward the far end of the path. When routing the coaxial cable, leave a service loop at the antenna so there will sufficient length of cable to replace a faulty connector, when necessary. Secure the coax so that there is no mechanical stress at the antenna connection. Follow the super structure with the cable to its base to the building. If the cable requires suspension from the base to the building, use a stranded wire to support the cable weight. (The support will prevent a migration of the cable's inner conductor to the shield.) Upon entering a building, leave a drip loop so that water will not follow the cable inside. If the cable lays on a roof or the ground, protect it with a conduit to guard against crushing. Inside, at the radio, use a short flexible patch cable, with the appropriate fittings, from the radio to the main coaxial run for stress elimination at the radio's SMA connector. An electrical test should be performed. After the test, water-proof all outdoor fittings, the ground connections, and the cable entry points into the building. TESTING When the mechanical installation is completed, a Voltage Standing Wave Ratio “VSWR” test should be done to determine that all electrical connections are correct and that the antenna is properly matched. A test instrument called an inline wattmeter is connected between the radio and the coaxial cable going to the antenna. The transmitter is turned on and its output power is measured on the meter. Next, the reflected power or “VSWR” is read, it must be less than 5% of the transmitter power to be acceptable. Each radio site will be checked in this way. If the “VSWR” is acceptable and the antennas are pointed correctly, the link is ready to be tested using data. The data can be two computers using G-TALK, two terminals, any device that will send back “known” information when polled “a DGH module” a Bit Error Rate Test set - called a “BERT” [or just put the system on line and see if it works!]. RS232 DATA The GINA 5000 RS-232 port is wired DCE to accept DTE with the transmit, receive data, and CTS lines being active. The data flow and transmit functions are controlled internally by the radio in a half duplex mode. The GINA 6000 (X.25 packet) is also wired DCE, operating in a half duplex mode, but the RTS and CTS are active along with the transmit and receive data lines. Before a “connect” can be initiated, it is necessary to make RTS high. One way to do this, with limited “hardware” data flow control, is to disconnect the DTE RTS wire and strap the CTS and RTS pins together at the DB9 interface. (Pin 7 to 8 additional flow control is accomplished by the Xon/Xoff commands which are supported in the “firmware.”) Using the VOICE OPTION, if it is installed, is a push-to-talk and release-to-listen operation, the same as in other two-way radio communication. A bonus with this option is the convenience of easy transmitter keying for RF testing. GRE AMERICA, Inc. 425 Harbor Blvd. Belmont, California 94002 4 of 5 phone (650) 591-1400 fax (650) 591-2001 PRODUCT NOTE 7106 TEST Equipment To achieve a satisfactory performance with an external gain antenna, it is necessary that the accessory parts, transmission line, connectors, filters, etc., and the antenna function properly. A common RF test instrument for testing is the inline VSWR watt meter. A suitable low cost meter is the Comet 900N. RF Adapters RF Adapters are also needed because most of the 900 MHz equipment has “N” type RF couplers and GINA uses reverse type SMA. An 8-10' RG58 cable with a reverse SMA male on one end and a N male on the other plus an N female (a barrel) adapter would be handy. The preference should be ones that allow the easiest access to the antenna system without compromising performance. Miscellaneous “gender menders” and data cables are also necessary. The GINA has a DB9F RS-232 interface and most async data equipment use a DB-25 connector. In case of trouble, a DATA TRAKKER will simplify a diagnosis but it requires the DB-25 connectors, as does the BERT, and most breakout boxes. To configure the GINA 6000 a PC with a terminal program such as G-TALK or Procomm is required. A convenient alternative is a Termiflex ST./2000 palm sized “dumb” terminal. To test the quality of a link from the far end, a DGH smart module will respond with a message when addressed and affords a quick and easy way to send and receive data over the radio path, it's a “poor man's” BERT. The Bit Error Rate Test set is needed when a high quality data circuit must be guaranteed. Also a Volt Ohm Meter (VOM) is an important item on every test equipment list. GRE AMERICA, Inc. 425 Harbor Blvd. Belmont, California 94002 5 of 5 phone (650) 591-1400 fax (650) 591-2001 APPLICATION NOTE 7100 3. This section demonstrates the programming of a GINA connected to a Model 170 controller operating at 1200 Kbps. This depicts a Host/Master to Remote operation utilizing the use of a repeater. Command CHANNEL SELECT COM PORT BAUD RATE CONMODE DEFAULT WAIT DISPLAY ECHO ENABLE REPEATER HARDWARE FLOW PACKET SIZE PACKET WAIT REPEATER ID RESET RF BAUD RATE SET TIME AND DATE TRANSMIT DELAY TRANSMITTER ID TRANSMITTER PATH System with up to Three Repeaters Abbreviation Host Repeater Remote CH= (User Selects) CB= 12,0,1,8 12,0,1,8 12,0,1,8 CONM= 2 2 2 DW= 1 1 1 D= (Display current settings) E= 0 0 0 ENR= 0 1 0 HF= 0 0 0 PS= 256 256 256 PW= 1,10 1,10 1,10 RID= 0 10 0 RESET (Resets parameters to default) RF= 128 128 128 STD= (yymmddhhnnss) TXD= 5 5 5 TXID= 1 0 2 TXP= 0 0 10 NOTE: TRANSMITTER ID AND TRANSMITTER PATH ID numbers are user selectable however Host/Master should be different than the Remotes. Above example is for a one repeater system. If more repeaters are required in the system, add repeater numbers to the Transmit Path (TXP) statement in the order they will be accessed. Example: Host has to contact Remote via three repeaters numbered 10 (closest to host), 20 (midway between units), 30 (closest to Remote); the Host TXP statement would appear as TXP=10,20,30. The Remote TXP would appear as TXP=30,20,10. 4. The following section deals with software settings. a. If “Traffic View” from Wapiti Micro Systems Corp. is utilized, set “Delay Factor” under TV Configuration menu to at least 5. Any setting below 5 will result in communication failures. b. If “TransLink” from Integrated Software Solutions, Inc. is utilized set, “Message Delay in Milliseconds” under System Timings of the Communications Setup screen to 200. This setting has been tested with up to three repeaters in the path. GRE A MERICA, Inc. 425 Harbor Blvd. Belmont, California 94002 2 of 2 phone(650) 591-1400 fax(650) 591-2001 ACCESSORY NOTE GRE A MERICA, Inc. 425 Harbor Blvd. Belmont, California 94002 USA phone (650) 591-1400 fax (650) 591-2001