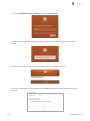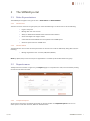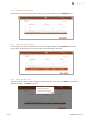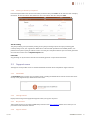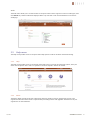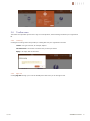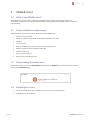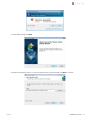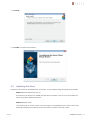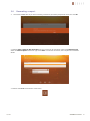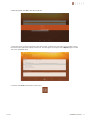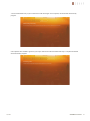
1
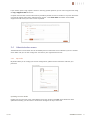
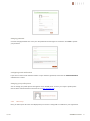
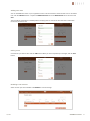
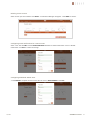
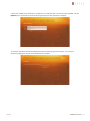
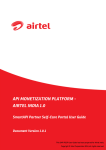
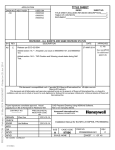
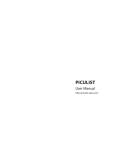
SONAR User manual Table of Contents Table of Contents 2 1 Organization registration 4 Forgotten password 5 The SONAR portal 7 Roles & permissions 7 2.1.1 2.1.2 7 7 1.1 2 2.1 2.2 Reports menu 2.2.1 2.2.2 2.2.3 2.2.4 2.2.5 2.2.6 2.2.7 2.2.8 2.3 2.4 2.5 2.6 3 02/2015 User Admin Completed reports Download a single report Download multiple reports Delete a single report Delete multiple reports Change a saved report name or reference information Searching for a report by keyword Filtering a column by a keyword 7 7 8 8 8 9 9 9 10 Support menu 10 2.3.1 2.3.2 2.3.3 2.3.4 10 10 10 10 Downloads Getting Started Buy Licenses Support Tickets Administration menu 11 2.4.1 2.4.2 11 12 My Profile User setup Help menu 15 2.5.1 2.5.2 15 15 Help About Toolbar area 16 2.6.1 2.6.2 16 16 Licensing Sign Out SONAR client 17 3.1 What is the SONAR client? 17 3.2 Client installation requirements 17 3.3 Downloading the latest client 17 3.4 Installing the client 17 3.5 Updating the client 19 3.6 Generating a report 20 SONAR User manual 2 You can find the latest documentation for this product here: http://sonar-raas.com Document Feedback Xtravirt welcomes any feedback for documentation improvement. Comments should be submitted to [email protected]. Technical Support Technical support is provided where there is a valid subscription under the terms of the End User License Agreement. Product feedback and fault identification is welcomed, and comments should be submitted to [email protected]. © 2015 Xtravirt® Ltd. All rights reserved. The Xtravirt logo and design are registered trademarks of Xtravirt Ltd. All other marks and names mentioned herein may be trademarks of their respective companies. Warranty, to the maximum extent permitted by applicable mandatory law, Xtravirt and its licensors provide the software without any warranties of any kind, express, implied, statutory, or in any other provision of the EULA or communication with you, and Xtravirt and its licensors specifically disclaim any implied warranties of merchantability, fitness for a particular purpose, and non-infringement. 02/2015 SONAR User manual 3 1 Organization registration Before you can use SONAR you need to register your organization with the SONAR portal. Registration will allow you to download the SONAR client, collect information and generate reports. Note: When you register your organization you are automatically added to the Admin role group. For more information refer to the Roles & permissions section in Chapter 4 of this document. 1. Navigate to the SONAR portal at the following URL: https://portal.sonar-raas.com. Click the Register here link. 2. Complete the registration form. Once completed, click Register. Please note all fields are required. 02/2015 SONAR User manual 4 4. Once registered, an activation email will be sent to the email address entered on the registration form. 5. Click the link provided in the email to successfully activate the organization account. This will enable login to the SONAR portal. 1.1 Forgotten password If you have forgotten your password you can request a password reset. Complete the following steps to reset a password. 1. 02/2015 On the login screen of the SONAR portal, click the Forgotten your password? link. SONAR User manual 5 2. Enter your organization name and email address. Click reset password. 3. A confirmation message will be displayed. Check your email for an automated message from the SONAR platform. 4. When the email arrives, click the link to reset your password; a browser window will open. 5. Enter your email address and a new password. Click the save button. You will then be redirected to the portal login page. 02/2015 SONAR User manual 6 2 The SONAR portal 2.1 Roles & permissions The SONAR portal supports two types of roles – General User and General Admin. 2.1.1 General User The User role is the common role group that your users should belong to. It allows users to do the following: 2.1.2 Login to the portal Manage their own user account Ability to download the SONAR client and associated collateral Access the FAQ & raise support tickets Collect data with the SONAR Client and upload to the SONAR portal Generate reports from the SONAR client General Admin The Administrator account has the same permissions as the User role as well as additionally being able to do the following: Manage organization user accounts (add/delete/disable) Note: By default, the first user account for an organization is a member of the General Admin role group. 2.2 Reports menu The Reports menu contains a single entry, the Reports page. It is comprised of 3 views, each accessed by clicking the relevant link above the table. 2.2.1 Completed reports All reports that have been successfully generated can be found under the completed reports view. You can select reports to edit their reference, delete or download them. 02/2015 SONAR User manual 7 2.2.2 Download a single report Find the report you wish to download. Select the report using the checkbox. Click the download button. 2.2.3 Download multiple reports Find the reports you wish to download. Select each report using the checkbox. Click download. The selected reports will be automatically put into a zip file and you will be prompted to download. 2.2.4 Delete a single report Select the report you wish to delete by ticking the checkbox box next to the report. Click delete. A confirmation dialogue will appear. Click delete to confirm. 02/2015 SONAR User manual 8 2.2.5 Delete multiple reports Find the reports that you wish to delete. Select multiple reports by ticking the checkboxes. Click delete. A confirmation dialogue will appear. Click delete to confirm. 2.2.6 Change a saved report name or reference information Select the report you wish to edit the name or reference information by selecting the checkbox. Click the edit button. Edit the report name and reference information then click save. 2.2.7 Searching for a report by keyword Select the search box located above the table and enter the word or characters you want to search, then press enter. The list will auto-filter to display the results as well as highlighting instances of your search term within the results. To clear the search term, click the x icon in the search box. 02/2015 SONAR User manual 9 2.2.8 Filtering a column by a keyword Enter the keyword within the column of the table you wish to filter press enter. The list will auto-filter to display the results. To clear the column filter, delete the text in the column filter box and press enter. Jobs Processing The jobs processing view (accessed by clicking on the ‘jobs processing’ link) lists all report processing jobs currently being run for your organization. When data is collected and uploaded to the SONAR platform, the platform service picks up the job and lists it here. Once the job is completed and the report has been generated the count will increase on the completed reports view. Failed Jobs Any job being run by the service that fails to successfully generate a report will be listed here. 2.3 Support menu The Support menu provides access to software downloads and both client and platform support facilities. 2.3.1 Downloads The downloads page contains various collateral items, including the SONAR client and user manual. The link at the top of the page will always download the latest client. 2.3.2 Getting Started Displays the Getting Started page which appears when you log into the portal. 2.3.3 Buy Licenses This link will send you to the online SONAR shop located on the sonar-raas.com website. From there you can purchase licenses and add-on features. 2.3.4 02/2015 Support Tickets SONAR User manual 10 If you need to report a bug, request a feature or have any general questions, you can raise a support ticket using the Log a support ticket online form. Complete the form with as much information as possible. If possible, attach a screenshot or any other assets that may help the support team better understand your request. Click create ticket. A member of the SONAR support team will review your ticket as soon as possible. 2.4 Administration menu The Administration menu allows users to the SONAR portal to amend their account details. If you are a member of the Admin role you can also manage user accounts for your organization from here. 2.4.1 My Profile My Profile allows you to manage your account configuration, update account information and reset your password. Updating account details Update your first name, last name, email address and country location. Click save. If the details have been updated successfully, you will receive a confirmation message at the top of the screen. 02/2015 SONAR User manual 11 Changing password Click the ‘change password’ link. Enter your new password and then again for verification. Click save to update your password. Configuring email notifications If you wish to receive email notifications when a report has been generated, ensure that the email notifications checkbox box is ticked. Changing your profile picture You can change your profile picture that appears on the SONAR portal. To do so, you require a profile picture that has been created with the free Gravatar service (http://gravatar.com). 2.4.2 User setup Note, you will only see this menu item displayed if your account is configured as an Admin for your organization. 02/2015 SONAR User manual 12 Adding new users You can add additional users to your organization. Users can be members of either the User role or the Admin role. Click the add user button. Complete the Add User form. Ensure the General User role is selected. Click save. The user will be emailed by the SONAR platform notifying that an account for them has been created with instructions for how to use. Editing a user Click the user you wish to edit. Click the edit button. When you have completed your changes, click the save button. Disabling a user account Select the user you wish to disable. Click disable to save the change. 02/2015 SONAR User manual 13 Deleting a user account Select the user you wish to delete. Click delete. A confirmation dialogue will appear. Click delete to confirm. Configuring email notifications for a user account Select a user and click edit. Tick the email notifications checkbox to enable notifications. Clear it to disable notifications. Click save to confirm the change. Configuring additional Admin users 1. Click add user. Complete the form. Ensure the role is set to General Admin. Click save. 02/2015 SONAR User manual 14 Audit The Audit menu allows you to review activities on the portal. Select a date range and a choice of audit types, then click search. Any results found will be displayed. Note: only users with a role of General Admin can access the Audit page. 2.5 Help menu The Help menu provides access to the portal online help system as well as the About information dialog. 2.5.1 Help The Help menu provides access to the portals online help system. To search the online Help system, enter your search term and press ‘enter’ Click on a question in the list to expand it and see the answer. 2.5.2 About The About dialog provides some basic information about the platform and your organization account. Your organization ID is found here which is required when purchasing licenses and upgrades. Administrators of your organization are also listed here. 02/2015 SONAR User manual 15 2.6 Toolbar area The toolbar area provides quick access to sign out of the platform, check licensing and obtain your Organization ID. 2.6.1 Licensing Clicking the ‘licensing’ button will provide you a dialog that lists your organization’s licenses. License – the type of license, for example, vSphere Current licenses – the number of licenses that you have purchased Expiry – the expiry date of the license. 2.6.2 Sign Out Clicking Sign Out will sign you out of the SONAR portal and return you to the login screen. 02/2015 SONAR User manual 16 3 SONAR client 3.1 What is the SONAR client? The SONAR client is used to select and generate SONAR reports, including configuring connections to infrastructure components, discovering and collecting data, and uploading to the SONAR platform for analytics and processing. 3.2 Client installation requirements The following are required to successfully install and use the SONAR client. • Physical or virtual machine • Windows 7, Windows 8, Windows Server 2008 or Microsoft Server 2012 • 4GB Ram • 1 Dual Core CPU • Minimum 8GB disk space (more if you have a large infrastructure) • Minimum supported screen resolution 1280 x 800 • Network Connectivity • Direct internet connection • Microsoft .Net Framework 4.5 SP1 3.3 Downloading the latest client Download the latest client from the Downloads page located in the Support menu of the portal. Click the link at the top of the Downloads page. 3.4 02/2015 Installing the client 1. Extract the SONAR client zip file. Double-click the .exe file to start the installation. 2. Click Yes to start the installation. SONAR User manual 17 3. On the Welcome page click Next 4. Change the installation location or accept the default location (recommended). Click Next to continue. 02/2015 SONAR User manual 18 5. Click Install 6. Click Finish to complete the installation. 3.5 Updating the client Periodically new versions of the SONAR Client are released. It can be updated using the following two methods. Method 1: Automated check at start-up If connected to the Internet, the SONAR client will check for updates at start up. If any are available you will be prompted to download and install. Method 2: Manual check To manually check for a newer version of the client sign in to the SONAR portal. If a newer version exists, download and follow the installation previous instructions to update to the latest version. 02/2015 SONAR User manual 19 3.6 1. Generating a report Launch the SONAR client. If you have no existing connections you will be prompted to create one. Click Ok. 2. Click the Enter a name for this connection cell. Type a name for the connection. Select the Connection type. Select the vCenter vSphere connection type. Press Enter to create the connection, then complete the connection details. 3. Click the next arrow at the bottom of the screen. 02/2015 SONAR User manual 20 4. When prompted, click Yes to save the connection. 5. Select the report you wish to generate. If you wish to enter a reference for your report you can select a cell in the custom report references and type a brief note. This will appear on the portal in the Reports page as a field next to the completed report. 6. Click the next arrow at the bottom of the screen. 02/2015 SONAR User manual 21 7. An automated discovery of your infrastructure will then begin. Once complete, the wizard will automatically progress. 8. The specific data needed to generate your report will now be collected. When this step is complete the wizard will automatically progress. 02/2015 SONAR User manual 22 9. Enter your SONAR portal credentials to authenticate, to enable the data to be automatically uploaded. Click the Upload button. The wizard will automatically progress when the data upload has completed. 10. Once the upload has finished the SONAR portal will automatically generate the report. You can check progress by logging into the portal and download once complete. 02/2015 SONAR User manual 23