1
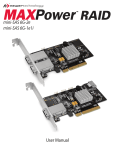
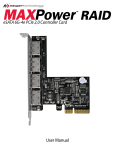
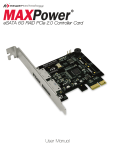
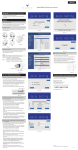
RAID
mini-SAS 6G-2e
mini-SAS 6G-1e1i
User Manual
NewerTech MAXPower RAID mini-SAS 6G
Table of Contents
Part 1: Introduction
Page 3
a.
b.
c.
d.
Page 3
Overview
MAXPower RAID mini-SAS 6G Features
What is mini-SAS?
What is RAID?
Part 2: System Requirements & Installation
a. System Requirements
b. Hardware Installation
c. Driver & Software Installation
Page 3
Page 3
Page 3
Pages 4-6
Page 4
Page 4
Page 5-6
Part 3: Management
Page 7
a.
b.
c.
d.
e.
f.
g.
h.
Page 7
NewerTech Web Manager Access
Device Management
Array Management
Spare Pool Management
Events
Tasks
Settings
SHI (Storage Health Inspector)
Part 4: Troubleshooting & FAQ
Part 5: Contact Information
Part 6: Warranty Information
Part 7: Software License Agreement (SLA)
Part 8: FCC Certification Information
Page 8
Page 9-10
Page 11
Page 11
Page 11
Page 12
Page 13
Page 14
Page 15
Page 16-17
Page 18-20
Page 21
Images and descriptions may vary slightly between this manual and the unit shipped. Please visit the product
webpage for the most recent specifications.
Page 2
NewerTech MAXPower RAID mini-SAS 6G
Part 1: Introduction
MAXPower RAID mini-SAS 6G Controller Card
Utilizing the latest SAS/SATA 6Gb/s technology, the MAXPower RAID mini-SAS 6G card is the ideal choice for highspeed, efficient, low-cost, RAID capable connectivity for the Mac and PC.
MAXPower RAID mini-SAS 6G Features:
• PCIe 2.0 x8 (up to 4GB/s)
PCIe 1.0 (up to 2GB/s)
• Two mini-SAS ports
• 2e Model: Two external mini-SAS (SFF-8088)
• 1e1i Model: One external mini-SAS (SFF-8088) &
one internal mini-SAS (SFF-8087)
• SAS Expander support up to 128 SAS/SATA devices
• RAID levels 0, 1, 5, 10, 50, and JBOD (SPAN and
individual drive modes) supported
• Device hot plug & hot swap support
• Automatic device passthrough to OS
• Convenient browser-based management
• SHI (Storage Health Inspector) for the monitoring
and reporting of drive health
• Compatible with SATA based hard disk drives and
solid state drives
• 3 year warranty
What is Mini-SAS?
SAS, which stands for Serial Attached SCSI, is a data transport protocol/bus that can connect storage devices
at speeds up to 6Gb/sec on a single channel. Mini-SAS is a connection type of SAS that carries four SAS data
channels through one cable.
What is RAID?
RAID stands for Redundant Array of Independent Drives. Put simply, this means taking multiple matching drives
and arranging them together to achieve large storage space, speed, data protection, or any combination of the
three. The MAXPower RAID mini-SAS 6G Controller Card supports the following RAID types:
RAID 0 “Stripe”
RAID 1 “Mirror”
RAID 5 “Stripe & Protection”
JBOD (SPAN & Independent Drive Modes)
Speed & Large Storage
Speed: Data is alternated across two or more drives to gain
speed by essentially distributing the workload.
Protection: No built-in protection.
Capacity: Usable space is the combined capacity of all the drives.
Optimized Speed, Capacity, & Protection
Speed: Data is striped like in a RAID 0, so significant speed gains
are seen.
Protection: Utilizes mathematical parity to achieve data
protection while taking up a minimum of space. One drive can
fail and all data will still be accessible.
Capacity: All but one drive worth of capacity is usable. In a four
drive RAID 5 array, there is three drives worth of usable space.
Combined RAIDs: RAID 10 & RAID 50
Protected Storage
Speed: No speed benefits gained.
Protection: One drive can fail and all data will still be accessible.
Capacity: One drive worth of usable space out of the two total
drives used.
Capacity & Flexibility
Speed: No significant speed gains.
Protection: No built-in data protection.
Capacity: In SPAN/Concatenated mode, the capacities are
combined. When set up as independent drives, each drive
presents its stated capacity for use.
Fast, Large, & Protected Storage
Speed: Combines multiple RAID 1 or RAID 5 sets by using RAID 0 “Striping” to gain speed.
Protection: There are two RAID 1 “Mirrored” sets used in order to tolerate 1-2 drives failing depending on which drives they are.
Capacity: Usable space is half of the combined capacity of all the drives used.
Page 3
NewerTech MAXPower RAID mini-SAS 6G
Part 2: System Requirements & Installation
Mac® OS X®:
10.6.8 and later
Mac Hardware:
•
•
Windows:
Windows® XP and later
PC Hardware:
•
•
Intel® Mac with an available PCIe 2.0 or 1.0 slot (PCIe 2.0 x8 slot recommended)
Macs with a Thunderbolt port and a PCIe expansion chassis may also be compatible with
this card when running 10.6.8 or later (10.9 or later for Thunderbolt 2 devices). Check with
your device manufacturer to verify compatibility.
Any PC with an available PCIe 2.0 or 1.0 slot (PCIe 2.0 x8 slot recommended)
PCs with a Thunderbolt port and a PCIe expansion chassis may also be compatible with
this card when running Windows 7 SP 1 or later. Check with your device manufacturer to
verify compatibility.
Hardware Installation
Before Installing the MAXPower RAID mini-SAS 6G card:
• Make sure computer is turned off and unplugged from its power source
• Take appropriate electrostatic discharge precautions:
Your computer is a static-sensitive device. It is susceptible to invisible damage if
not protected during installation. We recommend proper grounding by using
a grounding strap. Make sure to work in a clean and static-free area, and avoid
wearing clothing that retains static charges.
For more information, please visit: http://www.newertech.com/static
Step 1
Open the computer system’s chassis and locate an unused PCIe 2.0 or 1.0 slot (x8 or
x16 slot required).
Step 2
Remove the PCIe slot cover.
Step 3
Gently insert the MAXPower card into the PCIe slot and secure the bracket to the
computer chassis according to your chassis specifications.
Step 4
After installing the MAXPower card, start your computer.
Page 4
NewerTech MAXPower RAID mini-SAS 6G
Driver & Software Installation
For the latest drivers and software visit: www.newertech.com/support/
MAC OS X
Once you have installed the NewerTech MAXPower RAID mini-SAS 6G card and booted your Mac, follow these
instructions to install the drivers and the RAID Mangement application:
1. Download the latest installer file from www.newertech.com/support/ . The correct .dmg file is named with the
following prefix: newer_sas_controller_mac.
2. Double-click on the .dmg file to mount the disk image that contains the Mac OS X driver and RAID software.
3. Within the disk image, double-click the .pkg file named “MAXPower_RAID_Mini_SAS_6G_Controller”.
4. Follow the installer prompts to complete the installation. Once completed, you will need to restart in order to
use the NewerTech MAXPower RAID mini-SAS 6G Card.
WINDOWS® 7 / VISTA / 2008
Once you have installed the NewerTech MAXPower RAID mini-SAS 6G Card and booted your PC, follow these
instructions to install the drivers and the RAID Management application.
1. Download the latest installer file from www.newertech.com/support/ . The correct .zip file is named with the
prefix: MAXPower_RAID_miniSAS6G Win_drivers.
2. Right-click the downloaded file and choose “Extract All”.
3. Click the Start menu. Right-click on “Control Panel”, then double-click “System” to open the System screen.
4. From the System screen click the “Device Manager” link on the left side of the window. This will display a list of
connected devices. The MAXPower RAID Card will appear with a warning symbol within “Other Devices”.
5. Right-click on the MAXPower RAID Card icon and select “Update Driver Software...” to start the driver installation.
6. Click on “Browse my computer for driver software”.
7. Browse to and open the folder named “MAXPower_RAID_miniSAS6G Win_drivers”.
8. Make sure the “Include Subfolders” option is checked, then click “Next”.
9. When asked “Would you like to install this driver software?”, click “Install”.
10. Once the installation is complete, click the option to restart your computer.
RAID MANGEMENT APPLICATION
1. From the unzipped folder noted in step 7 above, browse to the sub-folder called “Web Manager”.
2. Run the Setup file.
3. Once the setup is complete restart your computer.
Page 5
NewerTech MAXPower RAID mini-SAS 6G
WINDOWS XP / 2003
Once you have installed the NewerTech MAXPower RAID mini-SAS 6G card and booted your PC, follow these
instructions to install the drivers and the RAID Management application.
Note: Windows XP is only supported on a PC and is not supported via Boot Camp on a Mac.
1. Download the latest installer file from www.newertech.com/support/ . The correct .zip file is named with the
prefix: MAXPower_RAID_miniSAS6G Win_drivers .
2. Right-click the downloaded file and choose “Extract All”.
3. Click the Windows Start menu, right-click on “Control Panel”, then double-click “System” to open the System
screen.
4. Click on “Hardware” tab then click the “Device Manager” button.
5. Under the “Other Devices” category, the MAXPower RAID Card will appear with a yellow warning symbol.
6. Right click on the MAXPower RAID Card and select “Update Driver Software...” to start the driver installation.
7. Click on “Browse my computer for driver software”.
8. Browse to the “maxpowerraidminisas6gwindrivers” folder, open it and then open the subfolder named “Drivers”.
9. Find the folder with your operating system’s name, open it and then click “Next”.
10. When asked “Would you like to install this driver software?”, click “Install”.
11. Once the installation is complete, click the option to restart your computer.
RAID MANAGER INSTALLATION STEPS
1. From the unzipped folder noted in step 7 above. Browse to the sub-folder called “Web Manager”.
2. Run the Setup file.
3. Once the setup is complete restart your computer.
Page 6
NewerTech MAXPower RAID mini-SAS 6G
Part 3: Management
NewerTech Web Manager
The NewerTech Web Manager is an easy-to-use browser-based utility to set up RAID arrays, manage
connected drives, view storage health status, and view information about your connected storage.
• Device management
• Array management
• Spare pool management
• Event log
• SHI (Storage Health Inspector)
• Task scheduler
• Settings
Access
The NewerTech Web Manager can be accessed from any web browser* on the computer being used by
entering the following address into the address bar:
PC:
https://localhost:7402/
Mac:
https://localhost:8402/
When prompted for a username and password, enter the following:
Username: admin
Password: admin
The password can be changed at any time from within the Settings section of the Web Manager.
*Browser must support XML (e.g. Safari, Firefox, Chrome, Internet Explorer, etc.)
Page 7
NewerTech MAXPower RAID mini-SAS 6G
Device Management
Mouse over the “Manage” menu item and select “Device” to enter the Device Management screen.
Automatic Device Passthrough
Changing Device Settings
The NewerTech MAXPower RAID mini-SAS 6G has an automatic
passthrough/legacy feature that will pass any connected drive
to the OS without needing to initialize it via the Web Manager.
The exception to this auto-passthrough feature is when a drive
or drives have been initialized via the Web Manager, for use in a
RAID array or as a hot spare. The drives will appear in the Web
Manager with an “L” over the icon to represent its state as a
passthrough/legacy drive.
Depending on the features of the drives you are using, you can
adjust settings such as Read Ahead, Write Cache, TCQ, and NCQ.
Initializing Devices
!! IMPORTANT !!
Initializing a drive writes necessary
RAID configuration information to the
Initializing a drive will
drive to prepare it for inclusion in a
destroy existing data!
RAID array and/or spare pool.
Rescanning for Devices
If a drive is connected to the controller while in the Device
Management screen, click “Rescan Devices” to have the Web
Manager recognize the connected drive.
Unplugging Devices
To properly disconnect a drive from the controller card, click on
the drive to be removed and then click “Unplug” to allow the drive
to be physically disconnected from the controller card.
If a drive is included in a RAID array, the entire RAID array will
need to be unplugged from the Array Management screen before
Drives will be initialized automatically as part of the RAID array
creation process, but it is recommended to initialize a drive before physically disconnecting the array or drive within the array. See
the “Unplugging an Array” on page 10 for more information.
including it into a spare pool.
Page 8
NewerTech MAXPower RAID mini-SAS 6G
Array Management
The Array Management screen acts as the Web Manager’s home screen, but to access it from any other
screen click on the “Manage” menu item and select “Array” to enter the Array Management screen.
Creating a RAID Array
To create a RAID array, click on the “Create Array” button in the “Logical Device Information” section. Once
the “Create Array” screen has loaded, configure the following settings to create the RAID array:
1) Array Type
Select the RAID level you want to use. See page 3
of the manual for RAID type explanations.
Select “JBOD (Volume)” if you want to use a single
drive or want to do a concatenation/spanning of
drives.
!
For optimal performance, always
use matching drives in a RAID array.
- Matching manufacturer
- Matching part number
- Matching size
- Matching speed
- Matching firmware
!! IMPORTANT !!
Creating an array will
destroy existing data!
2) Array Name
Name the array for identification within the Web
Manager. The volume name will be created after
you format the created array.
3) Initialization Method
Quick Initialization
Skips the full build/initialization of the array
and allows for a volume to be created. This
is not usually recommended as the array will
not be fully protected from failure until a full
initialization or verify task is completed.
Foreground
The RAID will fully initialize before a volume
can be created and the array utilized. This
may take hours depending on array size.
Background
Allows a volume to be created and utilized
while the RAID initialization is conducted
in the background. This may take hours
depending on array size.
4) Cache Policy
Write Back
Writes to the array are cached, which will result
in higher performance but data loss may occur
in the event of a power failure. Write back is the
default setting for RAID arrays.
Write Through
Writes to the array are always passed to the
drives and subsequent reads may still be
completed from the cache if necessary. This
option is safer but slower in performance than
write back.
5) Block Size
A smaller block size results in faster small file
reads and writes. A larger block size results in
faster large file reads and writes. A 64K block
size is the default setting as it provides a balance
of performance for both small and large file sizes.
Page 9
6) Sector Size
On systems such as Windows XP 32-bit that do not support volume sizes larger than 2.2TB, it is
necessary to adjust the sector size in order to force support for arrays larger than 2.2TB.
For systems that do natively support volumes larger than 2.2TB, it is recommended to keep
the default sector size of 512B (bytes).
7) Available Disks
Select the available drives you want to use in your RAID array.
8) Create
Click on “Create” to build the array. A pop-up notification will display with the creation
confirmation.
After the array has initialized, depending on the initialization method chosen, the array will be
passed to the operation system to be formatted as a volume for use.
NewerTech MAXPower RAID mini-SAS 6G
Array Information Window
To manage a RAID array after it has been created, you need to access the Array Information window of
the array you wish to manage. From within the Array Information window you can unplug, verify, delete,
rename, rebuild, and expand/migrate an array.
To access the Array Information window, click on the “Maintenance” link for the array you wish to manage.
Unplugging/Disconnecting an Array
To properly disconnect a RAID array from the controller card, you must
access the Array Information window and click “Unplug”.
If an array is physically disconnected without clicking “Unplug” an alarm
will sound if the audible alarm is enabled in the “Settings” section. The
alarm can be muted from the Array Management screen.
Verifying an Array
Verification can only be done on RAID arrays that have data redundancy
(data protection).
RAID 1 & RAID1/0
The verify process compares the data of one mirror with the other.
RAID 5
The verify process calculates RAID5 parity and compares it to the parity
data on the array.
In general, verification also checks each sector on a drive for any errors
or problems. Periodic verification of an array allows the drive firmware
to take corrective action on any problem areas of a drive to assist in
minimizing the occurrence of uncorrectable read and write errors.
For instruction on how to schedule periodic
verification, see page 11 on Tasks.
Deleting an Array
To delete an array, click the “Delete” button from within the “Array
Information” window. A pop-up window will ask you to confirm the
array deletion. Click “OK” to continue with the deletion or “Cancel” to
cancel the deletion. Deleting an array will delete all the data on that
array.
Renaming an Array
To change the name of an array, enter the desired name in the empty
field next to the “Rename” button and then click the “Rename” button.
Expanding/Migrating an Array
By utilizing Online Capacity Expansion (OCE) and Online RAID Level
Migration (ORLM) techniques, it is possible to migrate a RAID array from
one RAID level to another and also expand the capacity of the array
without taking the array offline or deleting the existing data.
!! WARNING !!
Use on Mac OS X will
destroy existing data!
Due to a limitation in Mac OS X which will
require the migrated and/or expanded
array to be reformatted, it is only
recommended to use the OCE/ORLM
feature with Windows systems.
Rebuilding an Array & Replacing a Failed Drive
When a redundant array becomes degraded and enters a “Critical” state, usually caused by a failed drive, it will need to be rebuilt.
If a spare drive has already been reserved via the Spare Pool Management section, it will automatically replace a failed drive and begin the rebuild
process. If there are no drives in the Spare Pool, follow these steps to replace a failed drive and begin the rebuild process:
1.
Physically replace the failed drive with a matching, unformatted drive. It is
strongly recommended with RAID arrays to use drives that are matching in
manufacturer, part number, size, speed, and firmware.
2.
Before adding the drive to the RAID array, it is suggested to initialize the drive
via the Device Management section of the RAID Manager. See page 8 , Device
Management for more information on initializing a drive.
3.
After the new drive has been initialized, navigate to the Array Management
screen. Click the “Maintenance” link on the array needing to be rebuilt to bring
up the Array Information window. Click the “Add Disk” button as pictured to the
right.
4.
On the Add Disk to Array screen, select the drive that will be added to the RAID
array and click the “Submit” button.
5.
Page 10
A pop-up window confirming the action will appear and the rebuild process
will begin immediately. Rebuild time will vary depending on drive speed and
capacity.
!
For optimal performance, always
use matching drives in a RAID array.
- Matching manufacturer
- Matching part number
- Matching size
- Matching speed
- Matching firmware
NewerTech MAXPower RAID mini-SAS 6G
Spare Pool Management
The purpose of a spare pool is to have drives in reserve to instantly take the place of any failed drives in
a redundant RAID array such as a RAID 1, RAID 5, RAID 10, or RAID 50 array. This allows rebuilds to start
instantly in order to minimize the risk of data loss.
To access the Spare Pool Management screen, click on
the “Manage” menu item and select “Spare Pool”.
To add a drive to the Spare Pool, select an available
drive from the “Available Disks” section and click on the
“Add Spare” button.
Events
The NewerTech Web Manager software will automatically log all events that occur on the MAXPower®
controller card.
Indicates general information and occurrences.
Warning of minor occurrences and issues. These include
plugging of devices into the card and minor issues such
as inconsistent data that can be easily fixed by a verify or
rebuild.
Warns of major occurrences and problems such as failed
drives and improper disconnections of drives and arrays.
Tasks
The NewerTech Web Manager has a built-in scheduling system to run background rebuilds, verifications,
integrity, and health checks to the attached arrays and drives. To enter the task scheduling systems, click on
“Task” menu item.
Health Inspector Scheduler
The Health Inspector Scheduler is always visible in the Task
screen of the Web Manager to check drive temperatures, bad
sector counts, and any other errors that may be reaching
critical levels. If any problems are found, a warning event will
be created and logged. If you have set SMTP settings for email
notification of warnings in the “Settings” section of the Web
Manager, you will receive an email notification.
New Verify Task Scheduler
The New Task Scheduler is only visible when redundant
RAID arrays are present and is used to schedule times to run
background verifications and rebuilds of arrays.
Tasks List
Once a Verify or Health Inspector task is created, it will appear
in the “Tasks List” section. To delete a scheduled task, select
the checkbox next to the task and click on the “Delete” button.
Page 11
NewerTech MAXPower RAID mini-SAS 6G
Settings
General configuration settings for the NewerTech MAXPower RAID mini-SAS 6G controller card can be set in
the Settings page by clicking on the “Setting” menu item.
Auto Rebuild
Enabling Auto Rebuild allows the controller to use any matching
unformatted drive for rebuilding a failed array regardless of
whether or not it is in the Spare Pool.
Continue Rebuilding on Error
Enabling this allows the controller to keep rebuilding the array as
much as possible even if there are read errors occurring on the
source drives.
Audible Alarm
Enables and disables the audible alarms for major events.
Disabled by default.
Rebuild Priority
Sets the rebuild priority grade with the higher the priority
providing the fastest rebuild times, but slowing down any access
that occurs during the rebuild.
Spindown Idle Disk
Sets the time in minutes for hard disk drives to spin down when
not being used.
SAF-TE
Configures SAF-TE settings for SAF-TE activated enclosures.
Listening Port
The controller card’s listening port for access to the Web Manager
can be changed here. The listening port is specified at the end of
the URL (https://localhost:####) used to access the Web Manager.
Changing the listening port is beneficial when multiple cards use
the same listening port.
Password
The password used for accessing the Web Manager can be
changed here. It is strongly recommend to change the password
to something other than the default password. The default
username and password are “admin” and “admin” respectively.
SMTP Setting / Recipients / Add Recipient
Enter SMTP (outgoing) mail server setting here to allow
notifications and warnings to be sent to email recipients. You can
add multiple recipients and choose level of events that are sent
to each email recipient.
Page 12
NewerTech MAXPower RAID mini-SAS 6G
SHI (Storage Health Inspector)
The NewerTech Web Manager has a built-in health monitoring system to allow for monitoring of drive
characteristics and S.M.A.R.T status attributes. To access, click on the “SHI” menu item.
Self-Monitoring, Analysis, and Reporting Technology (S.M.A.R.T.) is a monitoring system built into drives to monitor different
health attributes to assist in warning of potential problems before catastrophic failure can occur. To view the S.M.A.R.T
status attributes of an attached drive, click on “SMART” to expand the attributes for viewing.
Within the SHI section of the Web Manager, you can also set the temperature warning threshold for attached drives. Certain
drives have different maximum operating temperatures, so always check your drive’s specifications before changing the
threshold setting. If a temperature exceeds the
threshold, it will turn from green to red.
NOTE: as shown at right. some host devices may
not support SMART data reporting -- in this case
the temperature reading may show as “Failed”,
and the other SMART attributes will not appear.
SHI will also display the number of bad sectors
found and repaired. Having a small number
is acceptable, but if the number continually
grows or the number turns red, it is strongly
recommended to replace the drive.
Page 13
NewerTech MAXPower RAID mini-SAS 6G
Part 4: Troubleshooting & FAQ
Troubleshooting Tips
If a connected storage device is not recognized after connecting it:
First, try disconnecting the device from the MAXPower RAID mini-SAS 6G card and then connecting it again.
If the device is still not recognized, keep the storage device turned on and connected to the MAXPower RAID
mini-SAS 6G card and restart your machine. Please contact Technical Support for further assistance.
If the MAXPower RAID Mini-SAS 6G card is not being recognized by the computer:
First, make sure the card is seated completely in the PCIe slot by reviewing the Hardware Installation
steps. If the card is still not recognized, try installing the card into a different PCIe slot. If the card is still not
recognized, please contact Technical Support for assistance.
FAQ
Does the MAXPower Mini-SAS 6G card support booting?
Booting from the MAXPower RAID mini-SAS 6G card is not currently supported for Mac. On PC’s, BIOS
booting to RAID is supported.
Why does the card alarm sound when I disconnect the mini-SAS cable?
The audible alarm on the card is disabled by default, but if it is enabled you must follow a different procedure
for physically disconnecting drives from the card. Even though you ejected the drive from the desktop,
you must still “unplug” it from the Web Manager interface. Log into the Web Manager and click on the
“Maintenance” link for the array you wish to disconnect and click on the “Unplug” button. Now the drives are
ready to be physically unplugged from the RAID card.
I installed another card that uses the same localhost:7402 address and now I can’t access either card,
what do I do?
Remove one of the cards in order to gain access to the Web Manager. Navigate to the “Settings” section and
change the Listening Port number from “7402” to another “74xx” number. You should now be able to access
that installed card on the new port and the second card on the default “7402” port. Please see page 12 for
more information on the Listening Port setting.
What happens if I connect a drive that is already formatted?
The NewerTech MAXPower RAID mini-SAS 6G has an automatic passthrough/legacy feature that will pass any
connected drive to the OS without needing to initialize it via the Web Manager. The exception to this autopassthrough feature is when a drive or drives have been initialized via the Web Manager, for use in a RAID
array or as a hot spare. The drives will appear in the Web Manager with an “L” over the icon to represent its
state as a passthrough/legacy drive.
What do I do if a drive fails?
Please see “Rebuilding an Array & Replacing a Failed Drive” on page 10 for instructions on replacing a failed
drive.
Page 14
NewerTech MAXPower RAID mini-SAS 6G
Part 5: Contact Information
Telephone
North America: (800) 275-4576
International: +1 (815) 308-7001
8AM - 8PM CT Monday - Friday
9AM - 4PM CT Saturday
Live Chat
Available during normal business hours:
www.newertech.com/support/
Email
Submit your email at:
www.newertech.com/contact/
Page 15
NewerTech MAXPower RAID mini-SAS 6G
Part 6: Warranty Information
NewerTech MaxPower RAID mini-SAS 6G Controller Card 3 Year Warranty
•
Limited Warranty: 3 years parts and labor
Exclusions & Limitations
This Limited Warranty applies only to the NewerTech MaxPower RAID mini-sas 6G Controller Card. The Limited Warranty does
not apply to any other NewerTech, Inc. (NewerTech) or Other World Computing, Inc. (OWC) hardware products or any software, even if
packaged or sold with other hardware. Manufacturers, suppliers, or publishers, other than NewerTech and OWC, may provide their own
warranties to the end user purchaser, but NewerTech, in so far as permitted by law, provides their products “as is”. Software included with
the NewerTech MaxPower RAID mini-sas 6G Controller Card is not covered under this Limited Warranty. Refer to the licensing agreement
accompanying the software for details of your rights with respect to its use.
Neither NewerTech, nor OWC warrant that the operation of the product will be uninterrupted or error-free. Neither NewerTech, nor OWC
are responsible for damage arising from failure to follow instructions relating to the product’s use.
This warranty does not apply: (a) to damage caused by use with non-NewerTech products; (b) to damage caused by accident, abuse,
misuse, flood, fire, earthquake or other external causes; (c) to damage caused by operating the product outside the permitted or
intended uses described by NewerTech or OWC; (d) to damage caused by service (including upgrades and expansions) performed by
anyone who is not a representative of NewerTech, OWC or an Authorized Service Provider of NewerTech or OWC; (e) to a product or part
that has been modified to significantly alter functionality or capability without the written permission of NewerTech and OWC; (f ) to
consumable parts, such as batteries, unless damage has occurred due to a defect in materials or workmanship; or (g) if any NewerTech
serial number has been removed or defaced.
TO THE EXTENT PERMITTED BY LAW, THIS WARRANTY AND REMEDIES SET FORTH ABOVE ARE EXCLUSIVE AND IN LIEU OF ALL OTHER
WARRANTIES, REMEDIES AND CONDITIONS, WHETHER ORAL OR WRITTEN, STATUTORY, EXPRESS OR IMPLIED. AS PERMITTED BY
APPLICABLE LAW, NEWERTECH AND OWC SPECIFICALLY DISCLAIMS ANY AND ALL STATUTORY OR IMPLIED WARRANTIES, INCLUDING,
WITHOUT LIMITATION, WARRANTIES OF MERCHANTABILITY, FITNESS FOR A PARTICULAR PURPOSE AND WARRANTIES AGAINST HIDDEN
OR LATENT DEFECTS. IF NEWERTECH OR OWC CANNOT LAWFULLY DISCLAIM STATUTORY OR IMPLIED WARRANTIES THEN TO THE
EXTENT PERMITTED BY LAW, ALL SUCH WARRANTIES SHALL BE LIMITED IN DURATION TO THE DURATION OF THIS EXPRESS WARRANTY
AND TO REPAIR OR REPLACEMENT SERVICE AS DETERMINED BY OWC IN ITS SOLE DISCRETION. No OWC or NEWERTECH reseller, agent, or
employee is authorized to make any modification, extension, or addition to this warranty.
EXCEPT AS PROVIDED IN THIS WARRANTY AND TO THE EXTENT PERMITTED BY LAW, NEWERTECH, ALONG WITH OWC, ITS
PARENT, NEW CONCEPTS DEVELOPMENT CORPORATION, AND ITS AFFILIATES ARE NOT RESPONSIBLE FOR DIRECT, SPECIAL,
INCIDENTAL OR CONSEQUENTIAL DAMAGES RESULTING FROM ANY BREACH OF WARRANTY OR CONDITION, OR UNDER ANY
OTHER LEGAL THEORY, INCLUDING BUT NOT LIMITED TO LOSS OF USE; LOSS OF REVENUE; LOSS OF ACTUAL OR ANTICIPATED
PROFITS (INCLUDING LOSS OF PROFITS ON CONTRACTS); LOSS OF THE USE OF MONEY; LOSS OF ANTICIPATED SAVINGS; LOSS
OF BUSINESS; LOSS OF OPPORTUNITY; LOSS OF GOODWILL; LOSS OF REPUTATION; LOSS OF, DAMAGE TO OR CORRUPTION
OF DATA; OR ANY INDIRECT OR CONSEQUENTIAL LOSS OR DAMAGE HOWSOEVER CAUSED INCLUDING THE REPLACEMENT
OF EQUIPMENT AND PROPERTY, ANY COSTS OF RECOVERING, PROGRAMMING, OR REPRODUCING ANY PROGRAM OR DATA
STORED OR USED WITH OWC PRODUCTS AND ANY FAILURE TO MAINTAIN THE CONFIDENTIALITY OF DATA STORED ON THE
PRODUCT. THE FOREGOING LIMITATION SHALL NOT APPLY TO DEATH OR PERSONAL INJURY CLAIMS. OWC DISCLAIMS ANY
REPRESENTATION THAT IT WILL BE ABLE TO REPAIR ANY PRODUCT UNDER THIS WARRANTY OR MAKE A PRODUCT EXCHANGE
WITHOUT RISK TO OR LOSS OF THE PROGRAMS OR DATA.
Page 16
NewerTech MAXPower RAID mini-SAS 6G
Obtaining Warranty Service
Through is exclusive distributor; NewerTech is pleased to offer warranty service fulfilled by OWC. Please access, review the all included
product information, and contact our technical service department before requesting warranty service. If the product is still not
functioning properly after making use of these resources, please contact the OWC representatives or, if applicable, an OWC Authorized
Service Provider located using the information provided in the documentation. An OWC representative or OWC Authorized Service
Provider will help determine whether your product requires service and, if it does, will inform you how OWC will provide it. OWC or
its OWC Authorized Service Providers will provide warranty service on products that are tendered or presented for service during the
Warranty Period, as permitted by law. You will be responsible for shipping and handling charges to the United States of America for any
warranty service. In accordance with applicable law, OWC may require that you furnish proof of purchase details and/or comply with
registration requirements before receiving warranty service. Please refer to the accompanying documentation for more details on this
and other matters on obtaining warranty service.
This warranty is expressly subject to the website Terms & Conditions (“Terms”) & Terms of Sale located at http://eshop.macsales.
com/service/terms/sale, which are hereby incorporated herein and made a part hereof by this reference.
For OWC’s complete Return Policies, please visit http://eshop.macsales.com/service/returnpolicy.
*NEITHER NEWERTECH NOR OWC ARE RESPONSIBLE FOR THE LOSS, CORRUPTION OR DESTRUCTION OF DATA WHILE USING ANY
PRODUCT PURCHASED FROM NEWERTECH OR OWC. NEWERTECH AND OWC WILL NOT BE HELD LIABLE IN ANY MANNER FOR
THE RECOVERY OR RESTORATION OF ANY DATA LOST. TO MAXIMIZE YOUR DATA PROTECTION, OWC RECOMMENDS THAT YOU
KEEP AN ADDITIONAL COPY OF YOUR DATA IN A COMPLETELY DIFFERENT LOCATION.
Both NewerTech and OWC sells a wide variety of products, some from multiple manufacturers and cannot control all aspects of
manufacturing, delivery or use. As a result, NewerTech and OWC are not responsible for special, incidental, or consequential damages
including but not limited to, lost profits, downtime, technician fees, goodwill, damage to or replacement of equipment and property,
and any costs of recovering, reprogramming, or reproducing any program or data stored in or used with any product purchased from
OWC. Additionally, NewerTech and OWC are not responsible for any problem that is caused by (a) commercial use; accident; abuse;
neglect; shock; electrostatic discharge; heat or humidity beyond product specifications; improper installation; operation; maintenance
or modification; or (b) any misuse contrary to the instructions in the user manual; or (c) loss passwords; or (d) malfunctions caused by
other equipment.
Page 17
NewerTech MAXPower RAID mini-SAS 6G
Part 7: Software License Agreement (SLA)
NewerTech Web-Based RAID Manager Application
SLA
Your Acceptance of Terms
The following Software License Agreement (“SLA”) is between you and NewerTech, Inc. (collectively “NewerTech”), and constitutes as
the legal agreement that governs your use of the NewerTech Web-Based RAID Manager software application (collectively referred to as
the “Product”). You must agree to this SLA before you can use the Product. You can agree to this SLA by: a) actually using the Product, or
b) agreeing to this Software License Agreement. If you do not agree to any of the following terms, please do not use the Product. You
should print or otherwise save a copy of this SLA for your records.
Legal Authority
To use the Product you must be: a) of legal age to form a binding contract with NewerTech, and b) cannot be a person barred from
receiving the Product under the laws of the United States or other applicable jurisdiction, including the country in which you reside or
from where you use the Service. By accepting this SLA you represent that you understand and agree to the foregoing.
Description of the Product
The “Product” as listed above consists of RAID administrator computer software, which may include associated media, printed materials,
and “online”/”web” electronics documentation.
Changing the Product
NewerTech reserves the right to modify, suspend or stop the Product (or any part thereof ), either temporarily or permanently, at any
time or from time to time, with or without prior notice to you. Without limiting the foregoing, NewerTech may provide notice of any such
changes to the Product by posting them on its websites and/or via the Product. You agree that NewerTech shall not be liable to you or
any third party for any modification or cessation of the Product. You acknowledge that NewerTech has no express or implied obligation
to provide, or continue to provide, the Product, or any part thereof, now or in the future; and in addition, NewerTech may at any time,
upon prior notice as required by applicable law, institute charges or fees for the Service.
Limitations on Use
You agree to use the Product only for purposes as permitted by this SLA and any applicable law, regulation, or generally accepted
practice in the applicable jurisdiction. NewerTech reserves the right to modify or impose any limitations on the use of the Product at any
time, with or without notice to you.
No Resale of Service
You agree that you will not reproduce, copy, duplicate, sell, resell, rent or trade the Product (or any part thereof ) for any purpose.
Trademark Information
NewerTech and the NewerTech logo, and other NewerTech trademarks, service marks, graphics, and logos used in connection with the
Product are trademarks or registered trademarks of NewerTechnology, Inc., respectively. Other trademarks, service marks, graphics, and
logos used in connection with the Product may be the trademarks of their respective owners. You are granted no right or license in any
of the aforesaid trademarks, and further agree that you shall not remove, obscure, or alter any proprietary notices (including trademark
and copyright notices) that may be affixed to or contained within the Product.
Page 18
NewerTech MAXPower RAID mini-SAS 6G
Software
NewerTech’s® Proprietary Rights
You acknowledge and agree that NewerTech and/or its licensors own all legal right, title and interest in and to the Product, and any
software (including any Content provided therein) provided by NewerTech to you as a part of and/or in connection with the Product
(the “Software”), including any and all intellectual property rights that exist therein, whether registered or not, and wherever in the
world they may exist. You further agree that the Product (including the Software, or any other part thereof ) contains proprietary and
confidential information that is protected by applicable intellectual property and other laws.
License From NewerTech®
NewerTech grants you a personal, non-exclusive, non-transferable, limited license to use the Software as provided to you by NewerTech
as a part of the Product and in accordance with this SLA; provided that you do not (and do not permit anyone else to) copy, modify,
create a derivative work of, reverse engineer, decompile, or otherwise attempt to discover the source code (unless expressly permitted
or required by law), sell, lease, sublicense, assign, grant a security interest in or otherwise transfer any right in the Software.
Export Control
Use of the Product and Software, including transferring, posting, or uploading data, software or other Content via the Service, may
be subject to the export and import laws of the United States and other countries. You agree to comply with all applicable export and
import laws and regulations. In particular, but without limitation, the Software may not be exported or re-exported (a) into any U.S.
embargoed countries or (b) to anyone on the U.S. Treasury Department’s list of Specially Designated Nationals or the U.S. Department
of Commerce Denied Person’s List or Entity List. By using the Software or Service, you represent and warrant that you are not located
in any such country or on any such list. You also agree that you will not use the Software or Service for any purposes prohibited by
United States law, including, without limitation, the development, design, manufacture or production of missiles, nuclear, chemical or
biological weapons. You further agree not to upload to your account any data or software that cannot be exported without prior written
government authorization, including, but not limited to, certain types of encryption software. This assurance and commitment shall
survive termination of this SLA.
Disclaimer of Warranties
SOME JURISDICTIONS DO NOT ALLOW THE EXCLUSION OF CERTAIN WARRANTIES, AS SUCH, TO THE EXTENT SUCH EXCLUSIONS ARE
SPECIFICALLY PROHIBITED BY APPLICABLE LAW, SOME OF THE EXCLUSIONS SET FORTH BELOW MAY NOT APPLY TO YOU.
YOU EXPRESSLY UNDERSTAND AND AGREE THAT YOUR USE OF THE SERVICE IS AT YOUR SOLE RISK AND THE SERVICE IS PROVIDED ON
AN “AS IS” AND “AS AVAILABLE” BASIS. NEWERTECH AND ITS AFFILIATES, SUBSIDIARIES, OFFICERS, DIRECTORS, EMPLOYEES, AGENTS,
PARTNERS AND LICENSORS EXPRESSLY DISCLAIM ALL WARRANTIES OF ANY KIND, WHETHER EXPRESS OR IMPLIED, INCLUDING BUT
NOT LIMITED TO THE IMPLIED WARRANTIES OF MERCHANTABILITY, FITNESS FOR A PARTICULAR PURPOSE, AND NON-INFRINGEMENT. IN
PARTICULAR, NEWERTECH AND ITS AFFILIATES, SUBSIDIARIES, OFFICERS, DIRECTORS, EMPLOYEES, AGENTS, PARTNERS AND LICENSORS
MAKE NO WARRANTY THAT (I) THE PRODUCT WILL MEET YOUR REQUIREMENTS; (II) YOUR USE OF THE PRODUCT WILL BE TIMELY,
UNINTERRUPTED, SECURE OR ERROR-FREE; (III) ANY INFORMATION OBTAINED BY YOU AS A RESULT OF THE PRODUCT WILL BE ACCURATE
OR RELIABLE; AND (IV) ANY DEFECTS OR ERRORS IN THE SOFTWARE PROVIDED TO YOU AS PART OF THE PRODUCT WILL BE CORRECTED.
ANY MATERIAL TRANSMITTED, STORED, ACCESSED OR OTHERWISE MAINTAINED THROUGH THE USE OF THE PRODUCT IS DONE SO
AT YOUR OWN DISCRETION AND RISK, AND YOU WILL BE SOLELY RESPONSIBLE FOR ANY DAMAGE TO YOUR DEVICE OR LOSS OR
CORRUPTION OF DATA THAT RESULTS FROM ANY SUCH USE OF THE PRODUCT. YOU FURTHER ACKNOWLEDGE THAT THE PRODUCT
IS NOT INTENDED OR SUITABLE FOR USE IN SITUATIONS OR ENVIRONMENTS WHERE THE FAILURE OR TIME DELAYS OF, OR ERRORS OR
INACCURACIES IN, THE CONTENT, DATA OR INFORMATION PROVIDED BY THE PRODUCT COULD LEAD TO DEATH, PERSONAL INJURY, OR
SEVERE PHYSICAL OR ENVIRONMENTAL DAMAGE. NO ADVICE OR INFORMATION, WHETHER ORAL OR WRITTEN, OBTAINED BY YOU FROM
NEWERTECH OR THROUGH OR FROM THE SERVICE SHALL CREATE ANY WARRANTY NOT EXPRESSLY STATED IN THE SLA.
Page 19
NewerTech MAXPower RAID mini-SAS 6G
Limitation of Liability
SOME JURISDICTIONS DO NOT ALLOW THE EXCLUSION OR LIMITATION OF LIABILITY FOR INCIDENTAL OR CONSEQUENTIAL DAMAGES,
AS SUCH, TO THE EXTENT SUCH EXCLUSIONS OR LIMITATIONS ARE SPECIFICALLY PROHIBITED BY APPLICABLE LAW, SOME OF THE
EXCLUSIONS OR LIMITATIONS SET FORTH BELOW MAY NOT APPLY TO YOU.
YOU EXPRESSLY UNDERSTAND AND AGREE THAT NEWERTECH AND ITS AFFILIATES, PARENT HOLDING COMPANY, SUBSIDIARIES,
OFFICERS, DIRECTORS, EMPLOYEES, AGENTS, PARTNERS AND LICENSORS SHALL NOT BE LIABLE TO YOU FOR ANY DIRECT, INDIRECT,
INCIDENTAL, SPECIAL, CONSEQUENTIAL OR EXEMPLARY DAMAGES, INCLUDING, BUT NOT LIMITED TO, DAMAGES FOR LOSS OF
PROFITS, GOODWILL, USE, DATA, COST OF PROCUREMENT OF SUBSTITUTE GOODS OR SERVICES, OR OTHER INTANGIBLE LOSSES (EVEN
IF NEWERTECH HAS BEEN ADVISED OF THE POSSIBILITY OF SUCH DAMAGES), RESULTING FROM: (I) THE USE OR INABILITY TO USE THE
SERVICE; (II) ANY CHANGES MADE TO THE SERVICE OR ANY TEMPORARY OR PERMANENT CESSATION OF THE SERVICE OR ANY PART
THEREOF; (III) THE UNAUTHORIZED ACCESS TO OR ALTERATION OF YOUR TRANSMISSIONS OR DATA; (IV) THE DELETION OF, CORRUPTION
OF, OR FAILURE TO STORE AND/OR SEND OR RECEIVE YOUR TRANSMISSIONS OR DATA ON OR THROUGH THE PRODUCT; (V) STATEMENTS
OR CONDUCT OF ANY THIRD PARTY ON THE PRODUCT; AND (VI) ANY OTHER MATTER RELATING TO THE PRODUCT.
Indemnity
You agree to defend, indemnify and hold NewerTech, its parent holding company, affiliates, subsidiaries, directors, officers, employees,
agents, partners and licensors harmless from any claim or demand, including reasonable attorneys’ fees, made by a third party, relating
to or arising from: (a) any Content you submit, post, transmit, or otherwise make available through the Product; (b) your use of the
Product; (c) any violation by you of this SLA; or (d) your violation of any rights of another. This obligation shall survive the termination or
expiration of this SLA and/or your use of the Product.
Governing Law
Any litigation or other dispute resolution between you and NewerTech arising out of or relating to this SLA or your use of the Product
will take place in the McHenry County. Illinois, and you and NewerTech hereby consent to the personal jurisdiction of and exclusive
venue in the state and federal courts within that District with respect to any such litigation or dispute resolution. This Agreement will
be governed by and construed in accordance with the laws of the United States and the State of Illinois, except that body of Illinois law
concerning conflicts of law. This Agreement shall not be governed by the United Nations Convention on Contracts for the International
Sale of Goods, the application of which is expressly excluded.
Page 20
NewerTech MAXPower RAID mini-SAS 6G
Part 8: FCC Certification Information
FCC Part 15 Class B Radio Frequency Interference Statement
This equipment has been tested and found to comply with the limits for a Class B digital device, pursuant to part 15 of the FCC Rules.
These limits are designed to provide reasonable protection against harmful interference in a residential installation. This equipment
generates, uses and can radiate radio frequency energy and, if not installed and used in accordance with the instructions, may cause
harmful interference to radio communications. However, there is no guarantee that interference will not occur in a particular installation.
If this equipment does cause harmful interference to radio or television reception, which can be determined by turning the equipment
off and on, the user is encouraged to try to correct the interference by one or more of the following measures:
• Reorient or relocate the receiving antenna.
• Increase the separation between the equipment and receiver.
• Connect the equipment into an outlet on a circuit different from that to which the receiver is connected.
• Consult the dealer or an experienced radio/TV technician for help.
Modifications not expressly approved by the manufacturer could void the user’s authority to operate the equipment under FCC rules.
This device complies with part 15 of the FCC Rules. Operation is subject to the following two conditions:
(1) this device may not cause harmful interference, and
(2) this device must accept any interference received, including interference that may cause undesired operation.
European Union Compliance Statement This Information Technologies Equipment has been tested and found to comply with the following European directives:
• European Standard EN55022 (1998) Class B
• European Standard EN55024 (1998)
© 2015 NewerTech. All rights reserved. No part of this publication may be reproduced, stored in a retrieval system, or transmitted in any form or by any means,
electronic, mechanical, photocopying, recording or otherwise, without the prior written consent of Newer Tech Inc. MAXPower, NewerTech, and the NewerTech
arrow logo are trademarks of New Concepts Development Corporation, registered in the U.S. Patent and Trademark Office and in Canada. Apple, Mac, Mac Pro,
and OS X are trademarks of Apple Inc., registered in the U.S. and other countries. Windows and Vista are trademarks of Microsoft Corporation, registered in the
U.S. and other countries. Other marks may be the trademark or registered trademark property of their owners.
Page 21
R4 DM 5/07/15
NWTMANRAIDMS