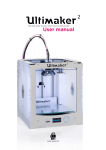
Download Ultimaker Original User Manual
Transcript
Original
The fast, easy to use, Open-source 3D printer
User manual
English Version 1.1
Table of Contents
A.
B.
Welcome to the Ultimaker Original
A1. The Ultimaker experience
A2. Specifications of the Ultimaker Original
First
B1.
B2.
B3.
C.
Make a print file with Cura software
C1. Cura software interface
C2. Cura mouse interface
C3. From YouMagine.com to load file in Cura
C4. Preparing a 3D model
C5. From SD-card to print your file
16
17
18
19
20
D.
E.
Use
D1. D2.
D3.
22
23
25
use of your Ultimaker Original
Downloading and installing Cura
The first run wizard
Installing filament
of the Ultimaker controller display
At first sight
Navigation and basic functionalities
Use of the controller during printing
Maintenance for your Ultimaker Original
E1. In General
E2. The build plate
E3. The Heated build plate
E4. Cleaning the material feeder
E5. Lubricating the axes
F.Terminology
F1.Terminology
Table of content User manual
5
6
8
9
14
27
28
29
30
31
33
WELCOME
TO THE
ULTIMAKER
ORIGINAL
4
A1.
Introduction & Specification
Dear customer,
Thank you for purchasing the Ultimaker Original Kit.
This user manual will guide you through the setup and printing process step by step.
Available online: www.ultimaker.com/pages/support/manuals
There’s also a wealth of information, tips, tricks and amazing Ultimaker printed objects on our
online community forum.
Drop by and say hello:
www.ultimaker.com/forum
Visit YouMagine for fun projects and free printable models:
www.youmagine.com
Happy building and printing and we’ll be in touch!
Team Ultimaker
Support
We would love to hear from you. We are easy to reach and enjoy answering all your questions.
Technical assistance, sales enquiries or general information, we are there for you. Find the information below to contact us.
General [email protected]
Support [email protected]
Sales [email protected]
Marketing/PR [email protected]
Phone +31 (0)345712017
Meet us online at: A1 The Ultimaker experience Original Introduction & Specification
5
A2. Specification of the Ultimaker Original
Printing
Print technology
Fused filament
fabrication (FFF)
Build volume
21 x 21 x 20,5 cm
Layer resolution
Ultra high 20 micron
60 micron
High 100 micron
Medium
200 micron
Low Position precision
X 12,5 micron
Y 12,5 micron
Z 1.875 micron
Filament diameter
2.85 mm (generally known as 3 mm filament)
Nozzle diameter
0.4 mm
Print speed
30 mm/1 - 300 mm/s
Travel speed
30 mm/1 - 350 mm/s
Software
Software package
Cura - Official Ultimaker
File types STL / OBJ / DAE / AMF
Supports
Windows (XP 32 bit/7+)
Ubuntu Linux (12.04+)
Mac OS X (10.6 64bit +)
Connectivity
Stand-alone printing from SD-card
USB (firmware)
Temperature
Ambient Operating
Temperature
Storage Temperature
15°- 32° C
0° - 32° C
Operating nozzle
temperature
180° - 260°
Operating Bed
temperature
50° - 110°
Electrical
AC INPUT
100 – 240 V, 2.0 AMPS,
50 – 60 HZ
120 watt max.
Power Requirements
19V DC @ 6.32 AMPS
Electrical with heated bed
AC INPUT
100 – 240 V, 4.0 AMPS,
50 – 60 HZ
221 watt max.
Power Requirements
24V DC @ 9.2 AMPS
Physical dimensions
Frame Dimension
X 35.7 cm
Y 34.2 cm
Z 38.8 cm
Operating dimension with UltiController,
spoolholder and the max height
filament guide tube
X 54.4 cm
Y 34.2 cm
Z 56.5 cm
WARNING: The Ultimaker Original generates high temperatures and has hot moving parts that can cause
injury. Never reach inside of the Ultimaker Original while it is in operation. Always control the Ultimaker
Original from the push wheel on the UltiController or with the power-switch on the back. Allow the
Ultimaker Original to cool down for at least 5 minutes before reaching inside.
CAUTION: When opening the Ultimaker Original for service, ensure that the power supply is turned off
and the cord is disconnected from the wall socket.
CAUTION: Only use the power supply provided with your Ultimaker Original.
A2.The Ultimaker experience Specification of the Ultimaker Original
6
FIRST USE
OF YOUR
ULTIMAKER
ORIGINAL
7
B1.Downloading and installing Cura
Before we start using the Ultimaker Original we need to install the software to calibrate the machine. The preferred software for your
Ultimaker Original is Cura developed at Ultimaker. This software package prepares your 3D model into instructions that your Ultimaker uses
to produce an object.
1. The Cura software package can be downloaded
from the “Our software” section on our website:
www.ultimaker.com/pages/our-software
2. Download the latest version of Cura for your operating system. Our software is
available for, WindowsXP or newer, MacOS 10.6 or newer and Ubuntu Linux 12.10
or newer.
3. Open the installer and follow the directions to install the software.
4. After the installation the configuration and calibration wizard will run.
NOTE: We keep on updating our software, so the
latest version that you have downloaded might be a
newer version than the one in this manual. This should
have no impact on the installation procedure.
B1. Downloading and installing Cura First use of your Ultimaker Original
8
B2.
The first run wizard
This chapter guides you through the steps and the first run of the
Ultimaker Original. After you switch on your Ultimaker Original, lets install
Cura and make your 3D printer print ready.
1. When you start Cura for the first time. Make
sure you follow the configuration wizard. Select
Ultimaker Original as your printer. Also deselect the check box if you do not agree with us
checking your slicer profiles.
Cura 13.02 or newer can collect user statistics. These statistics are gathered to improve next version of Cura and
possibly provide more features for Ultimaker and RepRap
users. The collected information includes profile settings
and machine types.
It does NOT collect usernames, models or any privacy
sensitive information. Currently these stats are only
collected and there is nothing done with it yet. We want
to make these stats quite open for everyone to use as well
as the option to share this information or not.
2. Leave the first check box selected if you
have a new Ultimaker Original. If not, make sure
you check the date of purchase of your
Ultimaker. Any of the other checkboxes can be
modified later. Hit the [Next>] button.
3. First Plugin the USB cabel then press the
Upgrade to Marlin firmware button to make
sure you have the latest firmware running on
your Ultimaker. This should take about a maximum time of 20 seconds. When its finished hit
the [Next>] button.
B2. The first run wizard First use of your Ultimaker Original
9
NOTE: Some steps during the endstop checks may be different if you have an Ultimaker Original+
4. In the next configuration steps we want to
do some check ups on your Ultimaker Original.
Make sure before doing these checks you have:
- Connected the usb cable
- The printhead is in the middle of the frame [1]
- The build plate has some distance from the
nozzle, minimal 3 cm. [2]
[1]
[2]
NOTE: with the Heated bed the build plate might
look different. the checks are still the same.
5. Please select the [Run Checks] function.
Now Cura connects with the electronics and
tests some of the internal communication.
Cura will also perform a temperature check to
see if it functions correctly
6. After the temperature check has finished Cura
will check your end stops. End-stops determine
the maximum motion size,
Make sure that you move the printhead in the
direction of every indicated end stop.
7. When the wizard asks you to check on the
right front switch (x axis) gently move the print
head in this direction till you here a click and
Cura gives you the next command.
B2. The first run wizard First use of your Ultimaker Original
10
8. If the printhead can’t touch the end stop,
don’t force it. Unscrew the end stop with the hex
screwdriver and move it a bit inwards the frame,
as indicated on the image.
9. Move the printhead to the left corner untill
you hear a click.
10. Now do the same with side front Y endstop.
11. Now do the same with side back Y endstop.
12. Next step is to click the top Z-end stop,
rotate the build plate screw or click it with your
screw driver/finger.
13. When Cura asks you to click the bottom
Z-endstop, use the hex screw driver to touch
and click it.
B2. The first run wizard First use of your Ultimaker Original
11
If the build plate is too far away from the nozzle your 3D-print might not stick to
the build plate. Equally, if you adjust the build plate too close to the nozzle, the
build plate can block the filament from extruding from the nozzle.
NOTE: If you have a heated bed installed follow steps 14a to 18a
14. In this step Cura will help you to level your
printbed. Make sure you choose the
[Connect to printer] button to perform this
action.
15. The printhead should have moved to its homing position in the front left corner. The printbed should have moved up almost or against
the nozzle.
Use the Hex screwdriver and a standard A4
piece of paper to level you bed. Slide the paper back and forth between the nozzle of the
printhead and build plate as you screw or unscrew with the screwdriver.
16. Make sure you feel a little bit of friction from
the paper, sliding between nozzle and build
plate.
17. When you are finished with this corner, select
the [Resume] button in cura. This will move the
head to the next corner. Repeat this step for all
corners.
18. Follow the instructions, when you have material inserted your Ultimaker Original, you should
select the [Resume] button again and now your
Ultimaker printhead will heat up and print a
square in lines to show and check that your build
plate is level and the material sticks to the tape.
B2. The first run wizard First use of your Ultimaker Original
12
If the build plate is too far away from the nozzle your 3D-print might not stick to
the build plate. Equally, if you adjust the build plate too close to the nozzle, the
build plate can block the filament from extruding from the nozzle.
14a. In this step Cura will help you to level your
printbed. Make sure you choose the
[Connect to printer] button to perform this
action.
15a. The printhead should have moved to its homing position in the front left corner. The printbed should have moved up almost or against
the nozzle.
Use the buttons Up 0,2mm or Up 10mm to move
the platform up to the nozzel. Make sure the
Z-switch is triggered. The Up buttons don’t work
if the switch is triggerd.
16a. Press Resume and the bed will move up to
the Z-switch trigger position.
Now use the thumbscrew in the left corner to
move the bed up or down so it is just touching
the nozzle.
17a. When you are finished with this corner, select the [Resume] button in cura. This will move
the head to the next corner. Repeat this step for
all corners.
18a. Follow the instructions, when you have
material inserted your Ultimaker Original, you
should select the [Resume] button again and
now your Ultimaker printhead will heat up and
print a square in lines to show and check that
your build plate is level and the material sticks to
the tape.
B2. The first run wizard First use of your Ultimaker Original
13
B3.Installing filament and the spoolholder
1. First rotate the the small black lever vertically
then pull it all the way up.
2. Now take the black feeder part and pull it
outwards, this gives you a better view how to
get your filament into the material feeder.
3. Now take the filament wire and guide it upwards between the two wooden plates and up
through the coupling.
4. Make sure you push the filament all the way
through to the end of the bowdentube untill you
can’t move it any further.
5. Now rotate the black feeder part back into
place. Apply some pressure so the lever can be
pushed back down.
6. Now you can easily rotate the black lever
back so that the material feeder places the right
amount of pressure on the filament.
B3. The first run wizard Installing the fillament.
14
MAKE A
PRINTFILE WITH
CURA SOFTWARE
15
C1. Cura software interface
This is the main screen of Cura. Here you can choose which object or objects to
print. And how you want them to be printed.
4
1
2
3
9
5
6
7
8
10
1. Load file
Click this button to load an
object to your print area. You
can add as many objects as
you can fit on the plate.
2. Save/print toolpath
When you press this button
the prepared toolpath will be
saved on your drive or SD card.
It can also be printed directly if
a usbcable is connected.
3. Share on
YouMagine.com
Through this button you can
share your 3D files on
YouMagine.
4. Menu bar
In this bar you can change to
Full settings, preferences and
more expert settings.
11
12
13
5. Print type profiles
3 options to choose a print
profile.
6. Material settings
2 different settings in material.
7. Material Diameter
If you buy Ultimaker filament,
the default value is 2,85mm
8. Print with support structure
The option to give your model
some support material to
make the print more
successfull.
9. View modes
After your model has been
prepared for printing, you can
use different view modes to
analyse your design.
C1. Cura software interface Make a printfile with Cura software
14
10. Rotate model
options
Option to change the rotation
of the object you would like to
print.
11. Scale model options
Option to change the scale of
the object you would like to
print.
12. Mirror model
options
Options to mirror the object
you’d like to print.
13. Loaded 3D model
This is the object you have
loaded through the load file
button.
14. 3D print volume
This is a visualisation of the
print area of your Ultimaker.
16
C2. Cura mouse interface
The following mouse actions are used to work, navigate and view the 3D model:
Leftmouse button
Scrollwheel button
Select objects. Hold and move
the mouse to drag
object on the 3D print area.
Use the scroll wheel to zoom
in or out.
Rightmouse button
Hold and move the mouse to
rotate the viewpoint around
the 3D model.
+
Rightmouse button +
Shift
Hold and move the mouse to
pan the 3D view.
Right and left mouse
button
Hold and move the mouse to
zoom.
C2. Cura mouse interface Make a printfile with Cura software
17
C3. From YouMagine.com to Cura
Now that you are familiar with Cura we continue to explain how you
can download a 3D file from YouMagine.com and load this into Cura.
YouMagine.com is an online community for 3D printing.
1. Open your browser and go to
www.youmagine.com
2. Use the search field at the menu bar next
to the magnifying glass to find a model of your
interest. Let’s search for example “coffee cup”
and ‘Enter’.
3. Choose a design you like.
4. The following page will provide you with a
‘Download’ button where you can get your .stl
file which is needed to print a 3D model.
5. The .stl file can be loaded into the Cura
software, this will be explained more fully in the
next
chapter.
Tip: If you’ve made a 3D design yourself, you
can contribute back to the YouMagine community!
NOTE: The screenshots may not look and work
exactly the same because this platform is in
continuous development.
C3. From YouMagine.com to load file in Cura Make a printfile with Cura software
18
C4. Preparing a 3D model
1. Most 3D printable files that you will find on
YouMagine.com are in the STL format. Let’s start
by clicking the Load button in Cura.
2. When you have loaded a file into Cura you
might notice the progress bar.
Cura will automatically start making the 3D model print ready for you.
3. In the meantime you can adjust settings and
select a print type.
4. When the 3D model is prepared, the Save
toolpath button pops up and gives you the
option to save the prepared model in a
directory.
Underneath the button Cura gives you an
indication about your print on
- Estimated print time
- Amount of material required
- The weight of your 3D print
5. After you insert the included SD-card into
your computer, Cura changes the Save
toolpath Button into the Toolpath to SD Button.
SD
6. Just after you choose the Toolpath to SD
button the progress bar will run again, but now
it will save the file on the SD card.
7. When cura has finished saving the file, it will
give you the notification that your file has been
saved.
8.Before taking out the SD-card make sure you
always choose the safely eject
button in Cura.
C4. Preparing a 3D model Make a printfile with Cura software
19
C5. From SD-card to print your file
1. After saving the file and safely ejecting your SD-card from your computer, it is
time to insert it in the SD-card Slot at the side of your UltiController.
2. By navigating to [card menu] and chosing
a file on the sd card, you press the button and
your object will start printing.
C5. From SD-card to print your file Make a printfile with Cura software
20
USE OF THE
ULTIMAKER
CONTROLLER
DISPLAY
21
D1. At first sight
When switching on the Ultimaker, the main thing you will notice is that the display
lights up. You instantly get the mainscreen of the controller as shown in the image
bellow. First lets explain what you see and their functionalities
2
1
3
4
5
6
7
1. Push wheel : You can navigate through the display by using the button. This button can
be pushed and rotated. By rotating you can select or control an action. By pushing you
can confirm an action. When pushing the button you hear a “beep” sound to confirm your
chosen action.
2. Nozzle temperature / Target temperature: The first temperature ‘ 024°’ shows the
nozzle’s current temperature, the second temperature ‘ 000°’ is the target temperature. For
example when preheating the target becomes 024°/210°
3. FeedRate: This is the print speed of your machine, You can change this by rotating the
pushwheel (Number 1). Its recommended you leave this value on 100%, especially when
you are not an experianced user.
4. SD card indication: The note: ‘ Card inserted’. is obvious, it means your SD-card is inserted and is accessible. When you remove the card by pushing it, the menu will read ‘ Card
removed’.
5. Print process indication: 000%SD keeps track of how far you are into you print. 000%
means you haven’t started, 100% means you print is finished.
6. Height 3D model: This shows you how much the z has moved down.
Optional:
7. Heated bed temperature / Target temperature: The first temperature ‘ 020°’ shows the
nozzle’s current temperature, the second temperature ‘ 000°’ is the target temperature. For
example when preheating the target becomes 020°/65°
D1. At first sight Use of the Ultimaker controller display
22
D2. Navigation and basic functionalities
1. When pressing down on the push wheel you will be presented with the following screen where see the main menu of the controller. The arrow in front of all
the functions indicate’s whats selected
1
2
3
4
1. When you have selected >Info screen (this could also be named >Watch) and push
down on the wheel you navigate back to the first screen.
2. Via > Prepare -> you will proceed to the next sub-menu where you can find a variety of
settings that can be used to prepare your Ultimaker Original.
>Disable steppers: With this function you will disable the steppers. This allows you to
move the printhead and printbed without the motor resistance
>Auto home: With auto home you sent the printhead to the auto home position. The home
position is in the front left.
>Set origin: Set origin will make your current position the 0,0,0 (home position)
[Optional >Move Z: This allows you to move the Z-stage up or down by turning the controller knob. ]
>Preheat PLA: With Preheat PLA your hot end will heat up to 210°C
>Preheat ABS: With Preheat ABS your hot end will heat up to 240°C
>Cooldown: With Cooldown the temperature will drop to room temperature.
>Move Axis: With Move axis you will open another sub menu which allows you to move your
axis around. You can move the X, Y, Z and E (extruder) motor by clicking on the X, Y, Z and E in the
menu and rotate your button. Extruding will only work when your print head is at least 180°C
D2. Navigation and basics functionalities Use of the Ultimaker controller display
23
3. When you have selected >Control -> you will proceed to the next sub-menu where you
will find a variety of settings that can be used to control your Ultimaker Original.
Temperature: In this sub menu you can change several settings that influence the tempe
rature of your Ultimaker. Here you can change the nozzle and bed temperature and fanspeed.
Motion: Only make changes in the Motion menu if you know what you are doing. More can be
found at our wiki page (http://wiki.ultimaker.com/)
Store memory: Save the settings you have changed in the control menu.
Load memory: If you ever made and saves any changes in the settings, this option allows
you to load them.
Restory failsafe: Restore failsafe will reset your UltiController to its Original settings. All
the settings you previously changed will be deleted.
Firmware version: Here you can see what the current firmware version is on your Ultimaker Original.
4. When there is no card inserted this function will indicate >No Card ->. When you have
selected >Print from SD -> you will access a sub-menu where all the Gcodes on your SDcard will be visible.
D2. Navigation and basics functionalities Use of the Ultimaker controller display
24
D3. Use of the controller during printing
You can start a print by navigating to >Print from SD -> and clicking one of the filenames.This will start a print. If your hot end is not heated yet, it will first start heating your hot
end to approximately 210°C. Next it will load the data and start your print.
When a print has been initiated one option in the menu will change. Instead of >prepare ->,
you will find it to be named >Tune -> . In the tune-menu you can live tune your printer.
Meaning you can change parameters of the print process, while printing.
>Speed: The speed you are printing in will increase/decrease. Changing the speed can be done
faster by just rotating the wheel in your home menu. If you change the speed, it will have effect on
the perimeter, infill and travel speed.
>Nozzle: With Nozzle you have the option to change the temperature of your hot end.
>Bed: With Bed you have the option to change the temperature of your heated bed.
>Fan Speed: You can change the speed of your fan from 0-255. But in thehe slicer you can
set more eleborate modes, for example if you want the fan on/off or with an interval.
>Flow: Flow allows you to increase or decrease the amount of filament that is being extruded.
This can be interesting when you are over or underextruding with the current settings. However,
the first thing you should do is check if you have entered the right diameter of your filament in
your slicer. An inaccurate value may result in the same complains.
>Change filament: This function allows you to change filament during printing. The printbed will lower, the printhead will move to side and the extruder will retract the filament. Now you
can open the material feeder and replace it with new filament. Make sure to push the filament all
the way through the bowden tube untill it exits through the nozzle, now press the pushwheel on
the UltiController to continiue the print
Common workflow with the UltiController.
A common workflow with a well calibrated Ultimaker Original is saving a sliced model on
your SD-card with Cura (Cura set to Ultimaker Original machine settings). Safetly remove the
SD-card and insert the SD card in your UltiController. From the first screen, click the button,
navigate to >Print from SD -> and select a file you want to print. After heating up the
print should start. When you do not use your UltiController it automaticly reverts back to the
first screen in approximately 15 seconds, where you can watch the state of the print.
D3. Use of the controller during printing Use of the Ultimaker controller display
25
MAINTENANCE
FOR YOUR
ULTIMAKER
ORIGINAL
26
E1. In General
To achieve the best results from your Ultimaker Original, some basic
maintenance is recommended. This chapter contains tips which helps
you to keep the Ultimaker Original running at it’s best.
Before you make a print a quick check is advised. A visual check is
recommended to see if there is not any:
- Old prints/objects on the build plate.
- Make sure no one can walk over, damage or pull out the power supply cable.
Updating firmware with USB cable
Every once in a while Cura will give you a notification that new firmware is available. New firmware means that we have optimised the control of the electronics
which results in better print results and user experience. If you see this notification,
connect the USB cable between your computer and your Ultimaker Original and
follow the instructions in Cura.
E1. In general Maintenance for your Ultimaker Original
27
E2. The build plate
Note: If you have a Heated Bed installed go to E3
After a lot of printing, The blue tape can get torn or worn down. This can cause an
uneven print surface and it is recommended to replace it once a while.
1. Turn off the machine and wait for the printhead to cool down so you won’t burn
your hands on a hot printhead.
2. Now carefully push-slide the plexiglass plate out of its clamp system.
3. Reapply tape to either the whole build plate or just part of it and carefully
push-slide the plate back.
4. After removeing the buildplate re-check if the calibration is still right.
E2. The build plate Maintenance for your Ultimaker Original
28
E3. The Heated build plate
After a lot of printing, The glass plate can get a little bit dirty and the excess glue
needs to be cleaned off. It is recommended to do this every once in a while.
1. Turn off the machine and wait for the printhead and printbed to cool down so
you won’t burn your hands.
2. Now carefully move the glass retainer clips all the way to the side. (use a screwdriver as leverage.
3. To take the glass plate out of the machine move the front a little bit upwards
and then pull it towards you.
4. Clean the glass plate using some dishwashing soap and water.
4. Reinsert the glass plate and do a quick check if the platform is still level.
E3. The Heated build plate Maintenance for your Ultimaker Original
29
E4. Cleaning the material feeder
Note: The drive might look different for your machine.
In the Ultimaker material feeder sits a knurled
bolt. This bolt grips the filament and can sometimes get clogged because the feeder is a
bit dirty. Then the material will start to slip. You
clean its as follow.
1. First pull the black lever upwards and open
the material feeder.
2. Then take off the little clip that holds the
filament gear in place.
3. Now you can take out the bigger wheel with
the dirty knurled bolt. You can blow against it
or use a brush the clean the bolt. Reverse the
previous steps to re-assemble the feeder.
E4. Cleaning the material feeder Maintenance for your Ultimaker Original
30
E5. Lubricating the axes
Z-Axes
Approximately every half year the threaded rod
on the z-stage has to be lubricated. A green grease (Magnalube-G) is supplied with the Ultimaker Original. This grease is the lubrication which
has to be used only on the threaded Z-stage rod.
Note: the green grease should be applied as shown in the
photograph.
Make sure you spread 10 drops of grease over
the entire exposed threaded rod. With you next
print on the Ultimaker Original the Thread will
grease itself by moving up and down.
X-Y-Axes
If you notice small waves in the outside surfaces
of your 3D printed objects.It is recommended to
add a single drop of sewing machine oil onto the
X and Y steel axes rods. This will improve the
smooth movement of your Ultimaker Original.
This lubrication is not included in the Ultimaker
Original package.
If you choose to lubricate the X- and Y-axes you
MUST use sewing machine oil. Apply a maximum of one droplet oil on the axis and move the
print head around to spread the oil across the
rods. Afterwards remove any excess oil.
E5. Lubricating the axes Maintenance for your Ultimaker Original
31
TERMINOLOGY
ULTIMAKER
ORIGINAL
32
F1. Terminology
ABS filament: This is a well-known plastic known for
Build plate screws: These screws can adjust the
its strength and industrial properties.
leveling of the build plate.
Build plate: The frame that supports the plexiglass
Power supply: The A/C power supply. It consists
print plate.
of a block and a power cable. The cable can have
Cura: Open Source Software that allows you to turn
different power plugs (US, EU,AU,UK). It depends on
your 3D model into a printable file.
what kind of electric outlet is used in a country.
Display: The LCD display provides the menu for con-
Power switch: Turns the Ultimaker on or off.
trolling the Ultimaker Original.
Print head: The assembly that melts the filament
Filament guide tube: The plastic tube that guides
while the material is pushed through the nozzle onto
the filament from the material feeder to the print
the build plate.
head.
Print head fan: The fan which cools the filament as
Firmware: The software that runs on the electronic
soon as it is put onto the build plate.
board.
Push button: By rotating and pushing the button in
Gantry: The construction of metal rods that allow
front of the Ultimaker Original, you can access the
movements on the x- y- and z-axis.
control panel.
G-code: The code that comes out of the slicing pro-
SD-card: Secure Digital memory card that can store
cess of a 3D model in Cura. It describes the move-
digital data. The card that can be used with the Ulti-
ments of your print head.
maker has to be an SD-card and not an SDHC card. It
Knurled Bolt: Gives grip to push the filament in the
has to be formatted with FAT16 or FAT32
filament guide tube.
Slicing: The process that turns a 3D model into code
Material feeder: The feeder that drives the filament
that can be used with 3D printers.
through the filament guide tube into the heater.
Slider blocks: The slider blocks maintain the connec-
Material feeder tensioner: The tension with which
tion between the gantry axes.
the filament is pushed through material feeder can
Spool holder: The wooden piece attached to the
be adjusted by tuning this tensioner.
back of the Ultimaker Original. It can hold different
Nozzle: The opening at the end of the print head.
kinds of filament spools.
The filament gets pushed through the opening and
.stl: A widely used file format for 3D models.
will deposited on your build plate.
Threaded rod: The long rod behind the build plate
PLA filament: This is a hard bioplastic that has a low
which is threaded. This rod moves the build platform
environmental impact. It is derived from renewable,
up and down.
starch-based resources. It has a very low shrinkage
USB cable: The cable that allows direct communi-
which is helpful for large prints.
cation between the Ultimaker and a computer, using
the USB interface on the computer.
YouMagine.com: A website where you can share
your models and download (3D) models from the
people within the YouMagine communnity.
F1. Terminology Terminologyfor the Ultimaker Original
33
NOTES:
Notes
34
Ultimaker B.V.
Burgemeester R. vd Venlaan 11
4191PL Geldermalsen
The Netherlands
[email protected]
Ultimaker.com


