1
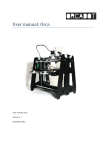
User manual: Prodim XXL Pro 3D printer User manual: Prodim XXL Pro version 3.0.3 Oct 2015 www.prodim-systems.com 1. Content 1. Content ......................................................................................................................................... 2 2. Welcome to the world of 3D printing ........................................................................................... 3 3. Safety ............................................................................................................................................ 3 4. FFF 3D-print technology ................................................................................................................ 3 5. Specifications ................................................................................................................................ 4 6. Glossary of Terms.......................................................................................................................... 5 7. Installing the Prodim XXL Pro 3D Printer ........................................................................................ 6 8. 9. 10. 11. 7.1. Setup the printer ................................................................................................................. 6 7.2. Computer preference and settings ..................................................................................... 7 7.3. Install “Orcabot-Repetier Host Software” .......................................................................... 8 7.4. Printer type and port ......................................................................................................... 11 Prepare a G-code for printing ..................................................................................................... 12 8.1. G-code for printing with dual extruder ............................................................................. 13 8.2. Slice the object(s) .............................................................................................................. 14 8.3. Change/add Print profile (advanced) ................................................................................ 16 Printing ........................................................................................................................................ 18 9.1. Startup & Connect ............................................................................................................. 18 9.2. Setting Temperature ......................................................................................................... 19 9.3. Loading/Replacing filament............................................................................................... 20 9.4. Start print & check bed level ............................................................................................. 21 Tips & Tricks ................................................................................................................................ 22 10.1. Calculate the amount of filament ................................................................................. 22 10.2. Change the colors of extruders in Repetier................................................................... 23 10.3. Adjusting Skirt height .................................................................................................... 24 10.4. Cleaning the hotend ...................................................................................................... 25 10.5. Printing Log .................................................................................................................... 26 Calibration ................................................................................................................................... 27 11.1. Nozzle allignment (height). ........................................................................................... 27 11.2. Calibration 2nd extruder (X,Y-axis calibration 2nd extruder) .......................................... 29 12. Troubleshooting .......................................................................................................................... 31 13. Warranty and repair.................................................................................................................... 32 14. Contact Prodim ........................................................................................................................... 33 User manual: Prodim XXL Pro version 3.0.3 Oct 2015 2 www.prodim-systems.com 2. Welcome to the world of 3D printing Thank you for choosing Prodim as supplier for your 3D printing partner! This user manual is designed to show you some basic steps in the 3D printing world. A world that is our future, full of challenges and opportunities. It is essential that you read through this manual, as there are also some tips how to work safe and secure. Let’s start making amazing things! 3. Safety Safety alert symbols precede each safety message in this manual. These symbols indicate potential safety hazards that could harm you or others or cause product or property damage. Warning: The Prodim XXL Pro 3D Printer generates high temperatures. Do not reach inside the machine when operating. Always allow the Prodim XXL Pro to cool down first. Warning: The Prodim XXL Pro 3D Printer includes moving parts. Never reach the Prodim XXL Pro when the machine is in operation. Warning: Do not leave the Prodim XXL Pro 3D Printer unattended during operation. Caution: Caution: Caution: 4. We recommend only to use materials supplied by Prodim XXL Pro 3D Printer. Other materials can have unexpected properties with can influence the quality or worse. In case of emergency disconnect power supply from wall socket. Prodim XXL Pro 3D Printer melts plastic during printing. Plastic odors are emitted during this operation. Make sure to set up the Prodim XXL Pro in a well-ventilated area. FFF 3D-print technology The Prodim 3D printer uses the FFF 3D-print technology. Fused filament fabrication (FFF) is an additive manufacturing technology commonly used for modeling, prototyping, and production applications. FFF works on an "additive" principle by laying down material in layers; a plastic filament or metal wire is unwound from a coil and supplies material to produce a part. The technology was developed by S. Scott Crump in the late 1980s and was commercialized in 1990. User manual: Prodim XXL Pro version 3.0.3 Oct 2015 3 www.prodim-systems.com 5. Specifications Printing Print technology: Fused Filament Fabrication (FFF) Layer resolution: 50 µm Position resolution: 50 µm Nozzle diameter: 0,40 mm (default) Filament: 1,75mm Prodim XXL Pro filament Dimensions Build volume: 360x280x230mm Frame dimensions: 620x400x520mm Total weight: 20,5 kg Temperature Maximal hotend temperature: 280 ˚C - 285 ˚C Bed temperature Middle of the bed 100 ˚C - 110 ˚C Side of the bed 80 ˚C - 90 ˚C Ambient operating temperature: 10˚C - 40 ˚C Storage temperature: 0˚C - 50 ˚C Electrical AC input: 88-264 VAC Frequency range: 47-63 Hz DC Voltage: 24V Rated Current: 13A User manual: Prodim XXL Pro version 3.0.3 Oct 2015 4 www.prodim-systems.com 6. Glossary of Terms Extruder: - That is the print head assembly where you can insert the filament. The XXL pro have 2 extruders (2 print heads) for combining 2 different materials. Hobbed shaft - A Hobbed shaft is a part in the extruder. It has sharp teeth in the shaft for transport the filament to the hotend. Hotend - That is de treated rod where the filament is melted. The Hotend is mounted under the extruder assembly. Heater block - The heater block is the block that’s is mounted above the nozzle. The heater element and the temperature sensor are mounted in the heater Block. Nozzle - It is the end of the hotend were the filament comes out. The nozzles are available in different sizes. (0.25mm, 0.35mm, 0.4mm & 0.5mm) Retracting - Retracting is the technique of taking the molten plastic up in the hotend (e.g. to prevent oozing). Oozing - Oozing is leaking material from the nozzle. Repetier Host - That is the software that controls the printer and loads the G-code file. Sli3er - Sli3er is a program that converts .stl files to a G-code. It makes from a model a printable file and also calculates the amount of material to be extruded and many more. G-Code - It’s a computer language that describe movement (toolpaths) of the Prodim XXL pro 3D printer. STL AMF - Is a widly used 3d format for 3d models. STL = Surface Tessellation Language Additive Manufacturing File Format (AMF) is an open standard for describing objects for additive manufacturing processes such as 3D printing. We use it for combining 2 models. Feeler gauge - A feeler gauge is a tool used to measure gap widths. Feeler gauges are mostly used in engineering to measure the clearance between two parts. User manual: Prodim XXL Pro version 3.0.3 Oct 2015 5 www.prodim-systems.com 7. Installing the Prodim XXL Pro 3D Printer 7.1. Setup the printer A few things are important while Installing the Prodim 3D-printer XXL Pro : - The Prodim XXL Pro must be placed on a smooth and level surface (solid table). There must be an electric socket available. It is recommended to choose a room or place which has decent ventilation. Although, try to avoid draught. Installing the Printer: - Install the float glass plate (use the 4 clamps) Install the spool holders and tube holders including tube at the right side of the machine. Glass plate - Tubeholder Spoolholder Connect the power cable on the right side of the machine. Here you can also find the On/Off switch. Power cable and On/Off switch. Power-on the machine on the right side of the printer and connect the Prodim XXL Pro 3D Printer with a computer using the shielded USB cable (included in the box). The USB port is located on the backside of the machine. Once the USB cable is connected and the computer is powered on, the computer will detect the 3D-printer as a new COM port. In the next chapter you can find the description how to install the printer driver and software. User manual: Prodim XXL Pro version 3.0.3 Oct 2015 6 www.prodim-systems.com 7.2. Computer preference and settings During printing it is important that: - Windows updates are disabled Energy saving mode is off Standby mode is off The computer or laptop is not connected to the internet during (longer) print jobs. There is no another program running Use the original USB cable (shielded cable) If you use a laptop or tablet it is also important that: - - Don’t forget to connect the power supply Use the USB adapter for charging your tablet (optional only with HP stream 7 tablet) Turn the screensaver on black Disable WIFI Dim the display brightness in the tablet ( only with HP stream 7 tablet) Set the interface tab on ‘’manual control’’ in the Repetier software when the printer is started. This option makes more hardware memory available for printing (only with HP stream 7 tablet) Turn ‘’travel moves off in the preview tab in Repetier software. Most communication problems are caused by faulty settings. User manual: Prodim XXL Pro version 3.0.3 Oct 2015 7 www.prodim-systems.com 7.3. Install “Orcabot-Repetier Host Software” Orcabot-Repetier Host Software is only available for windows 7 or higher. On the Prodim XXL Pro website you can download the driver and software to control your Prodim XXL Pro 3D printer. Download link: http://www.prodim-systems.com/en-en/Download-Area.ehtml Other Repetier versions are available for Linux or Mac-os download: http://www.repetier.com (these versions are not supplied or supported by Prodim). Use Prodim printer profiles while using other versions of Repetier. Installing: - Make sure that the printer is not connected with the USB cable while installing the software. Download the “Orcabot Repetier Host Software” from the website listed above. Install the downloaded executable file as administrator (Click right on the executable and select ‘’run as administrator’’ and click yes). Follow the steps on screen First, choose your preferred language for the installation. The following dialog will appear: Click: “Next” If you agree with the license agreement, select “I accept the agreement” and click “Next”. User manual: Prodim XXL Pro version 3.0.3 Oct 2015 8 www.prodim-systems.com Select the destination folder and click “Next”. Select the start menu folder and click “Next”. Make sure you have selected all components and click “Next”. Select the Start Menu folder and click “Next”. User manual: Prodim XXL Pro version 3.0.3 Oct 2015 9 www.prodim-systems.com If you would like to create a desktop icon click “Next”. Click install Make sure you select ALL the boxes and then click “Finish”. The software is ready for use. User manual: Prodim XXL Pro version 3.0.3 Oct 2015 10 www.prodim-systems.com 7.4. Printer type and port Start the installed program “Orcabot Repetier Host”. To check if the correct printer has been selected, press “Printer settings” in the right top corner. Please Check if the proper printer is selected : “Orcabot XXL” in the top line. When connecting the 3D-Printer your computer created a new COM port for your Printer. You can select the com port by clicking the drop down box Port: If 1 printer is connected, select Auto or the connected COM port. If 2 or more printers are connected select the COM port you want to use. User manual: Prodim XXL Pro version 3.0.3 Oct 2015 11 www.prodim-systems.com 8. Prepare a G-code for printing To print a 3d printed part a G-code is required. If you created a G-code file before, you can Load it by clicking on the ‘’Load’’ button on the left corner and select the file on your hard disk. If you didn’t create a G-code before you have to create one based on a 3D design which is created in a 3D- CAD program. Repetier host program needs a .STL files. (3D-surfaces) to create a G-code. Almost all 3D-CAD programs can export a design as .STL file. In “Orcabot Repetier Host” Click on the button “Add object” in the TAB Object Placement and choose the .STL file or files to import. Everytime when a new object is loaded, it will be placed automaticaly on the printerbed shown onscreen. On the right side your list of STL objects is shown. You can Copy, Scale, Rotate or Mirror the design in Repetier host. Make sure your 3D file is perfect before adding the .STL file to your software. Ïf there is a opening in one of the surfaces from the .STL file. Repetier will mention that the object is not Manifold. The area that is incorrect will be shown in green (as shown on the picture below). If an area turns green you will have to regenerate the .STL file in your 3D-Cad program or you can fix the file online by clicking the link that is stated in the orange box. User manual: Prodim XXL Pro version 3.0.3 Oct 2015 12 www.prodim-systems.com 8.1. G-code for printing with dual extruder If you want to print a dual color product you need to create a AMF file (see Glossary). This file is created from two .STL files. One for material/color 1 and the other for material/color 2. Make sure the origin (zero point) of both .STL files are on the same location. (for example designed in the same file or assembly). Create a AMF file (2 materials/colors) 1. Open the Slic3r configuration menu from the “Slicer TAB” button “Configuration”. 2. 3. 4. 5. 6. 7. In the Slicer configuration tool press: pulldown menu: File/Combine multi-material STL files… Select “the first file” to combine and click “Open” Select “the second file” and click “Open” After the two files are opened Click “Cancel” “Save” the new file as a .AMF file (If .xml is stated in the subject name, remove it!) Close Slicer. (the sequence of choosing is also defining which spool will be used. Spool 1 / Extruder 1 will be used for file 1 and Spool 2 / Extruder 2 will be used for file 2. You can change this later in the “object placement” screen by using the drop down box next to the files.) Go back to “Orcabot Repetier Host” and “Load” the created .AMF file. You will now see that the files are combined. (If you did not combine both files in the “slicer configuration tool” it’s impossible to align the files (right picture). User manual: Prodim XXL Pro version 3.0.3 Oct 2015 13 www.prodim-systems.com 8.2. Slice the object(s) The next step is to Slice the Object (s). (Slicing: Convert the 3D file to printable layers). Press the “Slicer TAB” and Select the print profile that fits to your printing job. When the proper profiles are selected Press “Slice with Slic3r”. The slicing process can take some time depending on the size or complexity of the object to print. (To learn how to adjust a profile go to the 8.3 Change/add Print profile (advanced) chapter). When the slicing is finished, the program will automatically show a Preview, filament usage, and Estimated Printing Time. The dark blue lines show the object layer by layer. The light blue lines show the Z-movements if you have activated “Show filament and Show travel” (located in the upper toolbar). User manual: Prodim XXL Pro version 3.0.3 Oct 2015 14 www.prodim-systems.com You can save the G-code in 2 different ways. 1. You can pressing the ‘’Save Print’’ button on top of the screen (this file contains only the G-code and no aditional information) 2. Or Press the Save button in the “G-code editor tab” (Recommended) (this file contains the G-code and additional info (infill,filament used, etc.) Examples: 1. “Save Print” file.gco 2. “Save in G-code editor tab” file.gcode User manual: Prodim XXL Pro version 3.0.3 Oct 2015 15 www.prodim-systems.com 8.3. Change/add Print profile (advanced) When you have downloaded the “Orcabot Repetier Host Software” you will find all “print profiles” for the XXL in your drop down box in the “slicer tab”. These profiles are standard settings for different materials provided, supported and tested by Prodim. If you want to customize settings or adjust/add new profiles, please follow the next steps. 1. Click configuration in the slicer tab. Slicer will open in a new window. 2. Select the profile you like to adjust/copy. (each tab has different profiles). 3. Change the required setting. Note: A change for “Print Settings”, “Filament Settings” and “Printer Settings” for a specific material has to be adjusted and saved in each tab! 4. Save the file. Make sure you give your profile a new name so that you do not overwrite the already existing profile. Note: Be careful with changing settings, while these will affect the performance of the 3D printer. Note: Hoover over a setting will show a pop up box which describes the use of the setting. Do not change: Print settings: tabs output options and advanced! Printer settings: bed size, this is a standard size. Printer settings: Don’t delete lines from the custom G-code (this contains settings for bed temperature and homing which are there for safety reasons). User manual: Prodim XXL Pro version 3.0.3 Oct 2015 16 www.prodim-systems.com Note: Make notes in your profile so you will know what has been changed. close the slicer configuration tool and you are able to select the new profiles in the drop down boxes in the “slicer tab”. User manual: Prodim XXL Pro version 3.0.3 Oct 2015 17 www.prodim-systems.com 9. Printing 9.1. Startup & Connect 1. The Prodim XXL Pro must be switched-on and connected to the computer using the USB cable. 2. Open the program ”Orcabot Repetier Host”. 3. Click on the button “Connect” in the top left corner (to connect the printer with the program). 4. When connected Press The Tab “Manual Control” 5. Always Home the device before changing settings. Use the Home buttons (located around the Round navigator button ) to start (you can use each axle separate (X, Y, Z) or home all axes at once using the home button without text = Home ALL) 1 2 3 Explanation other buttons: 1 The “round navigator button” are for manual controlling the extruders (right – left) and the bed (back – forth). 2 The middle button is the button for moving your Bed (Z Axis) up and down. 3 The third button is the button for extruding and retracting (reverse) your extruders. Be careful not to use the fast extruding button (double Arrows)! Always use the normal extruding speed button. User manual: Prodim XXL Pro version 3.0.3 Oct 2015 18 www.prodim-systems.com 9.2. Setting Temperature 1. Make sure the glass plate is installed on the printbed with the (yellow) kapton-tape on top. 2. It is important to start a print on a perfect clean Print bed. Degrease the Print bed with a towel and e.g. Acetone or Ammonia. 3. In the tab “Manual control” the temperature for the extruder and the print bed can be set. 4. Enable or disabled the heater bed and extruder by pressing the picture in front the temperature bars. 5. Enter the required value in the boxes behind the temperature bars. Note: The temperature values are shown in the thermometer and also on the bottom of your screen. Always wait untill the requred temperature is reached before continuing! Temperature Settings Print Materials These values can change, for actual temperature settings visit: http://www.prodim-systems.com/en-en/Download-Area.ehtml User manual: Prodim XXL Pro version 3.0.3 Oct 2015 19 www.prodim-systems.com 9.3. Loading/Replacing filament 1. If you printed with a material before , cut the filament 10 cm above the extruder. Retract the spool material from the tube. 2. (re)Place the new filament spool on the spool holder and slide the filament in the tube until it reaches the extruder. 3. Set the temperature of the extruder on the material temperature what last was printed (or if there is no material printed before set it to the required temperature for the material to print). Careful! The hotend will get hot. Do not touch it! 4. Wait until the extruder temperature is reached . 5. Unlock the extruder clamp, and pull out the material which was printed before. 6. Be sure that the Hobbed shaft is clean (no degrease from earlier material). If it’s not clean use a toothbrush to clean the hobbed shaft. 7. If you are going to print with a different material clean the Hotend. See chapter 10.4. Cleaning the hotend. 8. Cut the end of the new filament with a cutter and feed it into the extruder and close the extruder. 9. The hobbed shaft needs the right amount of pressure to extrude the filament material. Therefore the spring tension in the extruder knob can be adjusted. 10. Check if the filament is grooved but not squeezed. To adjust the hobbed shaft pressure rotate the knob. Clockwise = tighter Anti-clockwise = loose The spring tension variates with different materials! 11. Select the extruder you want to extrude by clicking “extruder 1” or “extruder 2” in the drop down box of the Manual Control tab (upper right). 12. Click on the arrow for extruding at least 20mm of material. 13. This should be enough to clean the old material. 14. Set the temperature of the new material 15. And extruding some more material again. 16. You’re ready for printing User manual: Prodim XXL Pro version 3.0.3 Oct 2015 20 www.prodim-systems.com 9.4. Start print & check bed level When a G-code is loaded you can start printing. Check If the temperature is at the required level and feed manually the extruder with some material see chapter 9.3. Loading/Replacing filament Start the printer by pressing the ‘’Start Print’’ button. When the print is started it is very important to check if the material sticks to the printbed. You can adjust the bed height while printing the first loop (skirt material) Rotate the Z-axe adjusting wheel clockwise to raise the bed a bit. Rotate counterclockwise to lower the bed You will get some experience adjusting the bed to the perfect level. Wait until the first layer is finished, to check if the material sticks to the complete bed. Notes: After printing, the machine will automatically cool down and move the extruders away from the product. Reminder, never touch the bed of extruder with bare hands. Use pliers or tweezers for removing parts (not manually, otherwise you need to degrease again). User manual: Prodim XXL Pro version 3.0.3 Oct 2015 21 www.prodim-systems.com 10. Tips & Tricks 10.1. Calculate the amount of filament The amount of filament is listed in the G-code. Scroll down in the “G-code editor tab” to the end of the “G-code” and look for “: filament used = …..mm (…. cm3)”. There the length (mm) and volume (cm3) of the filament used is listed. To calculate the amount of material in weight use these formulas: Volume = π * r² x L = 3,14 x (1,75/2 (material) x (1,75/2) x Length Example = 3,14 x 0,875 x 0,875 x 2170.3 = 5217 mm² = 5,2 cm3 Amount of material in weight = Volume x ρ (density) + 10% Density (approx.): PLA = 1,24 gr/cm3 ABS = 1,03 gr/cm3 PET = 1,38 gr/cm3 example PLA = 5,2 x 1,24 = 6,4 gram + at least 10% = 7,1 grams on spool. Each roll of filament contains approximately 750 grams of material (can variate, check the specs to get the proper values). Only the spool (excl. the filament) weight 250 grams To weigh the available amount of material on a half used roll, weigh it and subtract the 250 gr for the spool. Use at least a marge of 10%. User manual: Prodim XXL Pro version 3.0.3 Oct 2015 22 www.prodim-systems.com 10.2. Change the colors of extruders in Repetier You can colorize the materials on screen to match the installed spools on the printer, Start the Repetier host software and click ‘’Config’’ in the highest tab and select ‘’Printer settings’’. The printer settings window will be open. Click in the printer settings on the ‘’extruder tab’’. Under extruder 1 or 2 you can by clicking on the color select the color that you want. If you have selected the colors click first on ‘’Apply’’ and ‘’OK’’ User manual: Prodim XXL Pro version 3.0.3 Oct 2015 23 www.prodim-systems.com 10.3. Adjusting Skirt height A Skirt is an outline around your model with an offset of 7mm (standard). The skirt is a useful first line for checking the bed height level before you start printing your actual model. It helps you to adjusting the first layer for better adhesion. When must I adjust the height of the skirt? - If you have a lot of small parts on the bed with a lot of retraction (See Glossary). If extruder 2 has a long print duration and extruder 1 is oozing (leaking material) Advantage: - Better adhesion on bed because you can adjust the first layer. Better quality of printed models. disadvantages: - It consumes al little more of filament. Sample with/without maximal Skirt height on the outside of the model 1. You can adjust the Skirt height in your printer profiles see chapter Change/add Print profile (advanced) for the profile you are going to use. The settings can be found in the tab “Print Settings” > “Skirt and Brim” If you have high models then it is recommend to set the Skirt height to the maximum. You can do this by filling 999999 in in the layers field. User manual: Prodim XXL Pro version 3.0.3 Oct 2015 With Skirt 24 www.prodim-systems.com Without Skirt 10.4. Cleaning the Hotend It’s important that the hotend is clean before you start with printing. Cleaning of the hotend will result a better print quality. You can buy the Cleaning fiber on our website. When to clean the hotend? - If you change from material (example from ABS to PLA) is recommend to clean the hotend with Cleaning fiber. If the extruder filament contain residues from previous prints. 1. Set the temperature of the extruder on the material temperature what last was printed. For temperature settings: - Visit the Prodim website http://www.prodim-systems.com Always wait untill the right temperature is reached before continuing! Careful! The hotend is hot. Do not touch it! 2. Unlock the extruder clamp. 3. Retract the last used material from the extruder (manually). 4. Place the cleaning fiber in the extruder and close the extruder clamp. 5. Select extruder that you want by clicking “extruder 1” in the drop down box and feed the hotend with cleaning fiber. 6. Click four times on the arrow for extruding 200 mm of material. Extruder extrudes now the cleaning fiber. 7. Be sure and check of the cleaning fiber took all the existing old material from the hotend. 8. If the extruder filament is not clean after extruding the 200mm of material repeat these steps. 9. Unlock the extruder clamp, Retract the left pieces of the cleaning fiber from the extruder (manually). 10. Place the material to use for the next print in the extruder and close the extruder clamp. 11. Don’t forget to reset the temperature of the extruders for the material that you want for printing! 12. Then you’re ready for the next print. User manual: Prodim XXL Pro version 3.0.3 Oct 2015 25 www.prodim-systems.com 10.5. Printing Log User manual: Prodim XXL Pro version 3.0.3 Oct 2015 26 12 11 10 9 8 7 6 5 4 3 2 1 No. Printing date Print duration Material Dual extruder Finished If not finished what was the Problem? This logbook is a tool to record all your history print jobs. Based on this results you can a learn from your mistakes and you can improve your printing skills. www.prodim-systems.com 11. Calibration 11.1. Nozzle allignment (height). If you have replaced the hotend or nozzle you need to recalibrate your Printer in height. This is because the height can be variate with the new hotend or nozzle(s). Follow the steps for recalibrating the Nozzle height. Measuring the distance between nozzle and printbed. Disable the printer motors or shut down completely. Position the 2 printheads next to each other in the middle of the printbed. Position the print bed by turning the wheel of the Z-axis clockwise. Keep turning the bed up until the lowest nozzle touches the bed. Do not turn it up too far because then the nozzle will push the print bed downwards. Move the extruder that is situated nearest to the printbed out of the way (to its home position). Take the nozzle that is situated the furthest from the print bed. Measure the distance between the nozzle and the print bed. You can use a feeler gauge or you can do this with your Repetier host. Raise the bed Z-axle in streps of 0,1mm and counting the number of steps. times you have to push the button until the nozzle touches the bed. We will have to add/substract this measurement value from the extruder height in the Marlin.cfg file. (see next page) Downloading the Marlin.cfg file from the printer. you will need a USB-stick Mount the USB-stick in the USB port on the back of the printer. Open Repetier Host software and fill in the following code in the Gcode field: M511 and press “send”. Wait 10 seconds and remove the USB-stick from the printer. Mount the USB-stick in the computer and open the Marlin.CFG file with notepad. User manual: Prodim XXL Pro version 3.0.3 Oct 2015 27 www.prodim-systems.com Changing the offset value Scroll downwards until you see: Extruder_1_offset ; Printhead Right offset X, Y, Z We are going to modify only Extruder_1_offset = 0.0, 0.0, 0.0 (The last number = Z height) Do not change the ‘’Extruder_0_offset’’ or anything else! Because extruder 0 is our base reference. ‘’Extruder_0_offset’’ should be always 0.0, 0.0, 0.0 ! By adjusting the height value you can have 2 situations: Situation 1 If printhead Right is situated higher than printhead Left. Change Extruder_1_offset with the measured value. If printhead Right is situated higher than printhead Left, you will have to deduct the measured distance. (it will be a negative number) Example ( -0.3 - 0.25 = -0.55 ) (0.25mm = Measured value with feeler gauge) Situation 2 if printhead Right is situated lower than printhead Left. Change Extruder_1_offset with the measured value. If printhead Right is situated lower then printhead Left, you will have to add the measured distance. (it will be a positive number). Example ( -0.3 + 0.25 = 0.05 ) (0.25mm = Measured value with feeler gauge) After changing “Save” the file and close notepad. Upload the Marlin.cfg file to the printer. Mount the USB-stick into the USB port of the Printer and type in the G-code field : M510. This will upload the Marlin.cfg file from the USB to the printer. Remove the USB-stick. Shut down the printer by first disconnecting it from the computer and then switching it off by using the on/off switch on the right side of the Printer! The settings are now loaded in to the configuration of the machine. Check if the height of the nozzle(s) are adjusted perfectly by printing a small multi material file. If not, repeat the steps of this manual. User manual: Prodim XXL Pro version 3.0.3 Oct 2015 28 www.prodim-systems.com 11.2. Calibration 2nd extruder (X,Y-axis calibration 2nd extruder) If you have replaced a new hotend, nozzle or you made other modifications you need to recalibrate your Printer. This is because the Right printhead has to be aligned to the Left printhead in the configuration of the printer. You need: 2x PLA filament ( 2 different colors are advised). Print a calibration print 1. Start the printer and connect the printer with the Orcabot Repetier Host software. - Visit the Prodim website. http://www.prodim-systems.com/en-en/Download-Area.ehtml Download the Extruder Calibration file and save it to your harddisk. 2. Heat your extruders up to 205C and printbed on 60C. 3. Load the downloaded file into Repetier. 4. Before printing make sure both extruders are heated and some material is manually extruded trough both extruders. 5. Print the calibration print with the dual heads (PLA). 6. Remove the glass plate from the bed. 7. First we are going to change the offset of the X-axis. Check which orange line above is aligned perfectly with the black line on the glass plate. Count the stripes from the 0 to the one that is aligned perfectly. Every stripe is 0,1 mm. Example: If the 4th black stripe on the left side of the 0 is aligned perfectly with the orange one, Printhead right should move -0,1 x 4 = -0,4 mm in X-axis. 8. Do the same with the Y-axis. Example: If, for example, the 5th black stripe above the 0 is aligned perfectly, Printhead Right should move 0,1 x 5 = +0.5mm. User manual: Prodim XXL Pro version 3.0.3 Oct 2015 29 www.prodim-systems.com Downloading the Marlin.cfg file from the printer Type : M511 in the G-code field and press “send”. See page 27 Downloading the Marlin.cfg file from the printer. Changing the X,Y offset value Scroll downwards unit you see: Extruder_1_offset We are going to modify only Extruder_1_offset =0.0, 0.0, 0.0 Change the values by adding or deducting the measured value (depends of the value is positive or negative) For example: These values are before calculation: Extruder_1_offset Measured value = = -6.2, -0.62, -0.3 (in .cfg file) X = -0.4 Y = +0.5 New values after calculation: Extruder_1_offset = -6.6, -, -0.12, -0.3 9. Save the file to your USB stick. Upload the Marlin.cfg file to the printer. Type : M510 in the G-code field and press “send”. See page 28 Upload the Marlin.cfg file to the printer. Check the Calibration Start the printer and connect the printer with the Orcabot Repetier Host software. Home all axes. Check if the extruder offset calibration is correct by restarting the calibration print or print a small multi material file. If not, not repeat the steps of this manual. User manual: Prodim XXL Pro version 3.0.3 Oct 2015 30 www.prodim-systems.com 12. Troubleshooting If you are having difficulties during printing use this checklist to discover what is going wrong. Not enough or no filament flow. Temperature is too low Make sure the temperature of the hotend matches the recommended temperature for the filament you are using. Is the clamping system adjusted properly ? To test first click extrude, then retract. The teeth of the hobbed shaft should be pressed a little into the filament. See chapter 14.3 Loading / Replacing filament There is no filament coming out of the hotend. Is the clamping system tightened to much? To check: open the extruder and see if the grooves of the hobbed shaft are clogged with filament gravel. Clean the hobbed shaft with a brush. See chapter 14.3 Loading / Replacing filament There is no filament coming out of the hotend Try to push the filament manually through when the hotend is at its recommended temperature. If this is difficult/impossible your hotend or nozzle is probably clogged with material. To fix this you can clean the hotend or replace the hotend / nozzle. Please contact the helpdesk for a manual. The print is coming loose from the bed. The temperature of the bed is wrong. Make sure that the temperature of the bed matches the recommended temperature for the filament you are using. Bed not cleaned. Make sure you have degreased the bed with acetone fully before printing. Bed is not leveled Make sure the bed is aligned. You can change the bed height by tightening or loosening the springs under the bed. Calibration of the Left Printhead is lost Please see page 29 for calibrating the 2nd extruder. Communication Problems. Please check if you have adjusted the computer settings. Check chapter 7, computer preference and settings. There are no Print profiles installed Make sure you install the software with administrator rights! User manual: Prodim XXL Pro version 3.0.3 Oct 2015 31 www.prodim-systems.com 13. Warranty and repair Prodim Provides utmost care to its devices; every printer is carefully tested and tuned for optimum performance. The final print is the proof for Prodim that the printer leaves the company in good condition. Prodim offers a one-year warranty on critical components, such at the discretion of Prodim. The customer is responsible for the return shipment, according to proper procedure. Readjusting the printer is not covered by this warranty. 3D Printers are typical for the high level of research and trying. Boundaries are therefore, continuously challenged. Prodim Tries to assist its users by always improving its printer settings. However, it is not possible to grant warranty on this. The user is responsible for the use thereof. Consumable parts are not covered by this warranty. Always keep the package. Prodim is otherwise forced to charge a new package with a possible return shipment. Costs arising from damage caused by incorrect transport will be charged. All legal rights including copyrights of the software, manuals and documentation stay in possession of Prodim International B.V. or her suppliers. The General Terms and Conditions from Prodim International B.V. shall always apply. For a warranty claim or service appointment, please refer to our website by clicking the following link: http://www.prodim-systems.com/en-en/Support/Europe-3d-printer.html User manual: Prodim XXL Pro version 3.0.3 Oct 2015 32 www.prodim-systems.com 14. Contact Prodim Sales Office Europe Prodim International BV Lage Dijk 26 - 5705 BZ Helmond The Netherlands T: +31 (0)492 57 90 50 F: +31 (0)492 57 90 59 Opening Hours: Monday - Friday 8.30 am - 5 pm (Central European time) User manual: Prodim XXL Pro version 3.0.3 Oct 2015 33 www.prodim-systems.com