1
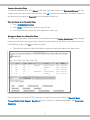
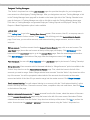
Last Updated: 03/13 ©2013 International Center for Leadership Development. All rights reserved. Site Administration Manual subject to change without notice. Table of Contents I. INTRODUCTION ........................................................................................................................... 1 II. SITE ADMINISTRATION AREA ................................................................................................... 1 A. HOW TO LOGIN TO THE SITE ADMINISTRATION AREA ..................................................................... 1 B. CLASSES .................................................................................................................................... 2 List Classes .............................................................................................................................. 2 Add a Class .............................................................................................................................. 2 List Scheduled Classes ............................................................................................................ 3 Schedule a Class (Add it to the Training Calendar) ................................................................. 4 Edit Scheduled Class Information ............................................................................................ 4 List Referenced Classes (non-DOT) ........................................................................................ 6 C. USER ACCOUNTS ........................................................................................................................ 6 List Users.................................................................................................................................. 6 Designate Training Managers .................................................................................................. 8 Lookup User ............................................................................................................................. 8 E. REVIEW TRAINING ....................................................................................................................... 9 F. ACCOUNT MAINTENANCE ...........................................................................................................10 List Training Manager (TM) Accounts .................................................................................... 10 Change My Password ............................................................................................................ 10 III. QUESTIONS..............................................................................................................................10 -i- I. Introduction This manual is designed to familiarize you with the Site Administration area of the Alaska Department of Transportation & Public Facilities (DOT&PF) Research, Development, & Technology Transfer (T2) Classroom Training Calendar and On-Line Training Service. User ID and Password for the Site Administration area are assigned for only a small number of users, and it is not the same as the User ID and Password used for class registration and on-line training. Site administrators can review and edit user accounts and access class lists, instructors, and scheduled classes. If you are not an authorized site administrator, your User ID and password will not provide you access to Administration area functions. II. Site Administration Area A. How to Login to the Site Administration Area 1. Go to the Alaska DOT&PF Training Calendar home page at http://dot.alaska.ecatts.com. 2. When the Training Calendar home page displays, locate the Training Links section at the lower right corner of the page. Four links are located there: On-line Training – Wetlands & Stormwater, User Manual, Log in, and Administrator Login. 3. Click Administrator Login. 4. On the Training Administrator Login page, input your administrator User ID and password and click Login. (For assistance, refer to the Having Trouble? box located at the bottom of the screen and click ECATTS Technical Support.) 5. You will be taken to the Training Administration home page shown below. From here, you can access information related to classes and user accounts. 1 B. Classes Under the heading Classes, you can click the following four links to list or edit information related to classes: List Classes provides a list of all classes. This option also allows you to add or delete classes and edit class information. List Instructors lists names and other information for instructors who have been added to the database. You can also add an instructor. List Scheduled Classes lists all classes that have been scheduled on the Training Calendar. From here, you can schedule a class, add the class to the calendar, and view the class roster. There are also options to edit or cancel a class as well as view a history of scheduled classes. List Referenced Classes (non-DOT) lists all non-DOT classes that have been added to the database. Step by step instructions for these links are discussed below. List Classes From the site administration home page, click List Classes to access a list of all classes that have been added to the database. You can also add new classes, delete classes, or edit existing classes from here. Click View to see all information in the database about the selected class. Add a Class Click List Classes. 1. Click Add Class at the top or bottom of the Class List page. 2. Enter the requested information in the fields. 3. Click inside a frame to enter or edit text. 4. Click Save as New. The class will now appear in the list of classes when you click List Classes. Delete a Class 1. Click List Classes from the site administration home page. Note that a class can be deleted from the class list only if it has not been scheduled on the calendar. 2. To delete a class, click Delete to the right of the class listing on the Class List page. Note: The delete link will appear only for those classes that have not been scheduled on the calendar. 2 Edit Class Information 1. Click List Classes from the site administration home page. 2. Select Edit to the right of the class you want to edit. 3. Click inside a frame to enter or edit text. 4. Click Save at the bottom of the page. 5. Note: if you click Save as New, the class you edited will become a new class with the newly added/edited information. The old (previously listed) class will still be in the Class List (unedited). List Instructors From the site administration home page, click List Instructors to list the names (and other information) of all instructors who have been added to the database. When a class is scheduled, the instructor can be selected from this list or added if necessary. Edit Instructor Information 1. Click List Instructors from the site administration home page. 2. Select Edit to the right of the instructor information you want to edit. 3. Click inside a frame to enter or edit text. 4. Click Save at the bottom of the page. Add Instructors to the Database 1. If the instructor for a class you are scheduling is not listed, you can add the instructor to the database by clicking List Instructors. 2. Click Add Instructor at the bottom of the page. 3. Add as much of the requested information as possible. First and last names are required fields. 4. Click Save. List Scheduled Classes From the site administration home page, click List Scheduled Classes to list all classes that have been scheduled on the Training Calendar. You can also edit information in this list. In addition, you can schedule classes (add them to the calendar), cancel classes, and access the class roster as detailed below. 3 Schedule a Class (Add it to the Training Calendar) 1. Click List Scheduled Classes. 2. Click Add Scheduled Class at the top or bottom of the page. 3. From the drop down menu in the field titled “Class Title/Number”, select the class you want to schedule. 4. Enter the requested information in the fields provided. 5. Select the instructor (if listed) by clicking once on the instructor’s name (to highlight it) and then clicking the right arrow to move the name over to the right “Selected” field. More than one instructor can be selected. a. If you do not know who will be the instructor, leave this blank. The class listing will say “Instructors Not Assigned”. You can edit this field later. b. You also have the option to add an instructor’s name by clicking Add Instructor. 6. Click Save. The scheduled class will now appear on the calendar. Edit Scheduled Class Information 1. To edit information about a scheduled class (e.g. change the date, enter a previously unknown location or instructor, etc.), click Edit next to the class listing on the Scheduled Classes page. 2. Edit any of the following information: Begin and End Dates Time City Location Registration Deadline Fee Contact Class Size Seat Allocation Comments Assigned Instructors 3. Click Save. 4 Cancel a Scheduled Class To cancel a scheduled class, click Cancel to the right of the class listing in the Scheduled Classes list. The system will prompt you to confirm your selection. Click ok to confirm the cancellation. The status column for that class will now display as Cancelled on the Scheduled Classes list. View the Roster for a Scheduled Class 1. Click List Scheduled Classes. 2. Click Roster to the left of the class you want to view. 3. You will see the list of users who have registered for the class. Manage the Roster for a Scheduled Class To change attendee status, select the name of the attendees (on the Training Class Roster page) using the boxes to the left of the user names. Next, select the correct status from the “Action” drop down box shown in the following image. Click Go to perform the action. There are also options to select the seats to assign and change the status of the class roster. From this screen, you can print DOT or NHI sign-in sheets. There are also options to Export to Excel, Process Waitlist, Batch Register, Send Email (to All, Confirmed, or Waitlisted Attendees), and Send Email Reminders. 5 List Referenced Classes (non-DOT) From the site administration home page, click List Referenced Classes (non-DOT) to access a list of all non-DOT classes that have been added to the database. You can also add new classes, delete classes, or edit existing classes from here. Click View to see all information in the database about the selected class. C. User Accounts Under the heading User Accounts, click List Users to lookup an account by listing all users registered. You can also use a database lookup feature to search for a specific name among all registered users if you click Lookup User. These two system features are detailed below. List Users Click List Users to access the User Listing page, which will show List by first letter of last name. There is also a search function for your convenience. When you choose a letter, the User Accounts page will display with the appropriate user list. From here, you have several options. From the chosen alphabetical list, click on a User’s name to go to the User Detail page (the user’s name is shown at the top of the page). The following information is provided about the user: User name User Login ID User Type Email address Installation Date the user account was created Date the user account was last modified Additional information User’s Training Plan Classroom Training Results On-Line Training Results Logins To return from the User Detail page to the alphabetical list of Users, click the red box marked with an “X” at the top right corner of the screen. Print Transcript: Click Print Transcript on the bottom of the User Detail page to print the user’s Training Transcript. 6 Edit Accounts: To edit a user’s account, personal or organizational information: 1. Click Edit Account on the bottom left of the User Detail page to go to the user account editor. You can also click on the user’s name on the User Accounts page (the alphabetical user list) and click Edit Account on the bottom left of the User Detail page to go to the user account editor. 2. Enter the new/changed information. 3. Click Save Changes on the bottom of the page. After the changes are saved, click Done. Note that you can also print a training transcript for the selected user by clicking Print Transcript on the User Detail page. Delete, Archive, Activate, Merge, or Credit External Training: To delete accounts from the list of users, select the names of the users (on the User Accounts page) using the boxes to the left of the user names. Next, select “Delete selected user accounts” from the “Action” drop down box at the top of the screen. Click Go to perform the action. Accounts can be archived or activated in the same manner using the “Action” drop down box. A “Merge Accounts” option is also available in the “Action” drop down box. First, check the boxes to the left of the accounts you want to merge. Select “Merge selected user accounts” from the “Action” drop down box at the top of the screen. You will be prompted to select which of the accounts should remain as the master account and which of the User IDs you want to merge into the master account. Click Merge Accounts. To credit external training to an account, choose the “Credit external training” option found in the drop down box. Choose the course, trainer, completion date, and credits hours, then click Save. 7 Designate Training Managers The “Action” drop down box on the User Accounts page also provides the option for you to designate a user account as a Sub-Agency Training Manager. After you designate a user as a Training Manager, a link to the Training Manager home page will be located on the lower right side of the Training Calendar home page for that user. A Training Manager can click on this link to reach the Training Manager home page. From here, a Training Manager can generate Employee Training Reports and Employee Training Cost Reports. A Batch Registration option is also available. Lookup User Click Lookup User to go to the Lookup User Account screen. Enter a name, User ID, or company name in the fields provided to find an account. Click Search. This will bring you to the Account Search Results page. From here, you can edit an account, credit external training, merge accounts, archive or delete accounts. Edit an account: To edit an account from the Account Search Results page, click on a user’s name. The User Detail page (shows the user’s name at the top of the page) will display. Click Edit Account on the bottom left of the User Detail page to go to the Account Editor page. Enter the new/changed information. Click Save Changes on the bottom of the page. After the changes are saved, click Done. Print Transcript: You can click Print Transcript on the User Detail page to print a user’s Training Transcript. Merge accounts: If two accounts exist for the same individual, a “Merge Accounts” option is available in the “Action” drop down box on the Account Search Results page. First, check the boxes to the left of the accounts you want to merge. Select “Merge selected user accounts” from the “Action” drop down box at the top of the screen. You will be prompted to select which of the accounts should remain as the master account and which of the User IDs you want to merge into the master account. Click Merge Accounts. Credit external training: To credit external training to an account, click the “Credit external training” option found in the drop down box. Choose the course, trainer, completion date, and credit hours, then click Save on the bottom of the page. Delete/ archive/activate accounts: To delete accounts from the list of users, select the names of the users (on the Account Search Results page) using the boxes to the left of the user names. Next select “Delete selected user accounts” from the “Action” drop down box at the top of the screen. Click Go to perform the action. Accounts can be archived or activated in the same manner using the “Action” drop down box. 8 Designate Training Managers: The “Action” drop down box on the Account Search Results page also provides the option for you to designate a user account as a Sub-Agency Training Manager. After you designate a user as a Training Manager, a link to the Training Manager home page will be located on the lower right side of the Training Calendar home page for that user. Training Managers can click on this link to reach the Training Manager home page. From here, a Training Manager can generate Employee Training Reports and Employee Training Cost Reports. A Batch Registration option is also available. D. Reports Under the heading Reports, the following training reports can be accessed: Click Training Report: Live Classes to generate a course training report. Select the name of a course from the drop down menu (to highlight it) and then click Submit Query. This request generates a training report for the selected course and includes attendees’ names, course date, city, and attendee status. Click Training Report: On-line Modules to generate a module completion report. Select the name of a module from the drop down menu (to highlight it) and then click Submit Query. This request generates a report for the selected module that includes user name, type, and completed date. Click DOT&PF Employee Training Report to generate an employee training report or spreadsheet that can be filtered by selected sub-agency for a selected time frame. Click Create Report or Create Spreadsheet to create the specific training report that will include attendee’s name, class title, and status. Click DOT&PF Employee Training Cost Report to generate an employee training cost report or spreadsheet which can be filtered by selected sub-agency for a selected time frame. Click Create Report or Create Spreadsheet to create the specific training cost report that will include both scheduled and completed training and related costs. Click Scheduled Classes - Diagnostic Report to generate a detailed report of scheduled classroom training. E. Review Training Under the heading Review Training, click Review Training to access a list of on-line training modules. Click on a module name to preview a specific on-line training module. 9 F. Account Maintenance Under the heading Account Maintenance, there are links to list Training Manager accounts and change a user password. List Training Manager (TM) Accounts Click this link to generate a list of Training Managers by name and sub-agency. An additional sub-agency may be added by clicking Add to the far right of a Training Manager’s name and then selecting from the sub-agency drop down list. Change My Password Click Change My Password from the User Account and Account Maintenance menu to access the Account Update screen. Enter information in each field to change name, email address, password and User ID. Click Save Changes. III. Questions Please contact Technical Support with any questions regarding this manual. Telephone: ECATTS Support 407- 880-9411 866-730-4253 (toll free) Email: [email protected] 10