1
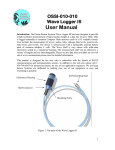
VW MiniLogger Radio Lid Programming Cable
52613497
User’s Manual
Revision 1.0
WARNING: The user is advised to read this document completely before attempting to
reprogram the Radio Lid with the Programming Cable.
INTRODUCTION
The Programming Cable is used to change the configuration parameters stored inside of the Radio
Lid. The purpose of this document is to provide the user with the knowledge and tools to modify
these parameters. Currently, this document only covers updating the Radio Lid’s Channel Number.
Changing any parameters other than those explicitly stated in this document may cause the Radio
Lid to perform poorly or not at all.
THE RADIO CHANNEL NUMBER
There are seven radio channels available (0 – 6). These channels allow multiple pairs of radios to
hold conversations at the same time with minimal interference. Typical logging scenarios using a
single base station and multiple radio loggers are not required to be on separate channels. However,
certain scenarios might realize a battery life increase if additional radio loggers are placed on
separate channels.
The radio logger is asleep most of the time and only wakes up to take a reading or during radio
communication. When the base station communicates to a radio logger, all of the radio loggers on
that channel go into receive mode to listen for their unique ID number (radio lid serial number). They
will stay in receive mode until the radio traffic on that channel stops. When data is being downloaded
from a particular radio logger, any logger on that radio channel will stay awake until the download is
finished. To extend the battery life, place additional radio loggers onto unused, or less used,
channels.
Page 1
CONNECTING THE CABLE
Connect the cables as shown below.
Page 2
RUNNING THE SOFTWARE
The Radio Base Station comes with a CD labeled “MaxStream,” which contains a software
application “X-CTU.” Install the X-CTU application onto your computer. Run the X-CTU application
You might see more than one COM Port on the list. COM1 is typically the port most computers use
for their serial port. Select the correct COM Port, and then click the “Modem Configuration” tab.
Page 3
While inside the Modem Configuration menu, click the “Read” button to read the Radio Lid’s stored
parameters.
CHANGING THE CHANNEL NUMBER
There are 7 possible radio channels (0 – 6). To change the Radio Channel, right click on the
parameter called, “HP – Hopping Channel.” This has a factory default of 5. Type in a number of 0 to
6. Then click the “Write” button. The X-CTU will reprogram the Radio Lid and the follow statement will
be displayed in the bottom part of the X-CTU.
This indicates successful completion of the programming. Click the Read button again to confirm the
new parameter setting.
Page 4
RESTORING FACTORY DEFAULTS
To restore the Radio Lid parameters back to their factory default, press the “Restore” button in the XCTU and then manually change the following parameters with the “Write” button (Note: all of the
parameters can be changed with one write command).
DT- Destination Address : Radio Lid serial number in hexadecimal notation
HP – Hopping Channel : 5
SM – Sleep Mode : 6
LH – Wake-up Initializer Time : 1
HT – Time Before Wake-up Initializer : FFFF
ST – Time Before Sleep : 3C
PW – Pin Wake-Up : 1
GETTING OUT OF TROUBLE
If an incorrectly set parameter makes the Radio Lid unresponsive to the X-CTU software, this Info
Box will appear. To recover, follow the directions below.
Page 5
The Programming Cable has a Red Button, which when depressed while cycling the Radio Lid’s
power will cause the Radio Lid to momentarily respond to the X-CTU command. This will allow the
user to correct the necessary parameter(s) or to restore the factory defaults.
To use the Red Button, depress and hold it while removing and then reinserting the 10 pin connector
as shown below. The Info Box will disappear and the Radio Lid will respond to the X-CTU’s last
command.
Change the Radio Lids parameters accordingly and then press the Write button. The Info box will
appear a second time during the write process. Perform the same operation as above and the write
command will finish. Repeat this process as needed.
Page 6