1
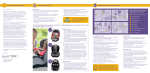
st 88
e
u
Q
User Manual
LEoSm
C
Y
C
T RI e s t 8 8 . c
w w w.qu
These are the user instructions for Quest 88 Limited Trikes. Please read them carefully before the trike is
used and store them in a safe place. Always refer to these instructions before adjusting the set up of the
trike, or if you feel the trike is not performing properly.
These instructions also include a guide to maintenance and general trike care. If followed the trike will
provide trouble free service. However, in the event of any severe deterioration in performance take the
trike out of service immediately and contact Quest 88 Limited.
Quest 88 Trikes
Quest 88 trikes have been designed to provide the correct postural support which allows disabled children
and young adults to benefit from the activity of cycling. The trikes are built for indoor and outdoor use
and are to be used as indoor and outdoor active therapy equipment as part of a therapy programme.
A level of supervision appropriate to the user's abilities should be applied at all times.
QD. TRINST1supp.PM6 iss.8/GJ-06/09
2
Dimensions
Carousel
The trikes come in three sizes, as
detailed below.
a
b
c
a
100
120
145
b
66
72
83
c
70-78
85-100
100-115
max user
weight
25kg
45kg
65kg
trike
weight*
25kg
28kg
35kg
user leg
length**
33-48
38-58
56-75
all sizes given in centimetres (cm)
*trike weight will vary with accessories.
**inside leg measurement when leg is slightly flexed. NB: When refering to the trike, left and right hand always denotes left and right
when sitting on the trike.
Before the Trike is Used
Each trike requires setting up when it has been delivered.
A combination tool is supplied with the trike in order for this to be
done. Look after this tool and keep all the parts with it. The spanners
slide out of the tool and the allan keys and screwdriver fold out. The
8mm allan key adapter is stored between the allan keys when the
tool is not in use. To use the 8mm allan key, fit it onto the 6mm allan
key which is part of the tool.
The ends of the spanners can be used as tyre levers. However, they
are not suitable for Quest 88 trike wheels. Use plastic tyre levers
when fixing punctures on Quest 88 trikes.
A pump is also supplied with the trike. Keep the tyres inflated as per
these instructions. Keeping the tyres firm will keep the trike stable
and help prevent punctures.
Setting Up to Get Going
It is essential that time and consideration is taken whilst setting the
trike up to ensure safe and easy use.
The best benefits of using the trike will come through careful and
accurate setting up, which will ensure a positive and active posture.
Quest 88 limited, Aston Street, Shifnal, Shropshire, TF11 8DW
tel: +44 (0)1952 463050 fax: +44 (0)1952 463077 www.quest88.com email:[email protected]
QD. TRINST1.P65 iss.7/GJ-06/09
3
Panther Mudguards (where ordered);
Fitting after Delivery
The Panther trike is delivered without mudguards fitted to avoid
damage in transit. The mudguards are left and right handed and are
labelled accordingly. When referring to left and right, it is always
as you are sitting on the trike. If the labels are missing, the longer
length of round tube on the mudguard is fitted pointing forwards.
To fit the mudguards, pass the socket head bolts through the
brackets welded to the trike frame. Offer the holes of the mudguard
stay to the frame brackets and fit the bolts through. Using the 3mm
hexagon key and multi spanner, fasten the mudguards in place as
shown RIGHT.
Saddle Height
The saddle height is the essential element in maintaining balance,
whilst providing the legs with the correct positioning for easy
pedalling.
The trike may arrive with the saddle and stem removed. Carefully align
the stem with the steel tube on the frame and slide into position. The
ideal seat height is when one of the user’s thighs is horizontal when
the corresponding pedal is at the top of its cycle. Use the user’s seat
to floor height as a measurement to set the top of the saddle to the
top of a pedal at the top of its cycle. Fasten the saddle in position
with the clamp at the top of the steel stem. To tighten the clamp,
hold the lever pointing down in the ‘open’ position and turn the knob
on the opposite side until it is as tight as possible. Lock the lever by
pulling it up through 180 degrees until it feels very stiff.
!
Check that the saddle is secure by leaning on
the saddle and trying to rotate it at the same
time. Ensure that there is no movement by
repeating the tightening process if necessary.
There is a maximum height setting indicated
by a gap in the knurling (textured surface) on
the saddle stem. Do not fasten the saddle in
position with this indicator above the top of the
trike frame saddle tube.
Quest 88 limited, Aston Street, Shifnal, Shropshire, TF11 8DW
tel: +44 (0)1952 463050 fax: +44 (0)1952 463077 www.quest88.com email:[email protected]
QD. TRINST1supp.PM6 iss.7/GJ-06/09
4
Saddle Position (Sliding Seat Option)
The Sliding Seat is an additional accessory that allows adjustment
of the saddle (forwards/backwards) in relation to the pedal position.
This is useful for children who have longer thighs in relation to their
total leg length. By sliding the saddle further back it prevents such
children from having their knees too far ahead of their feet, which
would otherwise impede pedalling.
Steering Set Up
4 Point Handlebar Stem
Steering needs to be correctly positioned to maximise steering ability
and control. A combination of stem height and handlebar angle is
used to achieve the steering position. The optimum position is one
which combines comfort and control, ideally with the elbows flexed,
hands at mid chest to shoulder level and trunk as vertical as possible.
To set the stem height, stand at the front of the trike looking at the
saddle with a foot on either side of the front wheel. Handlebar stems
come with either a 6mm hexagon socket bolt or a 13mm standard
bolt. Using either the 6mm socket key or 13mm spanner, loosen the
stem bolt and gently lift the stem to the desired height.
Ensure the stem is running in the same direction as the wheel and
tighten the bolt. To adjust the handle bar angle loosen the four
hexagonal socket bolts and angle the bars to the desired position.
Tighten the four hexagonal socket bolts to lock the bars in position.
Ensure all bolts are tightly fastened before use.
Quest 88 limited, Aston Street, Shifnal, Shropshire, TF11 8DW
tel: +44 (0)1952 463050 fax: +44 (0)1952 463077 www.quest88.com email:[email protected]
QD. TRINST1.P65 iss.7/GJ-06/09
5
Multi Positional Handlebar Stem
This is a handlebar stem which gives greater adjustment, providing a more accurate trike set up.
The stem is angle adjustable and has a greater height range than a standard handlebar stem. It can be
retro fitted and used with Quest 88 single and twin grip handlebars. The twin grip handlebars require
reducer sleeves to be fitted between them and the stem in order for them to be locked in position firmly.
Before retro fitting a Flexistem, remove the original handlebar stem. Undo the brake lever completely.
Loosen the bolts which control the angle of the handlebar and take the handlebar out of the stem.
NB: With single grip handlebars on Colt and Panther trikes, one handgrip will need to be removed
in order to slide the handlebar out of the stem.
To remove the old stem from the trike frame, undo the bolt which controls handlebar height (see earlier
instructions) and slide the stem out of the trike frame.
Fit the Flexistem into the frame and temporarily fix its height by
tightening the height adjustment bolt.
Remove the locking boss from the end of the Flexistem, position the
handlebar in the groove (fitting reducer sleeves where necessary)
and replace the locking boss. Adjust the handlebars to the desired
angle and fully tighten the bolts which hold the locking boss in place.
The bolts which hold the locking boss in place must be loosened in
order to adjust handlebar angle.
Re-fit the brake lever to the handlebars and check the brake's power.
Adjust the brake as necessary as per the procedure described later
in these instructions.
Once the handlebars have been fitted, they should be set up to
provide an effective position for the user as described earlier in
these instructions.
Benefits of the Multi Positional Stem
Adjustments can be made to;
1) Handlebar height, by undoing the vertical bolt going through
the handlebar stem.
2) Handlebar angle, by undoing the bolts holding the locking boss
in place.
3) Stem angle, by undoing the bolt on the underside of the stem
(see diagram and description on next page).
4) Reversing stem in order to bring handlebars even closer to rider.
Quest 88 limited, Aston Street, Shifnal, Shropshire, TF11 8DW
tel: +44 (0)1952 463050 fax: +44 (0)1952 463077 www.quest88.com email:[email protected]
QD. TRINST1supp.PM6 iss.7/GJ-06/09
6
Stem Angle Adjustment
Adjusting the angle of the stem determines how close the handlebars
are to the user. By considering the angle of the handlebars, the angle
of the stem and the height of the stem, the optimum handle bar
position can be achieved.
To adjust the angle of the stem, locate the single socket-head bolt
on the underside of the stem. Undo this bolt so that the plate it
holds in place moves freely. Adjust the stem to the desired angle
and tighten the bolt. The end of the plate will fit into one of the
grooves on the underside of the stem. Ensure the plate locks firmly
into one of the grooves and fully tighten the bolt. Adjust the height
of the stem and the angle of the handlebars to further fine-tune the
handlebar position.
Ensure all bolts are firmly tightened before the trike is used.
Steering Limiter (2009-onwards)
!
Critical
Safety
Feature
This device stops the front wheel from ‘jackknifing’ and is a critical safety feature and must
be engaged when the user is on the trike.
Once the handlebars have been set up ensure
the limiter is in position by turning the black
knob to the location show in fig.1. Lock the
limiter into place by tightening the white plastic
nut against the trike frame. Check the handle
bar movement is now restricted.
*Earlier models featured a hex-bolt and nut.
Quest 88 limited, Aston Street, Shifnal, Shropshire, TF11 8DW
tel: +44 (0)1952 463050 fax: +44 (0)1952 463077 www.quest88.com email:[email protected]
QD. TRINST1.P65 iss.7/GJ-06/09
7
Check of Correct Positioning
Positioning can be checked quickly after setting up
by pushing the trike forwards with the user on it.
The trike's fixed wheel means that forward motion
will be transferred to the pedals, which in turn will
move the user's legs up and down. If the trike is set
up well, all movement should resemble standard
cycling patterns. Any movement such as extreme
rocking from side to side, lifting from the saddle, or
knees locking in either full extension or full flexion,
will require further attention. Please contact Quest
88 Limited for further guidance if required.
Note: If testing set up without the additional
supports prescribed during demonstration,
support the child manually to avoid accidents.
Ensure that tyres are correctly inflated as specified
in the maintenance section of these instructions.
Look out for Growth!
Riders are always growing and the trike set
up should be re-visited to reflect this. Follow
the procedures described earlier to adjust the
settings for the best comfort and performance.
Intended Performance
Once the trike has been set up for use, check that
the operation is correct. All moving parts have been
designed to run as freely as possible.Therefore;
• Handlebars will turn freely between the stops of the
steering limiter (35 degrees in each direction from the centre when in use).
• If the back of the trike is lifted and the pedals turned, the left rear wheel will revolve smoothly.
• When the trike is pushed along the floor in both directions, the pedals will turn freely in the
corresponding direction.
• When the brake lever is pulled the front wheel will lock and the bike will be difficult to push, the
front wheel not turning at all.
If any of the features on your trike do not perform as described then they may require attention. Take the
trike out of service immediately and contact Quest 88 Limited. Check the care and maintenance section
of these instructions. Anything which is not covered in this list must be referred back to Quest 88 Limited.
Quest 88 limited, Aston Street, Shifnal, Shropshire, TF11 8DW
tel: +44 (0)1952 463050 fax: +44 (0)1952 463077 www.quest88.com email:[email protected]
QD. TRINST1supp.PM6 iss.7/GJ-06/09
8
Accessories
Quest trikes have a series of complimentary accessories which can help provide additional support and
stability. It is important to position these correctly for the individual user, as they are the ‘fine tuning’
necessary to maintain correct user posture.
Set up the position of any accessories after following the earlier main set up instructions.
The full set of accessories are not necessary for every user. Advice on the accessories required will have
been given during demonstration. However, if it is felt the user would benefit from any accessories listed
here, please contact Quest 88 Limited.
Hip and Thoracic Supports
These provide support to maintain a 'midline' position on the saddle. Both supports have straps to help
maintain the user's position and safety on the trike.
The hip and thoracic supports are held on a special assembly which is fitted to the underside of the saddle.
There are three standard sizes of support, which are measured across the width of the inside of the support.
They are: 210-290mm, 255-355mm, 310-390mm. Combinations can be used between hip and thoracic.
Width Adjustable Lateral
Supports
All hip and thoracic supports come with width adjustable lateral (side)
supports which can be removed for ease of transfer.
To adjust the width of the laterals or remove them for transfer, undo
the knobs on the laterals. There is no need to undo the knobs fully,
one full turn is suffficient. The laterals are now free to slide along the
support bar or be removed.
When re-fitting the laterals, ensure the small plate inside the lateral
tube fits into the channel in the lateral support bar.
Adjust the laterals to the correct width of the user, taking care to
ensure that the laterals are adjusted equally on each side to achieve
a 'midline' position for the user. Once the laterals are in the correct
position for the user, tighten the knobs and ensure they are fully
tightened before use.
Quest 88 limited, Aston Street, Shifnal, Shropshire, TF11 8DW
tel: +44 (0)1952 463050 fax: +44 (0)1952 463077 www.quest88.com email:[email protected]
QD. TRINST1.P65 iss.7/GJ-06/09
9
Adjusting Thoracic height
on Width Adjustable Lateral
Supports
The height of the thoracic support should be set up as described
earlier, with a three finger gap between the user's armpit and the
top edge of the thoracic support.
To adjust the height of the thoracic support with width adjustable
laterals, use the dumbell spanner in the tool kit to undo the two bolts
on the ends of the painted section of the thoracic control assembly.
With these bolts undone, slide the thoracic support up or down to
the desired height. Once in place, tighten up the bolts and ensure
they are firmly tightened before use.
Fastening Support Straps
The straps must fit the user snuggly. Loosely fitting the straps should
be avoided as the user may come out of position on the saddle and
become trapped by the straps. Fit the free end of the strap through
the buckle on the other end and pull until the user is held firmly but
their breathing is not restricted. Fasten the buckle by pushing the
lever into the body of the buckle. To undo, tug the free end of the
strap forwards so that it pulls the buckle open.
Quest 88 limited, Aston Street, Shifnal, Shropshire, TF11 8DW
tel: +44 (0)1952 463050 fax: +44 (0)1952 463077 www.quest88.com email:[email protected]
QD. TRINST1supp.PM6 iss.7/GJ-06/09
10
Fitting/Removing the
Thoracic Support
The thoracic support is an independent unit which can be added to,
or removed from, the hip support.
When fitting, remove the black dust caps which may be fitted into
the slotted vertical tubes of the saddle unit. Slide the chrome tubes
of the thoracic support into the slotted vertical tubes. Put the curved
washers onto the handwheel stems. Fit the handwheels through the
slots and into the threaded holes in the chromed tubes.
To remove the thoracic support, undo the handwheels completely
and lift it out of the slotted tubes. Re-fit the handwheels, along with
the shoulder washers, into the chrome tubes for safe keeping.
Soft Chest Plate
A soft chest plate can be used if the user has very low tone and has
a tendency to lean forward or slouch.
The soft chest plate fits onto the webbing belt of a thoracic supports,
making the belt wider and thus providing greater support for the user.
To fit the soft chest plate, the webbing belt from the thoracic
supports needs to be removed. Pay close attention to how the belt
is threaded through the slots in the lateral supports so that it can
be easily re-fitted.
Fit the loose end of the webbing belt beneath one of the loops on
the soft chest plate.
Re-fit the webbing belt through the thoracic support laterals.
Once the user is on the trike, the loose end of the webbing belt
can be fitted through the other loop of the chest plate and through
the buckle.
Quest 88 limited, Aston Street, Shifnal, Shropshire, TF11 8DW
tel: +44 (0)1952 463050 fax: +44 (0)1952 463077 www.quest88.com email:[email protected]
QD. TRINST1.P65 iss.7/GJ-06/09
11
Footplates and Foot Position
The position of the foot on the pedal is an important factor in
transferring leg muscle action into pedal power. This requires the
arch of the foot to be over the centre of the pedal where the most
force can be applied. Using the 10mm spanner provided, loosen the
nuts on the underside of the footplate to slide the plate backwards
and forwards to achieve the best position. Ensure the nuts are tight
before using the trike.
!
For safety, footplates must always be
used in conjunction with a hip support.
Fitting Crank Shorteners
Crank shorteners move the pedals closer to the centre of pedal
rotation. This helps position users with short legs and prevents legs
going into either full extension (straight) or full flexion (bent at knee).
The cycling action is thus made smoother and easier for the user to
control. Crank shorteners are made in left and right hand pairs. Fit
them one side at a time.
1
1
Remove the left hand pedal from the pedal crank. Ensure you
are fitting the left hand crank shortener by turning the bolt marked
with an 'L' anticlockwise into one of the threaded holes in the crank
shortener. If it does not turn in easily, try the other crank shortener.
2
Once you have selected the left hand crank shortener, hold it
on the crank with the small guides on the shortener fitting over the
crank and the hole with no thread in line with the hole on the end
of the crank.
3
Insert the bolt marked 'L' through the end of the crank shortener
and turn it anti-clockwise into the hole at the end of the crank. Ensure
the bolt is firmly tightened.
2
3
4
Once in place fit the pedal into one of the settings in the crank
shortener, paying attention to the action of the user's leg (see section
'Saddle Height').
Repeat the process for the right hand crank shortener, bearing in mind
that the pedals will undo anti-clockwise and tighten up clockwise.
4
Quest 88 limited, Aston Street, Shifnal, Shropshire, TF11 8DW
tel: +44 (0)1952 463050 fax: +44 (0)1952 463077 www.quest88.com email:[email protected]
QD. TRINST1supp.PM6 iss.7/GJ-06/09
12
!
For safety, AFO’s and footplates must
always be used in conjunction with a
hip support.
Ankle - Foot Orthoses (A.F.O.'s)
Ankle-Foot Orthoses, AFO’s, help maintain a 90 degree angle
between the foot and lower leg. Plantiflected ankles (toes pointing
downwards) often make pedalling difficult as when the pedal comes
to the top of its rotation, the ankle position greatly affects the knee
and upper leg position. AFO’s can also be used to help abduct the
knees, keeping the leg in a straight line with the action of the pedals.
The AFO consists of a stem which fits into the tube on the side of
an AFO footplate. Attached to the stem is the cuff and strap. The
AFO can be fitted to the inside or the outside of the leg. If abduction
control is the main priority, then the AFO should be fitted to the inside
of the leg. The fitting of the footplates to the pedals will govern
which side of the leg the AFO will fit on. See the earlier instruction
for fitting footplates. Attach the footplates to the pedals with the
rectangular tube on the required side.
With the user on the trike, position their foot on the footplate
(described earlier) and fasten in position. Fit the footplate straps
through the buckles, pull tightly and fasten by pushing down the
lever on the buckle.
With the cuff of the AFO at the front of the user's leg, slide the stem
of the AFO into the rectangular tube on the footplate. The ankle can
be held at 90 degrees by pushing the cuff up to meet the front of the
leg. The height of the AFO should be adjusted so that the top of the
cuff sits slightly below the knee cap. Fix the height by tightening the
small wing knob on the footplate tube. Fasten the AFO in place by
fixing the strap around the calf and through the buckle on the front
of the cuff. If the strap cuts into the back of the knee, the height of
the AFO should be slightly reduced.
!
Always remove AFO’s from the footplates when
the trike is not in use as the fixed-wheel action
will knock them along the ground as the trike
is pulled along. This will damage the AFO and
may cause further damage to the footplates
and trike.
Quest 88 limited, Aston Street, Shifnal, Shropshire, TF11 8DW
tel: +44 (0)1952 463050 fax: +44 (0)1952 463077 www.quest88.com email:[email protected]
QD. TRINST1.P65 iss.7/GJ-06/09
13
Push/Pull Rods (Parental/Carer Control)
Push/Pull Rods are used to “check” the action of the user on trike.
They can be used to encourage pedalling through the fixed wheel
action on the trikes so as the bike is pushed or pulled the pedals will
turn. Pull rods will enable you to steer the trike.
The rod can be used to pull the trikes when it is attached to a bracket
which fits onto the handlebar stem.
To fit the bracket, undo the bolt at the top of the handlebar stem
and pull the handlebars out of the head tube. Fit the bracket onto
the stem and replace the handlebars in the head tube.
Set the handle bars to the desired height (see main trike user
instructions) and fasten the bracket in position by tightening the
grub screws on each side of the bracket with a 3mm hexagonal key.
The Push/Pull Rod tube can be fitted position by sliding it over the
chromed tube on the bracket. Push in the popper on the chrome
tube and fit the Rod onto the tube. Ensure the popper fits through
the hole in the rod before use.
To push the trike, the Rod can be fitted onto a chrome tube attached
to the back of the trike between to plates. Fit the Rod as described
above.
!
Push and Pull Rods must not be used as levers to
tilt and turn the tricycle either with or without
the rider present. Neither is it to be used to lift
the front wheel over a threshold, such as a shed
door. The Pull Rod is intended to assist the child
with steering and pedalling and is not intended
to pull the child up steep inclines.
The push rod is not a “rear steer device”, it is
intended as a means of assisting pedalling whilst
allowing the rider to steer.
Quest 88 limited, Aston Street, Shifnal, Shropshire, TF11 8DW
tel: +44 (0)1952 463050 fax: +44 (0)1952 463077 www.quest88.com email:[email protected]
QD. TRINST1supp.PM6 iss.7/GJ-06/09
14
Day to Day Use
Getting on and off a Trike
It is important to develop a safe routine for getting on and off a trike.
Always ensure there is no clutter or obstacles which will obstruct
transfer to and from the trike. Use an appropriate transfer technique
to position the user on the saddle.
Where the user requires significant assistance to get on or off a trike,
the parking brake must be activated to keep the trike stationary. The
parking brake is activated by pulling the brake lever as normal and
pushing down the small silver button on the brake lever. This locks
the lever in position. To release the parking brake pull the lever in
again and the silver button will pop up automatically.
If the trike has accessories which have straps it is important to fasten
the straps in sequence, starting with the pelvis strap, followed by the
thoracic or chest strap, the footplate straps and finally the Ankle Foot
Orthoses straps. By following this sequence the user will be held at
the hips so that attention can be paid to the other accessories with
the user firmly positioned.
When getting off the trike this sequence should be reversed, with the
AFO’s released first, followed by the footplate straps and thoracic
strap. The pelvis strap should only be released once everything is in
place and the user is ready to be transferred from the trike.
Straps on the footplates and AFO’s must only be used once a pelvis
strap is firmly fitted. AFO cuffs always fit around the front of the knee,
with the straps fitting around the back of the calf.
Gripping aids
Gripping aids such as Quest 88’s own Gripmits, or Active Hands
should only be used when necessary and where parental/carer
encouragement and training have not been effective.
Instructions for Gripmits are supplied separately to these instructions.
Quest 88 limited, Aston Street, Shifnal, Shropshire, TF11 8DW
tel: +44 (0)1952 463050 fax: +44 (0)1952 463077 www.quest88.com email:[email protected]
QD. TRINST1.P65 iss.7/GJ-06/09
15
Two Piece Frame
Quest 88 tricycles can be split into two parts to make lifting and
handling, transport and storage simpler. The mechanism for this
splits the trike into the front steering assembly with down tubes
and the rear assembly of seat, pedals and drive mechanism. If the
mechanism which joins the two parts of the trike does not appear to
work correctly, take the trike out of service immediately and contact
Quest 88 Limited.
Note on Clamping Handles
These handles are fastened by rotating them clockwise and
released by turning them anticlockwise. The handles have a
mechanism inside which allows the lever to move freely without
affecting the clamping action. When the handle cannot be turned
completely, pull the lever out and turn it back from your intended
direction. Letting the lever go will engage the clamping action
again to continue fastening or releasing the handle.
Turn the clamping handle on the plates between the two down tubes
and continue to turn it until it comes free of the trike. The two parts
of the trike are now free to be split apart.
To Split the Two Parts
To split the trike, hold the front of the frame and apply a
downward pressure on the drive section on the top tube in
front of the chain guard. The drive section should drop away
and rest on the prop on the underside of the frame.
Once the trike has been split, wind the clamping handle into
the threaded hole in the plate for safe keeping.
Lift the rear end of the trike so that the pin lines up with the
tube in the front end of the trike. Fit the pin into the tube and
ensure that it is fully fitted by checking that the holes in the
plates between the down tubes line up. Once the holes are in
line, re fit the clamping handle and ensure it is fully tightened
before using the trike.
Quest 88 limited, Aston Street, Shifnal, Shropshire, TF11 8DW
tel: +44 (0)1952 463050 fax: +44 (0)1952 463077 www.quest88.com email:[email protected]
QD. TRINST1supp.PM6 iss.7/GJ-06/09
16
Fitting guide for printed wheel covers
Feed wheel cover (at slot) behind the mudguard stay and over hub.
Align holes in covers either side of the wheel. (3 holes Kitten wheel
covers, 5 holes Colt/Carousel, 5 holes Panther).
Insert longer (female) plastic fastening through holes in each disc
and secure using smaller (male) fastening
1
Notes on fitting wheel discs
Finger tighten, do not over tighten, if using a screwdriver as this
may split the fastenings.
Repeat for each set of holes.
Carefully tuck the exposed edge at the split disc, behind the secured
edge. Black (unprinted) discs are to be used on the inside of the
rear wheels.
2
You will need to remove the discs as appropriate for access to the
valve for inflating tyres (Kitten Trike). The rear Colt and Carousel wheel
covers have cutouts for access on rear wheels. When retrofitting wheel
covers to the Colt, Carousel and Panther tricycles, you will need to
remove any reflectors from the wheels.
3
4
5
Quest 88 limited, Aston Street, Shifnal, Shropshire, TF11 8DW
tel: +44 (0)1952 463050 fax: +44 (0)1952 463077 www.quest88.com email:[email protected]
QD. TRINST1.P65 iss.7/GJ-06/09
17
Trike Care and Maintenance
Cleaning: Regularly clean the trike with soapy water and
a damp cloth and dry thoroughly. Remove such debris as grass, hair
and fibres from axles and moving parts. Do not use solvent cleaners
on any part of the trike. Do not use T-cut or any similar abrasive
cleaner on paintwork.
Lubrication:
The trikes have been designed to
minimize the need to lubricate moving parts. However, a regular
application of a reputable light oil, such as '3 in 1' to the brake
callipers (not brake pads), the front wheel axle and pedal axles
(between the pedal crank and footplate) will help maintain trike
performance.
Wheels:
Although very durable, trike wheels may be
damaged by dropping or shocking e.g. jamming in a car boot door.
Upon receipt of a trike and after any undue drops or knocks, check
wheels for signs of any hairline cracks or splinters. A trike with any
suspected damage to the wheels should be taken out of service
immediately.
Tyres: Tyre pressure should be maintained at 25 to 30 psi
to maintain stability and even wear. If tyres are too soft the friction
caused will make pedalling increasingly difficult. As with any inflatable
tyre, expect to mend a puncture at some point. The front wheel can
be removed using the 16mm spanner in the toolkit. However the rear
wheels cannot be removed and no attempt should be made to do so.
Before taking the tyre off a rear wheel any wheeldiscs and the
mudguard must be removed. Using the 3mm hexagonal socket key
and the multispanner undo the bolts which hold the mudguard onto
the trike fame. Take care not to lose any of the nuts and washers.
For all wheels, to remove the tyre, completely deflate the tyre by
removing the dust cap and pressing the small pin on the inside of the
valve. When all the air is out the tyre can be levered off. Use plastic
tyre levers to do this. Using a screwdriver, tyre irons or spoons will
damage the plastic rim of the wheel. Put one tyre lever under the
bead of the tyre, opposite the valve. Lever the bead of the tyre over
the rim of the wheel.
Insert the second lever 10cm to the side of the first and do the
same. The levers can then be slid around to leave the tyre 'half off'
the wheel. The inner tube can then be carefully pulled out and any
punctures repaired as per the directions in the puncture repair kit.
Check the inside of the tyre for what caused the puncture.
Quest 88 limited, Aston Street, Shifnal, Shropshire, TF11 8DW
tel: +44 (0)1952 463050 fax: +44 (0)1952 463077 www.quest88.com email:[email protected]
QD. TRINST1supp.PM6 iss.7/GJ-06/09
18
Tyres (continued)
To insert a repaired or new inner tube, slightly inflate the inner tube
and insert the valve through the hole in the rim. Tuck the inner tube
into the tyre, being careful not to twist or pinch it, and push the tyre
bead back over the wheel rim. Inflate the tyre to the correct pressure
and replace the dust cap on the valve.
To replace the mudguard, pass the socket head bolts through the
holes on the mudguard bars. Fit the white spacer over the bolts and
position the mudguards on the brackets on the back of the trike
frame. Using the 3mm hexagon key and multi spanner, fasten the
mudguards in place as shown on the diagram.
Maintenance of Brakes
Keep brake pads and callipers clean and free of dirt and avoid any
overspray of lubricant getting onto brake pads or wheel rims.
Adjusting the Brakes
There are two ways in which brakes can be tightened.
1
If the brakes are not quite firm.
If the brakes are touching the rim of the wheel when the brake lever
on the handlebar is pulled but there is insufficient pressure to stop
the bike, then a slight adjustment to the brake cable tension will
provide extra braking power.
To do this, turn the barrel into which the brake cable fits on to the
brake callipers anti-clockwise so that it rises up in its mounting. Using
fingers or the 10mm spanner turn the small nut below the barrel
clockwise so that it sits against the mounting. Test the brakes again.
If there is still insufficient braking power then try method 2.
1
2
If the brakes still do not provide enough power or are not acting
against the rim. Using the 10mm spanner undo the bolt on the lower
calliper which the bare brake cable passes through. Push the brake
levers into the wheel rim, pull the cable through the bolt so that it
is as tight as possible and tighten the nut with the 10mm spanner.
Go back to method 1 to fine tune the braking power.
2
Quest 88 limited, Aston Street, Shifnal, Shropshire, TF11 8DW
tel: +44 (0)1952 463050 fax: +44 (0)1952 463077 www.quest88.com email:[email protected]
QD. TRINST1.P65 iss.7/GJ-06/09
19
General:
Always ensure that knobs, levers and bolts are firmly secured before use. Ensure that
pedals and crank shorteners are thoroughly tightened in position and are not loose. Loose components
left unchecked can lead to damage of the trike and may compromise user safety.
Trike Identification: Each trike is marked with a code number, which should be
used during all enquiries with Quest 88 Limited. The number is located on the foil label on the inside
(metal) face of the chain guard.
Intended Use:
equipment.
The trikes are built for indoor and outdoor use as active therapy
A level of supervision appropriate to the user’s abilities should be applied at all times.
Optimum performance will come through using the trike on a level surface such as asphalt, concrete or
wooden floors, which is free of obstructions. Soft or uneven ground, such as sand or mud, and inclined
surfaces will adversely affect ease of movement and stability and should be avoided. Riding along kerbs
and inclines will affect stability and should be avoided at all times. Use parental poles to control user
stability and speed whenever possible. Refer to User Instruction sections on tyre pressure, steering
limiter and push pull rods to ensure full stability for the user. The trikes are not intended for road use
and should not be used in areas frequently used by cars, vans and other road vehicles.
Quest 88 Limited advocates the wearing of safety helmets and reflective clothing whilst using the trikes.
If the trike is used in wet conditions it is recommended that it is cleaned and dried before storage to
maintain good condition. Your trike will continue to perform for many years if you take care of it!
For safety, extra care should be taken when using the trike on damp or wet surfaces.
The trikes are intended for single person use and must not be used to carry two or more persons.
Avoid riding off kerbs or into obstacles and any abrupt shocks to the wheels and frame.
Sit only on the saddle of the trike. Stand only on the pedals of the trike.
Do not attach any objects to the spokes or forks of the trike which may catch or damage the wheels.
Caution must be taken through use, transport and storage not to drop or knock the trike. Do not store
other equipment on top of the trike and/ or its accessories as this may affect components and trike set
up. Always store the trike under cover and away from excessive moisture as this may lead to corrosion
of components and assemblies over time.
The trikes have been manufactured by Quest 88 Limited engineers. Any adjustments or alterations
which are not listed in these instructions should not be made without the authorisation of a Quest 88
Limited representative. Any such adjustments will affect the trikes warranty. Quest 88 Limited do not
take any responsibility for any trike which has been adapted or affected by actions not described in
these instructions by any individual not authorised by Quest 88 Limited.
Declaration of Conformity: Quest 88 Limited as manufacturer declares that the Quest 88 range
of tricycles and associated accessories conforms to the requirements of the 93/42/EEC Guidelines
as a Class 1 medical device.
Quest 88 limited, Aston Street, Shifnal, Shropshire, TF11 8DW
tel: +44 (0)1952 463050 fax: +44 (0)1952 463077 www.quest88.com email:[email protected]
QD. TRINST1supp.PM6 iss.7/GJ-06/09
20
Quest 88 Tricycles - Limited Warranty
Dear Customer,
Thank you for purchasing a Quest 88 tricycle. We sincerely hope that this tricycle will meet all of
your expectations. As part of our Product Vigilance System and our commitment of service to
you, this form serves as warranty confirmation for your trike. Please keep these details in a safe
place as this will help us maintain traceability for your trike. If you wish to contact us in the future
please quote the FRAME CODE (below, also found on the inspection label on back of chain guard).
Manufacture Completed on:
________________
Model Name: KITTEN / COLT / CAROUSEL / PANTHER
Frame Number:
QU ______________
QUEST 88 TRICYCLE FRAMES AND FORKS ARE WARRANTED BY THE COMPANY: FOR THE FIRST 5 YEARS FROM DATE OF PURCHASE
AGAINST ANY DEFECTS IN MATERIALS AND WORKMANSHIP. OTHER PARTS OF THE TRICYCLE ARE WARRANTED FOR TWO YEARS
FROM DATE OF PURCHASE AGAINST DEFECTS IN MATERIALS AND WORKMANSHIP. THIS WARRANTY IS FREELY TRANSFERABLE.
TRANSPORTATION CHARGES ARE ALSO COVERED.
QUEST 88 WILL REPLACE WITHOUT CHARGE ANY FRAME AND/OR FORK FOUND TO BE DEFECTIVE BY THE FACTORY WITHIN
THE TERMS OF THE WARRANTY. (REPLACEMENTS WILL BE THE SAME OR SIMILAR IN CONSTRUCTION AND COSMETICS , BUT WILL
BE LIMITED TO CURRENT STOCK) HOWEVER, QUEST 88 WILL ASSUME LABOUR CHARGES INVOLVED ONLY IN FRAME AND FORK
REPLACEMENT AND LIMITED TO 90 DAYS FROM THE DATE OF PURCHASE AT RETAIL.
QUEST 88 TRICYCLES ARE NOT MANUFACTURED OR SOLD FOR USE INVOLVING RAMP JUMPING, PASSENGERS, NOR ARE
THEY INTENDED TO BE USED WITH MOTORS, ENGINES OR OTHER POWER EQUIPMENT. PRODUCT PERFORMANCE AND USE IS
DETAILED IN THE USER INSTRUCTIONS. THE COMPANY, IT'S AUTHORIZED AFFILIATES OR AGENTS SHALL NOT BE LIABLE UNDER
THIS WARRANTY OR ANY LAWS FOR ANY DAMAGE OR FAILURE INCLUDING PERSONAL INJURY, RESULTING FROM IMPROPER USE.
PERSONAL INJURY, BICYCLE FAILURE, LOSS OR DAMAGE, ABUSE, NEGLECT, NORMAL WEAR (SUCH AS TYRES AND TUBES, BRAKE
AND GEAR CABLES, SEAT, PEDALS AND HANDLEBAR GRIPS/TAPES), IMPROPER FIT OR MAINTENANCE BY ANYONE OTHER THAN
THE COMPANY OR AUTHORIZED AGENTS, OR USE OF PARTS INCONSISTENT WITH THE USE ORIGINALLY INTENDED FOR THE
TRICYCLE AS SOLD ARE NOT COVERED BY THIS. AUTHORIZED AGENT PURSUANT TO THIS WARRANTY HEREIN MADE SHALL BE
THE REPLACEMENT OF THE DEFECTIVE PART(S), AND IN NO EVENT SHALL QUEST 88 LIMITED BE LIABLE FOR INCIDENTAL OR
CONSEQUENTIAL DAMAGES.
SPECIAL NOTES TO USERS, PARENTS, GUARDIANS AND/OR SUPERVISORS
WE DO RECOMMEND THAT YOU CONTACT US IMMEDIATELY IF YOU EXPERIENCE ANY DIFFICULTY WHATSOEVER. TOTAL
SUPERVISION WILL BE REQUIRED IF THE USER HAS LIMITED SKILLS ESPECIALLY COMMUNICATION - PLEASE NOTE, ALL SAFETY
LABELS MUST BE REPLACED IF THEY BECOME WORN - CONTACT QUEST 88 LIMITED IF IN DOUBT. REGULAR INSPECTION
AND MAINTENANCE IS ESSENTIAL TO ENSURE THAT THE PRODUCT PERFORMS TO CLIENTS EXPECTATIONS AT ALL TIMES.
Quest 88 limited, Aston Street, Shifnal, Shropshire, TF11 8DW
tel: +44 (0)1952 463050 fax: +44 (0)1952 463077 www.quest88.com email:[email protected]