Download User Manual Reader Configuration Utility
Transcript
Reader Configuration
Utility
discover. track. monitor.
User Manual
Contents
Preface
3
3
3
3
Reader Configuration Utility
4
4
4
4
4
4
5
5
6
8
9
11
11
12
Warranty & Service
13
13
13
13
13
Trademarks
FCC Compliance
Copyright Statement
Introduction
Requirements
Installation Launching Application
Main Screen
Network Connection
Network Tab
Security Tab
Up Connect Tab
Firmware Tab
Local Connection Bluetooth Passcode
Command Line Interface
Limited Standard Warranty Terms
Standard Warranty Limitations Obtaining Service & Support
RF Code Customer Support
PN00135 REV06
Reader Configuration Utility User Manual 2
Preface
Trademarks
RF CodeTM and the RF Code logo are trademarks of RF Code, Inc. The Bluetooth® word mark and logos are registered trademarks owned by Bluetooth SIG, Inc. and any use of such marks by RF Code is under license. BlackBerry™
is a trademark of Research in Motion Limited. All other product or service names are the property of their respective
owners.
Information in this document is provided solely to enable system and software implementors to use RF Code
products. There are no express or implied copyright licenses granted hereunder to design or fabricate any integrated
circuits or integrated circuits based on the information in this document.
RF Code reserves the right to make changes without further notice to any products herein. RF Code makes no warranty, representation or guarantee regarding the suitability of its products for any particular purpose, nor does RF
Code assume any liability arising out of the application or use of any product, and specifically disclaims any and all
liability, including without limitation consequential or incidental damages.
The user of this system is cautioned that any changes or modifications to this system, not expressly approved by RF
Code, Inc., could void the warranty.
Bluetooth QD ID: B012541
FCC Compliance
This device complies with part 15 of the FCC Rules. Operation is subject to the following two conditions: (1) This
device may not cause harmful interference, and (2) this device must accept any interference received, including interference that may cause undesired operation.
is equipment has been tested and found to comply with the limits for a Class A digital device, pursuant to part 15
Th
of the FCC Rules. These limits are designed to provide reasonable protection against harmful interference when the
equipment is operated in a commercial environment. This equipment generates, uses, and can radiate radio frequency
energy and, if not installed and used in accordance with the instruction manual, may cause harmful interference to
radio communications. Operation of this equipment in a residential area is likely to cause harmful interference in
which case the user will be required to correct the interference at his own expense.
Copyright Statement
Copyright © 2008-2011 RF Code, Inc. All Rights Reserved.
This document, as well as the hardware and firmware described therein, is furnished under license and may only be
used or copied in accordance with the terms of such license. The information in these pages are furnished for informational use only, are subject to change without notice, and should not be construed as a commitment by RF Code,
Inc. RF Code assumes no responsibility or liability for any errors or inaccuracies that may appear in these pages.
Every effort has been made to supply complete and accurate information. However, RF Code assumes no responsibility for its use, or for any infringements of patents or other rights of third parties, which would result.
RF Code, Inc.
9229 Waterford Centre Blvd.
Suite 500
Austin, TX 78758
www.rfcode.com
PN00135 REV06
Reader Configuration Utility User Manual 3
Reader Configuration
Utility
The Reader Configuration Utility CD-ROM contains several items to assist partners and customers with using RF
Code readers:
• Reader Configuration Utility – a Windows-based utility for upgrading firmware and configuring M200 Family
Readers
• E
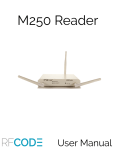
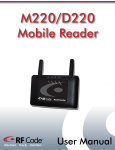
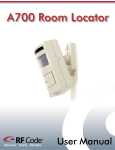
nd-user documentation for RF Code M200 Family Readers, M250 Reader, M220 Mobile Reader, R200
Reader, A700 Room Locator and A750 Room Locator
Introduction
e reader configuration utility is a Windows based software program that interfaces with an RF Code reader and is
Th
used to update firmware on a reader, or assign an IP address to a standard reader.
e reader configuration utility is typically used to upgrade the firmware embedded in one of the RF Code readers
Th
(mobile or standard reader). Updated firmware with new features and capabilities will periodically become available
for the RF Code readers. All firmware upgrades will be provided as one firmware update package.
e firmware image file can be uploaded to a reader connected to a network or to a reader connected to your PC by a
Th
RS-232 serial cable, PCMCIA card, or USB cable.
Requirements
System Requirements:
• 83 MB available hard drive space
• Windows 2000, NT, XP, or Vista operating system
Installation
I nsert the CD into your CD-ROM drive and click on “Install Reader Configuration Utility” to begin. If the CD
autorun program does not launch the CD main menu, you can use a Windows explorer window to browse to your
CD drive and double-click the RF Code Utility CD Menu file to start the autorun program or install the Reader
Configuration Utility directly by double clicking on the setup.exe file.
Launching Application
fter installing the application from the CD, select Start > All Programs > RF Code > Reader Configuration UtilA
ity > RF Code Reader Configuration Utility to launch the application and display the main screen.
Main Screen
fter launching the application, the main screen appears. You can select Network or Local and click Next to begin
A
the setup. The network setup is used to configure a reader connected to a network by means of an ethernet connection. The local setup is used to configure a reader connected to your PC by a RS-232 serial cable or USB cable.
PN00135 REV06
Reader Configuration Utility User Manual 4
Network Connection
Figure 1: Main Screen
Network Connection
Select Network and click the Next button to display the setup screen.
Figure 2: Main Screen
Network Tab
t the top of the screen is a Reader Address field to enter the IP address of a reader. This field displays the factory
A
default IP address (192.168.1.129) assigned to all readers. Choose the Connect button to connect to the reader.
Network settings are grayed out during a connection attempt. If necessary, choose the Stop button to terminate a
connection attempt if the reader can not be located or you want to enter another IP address.
PN00135 REV06
5
In versions prior to V 2.3.4, to change the IP address of a reader, you may have to change your PC’s IP
address in order to talk to the reader. You must match the subnet of your PC and the reader. Then you can
contact the reader and change its IP Address. Then change your PC’s IP address back to what it was before.
The Network tab consists of two groups:
• General Settings
• Advanced Network Settings
In the General Settings group you can specify the following after connecting to a reader:
• DHCP Checkbox - Check this box for automatic IP address configuration.
• IP Address – Initially indicates last address that was successfully connected.
• Port - Enter the port over which you wish to communicate with the reader.
• IP Subnet Mask – Enter your subnet mask. This is used with the network address to determine which part of
the address is the network address and which part is the host address.
• IP Gateway Address – Enter gateway address used as an entry point into another network. For example:
166.70.10.1 could be used as a gateway. It is common for .1 and .2 to be setup as a network’s gateway. The
gateway is commonly the address of a network device such as a network router.
In the Advanced Network Settings group you can specify the following:
• Keep Alive Requests – Enter number of requests for a connection to be reused. Persistent connections reduce
lag, because the client does not need to re-negotiate the TCP connection after the first request has been sent.
• Keep Alive Timeout (ms) – Enter how long keep-alive connections are kept alive.
• MTU – Maximum Transmission Unit (MTU) refers to the size (in bytes) of the largest packet that a given layer
of a communications protocol can pass onwards. The MTU may be fixed by standards (as with Ethernet) or
decided at connect time (usually the case with point-to-point serial links). A higher MTU brings higher bandwidth efficiency. However large packets can block a slow interface for some time, increasing the lag on other
packets.
• Network Timeout (ms) – Refers to the time allowed before a network connection attempt is terminated.
Click the Apply Settings button after defining the desired settings.
In the Network tab, click the Finish button to close the application.
When using Reader Configuration Utility with M250 Readers, please note that the only settings that should
be configured are Network Settings and Firmware Upgrades. All other settings for the M250 Reader should
be configured through the Web User Interface for this Reader.
Security Tab
e Security tab (only visible when connecting with a M200 or M220 Reader) allows you to grant or restrict access
Th
to the mobile reader through the use of a username, password, or both. The security feature is only functional for version 2.3.4 or later.
To use the Security tab to grant access to a new user, perform the following steps:
Security Tab will not appear if you are using the Reader Configuration Utility with the M250 Reader.
6
PN00135 REV06
Security Tab
Click on the Security tab so that the security options are displayed.
Figure 3: Security Settings
Check the Enable Login box and enter the username and/or the password that you wish to grant access to. Click Apply Settings.
Once you have added the user, a completion dialog will appear to indicate that you have successfully given the user
access. Click OK to continue.
Figure 4: Update Dialog
To use the Security tab to remove access of a user uncheck the enable dialog box and click Apply Settings.
PN00135 REV06
7
Figure 5: Disable Password
Once you have removed the user, a completion dialog will appear to indicate that you have successfully removed the
user’s access. Click OK to continue.
Up Connect Tab
The feature of the Reader Configuration Utility allows for reader communication with Zone Managers to be more
“firewall friendly”. When this option is selected, the utility configures the reader to initiate the contact with the Zone
Manager rather than requiring that access be granted to allow the Zone Manager to connect to readers behind a
firewall.
The Up connect tab consists of the following options.
• Enable Up connect - Check this box to enable the reader to up connect to a Zone Manager.
• Up connect IP Address - Input the IP address of the Zone Manager that the reader should connect to.
• Up
connect Port - Input the port number over which the reader will communicate with the Zone Manager.
• Up
connect Reader ID/Password - Input and verify a reader ID and password that will be utilized in the up
connect configuration of Zone Manager and Asset Manager.
8
PN00135 REV06
Firmware Tab
o enable the reader for up connect settings, check the enable box and enter an Up Connect Reader ID (required).
T
The Up Connect settings can be password protected (optional) by entering and confirming a password. To activate
the reader for Up Connect capabilities, click Apply Settings.
TIP Please keep note of the Up Connect Reader ID and password (optional) specified as this will be used in the
Reader Configuration of Asset Manager.
Figure 6: Up Connect Settings Tab
Firmware Tab
The Firmware tab consists of the following options:
• Current Firmware - Displays firmware version currently installed on reader.
• Firmware Build - Displays firmware build for version 2.3.4 or later.
• Available Firmware Images - Drop down list of available firmware images that can be uploaded to a reader.
Readers can not downgrade to previous versions of firmware. Readers can use existing firmware or greater.
If you are upgrading the reader from a laptop, it is recommended to use the laptop’s AC adapter instead of
laptop batteries.
!
The M220 Mobile Reader should be upgraded via the USB connection rather than the Bluetooth connection because it is a more reliable connection.
Select a firmware image from the dropdown list and click the Update Firmware button to begin the firmware upgrade process.
PN00135 REV06
9
Figure 7: Firmware Options
A warning dialog will appear. Click Yes to proceed with the upgrade process.
Figure 8: Warning Dialog
After the process is complete the reader will be rebooted and a completion dialog will appear.
Click OK and the configuration utility will attempt to reconnect to the reader.
Figure 9: Completion Dialog
efore performing an upgrade process you can click Finish to cancel the process and close the application. After an
B
upgrade process is complete, click Finish to close the configuration utility.
Firmware upgrades will take longer when uploading to a mobile PC Card reader.
Do not reboot the reader while the firmware image is uploading to the reader. This will corrupt the firmware
image.
!
10
PN00135 REV06
Local Connection
Local Connection
se the Local Connection settings to configure a reader connected to your PC by a RS-232 serial cable or PCMCIA
U
card.
On the main screen select local then click Next to begin a search of defined com ports.
Figure 10: Com Port Selection
If necessary, choose the Scan Ports button to re-scan ports for connected readers. Select the Configure Reader radio button next to the
reader you wish to upgrade and click Next.
Bluetooth Passcode
After you have connected to your reader locally, there is an option to set a Bluetooth passcode for your reader This feature only applies to the M220 Mobile Reader. It does not apply to fixed readers. To do this click on the Settings
tab and enter the passcode you wish your device to have (the default is 0000). Click Apply Settings to implement the
new passcode for the reader as shown below.
Figure 11 Bluetooth Passcode Settings
PN00135 REV06
11
Command Line Interface
The firmware upgrade feature can also be performed using the Command Line Interface (CLI). This may be particularly useful for users needing to upgrade many readers on a network. There are several parameters that can be used in
the CLI:
-h
allows connection to a specified IP address or hostname
-p
allows specification of a port number
-v
allows specification of the version of firmware
-c
allows connection to a specified COM port
-u
allows specification of user credentials (username and/or password) when connecting to the reader
Instructions for using the RCU CLI
To use the RCU CLI, change directory to the RCU installation directory - typically this is:
C:\Program Files\RF Code\Reader Configuration Utility
Then issue the following command:
run -h <ip address> -p <port> -v <version of firmware>
So in a typical install the command would look similar to the following:
run -h 10.1.18.108 -p 80 -v 240
The “-p 80” is optional. It will default to 6500 (the default reader port).
The command just issued would attempt to contact the reader whose ip is 10.1.18.108 and upgrade the firmware to
version 2.40.
You can also use the CLI to upgrade the reader via a serial port using the following command:
run -c com1 -v 240
Where “com1” is the serial port.
The RCU also supports an additional paramter “-u” which allows the user to specify the credentials used when connecting to the reader. The syntax is:
12
-u user:password (Both user and password configured on reader securitysettings)
-u user (Just user configured on reader security settings)
-u :password (Just password configured on reader security settings)
PN00135 REV06
Warranty & Service
Limited Standard Warranty Terms
RF Code warrants its products to be free from defects in materials and workmanship for a period of 1 year (12
months) for hardware and software from the date of purchase from RF Code. Its obligation under this warranty is
limited to repairing or replacing, at its own sole option, any such defective products. This warranty does not apply to
equipment that has been damaged by accident, negligence, or misapplication or has been altered or modified in any
way. This warranty applies only to the original purchaser (end-user) and is not transferable.
Standard Warranty Limitations
xcept as provided herein, the entire liability of RF Code and its suppliers under this limited warranty will be that RF
E
Code will use reasonable efforts to repair or replace, without charge, all defective Products returned to RF Code by
Customer, all as more particularly described in the End User Warranty. Except for the express warranties STATED
HEREIN, RF Code makes no other representations or warranties and RF Code hereby disclaims, all other warranties,
express, implied, statutory, or otherwise, including without limitation, any warranty of merchantability, non-infringement of third party intellectual property rights, fitness for a particular purpose, performance, satisfactory quality, or
arising from a course of dealing, usage or trade practice.
Obtaining Service & Support
or in-warranty service, customers have several options. Customers having difficulty with RF Code products should
F
attempt to solve those problems through RF Code’s Technical Support Problem Escalation Process:
irst, contact the RF Code representative or other distributor from whom the RF Code product was purchased for
F
information on how to obtain local support.
Second, contact the RF Code Customer Support via e-mail.
Third, contact the RF Code Customer Support via the Support Line.
or product returns, the support engineer will give you a return material authorization (RMA) number. No returns
F
will be accepted without an RMA number. If the warranty expired, there is a charge for repair or replacement per RF
Code’s out-of-warranty policy. For full details of the RF Code RMA policy, please review the “RF Code Warranty,
RMA, and Extended Warranty Policy” document.
RF Code Customer Support
F Code Customer Support gives entitled customers and partners the ability to contact RF Code about installation
R
and usage-related questions as well as make defect inquiries about eligible products that are covered under RF Code
warranty agreements. A team of technical specialists can be contacted electronically or via phone.
e Support Line is available to provide General Support during normal business hours: Monday through Friday,
Th
8:00am to 5:00pm Central time, excluding national holidays.
PN00135 REV06
E-mail: [email protected]
Support form: http://www.rfcode.com
Voice: 512.439.2244 or toll-free at 866.830.4578
Reader Configuration Utility User Manual 13
discover. track. monitor.


