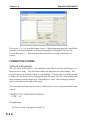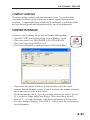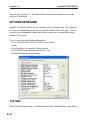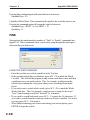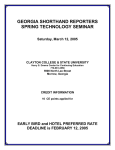
1
USER
GUIDE
www.stenovations.com
© 2006 by Stenovations, Incorporated. All rights reserved.
digitalCAT User Guide
FirstEdition
No part of this publication may be reproduced, stored in a retrieval system or transmitted in any form or by any
means (electronic, mechanical, photocopying, recording or otherwise), for any purpose other than the purchaser’s
personal use, without the prior written permission of Stenovations, Incorporated.
The information in this guide is furnished for informational use only and is subject to change without notice. The
software described in this guide is furnished under a license agreement, and may be used or copied only in
accordance with the terms of that agreement.
Microsoft, Windows and Windows NT are either registered trademarks or trademarks of Microsoft Corporation in
the United States and/or other countries. Pentium is a trademark of Intel Corporation. InstallShield is a registered
trademark and DemoShield is a trademark of InstallShield Software Corporation. Zip is a registered trademark of
Iomega in the United States and other countries.
All other brands or product names are the trademarks or registered trademarks of their respective holders.
Printed in the USA.
Stenovations, Inc.
606 Virginia Street, East
Charleston, WV 25301
(304) 346-8363
Johnny Jay Jackson, RPR, RMR, RDR
President: Sandra Marie Jackson
Technical Support is available 24 hours a day, 7 days a week.
Student Technical Support is available from 8 am to 8 pm Eastern Time, Monday through Friday.
Phone: (304) 346-8363
Fax: (304) 346-8376
Email: [email protected]
TECHNICAL ASSISTANCE
Phone: (304) 346-8363
Fax: (304) 346-8376
Email: [email protected]
WEBSITE
www.stenovations.com
Please note that this guide is not the full software manual The comprehensive software manual
may be obtained through Stenovations or their website at the contact details above.
CHAPTER 1
GETTinG sTARTEd
Getting Started with digitalCAT Software
Chapter 1
digitalCAT USER GUIDE
GETTING STARTED
WELCOME TO digitalCAT!
Welcome to the digitalCAT User Manual. This chapter will help you quickly get
started on your new software. It covers the installation of the software as well as
how to get started on your first job. Thank you for using digitalCAT, and again,
Welcome!
digitalCAT is a 32-bit, Windows-only application. Before installing Stenovations’
digitalCAT software, you may want to check our list of recommendations.
MINIMUM REQUIREMENTS:
digitalCAT only requires that you have Windows 98 Second Edition, Windows
ME, Windows 2000, or Windows XP installed and running on your computer.
MINIMUM RECOMMENDATIONS:
Windows 98 SE:
• 64 megabytes of RAM memory
• 400 MHz Pentium (or 100% Pentium-compatible) processor
• 100 megabytes of free hard disk space for installing digitalCAT
Windows ME and Windows 2000:
• 128 megabytes of RAM memory
• 400 MHz Pentium (or 100% Pentium-compatible) processor
• 100 megabytes of free hard disk space for installing digitalCAT
Windows XP:
• 256 megabytes of RAM memory
• 1 GHz Pentium (or a 100% Pentium-compatible) processor
• 100 megabytes of free hard disk space for installing digitalCAT
1.2
GETTING STARTED
INSTALLATION FROM CD-ROM
You may have received a CD-ROM with this manual. If so, please follow the steps
outlined in the next few sections to install the digitalCAT software onto your
computer.
• Close all programs that may be running on the computer.
• Place the digitalCAT CD, graphic side up, into the CD drive.
• From the desktop, double-click on the My Computer icon.
(Note to Windows XP users: If you cannot locate the My Computer icon
on your desktop, it may be listed on your start menu. Click on the Start
button, then single click on the “My Computer” icon.)
• Double-click on the CD Drive icon.
• A window will display the contents of the CD.
• Double-click the Install Build icon that has the lowest number after
it. In the example shown, you would choose digitalCAT
Install Build 182b.exe. The installation process will now begin.
Welcome!
This Welcome window is the first window that will appear on your screen. The
following sections will step you through the rest of the installation screens. When
you have finished the task requested by each window, press ENTER or click the
NEXT button to move to the next one.
Clicking the BACK button will allow you to return to previous windows in case
changes need to be made before the software is installed on your computer.
For those who are new to the Windows® environment, we invite you to look over
Chapter 12 for a basic Windows review.
1.3
Chapter 1
digitalCAT USER GUIDE
Select Destination Directory
The “Select Destination Directory”
screen, as shown, is the first screen
that appears after the Welcome
screen. As this window shows,
digitalCAT will be placed on the “C”
drive by default. This destination can
be changed to suit your computer’s
internal configuration or merely to
meet your personal preferences. If
you are unsure about the correct
placement of the software, please
leave it as the default location.
Changing the Destination Directory
• Press R for the BROWSE button. The Select Destination Directory window will
open.
• Highlight the location or folder where the digitalCAT
software should be installed.
• Press ENTER to save the new destination path and return to the previous
window.
• If you are satisfied with the new destination path, press ENTER to move to the
next installation window.
Choose Keyboard Command
DigitalCAT comes with several keyboard command setups to choose from,
including the command setups used by other CAT systems. The digitalCAT
keyboard is displayed in the window by default. To select another keyboard file,
click on the down arrow to open the list of available keyboards. Click the one you
wish to use.
Press ENTER to move to the next installation window.
Startup Menu
This window asks if you would like digitalCAT’s Translator/Editor to start
automatically each time the computer is started. This shortcut is quite handy when
1.4
GETTING STARTED
writing realtime, since once the Translator/Editor has been started, you are merely a
couple of keystrokes away from being able to write into a file.
If you are uncertain whether you would like digitalCAT to start automatically, you
may leave this setting checked. If you should desire, this feature can always be
disabled at a later time.
Ready to Install
DigitalCAT is now ready to be installed on the computer. Press ENTER to begin
the installation.
A status bar will appear on the screen showing the progress of the digitalCAT
software installation.
Installation Completed
When digitalCAT has been successfully loaded onto the computer, the Installation
Completed window will appear.
Press ENTER to finish the installation.
1.5
Chapter 1
digitalCAT USER GUIDE
INSTALL UPDATE FROM CD-ROM
Sometimes an update or “build” will be included on the CD-ROM. The next step
of the installation process is to check the contents of the CD to determine if an
update has been included and install it.
Make certain all digitalCAT programs are completely closed!
Installing an Accompanying Update
• From the desktop, double-click on the My Computer icon. (Note to Windows
XP users: If you cannot locate the My Computer icon on your desktop, it may
be listed on your start menu. Click on the Start button, then single click on the
“My Computer” icon.)
• Now double-click the CD Drive icon.
• A window will open displaying the contents of the digitalCAT CD that is located
in the CD ROM drive.
If there is an update file listed, such as digitalCAT Update 192.exe in
this example, double-click on that icon to have the latest update
installed. The same basic installation windows will appear on the
screen. Continue through the windows, pressing ENTER to move to
the next window, in order to complete the update.
Once the software update has been loaded, you will be returned to the CD window.
DICTIONARY AND THEORY INSTALLATION
To install a dictionary or theory:
• FOR PROFESSIONALS: If you are installing a dictionary that Stenovations
has converted for you, it should appear on the digitalCAT CD as YOUR NAME.
Double-click the dictionary file to begin installation.
• FOR STUDENTS: If you are installing a theory, open the DICTIONARIES
folder on the digitalCAT CD. You will see a list of theories. Double-click on the
one with your theory’s name. Please note that Stenovations does not carry all
theories.
• The Self-Extractor window will appear as shown on the following page.
• Press ALT + U to unzip the file.
1.6
GETTING STARTED
DIGITALCAT TUTORIAL VIDEOS
You may find a number of tutorial or training videos on your CD-ROM. Doubleclick the “Tutorials” or “Video” folder on the disc to see a listing of the videos.
Double-click any of the videos to begin playing it in your default viewer. If you
notice that you only get audio with no video, try installing the codec. The codec
installation can be found in the listing of videos. Simply double-click it and click the
Install button when prompted.
TRANSCRIPT EDITOR
The following sections of this chapter will guide you through setting up your
software in order to quickly get you started. All of these settings and options will be
found in the Transcript Editor program. A full description of these settings as well
as many others can be found in the chapters of the full manual available from
Stenovations.
You can find and open the Transcript Editor program by doing the following:
• Click on the “Start” button.
• Put your cursor over “Programs”
NOTE TO WINDOWS XP USERS: Your screen may say “All Programs.”
• Put your cursor over “Digital CAT”
• Click on “Transcript Editor”
1.7
Chapter 1
digitalCAT USER GUIDE
ADJUSTING YOUR VOLUME
To adjust your volume, you would click on the sound icon in your system tray.
Windows XP
Windows 98
Double-clicking these icons will open the volume control dialog. This screen
controls the playback volume and will allow you to easily adjust your volume levels.
Simply drag the sliders up or down the vertical bar to adjust the volume.
To adjust your recording volume:
• With the Volume Control window open, go to Options.
• Click Properties.
• In the window that appears, select “Recording”
• Click OK.
• The Recording Control window will appear. In this window, Microphone needs
to be selected and its volume up.
1.8
GETTING STARTED
nOTEs
1.9
Chapter 1
1.10
digitalCAT USER GUIDE
CHAPTER 2
TRAnslATing
Translating steno notes
Chapter 2
digitalCAT USER GUIDE
TRANSLATING
One of the tasks that you will be performing often with the software is translation.
This chapter covers the aspects of translating your steno notes in digitalCAT.
TRANSCRIPT EDITOR
Translating is done in the Transcript Editor program. To open this program,
double-click the icon on your desktop or follow these steps to open it from your
Start menu.
•
•
•
•
Click the START button at the bottom of your screen.
Place your cursor over PROGRAMS.
Place your cursor over DIGITAL CAT.
Click on the TRANSCRIPT EDITOR icon.
STENO SOURCE
The steno source tells the program where your steno notes will come from.
Depending upon the choices available for your writer, the notes could be stored on
a floppy disk, held in the writer’s memory, or they may stream directly to the
computer as you write realtime.
Selecting a Steno Device
DigitalCAT is compatible with the vast majority of available steno writers. When
setting this option, you may notice several choices available for your particular
brand of writer.
2.2
TRANSLATING
To Select Your Steno Writer
• Press ALT + T to open the Translator menu, then T again for Steno Source.
• Now press the first letter of the name of your steno writer or click the drop
down arrow as is circled in the image above. For example, if you are using a
Stentura writer, you could press the letter S. The various options associated
with that writer will appear in the Source window each time you press the letter.
You can also use the Arrow keys or the mouse to scroll through the list. If you
are using a Grand Jean writer, place a check in the box. Otherwise, please leave
this box blank.
There can be up to three options for your particular writer: Disk, Download, or
Realtime. If you will be writing realtime or downloading the notes from your
machine’s memory, you must also designate a COM Port. You will need to
specify how you will be retreiving your notes. For example, if you wanted to do
realtime with a Stentura 8000, you would set the source to “Stentura Realtime.” If
you wanted to download the notes from the machine’s memory, you would set the
source to “Stentura Download.” If, instead, you wish to translate the notes that
were saved on the disk, you would place the disk into your computer’s floppy
drive and choose “Stentura Disk” as your source.
2.3
Chapter 2
digitalCAT USER GUIDE
Selecting a COM Port
If you are retrieving your steno notes via realtime or download methods, you
MUST choose the correct COM port.
To choose a port:
• Press ALT + P to move the cursor to the Port box.
• Use the Up and Down Arrow keys to scroll through the list of COM Ports to
select the appropriate one.
If you are unsure of which port number to select:
• Locate the My Computer icon either on your desktop or in your Start Menu.
Right-click that icon.
• From the menu that appears, select Properties.
The next step varies between different operating systems. If you have Windows
98, you will need to click the “Device Manager” tab at the top of the screen. If
2.4
TRANSLATING
you have a more recent version of Windows, such as XP, you will need to
click the “Hardware” tab at the top of the screen, then click the “Device
Manager” button under that tab.
• Click the plus sign in front of “Ports (COM & LPT)”
• Locate the device you are using.
If you are using a USB to Serial adapter, you would locate it in the list. It will
be followed by a COM number in parenthesis. This is your COM port
setting.
If you are connected through the serial port in the back of your computer, it
would be listed as Communications Port followed by a COM number in
parenthesis. This would be your COM port setting.
CAT-TIP
If a symbol such as a yellow exclamation mark appears next to your
COM device, then the device is not working properly. You probably
need to install the drivers for the device from the CD-ROM that came
with it.
2.5
Chapter 2
digitalCAT USER GUIDE
Output Text
There are three options from which to choose in this section of the Steno Source
dialog. Please read the following descriptions of each before making your
decision.
One Line at a Time:
Before text is sent to the editor window, it will remain in a “buffer” window at the
bottom of the screen. While text is in the buffer window, realtime commands may
be used to modify the text, such as formatting a series of numbers as a date or
deleting an untranslate, before the text is displayed in the actual transcript. If you
are connected to an attorney or judge, this can be useful because it allows you to
make some changes to the text before it is transmitted to their computers. Text is
not transmitted to these connected computers until the text is “dumped” from the
buffer window. Press ALT + L to select this option.
One Translation at a Time:
Selecting this option will automatically place text into the editor window as it is
written. The delay, which allows the software to determine multiple stroke
translations, can be set by the Translation Timer. This timer, measured in
miliseconds, determines how long the program will wait to see if this stroke is part
of a longer entry before transmitting it to the screen. For example, writing
2.6
TRANSLATING
“brown” once would simply insert the word brown. Writing it twice, however,
could insert a new colloquy paragraph with MR. BROWN designated as the
speaker. Setting this timer to an appropriate value can determine whether your
multi-stroke translations appear correctly, and more importantly, transmit correctly
to any attorney or judge connected to your computer. A setting between 1500 and
2500 is usually appropriate for working reporters. Students may find that they
need to increase this number slightly. Press ALT + N to mark this option.
Hold Back # Translations At a Time:
This option will display a buffer window, as described earlier. However, this
option allows you to set the number of translations the buffer holds. For example,
you can choose to hold five translations back so that you may make limited
corrections before the text is transmitted out. This would be useful for formatting
numbers, fixing untranslates, and a host of other commands that can make your
work appear better when sent to other computers in realtime. Press ALT + D to
choose this option.
2.7
Chapter 2
digitalCAT USER GUIDE
DICTIONARY SETUP
The Dictionary Setup window contains various options that digitalCAT will use
during translation. This dialog holds the dictionaries to be used during translation,
the Artificial Intelligence options, and the Theory File selected. Although you may
select various dictionaries for certain jobs, most of the other features in this
window will never need to be changed after their initial setup.
Opening Dictionary Setup
• Press ALT + T to open the Translator menu.
• Press D to select Dictionaries. The Dictionary Setup window will open.
2.8
TRANSLATING
DICTIONARIES
The Dictionaries box contains the dictionaries that will be used during this
translation. You should have at least one dictionary present, preferrably your main
dictionary, to correctly translate steno notes.
ADDING A DICTIONARY:
To add an existing dictionary to the queue:
• Press ALT + A. The Add Dictionary to Translator window will open.
• Press SHIFT + TAB to move the cursor into the file list.
• Use the Arrow keys to highlight the dictionary you wish to add.
• Press ENTER to add the selected dictionary to the Dictionary Setup window.
DICTIONARY ORDER:
DigitalCAT will translate each stroke by searching the dictionaries listed in the
Dictionary Setup window. The search begins with the dictionary that is at the top
of the list. To insure proper translation, the JOB dictionary must be listed first and
the MAIN dictionary must be listed last!
2.9
Chapter 2
CAT-TIP
digitalCAT USER GUIDE
It is VERY important that the Job dictionary be listed as the
first dictionary and the Main dictionary as the last. All other
dictionaries may be listed between these two dictionaries.
CHANGING THE DICTIONARY ORDER:
If the dictionaries are not listed in the proper order (JOB dictionary first and MAIN
dictionary last), they can be rearranged.
To move a dictionary:
• Use the Up or Down Arrow keys to highlight the dictionary to be moved.
• Press ALT + V or click the Move Up button to move the dictionary upwards in
the list.
• Press ALT + D or click the Move Down button to move the dictionary down.
CREATING A NEW DICTIONARY:
This button will create a new dictionary and place it at the top of the Dictionaries
window.
To create a new dictionary:
• Press ALT + N or click the New button. The Save As window will open.
• Type in a name for the new dictionary, then press ENTER.
• The new dictionary will now be listed at the top of the Dictionaries window.
Remember that the order of dictionaries is important. If the dictionary needs to
be moved down the list, use the Move Down button or press ALT + D.
REMOVING A DICTIONARY:
This function will remove the highlighted dictionary from the translation list.
Removing a dictionary does NOT delete that dictionary. It merely removes it
from the list of dictionaries to translate against.
To remove a dictionary:
• Highlight the dictionary that you would like to remove from the list.
• Press ALT + R or click the Remove button. The dictionary will disappear from
the list. If you would like to add the dictionary back at a later time, please see
“Adding a Dictionary” on the previous page.
2.10
TRANSLATING
To remove all dictionaries listed:
• Press ALT + M or click the Remove All button. All of the dictionaries listed will
disappear. If you would like to add these dictionaries back at a later time, please
see “Adding a Dictionary” in this chapter.
CAT-TIP
Only dictionaries used during a translation session should be listed in
the dictionary window. Removing a dictionary will NOT delete that
dictionary. It will simply remove it from the list of dictionaries to
translate against. The dictionary can always be re-added at a later
time.
EDITING A DICTIONARY:
A dictionary can be opened and edited from the Dictionary Setup window.
To edit a dictionary:
• Highlight the dictionary to be edited and press ALT + E or click the Edit button.
• The Dictionary Maintenance program will open in a separate window, displaying
the contents of the selected dictionary. For more information and help on using
this program, please see the next chapter, Dictionary Entries.
2.11
Chapter 2
digitalCAT USER GUIDE
ARTIFICIAL INTELLIGENCE
NUMBERS RESOLUTION:
This feature will automatically format Social Security numbers, telephone numbers,
dollar amounts and standard numbers.
If Numbers Resolution is not used, many of the number formatting commands can
be done using realtime commands. A listing of these commands can be found in
Appendix B and a full explanation of each in the Translation Commands chapter.
When using Numbers Resolution, numbers can be written with the number bar,
written out, or by combining the number bar and written-out numbers -- the proper
formatting will still occur!
If you use this feature, it is important to write numbers exactly as they are spoken.
Do not add commas, dollar signs, decimal points or parentheses.
If there are dictionary entries that contain numbers (i.e. four hundred defined as
400), they may translate incorrectly with Numbers Resolution turned on. Entries
containing numbers should be removed or moved to another dictionary for
Numbers Resolution to perform effectively. Please refer to the next chapter for
help moving entries to another dictionary.
Press ALT + B to use Numbers Resolution.
USE MISSTROKE RULE AND ADVANCED MISSTROKE RULES:
This option will instruct the program to apply our default misstroke rules to your
untranslates. If an untranslate contains a frequently shadowed key, then that key
will be removed from the outline, resulting in a new outline. DigitalCAT will then
search the dictionaries again for this new outline. If the new stroke can then be
translated, the text is put into your transcript. If not, the original untranslate will
appear.
Press ALT + L to use the Misstroke Rule.
2.12
TRANSLATING
The misstroke rules allow the program to make suggestions or guesses as to what
a stroke should be when it appears that could have been mis-written. The
Advanced Misstroke Rules button allows you to customize your rules. From this
dialog, you can pick from our list the common misstrokes that apply to your
writing. Please note that choosing one of the rules under this button will apply to
ALL entries whereas just checking the Use Misstroke Rule option will only apply
to untranslates. For example, “Drop -L when -NLT is stroked” will drop the -L
from all -NLT strokes. If -NLT is part of any translation, that entry may no longer
translate correctly.
WHAT IS THE -D, -S, -Z, -G RULE?
This is a feature designed to help eliminate untranslates. If a stroke containing a
final D, S, Z or G cannot be found in the dictionaries being translated against, the
software will remove the suffix key and search the dictionaries again for a matching
outline.
If the outline now matches a dictionary entry, the Translator will assume the final
D, S, Z or G was meant to be a suffix stroke, so it will first translate the word
according to the dictionary entry, then add either at the appropriate ending. It will
also apply any necessary grammatical rules.
USE -D, -S, -Z, -G RULE BEFORE THEORY:
If this option is marked, the -D, -S, -Z, -G Rule will be applied to untranslates
before digitalCAT attempts to use the Phonetic Theory File to translate the outline.
Press ALT + Y to check Use -D, -S, -Z, -G Rule Before Theory
USE -D, -S, -Z, -G RULE AFTER THEORY:
This feature will apply the -D, -S, -Z, -G Rule after digitalCAT refers to the
Phonetic Theory File to translate the stroke into English. If the theory file is
unsuccessful in finding a translation, then the software will apply the -D, -S, -Z, G Rule to attempt to translate the outline.
Press ALT + G to check Use -D, -S, -Z, -G Rule After Theory.
2.13
Chapter 2
digitalCAT USER GUIDE
A-AN RESOLUTION
If you write “a” and “an” the same way, checking this option will instruct the
program to automatically select whichever is appropriate.
The steno outline for “a” and “an” must be defined as a conflict in your dictionary
in order for digitalCAT to select the correct article. You would need to define the
conflict as [a|an] with the “a” coming first. Please see the “Edit Conflict” section
of the next chapter for further help in defining conflicts.
Although the dictionary entry will be defined as a conflict, the appropriate article
will appear in the transcript so long as this resolution option is checked. The
translation will not appear as a conflict in this regard.
Press ALT + A to check A-An Resolution.
PHONETIC THEORY:
Outlines not defined in any active dictionary can still be translated into English
based on the way you write steno. DigitalCAT will first look through all active
dictionaries to find a translation. If unsuccessful, it will attempt to phonetically
translate the stroke based on your theory file. For more information and help
customizing your theory file, please see the Logic Editor chapter of this manual.
ACTIVATING THE THEORY FILE:
In order to use the theory file, it must be turned on.
• Locate the Theory box, approximately halfway down the Dictionary Setup
window.
• Press ALT + U to turn on or off the use of the theory file. When the USE
button appears pushed in and a lighter color, the theory file is enabled.
SELECTING A THEORY FILE:
There are several logic files included with digitalCAT. Select the file that best
represents the theory style you learned. Modifications can be made to this theory
file to better reflect your current style of writing.
2.14
TRANSLATING
To select the logic file that best suits your writing style:
• Tap the TAB key until the ellipsis button on the far right of the Theory box is
highlighted.
• Press Enter to open the Select Translation Logic window.
• Press SHIFT + TAB to move the cursor to the list of files.
• Use the Up and Down Arrow keys to highlight the name of the logic (theory) file
that matches your steno theory.
• Press ENTER to save your choice and have it placed in the Theory box in the
Dictionary Setup window.
COMMANDS:
This box contains the path to the Realtime Commands file. This feature was
designed to allow different realtime commands to be used when more than one
person uses the same computer. With the newer versions of digitalCAT, however,
we prefer this situation to be resolved by entering realtime commands into the
dictionaries.
BANKS:
“Banks” refers to the left and right banks on the steno writer.
QUESTON/ANSWER:
This feature can automatically determine whether an outline should be a Q or A
symbol. By using this feature, it is not necessary to define multiple misstroke
outlines for the Q and A designations in a dictionary.
The numbers in the boxes following “Question” and “Answer” represent the
minimum number of steno keys struck on the left or right bank at one time. If an
outline contains the minimum number of keystrokes and does not have a
corresponding dictionary entry, it will be translated into a Q or A symbol and the
appropriate paragraph style will begin.
2.15
Chapter 2
digitalCAT USER GUIDE
DEFINE BOTH BANKS SIMULTANEOUSLY:
An entry can be placed in this box (for example, {C}THE COURT:^ ), so
whenever both banks are struck and the outline is not found in the dictionary, the
assigned text will be placed in the transcript.
Place a check mark in the boxes below it to make the entry:
• a prefix (meaning no extra spaces added before the next word),
• a suffix (no spaces between this word and the one before it),
• or to capitalize the next word.
Note: More than one of these options can be checked.
ANSWER AFTER COLLOQUY:
During translation, this function changes the first Answer after a colloquy paragraph
to one of the listed options. You can use the Answer bank while writing, yet have
the proper identification, such as THE WITNESS, appear after a colloquy
statement. To set this option, press ALT + Y to highlight the Answer after
Colloquy box. Use the UP and DOWN ARROW keys to select the correct
designation for an Answer bank that appears after a colloquy statement.
QUESTION AFTER COLLOQUY:
You can also designate the appearance of a Question bank written after a colloquy.
This setting can automatically generate your BY lines or BY inserts. Press ALT + L
to highlight the Question after Colloquy box. Use the UP and DOWN arrow keys
to select the correct appearance of a Question after a Colloquy. You may repeat
this process for a Question after the word Examination by pressing ALT + X and
choosing the correct designation.
When you are finished making changes to the Add Entry window, press ALT + K
or ENTER to save and return to the open transcript. Please note that pressing
CANCEL or clicking the X in the top right corner will close the window
WITHOUT saving your changes.
2.16
TRANSLATING
STARTING AND STOPPING TRANSLATION
To begin translating:
• Press ALT + T to open the Translator menu.
• Start Translation is already highlighted. Press ENTER or the letter S to begin
translating.
• If your steno source is set to translate realtime, a Save As dialog will appear. If
you are translating from a floppy disk or downloading, the program will ask
which files you wish to translate before displaying the Save As dialog.
• To use the default date-time name displayed in the File Name box, just press
ENTER.
• To add more information to the end of the default date-time name, press the
Right Arrow key. The highlight will disappear leaving a blinking cursor at the
end of the line. Add whatever description you would like. DO NOT USE
PERIODS IN THE NAME! Windows may register the periods as a different file
extension, thus making it more difficult to find or open your files.
• Press ENTER or click the Save button to save the transcript under this name.
2.17
Chapter 2
digitalCAT USER GUIDE
If you are translating from a disk or download, translation will begin immediately
after saving the name. The program will display the translated text and steno
outlines on your screen. If you are translating realtime, you may now begin writing
on your machine. Strokes and translations will appear as you write them.
If asked to select a recording style, choose GSM 6.10 inthe format box and 11.025
kHz, Mono, 2 kb/sec in the attributes box and click OK. You should only be
asked for this once.
You MUST stop translation after writing realtime to tell the program where
to end! Do NOT simply close the program.
To stop realtime translation:
• Press ALT + T to open the Translator menu. Stop Translation will be
highlighted.
• Press ENTER or the letter S to stop translating.
After translation is complete or has been stopped, the
Translator Statistics window will appear. This window
shows the total number of strokes, the number of
untranslated strokes, and the percentage of the document
untranslated.
APPENDING TO A REALTIME FILE
After a realtime session has been stopped, you may begin the session again and
continue writing realtime into the same file. You can even resume writing into a file
after it has been closed!
• Open the transcript that will have additional steno added.
• Press ALT + T then ENTER to start the translation process again.
• Begin writing.
The transcript will have a continuous steno and audio file. It will not be evident
where the file was stopped and started again except by the gap in time as noted by
the time stamps.
2.18
TRANSLATING
RETRANSLATING
Should it ever become necessary to retranslate a file, digitalCAT offers two
choices. You may retranslate the entire file or from a specific point through the
end of the file.
To retranslate an entire file:
• Press ALT + T to open the Translator menu.
• Use the arrow keys to highlight “Retranslate All.”
• A message will appear asking if you are sure you wish to retranslate. If you are
sure, press ENTER or click Yes.
• After retranslating, the software will prompt you with a Save As dialog. If you
choose to give the file a new name here, the original file (before retranslating) will
remain intact as the original name. If you choose to overwrite the original name
with this file, simply press ENTER.
To retranslate from a specific point:
• Place the cursor at the point you would like to begin retranslating.
• Press ALT + T to open the Translator menu.
• Use the arrow keys to highlight “Retranslate from Current Location.”
• A message will appear asking if you are sure you wish to retranslate. If you are
sure, press ENTER or click Yes.
• After retranslating, the software will prompt you with a Save As dialog. If you
choose to give the file a new name here, the original file (before retranslating) will
remain intact as the original name. If you choose to overwrite the original name
with this file, simply press ENTER.
2.19
Chapter 2
digitalCAT USER GUIDE
CIC
DigitalCAT’s CIC features allow you to connect your realtime feed to other
computers, such as that of an attorney or judge. Before you can transmit,
however, you will need to set your CIC options.
To access the CIC Setup window:
• Press ALT + O to open the Options menu. (You may have to press and release
the ALT key before pressing the letter O to open this menu.)
• Press C for CIC. The CIC Setup window will appear as is shown on the
following page.
PORT PARAMETERS
PORT:
The port parameter allows you to transmit your realtime feed out to another
computer. You must set the Port value to the correct COM port number that will
be transmitting OUT to the other computer. See the Selecting a COM port section
of this chapter for help with this.
BAUD RATE:
This must be set to the baud rate of the realtime receive software. This value is
almost always 2400.
TRANSCRIPT BUFFER
BUFFER LAST # LINES OF TRANSCRIPT:
This setting will “hold back,” or buffer, a number of lines of the transcript. You
may specify the number in the box. This allows the reporter a small window of
time to make corrections, such as asterisk deletions, before the software transmits
the translations to the CIC software. In rare instances, a small buffer number may
be needed to allow certain formatting information to be passed to the CIC
software. The default value for this box is zero.
OUTPUT BUFFERED LINES IF NO STROKES
ARE RECEIVED WITHIN # MILLISECONDS
This setting will tell the program to release any text that may be held within the
2.20
TRANSLATING
transcript buffer if no strokes are written with the specified time limit. This will
allow writing followed by a pause or break to be transmitted to the CIC software
without waiting on further strokes to push them out of the buffer.
NOTE: A value of zero disables this feature.
Press ENTER or click OK when finished to save your settings and close this
dialog. Please note that clicking the CANCEL button or the X at the top right of
this dialog will close the dialog WITHOUT saving your changes.
STARTING AND STOPPING CIC TRANSMISSION
To transmit realtime feed from your computer, you must first be translating
realtime. Once you have a realtime translation started, the following instructions
will show you how to begin transmitting your realtime feed to the computers
connected to yours.
• First, make sure that you are in a realtime session.
• Make sure that all realtime cables, including those connected to the other
computers are connected securely.
2.21
Chapter 2
digitalCAT USER GUIDE
• Make sure that the other computers are ready to receive your realtime
•
•
•
•
transmission and that they are set up correctly.
Press ALT + L to open the Tools menu.
Press the letter I for CIC.
Press ENTER or the letter S for Start Session.
Two chevrons should appear in the bottom left corner of your screen. If you go
back to Tools->CIC, there should be a check beside of Transmitting. If you see
these chevrons and the check beside of transmitting, then digitalCAT software is
transmitting.
2.22
TRANSLATING
To stop CIC transmission:
• Press ALT + L to open the Tools menu.
• Press I for CIC.
• Press ENTER or the letter S for Stop Transmitting.
(This does not stop your realtime session.)
CAT-TIP
CIC software settings ask which software it will be receiving. You
may notice that digitalCAT is not on the list. That is because we use
an ASCII standard. For CaseView, set it to receive “Other
Software.” Set all other realtime receive software to receive
“CaseView.”
2.23
Chapter 2
2.24
nOTEs
digitalCAT USER GUIDE
CHAPTER 3
DiCTionARy
EnTRiEs
Defining steno in a dictionary
Chapter 3
digitalCAT USER GUIDE
DICTIONARY ENTRIES
This chapter is devoted to explaining how to use dictionary entries to define your
steno notes as English. It also shows you how to use digitalCAT’s Shadows and
Drops feature to turn a single dictionary entry into multiple entries that cover
possible misstrokes. This chapter will also explain how to create outlines that
incorporate final endings in the same stroke.
Although the methods for selecting text to define dictionary entries are covered
fully in the Editing chapter, we will also discuss them here.
MAKING A DICTIONARY ENTRY
MAIN DICTIONARY ENTRIES
• From the transcript, highlight the text/untranslate to be defined and press
ENTER.
• OR move the cursor to the beginning of the desired text/untranslate and press
ALT along with the number of steno strokes associated with the text/untranslate
(ie., ALT + 1, ALT + 2, etc.) Please note that this is a keyboard command and
may not be defined in your current keyboard setup. If it is not defined in your
current setup, please see the “Main Entry” section of the Editing chapter.
JOB DICTIONARY ENTRIES
• From the transcript, highlight the text/untranslate to be defined, then press
SHIFT + ENTER.
• OR move the cursor to the beginning of the desired text/untranslate and press
CTRL along with the number of steno strokes associated with the text/
untranslate (ie., CTRL + 1, CTRL + 2, etc.). Please note that this is also a
keyboard command and may not be defined in your current keyboard setup. If
not, please see the “Job Entry” section of Editing chapter.
Once you have performed one of these methods, the Add Entry dialog box will
appear.
3.2
DICTIONARY ENTRIES
ADD ENTRY DIALOG
LOCATING THE DICTIONARY NAME
After the Add Entry dialog opens, you may confirm that the entry will be placed
into the appropriate dictionary. The name of the dictionary in which the entry will
be placed is located on the title bar enclosed by square brackets. In the above
graphic, the “Main Dictionary” will receive the entry. The area that specifies this
has been circled.
You may change the destination dictionary in a number of ways.
• Pressing F11 will toggle through the active dictionaries.
• Pressing F12 will open the Dictionary List allowing you to select in which
dictionary you would like to place this entry.
• You may also click the “Pick A Dictionary button,” which is circled below.
Clicking this button will have the same effect as pressing the F12 key.
3.3
Chapter 3
digitalCAT USER GUIDE
ADDING OR REMOVING TEXT/STENO
Once text and its associated steno are displayed in the Add Entry dialog box, you
may realize that you did not select the correct number of steno strokes needed to
make the desired entry.
To add more lines of steno and English:
• Press SHIFT + DOWN ARROW.
Each time this is pressed, one stroke and its associated text will be added
to the Add Entry dialog box.
To remove lines of steno and English:
• Press SHIFT + UP ARROW.
Each time this is pressed, one stroke and its associated text will be
removed from the Add Entry dialog box.
EDITING THE ENGLISH TRANSLATION
The English Translation can be the most important part of the entire dictionary
entry. It is in this field that you will control what the translation will be. Type the
English here as you would want this steno to translate.
3.4
DICTIONARY ENTRIES
EDIT CONFLICT
A conflict can easily be created for the current dictionary entry. If you use
conflicts and would like to make this entry one, press ALT + F or click the Edit
Conflict button to open the Edit Conflict window.
• The first line will display the word from the Add Entry window. Your cursor
should appear in the second box.
• Type the second word of the conflict in this box.
• If you need to add more words to this conflict, press the TAB key to move
down to the following boxes.
• When finished adding words for this conflict, press ENTER. The conflict will
be displayed in the English Translation field.
SPELL CHECK ENTRY
The spelling of the word(s) in the English Translation field can be checked before
proceeding to the other sections of the Add Entry dialog box. You may do this by
clicking the Spell Check button or by pressing the F9 key.
If the spelling is correct, a message saying “Spell Check is Complete” will appear.
Otherwise, a Correct Spelling window will appear allowing you to correct any
errors.
EDITING THE STENO
When finished with the English Translation field, press the TAB key to move the
cursor to the Steno box. When the cursor is in this field, it is represented by a
dotted rectangle. The rectangle can be moved around the steno field with the
SPACEBAR or the ARROW KEYS.
To add letters to the steno that is inside the dotted rectangle, press the desired key
from your keyboard.
If the dotted box is on the left side, any entered letter will be placed as it would be
written from the initial side of the steno machine. For example, pressing the
letter “J” here would add SKWR to the steno. If, however, the dotted box is on
3.5
Chapter 3
digitalCAT USER GUIDE
the right side, any entered letter will be placed as it would be written on
the final side of the steno machine. For example, pressing the letter “N” here
would place -PB on the final side.
Pressing a vowel key will move the cursor from the initial side to the final side.
This allows you to easily add final keys without having to press the SPACEBAR
or ARROW KEYS to move from one side to the other.
To remove letters from the steno inside the dotted rectangle in the Steno box,
press the corresponding key from your keyboard. For example, to remove the L
from FPLT, with the cursor on the final side, you would simply press L. Pressing
a letter that does not currently appear in the steno will add that letter. Pressing a
letter that does currently appear will remove said letter.
SHADOWS/DROPS
This feature of the Add Entry dialog is designed to
automatically generate multiple entries for every
possible misstroke you can make while writing the
text shown in the English Translation field. This
feature effectively eliminates the need to manually
make individual dictionary entries for the inevitable
misstrokes that will occur in the future.
The Shadows/Drops feature utilizes fields that correspond to the line of steno to
its left. The cursor is again represented by the dotted rectangle when within these
fields. To move it to the right-hand, or final side of the Shadows/Drops box,
press the SPACEBAR. Press TAB to move the cursor to the next field box.
Press SHIFT + TAB to move the cursor to the previous field box.
Just as with the Steno field, when letters are pressed on the computer keyboard,
they will be placed into the dotted box. If a letter already appears in the field,
pressing it will remove it from the dotted box.
Misstroke entries will be created when the Add Entry dialog is completed and
either the ADD or ADD & CLEAR button is pressed. Once this occurs, the
Misstroke Entries window will show the entries the program will attempt to
3.6
DICTIONARY ENTRIES
automatically create. If the entries shown in this window already exist in your
dictionary, they will be discarded. None of the generated entries will replace an
existing entry!
• To move down the list, press M or the DOWN ARROW key.
• To move up the list, press I or the UP ARROW key.
• Press D to delete the highlighted entry from the list.
CAT-TIP
Make sure that you add the misstrokes to the correct stroke! The
first box should hold all shadows and drops that could occur on the
first stroke of this dictionary entry. The second box, all shadows and
drops for the second stroke, and so forth.
FLAGS
The flag section of the Add Entry dialog allows
you to specify characteristics assigned to an entry.
The flags that are checked will control the way the
text is handled when translated. For example, if
the Prefix flag is checked on an entry, then when
translated or globaled, this translation will attach to
the text that follows it. More than one flag may be checked on any entry.
PREFIX:
An entry flagged as a prefix will connect to the text immediately following it,
eliminating the space between the two words. Examples of words that this flag
would apply to: anti, circum, con, inter, pre, Mr.^, trans and un.
Press ALT + P to place a check in the Prefix box.
SUFFIX:
An entry flagged as a suffix will connect to the text immediately in front of it (to the
left), eliminating the space between the two words. Examples of possible suffixes
are: tion, ary, ed, ing, cation, ectomy, emia and ful.
It is also important to note that the Suffix flag will also automatically perform any
applicable grammatical rules. For example, attaching the –ing ending to the word
3.7
Chapter 3
digitalCAT USER GUIDE
“run” would automatically double the letter “n” to correctly spell “running.”
Press ALT + U to mark the Suffix box.
CAPITALIZE NEXT:
Check this box to capitalize the text that follows this steno outline. Examples of
words that this flag applies to: Mr.^, St.^, Dr.^.
This flag would apply to most ending punctuation marks, such as a period or a
question mark. Because the words following these marks usually begin a new
sentence, the first letter will need to be capitalized. Checking this flag on a stroke
will cause the next translation to be capitalized.
If you would like to make an entry to capitalize the next word without putting any
text into the transcript, simply create an entry, such as K-P, and leave the English
Translation field blank. Check only the Capitalize Next flag.
Press ALT + C to mark the Capitalize Next box.
ATTACH LETTERS:
Use this option when defining your finger-spelling alphabet(s). This feature
automatically joins the letters together. It can be used for regular alphabet letters as
well as stitching letters.
Press ALT + L to place a check mark in the Attach Letters box.
ATTACH NUMBERS:
This flag should be marked on individual numbers. Using this flag will instruct the
program to attach any surrounding numbers to this translation. For example
writing the numbers 1, 2, and 3 would generate 1 2 3 if the flag is not checked on
their respective entries. With the flag checked, however, it would create 123
without spaces between each number. Please note that if you use digitalCAT’s
3.8
DICTIONARY ENTRIES
Numbers Resolution feature, you may never need to use this flag. Numbers
Resolution will format numbers correctly without having number entries in your
dictionary. If there are no entries, you will not need to check the flag.
This option should also be marked when creating a dictionary entry for a decimal
point. Any surrounding numbers will automatically be attached to the decimal
point.
Press ALT + N to mark the Attach Numbers box.
SPELL CHECK ON ADD
If this item is checked, digitalCAT will automatically perform a spell check on the
entry before it is placed into the dictionary.
Press ALT + K to mark the Spell Check on an Add box.
If there is a misspelling, you will have the opportunity to correct it before the word
is added to the dictionary.
ADDING THE ENTRY TO THE DICTIONARY
Once the Add Entry dialog box has been completed, you may add the entry to
your dictionary. Press ENTER or click the ADD button to add the current entry
and close the Add Entry dialog.
If you need to add another entry, you could instead press the ADD & CLEAR
button to add the current entry and leave the Add Entry dialog open for the next
entry. The dialog will be cleared, allowing you to add information for the new
entry. Press ALT + E to use the ADD & CLEAR button.
DUPLICATE ENTRIES
If digitalCAT finds that this steno outline has already been defined in your
dictionary, it will present you with a Duplicate Entry dialog. This dialog will let you
choose what action you would like to take with the duplicate entry.
3.9
Chapter 3
digitalCAT USER GUIDE
The top box of this dialog shows the steno that is duplicated.
IS CURRENTLY DEFINED AS:
This area shows you the current English definition in the top box, and the flags, if
any, that are checked on the current entry in the lower box.
THE NEW DEFINITION IS:
This area shows the new English definition in the top box, and the flags, if any, that
are checked on the new entry in the lower box.
Select one of the following options:
• Press R to replace the old definition with the new one.
• Press O to keep the old definition.
• Press C to create a conflict between the two entries.
Press ENTER to tell digitalCAT to handle the duplicate entry in the manner
selected.
TOKENS
Tokens are special types of dictionary entries that tell the program it has some sort
of task to perform. This task can be as simple as inserting a new type of
paragraph to inserting a certificate include file.
3.10
DICTIONARY ENTRIES
A number of tokens can be entered into the “Add Entry” screen using shortcut
keys. They can also be entered using the “Starburst” icon. Press the Starburst or
the F5 key to see the tokens you can insert with a simple click of the mouse or the
press of a key.
PARAGRAPHING TOKENS
{Q}
This token represents a Question paragraph. When this token is added to a
dictionary entry, a Question paragraph will be inserted. Normally, this token has
Prefix, Suffix, and Capitalize Next checked. If text appears before this token in a
dictionary entry, you should not check Suffix. If text appears after this token in a
dictionary entry, you do not wish to check Prefix or Capitalize Next.
SHORTCUT KEY IN ADD ENTRY SCREEN:
CTRL + Q
Example Entries:
{Q}
with Prefix, Suffix, and Capitalize Next checked
Yes. {Q}
with Prefix and Capitalize Next checked
{Q}Would
with Suffix checked
3.11
Chapter 3
digitalCAT USER GUIDE
{A}
This token represents an Answer paragraph. When this token is added to a
dictionary entry, an Answer paragraph will be inserted. Normally, this token has
Prefix, Suffix, and Capitalize Next checked. If text appears before this token in a
dictionary entry, you should not check Suffix. If text appears after this token in a
dictionary entry, you do not wish to check Prefix or Capitalize Next.
SHORTCUT KEY IN ADD ENTRY SCREEN:
CTRL + A
Example Entries:
{A}
with Prefix, Suffix, and Capitalize Next checked.
Is that correct? {A}
with Prefix and Capitalize Next checked
{A}No.
with Suffix checked
{C}
This token represents a Colloquy paragraph. When this token is added to a
dictionary entry, a Colloquy paragraph will be inserted. Normally, this token has
Prefix and Capitalize Next checked.
SHORTCUT KEY IN ADD ENTRY SCREEN:
CTRL + C
Example Entry:
{C}MR. ATTY1:^
with Suffix and Capitalize Next checked.
{<}
This token will insert a continuation paragraph. This is used for long Questions,
Answers or any other style of text that you wish to break up into separate
3.12
DICTIONARY ENTRIES
paragraphs. For example, in a long Question, any paragraph after the first would
be referred to as a continuation paragraph. Normally, this token has Prefix, Suffix,
and Capitalize Next checked.
Example Entry:
{<}
with Prefix, Suffix, and Capitalize Next checked.
{P ???}
This token inserts a paragraph of a user specified type. For example, if you
wanted a Center paragraph, you would use: {P Center} You would not type the
question marks. Normally, this token has Prefix, Suffix, and Capitalize Next
checked.
Note that there is a space after the letter P! This space is very important!
Also note that this token requires a parameter. That means that something MUST
be entered with this token. Think of it this way. The P in the token says to insert a
paragraph. The paramater tells the program what type of paragraph. You should
never leave out the parameter when using a token that requires one.
Example Entries:
{P BY}
with Prefix, Suffix, and Capitalize Next checked will
insert a By paragraph.
SHORTCUT IN ADD ENTRY SCREEN: CTRL + Y
{P Paren}
with Prefix, Suffix, and Capitalize Next checked will
insert a Parenthetical paragraph.
SHORTCUT IN ADD ENTRY SCREEN: CTRL + P
{P Center}
with Prefix, Suffix, and Capitalize Next checked will
insert a center-aligned paragraph.
3.13
Chapter 3
digitalCAT USER GUIDE
Do not use < or > in your dictionary entries! Other programs may have used these
symbols to designate tokens or different paragraphs, but digitalCAT uses the
French Brackets { }. You must use these brackets for proper translation of
tokens.
FORMATTING TOKENS
{b}Words to be bolded{b}
The {b} token will bold text. Note that the words that need to be in bold type are
between two tokens. The first token orders the program to begin bolding. The
second shows the program where to stop bolding. If you forget to put the second
token in the dictionary entry, the program will not know where to stop bolding, and
may continue to bold written text. Remember to “close” the bolding by placing
the second token at the end of the entry!
Also note that the letters are lowercase in this token. Case is important when using
tokens!
SHORTCUT IN ADD ENTRY SCREEN:
CTRL + B
Example entry:
{b}These words will appear bolded.{b}
3.14
DICTIONARY ENTRIES
{i}Word to be italicized{i}
SHORTCUT IN ADD ENTRY SCREEN:
CTRL + I
Example entry:
{i}These words will appear in italics.{i}
{U}Words to be underlined{U}
SHORTCUT IN ADD ENTRY SCREEN:
CTRL + U
Example entry:
{U}These words will appear underlined.{U}
{B}Letters to be subscript{B}
SHORTCUT IN ADD ENTRY SCREEN:
CTRL + T
Example entry:
{B}2{B}
{S}Letters to be superscript{S}
SHORTCUT IN ADD ENTRY SCREEN:
CTRL + R
Example entry:
{S}2{S}
SYMBOLS
^
Inserting a caret in a dictionary entry (SHIFT + 6) will tell the program to insert a
hard space. This type of space, unlike the space bar, will not denote separate
3.15
Chapter 3
digitalCAT USER GUIDE
words. Therefore, it will not allow words to separate at the end of a line. For
example, an entry for Dr.^Smith would keep the name Smith with it’s title. If there
isn’t enough room at the end of the line for both items, both will drop down to the
next line.
If the same entry used a normal space, as Dr. Smith, the name Smith could drop to
the next line, leaving the title at the end of the previous line. Transcript Editor
automatically recognizes some salutations, such as Dr. It may not automatically
recognize some of the less common ones, so please be aware of the purpose of a
hard space.
Example Entry:
Dr.^
With Prefix and Capitalize Next checked.
>
The chevron, also known as a “Greater Than sign” or a right arrow, will tell the
program to insert a tab. This token symbol is rarely used because paragraph
tabbing is handled in your formatting template.
Special Characters
digitalCAT allows you to insert special characters, like the accented é. To insert
one of these symbols, use the Starburst or press CTRL + S to bring up the
Special Characters dialog.
SHORTCUT IN ADD ENTRY SCREEN:
CTRL + S
SPECIAL TOKENS
{K ???}
This token will insert a Bookmark. Please see the section on Bookmarks at the
beginning of this chapter.
Note that this token can accept a parameter, but it does not require one. You can
therefore insert blank bookmarks by using {K} alone. You can also give yourself
notes in bookmarks by using the parameters. For example, to tell yourself to
3.16
DICTIONARY ENTRIES
check the spelling of a word, you could use {K Check Spelling}. Please note the
space after the letter K and before the note you want to write to yourself.
Example Entries:
{K}
will insert a blank bookmark
{K Check Audio}
will insert a bookmark with the note “Check Audio”
{I ???}
This token will automatically insert an Include file. This token requires a parameter
to tell it which include file to insert. For example, to insert an include file named
“cover” from a dictionary entry, you would enter: {I cover}
It is important to type the name of the file in this entry EXACTLY as the name of
the saved include file. Please note the space between the capital I and the name of
the file.
Example Entries:
{I Cover}
will insert an include file named Cover.
{I Sign}
will insert an include file name Sign.
Because this token requires a parameter, you should not attempt to use {I} without
a parameter.
{T}
This token will insert the current time into the transcript. If you have to retranslate
the document, this entry will enter the time of re-translation. You will have to edit
the time to reflect the original time.
3.17
Chapter 3
digitalCAT USER GUIDE
{M}
When doing closed captioning, this symbol is used to mean a musical note.
{l+} and {l-}
Please note that these commands use a lowercase letter L. Do not confuse the
symbols with other letters or numbers. These commands are used when
captioning. Most of the time, closed captioning is done in all capital letters.
Sometimes, however, a lowercase letter is needed, such as an ending “s.” For
example, you may need CDs or Ph.D. to appear with a lowercase letter. Because
the program automatically turns all letters into uppercase before transmitting, you
will have to use these tokens in your dictionary entry.
The token with the plus sign will tell the program that what follows should be
transmitted in lowercase. The token with the minus sign will signal the program to
begin capitalizing as normal again.
Remember that the program will not know where to resume capitalizing without the
second token, so don’t forget to include it in your dictionary entries.
Example Entries:
{l+}s{l-}
with Suffix checked will attach a lowercase s to the previous translation.
P{l+}h{l-}.D.
will send Ph.D. with a lowercase letter h.
COMMANDS
Translation commands can also be entered as dictionary entries. These
commands can range from something like deleting the previous stroke by pressing
the Asterisk key on the steno machine to automatically formatting numbers.
Please refer to the Translation Commands chapter of the full digitalCAT manual for
an in depth explanation of all the translation commands digitalCAT offers.
3.18
DICTIONARY ENTRIES
DEFINING PUNCTUATION
Several options in the Flags area can be utilized when defining punctuation.
PREFIX:
Attaches punctuation to the next translation. This could be used for a hyphen or a
special punctuation mark.
SUFFIX:
Attaches punctuation to the previous translation. This flag is checked on nearly all
punctuation marks. This flag instructs the program to attach the punctuation mark
to the end of the previous word.
CAPITALIZE NEXT:
Capitalizes the next translation. This flag is checked on sentence-ending
punctuation marks, such as periods and question marks. Because the following
words will need to be capitalized, this flag must be checked.
The Hard Space Token ( ^ ) can be inserted after the punctuation in the English
Translation field to add one or more spaces after the punctuation when it
translates. For example, adding a caret after a period, .^, will instruct the program
to put an extra space after the period. This will bring the total number of spaces
after the period to two. Every translation automatically has a space after it, unless
the prefix flag is checked, or the suffix flag is checked on the next translation.
Adding a single caret after the period will add one additional space. Because of
the automatic space, there would then be two spaces after the period.
PERIOD
To define a period:
• Place the period and the Hard Space Token ( ^ ) in the English Translation
window pane. Do not leave a space between them or after the token.
• Make sure the steno outline is correct.
• Place any letters you may add or drop in the Shadows/Drops box.
• Press ALT + U to mark Suffix in the Flags area. This feature attaches the
period directly to the text preceding it.
• Press ALT + C to mark Capitalize Next in the Flags area. This feature ensures
the text following the period will be capitalized.
• Press ENTER to add the entry.
3.19
Chapter 3
digitalCAT USER GUIDE
COMMA
To define a comma:
• Place the comma in the English Translation window pane. There must not be
any spaces after the punctuation.
• Make certain the steno is correct.
• Place any letters you may add or drop in the Shadows/Drops box.
• Press ALT + U to mark Suffix in the Flags area. This flag ensures the comma is
attached to the text that precedes it.
• Press ENTER to save the entry.
QUESTION MARK
• Place the question mark and the Hard Space Token ( ^ ) in the English
•
•
•
•
•
Translation window pane. Do not leave a space between them or after the Hard
Space token.
Make sure the steno outline appears correctly.
Place any letters you may add or drop in the Shadows/Drops box.
Press ALT + U to mark Suffix in the Flags area. This flag attaches the
question mark directly to the text preceding it.
Press ALT + C to mark Capitalize Next in the Flags area. This flag ensures
the text after the question mark is capitalized.
Press ENTER to add the entry to your dictionary.
3.20
DICTIONARY ENTRIES
DECIMAL POINT
To define a decimal point:
• Place a period in the English Translation window pane.
• Make sure the steno in the Steno box is correct.
• Place any letters you may occasionally add or drop in the Shadows/ Drops box.
• Press ALT + N to mark Attach Numbers. This feature will attach any
surrounding numbers to the decimal point.
• Press ENTER to add the entry.
DICTIONARY MAINTENANCE
Most dictionary maintenance features and functions can be found in the Dictionary
Maintenance program included with digitalCAT.
OPENING DICTIONARY MAINTENANCE
To open Dictionary Maintenance:
• Go to START
• Place your cursor over PROGRAMS or ALL PROGRAMS.
• Place your cursor over DIGITALCAT.
• Click DICTIONARY MAINTENANCE to open the program.
3.21
Chapter 3
digitalCAT USER GUIDE
USING DICTIONARY MAINTENANCE
To create a new dictionary from Dictionary Maintenance:
• Press ALT + F to open the File menu.
• Press ENTER for NEW.
• Choose a name for the new dictionary.
• Press ENTER or click the Save button to save the new dictionary.
To open a dictionary once in Dictionary Maintenance:
• Press ALT + F to open Dictionary Maintenance’s File menu.
• Press O for Open.
• Press SHIFT + TAB to place the cursor in the list of dictionaries.
• Use the ARROW KEYS to highlight the dictionary you would like to open.
• Once the correct dictionary is highlighted, press ENTER to open that
dictionary.
Once a dictionary is open, you will notice that the Dictionary Maintenance window
is divided into three columns. The first column shows the steno. The second
shows the English that corresponds to that steno. The third column uses letters to
indicate which flags are checked on the entries. You can choose to see a fourth
column that displays the entry number by checking the appropriate selection under
the View menu.
3.22
DICTIONARY ENTRIES
• P indicates the Prefix flag is checked.
You can toggle this flag by pressing CTRL + P.
• S indicates the Suffix flag is checked.
You can toggle this flag by pressing CTRL + U.
• C indicates the Capitalize Next flag is checked.
You can toggle this flag by pressing CTRL + C.
• L indicates the Attach Letters flag is checked.
You can toggle this flag by pressing CTRL + L.
• N indicates the Attach Numbers flag is checked.
You can toggle this flag by pressing CTRL + N.
• Or indicates the OR Ending flag is checked.
• Pr indicates the Proper Name flag is checked.
NAVIGATING IN DICTIONARY MAINTENANCE
Moving around in Dictionary Maintenance is easy. Use the following commands
to do so.
•
•
•
•
•
•
Press the UP ARROW or the letter I to move up one entry.
Press the DOWN ARROW or the letter M to move down one entry.
Press the PAGE UP key to move up a page of entries.
Press the PAGE DOWN key to move down a page of entries.
Press the HOME key to move to the top of the dictionary.
Press the END key to move to the bottom of the dictionary.
There are a number of ways to add an entry through Dictionary Maintenance:
• Press the letter A to Add an entry.
• Press the INSERT key.
• Press ALT + E to open the Edit menu, then press A to add an entry.
• Click the “Plus” sign on the toolbar.
3.23
Chapter 3
digitalCAT USER GUIDE
There are a number of ways to remove an entry through Dictionary Maintenance:
• Press the letter D to Delete an entry.
• Press the DELETE key.
• Press ALT + E to open the Edit menu, then press D to delete the entry.
• Click the “Minus” sign on the toolbar.
There are also a number of ways to edit an existing entry through Dictionary
Maintenance:
• Press the letter E to Edit the highlighted entry.
• Press the SPACEBAR.
• Press ALT + E to open the Edit menu, then press M to modify the highlighted
entry.
Adding an entry through Dictionary Maintenance will open the Add Entry window
similar to the one described earlier. Editing an entry will display the current entry in
the same dialog so that changes can be made or shadows, drops, and endings may
be added.
MERGING TWO DICTIONARIES
To merge a dictionary into another:
• Make sure the target dictionary is open. This will be the dictionary to which
entries will be added.
• Press ALT + F to open the File menu.
• Press M for Merge Dictionary.
• An Open dialog will appear. Press SHIFT + TAB to move the cursor up into
the list of dictionaries.
• Use the ARROW KEYS to highlight the correct dictionary.
• Once the dictionary is highlighted, press ENTER or click the Open button to
merge that dictionary into this one.
• Please note that the second dictionary will remain intact.
EXPORT A DICTIONARY
You may export a dictionary to two formats, RTF and Stentura 8000. Exporting
to RTF could be used to transfer files between different CAT systems. Exporting
3.24
DICTIONARY ENTRIES
to your Stentura 8000 will allow you to see your translations appear on your
machine’s screen.
Please see the ConvertSten8000 section of this chapter for information on
exporting your dictionary for your Stentura 8000.
To export a dictionary to RTF format:
• Make sure the dictionary you wish to export is open.
• Press ALT + F to open the File menu.
• Press E for Export to RTF.
• Type a name for the RTF copy of your dictionary.
• Press ENTER or click the Save button to save the RTF file.
IMPORT A DICTIONARY
To import an RTF dictionary:
• Make sure a blank dictionary is open. You may create a new dictionary by
going to File->New.
• Press ALT + F to open the File menu.
• Press I to Import RTF.
• The entries contained within the RTF dictionary will be added into this
previously blank dictionary.
BACKING UP A DICTIONARY
Make sure the dictionary you wish to backup is not open!
If it is open, press ALT + F to open the File menu. Press C to close the open
dictionary.
To backup a dictionary:
• Press ALT + F to open the File menu.
• If you wish to backup the dictionary to a floppy disk, press F to choose that
option.
If you wish to backup the dictionary to some other location, press B.
• Press SHIFT + TAB to place the cursor in the list of dictionaries.
• Use the ARROW KEYS to choose the dictionary you wish to backup from the
list.
3.25
Chapter 3
digitalCAT USER GUIDE
• Once the dictionary is highlighted, press ENTER or click the Open button to
begin the backup process.
• If you chose to backup to another location, choose your location from the next
window.
Follow the on-screen prompts to complete the dictionary backup.
A message will inform you when the backup is complete. Until you see that
message, follow any prompts the program may give you. If you are backing up
your dictionary to floppy disks, make sure to keep the disks labeled. The order of
the disks is very important!
To restore an archived dictionary:
• Press ALT + F to open the File menu.
• If your dictionary is on floppy disks, press S.
If your dictionary is not on a floppy disk, press R.
• Choose the location of the dictionary and the name of the dictionary you wish
to restore.
• Press ENTER or click Open to begin the restoration process.
• Follow all on-screen prompts as they appear.
• A message will tell you when the dictionary has been restored.
COPYING AND MOVING DICTIONARY ENTRIES
Dictionary Maintenance also allows you to easily move or copy entries from one
dictionary to another.
To move or copy an entry to another dictionary:
• Press ALT + E to open the Edit menu.
• Press V to Move an entry to another dictionary or press C to Copy an entry to
another dictionary.
• The following dialog will appear.
3.26
DICTIONARY ENTRIES
SELECTED ENTRY:
This item will only send the highlighted entry to the other dictionary.
ENTRIES THAT CONTAIN:
Selecting this item will allow you to send only dictionary entries that are:
Phrases: entries that consist of multiple words
Numbers: entries that contain numbers
Conflicts: conflict entries
Proper Names: entries with the Proper Name flag checked
BRIEFS:
Selecting this item will allow you to send single stroke dictionary entries that have
an English translation longer than the number specified in this box.
PARTIAL STENO:
Selecting this option will allow you to send dictionary entries that contain the steno
specified in the box below this option.
WORDS THAT BEGIN WITH:
This option will allow you to send dictionary entries that begin with the English
written in the box below the option. This allows you to send only entries that
contain certain prefixes.
3.27
Chapter 3
digitalCAT USER GUIDE
WORDS THAT END WITH:
This option will allow you to send dictionary entries that end with the English
written in the box below the option. This allows you to send only entries that
contain certain suffixes.
• Once you have made your selection, press ENTER to continue moving or
copying the entries to another dictionary. A “Choose Dictionary” dialog will
appear.
• Press SHIFT + TAB to place the cursor in the list of dictionaries.
• Use the ARROW KEYS to highlight the dictionary to which you wish to add
the entry or entries.
• Once the correct dictionary is highlighted, press ENTER or click the Open
button to send the entries to the selected dictionary.
THE SEARCH MENU
The Search menu allows you to sort the dictionary by English or by steno, find a
particular entry or replace English or steno with other English or steno.
Press ALT + S to open the Search menu.
GO TO ENGLISH:
Selecting this item from the menu will
sort the dictionary alphabetically to
the English selected. The cursor will
be placed at the first occurrence of
the English requested.
With the Search menu open, press E
for this option. Without the menu
open, press the letter F.
GO TO STENO:
Selecting this item from the menu will
sort the dictionary by steno to the steno requested. The cursor will be placed at
the first occurrence of the Steno requested.
3.28
DICTIONARY ENTRIES
With the Search menu open, press S for this option. Without the menu open,
press the letter S.
SEARCH ENGLISH:
Selecting this item will find the occurrences of the English words requested.
With the Search menu open, press N for this feature. Without the menu open,
press SHIFT + F.
To repeat the last search and find the next occurrence, press F3.
SEARCH STENO:
Selecting this item will find the occurrences of the Steno requested.
To select this item, press S under the Search menu.
To repeat the last search and find the next occurrence, simply press F3.
SEARCH PARTIAL STENO:
Selecting this item will find the occurrences of the Steno requested, even if it the
steno exists with other steno.
To select this item, you may use the ARROW KEYS to highlight the menu item.
Press ENTER once it is highlighted.
To repeat the last search and find the next occurrence, simply press F3.
REPLACE ENGLISH:
This item will allow you to replace occurrences of English with other English.
With the Search menu open, press G to open the Replace dialog.
From this dialog, selecting flags will also check the flags of the entries in which the
English is being replaced.
3.29
Chapter 3
digitalCAT USER GUIDE
REPLACE STENO:
This item will allow you to replace occurrences of steno with other steno.
With the Search menu open, press O to open the Replace Steno dialog.
REPLACE PARTIAL STENO:
This item will allow you to replace occurrences of steno with other steno, even if it
exists with other steno.
With the Search menu open, press P to open the Replace Partial Steno dialog.
DETERMINING THE NUMBER OF ENTRIES
To get an entry count:
• Press ALT + T to open the Tools menu.
• Press E for Entry Count. The number of entries contained within this dictionary
will be displayed.
SPELL CHECK ON ADD
To keep the Spell check on add box checked on every Add Entry screen:
• Press ALT + T to open the Tools menu.
• Press S for Spell Checker.
3.30
DICTIONARY ENTRIES
COMPACT & REPAIR
These two options can help with some dictionary issues. If your dictionary
experiences problems, please contact our technical support department for
assistance. Compact and Repair should only be performed on a dictionary that
has been backed up and only when instructed by one of our techinicians.
CONVERTSTEN8000
To convert your dictionary for use on your Stentura 8000 machine:
• Open the START menu at the bottom of your Windows screen.
• Place your cursor over PROGRAMS or ALL PROGRAMS.
• Place your cursor over DIGITALCAT.
• Click ConvertSten8000 to open the Stentura 8000 Disk Builder.
• If you know the amount of memory in your machine, select the correct
amounts from the Memory section. If you do not know the amount of memory,
please leave this set to the default values.
• Set the destination to the A: if you have a floppy disk in your A drive. Set it to
B: if you have a floppy disk in your B drive. Most often, this is left as A.
• Press ALT + A to add a dictionary to the list of dictionaries to be converted.
• The Open dialog will appear. Press SHIFT + TAB to move the cursor into the
list of dictionaries.
3.31
Chapter 3
digitalCAT USER GUIDE
• Use the ARROW KEYS to highlight the dictionary you wish to transfer to your
machine.
• Once the dictionary is highlighted, press ENTER or click the Open button to
add the dictionary to the list.
• Once dictionaries have been added, you may select which dictionary will be the
main dictionary by highlighting it and clicking the Set Main button or pressing
ALT + S.
You will notice that a letter M will appear under the TYPE column for that
dictionary. All other dictionaries will be listed as J, or Job dictionaries.
• To begin converting the dictionaries, press ALT + M or click the Make Disks
button. This will instruct the program to begin converting the dictionary.
• If you receive a message that there will not be enough memory on your machine
for all of the entries, please try removing one or more of the dictionaries from
the list.
3.32
DICTIONARY ENTRIES
noTEs
3.33
Chapter 3
3.34
digitalCAT USER GUIDE
CHAPTER 4
EdiTing
Editing your transcripts
Chapter 4
digitalCAT USER GUIDE
EDITING
Stenovations has incorporated hundreds of powerful editing features into
digitalCAT that are designed to make the job of transcript production simple and
fast.
To open a transcript that has already been created:
• Press ALT + F to open the File Menu.
• If the transcript you wish to open has been used recently, it will be listed at the
very bottom of the menu in the “Recent Files” section. If the file is listed here,
press the number that appears before the file, such as 1, 2, 3 or 4. Doing this
will open the file. You may skip the rest of these instructions. If the transcript is
not listed at the bottom of the menu, please continue through these steps.
• Press O for Open. The Open File dialog will appear.
• Press SHIFT + TAB to move focus to the list of files.
• Use the arrow keys to highlight the name of the transcript to be opened.
• Once the correct transcript is highlighted, press ENTER to open it.
• If the transcript has already been opened before, it will reopen to the location
the cursor was located when the file was closed. This will allow you to resume
editing where you left off.
STANDARD KEYS AND QUICKKEYS
Editing commands are grouped into two categories: Standard Keys and
QuickKeys. Editing commands can be assigned into either of these groups.
Standard Key mode is the normal typing and editing mode. Because of this, most
keys pressed on the keyboard will actually type words. Standard Key commands
are key combinations that execute commands as opposed to typing text. Because
these keys are pressed in the normal typing mode, they must be pressed in
conjunction with the CTRL, ALT, or SPACEBAR to execute the command. You
can also press the keys with the SHIFT key so long as the CTRL, ALT, or
SPACEBAR is also included. This means that CTRL + S can execute one
command, and CTRL + SHIFT + S can execute an entirely different command.
Please note that some commands in this mode can be executed with a single key,
4.2
EDITING
such as pressing the DELETE key.
QuickKey mode is the quick editing mode. QuickKeys perform the same
functions as do Standard Keys, but with a single key press, or a single key in
conjunction with the SHIFT key. To use QuickKeys, one MUST be in QuickKey
mode. The slash ( / ) is the default key used to enter and exit this mode. When
the cursor is the traditional, vertical bar ( | ), the keyboard functions normally, and
you can use the Standard Key Commands. If the cursor becomes a square, black
box ( ), QuickKey mode is active.
Once QuickKeys are active, the keyboard no longer performs as a normal
keyboard, entering text one letter at a time; instead, the keys actuate editing
commands. Please note that Standard Key commands will work in QuickKey
mode, but QuickKey commands will NOT work in Standard Key mode.
Turning On/Off QuickKeys
QuickKeys mode can be entered and exited using an editing command called
QuickKeys Toggle. digitalCAT comes with this command predefined in both the
Standard Key Commands and QuickKeys as the forward slash ( / ) key.
Remember, this command can be redefined.
If you do not wish to use QuickKeys at all, you may wish to delete the
“QuickKeys Toggle” command from the Standard Key commands list so it is not
accidentally switched on. The command can be redefined at a later time if you then
wish to begin using QuickKeys. Please see the “Deleting a Command” section
later in this chapter.
QUICKKEYS TOGGLE:
Standard Key Command: /?
QuickKey Command: / ? --or-- A
If the forward slash key ( / ) will take you in and out of the QuickKeys mode, how
is it possible to enter a slash into the transcript you are editing?
One way is to press CTRL + / . A more efficient way is to select (highlight) the
words that require a slash between them. Once they have been highlighted, press
4.3
Chapter 4
digitalCAT USER GUIDE
the forward slash key (/?). The slash will be inserted and the space between the
words will be deleted.
OPTIONS KEYBOARD
digitalCAT software allows you to customize your keyboard setup. By doing this,
you can use commands you are already familiar with to edit a transcript. You can
even set your commands to mimic those that you may have learned while using
another CAT system.
To see your current keyboard configuration:
• Press and release the ALT key to place focus on the
menus.
• Press the letter O to open the Options menu.
• Press ENTER on the Keyboard selection. The
Keyboard Setup dialog will appear.
THE TABS
The Keyboard Setup dialog is divided into three tabs: Standard Keys, QuickKeys,
4.4
EDITING
and Quick Type. Select the tab that you would like to see by clicking on it with
the mouse. The currently selected tab will appear as if it is in front of the other
tabs. The tab that appears closest to you is the currently active tab. You can also
toggle the active tab by pressing CTRL + TAB.
To find a specific command, simply start typing that command. The list of
commands will automatically scroll to attempt to find the command that you are
typing.
PRINTING THE CURRENTLY DEFINED COMMANDS
Once the Keyboard Setup dialog is open, you may print the list of currently
defined commands. Take note of the tabs across the top of the dialog. If you
wish to print the Standard Key commands, make sure that tab is selected, or in
front. If you would like to print the QuickKey commands, make sure that tab
selected, or in front. Once you have selected the tab you would like to print, press
ALT + P or click the Print button to send the list of commands to your printer.
ADDING A COMMAND
The Standard Key tab lists all of the currently defined Standard Key commands.
From this tab, you can print the list, add a new command, or delete a command.
You can also specify whether you would like to use the SPACEBAR to execute
commands.
The QuickKey tab lists all of the currently defined QuickKey commands. From
this tab, you can print the list, add a new command, or delete a command.
To add a command:
• Make sure the correct tab, Standard Keys or Quick Keys, is active. If it isn’t,
press CTRL + TAB until it becomes the active tab.
• Press ALT + A or click the Add button to add a new command. The “Add
Keyboard Command” dialog will be displayed.
• If you know which command you wish to add, simply begin typing the name of
that command. The list will scroll down to match the letters that you type. You
can also use the PAGE UP, PAGE DOWN, and ARROW KEYS to move
through the list.
4.5
Chapter 4
digitalCAT USER GUIDE
• Once the command that you wish to define is highlighted, press the TAB key or
ALT + Y to place the cursor in the Keys box.
• Press the key that you wish to associate with this command, or use the PAGE
UP, PAGE DOWN, and ARROW KEYS to highlight the keyboard key you
wish to use to execute this command.
• Select either CTRL, ALT, or SPACE (or a combination) to be used with the
keyboard key to execute this command.
Press ALT + H to mark the SHIFT box.
Press ALT + T to mark the CTRL box.
Press ALT + L to mark the ALT box.
Press ALT + S to mark the Space box.
• Press ENTER or click the OK button to add this command and key
combination to the list of active Standard Key commands.
KEY COMBINATION IN USE
If the key combination you have selected is already defined as a command, the
“Key combination in use” dialog will be displayed.
• Press Y to overwrite the existing command with the one you have just made.
• Press N to keep the current command and return to the Add Keyboard
Command dialog to select a new key combination.
DELETING A COMMAND
When an active command is deleted, it will be deactivated and removed from the
list of active commands. It can always be added back to the list at a later time if
you should ever decide you wish to use that command. Please note that when you
delete a command, there will NOT be a confirmation dialog asking if you are sure.
4.6
EDITING
To delete a command:
• Highlight the command that you wish to delete.
• Press ALT + D or click the Delete button to delete the highlighted command.
QUICK TYPE
The Quick Type feature is the third tab in the Keyboard Setup window. By using
this editing feature, letters can be assigned to a word or phrase. When the assigned
letters, followed by the spacebar, are typed, the word or phrase will be inserted
into the transcript at the location of the cursor.
To add a Quick Type command:
• Make sure the Quick Type tab is the active tab. If it isn’t, press CTRL + TAB
until it becomes the active tab.
• Press ALT + A to add a new Quick Type command.
• Type the letters to be assigned to the text in the Command box.
4.7
Chapter 4
digitalCAT USER GUIDE
• Press TAB to move the cursor to the Text box.
• Type the desired text.
• Press ENTER to save the new Quick Type command.
To edit the text of a Quick Type command:
• Highlight the active Quick Type command.
• Press ALT + E or click the Edit button to edit the text.
To use the Quick Type command:
• When editing a transcript, type the letters assigned to the word or phrase,
followed by the spacebar.
• For example, typing “ex” then the spacebar, could insert the text
“(Exhibit No. [ ] marked for identification)” at the position of the cursor.
QuickKeys Toggle: This command will take you in and out of QuickKey mode.
Standard Keys: / ?
QuickKeys: A
UNDO
This feature will undo the last actions performed, in inverse order.
Undo: Reverses the last actions performed.
Standard Key: CTRL + Z
QuickKey: Z
You can also activate the Undo command from the Edit menu. Press ALT + E to
open the Edit menu from the menu bar. Then press U or the ENTER key to
activate the Undo function, and the last function will be reversed.
NAVIGATING IN TRANSCRIPT EDITOR
Moving the cursor, or caret, in digitalCAT is accomplished by using the Caret
commands. Most of these commands are pre-defined in digitalCAT, but they can
be redefined to suit your personal editing style. The commands that are already
defined in the digitalCAT keyboard setup are shown.
4.8
EDITING
Caret Document Beginning: Moves the cursor to the very beginning of the
transcript.
Standard Key: CTRL + PAGE UP
Caret Document End: Moves the cursor to the very end of the transcript.
Standard Key: CTRL + PAGE DOWN
Caret Down: Moves the cursor down one line.
Standard Key: DOWN ARROW
QuickKey: M
Caret End of Word: Moves the cursor to the end of the current word.
Caret Left: Moves the cursor one character to the left.
Standard Key: CTRL + LEFT ARROW
QuickKey: SHIFT + J
Caret Line Beginning: Moves the cursor to the beginning of the current line.
Standard Key: HOME
Caret Line End: Moves the cursor to the end of the current line.
Standard Key: END
Caret Next Paragraph: Moves the cursor to the beginning of the next paragraph.
Standard Key: SHIFT + ENTER
QuickKey: H
Caret Next Steno: Moves the cursor to the next steno stroke.
Caret Next Word: Moves the cursor to the next word.
Standard Key: CTRL + K --or-- RIGHT ARROW
QuickKey: K
Caret Page Down: Moves the cursor down one screen/page.
Standard Key: PAGE DOWN
QuickKey: SHIFT + M
4.9
Chapter 4
digitalCAT USER GUIDE
Caret Page Up: Moves the cursor up one screen/page.
Standard Key: PAGE UP
QuickKey: SHIFT + I
Caret Paragraph Beg: Moves the cursor to the beginning of the current paragraph.
QuickKey: SHIFT + B
Caret Paragraph End: Moves the cursor to the end of the current paragraph.
Caret Previous Paragraph: Moves the cursor to the beginning of the previous
paragraph.
Caret Previous Steno: Moves the cursor to the previous steno stroke.
Caret Previous Word: Moves the cursor to the previous word.
Standard Key: LEFT ARROW
QuickKey: J
Caret Right: Moves the cursor one character to the right.
Standard Key: CTRL + RIGHT ARROW
QuickKey: SHIFT + K
Caret Sentence Beg: Moves the cursor to the beginning of the current sentence.
Caret Sentence End: Moves the cursor to the end of the current sentence.
Caret Up: Moves the cursor up one line
Standard Key: UP ARROW
QuickKey: I
SELECTING OR HIGHLIGHTING
Many editing features are performed on text that has been selected, or highlighted.
Once text has been highlighted, editing features can be used on that text, such as:
fast deletion of multiple words, copying or cutting text, making multi-word
dictionary entries, and much more.
4.10
EDITING
Every “Select” command can be repeated or used in combination with other
“Select” commands to highlight additional text. Once a letter or word has been
selected, only cursor movement will adjust the selection.
To remove highlighting, hit the Escape key or use the Select Reset command.
Select Document Beginning: Highlights from the location of the cursor to the
beginning of the transcript.
Select Document End: Highlights from the location of the cursor to the end of the
transcript.
Select Down: Highlights text to the right of the cursor and down one line.
Standard Keys: SHIFT + DOWN ARROW
Select Left: Selects, or deselects, one character to the left. Use this command
after a word has been selected to deselect characters at the end of the word. This
allows for a dictionary entry to be made for the root word, to look up a definition
or perform a Find function.
Standard Keys: CTRL + SHIFT + S
or SHIFT + ARROW LEFT
Select Line Beginning: Highlights text from the cursor position to the beginning of
the current line.
Select Line End: Highlights text from the cursor position to the end of the current
line.
Select Next Steno: Selects the next steno stroke, usually for a dictionary entry.
QuickKey: SHIFT + S
Select Next Word: Highlights the next word. If the cursor is in the middle of a
word when this command is executed, the part to the right of the cursor is
highlighted. If you try to add a dictionary entry for this highlighted portion, the
entire word will appear in the Add Entry dialog.
Standard Keys: CTRL + S
or SHIFT + ARROW RIGHT
QuickKey: S
4.11
Chapter 4
digitalCAT USER GUIDE
Select Page Down: Highlights from the cursor position one page down.
Standard Keys: SHIFT + PAGE DOWN
Select Page Up: Highlights from the cursor position one page up.
Standard Keys: SHIFT + PAGE UP
Select Paragraph Beginning: Highlights from the cursor position to the beginning
of the current paragraph.
Select Paragraph End: Highlights from the cursor position to the end of the
current paragraph.
Select Previous Steno: Highlights the previous steno stroke, usually for entry into
a dictionary.
Select Previous Word: Highlights the previous word.
Select Reset: Removes all highlighting from text or steno.
Standard Keys: ESC
QuickKeys: U
Select Right: Selects one character to the right.
Select Sentence Beginning: Selects from the current caret position to the beginning
of the sentence.
Select Sentence End: Selects from the current caret position to the end of the
sentence.
Standard Keys: ALT + ‘ “
Select Up: Selects from the cursor position up one line.
Standard Keys: SHIFT + ARROW UP
DELETING
digitalCAT has a number of deleting commands that can make removing incorrect
text a simple and easy process.
4.12
EDITING
Delete Last Letter: This command will delete the last letter of the word the cursor
is currently on. It can be pressed multiple times to remove more letters. This
command is useful for removing suffixes, such as an s. It is more efficient to use
the Add/Change Word Ending command to alter suffixes.
Standard Key: SHIFT + BACKSPACE
QuickKey: SHIFT + O
Delete Line: This command will delete the current line.
Standard Key: ALT + D
Delete Line Beginning: This command will delete from the current cursor position
to the beginning of the line.
Delete Line End: This command will delete from the current cursor position to the
end of the line.
Delete Next Character: Deletes the character immediately to the right of the cursor.
Standard Key: DELETE
QuickKey: SHIFT + D
Delete Next Space: Deletes the next space, joining the current and next words
together.
Standard Key: SHIFT + SPACE or CTRL + N
QuickKey: SHIFT + N
Delete Next Word: Deletes the text between the cursor and the next word or
punctuation mark.
Standard Key: CTRL + D or SHIFT + DELETE
QuickKey: D
Delete Previous Character: Deletes the character immediately to the left of the
cursor.
Standard Key: BACKSPACE
QuickKey: V
Delete Previous Word: Deletes the text between the cursor and the previous word
or punctuation mark.
4.13
Chapter 4
digitalCAT USER GUIDE
SOUNDSYNC
DigitalCAT's audio synchronization features allow you to easily record, play and
stop audio.
When you start audio recording or playback, the VU meter will show you if there
is sound. This is extremely useful when recording audio. If the VU meter is
moving, you know that the program is recording audio. If, however, the VU meter
is blank or stays maxed out, you may have some sort of audio problem.
Blank VU Meter
VU Meter with Sound
SoundSync Pause Play: This command will pause playing audio. If pressed
again, audio will resume playing.
SoundSync Pause Record: This command will pause audio recording. If pressed
again, recording will resume.
SoundSync Play: This command will play the audio.
SoundSync Play/Stop: This command will begin playing audio. If pressed again,
audio will be stopped.
Standard Key: \ | --or-- CTRL + L
QuickKey: L
SoundSync Properties: Using this command will display the SoundSync
properties dialog. Please see Chapter 2 for help with this dialog.
SoundSync Record/Stop: This command will stop audio recording. Pressing it
again will resume recording.
Standard Key: ALT + R
SpeedSync Faster: Executing this command will increase the playback speed of
the audio.
Standard Key: ALT + RIGHT ARROW
4.14
EDITING
SpeedSync Slower: Executing this command will decrease the playback speed of
the audio.
Standard Key: ALT + LEFT ARROW
PARAGRAPHING
This section covers inserting new paragraphs as well as changing a paragraph from
one style to another.
CHANGING PARAGRAPH STYLES
If you need to change a paragraph from one style to another, like changing a
Question to an Answer for example, you would want to use the Change Paragraph
Style commands.
Change Paragraph Style: Executing this command will display the Change
Paragraph Style dialog. Select the style that you to which you wish to change this
paragraph from the list.
Standard Key: ALT + P
QuickKey: SHIFT + P
Change Paragraph to {A}: Executing this command will change the current
paragraph to an Answer paragraph. The Answer symbol, A., will be placed at the
beginning of the paragraph.
Standard Key: ALT + A
Change Paragraph to {C}: Executing this command will change the current
paragraph to a Colloquy paragraph. The Speaker list will be displayed. Please see
the Speaker list section of this chapter for help using this dialog. This command
can also be used to change the current speaker.
Standard Key: ALT + C
Change Paragraph to {Q}: This command will change the current paragraph into a
Question paragraph. A Question symbol, Q., will be placed at the beginning of the
paragraph.
Standard Key: ALT + Q
4.15
Chapter 4
digitalCAT USER GUIDE
INSERTING NEW PARAGRAPHS
Inserting a new paragraph will insert a new line in the style selected. If any of these
commands are executed in the middle of an existing paragraph, the text to the right
of the cursor will be moved down to the next line and will be formatted in the style
chosen.
Insert {A} Paragraph: Executing this command will insert an Answer paragraph.
Standard Key: CTRL + A
QuickKey: SHIFT + A
Insert {C} Paragraph: Executing this command will insert a new Colloquy
paragraph. The Speaker List dialog will appear. Please see the Speaker List
section of this chapter for help with this dialog.
Insert {P By} Paragraph: This command will insert a new By paragraph. The
Speaker List dialog will appear. Please see the Speaker List section of this chapter
for help with this dialog.
Standard Key: CTRL + B
QuickKey: B
Insert {P Center} Paragraph: Executing this command will insert a new centeraligned paragraph.
Standard Key: ALT + INSERT
Insert {P Paren} Paragraph: This command will insert a parenthetical paragraph.
Standard Key: ALT + 9
QuickKey: P
Insert {Q} Paragraph: This command will insert a new Question paragraph.
Standard Key: ALT + Q
QuickKey: SHIFT + Q
Insert Continuation Paragraph: Executing this command will insert a continuation
paragraph. A continuation paragraph is any paragraph after the first paragraph in a
specified style. For example, in a long question that has three paragraphs, both the
second and third paragraph would be continuation paragraphs.
4.16
EDITING
Insert Paragraph Style: This command will display the Choose Paragraph Style
dialog. A paragraph of the type you select will be inserted.
SPEAKER LIST
The Speaker List allows you to
quickly select speakers for Colloquy
and By paragraphs. This lets you
quickly correct dropped or misstroked speaker identifications.
When the dialog first opens, you will
notice that the first 10 names have
numbers in front of them. You may
select any of these names by pressing
the number in front of the one you
would like to insert. This dialog has
a dynamic list, meaning the numbers will change depending upon the transcript.
The first speaker you identify in a transcript will be listed as number 1. The
second will become number 2, the third number 3, and so forth.
You may also use the arrow keys to scroll through the list of names. You could do
this if you wanted to choose a name that was not in the top 10.
You may need to create a new speaker. If so, please follow these steps:
• Once the dialog is open, press TAB to place the cursor in the “New Speaker”
box.
• Type the name of the speaker just as you want it to appear. Do NOT type the
colon in the name! Please note that if you type the name in lowercase, you can
press the F8 key to capitalize the entire line.
• Once the name appears correctly, make sure the “Add new speaker to list” box
is checked so that the name will be stored in your Speakers List. If you do not
want the name to go into your list, uncheck this box. You may check/uncheck
this option by pressing ALT + A.
• When finished creating the new speaker name, press ENTER. The paragraph
your cursor was on should now appear with the speaker identification you
selected.
4.17
Chapter 4
digitalCAT USER GUIDE
To edit a speaker name:
• Make sure the Speakers List dialog is open. If not, you can press ALT + E to
open the Edit menu, then press E again for Speakers.
• Highlight the speaker identification that you wish to edit.
• Press ALT + E to edit that identification.
• Press ENTER when finished editing.
To delete a speaker name:
• Make sure the Speakers List dialog is open. If not, you can press ALT + E to
open the Edit menu, then press E again for Speakers.
• Highlight the speaker identification that you wish to delete.
• Press ALT + D to delete that identification.
• Press ENTER when finished editing.
The Speakers List can also be displayed by executing the Change Speaker
command. This command will display the list of speakers so that you may easily
change the identification of a By paragraph or a Colloquy paragraph.
OTHER PARAGRAPH COMMANDS
Toggle Answer/The Defendant: This command will toggle an Answer paragraph
with a Colloquy paragraph with “THE DEFENDANT:” as the speaker
identification. This command is a toggle, which means it will change either
paragraph to the other.
Toggle Answer/The Deponent: This command will toggle an Answer paragraph
with a Colloquy paragraph with “THE DEPONENT:” as the speaker identification.
This command is a toggle, which means it will change either paragraph to the
other.
Toggle Answer/The Witness: This command will toggle an Answer paragraph with
a Colloquy paragraph with “THE WITNESS:” as the speaker identification. This
command is a toggle, which means ti will change either paragraph to the other.
Standard Key: ALT + W
QuickKey: SHIFT + W
4.18
EDITING
Toggle Question/The Court: This command will toggle a Question paragraph with
a Colloquy paragraph with “THE COURT:” as the speaker identification. This
command is a toggle, which means it will change either item to the other.
Join Paragraph: Executing this command will join the paragraph the cursor is
currently in to the preceding paragraph.
Standard Key: ALT + J
QuickKey: Y
Number Paragraph: This command must be executed on a Colloquy paragraph!
If you number your Colloquy paragraphs, you would execute this command on
any Colloquy paragraph that needs to be numbered. Please note that the “Number
Questions in Transcript” option must be checked under Options->Document!
Please see Chapter 2 for help with this option.
RESOLVING UNTRANSLATES AND CONFLICTS
Even the best writers have untranslates or mistranslates. These items can be edited
in a number of ways. You can edit the untranslate directly or define it as a
dictionary entry.
If you are in Standard Key mode, with your cursor at the beginning of an
untranslate, you may simply begin typing the correct word. Once you begin
typing, the untranslate will disappear, leaving only the text that you type. If you are
in QuickKeys, you may use the Edit Word feature to perform the same function.
Please see the description of that feature later in this chapter.
DICTIONARY ENTRY COMMANDS
An untranslate can easily be defined into a dictionary.
Dictionary Entry 1-10: These commands will place the highlighted text into the
corresponding dictionary. The dictionaries are numbered based upon their
appearance in the Dictionary Setup screen. You can get to Dictionary Setup by
going to Translator->Dictionaries. The top dictionary would be numbered one.
The next would be number two, and so forth. Dictionary 1 will always be the Job
dictionary and Dictionary 10 will be the Main dictionary. This is because your
4.19
Chapter 4
digitalCAT USER GUIDE
Main dictionary must be listed at the bottom of the list, and the Job dictionary at
the top.
Standard Keys: Dictionary Entry 1: CTRL + J
Dictionary Entry 10: CTRL + M
QuickKeys: Dictionary Entry 1: SHIFT + T
Dictionary Entry 10: T
Dictionary Entry List: This command will place the highlighted text into the
dictionary that you select from the list it displays. Once this command is pressed,
a list of active dictionaries will appear. Select the dictionary into which you wish
to place the entry from this list.
Standard Keys: CTRL + T
Job Entry (1 Stroke) – Job Entry (4 Stroke): These commands will place entries
of the corresponding stroke count into the Job dictionary. For example, pressing
the command for Job Entry (4 Stroke) will bring up the Add Entry dialog with the
next four steno strokes ready to be defined. This allows you to quickly define
multiple stroke entries without having to highlight anything. Remember, to add
more strokes, press SHIFT + DOWN ARROW when the Add Entry dialog is
open. To take away strokes, press SHIFT + UP ARROW.
Standard Keys: CTRL + 1-4
Main Entry (1 Stroke) - Main Entry (4 Stroke): These commands will place entries
of the corresponding stroke count into the Main dictionary. For example, pressing
the command for Main Entry (3 Stroke) will bring up the Add Entry dialog with the
next three steno strokes ready to be defined. This allows you to quickly define
multiple stroke entries without having to highlight anything. Remember, to add
more strokes, press SHIFT + DOWN ARROW when the Add Entry dialog is
open. To take away strokes, press SHIFT + UP ARROW.
Standard Keys: ALT + 1-4
ENTER & SHIFT + ENTER: If you have text selected, you can press the
ENTER key to quickly add all of the English and steno you have selected to the
Main dictionary. If you press SHIFT + ENTER, the text and steno highlighted will
be added to the Job dictionary. You can highlight numerous strokes, then press
one of these commands to quickly make a dictionary entry.
4.20
EDITING
Once you resolve the current untranslate, you may find the next untranslate by
using any of the following commands:
Find Next Untranslate: This command will find the next untranslate and place the
cursor at its beginning.
Find Next Conflict/Untranslate: This command will find and place the cursor on
the next conflict or untranslate.
Standard Keys: ALT + U
QuickKeys: [ {
Find Previous Untranslate: This command will find the previous untranslate and
place the cursor at its beginning.
Find Previous Conflict/Untranslate: This command will find and place the cursor
on the previous conflict or untranslate.
QuickKey: SHIFT + [ {
Resolve All Untranslates: Executing this command will take you to the first
untranslate. Once you define that untranslate into your dictionary, your cursor will
be immediately taken to the next untranslate so that you may define it. By using
this one command, you never have to use any of the other “Find Next” or “Find
Previous” commands to go to the next untranslate. The program will automatically
move you to the next one once the current untranslate is resolved.
RESOLVING CONFLICTS
Conflicts can be resolved in a number of ways. You can even resolve them during
realtime by using the Resolve Conflict command. Please see Chapter 5 for
information on this.
Conflicts can also be easily resolved during editing. First, place your cursor at the
beginning of the conflict. You can then press the number that corresponds to the
word that you would like to choose. For example, if you wanted to select the
word “too” from [to|too|two], you would press the number 2.
You can also press the letters S, D and F to select the correct word. Again, if you
4.21
Chapter 4
digitalCAT USER GUIDE
wanted to select the word “too” from [to|too|two], you would press the letter D.
Please note that these letters will may only perform this function in the QuickKeys
mode if the option is selected under Options->General. Please see Chapter 2 for
help selecting this option.
You may move to another conflict by using the following commands:
Find Next Conflict: This command will find and place the cursor on the next
conflict.
Standard Keys: ALT + \ |
Find Next Conflict/Untranslate: This command will find and place the cursor on
the next conflict or untranslate.
Standard Keys: ALT + U
QuickKey: [ {
Find Previous Conflict: Using this command will find the previous conflict.
Find Previous Conflict/Untranslate: This command will find and the previous
conflict or untranslate.
Standard Keys: SHIFT + [ {
You may also have the program move you to the next conflict automatically. By
doing this, you can easily resolve all of your conflicts at once. Once you resolve
one, you will be automatically moved to the next one. You can do this by selecting
the option under
Options->Editor.
To set this option:
• Press and release the ALT key.
• Press the letter O to open the Options menu.
• Press E for Editor.
• Press ALT + N to put a check mark in the “Move to
next conflict after resolving current conflict” option.
• Press ENTER to save your change.
Now when you resolve a conflict, the program will automatically take you to the
4.22
EDITING
next conflict. You will receive a message informing you when no more conflicts
can be found.
PUNCTUATION
DigitalCAT has a number of artificial intelligence features that will help you
punctuate your document properly. Manually inserting punctuation marks need
not be done at the end of a word, and certain commands will allow you to
automatically toggle punctuation marks to other marks, even if you are relatively far
away from them in the transcript!
MANUAL PUNCTUATION
Depending upon your editing settings, your punctuation location may be before the
current word or after it. An example of each is given. You may check your
punctuation setting under Options->Editor. Please see Chapter 2 for information
on changing this setting.
Whenever punctuation is changed in the transcript, the formatting that pertains to
the surrounding words is automatically corrected. There is no need to move the
cursor to the end of a word before inserting or changing punctuation. The
punctuation will be placed at the end of the current word or the previous word,
depending on how the Editor Options are set.
With your cursor on a word where there is no punctuation, pressing a mark will
add that punctuation mark. There is no need to move the cursor to the location
the mark should be placed. The software will place the punctuation mark in the
correct location and format the surrounding words correctly. For example,
pressing the comma key with the cursor at the beginning of a word will add a
comma in the correct location. Pressing the period key will place a period in the
correct location. Surrounding text will be formatted correctly.
If a punctuation mark already exists at this word, pressing another punctuation
mark will change the existing mark to the one that you press. Again, digitalCAT
will automatically format the surrounding text. This means that if you change a
comma to a period, the next word will become automatically capitalized. To
remove the punctuation mark, strike the key that corresponds to the punctuation
4.23
Chapter 4
digitalCAT USER GUIDE
that appears. For example, to remove the comma at the end of a word, simply
press the comma key while the cursor is on that word.
HYPHEN
With the cursor on a word, press the hyphen key. Either the space before the
word or the space after the word, depending on your editor settings under
Options->Editor, will be replaced with a hyphen. This allows you to easily
hyphenate two words without having to move the cursor to the space between the
words. To hyphenate multiple words, highlight them using one of the Select
commands, then press the hyphen key.
Example: semi-transparent
STITCHING
Highlight the word that you would like to stitch. With the word highlighted, press
the hyphen key. The word will then be stitched. You may press the hyphen key
again to undo this action. You can also use the Stitch Word command, as is
described below.
Stitch Word: This command will stitch the word the cursor is on, whether the
word is highlighted or not. Pressing this command again will remove the stitch and
return the word to normal.
DASH
Just as mentioned above, you can place a hyphen between two words by simply
pressing the hyphen key. There will be no space between the words and the
hyphen. Pressing the hyphen key again will change the hyphen into a dash. There
will be a space between the words and the dash.
Example: Did you -- strike that.
SLASH
In most keyboard setups, the slash key will take you in and out of QuickKeys
mode. To place a slash between two words, highlight those words and press the
4.24
EDITING
slash key. The space between the words will be replaced with a slash.
You can also type a slash key by pressing and holding the CTRL key with the
slash key. This will insert a slash into your document, however it will not
automatically remove any spaces.
QUOTES
If you wish to place quote marks around text:
Highlight the text that you wish to have quoted.
Press the double (“) or single (‘) quote key.
The highlighted text will then be surrounded by quotes.
If the last highlighted word was followed by a comma or a period, that punctuation
mark will automatically be added inside the quotes. You can move other
punctuation marks inside the quotes by pressing the quote key a second time.
With the words still highlighted, press the quote key a third time to remove the
quote marks.
PARENTHESIS
To add a set of parenthesis around a word or multiple words:
• Highlight the text that you wish to have within
parenthesis.
• Press either the open or closing parenthesis key.
• (SHIFT + 9 or SHIFT + 0)
Press the parenthesis again to move punctuation within the parenthetical. Press it
again to remove the parenthesis.
PUNCTUATION COMMANDS
digitalCAT has a number of editing commands associated with punctuation. You
can of course punctuate by moving your cursor to the correct location, as
described above, but you can also use the following commands. Please note that
if your formatting information is set up properly, most punctuation at the ends of
paragraphs will be handled automatically. For example, a Question paragraph
4.25
Chapter 4
digitalCAT USER GUIDE
should automatically generate a question mark when another type of paragraph
stroke is written.
Toggle Comma/Dash: This command will toggle the next comma, dash or semicolon to the next item on that list. A comma will be changed into a dash, a dash to
a semi-colon, and a semi-colon to a comma. This command will find the next
occurrence of one of these punctuation marks to toggle, meaning you can be a
number of words away from the actual occurrence of the mark. This allows you
to easily alter punctuation without moving your cursor.
Standard Keys: SHIFT + , <
QuickKeys: SHIFT + , <
Toggle Period/Question Mark: This toggle command will find the next period,
question mark or dash. That punctuation mark will be toggled to the next one. A
period will become a question mark, a question mark a dash, and a dash a period.
This command allows your cursor to be relatively far away from the punctuation
mark that you wish to change. Because this command will search for the next
punctuation mark that it can alter, it can be used to alter punctuation without
moving the cursor.
Standard Keys: SHIFT + . >
QuickKeys: SHIFT + . >
Toggle Last Period/Question Mark: This command will toggle the last period,
question mark or dash to the next item, even if there is another punctuation mark
between the cursor’s location and the end of the paragraph. The final period will
become a question mark, a question mark will become a dash, and a dash will
become a period. This command, because it alters the final punctuation mark in
the paragraph, allows you to be a number of words away from the location of the
punctuation. You can easily alter the final punctuation mark without moving your
cursor to that location.
Incomplete Paragraph: Places dashes at the end of the previous paragraph
regardless of where the cursor is in the current paragraph.
Insert '--' at Beginning: This command will place dashes at the beginning of the
current paragraph regardless of what line of the paragraph the cursor is on.
Standard Keys: ALT + , <
4.26
EDITING
Insert '--' at End: This command will place dashes at the end of the current
paragraph regardless of what line of the paragraph the cursor is on.
Standard Keys: ALT + . >
QuickKeys: SHIFT + - _
Interrupted Answer: Dashes can be inserted at the end of an interrupted Answer as
well as at the beginning of the next Answer paragraph. The cursor must be on
either the Question paragraph interrupting the Answers or on the second Answer
paragraph.
Example:
A. No, I don’t.
Q. Okay.
A. Really think so.
Becomes:
A. No, I don’t -Q. Okay.
A. -- really think so.
This command is a toggle, so pressing it again will remove the dashes and restore
the original punctuation.
Interrupted Question: Dashes can be inserted at the end of an interrupted Question
as well as at the beginning of the continued Question. The cursor must be on
either the Answer interrupting the Questions or the second Question paragraph.
Example:
Q. How long?
A. One year.
Q. Has it been?
4.27
Chapter 4
digitalCAT USER GUIDE
Becomes:
Q. How long -A. One year.
Q. -- has it been?
Standard Keys: ALT + - _
Question/Answer Segue: This command will place dashes at the end of the
Question and also at the beginning of the next Answer. Use this command when
an answer interrupts the question that was asked and you need to place dashes in
the two paragraphs. The cursor may be located in either the Q or A paragraph
when the command is used.
Example:
Q. How long did it?
A. One year.
Becomes:
Q. How long did it -A. -- one year.
CAPITALIZATION
digitalCAT has a number of capitalization features. A lot of capitalization is
automatic. The first word of a sentence, for example, should automatically be
capitalized.
CAPITALIZATION IN DIALOGS
digitalCAT allows you to easily capitalize items even in dialog boxes such as the
Edit Word dialog or the Add Entry dialog.
F6: Pressing this key will capitalize the letter the cursor is on. If the words are
highlighted, the first letter will be capitalized.
4.28
EDITING
F7: Pressing this key will capitalize the first letter of all important words in item
shown in the dialog. This means that words like “of” and “the” will not be
capitalized.
F8: Pressing this key will capitalize every letter of the item typed in the dialog.
QUICK SHIFT
QuickShift allows you to quickly capitalize letters and words by simply tapping the
SHIFT key.
• One quick tap of the SHIFT key will capitalize the letter the cursor is currently
on. Tapping once again will return the letter to lowercase.
• Tapping the SHIFT key twice in rapid succession will capitalize the word the
cursor is currently on. Tapping the SHIFT key twice again will return the word
to lowercase.
• Tapping the SHIFT key three times rapidly will capitalize the entire line the
cursor is on. Again tapping three times will return the line to lowercase.
CAPITALIZATION COMMANDS
Capitalize Current Letter: This command will capitalize the letter the cursor is
currently on. This command can be used to capitalize letters in the middle of
words, such as the name “McAdams”.
If the letter is already capitalized, using this command will return it to lowercase.
Standard Keys: F6
Capitalize Entire Transcript: This command will capitalize all text within a
transcript. Please note that if more text is added, it will not be automatically
capitalized!
Capitalize First Letter: Capitalizes the first letter of the current word, regardless of
where in the word the cursor is. If the first letter is already capitalized, using this
command will return it to lowercase.
Standard Keys: F7
Capitalize Whole Line: This command will capitalize the line the cursor is on.
4.29
Chapter 4
digitalCAT USER GUIDE
Pressing this command again will return the line to lowercase.
Standard Keys: F8
Capitalize Whole Word: This command will capitalize the word the cursor is on.
Pressing the command again will return the word to lowercase.
Standard Keys: SHIFT + F6 or SHIFT + F7
QuickKey: O
FIND
Stenovations has implemented a number of “Find” or “Search” commands into
digitalCAT. These commands allow you to easily jump through the transcript to
the items that you wish to see.
USING THE FIND COMMAND
• Enter the text that you wish to search for in the Text box.
• If the capitalization of the word matters, press ALT + M to mark the Match
Case box. This will tell the program to only return words that exactly match in
capitalization to your search criteria. This, for example, would prevent the
search from returning the color green when you are searching for the name
Green.
• If you only want to search whole words, press ALT + W to mark the Whole
Words Only box. This, for example, would prevent a search for the word
“base” from returning words like “baseball” or “basement.”
• If you wish to search backwards, press ALT + U to mark the Up direction. If
you wish to search down the transcript, make sure Down is marked. If it is not,
you may press ALT + D to mark it.
• When finished entering your criteria and setting your search options, press
ENTER to begin the search.
4.30
EDITING
FIND AND REPLACE
The Find and Replace function is a quick way to search for one word or phrase
and replace it with another.
USING THE FIND AND REPLACE COMMAND
• Place the cursor on the word to be replaced. If you wish to replace multiple
words, highlight the text you wish to replace.
• Press the Find & Replace command or press ALT + E to open the Edit menu.
Then press R for Replace. The word the cursor was on or the text that was
highlighted will automatically appear in the Text box. The same text will also
appear in the Replace box beneath it, and will be highlighted.
• Begin typing to enter a new word in the Replace box. You may also use some of
our dialog commands to alter the text in the box.
• In the Replace Where box, press ALT + H to replace the text from the cursor
location to the end of the transcript. You may also press ALT + W to make the
replacement through the entire transcript, however you may not wish to let the
program make changes to pages you have already edited.
• If capitalization matters, press ALT + M to mark the Match Case box.
Replacement of text will be made only when the capitalization is an exact match
with the text in the Text box.
• Whole Words Only: This box is important when replacing short words!
Replacing “th” with “the” could change the spelling of all words that contain
“th,” turning the word “with” into “withe.” Press ALT + O to place a check
mark in front of this option.
• Make sure the “Confirm Replacement” box is checked. If this box is marked, a
confirmation window will appear at each occurrence of the text found in the
transcript. This lets you make sure that only the items that you wish to replace
4.31
Chapter 4
digitalCAT USER GUIDE
are replaced. Any occurrence of a word that is correct can be skipped. This
also prevents accidental incorrect replacements of words or letters.
FIND COMMANDS
Find: This command will open the Search for text dialog allowing you to begin
your search. If the Steno Window has focus, this command can also be used to
find Steno. This command is a shortcut for Edit->Search.
Standard Keys: CTRL + F
QuickKey: F
Find and Select: This command will open the Search for text dialog, just as the
Find command, but when a match has been found, it will be highlighted. This
command is a shortcut for Edit->Search and Select.
Find Next: This command will repeat the previous search. Use it to move the next
occurrence of the item for which you searched.
Standard Keys: F3
Find Next and Select: Just as with the Find Next command, the previous search
will be repeated. This command will find the next occurrence of the item you
searched for, but unlike the Find Next command, it will highlight the found item.
Find and Replace: This command will display the Find and Replace dialog. It
allows you to replace found text with new text. This command is a shortcut for
Edit->Replace.
Standard Keys: CTRL + R
QuickKeys: SHIFT + F
Find Next Punctuation: This command will place your cursor on the next
punctuation mark.
Find Previous: This command will repeat a Find or Search up the transcript. It
will tell the program to find the previous occurrence of the word you searched for.
Find Previous and Select: Just as the Find Previous command, this command will
find the previous occurrence of the word you searched for. This command will
4.32
EDITING
also highlight the occurrence once it is found.
Find Previous Punctuation: This command will place your cursor on the previous
punctuation mark.
GO TO COMMANDS
Go to Page/Line: Using this command will display the Go to Page/Line dialog.
This is a shortcut command for
Edit->Go to Page/Line.
Standard Keys: ALT + G
• Type the page number in the first box, then press the TAB key to move to the
next box.
• Enter the line number on that page of the transcript that you would like the
cursor to be placed.
• Press ENTER or click the OK button to move the cursor to that page and line
number.
Go to Time: If you would like to be taken to a specific time within a transcript,
use this command. The program will place your cursor at that time. This is a
shortcut for Edit->Go to Time.
Use the up or down arrow keys to change the time stamp, or enter the numbers
from the keyboard, pressing the right or left arrow keys to move past each colon
displayed in the box.
Press the RIGHT ARROW key to highlight the AM or PM. Type “A” to change it
to AM, or type “P” for PM.
Press ENTER or click the OK button to move the cursor to the designated time
stamp.
NUMBER COMMANDS
Toggle Arabic/Text Number: This command will toggle an Arabic number to its
written out version and back. For example, executing this command on the
number 12 would change it to the word twelve. Executing it again would change
4.33
Chapter 4
digitalCAT USER GUIDE
the word back into the number 12.
QuickKeys: N
Toggle Comma in Number: This command will insert or remove commas from a
number. For example, the zip code at Stenovations’ headquarters is 25301. If that
translated as 25,301, you could use this command to remove the comma. You can
also use this command to add commas in a number. The command will place the
commas in the correct locations.
Make Date: This command will format a set of numbers as a date. This command
can be used multiple times to make the correct date appear.
Example: 11999 appears in the transcript.
First time command is used (January 19, 1999):
1/19/99
Second time command is used (November 9, 1999):
11/9/99
Third time command is used (January of 1999):
1/1999
Fourth time command is used (Formatting removed): 1
1999
Standard Keys: ALT + / ?
Make Time: This command will format a set of numbers as a time value. For
example, using this command on 1,230 would transform the number into 12:30.
Standard Keys: ALT + ; :
SPELL CHECK
DigitalCAT has a number of commands that help to make spell checking your
document quick and easy. Please see Chapter 8 for more information on using the
spell check features efficiently.
Spell Check Here to End: Executing this command will check the spelling of the
transcript from the cursor position through the end of the document.
4.34
EDITING
Spell Check Transcript: Executing this command will check the spelling of the
transcript starting at the top of the document.
Spell Check Word: Executing this command will check the spelling of the word
the cursor is currently on. Unless the option is selected under Options->Spell
Checker, there will not be a message stating that the word is spelled correctly. If
the word is found to be correct, it will be highlighted. If it is found to be incorrect,
the spell check dialog will appear.
Standard Keys: F9
Batch Spell Check: Executing this command will run the Batch Spell Checker.
Please see Chapter 8 for more information on this feature.
View Batch Spell Check: Executing this command will display the Batch Spell
Check list without actually running the spell check. Please see Chapter 8 for more
information on this feature.
CUT, COPY AND PASTE COMMANDS
Copy: This command will copy selected text to the clipboard for pasting. Please
note that any previously copied text will be removed from the clipboard.
Standard Keys: CTRL + C
Cut: This command will cut selected text out of the current transcript. The text
will be placed on the clipboard. Please note that any previous text on the
clipboard will be removed.
Standard Keys: CTRL + X
Cut Line: This command will cut the line the cursor is on out of the current
transcript. This line will be placed on the clipboard. Please note that any previous
text on the clipboard will be removed.
Cut Paragraph: This command will cut the paragraph the cursor is on out of the
current transcript. This paragraph will be placed on the clipboard. Again, any
previous text on the clipboard will be removed.
Cut Word: This command will cut the word the cursor is in, regardless of whether
4.35
Chapter 4
digitalCAT USER GUIDE
or not that word is capitalized. This word will be placed on the clipboard. Any
previous text on the clipboard will be removed.
Paste: This command will paste, or insert, the text from the clipboard into the
current document. It also has the ability to paste formatting information.
Standard Keys: CTRL + V
Media Copy: Just as the Copy command mentioned above, this command will
place selected text on the clipboard. This command will also copy the steno and
audio link, allowing you to paste the steno and audio for the copied text into
another area or another transcript. This command should be used with the Media
Paste command.
Media Cut: Just as the Cut command mentioned above, this command will place
selected text on the clipboard and remove it from the current document. This
command will also cut the steno and audio link, allowing you to paste the steno
and audio for the copied text into another area or another transcript. This
command should be used with the Media Paste command.
Media Paste: Just as the Paste command mentioned above, this command will
paste, or insert, the text from the clipboard into the current document at the cursor
location. This command will also paste any steno or audio link that was also
placed on the clipboard. If you wish to cut or copy media, you must use the
Media Paste command to paste the media with the text.
TRANSPOSE WORDS
Transposing, or altering the order of words, can be accomplished automatically.
Transpose Words: This command will invert the order of the two words right after
the cursor. Capitalization changes will be made where appropriate.
Standard Keys: CTRL + O
QuickKeys: X
Example: “You have” becomes “Have you.”
4.36
EDITING
EDIT WORD
Edit Word is one of the most powerful commands included with digitalCAT. This
command allows you to quickly make many editing and typing changes. If you
use QuickKeys for editing, you can use the Edit Word feature to avoid going in
and out of QuickKeys mode to insert text!
Edit Word: Very similar to a single replace command, the Edit Word command
allows you to make changes to selected text. These changes will only be applied
to the text selected.
Standard Keys: CTRL + W
QuickKeys: R
To use Edit Word:
Place the cursor on the word that you wish to edit. If you wish to alter more than
one word, highlight the individual words.
Invoke the Edit Word command. The Edit Word dialog will appear.
OLD WORD:
This area shows how the text currently appears.
NEW WORD:
This area allows you to change how the text will appear.
Make your changes in the New Word section.
Press ENTER when finished to apply the changes. Press ESC to cancel and
discard any changes.
Edit Word is a very powerful feature. The full version of the digitalCAT manual
lists commands and functions of this dialog that make it an invaluable addition to
anyone’s editing commands.
4.37
Chapter 4
digitalCAT USER GUIDE
WORD ENDINGS
Word endings can be added,
changed or even deleted by using the
Add/Change Word Ending
command. If necessary, when a
change is made, the root word will be
modified to reflect proper spelling.
Add/Change Word Ending: Invoking
this command will show the Endings
dialog. From this dialog, you can
easily alter or add suffixes or endings
to a word.
Standard Keys: CTRL + E
QuickKey: E
Once the Endings dialog is displayed,
press the letter to the left of the suffix
or ending that you would like to add to the word. The suffix will be changed or
added.
Example:
To change the word “run” to “running”:
• Place the cursor on the word “run.”
• Invoke the Add/Change Word Ending command.
• When the dialog appears, press G for the -ing ending.
• The suffix -ing will be added to the end of the word.
Note that the letter N will be doubled to correctly spell the word “running.”
To add a new ending:
• With the Endings dialog open, press ALT + A or click the Add button. The
Add Ending dialog will open.
• Enter the Quick Selector you would like to use. This will be the letter you press
once the Endings dialog is open to add or remove this ending from a word.
• Press the TAB key to place the cursor in the Ending box.
• Enter the new ending here.
• Press ENTER when done. The new ending will be added to your list.
4.38
EDITING
To edit an ending:
• With the Endings dialog open, highlight the ending you
wish to edit.
• Press ALT + E or click the Edit button to display the
Edit Ending dialog.
• Make any changes necessary.
• Press ENTER when done to save your changes.
To remove an ending:
• With the Endings dialog open, highlight the ending you
wish to remove.
• Press ALT + D or click the Delete button to remove this
entry.
ALTERNATE WORDS
Alternate Words allow you to quickly correct common mistakes and change a
word or phrase to another word or phrase. For example, using the Toggle
Alternate Word command on the word “their” could transform it into the word
“there.”
Alternate Words is a powerful feature that can help to make editing much simpler.
Common mistakes can be corrected by a single key command rather than
extensive editing.
Add/Edit Alternate Words: This command will display the Manage Alternate
Words dialog. From this dialog, you can add or edit the list of Alternate Words.
Standard Keys: ALT + CTRL + X
Toggle Alternate Words: This command will toggle a word with the other words in
its Alternate Word list. If the word does not have an Alternate Word list, you will
4.39
Chapter 4
digitalCAT USER GUIDE
be prompted to create one.
Standard Keys: ALT + X
QuickKeys: W
To use the Alternate Word feature:
• Place the cursor on a word for which you would like to define an alternate
word.
• Press the Toggle Alternate Words command.
• If this word is not currently in your Alternate Words list, you will be prompted
to define an Alternate Word entry.
• If this word is in your Alternate Words list, it will be transformed into its
alternate word.
Note that a tilde ( ~ ) will instruct the program to delete a space when entered into
an Alternate Word entry.
4.40
EDITING
Examples:
To add to, too and two as Alternate Words:
• Press the Add/Edit Alternate Words command. You may also press ALT + E to
open the Edit menu. Then press L to display the Manage Alternate Words
dialog.
• Press ALT + A to add a new Alternate Word entry.
• Enter the word “to” in the first box.
• Press the TAB key to move the cursor to the next box. Enter the word “too”
into that box.
• Press the TAB key to move to the third box. Enter the word “two” into that
box.
• Press ENTER when finished. Then press ENTER again to close the Manage
Alternate Words dialog.
• Now when you use the Toggle Alternate Words command on the words to, too
or two, they will be changed into the next word!
Some reporters stack the final D with the word “to.” When that happens, it could
translate as the word today. So the sentence: “She wait today go,” should read:
“She waited to go.”
To add “~ed to” as an alternate word for today:
• Place the cursor on the word “today.”
• Press the Toggle Alternate Words command.
• If the word “today” is not in your Alternate Words list, you will be prompted to
create a new Alternate Words entry for it.
• The Alternate Words dialog will be displayed. The cursor will be in the second
box. Type “~ed to” in the second box.
• Press ENTER when finished.
• The word “today” should have changed to the word “to.” The -ed ending
should have also been added to the previous word. You can eliminate a number
of stacking and common writing errors by utilizing the Alternate Words
command!
4.41
Chapter 4
digitalCAT USER GUIDE
INSERT/OVERWRITE
Typing can be done in two manners. Insert mode will allow typed text to be
inserted into a transcript. Overwrite mode will cause typed text to overwrite
existing text. Depending upon the task you wish to perform, you may type text in
either of these modes.
Toggle Insert/Overwrite: This command will place you in the Overwrite mode if
you are currently in the Insert mode. If you are in the Overwrite mode, this
command will return you to the Insert mode. You can determine which mode you
are in by checking the bottom right corner of your screen. INS stands for Insert.
OVR stands for Overwrite.
Standard Keys: INSERT
STENO COMMANDS
Set Steno Font: This command will bring up the Steno Font dialog. Using this
dialog, you can control the size and vertical spacing in which the steno is
displayed.
Switch to Editor: This command will place cursor focus in the Editor window.
This is how most editing is done. When the Editor window has focus, your keys
will affect the English text within it.
Switch to Steno: This command will place cursor focus in the Steno window.
When this window has focus, your keys will affect the steno within it. Use your
ARROW KEYS to move up and down the steno pages.
Standard Keys: CTRL + G
QuickKeys: G
View Steno Toggle: This command will toggle the display of the Steno window.
If the Steno window is displayed, pressing this command will hide it. If it is
hidden, pressing this command will display it.
Find: The find command, when focus is in the Steno window, will search for
steno strokes instead of English.
KEY: CTRL + F
4.42
EDITING
Dictionary Query: When focus is in the Steno window, strokes may be highlighted
by pressing the SHIFT button with the UP and DOWN ARROW keys. Once a
stroke or set of strokes is selected, pressing the Q key on your keyboard will
display the Dictionary Query dialog. This dialog will tell you how the selected
steno is defined and in what dictionary it is defined. This is a very useful feature
when trying to determine where a bad or incorrect dictionary entry is hiding.
STENO:
This area shows the selected steno. This is the steno that is defined.
DICTIONARY NAME:
This area shows the name of the dictionary in which the steno is defined.
ENGLISH:
This area shows how the steno is currently defined.
FLAGS:
This area shows any flags that may be checked with the current entry.
REMOVE:
Pressing this button will remove this dictionary entry. This is useful if it is an
incorrect dictionary entry.
Press ALT + R to remove the entry.
4.43
Chapter 4
digitalCAT USER GUIDE
COPY TO:
Pressing this button will copy this entry to another dictionary.
Press ALT + C to copy this entry.
MOVE TO:
Pressing this button will move this entry to another dictionary. Please note that the
entry will be removed from its current dictionary and placed into another
dictionary.
Press ALT + M to move the current entry.
CLOSE:
Pressing this button will close the dialog.
Press ESC or ALT + L to close the dialog.
FORMATTING COMMANDS
Stenovations has implemented a number of commands into digitalCAT that help to
make formatting particular sections of a job easy.
Bold Text: This command will bold any selected text. Pressing this command
with bolded text highlighted will return the text to normal.
Italicize Text: This command will italicize any selected text. Pressing this
command with italicized text highlighted will return the text to normal.
Standard Keys: ` ~
QuickKeys: ` ~
Underline Text: This command will underline any selected text. Pressing this
command with underlined text highlighted will return the text to normal.
Standard Keys: CTRL + U
QuickKeys: U
Subscript Text: This command will make any selected text subscript. Pressing
this command with subscripted text highlighted will return the text to normal.
4.44
EDITING
Superscript Text: This command will make any selected text superscript.
Pressing this command with superscripted text highlighted will return the text to
normal.
Change Font: Executing this command will allow you to change the font of
selected text.
Insert Page Break: Pressing this command will insert a manual page break in your
text. Using this command will automatically cause the next line to begin as the first
line of the next page. An automatic page break appears in the transcript as a
dashed line. A manual page break appears as a solid line across the screen.
Standard Keys: CTRL + ENTER
Insert Hard Space: A hard space is a space between two items that should remain
together. For example, in the name Mr. Smith, the space between Mr. and Smith
would be a hard space. The name Smith should never wrap to the next line
without Mr. wrapping with it. By using this command, you can “glue” words
together so that they will always remain together, even at the end of a line.
Insert Special Character: Using this command will let you insert special characters
into your document. This is very useful when trying to write words of foreign
origin, such as resume. Accented letters can be easily added, making your
transcript appear more professional and appealing.
Standard Keys: CTRL + ` ~
BIRD CAGE FEATURE
DigitalCAT includes an automatic Bird Cage feature. This feature will put the
closing parentheses on your title page. These parentheses will be in perfect
alignment and will stay in alignment even if you change the text!
To insert a Bird Cage:
• Highlight the text that will be within the Bird Cage.
• Press ALT + E to open the Edit menu.
• Press the UP ARROW KEY to highlight Bird Cage.
• Press the ENTER key to display the sub-menu.
• Press ENTER again on Bracket Current Selection. The Bird Cage dialog will
appear.
4.45
Chapter 4
digitalCAT USER GUIDE
BRACKET POSITION:
The bracket position is the position of the parentheses on the page. Setting the
slide bar to the far left will position the parentheses at 50%, or half-way across the
paper. Positioning the slider at the far right will position them at 75%, or three
quarters across the page to the right.
RIGHT SIDE TEXT:
You would type your Case Number and any other information that needs to appear
to the right of the parentheses here. Any information typed in this area will appear
to the right of the Bird Cage.
EDITING AND REMOVING A BIRDCAGE
Place your cursor on any line within the Bird Cage to edit or remove the
parentheses.
To edit the Bird Cage:
• Make sure the cursor is within the cage.
• Press ALT + E to open the Edit menu.
• Press the UP ARROW to highlight Bird Cage.
• Press ENTER to display the sub-menu.
• Use the DOWN or UP ARROW KEYS to highlight Edit Selection. The Bird
Cage dialog will again appear. Make any changes that you deem necessary.
• Press ENTER when finished.
4.46
EDITING
To remove the Bird Cage:
• Make sure the cursor is within the cage.
• Press ALT + E to open the Edit menu.
• Press the UP ARROW to highlight Bird Cage.
• Press ENTER to display the sub-menu.
• Use the DOWN or UP ARROW KEYS to highlight Unbracket Selection. The
parentheses will be removed.
HEADERS AND FOOTERS
Header New: This command will add a new header to your document. You can
use this command when changing witnesses or speakers to change how the header
appears on the page. A transcript may have multiple headers in a document.
Please see Chapter 7 for more information on adding a header to your document.
Header Edit: This command will let you edit the current header. Please note that
editing a header will change that header on each page that it appears. If you wish
to change a header from a specific point in the transcript on, please insert a new
header.
Header Delete: This command will delete the current header. Please note that this
will remove the header from any page on which it currently appears.
Footer Edit: Using this command will allow you to edit the footer on this
transcript. A transcript is currently limited to one footer. The footer text can be
saved into a template to prevent future changes from being necessary.
AUTOMATIC APPEARANCES
The names of attorneys and information such as their address and phone number
can be saved in a database within digitalCAT. This information can then be
retrieved and inserted into a transcript quickly and easily.
Press the Insert Appearance command to display the Firms dialog. You can also
display this dialog by pressing ALT + E to open the Edit menu. Then press A for
Appearances. The Firms dialog will appear.
4.47
Chapter 4
digitalCAT USER GUIDE
Insert Appearance: Invoking this command will display the Firms dialog, allowing
you to easily insert an appearance of an attorney in your database.
Standard Keys: ALT + CTRL + A
FIRMS
The “Firms” section of the dialog lists the firm names in your database. Attorneys
can be added under the firms that they work for.
To add a new firm, press ALT + A.
To edit the information for an existing firm entry, highlight the firm name and press
ALT + E.
4.48
EDITING
To remove a firm from your database, highlight the firm name and press ALT + R.
In the Add Firm or Edit Firm dialog, you can enter the name of the firm, the
location of the firm (if perhaps they have a location in one city and a branch in
another), the address and phone number.
ATTORNEYS
To make adjustments to the attorneys that work for a specific firm, highlight the
correct name in the Firms box. A list of attorneys entered under that firm will be
displayed in the Attorneys box. Press ALT + Y to move the cursor to the
Attorneys box.
To add a new attorney, press ALT + D.
To edit the information for an existing attorney, highlight the correct name and
press ALT + T.
To remove an attorney from this firm listing, highlight the correct name and press
ALT + M.
4.49
Chapter 4
digitalCAT USER GUIDE
INSERT ATTORNEY NAMES FIRST:
Checking this box will display the attorney name before the firm name when the
appearance is inserted. If this box is unchecked, the firm name will be displayed
first.
INSERT INTO TRANSCRIPT:
Clicking this button, or pressing the ENTER key, will insert the highlighted
attorney into the transcript.
To insert an appearance:
• Press the Insert Appearance command, or press ALT + E to open the Edit
menu. Then press A to open the Firms dialog.
• Select the firm for which the attorney works.
• Press TAB or ALT + Y to move the cursor to the list of attorneys. Use the
ARROW KEYS to highlight the attorney you wish to insert.
• Press ENTER once the correct name has been highlighted.
AUTOMATIC INDEXING
digitalCAT can automatically generate and insert indexes for the examination of
witnesses, identification and admitting of exhibits, and the location of objections.
During the editing process, “flag” the witnesses, exhibits or objections to be
included in the indexes as you move through the transcript.
FLAGGING A WITNESS
To flag a witness:
• Go to the area of the transcript where the witness is sworn in.
• Highlight the witness name.
• Invoke the Witness New command or press ALT + I to open the Index menu.
Then press ENTER on Witness. Press ENTER again on New. The Enter New
Witness dialog will appear with the highlighted name already typed in.
• Press ENTER to accept the witness name. An asterisk will appear before the
line number at the left of the screen. When you see this asterisk, you know that
the witness is flagged.
• Repeat this process for any other witnesses that may appear in your transcript.
4.50
EDITING
FLAGGING AN EXHIBIT
To flag an exhibit as marked:
• Place the cursor on the line where the exhibit was marked.
• Invoke the Exhibit New command or press ALT + I to open the Index menu.
Press H for Exhibit. Press ENTER on New. The Insert Exhibit dialog will
appear.
NAME:
This area holds the name of the group to which this exhibit belongs. This may be
“Plaintiff’s Exhibits” or “Defendant’s Exhibits.”
Place ALT + N to place the cursor in this box.
NUMBER:
This area determines the exhibit number. For example, if this is exhibit four, then
this item should show the number four.
Press ALT + U to place the cursor in this box.
4.51
Chapter 4
digitalCAT USER GUIDE
MARKED:
Select this item to flag where an exhibit has been marked.
Press ALT + M to select this item.
ADMITTED:
Select this item to flag where an exhibit has been admitted. If an exhibit has been
marked, then admitted on another page, you will need to create a NEW exhibit.
Do not edit the existing exhibit.
Press ALT + A to mark this item.
MARKED AND ADMITTED:
Select this item to flag where an exhibit is both marked and admitted.
Press ALT + R to mark this item.
DESCRIPTION:
This area will hold the description of the exhibit. This description will appear in
the index. For example, you may enter the word “Photograph” to denote that
exhibit 5 was a photograph.
Press ALT + D to place the cursor in this box.
FLAGGING AN OBJECTION
To flag an objection:
• Place your cursor in the colloquy paragraph that contains the objection.
• Press the Objection New command or press ALT + I to open the Index menu.
Press O for Objection. Press ENTER on New.
• The asterisk should appear to the left of the line number. When it does, the
objection has been marked.
4.52
EDITING
INSERTING THE INDEXES
EXAMINATION INDEX
• Place the cursor at the location where the index should be inserted.
• Invoke the Insert Examination Index command or pressALT + I to open the
Index menu. Press X to insert the Examination Index.
• The Examination Index should be inserted.
EXHIBIT INDEX
• Place the cursor at the location where the index should be inserted.
• Invoke the Insert Exhibit Index command or press ALT + I to open the Index
menu. Press E to insert the Exhibit Index.
• The Exhibit Index should now be inserted.
OBJECTION INDEX
• Place the cursor at the location where the index should be inserted.
• Invoke the Insert Objection Index command or press ALT + I to open the Index
menu. Press B to insert the Objection Index.
• The Objection Index should now be inserted.
AUTOMATIC PAGE BREAKS AFTER INDEXES
DigitalCAT can automatically insert page breaks after indexes have been inserted.
Press ALT + I to open the Index menu.
Press P to mark “New Page after Examination Index.”
Press N to mark “New Page after Exhibit Index.”
USING LEADERS IN THE INDEX
Leaders (. . .) may or may not be inserted in an index.
To check the current status of the leader feature:
• Press ALT + I to open the Index menu.
• If there is a check mark before “Use Leaders in Indexes,” then the leaders will
4.53
Chapter 4
digitalCAT USER GUIDE
print in the index.
• To not use leaders, press L to remove the check mark.
UPDATING INDEXES
If more editing is done after an index has been inserted, you may update the
indexes to automatically adjust the page numbers. You may do this by invoking
the Index Update command. You can also press ALT + I to open the Index menu.
Then press U for Update Indexes.
Exhibit New: This command will display the Exhibit dialog allowing you to mark a
new exhibit.
Standard Keys: ALT + CTRL + E
Exhibit Edit: This command will display the Exhibit dialog allowing you to edit a
marked exhibit.
Standard Keys: CTRL + SHIFT + E
Exhibit Delete: This command will remove a marked exhibit.
Witness New: This command will allow you to mark a new witness.
Witness Edit: This command will allow you to edit the name of a marked witness.
Witness Delete: This command will delete a marked witness.
Objection New: This command will mark a new objection.
Objection Delete: This command will delete a marked objection.
Insert Examination Index: Invoking this command will attempt to insert an
Examination Index at the location of the cursor.
Insert Exhibit Index: Invoking this command will attempt to insert an Exhibit Index
at the location of the cursor.
4.54
EDITING
Insert Objection Index: Invoking this command will attempt to insert an Objection
Index at the location of the cursor.
Index Update: This command will update the page numbers included in an index.
This command is useful if further editing or insertion of indexes may have altered
the page numbers.
PRINT COMMANDS
Preview Transcript: Using this command will display the Print Preview of the
transcript. This command will show you the transcript exactly as it should print.
This is a shortcut for the Print Preview->Transcript item under the File menu.
Standard Keys: ALT + F1
Print: This command will send the transcript to the printer. This is a shortcut for
the Print->Transcript item under the File menu.
Print Current Page: This command will send only the page the cursor is on to the
printer. This command is useful when setting up or altering your formatting
information. You can see how the formatting will look by printing a single page.
This is a shortcut for the
Print->Current Page item under the File menu.
Standard Keys: ALT + F2
Print Setup: This command will display the Print Setup dialog. From this dialog,
you can select the printer you wish to use as well as some of your printing options.
This is a shortcut key for the Print Setup item under the File menu.
FILES
SPLITTING AND APPENDING FILES
digitalCAT allows you to split a file into two files. It also allows you to merge, or
append, two files together. You may need to split a file into multiple volumes, or
you may need to split a second witness into his own file. You may also need to
append two files together at some point.
4.55
Chapter 4
digitalCAT USER GUIDE
To split a file:
• Place the cursor at the location where the files should be split. Everything to the
left and above the cursor will be placed in the first file. Everything to the right
and below the cursor will be placed in the second file.
• With the cursor in the correct location, use the Split File command or press
ALT + F to open the File menu. Then press T for Split.
• A dialog will ask you to save the first portion of the file. Choose a name for the
first part of the file and press ENTER or click the Save button.
Another dialog will ask you to save the last portion of the file. The name you gave
the first file will still be typed in. If you simply wish to add “Vol. II” or something
similar to the end, press the RIGHT ARROW KEY and type your addition. If you
wish to completely rename the file, begin typing to overwrite the highlighted name
with your typed text. Press ENTER or click the Save button when finished.
4.56
EDITING
To append a file:
• Make sure that the first file is currently open!
• Press the Append File command or press ALT + F to open the File menu.
Then press the letter D for Append.
• An Open dialog will appear. Press SHIFT + TAB to place focus in the list of
files.
• Use the ARROW KEYS to highlight the file that you wish to append.
• Once the correct file is highlighted, press ENTER or click the Open button.
Regardless of cursor position, the file will be appended to the end of the first
document.
FILE COMMANDS
Append File: This command allows you to append another file to the end of the
current file. Executing this command will display an Open dialog. You may select
the file that you wish to append from this dialog. This command is a shortcut for
the Append item under the File menu.
Split File: This command allows you to split a file into two files. You may do this
to separate different witnesses from a file or to separate a file into multiple
volumes. Executing this command will display two Save As dialogs. Type the
name for the first portion of the file in the first dialog and press ENTER. Now
type the name for the second portion into the new Save As dialog and press
ENTER. Please note that you now have three files: the original complete file, the
first portion file and the second portion file. This command is a shortcut for the
Split item under the File menu.
Copy From Floppy: This command will restore an archived transcript from a
floppy disk. This command is the same as the Copy from Floppy item under the
File menu.
Copy To Floppy: This command will archive the currently open transcript to a
floppy disk. This command is the same as the Copy to Floppy item under the File
menu.
Insert Include File: Executing this command will allow you to easily insert an
include file while editing. This command will display an Open dialog. Select the
4.57
Chapter 4
digitalCAT USER GUIDE
include file that you wish to insert from this dialog and press ENTER. This
command is a shortcut for the Insert Include File item under the Edit menu.
Standard Keys: ALT + CTRL + I
New File: Executing this command will close the currently open transcript, if there
is a transcript open. A new, untitled transcript will be displayed. If you are
currently translating in realtime, you will be prompted to save this new realtime file.
This is a shortcut command for the New item under the File menu.
Open File: Executing this command will close the currently open transcript, if
there is a transcript open. An Open dialog will prompt you to select the transcript
that you would like to open. Highlight the file that you wish to open and press
ENTER. The file will be displayed. This is a shortcut command for the Open
item under the File menu.
Standard Keys: ALT + O
Save File: This command will save any changes that you may have made to the
open transcript. This is a shortcut command for the Save item under the File
menu.
Standard Keys: ALT + S
Save File As: This command will allow you to save the currently open transcript
under a new name or file type. Pressing this command will display a Save As
dialog. Simply type in the new name of the transcript and press ENTER. This is a
shortcut command for the
Save As->Transcript item under the File menu.
Save Page Image: This command will save the currently open transcript under the
Page Image ASCII format. This is a shortcut command for the
Save As->ASCII->Page Image item under the File menu.
Windows Explorer: This command will display the Windows Explorer screen.
This is the file management screen. Please see Chapter 9 for more information on
file management. This is a shortcut command for the Windows Explorer item
under the Tools menu.
Standard Keys: ALT + CTRL + W
4.58
EDITING
SPECIAL COMMANDS
Word Count: This command will display the number of words in the document.
Definition: If you have Microsoft Encarta or Bookshelf installed and linked to
digitalCAT, pressing this command will show you the definition of the word the
cursor is currently on. Please see General Options in Chapter 2 for more
information on linking Encarta or Bookshelf to digitalCAT.
Standard Keys: SHIFT + F9
Stedman’s Medical Definition: If you have Stedman’s Medical dictionary installed
on your computer, pressing this command will show you the medical definition for
a word the cursor is on.
TRANSLATING COMMANDS
Translator Commands: This command will display the Command Editor. You can
use the Command Editor to setup and alter your realtime commands. Please see
Chapter 5 for more information on the Command Editor.
Translator Dictionaries: This command will display the Dictionary Setup dialog.
From this dialog, you can add or remove dictionaries and set your artificial
intelligence preferences. Please see Chapter 6 for more information on this dialog.
Standard Keys: ALT + CTRL + D
Translator Set Font: If translation is being done in the buffer, you can use this
command to set the font of the text within the buffer. The larger the font, the less
information the buffer can hold. With a larger font, the buffer would more quickly
“dump” the translations into the transcript.
Translator Start/Stop: Pressing this command will start and stop translation. If
Translation has not been started, this command will start it. If you are currently
translating, pressing this command will stop translation. By using this command,
you can easily begin translation as soon as Transcript Editor is open. If the
program loads with your computer, you can press this command to immediately
begin writing.
Standard Keys: ALT + CTRL + S
4.59
Chapter 4
digitalCAT USER GUIDE
New Session: This command will invoke the New Session item under the File
menu. This item lets you choose your Steno Source, Dictionary Setup, and
template for the job. You may use this command if you find yourself constantly
changing steno sources or dictionaries. If you work for multiple firms and have a
number of templates, you can also use the New Session feature to apply the
appropriate template before you ever start translation.
CIC COMMANDS
CIC Setup: This command will display the CIC Setup dialog. From this dialog,
you can set your CIC Transmit port, transmission speed, etc.
CIC Start/Stop: Using this command will connect to a realtime receive software.
Please use the menu command under Tools->CIC to Start or Stop your CIC
session! Simply press ALT + L to open the Tools menu. Then press the I key for
CIC. Finally, press ENTER to Start or Stop your session.
CIC Transmit Start/Stop: This command will begin or end transmission of
translations to a realtime receive software. Please use the menu command under
Tools->CIC to Start or Stop your CIC session! Simply press ALT + L to open
the Tools menu. Then press the I key for CIC. Finally, press ENTER to Start or
Stop your session.
MACROS
Macros are combinations of commands executed at once. They can be very
powerful features. If you notice that you are constantly using the same series of
commands, you may wish to combine those commands in a macro. That way,
you can execute the same series of commands with only one keystroke!
Macros and how to create them are explained completely in the full version of the
digitalCAT manual.
4.60
noTEs
EDITING
4.61
Chapter 4
4.62
digitalCAT USER GUIDE
CHAPTER 5
FinisHing
A job
Putting on the final touches
Chapter 5
digitalCAT USER GUIDE
FINISHING A JOB
You have finished editing your job, and now you are ready to put on the final
touches. This chapter will help you insert your include files, like your cover pages
and certificate pages. It will also show you the different ways to run a spell check
and save as ASCII, RTF, or Microsoft Word documents.
INCLUDE FILES
Include files contain text and fomatting information. Examples would include
cover pages and certificate pages. Once an include file has been created, it can be
inserted into a transcript while writing or while editing.
As can all Windows files, includes can be saved with descriptive names up to 255
characters long.
CREATING AN INCLUDE FILE
To create an include file:
• Create a new transcript file. You can do this by selecting New from the file
menu. Press ALT + F to open the File menu. Then press ENTER for New.
• Type the text to be included in the file exactly as you want it to appear when
included.
• If you need to center or single space text:
Highlight the text that you are going to change if it is multiple lines. Press ALT +
M to open the Format menu. Press P for Paragraph. Then press ENTER for
Change Current Style. Select the correct style from the list. For example, you
could select Center or Single Spaced to apply the appropriate formatting. SS
Center will make text single spaced and centered.
• Don’t forget to use Stoppers! The Find Next Untranslate command will stop at
any text enclosed by square brackets. [ ] Text within these brackets is called a
stopper. Stoppers can be used around text such as [Defendant | Defendants]
and [DATE]. Stoppers can be easily replaced or filled in after an include is
inserted into a transcript.
5.2
FINISHING A JOB
STOPPERS
Place square brackets [ ] where text will
need to be added or altered. The Find
Next Untranslate command can find these
stoppers. This will allow you to easily
type in the text that needs to be added.
If the text will appear in other locations,
such as [DATE], you can use the Search
and Replace command to replace the
stopper with the correct text.
Place a “pipe” (SHIFT + BACKSLASH is a pipe ‘|’) between two or more words
within a stopper, such as [Plaintiff|Plaintiffs]. When the cursor is at the beginning
of the stopper, or conflict, press the number one on your keyboard to select the
first word, the number two for the second word, and so on. Up to four words
can be easily selected from the keyboard.
To save an include file:
• Highlight the portion of text that you wish to save as an include file. If you
would like to save all text as an include file, you do not need to highlight
anything.
• Press ALT + F to open the File menu.
• Press A for Save As.
• Press I for Include file. The Save As dialog will appear.
5.3
Chapter 5
digitalCAT USER GUIDE
• Type a descriptive name for the include file, such as Cover or Title.
• Press ENTER or click the Save button to save this include.
INSERTING AN INCLUDE FILE
Include files can be inserted while editing or when writing a document. The
following section will explain how to insert an include while editing. To learn how
to insert includes while writing, please see the Include File token in the Dictionary
Entry chapter.
To insert an include file:
• Position your cursor where you would like to insert the include file.
• Press ALT + E to open the Edit menu. (Please note that if ALT + E is defined
as a keyboard command, you may need to press and release the ALT key then
press the letter E.)
• Once the Edit menu is open, press the letter I for Insert Include File.
• An Open dialog will prompt you to select the include file you wish to insert.
• Press SHIFT + TAB to place focus on the list of include files.
• Use the arrow keys to highlight the include file you wish to insert.
• Press ENTER or click the Open button to insert the include file.
• The include file should now appear on the screen at the location of the cursor.
5.4
FINISHING A JOB
SPELL CHECK
Spell checking a file is a simple operation that can be accomplished in a number of
ways. You can spell check a single word, the entire document or only part of the
document.
SPELL CHECK DIALOG
When the spell checker finds something that it thinks may be an error, it will report
its findings to you in the spell checker dialog. This dialog allows you to skip the
word, ignore it, or replace it with another spelling.
MOVING THE DIALOG
Sometimes the spell check dialog will cover what it is asking you to check.
If this happens:
• Click the top blue bar of the spell check dialog where it says “Correct Spelling.”
• Keep the mouse button held down and drag the mouse in a direction away from
the word you want to see. You will notice that the dialog follows your mouse.
This is called “dragging” the dialog.
• When the dialog is at the desired location, release the mouse button.
5.5
Chapter 5
digitalCAT USER GUIDE
CURRENT SPELLING:
This box shows how the word currently appears in the transcript.
SUGGESTIONS:
A list of possible replacement spellings appears in this box. If you would like to
use one of these suggestions, you can simply press the number to the left of the
item. If you would like to pick one of the suggestions that does not have a number
beside of it, make sure that the item you wish to use is highlighted and press
ENTER or click the Replace button.
REPLACEMENT SPELLING:
This box will show what the word will look like if it is replaced.
SKIP:
The skip button will skip only this occurrence of a spelling.
REPLACE:
This button will tell the program to replace the misspelled word with the word that
appears in the “Replacement Spelling” box.
5.6
FINISHING A JOB
REPLACE ALL:
This button will tell the program to replace every occurrence of this misspelling
with the word that appears in the “Replacement Spelling” box. This will replace
only occurences within this transcript.
IGNORE:
Ignore will tell the spell checker to skip all occurrences of this word throughout
this transcript only.
ADD
This button will add this spelling into your lexicon list. This means that the spell
checker will consider this spelling to be correct throughout this transcript as well
as all future transcripts.
LEXICONS:
This button will bring up the Lexicons dialog. This dialog is explained in the full
version of the digitalCAT manual.
REMEMBER POSITION:
If you see something that you need to change, you may “pause” the spell checker.
Click this box to place a check mark in it, then click the Quit button. The
Remember Position box tells the software to remember where the spell checker left
off. That way, you can make your editing changes, and when you restart the spell
checker, it will start at the point it left off instead of going back to the beginning of
the transcript.
CAT-TIP
It is important to press the Quit button immediately after marking the
Remember Position box for this feature to work properly.
QUIT:
Quit stops the spell checker and closes the spell check dialog.
5.7
Chapter 5
digitalCAT USER GUIDE
SPELL CHECK A SINGLE WORD
To spell check a single word, you can use the “Spell Check Word” command. To
invoke this command, place your cursor on the word you would like to check. If
you are using digitalCAT’s default keyboard setup, you can then press F9 to spell
check the word.
You can also spell check a single word from the Tools menu:
• Press ALT + L to open the Tools menu.
• Press ENTER to select Spell Checker.
• Press W for Check Word.
• If the word was found to be incorrect, the spell check suggestion box will
appear. If the word is typed correctly, then it will be highlighted to show you
that the spell check is finished.
Should you wish to see a message confirming the completion of the spell check
along with the highlight, go to the Options menu and select “Spell Checker.” Place
a check in the box for “Confirmation message on Completion.” This will enable a
message informing you when the spell check is complete. It will also confirm that
a word is correct after spell checking a single word.
SPELL CHECK THE DOCUMENT
You may also run a spell check on the entire document.
To spell check the entire document:
• Press ALT + L to open the Tools menu.
• Press ENTER for Spell Checker.
• Press ENTER again for Check Transcript.
• The spell checker will begin from the beginning of the document.
SPELL CHECK HERE TO END
You can also spell check the transcript from a certain point through the end of the
document. This allows you to quickly bypass certain areas, such as include files,
or to spell check a recently appended or added portion of the transcript.
5.8
FINISHING A JOB
To spell check a portion of the document:
• Place your cursor where you would like to begin checking.
• Press ALT + L to open the Tools menu.
• Press ENTER for Spell Checker.
• Press “H” for “Check Here to End.”
• The spell check will begin from the location of the cursor.
BATCH SPELL CHECK
The batch spell check is an advanced feature of digitalCAT that can save you a lot
of time spell checking a file. This feature goes through the file and populates a list
of all errors it finds. Once the list is displayed, you can go straight to the errors
you need to change, ignoring the proper names, medical terms, and any other items
that are not really errors and do not need to be altered. Because you are skipping
common types of errors that would normally slow you down, you will save time
when spell checking.
To run a batch spell check:
• Press ALT + L to open the Tools menu.
• Press ENTER for Spell Checker.
• Press B to run the Batch Spell check.
Once the Batch Spell check has been done, you may
bring the box up again without re-running the spell check.
To view the batch spell check:
• Press ALT + L to open the Tools menu.
• Press ENTER for Spell Checker.
• Press V to view the batch list.
5.9
Chapter 5
digitalCAT USER GUIDE
BATCH SPELL CHECK DIALOG
The batch spell check will display the Spelling Errors
dialog to show you the errors it has found.
WORD:
This column shows how the word(s) currently appear
within the transcript.
CUR:
This column shows the current number of the item you
are working on. For example, if an incorrect spelling
appears three times throughout the transcript, and you
are checking the second appearance, this number
would indicate two.
TOT:
This column shows the total number of occurrences of
this error. For example, if an error appears three times
throughout a transcript, this column would indicate a
three.
PREVIOUS:
This button will take you to the previous error found. This would either be the
error above the current error in the list or the previous occurrence of the current
error.
NEXT:
This button will take to you the next error found. This would either be the next
occurrence of the current error or the next error down the list.
SUGGEST:
This button displays the normal spell check dialog. It allows you to correct the
error by offering suggestions or allowing you to type in your own correction.
5.10
FINISHING A JOB
ADD:
The Add button tells the program to add this word to the spell checker lexicons.
This means that the error is added to the list of correct words and will not be
displayed as an error again.
CLOSE:
The Close button closes the Spelling Errors dialog.
With the cursor in the column listing of the dialog, you can use your arrow keys to
quickly highlight any error that you need to correct. Because you can simply press
the arrow key again to skip words that you know are correct, they do not take up
your time during a spell check. The batch check, therefore, can save you time
during the final stages of your transcript.
PRINTING A TRANSCRIPT
PRINT SETUP
Print setup allows you to select the printer and paper you wish to use.
To use Print Setup:
• Press ALT + F to open the File menu.
5.11
Chapter 5
digitalCAT USER GUIDE
• Press R for Print Setup. The Print Setup dialog will appear.
• Click the down arrow to the far right of the Name box. All the printers that have
been installed on your system will be displayed. Select the one that you would
like to use. If you wish to use a network printer that does not appear in the list,
press the Network button.
• Verify that the correct paper size appears in the Size box.
• Make sure the proper orientation is selected. Portrait is the normal orientation
of transcripts.
• Press ENTER to accept the settings and close the window.
PRINT PREVIEW
Print Preview shows the information that will be sent to the printer on your screen.
This preview can be used to make sure you have the correct printer settings. It
can also show you what your transcript will look like before it is printed out.
When you request a preview, the preview menu appears at the top of the screen.
PRINT:
This button will send your document, as it appears on your screen, to the printer.
Press P to send the document to the printer.
NEXT PAGE:
This button will scroll the preview to the next page of the document.
Press N to go to the next page.
PREV PAGE:
The Prev Page button will scroll the preview to the previous page of the document.
Press V to go to the previous page.
ZOOM IN:
This button will zoom in to, or magnify, the document.
Press I to zoom in.
5.12
FINISHING A JOB
ZOOM OUT:
This button will zoom out, or decrease magnification, of the document.
Press O to zoom out.
CLOSE:
This button will close the Print Preview screen and return you to your normal
document view.
Press C to close the Print Preview window.
FORMATTING IN PRINT PREVIEW
Formatting information can be easily adjusted in the Print Preview display. Doing
this allows you to see your formatting changes before you print them out. Please
see the Formatting chapter for specific instructions on using these features.
PRINT AND PRINT PREVIEW MENUS
There is basically only one difference between the Print and Print Preview menus
listed under the File menu. The Print menu will send the document information
straight to the printer. The Print Preview menu will display that same information
directly to the screen.
To open the Print menu:
• Press ALT + F to open the File menu.
• Press P for Print.
• Press the letter that corresponds to what you would like to print.
5.13
Chapter 5
digitalCAT USER GUIDE
To open the Print Preview menu:
• Press ALT + F to open the File menu.
• Press V for Print Preview.
• Press the letter that corresponds to what you would like to print.
PRINT OR PREVIEW TRANSCRIPT
This selection will send the entire transcript to the printer or to be previewed. If
you are previewing the transcript, the preview will begin at the page the cursor is
currently located.
With the menu open, press the letter T to print or preview the entire transcript.
You can easily print the current transcript from the menu bar by clicking the button
that looks like a printer.
You can also easily preview the current transcript from the toolbar by clicking the
Preview Transcript icon.
PRINT CURRENT PAGE
This selection only exists under the Print menu. This selection will send only the
page the cursor is on to the printer. This will allow you to see how formatting
information, such as borders and margins, will appear. By only printing a single
page, you can also print a corrected page without wasting a lot of paper or ink on
a full transcript.
5.14
FINISHING A JOB
With the Print menu open, press the letter C to send only the current page.
PRINT OR PREVIEW CAPITALIZED TRANSCRIPT
This selection will print or display a version of the transcript in all capital letters,
even if the transcript doesn’t appear in all capital letters.
Press the letter A to print or preview a capitalized version of the transcript.
PRINT OR PREVIEW A REDUCED TRANSCRIPT
A reduced transcript is sometimes referred to as a mini-transcript or a condensed
transcript. It is a transcript printed as four small pages on one page.
To print or preview a reduced transcript, press the letter R. The Reduced dialog
will appear. We suggest that you preview the reduced transcript before printing it
for the first time to make certain all of your settings are correct.
5.15
Chapter 5
digitalCAT USER GUIDE
TRANSCRIPT FONT:
This setting allows you to set which reduced print font you wish to use. Some
fonts are larger than others, and may cause the reduced print to become
misaligned. Please preview the reduced transcript before printing.
Some fonts are listed multiple times with numbers following them. The number is
the size, or pitch, of the font. The larger the number, the larger the size.
MARGINS:
Margins are the distances from the edges of the page to the actual document.
These values control the position of the document on your paper.
GUTTER:
The gutter is the amount of space to allow for binding or hole-punches. The gutter
should be used to measure this instead of the left margin for duplex printing
purposes. The gutter can be set to the side of the page if the binding or holes will
be on the side. It can also be set to the top of the page if the binding or holes will
be at the top.
PRINT TRANSCRIPT HEADERS ON REDUCED PAGES:
This setting will tell the program to show the headers that appear on each page at
the top of each page in the reduced document. This can be used if you use
multiple headers in a document, say to denote different witnesses or different
examinations.
HEADER:
The top and bottom boxes are used to position the header on the page. The
Centered box, when checked, will tell the program to display the reduced header
centered on the page.
The font button allows you choose in which the font the header should appear.
The Edit Header button allows you to type in the text of the reduced header.
5.16
FINISHING A JOB
FOOTER:
The top and bottom boxes are used to position the footer on the page. The
Centered box, when checked, will tell the program to display the reduced footer
centered on the page.
The font button allows you choose in which font the footer should appear.
The Edit Footer button allows you to type in the text of the reduced footer.
PRINT ACROSS:
This setting will tell the program to print the pages consecutively across the paper.
In other words, page number one would be in the upper left corner of the paper.
Page two would be directly to the right of it in the upper right corner.
PRINT DOWN:
This setting will tell the program to print the pages consecutively down the paper.
In other words, page number one would still be in the upper left corner of the
paper, but page two would now be directly below it in the bottom left corner.
When done setting your reduced options, press ENTER or click the OK button to
preview or print the reduced document. Once the reduced options have been set,
they will remain set until you again alter them.
Because the software gives you the freedom to move your header and
footer, it is possible to move them BEHIND the reduced document.
If your header and/or footer do not appear on your reduced
document, it may be hidden behind the text. Adjust the position until
it becomes visible.
PRINT OR PREVIEW A LANDSCAPE REDUCED TRANSCRIPT
This feature will print two reduced pages of transcript sideways across a standard
sheet of paper.
With the menu open, press the letter L to print or preview a landscape reduced
transcript. The Landscape Reduced dialog will appear.
5.17
Chapter 5
digitalCAT USER GUIDE
This dialog allows you to control how the landscape reduced transcript will
appear. As this dialog is very similar to the previous, please refer to the previous
comments for a full explanation of each item on this dialog.
PRINT OR PREVIEW A NOTESCRIPT TRANSCRIPT
A NoteScript version of the transcript resembles the reduced, or four-to-a-page,
version. It, however, only has two reduced pages per page. The rest of the space
is taken up by lines used for writing notes.
With the Print or Print Preview menu open, press the letter N to display the
EcoNote dialog.
PRINT OR PREVIEW A WORD INDEX
Transcript Editor can automatically create a word index for you. With the Print or
Print Preview menu open, press the letter I for Index. The Create Index dialog will
appear.
PRINT WORDS USING:
This setting controls how words appear in the word index. The options are
Lowercase, Uppercase, and First Occurrence.
Lowercase: This option will print all words in lowercase letters.
5.18
FINISHING A JOB
Uppercase: This option will print all words in uppercase letters.
First Occurrence: This setting will print the words as they first appear. This
setting is useful for names, as they will appear capitalized in both the transcript
and the index. This setting, however, will cause words that make their first
appearance at the beginning of a sentence to also be capitalized in the index.
COLUMNS:
This setting controls how many columns of words appear on each page. The
higher this number, usually the more words that appear on the page. This is very
useful in large transcripts as it cuts down on the amount of pages the index takes
up.
WORD FONT:
This setting controls the font for the words listed in the index.
POSITION FONT:
This setting controls the font for the locations where the words can be found.
PAGE NUMBERS:
This button allows you to control the position and appearance of page numbers on
the index pages.
MARGINS:
The margin values control how much space exists between the edges of the page
and the actual document.
GUTTER:
The gutter controls the variable amount of space allowed on pages for binding or
hole-punching. This value can be set to the side if binding will be done on the
side. It can also be set to the top of the document if the document
will be bound or hole-punched at the top of the page, say if it were printed
landscape.
EXCLUDE WORDS:
Pressing this button will bring up the Excluded Words dialog. You may add or
remove words to be left out of the index using this dialog. Use the Add button to
5.19
Chapter 5
digitalCAT USER GUIDE
add a new word to exclude. Use the Delete button to remove the highlighted
exclude word.
EXCLUDE PAGES:
This box tells the program to not include certain pages in the index. This can be
used to tell the program to ignore your include files. Simply enter the pages that
you would like to have excluded in this box. Ranges of pages can be entered with
a hyphen. Separate pages must be entered with a comma separating them. For
example, entering 1-3, 5, 14-16 will tell the program to ignore pages 1 through 3,
page 5 and pages 14 through 16.
EXCLUDE NUMBERS:
If this box is checked, then numbers will not be listed in the word index.
PRINT STENO
This feature only exists in the Print menu. It allows you to print the steno notes
from a file. This feature can also be used to print the notes even if they come from
a paperless machine!
With the Print menu open, press the letter S for steno. The Print Steno dialog will
appear.
5.20
FINISHING A JOB
PAGE MARGINS:
The margins are the
distances from the
edges of the page to
the area where the
steno will actually
print.
PRINT PAGE
NUMBERS:
This setting, when
checked, will print
page numbers at the
bottom of each page
of steno notes.
PRINT HEADER:
This setting, when checked, will print the transcript header associated with the
page from which the steno is pulled.
PRINT FOOTER:
This setting, when checked, will print the transcript footer associated with the page
from which the steno is pulled.
COLUMNS PER PAGE:
This setting controls the number of columns of steno notes that will be printed on
each page.
PRINT RANGE:
You can either print all of your steno notes or just a specific portion. To print a
specific portion, select “Strokes,” and enter the beginning and ending strokes that
you would like to print.
EXPORTING TO ASCII
Transcript Editor offers a number of file formats in which you may save a file.
These formats include ASCII, RTF, and Microsoft Word.
5.21
Chapter 5
digitalCAT USER GUIDE
An ASCII file is a simple text-only file. Some attorneys request ASCII copies of
transcripts. Transcript Editor allows you to save your file in any of numerous
ASCII formats.
To save an ASCII:
• Press ALT + F to open the File menu.
• Press “A” for Save As.
• Press “A” again for ASCII.
• You will be presented with a number of different ASCII formats.
AMICUS AND AMICUS ZX
These formats are preferred by certain litigation-support software programs.
Press the letter A to select Amicus or the letter M to select Amicus ZX.
PAGE IMAGE AND SPECIAL PAGE IMAGE:
These two formats are somewhat universal and can be used with many litigationsupport and word-processing programs.
Press the letter P to select Page Image. Press the letter E to select Special Page
Image.
CAPITALIZED PAGE IMAGE:
This ASCII format will save a file in ALL capital letters, even if the file was not
created in all capital letters.
Press the letter C for Capitalized Page Image.
WITH HEADERS AND FOOTERS:
This format is similar to the Page Image format, but it also includes the transcript’s
headers and footers.
Press the letter H to select With Headers and Footers.
SUMMATION:
This format is preferrred for use with Summation litigation-support software.
5.22
FINISHING A JOB
Press the letter S to select Summation.
• Once you have made the selection of what type of ASCII file to save, a Save As
dialog will appear.
• Choose a name for the ASCII file and press ENTER. If you would like to keep
the name the same as your transcript file, simply press ENTER.
• Once you have chosen a name, the ASCII Options dialog will appear.
PAGE RANGE:
If All is selected, then all of the pages of the transcript will be saved as the ASCII
file.
If you would like to specify pages to be saved:
• Select Pages by pressing ALT + G.
• Then press the TAB key to place focus in the Pages box.
• Enter the page(s) you would like to save in the ASCII box. Separate pages or
ranges must be separated by a comma. For example, typing in 1-15, 17, 20-25
5.23
Chapter 5
digitalCAT USER GUIDE
would tell the program to save pages 1 through 15, page 17, and pages 20
through 25 to the ASCII file.
COPIES:
You can specify how many copies of this ASCII disk you would like to save here.
If you need to make more than one copy of this ASCII file, enter the number you
need in this box. The program will prompt you when it is time to insert the next
disk.
INSERT FORM FEEDS ON PAGE BREAKS:
Check this box only if you need ASCII page breaks in your file. Some production
softwares that import ASCII require these breaks whereas others do not. Please
refer to your production software documentation to determine whether or not you
need these breaks.
When finished making changes to the options, press ENTER to save the ASCII
file. If no changes need to be made to the options, you can simply press ENTER
to accept the defaults and save the file.
EXPORTING AN RTF FILE
An RTF (also known as RTF/CRE) version of your file may be saved from
Transcript Editor. This type of file holds a little more formatting information than
does an ASCII file. It can also be used to transfer files from one CAT system to
another, provided that system supports RTF import.
To save an RTF copy of your file:
• Press ALT + F to open the File menu.
• Press “A” for Save As.
• Press “R” for RTF.
5.24
FINISHING A JOB
• A Save dialog will prompt you to name and save the RTF file. Choose the
name and saving location of the file.
• If any changes need to be made to the file name, do so. When done, press
ENTER or click the Save button to save the file and close the dialog.
EXPORTING A MICROSOFT WORD FILE
Transcripts can also be exported as Microsoft Word files. This type of file, unlike
ASCII and RTF, holds all formatting information. A Word file will hold your
border, page numbers, line numbers and other formatting information exactly as it
appears in your transcript. To save your transcript in Microsoft’s Word format,
you MUST have Microsoft Word installed on your computer.
To save a transcript as a Word file:
• Press ALT + F to open the File menu.
• Press “A” for Save As.
• Now, press “W” for MS-Word Document.
• The Save As dialog will appear.
• If needed, change the name or saving location of the file .
• Press ENTER or click the Save button to save the file and close the dialog.
5.25
Chapter 5
5.26
noTEs
digitalCAT USER GUIDE
CHAPTER 6
windows REviEw
Reviewing Terms, Properties & Settings
Chapter 17
digitalCAT USER GUIDE
WINDOWS REVIEW
Whether you are completely new to using Windows-based applications or just
need a quick refresher on the basic fundamentals, this Windows review should be
quite helpful.
This chapter will describe the basic Windows terms, give a general overview of the
desktop tools and explain the taskbar.
This is just a brief summary of the many Windows features. It is not meant to
replace or substitute for any Microsoft Windows manual. For a more in-depth
discussion of any terms or techniques discussed here, please refer to an authorized
Microsoft Windows manual.
TERMS & DEFINITIONS
These terms apply when using digitalCAT as well as many other Windows-based
programs.
POINT: Use the mouse to move the arrow around the screen. When pointing to
an object or word, the tip of the arrow should hover directly over that item.
Arrow
CLICK: Press the left mouse button one time when the mouse arrow is directly
over the item to be selected.
DOUBLE-CLICK: Press the left mouse button twice in quick succession when
the mouse arrow is directly over an item.
LEFT CLICK: Same as Click.
RIGHT CLICK: Press the right mouse button one time. Oftentimes, a pop-up
menu will appear with various selections pertaining to the item the mouse arrow
is presently over.
6.2
WINDOWS REVIEW
SCROLL: A scroll bar on a window means there are more items to view in the
window than are currently showing. They can be accessed by scrolling up or
down on a vertical scroll bar or right and left on a horizontal scroll bar.
Scroll Bar
To scroll:
• Click on either of the small arrows at the ends of the bar to scroll the
window.
• Or click and drag the rectangular button on the scroll bar, pulling the button
in the direction you wish to scroll.
CLICK AND DRAG: After placing the arrow over an item, hold down the left
mouse button – do not let go – then move the mouse. You are now dragging
that item to a new location.
Release the left mouse button when the item is poised over its new location, and
it will “drop” right into place. This feature is used extensively when working in
Windows Explorer.
SELECT and HIGHLIGHT: To select an item means to place the mouse
arrow directly over that item and left-click.
INSERTION POINT/CARET: Terms for the cursor, which is the blinking bar or
box indicating where the next text will be added.
6.3
Chapter 17
digitalCAT USER GUIDE
KEY COMBINATIONS
Windows utilizes key combinations to perform certain steps and eliminate the need
to use the mouse to carry out commands.
Whenever you need to press two or more keys at one time, a plus sign (+) will
appear between the keys. For example, ALT + F means to press the ALT key
AND the F key at the same time. Do not press the + key.
When opening a menu from the menu bar (File, Edit, Index, Format, etc.), it may
be necessary to press and release the ALT key, and then press the associated letter.
In some keyboard setups, a command may be defined as that ALT + LETTER. If
you press that key combination, it will execute the command instead of opening
the menu. For example, in the default digitalCAT keyboard setup, ALT + O is
defined as Open File. If you press ALT + O, a dialog prompts you to select a file.
It does not open the Options menu. By first pressing and releasing the ALT key,
then pressing O, the Options menu will open.
MOVING AROUND IN WINDOWS
It is entirely possible to move around in digitalCAT without using the mouse.
Nearly every command and task can be accomplished with the keyboard.
MENU SELECTION
The menu bar that lies horizontally across the top of a program lists the main
menus for that application. To open one of those main menus, two keys must be
pressed at the same time.
Notice that each menu name contains one underlined letter. In Windows XP, you
may need to press the ALT key to see those underlined letters. To open the menu,
hold down the ALT key and press the key that corresponds to the underlined letter
in the menu name.
6.4
WINDOWS REVIEW
Example: To open the FILE menu, press ALT + F, since F is the letter that has the
underscore below it.
SELECTING AN OPTION FROM THE OPENED MENU
File Menu
Once a main menu is open, simply press the key that corresponds to the
underlined letter of the selection you wish to make. It is NOT necessary to use the
ALT key once the drop-down menu has been opened.
Once the main menu has been opened, the arrow keys can also be used to move
down the menu. Tap the down arrow key until the option you wish to select is
highlighted, then press the ENTER key.
ESCAPING FROM MENU SELECTION
If the ALT key was used to open a menu and you decide to back out from, or
cancel, that operation without using the mouse, press the escape key (ESC).
6.5
Chapter 17
digitalCAT USER GUIDE
MOVING THE CURSOR FROM ONE BOX TO
ANOTHER
When there is a window with fill-in boxes, simply press the TAB key to move from
one box to another. Pressing SHIFT + TAB will move the cursor to the previous
box.
Margins
Dialog
TASKBAR
One of the many great features of Windows is the ability to open more than one
application at a time. However, when a second program is opened, it will cover up
the first. The taskbar is a component built into all of the latest versions of
Windows that allows you to easily access the covered programs. It is a narrow
strip of icons usually located across the very bottom of the monitor screen.
Windows XP Taskbar
The taskbar keeps track of the various applications that are open, allows for
switching between programs, displays the current time, and gives access to the
Start menu.
On the far left of the taskbar is the START button. By clicking on the start button,
any program may be started or the computer can be shut down.
6.6
WINDOWS REVIEW
The middle portion of the taskbar is reserved for listing programs that have been
opened. Once an application is opened, a rectangular button appears on the
taskbar listing the program’s icon and name. The button that appears to be a
lighter color and pushed in is showing which program is currently active.
SWITCHING BETWEEN APPLICATIONS
To switch between programs that are open and listed on the taskbar, simply click
on the rectangular button that lists the name of the application you wish to make
active.
Switching between programs can also be done from the keyboard by pressing
ALT + TAB. This will bring up a window that lists all programs on the taskbar.
The last program that was used will be highlighted. To switch to that program,
simply release the ALT and TAB keys. To choose another program, keep the ALT
key pressed down and tap the TAB key again. The next application will be
highlighted. Keep tapping the TAB key until the program you wish to make active
is highlighted. Then release both keys at once.
ALT + TAB can be very useful when there is a lengthy pause in proceedings.
Another transcript can be opened, and you can be working on it. When you need
to go back to the current transcript, simply press and release ALT + TAB.
CLOSING PROGRAMS ON THE TASKBAR
Before shutting down the computer, take a quick look at the taskbar. All programs
listed on the taskbar should be saved and closed before the computer is turned off
to prevent accidental loss of data.
To close and save programs quickly:
• Right-click a program button on the taskbar.
• From the menu that pops up, click CLOSE.
• If the file hasn’t been recently saved, a dialog will prompt you to save the file
before it closes.
6.7
Chapter 17
digitalCAT USER GUIDE
A PROGRAM WON’T OPEN
If you click a button on the taskbar and the application does not open, right-click
on that button. From the menu that pops up, click MAXIMIZE. The program
should fully display on your screen.
THE SYSTEM TRAY
Located at the far right side of the taskbar is the system tray. The clock is located
here, along with additional icons that represent various features of the computer’s
properties. We will cover the most useful ones here.
Clock
By holding the cursor over the time, a small box will appear displaying the current
day and date. You should not change your computer time with digitalCAT
installed. Doing so may cause your current authorization code to prematurely
expire. If you need to change your time to synchronize with that of say a
videographer, please use our TimeStamp feature described in Chapter 3.
If you must change your computer time, you may have to call our technical
support department for another authorization code.
Speaker Icon
Click once on the speaker icon and a volume control box will appear.
Drag the bar to change the volume, or click the MUTE box to turn the
volume off.
6.8
WINDOWS REVIEW
Recording Volume
Double-click on the speaker icon and the Volume Control window will appear.
The window you see represents the playback volume.
To switch to the recording volume window:
• Click the Options menu.
• Click Properties.
• Click the option button in front of RECORDING.
• Click OK. The recording volume controls will appear.
• Make sure there is a check mark is in the Select box under
Microphone. If there is not, click once in the Select box place a
check in it. Microphone must be selected before recording can
occur.
• Once you have adjusted your volume, you may close the dialog.
6.9
Chapter 17
digitalCAT USER GUIDE
Battery Icon
This icon appears on laptop computers only when they are using battery power.
By holding the mouse arrow over the battery icon, a small box will appear
displaying the current amount of battery charge and the estimated amount of time
that charge can operate the computer.
FILES
For help finding and controlling files, please see Chapter 9, File Management.
6.10
noTEs
WINDOWS REVIEW
6.11