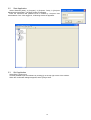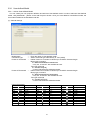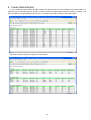
1
Projector Management Application
Version 7.00
Instruction Guide
Contents
1
2
3
4
5
INTRODUCTION .................................................................................................................................... 4
1.1
OUTLINE ............................................................................................................................................ 4
1.2
SYSTEM .............................................................................................................................................. 4
INSTALLATION ..................................................................................................................................... 5
2.1
SYSTEM REQUIREMENTS .................................................................................................................... 5
2.2
PROJECTOR MANAGEMENT APPLICATION INSTALLATION .................................................................. 6
OPERATING INSTRUCTIONS .............................................................................................................. 8
3.1
CREATE LOGIN ACCOUNTS ................................................................................................................. 8
3.2
START APPLICATION ........................................................................................................................ 10
3.3
QUIT APPLICATION .......................................................................................................................... 10
3.4
MAIN SCREEN .................................................................................................................................. 11
3.5
ADD A GROUP OF PROJECTORS ......................................................................................................... 18
3.6
ADD AN INDIVIDUAL PROJECTOR ...................................................................................................... 18
3.7
DELETE A GROUP OR INDIVIDUAL PROJECTOR .................................................................................. 20
3.8
CHANGE A GROUP OR INDIVIDUAL PROJECTOR SETTINGS ................................................................. 20
3.9
COPY ................................................................................................................................................ 20
3.10
MOVE ........................................................................................................................................... 20
3.11
APPLY THE ALARM / REMINDER SETTING TO THE PROJECTORS IN THE GROUP .............................. 21
3.12
UPDATE STATUS ........................................................................................................................... 21
3.13
SEARCH QUERIES FOR STATUS VIEW............................................................................................. 21
3.14
CONTROL THE PROJECTOR ............................................................................................................ 22
3.15
TURN ON THE POWER ................................................................................................................... 46
3.16
TURN OFF THE POWER .................................................................................................................. 46
3.17
DISPLAY E-SHOT / MY MAGE .................................................................................................... 46
3.18
SCHEDULE EVENTS ...................................................................................................................... 46
3.19
ACTIVATE MONITORING SCHEDULED EVENTS ............................................................................... 47
3.20
STOP MONITORING SCHEDULED EVENTS....................................................................................... 47
3.21
POLLING INTERVAL PERIOD ......................................................................................................... 47
3.22
MAIL SETTING .............................................................................................................................. 48
3.23
MY IMAGE TRANSFER ................................................................................................................ 50
3.24
USER-DEFINED MODEL ................................................................................................................ 51
3.25
OPEN THE BUILD-IN HTML PAGE IN THE PROJECTOR .................................................................. 54
3.26
ABOUT DIALOGUE ........................................................................................................................ 54
MAIL FEATURE ................................................................................................................................... 55
4.1
MAIL FORMAT .................................................................................................................................. 55
4.2
OTHERS............................................................................................................................................ 55
STATUS ................................................................................................................................................. 56
2
6
OUTPUT LOG ....................................................................................................................................... 57
7
CREATE LOG REPORT........................................................................................................................ 58
8
CREATE STATUS REPORT................................................................................................................. 59
・ Microsoft and Windows is the registered trademark of Microsoft Corporation in the US and other countries.
・ Pentium is the registered trademark of Intel Corporation in the US and other countries.
・ All other trademarks are the property of their respected owners.
Warning
・ This software is free. The manufacturer has no responsibility for any errors that may occur while using this software.
・ This software, or any product used with this software may not be used for any act which obstructs the Maintenance
of the International Peace and Safety.
3
1 Introduction
1.1
Outline
Using the Projector Management Application allows you to use a single computer to control diagnose and monitor
multiple projectors that are connected to the network or via an RS-232C cable.
1.2
System
The following diagram shows a typical network diagram for the Projector Management Application.
RS-232C
LAN
HUB
LAN
LAN
LAN
LAN
Ethernet
/ RS-232C
Converter
RS-232C
Use a UTP cable category 5 or higher for a Local Area Network cable.
Use a cross type cable when using a RS-232C serial cable.
4
2 Installation
2.1
System Requirements
The following are the minimum system requirements of hardware and software to use the Projector Management
Application.
(1) Operating System
Windows 2000 Professional
Windows XP Home Edition
Windows XP Professional
Windows Vista Home Basic (32-bit)
Windows Vista Home Premium (32-bit)
Windows Vista Business (32-bit)
Windows Vista Ultimate (32-bit)
(2) CPU
Pentium3 500MHz or higher
(3) Memory
256MB or higher
(4) Hard disc
Minimum 20MB free space for installation
(5) Local Area Network port (RJ-45) or Serial port (RS-232C)
5
2.2
Projector Management Application Installation
The following describes the installation process for the Projector Management Application:
(1) Double click the file “InstForPJMan.exe”.
(2) Select the language (English, Japanese or Chinese [Simplified]) during
the installation process. And then click [OK].
(3) Click [Next]
(4) Read “License Agreement” and select “I accept the terms of
the license agreement” and click [Next] if you agree the
license agreement. Otherwise, click [Cancel] and stop the
installation.
(5) Confirm the program folder, and then click [Next].
6
(6) Confirm the install folder and program folder again, and then
click [Next].
(7) Click [Finish] to complete the Projector Management
Application setup wizard.
7
3 Operating Instructions
3.1
Create login accounts
The Projector Management Application requires a login name and password to launch the software. The Projector
User Administration Tool helps you to create new user accounts.
3.1.1
How to launch
Double Click “PJUsrEdit.exe” that is located on same folder
that you installed Projector Management Application.
It automatically launches the Projector User Administration Tool,
if no user accounts are created yet. Also Projector Management
Application has a short cut [File]
[User Configuration] to launch
Projector User Administration Tool.
3.1.2
How to exit
Select [File]
[Exit] from the menu or click [x] button of the top right corner. If the changes are made, you will be
required to confirm the changes.
3.1.3
Main Window
Menu
User List
(1) Menu
Menu
File
Edit
Sub Menu
Save
Exit
Add New User
Change User
Delete User
Description
Save user data
Exit
Create new user
Edit user account
Delete user account
(2) User List
The status in the User List is described below.
Row name
Description
User Name
Username (ID)
Description
Comment
Man
“●” shows that the user can access to the PJMan (Projector Management Application).
Ctrl
“●” shows that the user can access to the PJCtrl (Projector Control Tool).
Img
“●” shows that the user can access to the PJImg (Projector Image Tool).
FTP
“●” shows that the user can access to the PJTransfer (Projector File Transfer Tool).
8
3.1.4
Creating new user account
Select [Edit]
[Add New User] or right clicks on the user list and
select [Add New User]. The following dialog window appears.
User
Description
User Rights
Select All
UnSel All
--- Define user name, up to 20 characters
--- Add comments, up to 50 characters
--- Define accessibility. It defines the
accessibility for the application software
by each user account. The user can use
allocation
only
marked
application
software.
--- Select all application software.
--- Unselect all application software.
Press [OK] button after entering user name. The [Change Password]
dialog appears. Enter new password and confirm entered password.
The password is up to 20 characters and case sensitive.
3.1.5
Edit user account
Double click a username on the user list or select [Edit]
[Change
User] after choosing user to open edit dialog. You can edit username,
description and accessibility (user rights).
Click the button to change password. Enter old and new password,
and re-enter new password to confirm.
3.1.6
Delete user account
Select [Edit]
popup.
3.1.7
[Delete User] or right click on the user list and select [Delete User]. The confirmation window will
Save user account
Select [File]
\UserList”.
[Save]. The date is stored in the file, “C:\Program Files\Common Files\Projector Tools\config
9
3.2
Start Application
Select Windows [Start]
[Program]
[Projector Tools]
[Projector
Management Application]. The login window is appeared.
Enter the username and password that is created by “Projector User
Administration Tool”. After logged in, a following window is appeared.
3.3
Quit Application
Select [File] - [Exit] to quit
It is also possible to quit this software by clicking [x] on the top right corner of the window.
When the confirmation dialogue appears, select [Yes] to finish.
10
3.4
Main Screen
(1) Menu
Menus and Functions in the Main Screen are shown below.
Menu
File
Edit
Sub Menu
Import
Export
User Configuration
Output Report
Log
Log Report
Exit
Add Group
Add Projector
Discovery
Delete
Edit
View
Cut
Copy
Paste
Alarm Time Settings
Refresh
Control
Search
Schedule
Projector Control
Power ON
Power OFF
Schedule
Option
Help
Display Image
Execute Command
Edit
Start
Stop
Status Check Interval
Mail Settings
Send Image
Edit User-defined Model
Access Projector via HTML
About Projector
Management Application
Function
Load the projector configuration file.
Save the projector configuration file.
Launch Projector User Administration Tool.
Create the report.
Log on / off.
Create the log data report.
Quit this application
Add Group
Add projectors which user is going to manage
Discover projectors.
Delete the projectors or groups that are selected from tree
Edit the registered information of the projectors or groups that
are chosen from tree
Cut the selected projector on the tree view.
Copy the selected projector on the tree view.
Paste projectors
Set / Edit the period of the lamp and filter hours reminder.
Refresh the status of the projectors or groups that are chosen
from the tree
Edit the search query
Select on / off for the Schedule view
Control the selected group of projector, or the selected
projector.
Power ON the projectors which are selected from the tree, or
the projectors which belong to a group which is chosen from the
tree
Power OFF the projectors which are selected from the tree, or
the projectors which belong to a group which is chosen from the
tree
Select e-SHOT image to display
Control User-defined model
Edit the Schedule settings
Start Schedule execution
Stop Schedule execution
Set the Status Check Interval
Configure the Mail Settings
Transfer MY IMAGE to projectors
Edit User-defined model information
Open the internal HTML page with default Internet browser.
Display version of this application
11
(2) Toolbar
The functions of these icons correspond with the menus as follows:
Icon
Menu
[Edit]-[Add Group]
[Edit]-[Add Projector]
[Edit]-[Delete]
[Edit]-[Edit]
[Edit]-[Cut]
[Edit]-[Copy]
[Edit]-[Paste]
[View]-[Refresh]
[Control]-[Power ON]
[Control]-[Power OFF]
[Schedule]-[Start]
[Schedule]-[Stop]
[Help]-[About Projector Management Application]
12
(3) Status Group
PJMan provides two pre-defined projector views, and the flexible views that are based on the search queries.
(a) All Projectors View
It shows the list of all projectors that are defined in the PJMan software.
(b) Error / Warning View
It shows the list of projectors that are ONLY in Error or Warning state.
(c) Search Result View
It shows the multiple lists of projectors based on the given search queries that is described later section.
Projector Name
Model
Connection
MAC Address
Power
Input
Status
Lamp Time
Filter Time
Total Run Time
--- Displays the projector name.
--- Displays the model name.
--- Displays the connection information.
(IP address and MAC address / COM port)
--- Displays the MAC address.
--- Displays the power status (ON / STANDBY).
--- Displays the input source.
--- Displays the error status.
--- Displays the current lamp time.
--- Displays the current filter time.
--- Displays the total run time.
13
(d) Projectors Group View
It shows the list of groups and projectors in the selected group.
Group Name
Contains
Comment
--- Displays the group name.
--- Displays the number of projectors and groups in the group.
--- Displays the comment.
Projector Name
Model
Connection
--- Displays the projector name.
--- Displays the model name.
--- Displays the connection information.
(IP address and MAC address / COM port)
--- Displays the MAC address.
--- Displays the power status (ON / STANDBY).
--- Displays the input source.
--- Displays the error status.
--- Displays the current lamp time.
--- Displays the current filter time.
--- Displays the total run time.
MAC Address
Power
Input
Status
Lamp Time
Filter Time
Total Run Time
14
(e) Individual Projector View
It shows the status of selected projector.
Projector Name
Model
Comment
--- Displays the projector name.
--- Displays the model name.
--- Displays the comment.
Projector Name
Model
Connection
--- Displays the projector name.
--- Displays the model name.
--- Displays the connection information.
(IP address and MAC address / COM port)
--- Displays the MAC address.
--- Displays the power status (ON / STANDBY).
--- Displays the input source.
--- Displays the error status.
--- Displays the current lamp time.
--- Displays the current filter time.
--- Displays the total run time.
MAC Address
Power
Input
Status
Lamp Time
Filter Time
Total Run Time
15
(4) Schedule View
(a) For a group of projectors
Current Time
Group Path
Group Path
Current Time
Date
Time
Control
--- Shows the full path name of selected group.
Displays the current date and time.
--- Displays the activation date.
--- Displays the activation time.
--- Displays the execute command.
16
(b) For an individual projector
Current Time
Projector Path
Group Path
Current Time
Date
Time
Control
--- Show the full path name of selected projector
Displays the current date and time.
--- Displays the activation date.
--- Displays the activation time.
--- Displays the execute command.
17
3.5
Add a group of projectors
You can define a group of projectors into the tree view. Select [Edit]
Group] to add a group.
Group Name
Comment
[Add
--- Enter a group name up to 256 characters.
--- Enter a comment up to 256 characters.
Note: The maximum depth of sub group is 5th,
3.6
Add an individual projector
You can define an individual projector into the tree view. Select [Edit]
[Add Projector] to add a projector.
Projector Name
Model
Add Model
Comment
Connection
RS-232C
NETWORK
[Discovery]
---------------
---
Status Check
---
Lamp Alarm Time
---
Filter Alarm Time
---
Enter a projector name up to 256 characters.
Select a model.
Add new User-defined model. Please see the section 3.20 for details.
Enter a comment up to 256 characters.
Select a connection method.
Select when using RS-232C, and set COM Port.
Select when using network, and set IP Address and Port No
Network Port No. of X75, X70 and X80 is 23.
Network Port No. of X30N, X35N, X62w, X64w, X90w, X95, X95i is 23 or 9715.
The authentication of commands is available for X30N, X35N, X62w, X64w, X90w,
X95 and X95i.
The authentication of e-SHOT feature is available for X30N and X35N.
The password for the both authentications above is common.
User can search for the projector (X30N, X35N, X62w, X64w, X90w, X95, X95i)
which connected to the network.
Check the check box if you want to enable the status polling. If it is not checked, the
projector is ignored from the status check process and won’t show up in the status
list. It is registered in PJMan, but it excludes from the current status monitoring list.
Define the lamp alarm / reminder period. The setting is effective for individual
projector. If you don’t want to enable this function, please set 0 hours.
Define the filter alarm / reminder period. The setting is effective for individual
projector. If you don’t want to enable this function, please set 0 hours.
The discovery feature allows you to search projectors on the network automatically. The discovery works when
you are selecting a group or root. Select [Edit]
[Discovery] from the menu. The discovery window is as follows.
Click start button.
18
For searching certain IP address range, please specify the IP address range to enter Start and End address. And
then check the checkbox ”Specify an address range and search” and click [Start] button. It will take several minutes
depending upon the number of IP addresses needed to be scanned.
When the discovery finds projectors, the list of
projectors is shown and [Register] button becomes
available. You can register multiple projectors at the same
time.
When the [Register] button is clicked, the projector is added under the group or root that you selected. The
projector name and model is automatically assigned. Please edit the name and model if you need.
[NOTE]
Windows Security Alert will be shown on your display when the discovery function activates, if Windows Firewall
is “On” on Windows XP SP2 or later. Please choose “Unblock” to add the software onto the exception list. Also
other firewall security software may block the discovery function. In that case, please add the software to the safe
list or disable firewall software when you use discovery function.
19
3.7
Delete a group or individual projector
You can delete a group of projectors or an individual projector. Click a group or projector in the tree view, select
[Edit]
[Delete]. You can also delete a group or projector by clicking delete icon on the toolbar. When the
confirmation dialogue appears, select [OK] to delete.
3.8
Change a group or individual projector settings
You can change a group or individual projectors settings. Click a group on the tree view, select [Edit]
[Edit]. Or
Click a projector, select [Edit]
[Edit]. You can also change settings by clicking edit icon on the toolbar.
The ‘Edit Group’ or ‘Edit Projector’ screen is shown below. Content to be set is same as ‘Add Group’ or ‘Add
Projector’ screen.
3.9
Copy
You can copy the projector from the tree view. Select [Edit]
[Copy] on the menu after choosing projectors on
the tree view. You can paste copied projectors to select [Edit]
[Copy] from the menu or click “Paste” button on the
tool bar.
Also you can copy projectors by drag and drop during holding down Ctrl key. Note that you cannot copy
projectors if there is same name projector on the destination.
3.10
Move
You can move the projectors from tree view. Select [Edit]
[Cut] on the menu or click “Cut” on the tool bar after
choosing projectors on the tree view. You can paste copied projectors to select [Edit]
[Copy] from the menu or
click “Paste” button on the tool bar.
Also you can drag and drop projectors onto the other projector group.
20
3.11
Apply the alarm / reminder setting to the projectors in the group
You can set the alarm / reminder setting to the multiple projectors in the group at the same time. Select the group
that you want to set the alarm / reminder, and then go to [Edit]
[Alarm Time Setting] from the menu. The Alarm
Time Settings dialogue will appear. Check the checkbox and enter the hours that the alarm / reminder will be
activated.
If you apply new setting to the group, the individual alarm / reminder setting on each projector will be overwritten.
3.12
Update Status
Select [View]
[Refresh] to update status of a group or individual projector. This function only works when the
status tab is displayed.
3.13
Search queries for Status view
In order to make the search queries for Status view, Go to [View]
will appear.
Connection
IP Address
Power
Status
Lamp Time
Filter Time
Total Run Time
All or part of the projector name
-----------------
[Search] from the menu. The Search dialogue
Search by connection type
Search by IP address range
Search by projector power status
Search by error / warning status
Search by lamp hours
Search by filter hours
Search by total operation hours
Search by projector name
The search group will be added in Search Result tree, when you press [Search] button with given query. The list
of projectors that are matched with your search query will be shown in the Status View.
21
3.14
Control the projector
Select [Control]
[Projector Control] to control the projector. The controllable functions will be depending upon
what group or projector is selected.
(a) In case of All Projectors selected
Power
Input Source
Whisper
Blank
Mute
Freeze
Display Image
---------------
Turn on / off power for a group of projectors.
Change input source.
Change whisper mode.
Change blank on / off.
Change sound mute status.
Change freeze status.
Select e-SHOT / MY IMAGE to display.
(b) In case of Error/ Warning selected
Power
Input Source
Whisper
Blank
Mute
Freeze
Display Image
---------------
Turn on / off power for a group of projectors.
Change input source.
Change whisper mode.
Change blank on / off.
Change sound mute status.
Change freeze status.
Select e-SHOT / MY IMAGE to display.
22
(c) In case of Search Result item selected
Power
Input Source
Whisper
Blank
Mute
Freeze
Display Image
---------------
Turn on / off power for a group of projectors.
Change input source.
Change whisper mode.
Change blank on / off.
Change sound mute status.
Change freeze status.
Select e-SHOT / MY IMAGE to display.
(d) In case of a group selected
Group Information
Group Name
Contains
Comment
--- Displays the group name.
--- Displays the number of projectors and groups in the group.
--- Displays the comment.
Power
Input Source
Whisper
Blank
Mute
Freeze
Display Image
---------------
Turn on / off power for a group of projectors.
Change input source.
Change whisper mode.
Change blank on / off.
Change sound mute status.
Change freeze status.
Select e-SHOT / MY IMAGE to display.
23
(e) In case of a projector selected
Projector Information
Projector Name --- Displays the projector name.
Model
--- Displays the model name.
Comment
--- Displays the comment.
Power
Input Source
Aspect
Whisper
Mirror
Blank
Mute
Freeze
Display Image
Brightness
Contrast
Sharpness
Color
Tint
Auto Adjust
Lamp Time Reset
Filter Time Reset
Advanced Control
--- Turn on / off power for a group of projectors.
--- Change input source.
Change aspect ratio.
--- Change whisper mode.
--- Change mirror status.
--- Change blank on / off.
--- Change sound mute status.
--- Change freeze status.
--- Select e-SHOT / MY IMAGE to display.
--- Change brightness.
[-]: Decrease value.
[+]: Increase value.
--- Change contrast.
[-]: Decrease value.
[+]: Increase value.
--- Change sharpness.
[-]: Decrease value.
[+]: Increase value.
--- Change color.
[-]: Decrease value.
[+]: Increase value.
--- Change tint.
[-]: Decrease value.
[+]: Increase value.
--- Execute auto image adjustment.
--- Reset the lamp time.
--- Reset the filter time.
--- Open the projector Advance Control Menu.
(‘Advanced Control’ Screen varies depending on the projector model.)
24
The details for each Advance Control screen (for the appropriate projector model types) are described below.
■ X70 / X80
[STATUS] Tab
Function
Power Status
Input Status
Error Status
Blank On /Off
Mute
Freeze
Lamp Time
Filter Time
Reset
General Description
Display the Power Status.
Off / On / Cool down
Display the Input source status.
M1-D / RGB / BNC / Video / S-Video / Component
Display the Error status.
Normal / Cover Error / Fan Error / Lamp Error / Temp Error /
Air Flow Error / Lamp Time Error / Cold Error / Filter Error / Other Error
Display the Blank status.
Off / On
Display the Mute status.
Off / On
Display the Freeze status.
Normal / Freeze
Display the Lamp Time.
Display the Filter Time.
Initialize the selected Function.
Lamp Time / Filter Time
[Execute]: After the confirmation message, the selected Function will be initialized.
[MAIN] Tab
Function
Brightness
Contrast
Aspect
Whisper
Mirror
Language
Reset
General Description
Setting the Brightness
[-]: Decrease the Brightness value.
[+]: Increase the Brightness value.
Setting the Contrast
[-]: Decrease the Contrast value.
[+]: Increase the Contrast value.
Setting the Aspect
4:3 / 16:9 / Small / Normal
Setting the Whisper Mode
Normal / Whisper
Setting the Mirror display
Normal / H Inverse / V Inverse / H&V Inverse
Setting the Language
English / French / German / Spanish / Italian / Norwegian / Dutch / Portuguese /
Japanese / Simplified Chinese / Korean / Swedish / Russian / Finnish / Polish
Initialize the selected Function.
Brightness / Contrast
[Execute]: After the confirmation message, the selected Function will be initialized.
[PICTURE-1] Tab
Function
Gamma
Custom Gamma
Color Temp
Custom User R
Custom User G
Custom User B
Color Bal R
General Description
Setting the Gamma.
Normal / Cinema / Dynamic / Custom
Setting the Custom Gamma.
[-]: Decrease the Custom Gamma value.
[+]: Increase the Custom Gamma value.
Setting the Color Temp.
Low / Middle / High / User
Setting the Color Temp (Red).
100 / 90 / 80 / 70 / 60 / 50
Setting the Color Temp (Green)
100 / 90 / 80 / 70 / 60 / 50
Setting the Color Temp (Blue)
100 / 90 / 80 / 70 / 60 / 50
Setting the Color Balance (Red)
[-]: Decrease the red value.
[+]: Increase the red value.
25
Color Bal G
Color Bal B
Sharpness
Color
Tint
My Memory
Reset
Setting the Color Balance (Green)
[-]: Decrease the green value.
[+]: Increase the green value.
Setting the Color Balance (Blue)
[-]: Decrease the blue value.
[+]: Increase the blue value.
Setting the sharpness of the picture.
[-]: Decrease the color density value.
[+]: Increase the color density value.
Setting the color density.
[-]: Decrease the color density value.
[+]: Increase the color density value.
Setting the tint.
[-]: Decrease the tint value.
[+]: Increase the tint value.
Load / Save the My Memory.
Load1 / Load2 / Load3 / Load4 / Save1 / Save2 / Save3 / Save4
[Execute]: Load / Save the selected Function.
Initialize the selected Function.
Color Bal R / Color Bal G / Color Bal B / Sharpness / Color / Tint
[Execute]: After the confirmation message, the selected Function will be initialized.
[PICTURE-2] Tab
Function
Position
H Phase
H Size
Over Scan
Reset
General Description
Setting the display position.
[ ]: Increase the vertical position.
[ ]: Decrease the vertical position.
[ ]: Increase the horizontal position.
[ ]: Decrease the horizontal position.
Setting the clock phase.
[-]: Decrease the clock phase value.
[+]: Increase the clock phase value.
Setting the horizontal size.
[-]: Decrease the horizontal size value.
[+]: Increase the horizontal size value.
Setting the Over Scan.
[-]: Decrease the Over scan value.
[+]: Increase the Over scan value.
Initialize the selected Function.
V Position / H Position / H Size / Over Scan
[Execute]: After the confirmation message, the selected Function will be
initialized.
[INPUT] Tab
Function
Color Space
Component
Video Format
3D-YCS
Video NR
S2-Aspect
P.IN P. Input
P.IN P. Position
P.IN P. Audio
General Description
Setting the Color Space.
Auto / RGB / SMPTE240 / REC709 / REC601
Setting the Component.
Component / Scart RGB
Setting the Video Format
Auto / NTSC / PAL / SECAM / NTSC4.43 / M-PAL / N-PAL
Setting the 3D-YCS
On / Off
Setting the Video NR.
Low / Middle / High
Setting the S2-Aspect
Off / On
Setting the P.IN P.
Video / S-Video
Setting the P.IN P. position.
Upper Left / Upper Right / Bottom Left / Bottom Right
Setting the P.IN P. Audio.
RGB / Video
26
P.IN P. Size
Power Up Input
Setting P.IN P. Size
Off / Large / Small
Setting which source will be input when power turned on.
Lash CH / M1-D / RGB / BNC / Video / S-Video / Component
[AUTO] Tab
Function
Auto Adjust
Auto Power Off
Auto Power On
Auto Search
General Description
Execute Auto Adjust.
Setting Auto Power Off.
[-]: Decrease Auto Power Off time.
[+]: Increase Auto Power Off time.
Setting Auto Power On.
Off / On
Setting Auto Search.
Off / On
[SCREEN] Tab
Function
Blank
Startup
MyScreen Size
MyScreen Lock
Menu Position
Message
Reset
General Description
Setting the Blank Color.
Blue / White / Black / MyScreen / Original
Setting the Startup screen.
Original / Off / MyScreen
Setting MyScreen size.
Full / x1
Setting MyScreen Lock.
Off / On
Setting the Menu Position
[ ]: Increase the vertical menu position.
[ ]: Decrease the vertical menu position.
[ ]: Decrease the horizontal menu position.
[ ]: Increase the horizontal menu position.
Setting Message
Off / On
Initialize the selected Function.
Menu Position V / Menu Position H
[Execute]: After the confirmation message, the selected Function will be initialized.
[OPTION] Tab
Function
Volume
Speaker
IR Remote
IR Remote ID
Auto Adjust Enable
Lens Type
Lens Lock
General Description
Setting the Volume.
[-]: Decrease the Volume.
[+]: Increase the Volume.
Setting the speaker.
Off / On
Setting the IR Remote.
Front (Off / On)
Rear (Off / On)
Top (Off / On)
Setting the IR Remote ID.
All / 1 / 2 / 3
Setting the Auto Adjust Enable.
Disable / Enable
Setting the Lens Type.
Auto / 1 / 2 / 3 / 4 / 5
Setting the Lens Lock
Off / On
27
[OTHER] Tab
Function
Power
Input Source
Blank On / Off
Mute
Freeze
Magnify
Keystone V
Keystone H
Reset
General Description
Controlling the Power.
Off / On
Setting the Input Source.
M1-D / RGB / BNC / Video / S-Video / Component
Setting Blank.
Off / On
Setting Mute.
Off / On
Setting Freeze.
Normal / Freeze
Setting Magnify
[-]: Decrease the Magnify value.
[+]: Increase the Magnify value.
Setting the Vertical Keystone.
[-]: Decrease the V Keystone value.
[+]: Increase the V Keystone value.
Setting the Horizontal Keystone.
[-]: Decrease the H Keystone value.
[+]: Increase the H Keystone value.
Initialize the selected Function.
Keystone V / Keystone H
[Execute]: After the confirmation message, the selected Function will be
initialized.
28
■ X75
[STATUS] Tab
Function
Power Status
Input Source
Error Status
Blank On / Off
Mute
Freeze
Lamp Time
Filter Time
Reset
General Description
Display the Power Status.
Off / On/ Cool down
Display the Input source status.
DVI / RGB1 / RGB2 / Video / S-Video / Component
Display the Error status.
Normal / Cover Error / Fan Error / Lamp Error / Temp Error / Air Flow Error
/ Lamp Time Error / Cold Error / Filter Error / Other Error
Display the Blank status.
Off / On
Display the Mute status.
Off / On
Display the Freeze status.
Normal / Freeze
Display the Lamp Time.
Display the Filter Time.
Initialize the selected Function.
Lamp Time / Filter Time
[Execute]: After the confirmation message, the selected Function will be initialized.
[PICTURE] Tab
Function
Brightness
Contrast
Gamma
Color Temp
Color
Tint
Sharpness
My Memory
Reset
General Description
Setting the Brightness
[-]: Decrease the Brightness value.
[+]: Increase the Brightness value.
Setting the Contrast
[-]: Decrease the Contrast value.
[+]: Increase the Contrast value.
Setting the Gamma.
#1-Custom / #2-Custom / #3-Custom / #1-Default / #2-Default / #3-Default
Setting the Color Temp.
Low / Middle / High / Custom
Setting the color density.
[-]: Decrease the color density value.
[+]: Increase the color density value
Setting the Tint.
[-]: Decrease the tint value.
[+]: Increase the tint value.
Setting the sharpness of the picture.
[-]: Decrease the color density value.
[+]: Increase the color density value.
Load/Save the My Memory.
Load1 / Load2 / Load3 / Load4 / Save1 / Save2 / Save3 / Save4
[Execute]: Load/Save the selected Function.
Initialize the selected Function
Brightness / Contrast / Color / Tint / Sharpness
[Execute]: After the confirmation message, the selected Function will be initialized.
Gamma -CustomFunction
User Gamma Pattern
User Gamma Point 1
User Gamma Point 2
User Gamma Point 3
General Description
Setting the test pattern.
Off / 9steps Gray Scale / 15steps Gray Scale / Ramp
Setting the User Gamma Point 1.
[-]: Decrease the User Gamma Point 1 value.
[+]: Increase the User Gamma Point 1 value.
Setting the User Gamma Point 2.
[-]: Decrease the User Gamma Point 2 value.
[+]: Increase the User Gamma Point 2 value.
Setting the User Gamma Point 3.
[-]: Decrease the User Gamma Point 3 value.
[+]: Increase the User Gamma Point 3 value.
29
User Gamma Point 4
User Gamma Point 5
User Gamma Point 6
User Gamma Point 7
User Gamma Point 8
Setting the User Gamma Point 4.
[-]: Decrease the User Gamma Point 4 value.
[+]: Increase the User Gamma Point 4 value.
Setting the User Gamma Point 5.
[-]: Decrease the User Gamma Point 5 value.
[+]: Increase the User Gamma Point 5 value.
Setting the User Gamma Point 6.
[-]: Decrease the User Gamma Point 6 value.
[+]: Increase the User Gamma Point 6 value.
Setting the User Gamma Point 7.
[-]: Decrease the User Gamma Point 7 value.
[+]: Increase the User Gamma Point 7 value.
Setting the User Gamma Point 8.
[-]: Decrease the User Gamma Point 8 value.
[+]: Increase the User Gamma Point 8 value.
Color Temp -CustomFunction
User Gamma Pattern
Color Temp Gain R
Color Temp Gain G
Color Temp Gain B
Color Temp Offset R
Color Temp Offset G
Color Temp Offset B
General Description
Setting the test pattern.
Off / 9steps Gray Scale / 15steps Gray Scale / Ramp
Setting Color Temp Gain R.
[-]: Decrease the Color Temp Gain R value.
[+]: Increase the Color Temp Gain R value.
Setting Color Temp Gain G.
[-]: Decrease the Color Temp Gain G value.
[+]: Increase the Color Temp Gain G value
Setting Color Temp Gain B.
[-]: Decrease the Color Temp Gain B value.
[+]: Increase the Color Temp Gain B value
Setting Color Temp Offset R.
[-]: Decrease the Color Temp Offset R value.
[+]: Increase the Color Temp Offset R value
Setting Color Temp Offset G.
[-]: Decrease the Color Temp Offset G value.
[+]: Increase the Color Temp Offset G value
Setting Color Temp Offset B.
[-]: Decrease the Color Temp Offset B value.
[+]: Increase the Color Temp Offset B value
[IMAGE] Tab
Function
Aspect
Over Scan
Position
H Phase
H Size
Auto Adjust
Reset
General Description
Setting the Aspect.
4:3 / 16:9 / Small / Normal
Setting the Over Scan
[-]: Decrease the Over scan value.
[+]: Increase the Over scan value.
Setting the display position.
[ ]: Increase the vertical position.
[ ]: Decrease the vertical position.
[ ]: Increase the horizontal position.
[ ]: Decrease the horizontal position.
Setting the clock phase.
[-]: Decrease the clock phase value.
[+]: Increase the clock phase value.
Setting the horizontal size.
[-]: Decrease the horizontal size value.
[+]: Increase the horizontal size value.
Execute Auto Adjust.
Initialize the selected Function.
Over Scan / V Position / H Position / H Size
[Execute]: After the confirmation message, the selected Function will be initialized.
30
[VIDEO QLTY.] Tab
Function
Progressive
3D-YCS
Video NR
General Description
Setting the Progressive
Off / TV / FILM
Setting the 3D-YCS
Off / Normal / Still Image
Setting the Video NR.
Low / Middle / High
[INPUT] Tab
Function
Color Space
Component
Video Format
DVI
General Description
Setting the Color space.
Auto / RGB / SMPTE240 / REC709 / REC601
Setting the Component.
Component / Scart RGB
Setting the Video Format.
Auto / NTSC / PAL / SECAM / NTSC4.43 / M-PAL / N-PAL
Setting the DVI Signal Type.
DVD / Computer
[SETUP] Tab
Function
Whisper
Mirror
Volume
Stereo
IR Remote
General Description
Setting the Whisper.
Normal / Whisper
Setting the Mirror display.
Normal / H Inverse / V Inverse / H&V Inverse
Setting the Volume.
[-]: Decrease the Volume.
[+]: Increase the Volume.
Setting the Stereo.
Mono / Stereo
Setting the IR Remote.
Front (Off / On)
Top (Off / On)
[SCREEN] Tab
Function
Language
Menu Position
OSD Bright.
Blank
Startup
MyScreen Lock
Message
Reset
General Description
Setting the Language.
English / French / German / Spanish / Italian / Norwegian / Dutch / Portuguese /
Japanese / Simplified Chinese / Korean / Swedish / Russian / Finnish / Polish /
Turkish / Traditional Chinese
Setting the Menu Position.
[ ]: Increase the vertical menu position.
[ ]: Decrease the vertical menu position.
[ ]: Decrease the horizontal menu position.
[ ]: Increase the horizontal menu position.
Setting the OSD Brightness.
[-]: Decrease the OSD Brightness.
[+]: Increase the OSD Brightness.
Setting the Blank color.
Blue / White / Black / MyScreen / Original
Setting the Startup screen.
Original / Off / MyScreen
Setting MyScreen Lock.
Off / On
Setting Message.
Off / On
Initialize the selected Function.
Menu Position V / Menu Position H
[Execute]: After the confirmation message, the selected Function will be initialized.
31
[OPTION] Tab
Function
One Touch
Auto Search
Auto Power Off
Auto Adjust Enable
General Description
Setting the One Touch.
Auto Keystone V Off / Auto Keystone V On
Setting Auto Search.
Off / On
Setting Auto Power Off
[-]: Decrease the Auto Power off time.
[+]: Increase the Auto Power off time.
Setting Auto Adjust Enable
Disable / Enable
[OTHER] Tab
Function
Power
Input Source
Mode
Blank On / Off
Mute
Freeze
Magnify
Keystone V
Keystone H
Auto Keystone V
Reset
General Description
Controlling the Power.
Off / On
Setting the Input Source.
DVI / RGB1 / RGB2 / Video / S-Video / Component
Setting the Picture Mode.
Normal / Cinema / Dynamic / Custom
Custom is displayed only. It cannot be set.
Setting Blank.
Off / On
Setting Mute.
Off / On
Setting Freeze.
Normal / Freeze
Setting Magnify
[-]: Decrease the Magnify value.
[+]: Increase the Magnify value.
Setting the Vertical Keystone.
[-]: Decrease the V Keystone value.
[+]: Increase the V Keystone value.
Setting the Horizontal Keystone.
[-]: Decrease the H Keystone value.
[+]: Increase the H Keystone value.
Execute Auto Keystone V.
Initialize the selected Function.
Keystone V / Keystone H
[Execute]: After the confirmation message, the selected Function will be initialized.
32
■ X62w / X64w / X90w / X95 / X95i
[STATUS] Tab
Function
Power Status
Input Source
Error Status
Blank On / Off
Mute
Freeze
Lamp Time
Filter Time
Reset
General Description
Display the Power Status.
Off / On / Cool down
Display the Input source status.
X62w
RGB1 / RGB2 / Video / S-Video / Component / MIU
X64w
Computer1 / Computer2 / Video / S-Video / Component / MIU
X90w
RGB1 / RGB2 / M1-D / Video / S-Video / Component / MIU
X95 / X95i
RGB1 / RGB2 / HDMI / Video / S-Video / Component / MIU
Display the Error status.
Normal / Cover Error / Fan Error / Lamp Error / Temp Error / Air Flow Error
/ Lamp Time Error / Cold Error / Filter Error / Lens Door Error / Other Error
Display the Blank status.
Off / On
Display the Mute status.
Off / On
Display the Freeze status.
Normal / Freeze
Display the Lamp Time.
Display the Filter Time.
Initialize the selected Function.
Lamp Time / Filter Time
[Execute]: After the confirmation message, the selected Function will be initialized.
[PICTURE] Tab
Function
Brightness
Contrast
Gamma
Color Temp
Color
Tint
Sharpness
Active Iris
General Description
Setting the Brightness
[-]: Decrease the Brightness value.
[+]: Increase the Brightness value.
Setting the Contrast
[-]: Decrease the Contrast value.
[+]: Increase the Contrast value.
Setting the Gamma.
X62w / X90w
#1-Custom / #2-Custom / #3-Custom / #4-Custom / #5-Custom / #1-Default /
#2-Default / #3-Default / #4-Default / #5-Default
X64w / X95 / X95i
#1-Custom / #2-Custom / #3-Custom / #4-Custom / #5-Custom / #6-Custom /
#1-Default / #2-Default / #3-Default / #4-Default / #5-Default / #6-Default
Setting the Color Temp.
X62w / X90w
Low / Mid / High / Hi-Bright-1 / Hi-Bright-2 / Custom-Low / Custom-Mid /
Custom-High / Custom-Hi-Bright-1 / Custom-Hi-Bright-2
X64w / X95 / X95i
Low / Mid / High / Hi-Bright-1 / Hi-Bright-2 / Hi-Bright-3 / Custom-Low / Custom-Mid /
Custom-High / Custom-Hi-Bright-1 / Custom-Hi-Bright-2 / Custom-Hi-Bright-3
Setting the color density.
[-]: Decrease the color density value.
[+]: Increase the color density value
Setting the Tint.
[-]: Decrease the tint value.
[+]: Increase the tint value.
Setting the sharpness of the picture.
[-]: Decrease the color density value.
[+]: Increase the color density value.
Setting the Active Iris.
Off / Theater / Presentation
This Function is not displayed for X62w / X64w.
33
My Memory
Reset
Load/Save the My Memory.
Load1 / Load2 / Load3 / Load4 / Save1 / Save2 / Save3 / Save4
[Execute]: Load / Save the selected Function.
Initialize the selected Function
Brightness / Contrast / Color / Tint / Sharpness
[Execute]: After the confirmation message, the selected Function will be initialized.
[Gamma -Custom-]
Function
User Gamma Pattern
User Gamma Point 1
User Gamma Point 2
User Gamma Point 3
User Gamma Point 4
User Gamma Point 5
User Gamma Point 6
User Gamma Point 7
User Gamma Point 8
General Description
Setting the test pattern.
Off / 9steps Gray Scale / 15steps Gray Scale / Ramp
Setting the User Gamma Point 1.
[-]: Decrease the User Gamma Point 1 value.
[+]: Increase the User Gamma Point 1 value.
[Reset]: Initialize the User Gamma Point 1 value.
Setting the User Gamma Point 2.
[-]: Decrease the User Gamma Point 2 value.
[+]: Increase the User Gamma Point 2 value.
[Reset]: Initialize the User Gamma Point 2 value.
Setting the User Gamma Point 3.
[-]: Decrease the User Gamma Point 3 value.
[+]: Increase the User Gamma Point 3 value.
[Reset]: Initialize the User Gamma Point 3 value.
Setting the User Gamma Point 4.
[-]: Decrease the User Gamma Point 4 value.
[+]: Increase the User Gamma Point 4 value.
[Reset]: Initialize the User Gamma Point 4 value.
Setting the User Gamma Point 5.
[-]: Decrease the User Gamma Point 5 value.
[+]: Increase the User Gamma Point 5 value.
[Reset]: Initialize the User Gamma Point 5 value.
Setting the User Gamma Point 6.
[-]: Decrease the User Gamma Point 6 value.
[+]: Increase the User Gamma Point 6 value.
[Reset]: Initialize the User Gamma Point 6 value.
Setting the User Gamma Point 7.
[-]: Decrease the User Gamma Point 7 value.
[+]: Increase the User Gamma Point 7 value.
[Reset]: Initialize the User Gamma Point 7 value.
Setting the User Gamma Point 8.
[-]: Decrease the User Gamma Point 8 value.
[+]: Increase the User Gamma Point 8 value.
[Reset]: Initialize the User Gamma Point 8 value.
[Color Temp -Custom-]
Function
User Gamma Pattern
Color Temp Gain R
Color Temp Gain G
Color Temp Gain B
Color Temp Offset R
General Description
Setting the test pattern.
Off / 9steps Gray Scale / 15steps Gray Scale / Ramp
Setting Color Temp Gain R.
[-]: Decrease the Color Temp Gain R value.
[+]: Increase the Color Temp Gain R value.
[Reset]: Initialize the Color Temp Gain R value.
Setting Color Temp Gain G.
[-]: Decrease the Color Temp Gain G value.
[+]: Increase the Color Temp Gain G value.
[Reset]: Initialize the Color Temp Gain G value.
Setting Color Temp Gain B.
[-]: Decrease the Color Temp Gain B value.
[+]: Increase the Color Temp Gain B value.
[Reset]: Initialize the Color Temp Gain B value.
Setting Color Temp Offset R.
[-]: Decrease the Color Temp Offset R value.
[+]: Increase the Color Temp Offset R value.
[Reset]: Initialize the Color Temp Offset R value.
34
Color Temp Offset G
Color Temp Offset B
Setting Color Temp Offset G.
[-]: Decrease the Color Temp Offset G value.
[+]: Increase the Color Temp Offset G value.
[Reset]: Initialize the Color Temp Offset G value.
Setting Color Temp Offset B.
[-]: Decrease the Color Temp Offset B value.
[+]: Increase the Color Temp Offset B value.
[Reset]: Initialize the Color Temp Offset B value.
[IMAGE] Tab
Function
Aspect
Over Scan
Position
H Phase
H Size
Auto Adjust
Reset
General Description
Setting the Aspect.
4:3 / 16:9 / 14:9 / Small / Normal
Setting the Over Scan
[-]: Decrease the Over scan value.
[+]: Increase the Over scan value.
Setting the display position.
[ ]: Increase the vertical position.
[ ]: Decrease the vertical position.
[ ]: Increase the horizontal position.
[ ]: Decrease the horizontal position.
Setting the clock phase.
[-]: Decrease the clock phase value.
[+]: Increase the clock phase value.
Setting the horizontal size.
[-]: Decrease the horizontal size value.
[+]: Increase the horizontal size value.
Execute Auto Adjust.
Initialize the selected Function.
Over Scan / V Position / H Position / H Size
[Execute]: After the confirmation message, the selected Function will be initialized.
[INPUT] Tab
Function
Progressive
Video NR
3D-YCS
Color Space
Component
C-Video Format
S-Video Format
HDMI
M1-D
Frame Lock
Frame Lock-RGB1
Frame Lock-Computer1
General Description
Setting the Progressive.
Off / TV / FILM
Setting the Video NR.
Low / Mid / High
Setting the 3D-YCS
Off / Movie / Still Image
This Function is not displayed for X62w / X64w.
Setting the Color space.
Auto / RGB / SMPTE240 / REC709 / REC601
Setting the Component.
Component / Scart RGB
Setting the C-Video Format.
Auto / NTSC / PAL / SECAM / NTSC4.43 / M-PAL / N-PAL
Setting the S-Video Format.
Auto / NTSC / PAL / SECAM / NTSC4.43 / M-PAL / N-PAL
Setting the HDMI Signal Type.
Auto / Normal / Enhanced
This Function is not displayed for X62w / X64w / X90w.
Setting the M1-D Signal Type.
Normal / Enhanced
This Function is not displayed for X62w / X64w / X95 / X95i.
Setting the Frame Lock.
Off / On
This Function is not displayed for X64w / X95 / X95i.
Setting the Frame Lock-RGB1.
Off / On
This Function is not displayed for X62w / X64w / X90w.
Setting the Frame Lock-Computer1.
Off / On
This Function is not displayed for X62w / X90w / X95 / X95i.
35
Frame Lock-RGB2
Frame Lock-Computer2
Frame Lock-HDMI
RGB IN-1
Computer in-1
RGB IN-2
Computer in-2
Setting the Frame Lock-RGB2.
Off / On
This Function is not displayed for X62w / X64w / X90w.
Setting the Frame Lock-Computer2.
Off / On
This Function is not displayed for X62w / X90w / X95 / X95i.
Setting the Frame Lock-HDMI.
Off / On
This Function is not displayed for X62w / X64w / X90w.
Setting the RGB IN-1 Signal Type.
X95 / X95i
Sync On G Off / Auto
X62w / X90w
Sync On G Off / Sync On G On
This Function is not displayed for X64w.
Setting the Computer in-1 Signal Type.
Sync On G Off / Sync On G On
This Function is not displayed for X62w / X90w / X95 / X95i.
Setting the RGB IN-2 Signal Type.
X95 / X95i
Sync On G Off / Auto
X62w / X90w
Sync On G Off / Sync On G On
This Function is not displayed for X64w.
Setting the Computer in-2 Signal Type.
Sync On G Off / Sync On G On
This Function is not displayed for X62w / X90w / X95 / X95i.
[SETUP] Tab
Function
Auto Keystone
Keystone V
Keystone H
Whisper
Mirror
Volume
Speaker
Audio-RGB1
Audio-Computer1
Audio-RGB2
Audio-Computer2
Audio-Video
General Description
Execute Auto Keystone.
Setting the Keystone V.
[-]: Decrease the Keystone V value.
[+]: Increase the Keystone V value.
Setting the Keystone H.
[-]: Decrease the Keystone H value.
[+]: Increase the Keystone H value.
This Function is not displayed for X62w / X64w.
Setting the Whisper.
Normal / Whisper
Setting the Mirror display.
Normal / H Inverse / V Inverse / H&V Inverse
Setting the Volume.
[-]: Decrease the Volume.
[+]: Increase the Volume.
This Function is not displayed for X90w / X95 / X95i.
Setting the Speaker.
Off / On
This Function is not displayed for X62w / X90w / X95 / X95i.
Setting the Audio-RGB1.
Off / Audio1 / Audio2 / Audio3
This Function is not displayed for X64w / X90w / X95 / X95i.
Setting the Audio-Computer1.
Off / Audio1 / Audio2 / Audio3
This Function is not displayed for X62w / X90w / X95 / X95i.
Setting the Audio-RGB2.
Off / Audio1 / Audio2 / Audio3
This Function is not displayed for X64w / X90w / X95 / X95i.
Setting the Audio-Computer2.
Off / Audio1 / Audio2 / Audio3
This Function is not displayed for X62w / X90w / X95 / X95i.
Setting the Audio-Video.
Off / Audio1 / Audio2 / Audio3
This Function is not displayed for X90w / X95 / X95i.
36
Audio-S-Video
Audio-Component
Audio-MIU
Monitor Out-RGB1
Monitor Out-RGB2
Monitor Out-HDMI
Monitor Out-Video
Monitor Out-S-Video
Monitor Out
-Component
Monitor Out-MIU
Monitor Out Standby
Reset
Setting the Audio-S-Video.
Off / Audio1 / Audio2 / Audio3
This Function is not displayed for X90w / X95 / X95i.
Setting the Audio-Component.
Off / Audio1 / Audio2 / Audio3
This Function is not displayed for X90w / X95 / X95i.
Setting the Audio-MIU.
Off / Audio1 / Audio2 / Audio3 / Audio MIU
This Function is not displayed for X90w / X95 / X95i.
Setting the Monitor Out-RGB1.
Off / RGB1 / RGB2
This Function is not displayed for X62w / X64w / X90w / X95.
Setting the Monitor Out-RGB2.
Off / RGB1 / RGB2
This Function is not displayed for X62w / X64w / X90w / X95.
Setting the Monitor Out-HDMI.
Off / RGB1 / RGB2
This Function is not displayed for X62w / X64w / X90w / X95.
Setting the Monitor Out-Video.
Off / RGB1 / RGB2
This Function is not displayed for X62w / X64w / X90w / X95.
Setting the Monitor Out-S-Video.
Off / RGB1 / RGB2
This Function is not displayed for X62w / X64w / X90w / X95.
Setting the Monitor Out-Component.
Off / RGB1 / RGB2
This Function is not displayed for X62w / X64w / X90w / X95.
Setting the Monitor Out-MIU.
Off / RGB1 / RGB2
This Function is not displayed for X62w / X64w / X90w / X95.
Setting the Monitor Out Standby.
Off / RGB1 / RGB2
This Function is not displayed for X62w / X64w / X90w / X95.
Initialize the selected Function.
X62w / X64w
Keystone V
X90w / X95 / X95i
Keystone V / Keystone H
[Execute]: After the confirmation message, the selected Function will be initialized.
[AUDIO] Tab
This tab is displayed for X90w / X95 / X95i.
Function
Volume
Treble
Bass
SRS WOW
Speaker
Audio-RGB1
Audio-RGB2
Audio-M1-D
Audio-HDMI
General Description
Setting the Volume.
[-]: Decrease the Volume.
[+]: Increase the Volume.
Setting the Treble.
[-]: Decrease the Treble.
[+]: Increase the Treble.
Setting the Bass.
[-]: Decrease the Bass.
[+]: Increase the Bass.
Setting the SRS WOW.
Off / Mid / High
Setting the Speaker.
Off / On
Setting the Audio-RGB1.
Off / Audio1 / Audio2 / Audio3 / Audio4
Setting the Audio-RGB2.
Off / Audio1 / Audio2 / Audio3 / Audio4
Setting the Audio-M1-D.
Off / Audio1 / Audio2 / Audio3 / Audio4
This Function is not displayed for X95 / X95i.
Setting the Audio-HDMI.
Off / Audio1 / Audio2 / Audio3 / Audio4 / Audio HDMI
This Function is not displayed for X90w.
37
Audio-Video
Audio-S-Video
Audio-Component
Audio-MIU
Audio Out Standby
HDMI Audio
Setting the Audio-Video.
Off / Audio1 / Audio2 / Audio3 / Audio4
Setting the Audio-S-Video.
Off / Audio1 / Audio2 / Audio3 / Audio4
Setting the Audio-Component.
Off / Audio1 / Audio2 / Audio3 / Audio4
Setting the Audio-MIU.
Off / Audio1 / Audio2 / Audio3 / Audio4 / Audio MIU
Setting the Audio Out Standby.
Off / Audio1 / Audio2 / Audio3 / Audio4
This Function is not displayed for X90w / X95.
Setting the HDMI Audio.
1/2
This Function is not displayed for X90w.
[SCREEN] Tab
Function
Language
Menu Position
Blank
Startup
MyScreen Lock
Message
Template
Reset
General Description
Setting the Language.
English / French / German / Spanish / Italian / Norwegian / Dutch / Portuguese /
Japanese / Simplified Chinese / Korean / Swedish / Russian / Finnish / Polish /
Turkish / Traditional Chinese
Setting the Menu Position.
[ ]: Increase the vertical menu position.
[ ]: Decrease the vertical menu position.
[ ]: Decrease the horizontal menu position.
[ ]: Increase the horizontal menu position.
Setting the Blank color.
Blue / White / Black / MyScreen / Original
Setting the Startup screen.
Original / Off / MyScreen
Setting MyScreen Lock.
Off / On
Setting Message.
Off / On
Setting the Template.
Test Pattern / Dot-Line1 / Dot-Line2 / Dot-Line3 / Dot-Line4
This Function is not displayed for X62w / X64w / X90w / X95.
Initialize the selected Function.
Menu Position V / Menu Position H
[Execute]: After the confirmation message, the selected Function will be initialized.
[OPTION] Tab
Function
Auto Search
Auto Keystone
Auto On
Auto Off
General Description
Setting Auto Search.
Off / On
Setting Auto Keystone.
Off / On
Setting Auto On.
Off / On
Setting Auto Off.
[-]: Decrease the Auto Power off time.
[+]: Increase the Auto Power off time.
38
My Button-1
My Button-2
My Source
C.C. Display
C.C. Mode
C.C. Channel
Setting My Button-1.
X62w
RGB1 / RGB2 / Video / S-Video / Component / MIU / Information /
Auto Keystone Execute / My Memory / Picture Mode / Filter Reset / e-SHOT /
Volume+ / VolumeX64w
Computer1 / Computer2 / Video / S-Video / Component / MIU / Information /
Auto Keystone Execute / My Memory / Picture Mode / Filter Reset / e-SHOT /
Volume+ / Volume- / Live Mode / Thumbnail / Slide Show / Directory /
Remove Media
X90w
RGB1 / RGB2 / M1-D / Video / S-Video / Component / MIU / Information /
Auto Keystone Execute / My Memory / Picture Mode / Filter Reset / Active Iris /
e-SHOT / Volume+ / VolumeX95
RGB1 / RGB2 / HDMI / Video / S-Video / Component / MIU / Information /
Auto Keystone Execute / My Memory / Picture Mode / Filter Reset / Active Iris /
e-SHOT / AV Mute / Template / Live Mode / Thumbnail / Slide Show / Directory /
Remove Media
X95i
RGB1 / RGB2 / HDMI / Video / S-Video / Component / MIU / Information /
Auto Keystone Execute / My Memory / Picture Mode / Filter Reset / Active Iris /
My Image / AV Mute / Template / Live Mode / Thumbnail / Slide Show / Directory /
Remove Media / Other
Setting My Button-2.
X62w
RGB1 / RGB2 / Video / S-Video / Component / MIU / Information /
Auto Keystone Execute / My Memory / Picture Mode / Filter Reset / e-SHOT /
Volume+ / VolumeX64w
Computer1 / Computer2 / Video / S-Video / Component / MIU / Information /
Auto Keystone Execute / My Memory / Picture Mode / Filter Reset / e-SHOT /
Volume+ / Volume- / Live Mode / Thumbnail / Slide Show / Directory /
Remove Media
X90w
RGB1 / RGB2 / M1-D / Video / S-Video / Component / MIU / Information /
Auto Keystone Execute / My Memory / Picture Mode / Filter Reset / Active Iris /
e-SHOT / Volume+ / VolumeX95
RGB1 / RGB2 / HDMI / Video / S-Video / Component / MIU / Information /
Auto Keystone Execute / My Memory / Picture Mode / Filter Reset / Active Iris /
e-SHOT / Volume+ / Volume- / AV Mute / Live Mode / Thumbnail / Slide Show /
Directory / Remove Media
X95i
RGB1 / RGB2 / HDMI / Video / S-Video / Component / MIU / Information /
Auto Keystone Execute / My Memory / Picture Mode / Filter Reset / Active Iris /
My Image / AV Mute / Template / Live Mode / Thumbnail / Slide Show / Directory /
Remove Media / Other
Setting the My Source.
RGB1 / RGB2 / HDMI / Video / S-Video / Component / MIU
This Function is not displayed for X62w / X64w / X90w / X95.
Setting the Closed Caption Display.
Off / On / Auto
This Function is not displayed for X62w / X90w / X95.
Setting the Closed Caption Mode.
Captions / Text
This Function is not displayed for X62w / X90w / X95.
Setting the Closed Caption Channel.
1/2/3/4
This Function is not displayed for X62w / X90w / X95.
39
[Service]
Function
Auto Adjust
IR Remote
IR Remote
Frequency Normal
IR Remote
Frequency High
General Description
Setting the Auto Adjust.
X64w / X95 / X95i
Disable / Fast / Fine
X62w / X90w
Disable / Enable
Setting the IR Remote.
X90w / X95 / X95i
Front (Off / On)
Rear (Off / On)
Top (Off / On)
This Function is not displayed for X62w / X64w.
Setting the IR Remote Frequency Normal.
Disable / Enable
Setting the IR Remote Frequency High.
Disable / Enable
[OTHER] Tab
Function
Power
Input Source
Mode
Blank On / Off
Mute
Freeze
Magnify
e-SHOT
My Image
General Description
Controlling the Power.
Off / On
Setting the Input Source.
X62w
RGB1 / RGB2 / Video / S-Video / Component / MIU
X64w
Computer1 / Computer2 / Video / S-Video / Component / MIU
X90w
RGB1 / RGB2 / M1-D / Video / S-Video / Component / MIU
X95 / X95i
RGB1 / RGB2 / HDMI / Video / S-Video / Component / MIU
Setting the Picture Mode.
X62w / X90w
Normal / Cinema / Dynamic / Board(Black) / Board(Green) / White Board / Custom
X64w / X95 / X95i
Normal / Cinema / Dynamic / Board(Black) / Board(Green) / White Board /
Daytime / Custom
Custom is displayed only. It cannot be set.
Setting Blank.
Off / On
Setting Mute.
Off / On
Setting Freeze.
Normal / Freeze
Setting Magnify
[-]: Decrease the Magnify value.
[+]: Increase the Magnify value.
Setting the e-SHOT.
Off / Image1 / Image2 / Image3 / Image4
This Function is not displayed for X95i.
Setting the My Image.
Off / Image1 / Image2 / Image3 / Image4
This Function is not displayed for X62w / X64w / X90w / X95.
40
■ X30N / X35N
[STATUS] Tab
Function
Power Status
Input Source
Error Status
Blank On/Off
Mute
Freeze
Lamp Time
Filter Time
Reset
General Description
Display the Power Status.
Off / On / Cool down
Display the Input source status.
Computer in1 / Computer in2 / Video / S-Video / Component
Display the Error status.
Normal / Cover Error / Fan Error / Lamp Error / Temp Error / Air Flow Error
/ Cold Error / Filter Error / Other Error
Display the Blank status.
Off / On
Display the Mute status.
Off / On
Display the Freeze status.
Normal / Freeze
Display the Lamp Time.
Display the Filter Time.
Initialize the selected Function.
Lamp Time / Filter Time
[Execute]: After the confirmation message, the selected Function will be initialized.
[PICTURE] Tab
Function
Brightness
Contrast
Gamma
Color Temp
Color
Tint
Sharpness
Active Iris
My Memory
Reset
General Description
Setting the Brightness
[-]: Decrease the Brightness value.
[+]: Increase the Brightness value.
Setting the Contrast
[-]: Decrease the Contrast value.
[+]: Increase the Contrast value.
Setting the Gamma.
#1-Custom / #2-Custom / #3-Custom / #4-Custom / #5-Custom / #6-Custom /
#1-Default / #2-Default / #3-Default / #4-Default / #5-Default / #6-Default
Setting the Color Temp.
Low / Mid / High / Hi-Bright-1 / Hi-Bright-2 / Hi-Bright-3 / Custom-Low / Custom-Mid /
Custom-High / Custom-Hi-Bright-1 / Custom-Hi-Bright-2 / Custom-Hi-Bright-3
Setting the color density.
[-]: Decrease the color density value.
[+]: Increase the color density value
Setting the Tint.
[-]: Decrease the tint value.
[+]: Increase the tint value.
Setting the sharpness of the picture.
[-]: Decrease the color density value.
[+]: Increase the color density value.
Setting the Active Iris.
Off / Theater / Presentation
Load/Save the My Memory.
Load1 / Load2 / Load3 / Load4 / Save1 / Save2 / Save3 / Save4
[Execute]: Load / Save the selected Function.
Initialize the selected Function
Brightness / Contrast / Color / Tint / Sharpness
[Execute]: After the confirmation message, the selected Function will be initialized.
41
[Custom - Gamma -]
Function
User Gamma Pattern
User Gamma Point 1
User Gamma Point 2
User Gamma Point 3
User Gamma Point 4
User Gamma Point 5
User Gamma Point 6
User Gamma Point 7
User Gamma Point 8
General Description
Setting the test pattern.
Off / 9step Gray Scale / 15step Gray Scale / Ramp
Setting the User Gamma Point 1.
[-]: Decrease the User Gamma Point 1 value.
[+]: Increase the User Gamma Point 1 value.
[Reset]: Initialize the User Gamma Point 1 value.
Setting the User Gamma Point 2.
[-]: Decrease the User Gamma Point 2 value.
[+]: Increase the User Gamma Point 2 value.
[Reset]: Initialize the User Gamma Point 2 value.
Setting the User Gamma Point 3.
[-]: Decrease the User Gamma Point 3 value.
[+]: Increase the User Gamma Point 3 value.
[Reset]: Initialize the User Gamma Point 3 value.
Setting the User Gamma Point 4.
[-]: Decrease the User Gamma Point 4 value.
[+]: Increase the User Gamma Point 4 value.
[Reset]: Initialize the User Gamma Point 4 value.
Setting the User Gamma Point 5.
[-]: Decrease the User Gamma Point 5 value.
[+]: Increase the User Gamma Point 5 value.
[Reset]: Initialize the User Gamma Point 5 value.
Setting the User Gamma Point 6.
[-]: Decrease the User Gamma Point 6 value.
[+]: Increase the User Gamma Point 6 value.
[Reset]: Initialize the User Gamma Point 6 value.
Setting the User Gamma Point 7.
[-]: Decrease the User Gamma Point 7 value.
[+]: Increase the User Gamma Point 7 value.
[Reset]: Initialize the User Gamma Point 7 value.
Setting the User Gamma Point 8.
[-]: Decrease the User Gamma Point 8 value.
[+]: Increase the User Gamma Point 8 value.
[Reset]: Initialize the User Gamma Point 8 value.
[Custom - Color Temp -]
Function
User Gamma Pattern
Color Temp Gain R
Color Temp Gain G
Color Temp Gain B
Color Temp Offset R
Color Temp Offset G
Color Temp Offset B
General Description
Setting the test pattern.
Off / 9step Gray Scale / 15step Gray Scale / Ramp
Setting Color Temp Gain R.
[-]: Decrease the Color Temp Gain R value.
[+]: Increase the Color Temp Gain R value.
[Reset]: Initialize the Color Temp Gain R value.
Setting Color Temp Gain G.
[-]: Decrease the Color Temp Gain G value.
[+]: Increase the Color Temp Gain G value.
[Reset]: Initialize the Color Temp Gain G value.
Setting Color Temp Gain B.
[-]: Decrease the Color Temp Gain B value.
[+]: Increase the Color Temp Gain B value.
[Reset]: Initialize the Color Temp Gain B value.
Setting Color Temp Offset R.
[-]: Decrease the Color Temp Offset R value.
[+]: Increase the Color Temp Offset R value.
[Reset]: Initialize the Color Temp Offset R value.
Setting Color Temp Offset G.
[-]: Decrease the Color Temp Offset G value.
[+]: Increase the Color Temp Offset G value.
[Reset]: Initialize the Color Temp Offset G value.
Setting Color Temp Offset B.
[-]: Decrease the Color Temp Offset B value.
[+]: Increase the Color Temp Offset B value.
[Reset]: Initialize the Color Temp Offset B value.
42
[IMAGE] Tab
Function
Aspect
Over Scan
Position
H Phase
H Size
Auto Adjust
Reset
General Description
Setting the Aspect.
4:3 / 16:9 / 16:10 / 14:9 / Normal
Setting the Over Scan
[-]: Decrease the Over scan value.
[+]: Increase the Over scan value.
Setting the display position.
[ ]: Increase the vertical position.
[ ]: Decrease the vertical position.
[ ]: Increase the horizontal position.
[ ]: Decrease the horizontal position.
Setting the clock phase.
[-]: Decrease the clock phase value.
[+]: Increase the clock phase value.
Setting the horizontal size.
[-]: Decrease the horizontal size value.
[+]: Increase the horizontal size value.
Execute Auto Adjust.
Initialize the selected Function.
Over Scan / V Position / H Position / H Size
[Execute]: After the confirmation message, the selected Function will be initialized.
[INPUT] Tab
Function
Progressive
Video NR
Color Space
Component
S-Video Format
C-Video Format
Computer in1
Computer in2
Frame Lock - Computer
in1
Frame Lock - Computer
in2
General Description
Setting the Progressive.
Off / TV / FILM
Setting the Video NR.
Low / Mid / High
Setting the Color space.
Auto / RGB / SMPTE240 / REC709 / REC601
Setting the Component.
Component / Scart RGB
Setting the S-Video Format.
Auto / NTSC / PAL / SECAM / NTSC4.43 / M-PAL / N-PAL
Setting the C-Video Format.
Auto / NTSC / PAL / SECAM / NTSC4.43 / M-PAL / N-PAL
Setting the Computer in-1 Signal Type.
Sync On G Off / Auto
Setting the Computer in-2 Signal Type.
Sync On G Off / Auto
Setting the Frame Lock-Computer in1.
Off / On
Setting the Frame Lock-Computer in2.
Off / On
[SETUP] Tab
Function
Auto Keystone Execute
Keystone V
Eco Mode
Mirror
Standby Mode
Monitor Out - Computer
in1
Monitor Out - Computer
in2
Monitor Out - Component
Monitor Out - S-Video
General Description
Execute Auto Keystone.
Setting the Keystone V.
[-]: Decrease the Keystone V value.
[+]: Increase the Keystone V value.
Setting the Eco Mode.
Normal / Eco
Setting the Mirror display.
Normal / H Inverse / V Inverse / H&V Inverse
Setting the Standby Mode.
Normal / Saving
Setting the Monitor Out-Computer in1.
Off / Computer in1
Setting the Monitor Out-Computer in2.
Off / Computer in2
Setting the Monitor Out-Component.
Off / Computer in1 / Computer in2
Setting the Monitor Out-S-Video.
Off / Computer in1 / Computer in2
43
Monitor Out - Video
Monitor Out - Standby
Reset
Setting the Monitor Out-Video.
Off / Computer in1 / Computer in2
Setting the Monitor Out Standby.
Off / Computer in1 / Computer in2
Initialize the selected Function.
Keystone V
[Execute]: After the confirmation message, the selected Function will be initialized.
[AUDIO] Tab
Function
Volume
Speaker
Audio Source Computer in1
Audio Source Computer in2
Audio Source Component
Audio Source - S-Video
Audio Source - Video
Audio Out Standby
General Description
Setting the Volume.
[-]: Decrease the Volume.
[+]: Increase the Volume.
Setting the Speaker.
Off / On
Setting the Audio-Computer in1.
Off / Audio1 / Audio2 / Audio3
Setting the Audio-Computer in2.
Off / Audio1 / Audio2 / Audio3
Setting the Audio-Component.
Off / Audio1 / Audio2 / Audio3
Setting the Audio-S-Video.
Off / Audio1 / Audio2 / Audio3
Setting the Audio-Video.
Off / Audio1 / Audio2 / Audio3
Setting the Audio Out Standby.
Off / Audio1 / Audio2 / Audio3
[SCREEN] Tab
Function
Language
Menu Position
Blank
Startup
MyScreen Lock
Message
Template
C.C. - Display
C.C. - Mode
C.C. - Channel
Reset
General Description
Setting the Language.
English / French / German / Spanish / Italian / Norwegian / Dutch / Portuguese /
Japanese / Simplified Chinese / Korean / Swedish / Russian / Finnish / Polish /
Turkish / Traditional Chinese / Danish / Czech / Hungarian / Romanian /
Slovenian / Croatian / Greek / Lithuanian / Estonian / Latvian / Thai / Arabian /
Persian / Portuguese-Brazil
Setting the Menu Position.
[ ]: Increase the vertical menu position.
[ ]: Decrease the vertical menu position.
[ ]: Decrease the horizontal menu position.
[ ]: Increase the horizontal menu position.
Setting the Blank color.
Blue / White / Black / MyScreen / Original
Setting the Startup screen.
Original / Off / MyScreen
Setting the Blank color.
Blue / White / Black / MyScreen / Original
Setting Message.
Off / On
Setting the Template.
Test Pattern / Dot-Line1 / Dot-Line2 / Dot-Line3 / Dot-Line4
Setting the Closed Caption Display.
Off / On / Auto
Setting the Closed Caption Mode.
Captions / Text
Setting the Closed Caption Channel.
1/2/3/4
Initialize the selected Function.
Menu Position V / Menu Position H
[Execute]: After the confirmation message, the selected Function will be initialized.
44
[OPTION] Tab
Function
Auto Search
Auto Keystone
Direct On
Auto Off
My Button-1
My Button-2
My Source
General Description
Setting Auto Search.
Off / On
Execute Auto Keystone.
Setting Direct On.
Off / On
Setting Auto Off.
[-]: Decrease the Auto Power off time.
[+]: Increase the Auto Power off time.
Setting My Button-1.
Computer in1 / Computer in2 / Video / S-Video / Component / Information /
Auto Keystone Execute / My Memory / Active Iris / Picture Mode / Filter Reset /
AV Mute / Template / My Image / Messenger / Other
Setting My Button-2.
Computer in1 / Computer in2 / Video / S-Video / Component / Information /
Auto Keystone Execute / My Memory / Active Iris / Picture Mode / Filter Reset / AV
Mute / Template / My Image / Messenger / Other
Setting the My Source.
Computer in1 / Computer in2 / Video / S-Video / Component
[Service]
Function
IR Remote Frequency
Normal
IR Remote Frequency
High
General Description
Setting the IR Remote Frequency Normal.
Disable / Enable
Setting the IR Remote Frequency High.
Disable / Enable
[OTHER] Tab
Function
Power
Input Source
Picture Mode
Blank On/Off
Mute
Freeze
Template On/Off
Magnify
My Image
My Image Delete
General Description
Controlling the Power.
Off / On
Setting the Input Source.
Computer in1 / Computer in2 / Video / S-Video / Component
Setting the Picture Mode.
Normal / Cinema / Dynamic / Board(Black) / Board(Green) / White Board / Daytime /
Custom
Custom is displayed only. It cannot be set.
Setting Blank.
Off / On
Setting Mute.
Off / On
Setting Freeze.
Normal / Freeze
Setting Template.
Off / On
Setting Magnify
[-]: Decrease the Magnify value.
[+]: Increase the Magnify value.
Setting the My Image.
Off / Image1 / Image2 / Image3 / Image4
Deleting the My Image.
Image1 / Image2 / Image3 / Image4
45
3.15
Turn on the power
Select [Control]
[Power ON] to turn on the power. You can also turn on the power by clicking the power on icon
on the toolbar. If you select a group of projectors, all projectors in the group are powered on.
3.16
Turn off the power
Select [Control]
[Power OFF] to turn off the power. You can also turn off the power by clicking the power off
icon on the toolbar. If you select a group of projectors, all projectors in the group are powered off.
3.17
Display e-SHOT / MY MAGE
You can display e-SHOT / MY IMAGE on projectors that supports e-SHOT / MY IMAGE feature. The e-SHOT /
MY IMAGE is available for the following models, X62w, X64w, X90w, X95 and X95i. Select [Control]
[Display
Image] and image number, when you display e-SHOT / MY IMAGE. Select [Control]
[Display Image]
[Off],
when you exit e-SHOT / MY IMAGE. If you choose projector group, e-SHOT / MY IMAGE command is sent to the all
projectors in the group.
3.18
Schedule Events
In order to schedule the events, go to [Schedule]
[Edit] from the menu. The Edit Schedule dialogue will appear.
Group selected
Projector selected
Group Information
Group Name
--- Displays the group name.
Contains
--- Displays the number of projectors and groups in the group.
Comment
--- Displays the comment.
Projector Information
Projector Name --- Displays the projector name.
Model
--- Displays the model name.
Comment
--- Displays the comment.
Schedule List
[Add]
[Delete]
[Close]
---------
Show the list of scheduled events
Add a new event
Delete a selected event
Close the dialogue
The Add Schedule dialogue will appear when you are adding a new event.
46
Schedule Kind
Date
Time
Control
[OK]
3.19
--- Select a following schedule type.
Daily / Sunday / Monday / Tuesday / Wednesday / Thursday / Friday / Saturday /
Specific date
--- Specify the event date for Specific date schedule type
--- Specify the event time
--- Specify the event
--- Add the event and close the dialogue
Activate monitoring scheduled events
Select [Schedule]
[Start]. You can also activate monitoring events by clicking the schedule start icon on the
toolbar. You cannot add, delete or edit an event during while the event monitoring process is active. Please see the
chapter 5 for the details.
3.20
Stop monitoring scheduled events
Select [Schedule]
[Stop]. You can also stop the monitoring events by clicking [schedule stop] icon on the
toolbar. Please see the chapter 5 for the details.
3.21
Polling Interval Period
Select [Option]
[Status Check Interval], enter the polling interval time in seconds.
The polling interval time must be within the range from 10 to 3600 seconds.
47
3.22
Mail Setting
A notification mail will be sent when any error or selected condition occurs. Select [Option]
open the mail settings dialogue.
(1) Mail Settings
Mail Settings dialog is as follows.
Send Mail
SMTP Server
From Address
Send Address
---------
Subject
Mail Text
Attach File
-------
Mail Send Test
---
Enable / Disable send mail function
Enter the SMTP Server
Enter the sender’s mail address
Enter the receiver’s mail addresses up to 10 addresses
[Add]:
Add a receiver’s mail address
[Delete]: Delete a receiver’s mail address
[Edit]:
Edit receiver’s mail address
Enter the subject
Mail Text Setting screen appears to set the mail message
Enter the file name of attached file (optional)
[Browse] File dialogue appears
:
Send a test mail
(2) Mail Address Settings
Mail Address Setting dialogue is as follows.
Mail Address --- Enter the mail address to be sent, up to
256 characters.
[TO][CC][BCC]: Select TO / CC / BCC.
Notification
--- Chose the Error / Alarm to send the mail.
[Select All]:
Turn all the check box ON.
[Release All]: Turn all the check box OFF.
48
[Mail Settings] to
(3) Mail Text Settings
Mail Text Settings dialogue is as follows.
Cover Error
Fan Error
Lamp Error
Temp Error
Air Flow Error
Lamp Time Error
Cold Error
Filter Error
Other Error
Disconnect
Lamp Time Alarm
Filter Time Alarm
-------------------------
Enter the text message, which is sent when Cover Error occurs
Enter the text message, which is sent when Fan Error occurs
Enter the text message, which is sent when Lamp Error occurs
Enter the text message, which is sent when Temp Error occurs
Enter the text message, which is sent when Air Flow Error occurs
Enter the text message, which is sent when Lamp Time Error occurs
Enter the text message, which is sent when Cold Error occurs
Enter the text message, which is sent when Filter Error occurs
Enter the text message, which is sent when Other Error occurs
Enter the text message, which is sent when connection is disconnected
Enter the text message, which is sent when Lamp Alarm Time comes
Enter the text message, which is sent when Filter Alarm Time comes
49
3.23
MY IMAGE transfer
You can send an MY IMAGE file to a projector that supports MY IMAGE feature. This function is available for the
following models, X30N and X35N. The X62w, X64w, X90w, X95 and X95i support MY IMAGE also, but this tool is
not supported those models due to transfer mechanism difference. Select [Option]
[Image Send] to display the
window “Send Image file to projector(s)” as shown next.
In order to add projectors on the list, please mark the
projector group on the tree view. Also you can unselect
projector individually.
Once you select the image file and store location number, the “Send” button becomes available. The compatible
image file is only PJ1 format file that can be created by Projector Image Tool (PJImg). And then, click the Send
button to transfer image. The maximum size of transferred file is depending on the model. Please check the
following list.
X30N / X35N
Less than equal 130,816byte
The status is shown during transfer. The status will change “Completed” if it succeeds.
[Note]
Please verify the port setting on the projector and the port / authentication setting on the application.
50
3.24
User-defined Model
3.24.1 Add an User-defined Model
You can create your own projector definition and add it as User-defined model. In order to add new User-defined
model, click [Add Model…] button on the Add Projector window. Once you have added a User-defined model, the
new model is added in the standard model list.
(1) General Settings
Model Name
Command Type
Power On Command
-------
Power Off Command
---
Enter the name of User-defined model
Select command type wither Binary or Text (ASCII)
Define Power On command. It allows up to 32 ASCII character length.
Binary type command
Ex: BEEF030600BAD2010000600100
* Only 0-9, a-f and A-F are available to enter.
Text type command
Ex: POWER ON[CR]
* Control characters are defined as below.
Define Power Off command. It allows up to 32 ASCII character length.
Binary type command
Ex: BEEF0306002AD3010000600000
* Only 0-9, a-f and A-F are available to enter.
Text type command
Ex: POWER OFF[CR]
* Control characters are defined as below.
Control Characters
Control Character
NUL
0x00
SOH
0x01
STX
0x02
ETX
0x03
EOT
0x04
ENQ
0x05
ACK
0x06
BEL
0x07
BS
0x08
HT
0x09
LF
0x0a
Notation
[NUL]
[SOH]
[STX]
[ETX]
[EOT]
[ENQ]
[ACK]
[BEL]
[BS]
[HT]
[LF]
Control Character
VT
0x0b
NP
0x0c
CR
0x0d
SO
0x0e
SI
0x0f
DLE
0x10
DC1
0x11
DC2
0x12
DC3
0x13
DC4
0x14
NAK
0x15
51
Notation
[VT]
[NP]
[CR]
[SO]
[SI]
[DLE]
[DC1]
[DC2]
[DC3]
[DC4]
[NAK]
Control Character
SYN
0x16
ETB
0x17
CAN
0x18
EM
0x19
SUB
0x1a
ESC
0x1b
FS
0x1c
GS
0x1d
RS
0x1e
US
0x1f
DEL
0x7f
Notation
[SYN]
[ETB]
[CAN]
[EM]
[SUB]
[ESC]
[FS]
[GS]
[RS]
[US]
[DEL]
(2) Communication Settings
RS-232C
bits/s
Data bits
Parity
Stop bit
Flow Control
Network
---------------
COM port parameter setting (if RS232C uses)
Baud rate
Data bit
Parity bit
Stop bit
Flow control
Select network protocol (TCP or UDP)
(3) Command Definitions 1
Name
Command
--- Enter the name of command, up to 32 ASCII characters.
--- Define the command up to 32 ASCII characters.
The allowed characters are depending on the command type selection (binary or Text)
on the General Setting TAB.
52
(4) Command Definitions 2
Name
Command
-----
Enter the name of command, up to 32 ASCII characters.
Define the command up to 32 ASCII characters. The allowed characters are depending
on the command type selection (binary or Text) on the General Setting TAB.
3.24.2 Edit User-defined Model
In order to edit User-defined model, select [Option]
appeared.
[Edit User-defined Model]. The following window will be
(1) Edit
Choose a User-defined Model form the list, and then click [Edit…] button.
(2) Delete
Choose a User-defined model from the list, and then click [Delete…] button. The confirmation message will be
appeared. The deleted model on the projector tree will be removed when the User-defined Model definition is
deleted.
53
3.24.3 Control User-defined Model
(1) Power On
Select [Control]
[Power ON] to turn on the power. You can also turn on the power by clicking the power on
icon on the toolbar. If you select a group of projectors, all projectors in the group are powered on.
(2) Power Off
Select [Control]
[Power OFF] to turn off the power. You can also turn off the power by clicking the power off
icon on the toolbar. If you select a group of projectors, all projectors in the group are powered off.
(3) Command No.1-10
Select [Control]
[Execute Command] to execute a command.
(4) Schedule
Only Power On / Off commands are allowed as the schedule event for User-defined model.
3.25
Open the build-in HTML page in the projector
You can access the projector build-in HTML page from PJMan directly. Select the projector from the tree view,
and then go to [Option]
[Access Projector via HTML] from the menu. The default browser on your computer will
launch automatically and access the selected projector HTML page. This function supports the network projector
only.
3.26
About Dialogue
Select [Help]
[About] to open the about dialogue.
54
4 Mail Feature
4.1
Mail Format
The Projector Management Application sends an e-mail by following format.
Time : YYYY / MM / DD hh:nn:ss
Projector Name : xxxxxx
Connection: xxxxxx
Message: xxxxxxxxxxxxxxxxxx (Typed in text on Message Setting screen)
(Sample 1)
Time: 2003 / 11 / 11 23:12:22
Projector Name: Projector1
Connection: 192.168.1.10 (00-00-87-F3-EB-01)
Message: Fan Error!!!
(Sample 2)
Time: 2003/11/12 20:00:17
Projector Name: Projector2
Connection: COM1
Message: Lamp Error!!!
4.2
Others
The e-mail sending process is triggered by the transition from normal status to error (or event) mode. When an
error happens at the startup, this Projector Management Software application will not send e-mail.
55
5 Status
The projector status is classified with colored label.
Status
Normal
Display
(Black text with white background)
Warning
(Black text on yellow background)
Error
(White text on brown background)
Disconnect
(White text on red background)
All of projectors are normal
(Black text on white background)
At least one projector is in the warning state and
rests of projectors are normal.
(Black text on yellow background)
At least one projector is in the error state and rests of
projectors are either warning or normal state.
(White text on brown background)
At least one projector is in the disconnect state, and
rest of projectors are error, warning or normal.
(White text on red background)
The each projector is classified by colored label on the list of projector when the user select a group.
Status
Normal
Display
(Black text with white
background)
Warning
(Black text on yellow
background)
Error
(White text on brown
background)
Disconnect
(White text
background)
The priority of colored label is; 1st Disconnect, 2nd Error and 3rd Warning.
56
on
red
6 Output Log
In order to enable logging status data, please enable log setting through [File]
when it is unchecked.
[Log]. It does not record log data
Output folder : (PJman installed folder)\Log\
Filename :
TCP / IP network --- (IP address)_(Port No.).log (ex: 192.168.1.10_23.log)
Serial (RS232C) --- COMM_(Port No.).log
(ex: COMM_1.log)
Format :
Command log
[Cmd ], [Date], [Action code], [Operation ID], [Operation Name], [Setting Value], [Result], [Return Value]
Status log (only status is changed)
[Stat], [Date], [Status Name], [Status]
Example
[Stat], 2008/11/07 20:06:16, Power Status, ON
[Stat], 2008/11/07 20:06:16, Lamp Time, 0
[Stat], 2008/11/07 20:06:16, Filter Time, 0
[Stat], 2008/11/07 21:06:16, Lamp Time, 1
[Stat], 2008/11/07 21:06:16, Filter Time, 1
[Cmd ], 2008/11/07 21:10:35, Set, 0x2000, Input Source, 1, OK, 0
[Cmd ], 2008/11/07 21:15:27, Get, 0x6000, Power, 0, OK, 0
[Cmd ], 2008/11/07 21:15:27, Set, 0x6000, Power, 0, OK, 0
[Stat], 2008/11/07 21:15:30, Error Status, Disconnect
57
7 Create Log Report
In order to create Log Report, choose a projector or group that you want to create Report from the tree view. Ands
then, select [File]
[Log Report]. The following dialogue appears.
Period --- The reporting period.
Start : Start Date
End : End Date
Output folder --- Output folder
The Log Report will create in the output folder when OK button is
pressed. The folder contains individual Log Report of each
projector separately. The individual log life is provided as csv
format with projector name (“projector name.csv”)
The format of Log Report is shown below.
Projector Name: Projector 1
Model: X62w
Connection: 192.168.1.10:23 (00-00-87-f3-eb-01)
Period: 2008/04/01 - 2008/04/30
Use Information
[Date],[Power On Count],[Power Off Count],[Lamp Time],[Filter Time],[Error Count]
2008/04/01,5,5,145,145,0
2008/04/02,3,3,148,148,1
:
:
2008/04/30,1,1,193,193,0
Error Information
[Date], [Time], [Error Info]
2008/04/02,17:43:36,Disconnect
Item
Projector Name
Model
Connection
Description
Projector name
Model name
Connection type
Period
Use Information
Date
Power On Count
Log data period
Usage information
Date
Sum of power status change from OFF
to ON
Sum of power status change from ON
to OFF
Lamp hours
Filter hours
Sum of Error / Warnings
Error Information
Date of Error
Time of Error
Error type
Power Off Count
Lamp Time
Filter Time
Error Count
Error Information
Date
Time
Error Info
Note
58
Serial (RS232C):
COM Port number
Network:
IP Address:Portnumber (MAC address)
yyyy/mm/dd
yyyy/mm/dd
The lamp hours when the report is generated.
The filter hours when the report is generated.
yyyy/mm/dd
hh:nn:ss
8 Create Status Report
You can create the status report as HTML format. The report shows a current snapshot of projector status in a
particular group, searched group or groups. In order to show the status report, select the group or projector. And
then go to [File]
[Output Report] from the menu. The status report will be shown in the web browser.
The status report will be given by group as shown below.
59