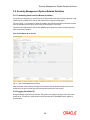
1
Oracle FLEXCUBE Core Banking System Operations User Manual Release 11.5.0.0.0 Part No. E52876-01 July 2014 System Operations User Manual July 2014 Oracle Financial Services Software Limited Oracle Park Off Western Express Highway Goregaon (East) Mumbai, Maharashtra 400 063 India Worldwide Inquiries: Phone: +91 22 6718 3000 Fax: +91 22 6718 3001 www.oracle.com/financialservices/ Copyright © 2014, Oracle and/or its affiliates. All rights reserved. Oracle and Java are registered trademarks of Oracle and/or its affiliates. Other names may be trademarks of their respective owners. U.S. GOVERNMENT END USERS: Oracle programs, including any operating system, integrated software, any programs installed on the hardware, and/or documentation, delivered to U.S. Government end users are “commercial computer software” pursuant to the applicable Federal Acquisition Regulation and agencyspecific supplemental regulations. As such, use, duplication, disclosure, modification, and adaptation of the programs, including any operating system, integrated software, any programs installed on the hardware, and/or documentation, shall be subject to license terms and license restrictions applicable to the programs. No other rights are granted to the U.S. Government. This software or hardware is developed for general use in a variety of information management applications. It is not developed or intended for use in any inherently dangerous applications, including applications that may create a risk of personal injury. If you use this software or hardware in dangerous applications, then you shall be responsible to take all appropriate failsafe, backup, redundancy, and other measures to ensure its safe use. Oracle Corporation and its affiliates disclaim any liability for any damages caused by use of this software or hardware in dangerous applications. This software and related documentation are provided under a license agreement containing restrictions on use and disclosure and are protected by intellectual property laws. Except as expressly permitted in your license agreement or allowed by law, you may not use, copy, reproduce, translate, broadcast, modify, license, transmit, distribute, exhibit, perform, publish or display any part, in any form, or by any means. Reverse engineering, disassembly, or decompilation of this software, unless required by law for interoperability, is prohibited. The information contained herein is subject to change without notice and is not warranted to be error-free. If you find any errors, please report them to us in writing. This software or hardware and documentation may provide access to or information on content, products and services from third parties. Oracle Corporation and its affiliates are not responsible for and expressly disclaim all warranties of any kind with respect to third-party content, products, and services. Oracle Corporation and its affiliates will not be responsible for any loss, costs, or damages incurred due to your access to or use of third-party content, products, or services. System Operations User Manual Table of Contents 1. Preface ........................................................................................................................................ 5 2. Introduction ................................................................................................................................ 7 2.1. Purpose of the Manual ......................................................................................................... 8 2.2. Audience .............................................................................................................................. 9 2.3. Overview ............................................................................................................................ 10 3. Branch Server .......................................................................................................................... 11 3.1. Bank Maintenance.............................................................................................................. 12 3.1.1. Bank Master Maintenance .......................................................................................... 12 3.2. Branch Operations ............................................................................................................. 14 3.2.1. Branch Server Start Operations .................................................................................. 14 3.2.2. Cash and Transfer Operations ................................................................................... 15 3.3. Branch Tables Purging ....................................................................................................... 20 3.3.1. Inward Clearing batch Upload .................................................................................... 22 3.3.2. Load Central Bank Floppy File ................................................................................... 23 3.3.3. Load the Inward MICR file .......................................................................................... 24 3.4. Database Backups and Reports Backups ......................................................................... 25 3.4.1. Database Backup........................................................................................................ 25 3.4.2. Reports Backups......................................................................................................... 25 3.5. Data Downloads ................................................................................................................. 26 3.5.1. Automatic Download ................................................................................................... 26 3.5.2. Manual Download ....................................................................................................... 28 3.6. GEFU File Upload .............................................................................................................. 31 3.6.1. Upload Process........................................................................................................... 34 3.6.2. Inquiry ......................................................................................................................... 36 3.6.3. Reports ....................................................................................................................... 37 3.7. Maintenance ....................................................................................................................... 39 3.7.1. Release Area Maintenance ........................................................................................ 39 3.7.2. Branch Server Maintenance ....................................................................................... 39 3.8. Security Management System Related Activities .............................................................. 40 3.8.1. Transferring Users from One Branch to Another ........................................................ 40 3.8.2. Logging Out of User ID ............................................................................................... 40 3.8.3. Enable / Disable of user ID ......................................................................................... 42 3.8.4. Adhoc Reports ............................................................................................................ 42 3.8.5. Dos and Don’ts on the Branch Server ........................................................................ 43 4. Data Center............................................................................................................................... 44 4.1. Database Backups and Reports Backups ......................................................................... 45 4.1.1. Database Backup........................................................................................................ 45 4.1.2. Reports Backups......................................................................................................... 45 4.2. Data Purging ...................................................................................................................... 46 4.2.1. Host Tables Purging ................................................................................................... 46 4.2.2. Log Files Purging ........................................................................................................ 46 4.2.3. Reports Purging .......................................................................................................... 46 4.3. Host Operations ................................................................................................................. 55 4.4. Interfacing with FLEXCUBE Corporate .............................................................................. 56 4.4.1. EOD Flow of Events for FCR ...................................................................................... 58 4.5. Login for EOD Operations .................................................................................................. 60 4.5.1. Control of EOD Services for Retail Application .......................................................... 60 4.5.2. Bringing Up the Operator Menu .................................................................................. 62 4.5.3. Invoking the EOD Console ......................................................................................... 62 4.5.4. Other Buttons on the EOD Console............................................................................ 68 4.5.5. Process Run and Status Update ................................................................................ 68 4.5.6. Exception Processing ................................................................................................. 73 4.6. Normal Processing Day ..................................................................................................... 74 4.6.1. Cut-off processing ....................................................................................................... 74 System Operations User Manual 4.6.2. End of day (EOD) processing ..................................................................................... 75 4.6.3. Beginning of day (BOD) processing ........................................................................... 77 4.6.4. Adhoc processing ....................................................................................................... 78 4.7. Other Activities Done During EOD Processing .................................................................. 79 4.8. Pre-requisites Required for EOD Processing .................................................................... 80 4.8.1. FLEXCUBE Retail Services ........................................................................................ 80 4.8.2. Data Area .................................................................................................................... 81 4.8.3. Branch Batch Close .................................................................................................... 81 4.9. Steps for EOD on a Normal Processing Day ..................................................................... 83 4.9.1. Eligibility Shell ............................................................................................................. 83 4.9.2. Cut-off Processing ...................................................................................................... 84 4.9.3. End of day (EOD) Processing ..................................................................................... 85 4.9.4. Beginning of day (BOD) Processing ........................................................................... 88 4.10. System Maintenance ........................................................................................................ 90 4.10.1. Release Area Maintenance ...................................................................................... 90 4.10.2. Host Maintenance ..................................................................................................... 90 4.11. Troubleshooting................................................................................................................ 91 4.11.1. Path for Logging the Trace File ................................................................................ 91 4.11.2. Process Abort Procedures ........................................................................................ 94 4.11.3. Common Script to Update Non-Operator Login Status ............................................ 95 4.11.4. Database Access Problem or Space Problem ......................................................... 95 5. Host and Branch Report ......................................................................................................... 96 5.1. Reports ............................................................................................................................... 97 Preface 1. Preface 1.1. Intended Audience This document is intended for the following audience: Customers Partners 1.2. Documentation Accessibility For information about Oracle's commitment to accessibility, visit the Oracle Accessibility Program website at http://www.oracle.com/pls/topic/lookup?ctx=acc&id=docacc. 1.3. Access to OFSS Support https://support.us.oracle.com 1.4. Structure This manual is organized into the following categories: Preface gives information on the intended audience. It also describes the overall structure of the User Manual Introduction provides brief information on the overall functionality covered in the User Manual Chapters are dedicated to individual transactions and its details, covered in the User Manual 5 Preface 1.5. Related Information Sources For more information on Oracle FLEXCUBE Core Banking Release11.5.0.0.0, refer to the following documents: Oracle FLEXCUBE Core Banking Licensing Guide 6 Introduction 2. Introduction 7 Purpose of the Manual 2.1. Purpose of the Manual The purpose of this manual is to provide details into all the operations which would be required to be undertaken at the branch as well as the Data Center level. Banks can prepare an exhaustive operations manual using the contents of this manual as the base. This manual is not expected to provide an exhaustive checklist of all operations/tasks which are required to be done in particular operations. Depending upon the configuration of FLEXCUBE, it is possible that some operations need not be undertaken or some additional steps would be needed to be undertaken to complete a task. For e.g., FLEXCUBE Corporate as an external system may not be used at a particular site. In such a scenario, the related/brief operations pertaining to FLEXCUBE Corporate should be disregarded. As this manual refers to operations pertaining to FLEXCUBE Core Banking, the operations in other systems such as FLEXCUBE Corporate would not be mentioned in detail. 8 Audience 2.2. Audience The audience of this manual would be: Branch personnel who are responsible for operations on branch server Data center personnel who are responsible for operations on Application and Database server EOD/EOM and batch operators 9 Overview 2.3. Overview The first task of the day for the System Operator is to prepare the bank for the day’s operation. This Beginning of Day (BOD) operation is carried out by the System Operator at the Host server. Next, the designated supervisor at the branch carries out the Branch batch opening. This opens the branch for transactions. Then the vault operator opens the Vault batch for currency vault operations and the teller opens the Teller Batch for the teller counter transactions. The teller then gets cash for transactions from the Cash Officer using the Buy Cash from Vault option. The designated Supervisor checks transactions executed in EOD/BOD viz. Standing Instructions, Sweepin/Sweepout, Maturity Processing, and Interest compounding/payout using the EOD/BOD Reports. After all the above basic operations, the bank begins transactions for the day. The transactions include clearing operations, customer/module transactions, CASA, RD, Term Deposit, Loans, and GL. Clearing Operations such as inward clearing, authorizing data entry batches are done with the help of GEFU Upload. At the end of the day’s transactions, a sequence of steps is followed before the bank is closed for the day. The first operation is to balance the cash. This is done by the teller. Next, the teller hands over cash to the Cash Officer with the Sell Cash to Vault option. Then the teller closes its day’s operations through the Close Teller Batch option. After this the vault operator closes the vault for the day. If for any reason the branch is cut off from host for some time, the transactions will be transferred from branch server to host server after the restoration of network. The Branch Batch Confirm option will show whether both are in sync. Finally, the supervisor will close the branch for the day. After all the branches are closed, a pre cutoff backup is taken. Next, transactions done after the previous cutoff till current cut-off are taken up for processing in the EOD. Further transactions posted through TBS, POS, ATM, and INB will be taken up on the next day. The System Operator then starts the EOD operation and takes a post EOD backup. 10 Branch Server 3. Branch Server 11 Bank Maintenance 3.1. Bank Maintenance Bank maintenance is a key operation. The two important bank maintenance operations are: Bank Master Maintenance and Bank Calendar Maintenance. 3.1.1. Bank Master Maintenance The user can maintain the general information of the bank operating FLEXCUBEusing Bank Master Maintenance. The Bank Master is a single record table, set up at installation. A user cannot add or delete data in it. The Bank Master contains all the bank level parameters such as the bank code, module-wise processing date, next process date, local currency of the bank, suspense GL and Inter-Branch (IB) GL codes that are used by all branches and modules. It also enables the bank to maintain the name and address of the Head Office along with separate process date for each of the modules. The various GLs such as the suspense GL, Inter-branch GL, With-Holding Tax GL, Cash Overage, Cash Shortage, Bank Cash GL and Branch Vault GL can also be specified in this maintenance. 12 Bank Maintenance 13 Branch Operations 3.2. Branch Operations 3.2.1. Branch Server Start Operations The activities mentioned in this section constitute the Beginning of Day operations for the Branch Systems. The Branch system administrator can perform these tasks. From a FLEXCUBE perspective, the following services should be running on the branch server for effective operations: Sr. No. Service Name Order of Start Description / Purpose of Service 1 IIS 1 Web Service for publishing the branch URL Branch Server Start Operations Screen Fig 1 - Branch Server Start Operations Screen To prepare the bank for the day’s operation 1. Switch on the UPS and Branch Server, in that order. 2. After the Branch Server comes up, click the Services shortcut icon on the Branch Server desktop. (IT staff to ensure that the shortcut is created.) 3. Start the Branch Service. 4. Data Center will then download the previous day’s EOD / Current day’s BOD reports from the Data Center. 5. Double-click the Download icon on the desktop to start the automatic download operations. 6. Now the Branch server is ready for the branch to start the day’s operations. 14 Branch Operations 3.2.2. Cash and Transfer Operations This section deals with the workflow related to the cash and transfer operations in a typical business day, in chronological order, with respect to FLEXCUBE. Start of Business Day Open Branch Batch The Branch Manager / Operations Manager opens the branch batch for a particular posting day in FLEXCUBE using the Open Branch Batch (Fast Path: 6001) option. Only after the branch batch has been opened will the vault teller and the other tellers be able to open their respective batches for that posting day. In case of split day processing, the Operations Incharge or the branch manager can open a branch batch for the next working day. At any point in time a maximum of 2 days including the current one can be opened. Open Vault Batch The vault custodian should open the vault batch immediately after the branch batch has been opened. Execution of the Open Vault Batch (Fast Path: 9003) option also signifies the opening of the physical cash vault of the branch. While opening the vault batch, the system prompts the vault custodian to enter the physical count for the vault cash. This process also verifies whether the vault cash tallies at the start of the day. The related tellers can buy cash for their individual transactions for the day only after this process. Open Teller Batch The Teller can start posting transactions for the day after the teller batch has been opened (Open Teller Batch (Fast Path: 9001) option) for the day. If the teller is a cash teller then the system prompts the teller to enter the physical cash position at the start of the day. This also ensures that the physical count matches the system count i.e. the cash position is tallied at the end of the day. The basic order of activities is as listed below. The order of the transactions need not be strictly followed and the same can be modified to suit the bank workflow. TC Balancing (Fast Path: 6203): If the teller is authorised to deal in foreign currency TC’s, the teller can balance the TC’s in his custody at the start of the day to ensure that the physical TC count matches the system count. Buy Cash from Vault (Fast Path: 9007): The teller would be required to buy cash if the entire cash has been returned to the vault at the end of the previous business day. Alternatively, the teller can retain a certain amount of cash in his cash-till which is equal to or less than the teller limit. The teller can also buy/sell cash from the vault anytime through the day whenever the teller cash falls below/above the drawer lower limit. Buy TCs from Vault (Fast Path: 9017): If the teller is authorized to deal in foreign currency TC’s, he can buy/sell the TC’s from the vault according to his requirement. General transactions. 15 Branch Operations After completion of the activities mentioned above, the tellers can proceed with their respective operations like: Cash Withdrawals (Withdrawal slips and Cheque withdrawals) Cash Deposits Cheque Deposits CASA related operations Remittance transactions like issuance of Bankers Cheques, Demand Drafts, and Telegraphic Transfers Term deposit related operations Loan related operations EOD and BOD Report Verification The reports pertaining to the branch for previous day’s EOD and the same day’s BOD are available in a designated area on the host server to a designated area on the branch server. The default designated area is: <FLEXCUBE Installation Path>\rjsout\<mm>\<dd> where, mm: month of the posting date and dd: day of posting. For example, reports for 15th June will be available in <FLEXCUBE Installation Path>/rjsout/06/15 area. The default designated area is rjsout area of the application server. This default area can be configured during FLEXCUBE installation. Then after the day is complete and the next set of reports are generated, the earlier reports move into the mmdd folder in the same area. For the specific reports to be downloaded to the branches, there are three methods. They are: Manually transfer the same to the respective branch servers' rjsout area, and the branches at their end will check the reports. Through the report download utilities (external utility and not part of FC), can be configured for the download of the reports to the respective branch servers. The reports are kept in an Intranet set up of the Bank and the branches will be authorised to view their reports. The supervisors in the branch can refer to these reports and verify the transactions, mainly the GL postings for the previous day’s transactions using the Report Request (Fast Path: 7775) option and selecting the relevant report. This activity should form a part of the supervisors’ daily branch operations. The daily BOD reports also include important details like the SI success, failure, the TD maturity processing, the OD maturity processing related reports, etc. Intermediate Cash Balancing and Verification The teller should balance his physical cash with the system count at an intermediate interval, e.g. before going for lunch. The teller should also verify at frequent intervals whether he has submitted all the transactions which had been sent for remote authorisation and which have been subsequently authorised. 16 Branch Operations Closure of Business Day After Business Hours The teller should ensure that all the transactions, including batch data entry for the day, have been authorised. The teller should use the Search Electronic Journal (Fast Path: 6006) option to verify if there are any authorised transactions which are pending for submission. If there are any transactions pending, they should be completed by clicking the Submit button. To verify whether all the batches have been authorised, the teller should use the List Batch Status (Fast Path: 5515) option. If any batches are pending for authorisation, then the system will not allow the user to close the batch for the day. Before the teller closes his teller batch, he should print TP5050 - Batch Journal Report and verify the entries for correctness with actual vouchers/slips. This is a must so that if any entry has been posted wrongly, it can be reversed through the Search Electronic Journal (Fast Path: 6006) option. End of Day Cash Balancing & Transfer of Cash to Vault: At the end of the day the teller should tally the physical cash with the system cash. If there is any shortage or overage, the teller should try to resolve the difference by verifying the actual slips and details of denominations with the TP5050 - Teller Transaction Report TP5021 - Cash Position Report. If the difference remains even after verification, a Shortage or Overage needs to be booked accordingly. After the teller has tallied his physical cash with the system count, the cash can be retained in the teller’s till-box to the extent of the teller drawer lower limit. However if the entire cash has to be turned over to the vault overnight, the teller can use the Sell Cash to Vault (Fast Path: 9008) option. Similarly for TCs, the Sell TCs to Vault (Fast Path: 9019) option needs to be used. The teller should also print and verify the following reports to verify transactions posted through GL Voucher Data Entry GLM01: GL210 – GL Voucher TX’s Summary GL211 – GL Voucher batches not closed report End of Day Teller Batch Closure The teller should close the teller batch at the end of the day after the following has been done: 1. All data entry batches have been Authorised and Closed. 2. All transactions have been submitted. 3. Physical cash has tallied with the system count. 4. Entire / Excess cash has been transferred to the vault. Note: The teller should not leave the branch while the teller batch is still open. 17 Branch Operations Close Teller Batch (Fast Path: 9005) option needs to be used for closing teller batches for a particular posting date. In case the teller does not close batch, cannot be contacted, or password is not known, the password needs to be reset and the teller batch needs to be closed by the System Administrator. Batch Status Verification Before the tellers leave for the day, the Supervisors should verify if the batches for the respective tellers are closed for the day. The supervisor can use the Batch Status Enquiry (Fast Path: 7017) option to inquire the batch status. End of Day Vault Teller Batch Closure The vault custodian should close the vault teller batch at the end of the day after the following has been done: 1. All the tellers have closed their respective batches and successfully tallied their cash. 2. All transactions have been submitted. 3. The physical cash in the vault has tallied with the system count. The vault custodian should not leave the branch while the vault teller batch is still open. End of Day Branch Batch Closure The Branch Manager / Supervisor / Operator should ensure that all the branch reports listed below have been printed for the branch at the end of each business day using the Report Request (Fast Path: 7775) and Advice / Report Status Enquiry (Fast Path: 7778) options. TP5021 - Cash Position TP5023 -Teller Transaction Report TP5028 - Inter Branch Accounts Opened Today TP5029 - Teller Inter Branch Transactions Report TP5049 - Cash Transactions Position TP5050 - Batch Journal Report TP5051 - EOD Cash Position Report TP5052 - Authentication Report TP5070 - Overage/Shortage Report TP5033 - Instrument Details Report TP5080 - Travelers’ Cheque Sold Report TP5081 - Travelers’ Cheque Purchase Report 18 Branch Operations All reports generated through the Adhoc Report / Advice Request option are present in the following default area / dictionary on the branch server: <FLEXCUBE INSTALLATION PATH>\branch\brn\reports\ After the above reports have been taken the branch supervisor /manager should ensure the following: 1. Supervisors should ensure that all the batches have been authorised and there is no batch pending for authorisation. 2. All tellers have tallied their cash and successfully closed their respective batches. The branch batch can be closed only after all the tellers belonging to that branch have successfully closed their batches. 3. The vault custodian has tallied the vault cash and successfully closed the vault batch. 4. The Branch Batch Confirm (Fast Path: 6005) option is executed successfully. The supervisor should check for any differences in the transactions posted in branch and transactions updated in Data Center (host). If there is a difference between these transactions, the system will give a warning stating that branch batch confirmation is not successful and will not allow the supervisor to close the branch batch. In such cases, the supervisor should inform the data center about the difference immediately and seek guidance. If the branch batch confirmation is successful, the supervisor should close the branch batch using Branch Batch Close (Fast Path: 6002) option. If the branch batch confirmation is not successful, the supervisor should invoke the Force Close Branch Batch (Fast Path: 6009) option for closing the branch batch on the advice of the data center. The differences displayed in the branch batch confirmation should be accounted in the next business day and suitable remedial action should be undertaken. 19 Branch Tables Purging 3.3. Branch Tables Purging All the temporary tables and the transaction history tables in the branch database need to be purged at periodic intervals through the option provided in the software. Before purging, take a full dump of the database on to a separate DAT with appropriate label. The suggested purge tables and their retention frequency are mentioned below. Additional tables can be set up for purge whenever required and the purge retention period is set up depending on the data requirements of the bank. Purge Mechanism for Dynamic Tables - Branch Table Name Purpose Recommended Purge Frequency Recommended Purge Handling (Days retained) sm_br_event_log Login/Logout information for tellers Daily 30 rec_bctl Stores control information for Teller / Supervisor / Vault Teller Batch Opening/Reopening and closing Daily 60 rec_txnlog Log of daily transaction details Daily 120 rec_txnlog_rejects Log of rejected online branch transactions Daily 120 rec_denm Stores information of tellers cash position with the denomination details Daily 120 rec_auth Stores information of (local/remote) authorisation granted in a branch for teller transactions Daily 60 br_document_store Log of all spooled documents Daily 120 br_instr_issued Log of instruments BC/DD issued from the branch Daily 120 20 Branch Tables Purging Table Name Purpose Recommended Purge Frequency Recommended Purge Handling (Days retained) br_batch_details Log of all batches – batch data entry option Daily 60 br_consolidated_cheques Data for consolidated cheque batches inputted in the branch Daily 60 br_consol_chqs_data Data for consolidated cheque batches inputted in the branch Daily 60 br_inward_chqs_data Data for inward cheque batches inputted in the branch Daily 60 br_outward_chqs_data Data for outward cheque batches inputted in the branch Daily 60 rjs_requests Stores log of adhoc report / advice requests processed Daily 0 br_salary_details Data for salary details Daily Delete all records with status ‘Authorised’ or ‘Reversed’ br_salary_chqs_data Data for salary cheques data entry batches Daily Delete all records with status ‘Authorised’ or ‘Reversed’ ba_download_log Stores information about the downloaded tables Daily 15 rec_txnxmllog XML log of daily transaction details Daily 120 The Recommended Purge Handling days data cannot be changed. 21 Branch Tables Purging Clearing File Uploads 3.3.1. Inward Clearing batch Upload If an inward clearing file format is different to that accepted by the system in the central bank file screens, or the clearing file format is available with the account number rather than the small clearing number then this method may be used. The Batch Inward-Clearing Cheque Data Entry (Fast Path: 5521) option can be used for directly adding the inward clearing cheques to form a batch or to upload a file containing the records to be processed in inward clearing. Branch Inward-Clearing Cheque Data Entry Screen Fig 2 - Batch Inward-Clearing Cheque Data Entry Screen The teller / data entry operator would use the Branch screen to directly upload the inward clearing file in XML format. This file can be present anywhere and can be selected using the Browse button. There is a utility available to convert the text file into an XML format (Utility Name: InwdFloopyUpld.exe). The data can then be loaded onto the screen using the Load button. Once the data is successfully loaded the operator can save and validate the batch. The rest of the processes would be the same as that for the batch data entry. The records uploaded and authorised using the above would be processed in the next Inward Clearing batch run. 22 Branch Tables Purging 3.3.2. Load Central Bank Floppy File The Load Central Bank File (Fast Path: ST042) option enables the user to upload the inward clearing flat file received from the central bank. FLEXCUBE Retail reads the input file and creates another flat file, which is used in the Load Inward MICR File (Fast Path: ST031) option. Load Central Bank File Screen Fig 3 - Load Central Bank File Screen There is a pre-specified format that can be used to directly load the data provided by the central bank. The file needs to be present in the FLEXCUBE branch data base area in the Host \ rjsin area. The system will convert the small clearing account numbers to the account numbers used by the FLEXCUBE system and use the same for further processing. Note down the batch number so generated. The system creates a MICR file and generates a file name for the same which requires to be noted down. 23 Branch Tables Purging 3.3.3. Load the Inward MICR file The Load Inward MICR File (Fast Path: ST031) option enables the user to complete the inward clearing data file upload process. Once the central floppy file is uploaded, the system generates a file name which has to be selected from this screen to complete the file upload. You can also load data directly for inward clearing of cheques from a flat file using this option. The file should be present in the appropriate area and in the correct format. Each flat file should have all cheques in the same currency and should be from the same endpoint. When the upload from the central bank file upload screens is successful, the system generates a file number. Note down this file name. The file number which was generated will be available as part of the pick list under the file name. Load Inward MICR File Screen Fig 4: Load Inward MICR File Screen In the MICR Upload screen, enter the File Number and the system will generate the host batch number. Note down this number for further processing. 24 Database Backups and Reports Backups 3.4. Database Backups and Reports Backups 3.4.1. Database Backup Backup should be taken on the hard disk and DAT media provided on all the branch servers. There should be 6 DATs, one for each day of the week. Data backup should be taken daily through oracle export dump (using ‘fastbackup.bat’ provided to the branches) on the hard disk of a designated client machine. The same dump should also be taken to the appropriate DAT (DAT labeled for that day of the week). The media backup should be kept offsite. Backup of the branch database schema should be taken every week on Saturday to a separate DAT with appropriate label. This ensures that at any point of time, branches can have the database schema with all updates till the previous week for restoration in case of need. Backups for the successive weeks can be appended to the same tape. 3.4.2. Reports Backups Backup of all the reports downloaded from the data center should be taken once in a month to a separate DAT with appropriate label. Backups for the successive months can be appended to the same tape. 25 Data Downloads 3.5. Data Downloads Once an entity is defined in the FLEXCUBE Retail, you need to download the entity to the respective branch, using the Data Download option. The user with specific access rights can download the product. There are two different types of downloads: Automatic Download Manual Download 3.5.1. Automatic Download Automatic download is done using a download scheduler. Once the schedule is defined, download starts automatically. This schedule can later be changed or removed. When the automatic download is enabled, the system automatically downloads the entity / entities at the pre-configured time provided the link to the branch server is working at that time. In case the link is not working at the time of download, the download process creates an output file in a pre-designated directory in the FLEXCUBE Application Server. The type of Automatic download is defined in the TBL file. There are two types of Automatic download: Incremental Download Incremental download only downloads the records which are added or updated after the sync point. This sync point is defined in the XML (TBL) file for a particular table. In the incremental download, it will check for the latest records and download only the new records. Use the following steps for a automatic incremental download: Open the Download Service (Fast Path: 8892) option. The Download Service screen is displayed. 26 Data Downloads Fig 5 - Download Service Screen Type the appropriate information in the Entity, From, and To fields. Clear the Delete Old Record check box. Select the path in the Path field using the Browse button. Click the Start button. The system checks the entered data. Click the Download button. A request ID is generated. This ID should be noted down. The Request ID is used to enquire the download status for a particular download. Request ID is a unique ID generated when the download starts. To view the download status: Open the Download-Upload Status Inquiry (Fast Path: 5504) option. The DownloadUpload Status Inquiry screen is displayed. 27 Data Downloads Fig 6 - Download-Upload Status Inquiry Screen Type the request ID in the Request ID field. Click the Status button. Full Download Full download deletes all existing records and the new records are inserted in the table. The procedure for a Full Automatic download is same as Incremental Automatic download except for a full download, the Delete Old Record check box is selected. 3.5.2. Manual Download Manual download can be used to download data in adhoc mode. In case of manual download, the user uses download service to download data at a particular time. There are two types of Manual downloads: 28 Data Downloads Incremental Download Incremental download downloads only the records which are added or updated after the sync point. This sync point is defined in the XML (TBL) file for a particular table. In the incremental download, it will check for the latest records and download only the new records. Manual Incremental download is similar to Automatic Incremental download, except a Manual download has to be triggered by a user. Full Download Full download deletes all existing records and the new records are inserted in the table. Use the following steps for a manual full download: The FLEXCUBE download service runs on the branch server. It has to be invoked by double-clicking the shortcut to download on the branch server. The Download icon will appear on the bottom right on the status bar next to the date and time slot. Double-click the icon, and in the Flexcube-Download screen, type the appropriate information in the Entity, From, and To fields. The Flexcube-Dowload Screen is displayed. Fig 7 - Flexcube-Download Screen Click the Start button. The system checks the entered data and displays the FlexcubeDownloadscreen. 29 Data Downloads Fig 8 - Flexcube-Download Screen Note: On the centralized branch server the download service should be running only on one of the branch server. Click the Download button to start the download service. If the trace file is viewed, it will display the contents of the data extraction and then the successful completion of the download. If there is a failure, then the error message can be viewed in the trace file. By downloading this, the existing records in the branch table are deleted and the full data is downloaded. 30 GEFU File Upload 3.6. GEFU File Upload Generic file upload can be used for any bulk transactions like salary credits, utility payments, inward direct debit, inward direct credit, etc. The GEFU ++ functionality enables the user to define the file format in XML as per the utility requirement. It also continues to support the earlier GEFU functions. A Global set up is required, which will capture the vital details for a specific file like the file format, required GL’s, scheduler details, etc. Following are the tabs for the External File Setup (Fast Path: BAM54) option: Common Parameters Fig 9 - File Upload Setup (GEFU ++) 31 GEFU File Upload GL Setup Fig 10 - File Upload Setup (GEFU ++) - GL Setup The required data can be maintained in an XML file format and the different functions which can be performed through the GEFU file upload can be pre-defined. Only these functions can be done through the File Upload process. The set up is also done if the user requires that the output of this processing should go for another interface or for another processing in FLEXCUBE itself. The data which is to be uploaded into the system is entered into the Excel file as per the format mentioned in the file. The flat file is generated, which will be in the file format required for it to be uploaded in the application. The generated file, by running the macro in the Excel sheet, will have to be kept in the rjsin folder of the Branch server. This is as per the earlier GEFU file format. Alternately, the GEFU ++ also supports the file in a comma separated format, which can be created and directly kept in the rjsin folder of the Branch Server. Before uploading the file ensure that the GEFU service is up and running. If it is not, start the service as mentioned in the Branch Server Start Operations section of the document under the startup of online services. 32 GEFU File Upload FLEXCUBE Retail Services Screen Fig 11 - FLEXCUBE Retail Services Screen Note: The GEFU service can be shut down once the upload is over, and then restarted once the new files have to be uploaded. Only ensure that when the file is uploaded, the service is up for it to get processed. 33 GEFU File Upload 3.6.1. Upload Process For the file to upload, use the File Upload (GEFU ++) (Fast Path: BA452) option. Depending on the set up done in the application the system code is selected from the pick list. File Upload (GEFU ++) Screen Fig 12 - File Upload (GEFU ++) Screen The file to be uploaded is kept in the rjsin directory of the Branch server. The file name is entered in the Input File Name field. It is case sensitive, so the name has to be entered accurately. A proper description of the file which is uploaded is mentioned in the Narration field. After adding the file details, before the actual upload, the user has the option of viewing/enquiry of the file being uploaded. The user can view the summary of all records in the file and also, on double-clicking each record, can view the further details of that particular record item. To do the upload, the screen requires online authorisation from an online Supervisor. 34 GEFU File Upload Generic External File Upload Details Screen Fig 13 - Generic External File Upload Details Screen 35 GEFU File Upload Gefu Record Details Screen Fig 14 - Gefu Record Details Screen 3.6.2. Inquiry After the online authorisation, if the GEFU service is started, the file is processed. After the processing the operator can inquire on the status of the file in the File Upload Inquiry (GEFU ++) (Fast Path: BAM96) option. 36 GEFU File Upload File Upload Inquiry (GEFU ++) Screen Fig 15 - External File Processing - Upload File Status Inquiry Screen The details and the status of the file can be selected by the File Name (which is case sensitive), the Status (Processed, unprocessed, all), the Branch Code from which the file was uploaded, Upload Date and the User Id fields. The processing of the file is done and the status of success and failure along with the reasons will be given. If the file is rejected, the reason for the same will be displayed. The file should have matching credits and debits if the format demands else the file will be rejected. The related suspense will be generated only if the total details of the file are ok, but there are specific exceptions at the account or GL level like account status, balance issues, incorrect account numbers, etc. Based on the functionality, the financial debits or credits occur online after the successful processing of the file. The non financial data files like customer creation or account opening also occur online. 3.6.3. Reports After a file is uploaded and if the auto report generation is set up, the reports are automatically generated in the reports folder of the FLEXCUBE in the application server. Else the adhoc reports can be generated as shown below under ‘File upload reports’. 37 GEFU File Upload Report Request Screen Fig 16 - Report Request Screen 38 Maintenance 3.7. Maintenance Maintenance allows the user to up keep different activities. It also allows the user for the smooth functioning of various activities. 3.7.1. Release Area Maintenance The Release area is the main section where FLEXCUBE is installed. This area contains all the executable and supporting files. All the reports are also generated here. This makes the area very critical and should have strict controlling and restraining access. The access to this area should be controlled. It should not be available to everyone. It should be monitored as users can go in that area and modify data, which could lead to disastrous effects. 3.7.2. Branch Server Maintenance Following are the options which can enhance the productivity of the branch server. Routine cleanup of C:\temp Regular backup and cleanup of event viewer (eventvwr) Regular clean up of %WinDir%\System32\LogFiles (IIS log) Regular space check and monitoring memory usage to enhance the server productivity Anti virus schedule set up (to ensure that scanning time does not coincide with branch working hours) Restarting server (frequency), restarting services (frequency), ready batch files on desktop for restart, etc. Check growth of branch tables (fast growing tables) Regular check on date-time synchronization on all branch servers in line with application/database server Auto download scheduler, set up, frequency set up, and monitoring for any failures 39 Security Management System Related Activities 3.8. Security Management System Related Activities 3.8.1. Transferring Users from One Branch to Another An existing user belonging to one branch can be transferred to the other branch of the bank. That user has to be modified in the user profile maintenance using the modify option. The cost center, i.e. the branch to which the existing user has been transferred will have to select from the available pick list, which is the listing of the branches of the bank. The User Profile Maintenance (Fast Path: SMM02) option should be used for transferring users from one branch to another. User Profile Maintenance Screen Fig 17 - User Profile Maintenance Screen After the branch code has been changed to the new branch, the download option for the user profile has to be done for both the previous branch as well as the new branch. 3.8.2. Logging Out of User ID Using the Modify Login Status (Fast Path: 755) option, the operator can log out the user at the branch level. This option is used when the teller has killed his FLEXCUBE session without a formal signoff. 40 Security Management System Related Activities Modify Login Status Screen Fig 18 - Modify Login Status Screen The pick list will give the listing of the users logged in. The operator can select the user and log the user out. 41 Security Management System Related Activities 3.8.3. Enable / Disable of user ID Using the Enable / Disable User (Fast Path: 753) option the operator can enable or disable the user at the branch level. Enable / Disable User Screen Fig 19 - Enable / Disable User Screen 3.8.4. Adhoc Reports Please refer to Host & Branch Reports section for details on generation of Adhoc Reports. Branch Server Shutdown Operations After the branch batch is closed successfully, the branch system administrator should proceed to shutdown the branch server as per the steps explained in the section below. Take the branch database backup. Also transfer the data to a DAT drive. A standard naming convention of dumps is to be maintained. For example: BRNCODE_date. Shutdown the Branch Server and power off the Branch Server and UPS. By default, the back up for Key Data tables (master tables, transaction log tables, etc.) is taken. Full database backup should be taken at periodic intervals. 42 Security Management System Related Activities 3.8.5. Dos and Don’ts on the Branch Server Don’ts: Do not remove any folders/files on the branch server without the explicit approval from the Datacenter. Do not create any new files and folders on the branch server hard disk. Do not power off the branch server when it is up and running. Do not change the system parameters or Oracle parameters without the explicit approval from Datacenter. Do not unplug the cables when the server is up and running. Do not connect the printers to the branch server, as it will reduce the server performance in case of continuous printing. Dos: Startup and shutdown the branch server as per the procedure explained above. Keep updating the branch server and clients with the latest anti-virus software. Change the power-on and administrator passwords of the branch server as per the password policy. 43 Data Center 4. Data Center 44 Database Backups and Reports Backups 4.1. Database Backups and Reports Backups 4.1.1. Database Backup Backups are an essential part of the EOD and BOD processing in FLEXCUBE Retail. It is a very important activity which has to be performed as a part of the batch processing activities. In FLEXCUBE Retail, backups have to be taken at the following stages: PRECUTOFF POSTEOD POSTBOD The stage names themselves clearly indicate the stage at which the FLEXCUBE Retail system will be when the backup is taken. For PRECUTOFF backup, it has to be taken before the operator initiates the cutoff process. The POSTEOD backup has to be initiated once the entire End of Day category is over in FLEXCUBE Retail and End of Financial Input or EOFI has been marked in FLEXCUBE Corporate. This backup has to be taken before starting the Beginning of Day for the next process date. The POSTBOD backup has to taken after the operator runs the BOD process. It is suggested that the backups follow a naming convention as follows: <FCR><Stagename><Date> For example: Post BOD backup for 20/02/2006 can be named as FCRPOSTBOD20062002. After the backup is over, the backups should be moved to the tape drive, which can be used later for any data restorations if required. Note: Once in a while the backups should be restored in the support database to verify for the data consistency. Apart for the regular data backups, there should be a schema backup of the Oracle database taken at a fixed interval. 4.1.2. Reports Backups The reports are generated daily during the process of EOD and BOD. These reports should be backed up on a monthly bases. The ATM transactions occupy significant space on the server. The user can take backup of the ATM trace files at regular intervals and can delete them. 45 Data Purging 4.2. Data Purging The Purge shell which runs as part of the FLEXCUBE BOD process, enables a frequency based data purge from internal host tables that are used by the system for temporary storage. In addition to the above daily purge process, financial and non financial data needs to be purged at specific frequency. The purge for financial tables like ch_acct_ledg, gl_txnhist, etc. can be set up such that it is aligned with the financial year end of the bank. Before running the purge process a database backup would be taken which can be retained and retrieved for any future reference to the purged data. 4.2.1. Host Tables Purging During the batch processing there is a shell called as purge shell which is run as part of BOD processing. This process purges data from transaction tables and temporary tables created for report generation, based on the pre-defined set-up in purge control table. 4.2.2. Log Files Purging Depending on the logging configuration done in Host, the log files need to be purged. In case LOG4J logging is used, no purging is required. If RAS logging is being used, it is recommended to purge the diagnostic trace log file once a week preferably on the Saturday before the host server is brought down. In addition, the host startup/shutdown log files can be purged after taking backup. 4.2.3. Reports Purging The EOD reports occupy significant space on the hard disk of the host server. In case a separate report server is not being used, after taking backup on a DAT or on another machine, the reports can be purged from the main host server at monthly intervals. Host Data Purge (Financial Tables) Table Name Purpose Recommended Purge Frequency Recommended Purge Handling (Months) ba_billing_details Used in ASP mode for billing transactions Monthly 6 ol_td_aux_table Stores information of online TD transactions Monthly 6 st_clrreg_mmdd Stores details of cheques sent for clearing Monthly 12 ol_sweepin_log_mmdd History of online sweepins Monthly 12 46 Data Purging Table Name Purpose Recommended Purge Frequency Recommended Purge Handling (Months) xf_ol_ch_ib_req_logs Stores history of adhoc requests done through NetBanking Monthly 12 xf_ol_ch_requestlog_mmdd Stores history of adhoc requests (statements, cheque book, etc.) done across channels Monthly 12 xf_ol_st_txnlog_mmdd Stores transactions from branch Monthly 12 xf_stcap_gl_txns_mmdd Stores GL handoff transactions Monthly 12 xf_st_cap_input_txn_temp History of transactions processed by CASA, Loans, and TD modules Monthly 12 xf_ol_st_txnlog_stl_mmdd Stores details of transaction details processed by STL EOD Monthly 12 st_inward_temp_bkup Stores details of records processed by Inward Clearing Monthly 12 st_inwtxn_bkup Stores details of records passed by Inward Clearing Monthly 12 47 Data Purging Table Name Purpose Recommended Purge Frequency Recommended Purge Handling (Months) st_inwtxn_rej_bkup Stores records rejected by Inward Clearing process Daily 60 st_inwtxn_rej_hist Stores records rejected by Inward Clearing process Monthly 12 fct_all_fcr_txns_mmdd Stores log of all transactions on GL accounts. Monthly 12 ba_cheque_issue Stores the details of MC/DD/TT Issued Bi-monthly The MC/DD/TT which are issued to the customer and for which issue date is 7 days earlier from today’s posting date are purged. ch_acct_ledg Ledger for the transactions on CASA accounts Monthly The data in CASA account ledger is retained for the period specified at the product level. All records in the ledger which are older than the data retention period specified at the product level from today’s posting date are purged. 48 Data Purging Table Name Purpose Recommended Purge Frequency Recommended Purge Handling (Months) ch_nobook Stores the transaction details of CASA accounts to print passbook & statements Monthly In the third year, the transaction entries that are printed by the system of two years earlier than today’s posting date are purged (For e.g. If Bank has data for 2000, 2001 & 2002 starting from 15th June 2000, Then on 15th June 2002 all transactions belonging to the period 15th June 2000 to 14th June 2001 are purged by the system). For the transactions that are yet not printed by the system and that are to be purged will be converted in to one entry after the consolidation. gl_txnhist Stores log of transactions on GL accounts Yearly In the second year, the transaction entries earlier than one year from today’s posting date are purged. st_bp_availed Stores the details of BP availed by CASA accounts Daily Records are purged on the value date of check from this table. 49 Data Purging Table Name Purpose Recommended Purge Frequency Recommended Purge Handling (Months) st_float_extension Stores the details of float extensions performed (The data from this table is primarily used for report generation) Weekly The records pertaining to float extensions done seven days earlier than today’s posting date are purged. td_acct_ledg Ledger of transactions on TD accounts Yearly In the second year, the ledger transactions earlier than two years from today’s posting date are purged. td_int_payment_history Stores interest payment history for TD accounts Yearly The records for which interest has been paid by the system and are two years earlier from today’s posting date are purged by the system. td_renewal_history Stores the log of automatic/online renewal done for TD accounts Yearly In the second year, the transaction entries earlier than one year from today’s posting date are purged. xf_ol_st_chq_deposits Stores details of cheque details Daily After the outward clearing process is run for a posting date the records of the instrument that are processed in OWC are purged. 50 Data Purging Table Name Purpose Recommended Purge Frequency Recommended Purge Handling (Months) ch_acct_mast CASA Account Master None No system purge set up on this table. td_acct_mast TD Account Master None No system purge set up on this table. ln_acct_mast Loans Account Master None No system purge set up on this table. ln_acct_ledg Ledger for transactions on Loan accounts None No system purge set up on this table ch_acct_statistics Stores the CASA account balances to be used for ADB computation None At the beginning of financial year the balances from this table get initialized by the system. When ever CASA account is closed, corresponding record from this table is deleted by the system. ch_si_table Stores the information of Standing Instructions on CASA accounts to be executed Monthly Records pertaining to the standing instructions for which execution period has expired three months before the today’s posting date are purged by the system 51 Data Purging Table Name Purpose Recommended Purge Frequency Recommended Purge Handling (Months) ch_chqbk_issue Stores cheque book issuance details for CASA accounts Monthly The records of check books that are fully utilized/paid and for which cheque book issuance date is earlier than posting date by six months are purged ch_acct_stmt_hist The log of periodic account statements generated by the system Monthly The statement that are generated six months earlier than today’s posting date are purged xf_ol_st_late_clg Stores details of late cheque marking Daily Records pertaining to late clearing markings done one month earlier than today’s posting date are purged td_audit_trail Stores details of transactions performed on TD accounts Yearly In the second year, the transactions on TD account earlier than two years from today’s posting date are purged td_temp_ren_red Stores information of online TD transactions Daily 90 Host Data Purge (Non-Financial Tables) Table Name Purpose Recommended Purge Frequency 52 Recommended Purge Handling (Months) Data Purging Table Name Purpose Recommended Purge Frequency Recommended Purge Handling (Months) ba_log_cube_txn Stores log of transactions that happened to and from FCC Daily 6 ba_report_restart Stores details of reports generated during EOD/BOD along with the status Daily 2 ba_tmp_r_ext_hoff Stores details of files uploaded through GEFU Daily 6 ol_bots_bcl Stores log of Branch Batch status for each posting date Daily 12 ol_batch_info Stores log of Branch Batch status for each posting date Daily 12 mu_unauth_logtable Stores details of unauthorised maintenances Daily 12 rjs_requests Stores log of adhoc report requested by the branch Daily 2 sm_evtlog Stores the activity of maintenances Daily 12 xf_cap_cifs_handoff_temp Stores history of balance change of accounts Daily 12 53 Data Purging Table Name Purpose Recommended Purge Frequency Recommended Purge Handling (Months) ba_download_log Stores information about the downloaded tables Daily 2 gl_batctrl Details of IC and Voucher Entry batches Daily 1 ch_stop_chq_hist History of Stopped cheques Monthly 1 ch_acct_activate_details_hist Stores the account activation history Monthly 0 The Recommended Purge Handling (Days Retained) for a particular table can be changed by updating the retention period or frequency in ba_purge_control table. For adhoc purges, the frequency of running the purge needs to be changed. 54 Host Operations 4.3. Host Operations Note: For more information to start the host server please refer to the Installation Guide. A detailed description to install and start the server is provided in the guide. Services Running at Application Server Fig 20 - Services Running at Application Server Screen From a FLEXCUBE perspective, the following services should be running on the application server for effective operations: Sr. No. Service Name Order of Start Description / Purpose of Service 1 IBM WAS or Oracle 10gAS 2 Host Application Server hosting 2 MQ Server 1 Provides MQ support 3 Http Server 3 For providing reports over http server FLEXCUBE 55 Interfacing with FLEXCUBE Corporate 4.4. Interfacing with FLEXCUBE Corporate This section is applicable only for sites where FLEXCUBE Corporate is also installed. There are some interdependencies between FLEXCUBE Core Banking and FLEXCUBE Corporate. Though the End of Day / Month batch operations are commenced simultaneously in both the systems, there are some dependencies for commencement of Loans shell in FLEXCUBE Core Banking and GL processing in FLEXCUBE Corporate. Regarding the EOD processing, the Retail EOD process category contains a sub process called FLEXCUBE Loans Shell. When the EOD runs, this process keeps on polling till the Allow retail to run flag is marked from FLEXCUBE Corporate module EOD. This flag will be marked when the IFPREGL shell is completed for all branches as a part of the corporate module EOD. Also, the GL upload operation in FLEXCUBE Corporate should be performed only after the EOD process is completed in FLEXCUBE Retail. Following is EOD Flow of Events Screen. Fig 21 - EOD Flow of Events Screen 56 Interfacing with FLEXCUBE Corporate Checklist for the EOD operator when there is an interface with the FCC: Sr. No. 1 Description FCR/FCC Closing of all teller, vault, and branch batches FCR To authorise unauthorised (transactions) for all the branches. There should not be any pending authorised transaction. FCC 2 Mark End of Transaction Input (EOTI) for all branches FCC 3 FCC EOTI Backup FCC 4 FCR Branch Backup of the branch before running EOD FCR 5 FCR Pre-Cutoff Backup (host -- from corporate to retail) FCR 6 Run EOTI batches for each branch other than IFPREGL, IFCASAEOD, IFGLUPD, ACCREVAL, and FX Auto revaluation FCC 7 Run Loans Hands-off (i.e. IFPREGL) – for all branches FCC 8 Check if the Batch Application is running in Host. Start if not running. FCR 9 Start the cutoff FCR 10 Run the EOD FCR 11 Run the statement shell FCR 12 Take FCR Post EOD backup FCR 13 Make sure the CASA EOD completed successfully for each branch FCC 14 Run GL Upload for each branch FCC 15 Run Account Revaluation for each branch FCC Run FX Auto Revaluation for each branch 16 17 18 Mark End Of Financial Input (EOFI) for all the branches FCC Run FCC EOFI Backup FCC Spool the necessary reports such as balance sheet and trial balance for each branch FCC Generate GL consolidated balance sheet for Head Office 19 Run End Of Day for each branch FCC 20 Run the BOD batches (viewing the pending programs would be helpful) for each branch FCC 21 Take SOTI backup FCC 57 Interfacing with FLEXCUBE Corporate Sr. No. Description FCR/FCC 22 Start Transaction Input for each branch FCC 23 Run FCR BOD FCR 24 Run Generate CIF program FCR 25 Run Apply CIF program FCR 26 Take FCR Post BOD Backup FCR 4.4.1. EOD Flow of Events for FCR Following is the screen for EOD Flow of Events for FCR Fig 22 - EOD Flow of Events - FCR Screen 58 Interfacing with FLEXCUBE Corporate Checklist for the EOD operator for FCR: Sr. No. Description 1 Closing of all teller, vault, and branch batches 2 FCR Branch Backup of the branch before running EOD 3 Eligibility Evaluation Category (if required) 4 5 6 7 8 9 10 11 FCR Pre-Cutoff Backup (host) Check if the Batch Application is running in Host. Start if not running. Start the cutoff Run the EOD Take Post EOD backup Run BOD Take Post BOD Backup Run statement category to generate statements (on Month-ends) 59 Login for EOD Operations 4.5. Login for EOD Operations 4.5.1. Control of EOD Services for Retail Application For FLEXCUBE Retail, there are a number of services that are running and that can be viewed. To view them, login to the IBM WAS Admin Console. This will invoke a window which will appear as follows: Enterprise Applications Screen Fig 23 - Enterprise Applications Screen When these services are running, the status should be shown with a green arrow Started, while if the service is not running then the status is a blank. It indicates that the service is not running any more. For the EOD/BOD processing, the most important service Batch is required to be up and running. Before starting off cutoff, this service should be stopped and started again. This is an ideal sequence before starting the batch processing activities of the bank. For this, the operator has to follow these steps. Go to Applications on the Web server application server. Select the Batch service. If the status for this shows Blank, select the check box and then start the service. Once this is completed, then the operator can start the EOD Processing. 60 Login for EOD Operations Before running any operation under the EOD Processing, the operator has to ensure that the service Batch is started using the Services window as follows: Note: The service to check is the one which has been highlighted in the screen below. EOD Services for Retail Application Screen Fig 24 - EOD Services for Retail Application Screen 61 Login for EOD Operations 4.5.2. Bringing Up the Operator Menu The Beginning of Day (BOD) is run from an operator's login on FLEXCUBE Retail. To open the operator menu: Logon to FLEXCUBE with a valid System Operator Login ID. Login Screen Fig 25 - Login Screen 4.5.3. Invoking the EOD Console All the batch processing operations mentioned above have to be run from the EOD Processing (Fast Path: EOD10) option. To invoke the EOD console: 1. Logon to FLEXCUBE with a valid System Operator Login ID. 2. Enter the Fast Path : EOD10. OR 3. From the EOD/BOD Operations menu, select EOD Processing. 4. FLEXCUBE displays the screen as shown in the following figure. 62 Login for EOD Operations EOD Client Screen Fig 26 - EOD Client Screen As can be seen from the screen above, there are two frames in this window. The top frame is called the General frame and the bottom frame is called the Status frame. Both the frames are disabled when no category is selected. The General frame displays the status of the process category which will run once it is selected and also the current and next process date for which the category will be run. From the General frame, the operator has to select the process category which has to be run for that process or system date in FLEXCUBE Retail. The other details are automatically populated. There is also a drop-down list of the various categories that can be run from FLEXCUBE Retail. It can be best explained with an example. For e.g. Suppose the process category cutoff has to be run for 28th Nov 2004. Once the console is obtained, the operator just has to press the Down Arrow next to the Process Category field and select Cutoff from the options available as follows: 63 Login for EOD Operations EOD Client Screen Fig 27 - EOD Client Screen FLEXCUBE Process Categories: Category Name Category No. Description Eligibility Shell 11 The eligibility shell is related with RVT (Relationship Value Tagging). Eligibility criteria can be defined under the tag of an “Eligibility Plan” in the Relationship Pricing Project. This Plan determines which set of customers will get benefits defined under a scheme, and thus helps identify the target customers for a scheme. The benefits available under a scheme can be reduction in Service Charges or positive variance in Credit Interest Rates. 64 Login for EOD Operations Category Name Category No. Description Cut-off Processing 3 Cut-off is the process that operator must run at the end of every day before starting the EOD for that day, to ensure that all transactions done through the on-line delivery channels (including branch, ATMS, POS and Tele banking) are handed over to a log for batch processing. A fresh log is created for the next day’s transactions. Here it is important to note that while the processing date from the point of view of EOD processing is still today, the on-line processing date has moved to the next processing date and the online transactions done after cut-off will be processed in the next day’s EOD. End of Day (EOD) Processing 1 EOD refers to the processing required to be done for each functional module of FLEXCUBE Retail as well as some files that are generated for updating data in other LO’s. Beginning of Day (BOD) Processing 2 Beginning of the Day process opens a new transaction day for the Bank. BOD as a process depends on EOD process for the previous working day. This means, if the EOD is not completed for a day, system will not allow the BOD for the next day to start. The days are always business days as specified in Branch Calendars. So, even if one branch is functioning on a particular day, BOD will have to be run for that day. Process CIF Handoff This process is used to download the customers and related tables, which are opened in other branch to the base branch of the customer. The validation for CIF handoff is that the previous day BOD should be completed. Schedule Extracts It is a process to extract specific schedule and to have a proper handoff to the interface. MONTHLY STATEMENTS This process is used to generate the customer monthly statement in order to stream line the time during the actual EOM process. This process is run separately. This process can be run even after the BOD process next day. Handoff After EOD It is a process to extract specific schedule and to have a proper handoff to the interface. 65 Login for EOD Operations Category Name Category No. Description Elig Evaluation It is a process to evaluate the eligibility of the RVT schemes. For more information on RVT schemes refer to Relationship Pricing user manual. File Handoff It is a process to extract specific schedule and to have a proper handoff to the interface. Automatic EFS for Converted Loan This process is used to close the loan accounts with Automatic EFS Date falling on running day. If running of this process is skipped on a particular day, such accounts falling due for automatic closure on that day will be picked on next working day process. Future dated closure or back dated closure is not be supported. If the automatic closure date falls on a holiday, then such accounts will be picked up on the next working days process. All accounts attempted for such system initiated closure will be marked as Tried for both successful and failure cases. The accounts which are marked as Tried will not be picked up for further retries when the process is attempted at the later dates. Mark for Write Off In this process system displays the “Accounts marked for write off are pending processing. Cannot proceed” message for the account which are marked for write off for which the write off process has not been executed. If there are no accounts marked for write off, FLEXCUBE will start the process of marking accounts for write off based on the parameters defined. The system displays the message "SUCCESS MESSAGE" after the process is completed. Bulk Tax Certificate This process is used to generate tax certificate of all the customers of the bank and stored in a spool file. The report is generated customer wise with page break and print can be taken whenever required. 66 Login for EOD Operations Category Name Automatic Write Off Category No. Description In this process system displays the “No accounts marked for write off, Cannot Proceed” message if no account is write off for which the write off process. Accounts manually marked for write off will be fully written off irrespective of the present CRR status or the DPD. If the accounts are marked for write off, FLEXCUBE will write off the accounts if the accounts meet the eligibility criteria as on the date of write off. Accounting entries including off balance sheet entries will be passed by the system pertaining to written off accounts. The system displays the message "SUCCESS MESSAGE" after the process is completed. Once the process category is selected, the other details in the General frame will be populated. This can change depending on the status of the category. If the entire category is complete, the status will be displayed as Completed or if the category has aborted or fallen over, the status is Aborted. Note: Whenever any process category is chosen, before the category is started, the operator must look at the process and next process date and confirm that these are the current and next working dates of the bank. After the dates have been confirmed, the process category can be started by clicking the Start button. As soon as this is done, the processing will begin and control will be taken over by the EOD Console. The first event to take place is that the Status frame will be enabled and the list of processes within that category or the jobs in that category will be thrown up on the console. Once this is done, the initiation of the different processes will be controlled by the EOD Service that will be running on the Application Server for FLEXCUBE Retail and will not involve any intervention by the user in the sense of selection of processes and running them individually. 67 Login for EOD Operations 4.5.4. Other Buttons on the EOD Console There are two more buttons at the bottom right hand corner of the console next to the Start button. These are Refresh and Close button. Refresh Button The Refresh button can be used by the operator to get the latest status of the various processes running for a particular category. Alternatively, the system also has an auto-refresh feature which automatically updates the status of a particular process after a certain period of time. After refreshing the particular process, it regularly refreshes the status of the different processes. Close Button The Close button is used for closing the EOD Console. This can be done in a number of scenarios. For example: The process category is completed successfully and the user wants to logout. The process category has aborted but the user wants to check some other or invoke another application and can use the Close button to close the EOD Console. OR Note: Closing of the EOD Console when a process category has finished or aborted is acceptable. When the process is restarted, in case of an abort, then the status would have changed to Aborted, so the operator will know exactly what the status of the category is once the console is brought up or invoked again. 4.5.5. Process Run and Status Update When individual processes in a category are run, each process goes through various stages. The order in which these processes are run is pre-defined and will not change unless new processes / jobs have to be added to a category. The various stages for a particular process that will be displayed, in the status window are as follows COMPLETE NOT STARTED STARTED ABORTED PREREQ_ABORTED and PREREQ_ABSENT These are the stages that a process can be in. When the category is started, it builds a reference and pre-requisite list which determines the order in which the processes have to be run. Once the process is started, it may resemble as follows: 68 Login for EOD Operations EOD Client Screen Fig 28 - EOD Client Screen The block next to the Process Name field indicates the status of the process in addition to the Status field, which it displays as STARTED. Also, the duration for which the process is running is displayed. The time, till which the process is not completed, the auto-refresh will update the individual process status and duration of the process run in this category. Once the process is over, the screen will be refreshed and will be displayed as follows: 69 Login for EOD Operations EOD Client Screen Fig 29 - EOD Client Screen Once the individual process is over, the status bar for that process will be like the one above. Note: The color bar indicating the status has now become grayed and the Status field shows COMPLETE, which indicates that the process has run for that day under this process category. Once the entire process category is over, the window indicating the status of the category appears as follows: 70 Login for EOD Operations EOD Client Screen Fig 30 - EOD Client Screen The operator can clear this window by either clicking the Ok button or pressing the Space Bar. After this, click the Close button on the EOD Console which should take the user back to his Access menu. If a particular process does not complete successfully, the status is indicated as ABORTED. The colour bar indicating the process status is marked Red and the field for Status shows ABORTED which means that the process has stopped running for this processing date. After this, if there are dependent processes on this process, they will be marked on the EOD Console as PREREQ_ABORTED. Once the category reaches a stage where the aborted process has to be restarted without which the category will not be completed, a messages box will appear as follows: 71 Login for EOD Operations EOD Client Screen Fig 31 - EOD Client Screen This indicates that the process that has been aborted has to be corrected or looked into by the support personnel and the category has to be restarted after the problem has been resolved. Once the category is completely run and all the processes have run, the message "Category successfully completed" is displayed. 72 Login for EOD Operations 4.5.6. Exception Processing Once an EOD category is started, it will continue till one of the following conditions occurs: All the processes of that category are completed successfully Some of the processes are aborted In case some process is aborted and if all the remaining processes depend on this process, the EOD will stop. Sometimes this will not lead to the stopping of the entire EOD. Processes which are independent of the aborted process will continue. The operator will have to look in the status log to check for the error that has occurred. Some of the reasons for which a process may abort are: Setup error System error The operating system resources such as shared resources and memory or disk space are exhausted. Database error Application error Incorrect or Inconsistent Data To view the log file, please refer to the Troubleshooting section. Based on the error reported in the status log, corrective action will have to be taken. Once the action has been taken, it is possible to restart the aborted process (es) by pressing the F2 key, without waiting for the remaining processes to finish. All processes have restart logic built into them. For example, the CASA EOD has aborted in the middle of the processing it will restart from the point where it stopped and not from the beginning. If all the processes are in the completed state or stopped, the operator will have to restart the EOD. In such a case the system will start only those processes which were not completed in the previous run. Also, the system will display the message “This is not a Fresh Start.” on the screen. BOD as a process category depends on EOD. This means, that if the EOD is not completed for a day, system will not allow the BOD for the next day to start. A successful completion of the EOD sets the processing date to the next working day. 73 Normal Processing Day 4.6. Normal Processing Day Normal processing day includes the following: Cut-off processing End of day (EOD) processing Beginning of day (BOD) processing Adhoc processing 4.6.1. Cut-off processing A. Take pre cutoff backup for that process date B. Checking whether the service is running Check whether the service ‘Batch’ shows status as ‘Started’. If the service shows the status ‘Started’, just stop the service and start it again. If the service is not running, then simply start it. C. Starting with the category Login into the application using a valid user id and password Select ‘EOD Processing’ from the Menu When the EOD Console comes up, Select the process category drop-down list Check the current process date and next process date and ensure that they are correct Click on the ‘Start’ button ‘CUTOFF’ from the The processes that should be run will be displayed and the processes will start running automatically. The ‘Refresh’ button can be used to refresh the process status. Even if this is not done, it has an auto-refresh mechanism which will update the status after the refresh poll time-interval. Once the process is over the message box, ‘Category successfully completed’ will appear. Clear this box using the space bar or by clicking on the Ok button. After this, press the Close button. After the Cutoff process is over, exit out of the menu and before starting End of Day, login afresh into the system. During OLTP CUT-OFF Change of business day Close current logs and Initiate a new log file System not available. Typically less than few minutes. 74 Normal Processing Day During ATM CUT-OFF Change of business day for ATM network ATM available only in off-line mode EOD can start after last cut-off (ATM and OLTP) is done 4.6.2. End of day (EOD) processing A. Checking whether the batch service is running Check whether the service ‘Batch’ shows status as started. If the service shows the status ‘Started’, Stop it and Start it again. If the service is not running, then Start it again. B. Start EOD category Login into the application using a valid user id and password Select ‘EOD Processing’ from the Menu When the EOD Console comes up, Select the process category ‘End of Day’ from the drop-down list Note: Check the current process date and next process date and ensure correct that they are Click on the ‘Start’ button The processes that should be run will be displayed and the processes will start running automatically. The ‘Refresh’ button can be used to refresh the process status. Even if this is not done, it has an auto-refresh mechanism which will update the status after the refresh poll time-interval. Once the process is over the message box, ‘Category successfully completed’ will appear. Clear this box using the space bar or by clicking on the Ok button. After this, press the Close button. Note: Once this is done, the operator logout completely out of the system and login again. After the EOD Console is brought up again, the operator must check the process date displayed at the bottom right hand corner of the status bar below. The date should have moved to the next process date. C. Take POSTEOD backup for that process date FCC Note: Please ensure that the post eofi backup for Flexcube corporate and post EOD backup for Flexcube retail are taken at the same time. So, even if one process is over, do not start the backup unless the other system has reached the stage for backup 75 Normal Processing Day End of Day Activities Transactions Posting Interest Processing Service Charges change of cycle depending on the Capitalisation frequency Interest Rate Changes Sweep Out transactions Account and customer Dormancy Account classification Reports Generation GL-Handoff to FLEXCUBE Corporate Account status change Account provisioning 76 Normal Processing Day 4.6.3. Beginning of day (BOD) processing Note: The BOD Category Should Be Run As Soon As The Post EOD Backup Has Been Completed. A. Check whether service is running Ensure that the status of on-line services is started If one of them or a few are not running then start the services. Note: If during any of these stages, the operator faces a problem, then I-flex Support should be contacted immediately. B. Start BOD category Login into the application using a valid user id and password Select ‘EOD Processing’ from the Menu When the EOD Console comes up, Select the process category ‘Beginning of Day’ from the drop-down list Note: This date should be the process date for which BOD has to be run. If it is the “correct process date”, then the operator can proceed and run BOD by selecting from the drop-down list. If the category runs smoothly and gets completed, the message box ‘Category completed successfully’ is displayed. After this, the user has to clear this box and close the EOD Console. Then log out of the application. Go to the Application Server and the Services under Control Panel. Check whether all the services mentioned below Show status as ‘Started’ in the Panel. If not, then start the services C. Take POSTBOD backup for that process date Beginning of Day Activities Time Deposits Interest Processing Time Deposits Maturity Processing Time Deposits Unclaimed Deposits Processing Standing Instructions Execution Value Date Processing of cheques Expiry of Overdraft Limits Maturity processing for Recurring Deposit (RD) accounts Release of hold funds which have expired the previous day Resetting of the average daily balance statistics on the BOD of the New Year. Updating the Unclaimed Status for the instruments SC package change 77 Normal Processing Day 4.6.4. Adhoc processing GENERATE CIFS HANDOFF Note: THE Generate CIFS Handoff CATEGORY SHOULD BE RUN AS SOON AS THE POSTBOD BACKUP HAS BEEN COMPLETED. A: Check Whether Service Is Running Go to the Web sphere application server Ensure that the status of the following services is started on the Web sphere application server Adhoc Processing screen If all of these services are not running, follow the procedure mentioned under the section Start Services below. If one of them or a few are not running then follow the procedure mentioned under the Section ‘Startup of On-Line Services’. If during any of these stages, the operator faces a problem, then I-flex Support should be contacted immediately. APPLY CIFS HANDOFF Note: the apply cifs handoff category should be run after generate cifs handoff process has been completed. 78 Other Activities Done During EOD Processing 4.7. Other Activities Done During EOD Processing When the EOD is in progress, the branches can continue doing the online transaction. But the users will not be able to do any maintenance as it is not allowed when EOD is in progress. If the user tries doing it, the system will give an error indicating that the EOD/BOD is in progress. The ATM, POS, and Tele banking transactions can be done during the EOD processing. 79 Pre-requisites Required for EOD Processing 4.8. Pre-requisites Required for EOD Processing 4.8.1. FLEXCUBE Retail Services The services that are in use for the FLEXCUBE Retail application, running on the Application Server are listed below. These services start at the same time. Service Name Description Batch Controller of all the EOD shells running within the system. File transfer Server for the TCP/IP communication of files from branch communication server to the host application server. Gefu Service for handling transactions coming through the GEFU route Mnt Supports the various back office maintenances Oltp Server for servicing all monetary branch transactions Reports Server for servicing all the advice/report requests from the branch. FCR ATMS SERVER 1 Server for servicing the ATM related transactions FCR FepiSCS Server 1 Communication service for Front end processing FCR POS Server 1 Server for servicing the POS related transactions FCR FEPI Server 1 Front end processing service for ATM/POS transactions. 80 Pre-requisites Required for EOD Processing 4.8.2. Data Area When the EOD or BOD is in progress, the reports are generated in the area called as Reports in the data area in the FLEXCUBE folder. It has to be ensured that there is enough space for the reports to be generated. In addition, the user can also do the routine space check on the Oracle database. 4.8.3. Branch Batch Close All the branches should close their respective branch batch for the day. Incase there are branches which work 24 X 7 they should also close the branch batch for that day and open the branch batch for the next working day depending on the bank’s policy, rules, and regulations. The EOD operator can view the list of branches which have not yet closed the branch batch for the day by using the Branch Batch Status-Inquiry (Fast Path: BAM95) option. Branch Batch Status-Inquiry Screen Fig 32 - Branch Batch Status-Inquiry Screen From the drop-down of the Branch Status field on the screen, depending on the selected status, the details will be listed. The latest date will be displayed on the top. 81 Pre-requisites Required for EOD Processing 82 Steps for EOD on a Normal Processing Day 4.9. Steps for EOD on a Normal Processing Day A complete list of the execution steps that the operator has to perform for the End of Day operations is: Note: In case any sub-processes in the categories mentioned below abort, then please follow the instructions in the section Process abort procedures mentioned at the end of the document 4.9.1. Eligibility Shell Overview The eligibility shell is related with RVT. Eligibility criteria can be defined under the tag of an Eligibility Plan in the Relationship Pricing Project. This plan determines the set of customers who will get benefits defined under a scheme, and thus helps identify the target customers for a scheme. The benefits available under a scheme can be reduction in service charges or positive variance in credit interest rates. In addition, customers who will be excluded from getting the benefits defined under the scheme can also be set up as an Exclusion Plan. Once the Eligbility plans are defined, they can be linked to various schemes for the eligible customers as per the eligibility plans. To link the schemes to customers, eligibility needs to be evaluated first. Eligibility plans are stand alone entities, and can be evaluated at any time of the day. The following will be executed in the eligibility shell: List out all plans from rp_elig_plan_mast, which need to be evaluated, and pick up eligibility plans based on the active flag, the maintenance status, and eligibility frequency. Pull out the exclusion plans of all these eligibility plans, their revision frequency is the same as the eligibility plans to which they are attached. Select all customers from ci_custmast. For each customer, check eligibility plan and exclusion plan If eligibility is true and exclusions is also true, the customer will not be marked as eligible for the benefits. If eligibility is true and exclusions is false, the customer will be marked as eligible for the benefits. Steps for running the category: Steps for A. Checking whether the service is running Check whether the service Batch shows status as Started. If the service shows the status Started, restart the service. If the service is not running, then start it. 83 Steps for EOD on a Normal Processing Day B. Starting with the category Login into the application using a valid user id and password. Select EOD Processing from the Menu. When the EOD Console is displayed, select the process category Elig from the drop-down list. Check the current process date and next process date and ensure that they are correct. Click on the Start button. The processes that should be run will be displayed and the processes will start running automatically. The Refresh button can be used to refresh the process status. Even if this is not done, it has an auto-refresh mechanism which will update the status after the refresh poll time-interval. Once the process is over the message box, ‘Category successfully completed’ is displayed. Clear this box using the space bar or by clicking on the Ok button. After this, click the Close button. After the Elig process is over, exit out of the menu and before starting Cutoff, login afresh into the system. 4.9.2. Cut-off Processing Overview Cut-off is the process that operator must run at the end of every day before starting the EOD for that day, to ensure that all transactions done through the on-line delivery channels (including branch, ATMS, POS and Tele banking) are handed over to a log for batch processing. A fresh log is created for the next day’s transactions. Here it is important to note that while the processing date from the point of view of EOD processing is still today, the on-line processing date has moved to the next processing date and the online transactions done after cut-off will be processed in the next day’s EOD. OLTP CUT-OFF - The following transactions are carried out during OLTP cut-off: Change of business day Close current logs Initiate a new log file while the cutoff process is running System is not available for external transactions like ATM, Internet Banking, etc. ATM CUT-OFF - The following transactions are carried out during ATM cut-off: Change of business day for ATM network ATM available only in off-line mode The ATM CUT-OFF is automatically done by the system as soon as the normal cut-off is complete. EOD can start after last cut-off (ATM and OLTP) is done. 84 Steps for EOD on a Normal Processing Day Steps for A. Take Pre Cutoff Backup for that Process Date B. Checking Whether the Service is Running Check whether the service Batch shows status as Started. If the service shows the status Started, restart the service. If the service is not running, start it. C. Starting with the Category Login into the application using a valid user ID and password. Select EOD Processing from the menu. When the EOD Console is displayed, select the process category CUTOFF from the dropdown list. Check the current process date and next process date and ensure that they are correct. Click on the Start button. The processes that should be run will be displayed and the processes will start running automatically. The Refresh button can be used to refresh the process status. Even if this is not done, it has an auto-refresh mechanism which will update the status after the refresh poll time-interval. Once the process is over the message box, "Category successfully completed" is displayed. Clear this box by using the space bar or by clicking the Ok button. After this, click the Close button. After the Cutoff process is over, exit out of the menu and before starting End of Day, login again into the system. 4.9.3. End of day (EOD) Processing Overview EOD refers to the processing required to be done for each functional module of FLEXCUBE Retail as well as some files that are generated for updating data in other LO’s. While the processing is specific to each module, the typical activities that are performed are: Transactions Posting Interest Processing Reports Generation GL-Handoff Generating files for Inter-LO updates Loans Account opening in batch 85 Steps for EOD on a Normal Processing Day Steps for A. Checking Whether the Batch Service is Running Check whether the service Batch shows status as started. If the service shows the status Started, restart the service. If the service is not running, start it. B. Start EOD Category Login into the application using a valid user ID and password. Select EOD Processing from the menu. When the EOD Console is displayed, select the process category End of Day from the drop-down list. Click the Start button. Note: Check the current process date and next process date and ensure that they are correct. The processes that should be run will be displayed and the processes will start running automatically. The Refresh button can be used to refresh the process status. Even if this is not done, it has an auto-refresh mechanism which will update the status after the refresh poll time-interval. Once the process is over the message box, ‘Category successfully completed’ is displayed. Clear this box using the space bar or by clicking the Ok button. After this, click the Close button. Note: Once this is done, the operator should logout completely out of the system and login again. After the EOD Console is brought up again, the operator must check the process date displayed at the bottom right hand corner of the status bar below. The date should have moved to the next process date. C. Take POSTEOD Backup for that Process Date FCC Note: Please ensure that the post EOFI backup for FLEXCUBE Corporate and post EOD backup for FLEXCUBE Retail are taken at the same time. So, even if one process is over, do not start the backup unless the other system has reached the stage for backup. 86 Steps for EOD on a Normal Processing Day End of Day / End of Month Activities There is no separate process or category for End of Day or End of Month. Depending upon the process date for which the End of Day category is run, the system runs certain special categories which fall under the End of Month domain. The broad set of activities which are undertaken by the system during the End of Day or End of Month are: Transactions Posting Interest Processing Service Charges change of cycle Capitalization frequency Interest Rate Changes Sweep Out transactions Account and customer Dormancy Account classification Reports Generation GL-Handoff to FLEXCUBE Corporate Account status change Account provisioning 87 Steps for EOD on a Normal Processing Day 4.9.4. Beginning of day (BOD) Processing Overview Beginning of the Day process opens a new transaction day for the Bank. BOD as a process depends on EOD process for the previous working day. This means, if the EOD is not completed for a day, system will not allow the BOD for the next day to start. The days are always business days as specified in Branch Calendars. So, even if one branch is functioning on a particular day, BOD will have to be run for that day. Apart from starting a new day, BOD does some processing that typically includes Time Deposit processing related to interest and maturity Standing instructions execution Value date processing of cheques (Based on the set up) Salary Processing Expiry of Overdraft Limits Note: The BOD Category should be run as soon as the post EOD backup has been completed. Steps for A. Check Whether Service is Running Ensure that the status of on-line services is started If one of them or a few are not running then start the services. Note: If during any of these stages, the operator faces a problem, then support should be contacted immediately. B. Start BOD Category Login into the application using a valid user ID and password. Select EOD Processing from the menu. When the EOD Console is displayed, select the process category Beginning of Day from the drop-down list. Note: This date should be the process date for which BOD has to be run. If it is the Correct Process Date, then the operator can proceed and run BOD by selecting from the drop-down list. If the category runs smoothly and gets completed, the message box ‘Category completed successfully’ is displayed. After this, the user has to clear this box and close the EOD Console. Then log out of the application. Go to the Application Server and the Services under Control Panel. Check whether all the services mentioned below show status as Started in the Panel. If not, start the services. 88 Steps for EOD on a Normal Processing Day C. Take POSTBOD Backup for that Process Date Beginning of Day Activities The broad set of activities which are undertaken by the system during the Start of Day / Beginning of Day are: Time Deposits Interest Processing Time Deposits Maturity Processing Time Deposits Unclaimed Deposits Processing Standing Instructions Execution Value Date Processing of cheques Expiry of Overdraft Limits Maturity processing for Recurring Deposit (RD) accounts Release of hold funds which have expired the previous day Resetting of the average daily balance statistics BOD of the New Year Updating the Unclaimed Status for the instruments SC package change 89 System Maintenance 4.10. System Maintenance System Maintenance allows the user to up keep different activities. It also allows the smooth functioning of various activities. 4.10.1. Release Area Maintenance The Release area is the main section where FLEXCUBE is installed. This area contains all the executable and supporting files. All the reports are also generated here. This makes the area very critical and should have strict controlling and restraining access. The access to this area should be controlled. It should not be available to everyone. It should be monitored as users can go in that area and modify data, which could lead to disastrous effects. 4.10.2. Host Maintenance Following are the options which can enhance the productivity at the host server. General Checks: Routine check on date and time synchronization on database, Application server, and branch server Monitoring the link utilization between Data Center and branches and Data Center and DR site (only if applicable) Memory Checks: Monitoring memory utilization on the Application server Database Checks: Daily check on invalid objects in the database (disabled triggers) Regular check on database, like analyze table/index, rebuild indexes, monitoring tables with rapid growth Setting up the adhoc purging processes to make sure that it does not affect the database performance Server Maintenance: Anti virus schedule set up. It helps the user to ensure that scanning does not coincide with the EOD process. Routine space check on the apps server Checking the disk space on the report server (if reports are getting spooled on independent server instead of apps server) System Software Updates: FLEXCUBE installation area maintenance, like updating new releases regularly and registry updates for new branch additions 90 Troubleshooting 4.11. Troubleshooting 4.11.1. Path for Logging the Trace File To locate the path where the trace file will be logged, log into the Web Sphere Application server. Under Services, click the application server to view it. The application server will be displayed as shown below in the screen. Application Servers Screen Fig 33 - Application Servers Screen After double-clicking the service name under the Name column, the Configuration screen will appear as shown below. 91 Troubleshooting Configuration Tab Screen Fig 34 - Configuration Tab Screen Then double-click the logging and tracking under Additional Properties as shown below in the screen. 92 Troubleshooting Additional Properties Screen Fig 35 - Additional Properties Screen The trace file name and its associated path will be displayed when the user selects the Logging and Tracing link. 93 Troubleshooting Diagnostic Trace Service Screen Fig 36 - Diagnostic Trace Service Screen 4.11.2. Process Abort Procedures If any of the process in the Category Cutoff, End of Day, or Beginning of Day shows aborted and the process cannot move ahead, the operator has to follow the instructions mentioned below: Note down the sub process name of the category that has aborted. Contact support and follow the instructions given by the support staff. Also, by the time contact is established, the operator can ensure that the trace file has been generated in the location mentioned in the diagnostic trace file path. 94 Troubleshooting 4.11.3. Common Script to Update Non-Operator Login Status When the operator starts End of Day category in FLEXCUBE Retail and he clicks Start, then sometimes the error message ‘Non-operators logged in, Cannot start Category’ is displayed. This may happen when there are other users still logged into the system or when the client side at the workstation has a problem and the login state has not been reset. When this problem is encountered, the operator has to follow the following steps: Double-click the Folder ‘sqlplus’ at the Desktop of the EOD workstation. Double-click the Retail Live icon which will take the user to the retail database. Type @D:\flexsup\db\upd and press Enter at the prompt. The output should say n rows updated where n can be any number greater than 0. If the output is zero, then support should be contacted immediately, else, the operator has to type exit followed by a semi-colon (;) and press Enter. This will take the user back to the Desktop. Once this is done, the operator can proceed with the EOD processing in FLEXCUBE Retail. 4.11.4. Database Access Problem or Space Problem Sometimes due to network problem, the access to the Oracle database is lost. There is a message which is logged into the trace file, indicating that the system is not able to access the Oracle database. Try to ping using the ping IP address command in the command prompt to the Oracle server and if it is not able to access, contact the system administrator immediately. When there is a space problem in the database, the cut off / EOD / BOD process gets aborted. A error message is logged in the trace file indicating that there is a table space problem or that the redo log is full. Contact the database administrator for the same or call support for help. 95 Host and Branch Report 5. Host and Branch Report 96 Reports 5.1. Reports The reports get generated as part of EOD and BOD processing. They are generated depending on the frequency defined for them. The reports are first generated in the Reports folder in the FLEXCUBE folder and then finally are moved to the rjsout folder. The data is stored with respect to the month with a sub-folder for each working day under the month folder. The branch reports are generated in <FLEXCUBE INSTALLATION PATH>\branch\brn\reports\ The host reports are generated in <FLEXCUBE Installation Path>\rjsout\<mm>\<dd>, where mm is the month of the posting date and dd is the day of posting. Fig 39 - Report Request Screen The reports can be generated at different frequencies. The frequencies are: Daily The reports which are of daily frequency are generated daily. They can also be viewed from the application and are generated for the respective branches. The operator can view reports for any branch, by selecting it, from the head office, whereas only individual reports can be viewed from the respective branches. 97 Reports Monthly The reports which are of monthly frequency are generated on the month end. These are the additional reports which are generated along with the daily reports. The reports can also be viewed from the application. The reports are generated for the respective branches. The operator can view reports for any branch, by selecting it, from the head office, whereas only individual reports can be viewed from the respective branches. Half Yearly and Yearly The reports which are of half yearly and yearly frequency are generated on half yearly month end and financial year end respectively. These are additional reports which are generated along with the daily reports. The reports can also be viewed from the application. The reports are generated for the respective branches. The operator can view reports for any branch, by selecting it, from the head office, whereas only individual reports can be viewed from the respective branches. The procedure to generate a EOD report: 1. Open the Report Request (Fast Path: 7775) option. 2. In the Report Request screen, click the Batch Reports button. 3. Select the group from the Report Group section. 4. Type the date in the Process Date (DD/MM/YYYY) field. 5. Click the View button. 6. The reports are generated As mentioned above, the reports are available branch-wise and are generated in the folders with respect to the working dates. The report is saved as <Report ID>.out. For e.g., in the screen below, the generated report will be saved as CH118.out. Find below the screen on how to view an EOD report. Change the process date to view a backdated report. 98 Reports The other option is the required EOD reports are transferred to respective branches by using FTP. In such cases, the branches generate the reports and take the printouts at the respective branches. Adhoc Reports If there are some important reports which have to be generated before EOD, the operator can generate the required report by using the Adhoc option of the report generation and save the report. The procedure to generate a adhoc report is 1. Open the Report Request (Fast Path: 7775) option. 2. In the Report Request screen, click the Adhoc Reports button. 3. Select the group from the Report Group section. 4. Type the date in the Process Date(DD/MM/YYYY) field. 5. Click the View button. 99 Reports Monthly Statements The monthly statement is generated in the backup database. The post EOD data is loaded in the backup database. The date of the last statement generated is updated and then the monthly statements are generated. Fig 41 - EOD Client Screen 100