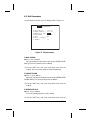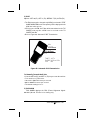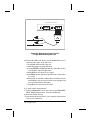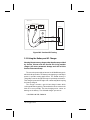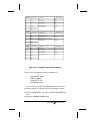
1
SUNRISE TELECOM I N C O R P O R A T E D SunSetTM E20 User’s Manual Version 1.01 SS266 MAN-11100-E101 Rev. C ....a step ahead Sunrise Telecom 22 Great Oaks Blvd. Version 1.01 San Jose, CA 95119 USA SunSet E20 SUNRISE TELECOM I N C O R P O R A T E D EC DECLARATION OF CONFORMITY We Sunrise Telecom 22 Great Oaks Boulevard San Jose, CA 95119 USA declare under sole responsibility that the SunSet model E20 meets the intent of Directive 89/336/EEC for Electromagnetic Compatibility Directive. Compliance was demonstrated to the following specifications as listed in the official Journal of the European Communities EN 50081-1 Emissions EN 55022:1995 (Class A) EN 50082-1 Immunity EN61000-4-2:1995 EN61000-4-3:1995 EN61000-4-4:1995 The tests have been performed in a typical configuration. The conformity is indicated by the symbol i.e., “Conformité eurpoéenne” SunSet E20 Version 1.01 SunSet E20 User’s Manual Table of Contents EC DECLARATION OF CONFORMITY ................ 2 Chapter 1 Initial Setup 1.0 Unpacking the SunSet ................................... 9 2.0 Replacing the Battery Pack ......................... 11 Chapter 2 Test Set Description 1.0 Warnings ........................................................ 15 2.0 Front View Description ................................. 15 2.2 LEDs .............................................................. 22 2.3 Connector Panels .......................................... 24 Chapter 3 Menus 1.0 Introduction ................................................... 29 2.0 2.1 2.2 2.3 2.4 Test Configuration ........................................ 31 E1SINGL TEST MODE................................... 32 E1DUAL Mode ............................................... 37 E1-MUX Mode................................................ 45 MUXTEST MODE .......................................... 50 3.0 Send Test Pattern .......................................... 56 3.1 Standard Patterns ......................................... 56 3.2 User Test Patterns ......................................... 58 4.0 4.1 4.2 4.3 Measurement Results................................... 62 E1 Results and General Definitions ............ 65 E1-MUX Mode Measurement Results .......... 76 MUXTEST Mode Results .............................. 77 SunSet E20 Version 1 .01 4.4 DATACOM Mode Measurement Results ........................................................... 78 5.0 Other Measurements .................................... 78 5.1 View Received Data ...................................... 78 5.2 View FAS Words ............................................ 80 5.3 View MFAS Words ......................................... 82 5.4 Pulse Mask Analysis .................................... 83 5.4.1 Start New Analysis ..................................... 85 5.4.2 View Last Pulse Shape .............................. 86 5.5 C-Bit Analysis ............................................... 86 5.6 Histogram Analysis ...................................... 90 5.6.1 Current Histogram ..................................... 90 5.6.2 Saved Histogram ....................................... 93 5.7 Propagation Delay ........................................ 95 6.0 VF Channel Access ...................................... 96 6.1 VF & Noise Measurements ........................... 97 6.2 View Line CAS ............................................. 101 6.3 Call Analysis ............................................... 102 6.3.1 Digit Analysis ........................................... 106 6.4 Call Emulator ............................................... 107 6.4.1 Standard Emulations ............................... 108 6.4.2 Place a Call ............................................... 109 6.4.3 Receive a Call ........................................... 110 6.4.4 User Emulation ........................................ 112 6.5 Supervision Setup ...................................... 117 6.6 Dial Parameters ........................................... 119 6.7 Signal Meanings ......................................... 121 7.0 7.1 7.2 7.3 7.4 Other Features ............................................ 126 Error Injection ............................................. 126 Alarm Generation ........................................ 129 View Results Records ................................ 131 Send Frame Words ..................................... 133 8.0 System Parameters .................................... 135 8.1 Version/Option ............................................ 136 SunSet E20 Version 1 .01 8.2 8.3 8.4 8.5 8.6 8.7 8.8 System Profiles ........................................... 137 MEAS Configuration................................... 140 General Configuration ................................ 145 Erase NV Ram ............................................. 148 Self Test ....................................................... 149 CLR Print Buffer ......................................... 149 Factory Defaults ......................................... 150 9.0 Language Selection ................................... 150 Chapter 4 Applications 1.0 Connecting the Cords ................................ 153 2.0 Basic Applications ..................................... 156 2.1 Accept a New Circuit .................................. 156 2.2 Monitor an In-Service Circuit ..................... 157 2.3 Checking for Frequency Synchronization 160 2.4 Measure Signal Level ................................. 161 2.5 Run a Timed Test ......................................... 164 2.5.1 Manual Start ............................................. 164 2.5.2 Auto Start ................................................. 164 2.6 Observe Network Codes or Channel Data 165 2.7 Monitor a Voice Frequency Channel ......... 167 2.8 Simple Talk/Listen ....................................... 168 2.9 Send a Tone ................................................. 170 2.10 Nx64 kbps Testing .................................... 171 2.11 Using the Battery and AC Charger .......... 173 2.12 Using the Serial Port ................................. 175 2.12.1 Serial Port Settings ................................ 175 2.12.2 Configuring for Printing ........................ 175 2.13 Using the Remote Control ....................... 180 2.13.1 Using Remote Control / Windows 95 ....185 3.0 3.1 3.2 3.3 Advanced Applications .............................. 186 In Service Dual Drop & Insert THRU Test .. 186 Testing a Terminal Multiplex ....................... 189 Emulating a Terminal Multiplex .................. 191 SunSet E20 Version 1 .01 3.4 Emulating an Add/Drop Multiplexer .......... 194 Chapter 5 Datacom 1.0 Datacom Technology Overview ................. 201 1.1 Introduction ................................................. 201 1.2 Communication Components ................... 201 1.3 Transmission Basics .................................. 202 1.4 Data Networks ............................................. 203 1.5 Call Control Procedure............................... 204 1.6 Physical Layer Protocol ............................. 205 2.0 DATACOM Menus ....................................... 207 2.1 DATACOM Mode Test Configuration ......... 207 2.1.1 DATACOM Test Mode ............................... 208 2.2 Datacom Interface ....................................... 212 2.2.1 Live Tracer ................................................ 213 2.3 View/Print Buffer ......................................... 217 2.4 DATACOM Measurement Results .............. 218 2.5 Other Measurements .................................. 221 2.5.1 View Received Data ................................. 222 2.5.2 Propagation Delay ................................... 222 2.6 Protocols ..................................................... 224 3.0 Datacom Interface Pin-outs ....................... 224 4.0 Applications ................................................ 228 4.1 Point-to-Point Datacom Testing ................. 228 4.2 Testing the Datacom Port of a Multiplex ............................................................ 231 4.3 Datacom Monitoring ................................... 232 4.4 Fault Location with Remote & Local Loopbacks ................................................... 234 Chapter 6 Technology Overview 1.0 E1 Technology Overview ............................ 239 1.1 Introduction ................................................. 239 SunSet E20 Version 1 .01 1.2 1.3 1.4 1.5 1.6 1.7 1.8 1.9 Technical Standards ................................... 239 Basic Definitions ......................................... 239 Converting a Voice Signal .......................... 240 2.048 Mbps Data Rate ................................. 241 Line Coding ................................................. 241 Signal Levels ............................................... 244 2.048 Mbps Framing ................................... 245 MFR2/DTMF/DP Technology ...................... 250 Chapter 7 Troubleshooting 1.0 Troubleshooting .......................................... 255 2.0 Calibration ................................................... 257 3.0 Customer Service ....................................... 260 Chapter 8 Specs & Configs 1.0 Main Specifications .................................... 263 2.0 Configurations ............................................ 270 3.0 Access Network Options Specifications .. 275 4.0 Cellular Network Options Specifications .. 278 5.0 Frame Relay Network Options Specifications 280 6.0 Switching Network Options Specifications 282 EXPRESS LIMITED WARRANTY....................... w-i Certificate of Origin............................................w-iii Index ..................................................................... i-1 SunSet E20 Version 1 .01 Copyright 2001 Sunrise Telecom Incorportated This device uses software either developed by Sunrise or licensed by Sunrise from third parties. The software is confidential and proprietary. The software is protected by copyright and contains trade secrets of Sunrise or Sunrise’s licensors. The purchaser of this device agrees that it has received a license solely to use the software as embedded in the device, and the purchaser is prohibited from copying, reverse engineering, decompiling, or disassembling the software. SunSet E20 Version 1 .01 Chapter 1 Initial Setup 1.0 Unpacking the SunSet ................................... 9 2.0 Replacing the Battery Pack ......................... 11 SunSet E20 Version 1.01 SunSet E20 Version 1.01 Welcome to the SunSet E20. This manual will take you through setting up and using your test set, helping you make full use of its extensive and flexible testing capabilities. 1.0 Unpacking the SunSet Use the following procedure for unpacking your new SunSet: 1) Remove the packing list from the shipping container. 2) Remove the SunSet and accessories from the shipping container. 3) Inspect all parts and immediately report any damage to both the carrier and to Sunrise Telecom Incorporated. 4) Verify that all parts specified on the packing list were received. 5) Complete the Warranty Registration Card and return it immediately to Sunrise Telecom Incorporated or your national distributor. NOTE: Sunrise Telecom Incorporated must receive your warranty registration card in order to provide you with updated Software releases. 6) Ensure the Software cartridge is fully seated in its slot (refer to Figure 1, Software Cartridge Installation). 7) Plug the AC Battery Charger, SS138, into an appropriate AC wall outlet: 120 VAC - 240 VAC 8) Switch the set on and verify that it passes the SELF TEST. If the SunSet does not turn on immediately, it may need to charge for up to 5 minutes before it can run. 9) Charge the unit for at least one hour before its first use. Or, leave the Battery Charger plugged in while operating the SunSet. 10) Put the SunSet and accessories into the soft Carrying Case (if it was ordered). Ch.1 Unpacking 9 Software SunWare INSERT HERE SunSet E20 Serial Number QP 000503 SUNRISE TELECOM I N C O R P O R A T E D 22 Great Oaks Blvd. San Jose, CA 95119 Tel: 1-408-8000 Fax: 1-408-363-8313 Internet: [email protected] Figure 1 Cartridge Installation NOTE: Each Software cartridge is mated to a single SunSet. If your SunSet does not start properly, verify that the Serial Number printed on the Software Cartridge matches the Serial Number on the back of your SunSet. When ordering Software upgrades, be sure to specify the Serial Number of the SunSet into which the new cartridge will be installed. Please note your SunSet E20 features a second slot, which may 10 SunSet E20 Version 1.01 hold an optional SRAM memory card. 2.0 Replacing the Battery Pack 1) Push down on the battery cover on the back panel, in the direction indicated by the arrow, to remove the battery cover. Refer to Figure 2. Unclip here Figure 2 Replacing the Battery Pack 2) Pull the SS140 NimH battery pack off its velcro backing, and out of the set. 3) Unclip the battery pack, as indicated on Figure 2. 4) Clip in your new battery pack, replace it against the velcro inside the unit, and slide the battery cover back on, hooking the cover clips into the provided slots. Please dispose of expired batteries safely. Ch.1 Unpacking 11 12 SunSet E20 Version 1.01 Chapter 2 Test Set Description 1.0 Warnings ....................................................... 15 2.0 Front View Description ................................. 15 2.2 LEDs .............................................................. 22 2.3 Connector Panels ......................................... 24 SunSet E20 Version 1.01 SunSet E20 Version 1.01 1.0 Warnings 1) Insert and remove Software cartridges ONLY with the power switched OFF. Otherwise, Software cartridges may become damaged. 2) Use the SunSet charger only. It is marked with the Sunrise Telecom Incorporated logo AC Battery Charger name. 3) When bringing the SunSet from an extreme cold to warm environment, allow the SunSet to warm for at least 4 hours prior to use. Condensation may interfere with the operation of the test set and may result in damage if power is applied. 4) Do not immerse the set in water or expose the set to rain. 2.0 Front View Description Refer to Figure 3, SunSet E20 Front View, on the following page for the front view of the SunSet E20. 2.1 Keys Most SunSet keys perform two distinct operations. The white label on the key indicates what function will be performed if the key is pressed by itself. The orange label above the key shows what function will be performed if the SHIFT-lock key is pressed first. A SHIFT indicator will be displayed in the upper left-hand corner of the screen, in reverse video. The SHIFT-lock key should not be pressed simultaneously with another key. Instead, the SHIFT-lock key should be pressed and then released. At this point, the SHIFT indicator, will appear. Any other key can now be pressed and released, and the SunSet will perform the function indicated by the orange label. If the keys are not behaving as expected, check the SHIFT indicator. If the SHIFT indicator (upper left-hand corner of the screen) indicates the wrong shift status, simply press the SHIFTlock key again Ch.2 Test Set Description 15 SIGNAL PCM 31 AIS POWER CODE ERR PCM 30 ALARM BATTERY ERROR CRC DET SIGNAL PCM 31 BIT ERROR CODE ERR RxDCE RxDTE ERROR PCM 30 RTS AIS USER1 CTS CRC DET USER2 ALARM PAT SYNC SunSet E20 12:34:41 VIEW RECEIVED DATA : 01 BINARY HEX ASCII 11011111 DF ( 11000100 C4 (#) 01000010 42 B (B) 00011110 1E (x) 01100101 65 e ( 00101110 2E . (t) 11010100 D4 (+) 11000101 C5 ( PAGE T/S 000 001 002 003 004 005 006 007 PAGE-UP PAGE-DN F1 F2 PAUSE PRINT F3 F4 SUNRISE TELECOM I N C O R P O R A T E D A B C D F1 F2 F3 F4 E* 1 PRINT Z F# 4 AUTO 7 2 GRAPH 3 ERR INJ 5 6 MEAS LED 8 9 0 SHIFT ESC ENTER POWER Figure 3 SunSet E20 Front View 16 SunSet E20 Version 1.01 White Labels F-keys (F1, F2, F3, F4): These keys are used to select choices F1 through F4 at the bottom of the LCD display. When you configure a setup screen, a number of options are typically available for each setup item. The available choices appear on the bottom of the screen. The desired option may be invoked by pressing the corresponding F-key directly below. Refer to Figure 4. In Figure 4, the Framing is set to PCM-30 by pressing the F1 key. Note the following: 1) In most instances, when the desired F-key is pressed, the cursor will advance to the next line of the display automatically. To change the settings of a previous line, press the Up Arrow key, then re-select the option using the appropriate Fkey. 2) The options appearing at the bottom of the screen are associated with a particular setup parameter within that screen. As you change the position of your cursor within a setup screen, the F-key options available to you will also change. 3) If more than four F-key options are available to the user, a "MORE" indicator will appear in the F4 position. Pressing the F4 key will show the other available options. Ch.2 Test Set Description 17 2:30:02 TEST CONFIGURATION TEST MODE : E1SINGL TX SOURCE : FRAMING : CRC-4 : TEST RATE : L1-Rx Port: XMT CLOCK : PCM-30 F1 TESTPAT PCM-30 YES 2.048M TERM INTERN PCM-31 UNFRAME F2 F3 F4 Press the Desired F-Key F1 F2 F3 F4 Figure 4 F-Keys PRINT: The print key is used to print any alphanumeric and graphical information appearing on the screen. : The backlight key is used to switch the system backlight off and on. Keeping the backlight off when it is not needed will allow the SunSet to maintain its battery charge approximately 15% longer. The SunSet's backlight has a programmable timer for automatic shut-off. This timer can be set from 1 to 99 minutes or continuous operation. This feature is configured in SYSTEM PARAMETERS, GENERAL CONFIG, BACK LIGHT. GRAPH: The GRAPHic key displays a picture of the current circuit configuration and status. The graphic may be invoked during basic menu setups and basic operations, such as: TEST CONFIGURATION, SEND TEST PATTERN, and VF CHANNEL ACCESS. It is wise to press the GRAPHIC key upon completing TEST CONFIGURATION setup to ensure that you have selected the proper settings. 18 SunSet E20 Version 1.01 The graphics will update based on your Test Configuration settings. MEAS 01:34:25 E1SINGL Line 1 T Tx R Rx TERM FRAMING : PCM30C CODING : HDB3 PAT: 2e15 TEST RATE: 2048 Kbps Figure 5 Graphic Screen, Example Here is a description of some of the elements common to a graphic display: The following letters will often be present, in reverse video: R = this is where the SunSet performs its received measurement results T= this is where the SunSet transmits a test pattern Arrows denote the direction the signal is travelling. Boxed words, or abbreviations provide additional information: Tx- the transmit port of the noted line (1 or 2) Rx- the receive port of the noted line FRAMING reports the framing type, and if CRC checking is present. CODING reports the transmitted coding type. PATtern presents the test pattern. TEST RATE is provided at the bottom of the screen, reporting the full or fractional test rate. BRiDGe, TERM, or MONitor is noted by each line. Ch.2 Test Set Description 19 ERR INJ: The ERRor INJect key is used to inject errors into the SunSet's transmitted signal. Errors are injected according to the current settings in the OTHER FEATURES/ ERROR INJECTION menu. If the error injection mode is set to rate, an error inject indicator will appear on the top of the screen when you press this button. AUTO: The AUTO key has two functions: 1) AUTO lets the test set auto-synch on the received line code, frame, and pattern. It may not be always possible to determine the line code of a circuit. For instance, an all 1s signal will mask the presence of HDB3 coding. The test set reports HDB3 coding if it actually sees the code; otherwise, it reports AMI coding. 2) Pressing the AUTO key will restart the measurements. : The volume key turns the speaker volume higher or lower via UP and DOWN F-keys on a graphical screen. Press EXIT (F3), ESCape, or ENTER when finished. MEAS: Press this key to access the MEASUREMENT RESULTS menu. LED: The LED key is used to turn off any flashing LEDs. The LEDs flash to indicate any error or alarm condition which occurred previously, but which is no longer present. : The CONTRAST key adjusts the contrast of the LCD screen. Press the key repeatedly until the contrast is as you wish. , , , (Cursor Up/Down/Left/Right Arrow): The arrow keys are used to move the cursor in the indicated direction. ESCAPE: The ESCAPE key moves you back toward the main menu. To return to the main menu, keep pressing ESCAPE until you arrive there. ENTER: The ENTER key performs three functions: 1) When a menu item is highlighted and the ENTER key is pressed, the SunSet will display the screen for the highlighted menu item. 20 SunSet E20 Version 1.01 2) If setups are complete in a data entry screen, pressing ENTER will often return you to the previous menu. 3) In a few cases, pressing the ENTER key is required after the user finishes entering data in a given screen. In these cases, the SunSet will execute the inputs only after the ENTER key has been pressed. In most of the high usage functions, it is not necessary to press ENTER to invoke the operation. If the operation you are trying to perform will not begin, try pressing the ENTER key. When the ENTER key is used to invoke the operation, you may need to press ESCAPE to return to the previous menu. Black Labels SHIFT: The SHIFT-lock key is pressed to provide access to the functions specified by orange labels. The SHIFT-lock key should always be pressed first, then must be released before the desired orange-label key is selected. SHIFT-lock status is displayed in reverse video in the upper left-hand corner of the screen. The SHIFT-lock indicator must not be present when the white label functions are to be used. The SHIFT-lock indicator must be present when the orange-label functions are to be used. POWER: The power key controls the ON/OFF function of the SunSet E20. It is the red key located in the lower left-hand corner of the test set’s keypad. Orange Labels A, B, C, D, E*, F#: These keys are used to enter DTMF tones, as well as hexadecimal numbers. They can also be used to provide labels for user-defined information. 0, 1, 2, 3, 4, 5, 6, 7, 8, 9: These keys are used to enter user test patterns and telephone numbers. They can also be used to provide labels for user-defined information. Ch.2 Test Set Description 21 2.2 LEDs The bicolor LEDs (Light Emitting Diodes) provide a visual indication for the condition of the received signal. The LEDs provide enough diagnostic information at a glance that additional testing may not be required by some users. A LED will be lit green continuously when the particular condition for that LED is detected. For example, a continuous green light for PCM-30 indicates that the test set has detected PC-30 framing. A continuous red light denotes an alarm condition for the item. For example, the ERROR LED lights red if an error (code, bit, CRC, framing) has been observed. Blinking lights provide historical information for the circuit condition. This is quite helpful if the user happened to be away from the set when the error or alarm condition occurred. Pressing the LED key stops the blinking. Common LEDs: PAT SYNC: Lights green if the unit has synchronized on the test pattern in the received signal. The received pattern must match the transmitted pattern. The pattern may be observed in MEASUREMENT RESULTS and on the graphic screen. When the test set is in BER mode, the SunSet will automatically attempt to synchronize on the pattern that is being sent. If synchronization is lost, the PATtern SYNChronization LED lights red. BIT ERR: Lights red if a BIT ERRor has been detected. POWER: Lights green when the SunSet is switched on and has an adequate power source. BATTERY: Lights green when the battery is being charged. The LED lights red when the SunSet’s power supply voltage has dropped to a low level. A 15 minute countdown (900 seconds) is displayed after the BATTERY LED lights, indicating when the SunSet will automatically shut down. Connecting the AC Battery Charger will allow you to use the SunSet indefinitely. However, if you plan to use the SunSet for an extended period of time, it is best to plug the AC Battery Charger in first. If the charger is plugged in while a measurement is in process and while the battery is not fully charged, the SunSet may 22 SunSet E20 Version 1.01 automatically reset itself. In this case, the current measurement results would be lost. The following LEDs provide the same functions for both Line 1 and Line 2 displays. SIGNAL: A green signal LED indicates that the SunSet is receiving valid 2.048 Mbps signals. A red LED indicates no signal. PCM-31, PCM-30: A green LED indicates that the type of framing chosen in TEST CONFIGURATION has been detected on the received signal. PCM-31 indicates that the basic FAS (Frame Alignment Signal) has been detected. PCM-30 indicates that the MF 16 (Multiframe) pattern has been detected, as well as the basic FAS pattern. A red LED indicates that the selected framing has not been detected. If the received signal is unframed, neither LED will be lit. If the SunSet is configured for a particular type of framing in the TEST CONFIGURATION menu, it will continuously search for that type of framing. The appropriate LED will light whenever the framing is found. AIS: Lights red if the SunSet detects an Alarm Indication Signal (unframed all ones) on its receive jack. CODE ERR: Lights red if a coding violation is detected on the received signal. A code error is a bipolar violation that is not part of a valid HDB3 substitution. CRC DET: When CRC is enabled in the TEST CONFIGURATION menu, the CRC DETect LED lights green if CRC-4 check sequences are detected by the SunSet. If CRC is enabled, but no CRC is detected, the LED lights red. When CRC is disabled, it is not lit. ERROR: Lights red if any of the following errors have been observed: frame errors, E-bit errors. The ERROR LED will also light if CRC-4 errors are detected when CRC error checking has been enabled, and frame errors are detected when the signal is a framed signal. CRC-4 and framing are both configured in the TEST CONFIGURATION menu. Ch.2 Test Set Description 23 ALARM: Lights red if the SunSet detects FAS ALM, MFAS ALM, or AIS T/S-16 alarm. Datacom LEDs, which are dual function with Line 2 LEDs: RxDCE: Lights green when the test set is receiving data on the DCE port. RxDTE: Lights green when the test set is receiving data on the DTE port. RTS: Lights green when the Ready To Send control lead is on. CTS: Lights green when the Clear To Send control lead is on. USER1 & USER 2: These LED’s light when the control lead, defined as User 1 or User 2 in the Test Configuration, is on. 2.3 Connector Panels The SunSet E20 has two connector panels as shown in Figure 6. Left Side Connector Panel HEADPHONE x 75W L2-RX 120W x DATACOM 75W-L2-TX Right Side Connector Panel 75W L1-TX 120W 75W L1-RX 120W Figure 6 Connector Panels The left side connector panel has the following ports: 24 SunSet E20 Version 1.01 DATACOM: The MULTI PORT is provided for DATACOM testing. This port uses an SCSI (36 pin connector) interface to connect with other industry standard interfaces such as RS-232/ V.24, V.35, RS530, X.21, RS449, and 64 Kbps G.703 codirectional. The interface cables and datacom option can be purchased from Sunrise Telecom Incorporated. HEADPHONE Port: Plug in a regular headphone in this port, located directly above the Multiport. In general, when the headphone is used, the speaker will no longer apply. • When both is specified, Line 1 will be outputted to the left side and Line 2 will be outputted to the right side. • Stereo to Mono headphone converter should be used for VF, ISDN, QSIG, V5.X applications using Line 1 only. Application VF Channel Access ISDN Analysis* QSIG Analysis* V5.X Monitor GSM Monitor Output Remarks Both Line 1=Left only or Line 2=Right only, dependent on SPEAKER setting Both Both Both Both * Call emulation is Line 1 only (Use Stereo to Mono converter). Line 2 RX: The RX BNC and banana connectors are where the 2.048 Mbps line signal is received by the SunSet. Optionally, BR2 and 1.6/5.6mm ports are available. Line 2 ports are used for DUAL mode. Line 2 TX: The TX BNC connector is where the 2.048 Mbps line signal is transmitted from the SunSet. Optionally, BR2 and bantam ports are available. The right side connector panel has the following line 1 ports: Line 1 TX: These connectors are where the 2.048 Mbps line signal is transmitted from the SunSet, with 75 ohm unbalanced and 120 ohm balanced, simultaneously. Line 1 ports are always used in SINGLE mode. Ch.2 Test Set Description 25 Line1 RX: These connectors are where the 2.048 Mbps line signal is received by the SunSet, in either the 75 ohm unbalanced or 120 ohm balanced port. The top of the E20 also features connectors. See Figure 7. SERIAL PORT 15 VDC Software Cartridge Memory card slot Figure 7 Top of the SunSet E20 SERIAL PORT: The serial port is used for sending information to the Sunrise Telecom Incorporated thermal printer or for operating the Remote Control. This port uses an RS-232C DTE configuration with hardware flow control when the 8-pin DIN to 25-pin D-Sub conversion cable is connected. 15 VDC: The SunSet charger, SS138, is plugged in here. The SunSet may be operated with a discharged battery, provided the charger is connected. The battery will charge while the SunSet is being operated, if the charger remains connected. 26 SunSet E20 Version 1.01 Chapter 3 Menus 1.0 Introduction .................................................. 29 2.0 2.1 2.2 2.3 2.4 Test Configuration ........................................ 31 E1SINGL TEST MODE .................................. 32 E1DUAL Mode ............................................... 37 E1-MUX Mode ............................................... 45 MUXTEST MODE .......................................... 50 3.0 Send Test Pattern ......................................... 56 3.1 Standard Patterns......................................... 56 3.2 User Test Patterns ........................................ 58 4.0 4.1 4.2 4.3 4.4 Measurement Results .................................. 62 E1 Results and General Definitions ............ 65 E1-MUX Mode Measurement Results ......... 76 MUXTEST Mode Results .............................. 77 DATACOM Mode Measurement Results .......................................................... 78 5.0 Other Measurements.................................... 78 5.1 View Received Data ...................................... 78 5.2 View FAS Words ............................................ 80 5.3 View MFAS Words ......................................... 82 5.4 Pulse Mask Analysis .................................... 83 5.4.1 Start New Analysis .................................... 85 5.4.2 View Last Pulse Shape .............................. 86 5.5 C-Bit Analysis ............................................... 86 5.6 Histogram Analysis ...................................... 90 5.6.1 Current Histogram..................................... 90 5.6.2 Saved Histogram ....................................... 93 5.7 Propagation Delay ........................................ 95 6.0 VF Channel Access ...................................... 96 6.1 VF & Noise Measurements .......................... 97 SunSet E20 Version 1.01 6.2 View Line CAS ............................................ 101 6.3 Call Analysis ............................................... 102 6.3.1 Digit Analysis........................................... 106 6.4 Call Emulator .............................................. 107 6.4.1 Standard Emulations............................... 108 6.4.2 Place a Call .............................................. 109 6.4.3 Receive a Call .......................................... 110 6.4.4 User Emulation ........................................ 112 6.5 Supervision Setup ...................................... 117 6.6 Dial Parameters .......................................... 119 6.7 Signal Meanings ......................................... 121 7.0 7.1 7.2 7.3 7.4 Other Features ............................................ 126 Error Injection ............................................. 126 Alarm Generation ....................................... 129 View Results Records ................................ 131 Send Frame Words ..................................... 133 8.0 8.1 8.2 8.3 8.4 8.5 8.6 8.7 8.8 System Parameters .................................... 135 Version/Option ............................................ 136 System Profiles .......................................... 137 MEAS Configuration .................................. 140 General Configuration ............................... 145 Erase NV Ram ............................................. 148 Self Test ....................................................... 149 CLR Print Buffer ......................................... 149 Factory Defaults ......................................... 150 9.0 Language Selection ................................... 150 SunSet E20 Version 1.01 1.0 Introduction The SunSet E20 operates by a menu-driven format. Before you can select a menu item, you must first highlight the desired line using the arrow keys. You can easily recognize a highlighted item, because the surrounding area is darkened while the writing is lightcolored. This appearance will be referred to as reverse video in this manual. After highlighting the item, you may execute the selection by pressing the ENTER key. In a few specific cases, the simple action of highlighting an item will execute the selection. The SEND TEST PATTERN menu works in this way. The following menu tree shows the location of each menu item. Some menu items are offered only with certain Software options. E20 MAIN MENU TEST CONFIGURATION (select parameters here) mode: E1SINGL E1DUAL E1-MUX MUXTEST DATACOM TEST PATTERN (select or define a test pattern) MEASUREMENT RESULT Line 1, Line 2 Summary Line 1, Line 2 Frequency Line 1, Line 2 G.821 Line 1, Line 2 ALM/SIG Line 1, Line 2 M.2100/550 Line 1, Line 2 G.826 OTHER MEASUREMENTS VIEW RECEIVED DATA VIEW FAS WORDS VIEW MFAS WORDS PULSE MASK ANALYSIS X.50 ANALYSIS (N/A E1-MUX mode) C-BIT ANALYSIS Ch.3 Menus 29 HISTOGRAM ANALYSIS PROPAGATION DELAY PROTOCOLS FRAME RELAY (E1SINGL, E1DUAL and DATACOM modes) SS#7 ANALYSIS ISDN ANALYSIS GSM ANALYSIS V5.1/V5.2 VF CHANNEL ACCESS (Dialing & VF measurement) VF MEASUREMENTS VIEW LINE CAS CALL ANALYSIS SUPERVISION SETUP DIAL PARAMETERS SIGNAL MEANINGS DATACOM INTERFACE (When TEST MODE is set to E1MUX, MUXTEST, DATACOM,) LIVE TRACER VIEW/PRINT BUFFER OTHER FEATURES ERROR INJECTION ALARM GENERATION VIEW RESULTS RECORDS SEND FRAME WORDS SYSTEM PARAMETERS VERSION/OPTION SYSTEM PROFILES MEAS CONFIGURATION GENERAL CONFIG ERASE NV RAM SELF TEST CLR PRINT BUFFER FACTORY DEFAULTS LANGUAGE SELECTION 30 SunSet E20 Version 1.01 Following sections within this chapter provide a detailed explanation for each menu item. However, the menu items for datacom and protocols are contained in their own chapters later in this manual. 2.0 Test Configuration Before connecting the SunSet E20 to the circuit, be sure to properly configure the TEST CONFIGURATION. To access the TEST CONFIGURATION screen, press the ESCAPE key until you have reached the MAIN MENU. Cursor to the TEST CONFIGURATION line and press ENTER. F-keys show the options for each setup parameter in this screen. As each F-key is pressed, the SunSet E20 immediately alters its configuration to reflect these new settings. Note the following: 1) To avoid configuration mistakes, use the GRAPHIC key to confirm any changes to your setup. 2) Press the AUTO key in E1 or E1-MUX modes to automatically detect incoming framing, coding, and CRC-4 patterns. Refer to Figure 8 for the E1SINGL Test Configuration menu. 2:30:02 TEST CONFIGURATION TEST MODE : Tx SOURCE : FRAMING : CRC-4 : TEST RATE : L1-Rx Port: XMT CLOCK : E1SINGL E1DUAL E1SINGL TESTPAT PCM-30 YES 2.048M TERM INTERN E1-MUX MORE Figure 8 Test Configuration Menu Ch.3 Menus 31 The first selection in the TEST CONFIGURATION Menu is TEST MODE. Several choices are available: E1SINGL, E1DUAL, E1-MUX, MUXTEST, and DATACOM. The Test Configuration menu differs for each mode. 2.1 E1SINGL TEST MODE • Use for voice frequency, VF, and 2.048 Mbps BERT (Bit Error Rate Test) applications. • The Line 1 ports are used for the E1SINGL mode. Figure 8 provides the E1 Mode Test Configuration Menu, and Figure 9 shows the graphic associated with the settings in Figure 8. The reverse-video MEAS at the screen indicates measurements are being taken. Configure the following items in the E1 Mode. Press the corresponding F-key to select the desired setting. MEAS 01:34:25 E1SINGL Line 1 T Tx R Rx TERM FRAMING : PCM30C CODING : HDB3 PAT: 2e15 TEST RATE: 2048 Kbps Figure 9 E1 Mode Graphic 1) Tx SOURCE Options: THRU (F1), TESTPAT (F2) • THRU (F1) is used for full duplex drop and insert testing on an inservice line. In this case the signal received on the Rx jack will be transmitted out the Tx jack for Line 1. •TESTPAT (F2) is used for out-of-service bit error rate testing. 32 SunSet E20 Version 1.01 In this case, a test pattern will be transmitted on the selected Transmit jack. During Nx64 or VF CHANNEL ACCESS testing, an idle code will be inserted on the unused channels. 2) FRAMING Options: PCM-30 (F1), PCM-31 (F2), UNFRAME (F3) Choose the framing appropriate for the circuit under test. • If you are unsure of the proper framing, push the AUTO key. Use the combination which synchronizes properly and/or allows error free measurement results. • PCM-30 means the set will synchronize on both Frame Alignment Signal (FAS) and MultiFrame Alignment Signal (MFAS). • PCM-31 means that the set will synchronize only on Frame Alignment Signal (FAS). Notes: a) If the framing and CRC-4 state of the received signal do not exactly match the framing and CRC-4 settings, the SunSet will display Loss of Frame condition and may display loss of CRC DET. b) HDB3 is the default line code. The line code can be configured for AMI or HDB3 in: MAIN MENU/ SYSTEM PARAMETERS/ MEAS CONFIGURATION. 3) CRC-4 Options: YES (F1), NO (F2) • Choosing YES allows the SunSet to measure CRC-4 errors on the incoming signal and also to transmit the CRC-4 bits on the outgoing signal. CRC-4 works with PCM-31 and PCM-30 framing only. • If UNFRAME has been selected for framing, the SunSet will force the CRC-4 configuration to NO. 4) TEST RATE Options: 2.048 (F1), Nx64K (F2) • 2.048M (F1) configures the set for full rate testing. • Nx64 (F2) configures for fractional testing. • If you are not certain about which one to choose, press the F1 key Ch.3 Menus 33 for full rate testing at 2.048 Mbps. • Upon pressing Nx64, you will immediately enter the SELECT TIME SLOT, screen. Select each timeslot to test. A sample screen is shown in Figure 10. • Select timeslots AUTOmatically, or manually. 11:41:45 SELECT TIME SLOT RECEIVE 01 09 17 25 02 10 18 26 03 11 19 27 01 09 17 25 02 10 18 26 03 11 19 27 AUTO 04 12 20 28 TRANSMIT 04 05 12 13 20 21 28 29 SELECT Figure 10 05 13 21 29 06 14 22 30 07 15 23 31 06 14 22 30 07 15 23 31 UN-SEL 08 24 08 24 CLR-ALL Select a Timeslot To Manually Select the Timeslots: 1) Place cursor on desired timeslot by pressing the arrow keys. a ) Press the SELECT (F2) key. b) Repeat until you have selected all the necessary timeslots. Selected timeslots remain highlighted, as shown in Figure 10. c) Press UN-SEL (F3) key to deselect a timeslot. Pressing the CLR-ALL (F4) key erases all selections. Press (F4) if you want to start the selection process over again. To Automatically Select the Timeslots: 1) Press AUTO (F1) a) If you are receiving a signal which is already formatted in the N (or M) x64Kbps fractional E1 format, the quickest method for selecting time slots is to press the AUTO (F1) key. b) Press ENTER to set your choices, and return to the MAIN MENU. • In AUTO, the SunSet will automatically configure the timeslots by looking for active data. It will configure the transmit side 34 SunSet E20 Version 1.01 to be the same as the active timeslots on the receive side. The set determines which timeslots are active by first determining which timeslots are idle. Any timeslot that is not idle is assumed to be active. The set determines that a timeslot is idle when it finds the line's idle code (specified in the SYSTEM PARAMETERS/ MEAS CONFIGURATION page 2/ IDLE CHNL CODE). Note: In PCM-31 framing, timeslots 1 through 31 correspond to channels 1 through 31. In PCM-30 framing, timeslots 1 through 15 correspond to channels 1 through 15, and timeslots 17 through 31 correspond to channels 16 through 30. In PCM-30, timeslot 16 is used for the multiframe alignment signal. Fractional E1 is not offered with unframed signals, because framing is required to determine the location of timeslots. The time slots specified for transmit and receive need not be the same. The number of selected timeslots can differ from the Tx side to the Rx side. The SunSet will assume that all incoming data is received byte by byte in ascending channel order. 5) L1-Rx PORT Options: TERM (F1), BRIDGE (F2), MONITOR (F3) Configures the Line 1 2.048 Mbps receiver. • These settings let the SunSet electrically decode a 2.048 Mbps signal under a wide range resistive of cable losses. They also determine which electrical load will be placed on the circuit by the SunSet. These settings have no effect on the transmitters. On a 2.048 Mbps circuit, there must always be exactly one receiver that applies the low impedance (75 ohm/120 ohm) termination. There should never be two or more receivers applying a low impedance termination. WARNING! IF YOU ARE UNCERTAIN, CHOOSE BRIDGE. THIS WILL PROTECT THE 2.048 SIGNAL. The TERM mode terminates the received signal with a 75 ohm or 120 ohm impedance termination. The tested signal has been transmitted over real cable at a level between approximately +6 and -43 dB. Usually, you should use TERM when you will disrupt the circuit for testing. Ch.3 Menus 35 In the BRIDGE mode, the SunSet applies high-impedance isolation resistors to the circuit under test. This isolation circuit will protect the signal from any possible disruption. The tested signal has been transmitted over regular cable at a level of approximately +6 and -43 dB. The MONITOR mode should be used when a measurement is made at a protected monitoring point, at a level between -15 and -30 dB. The signal is provided from the protected MONITOR jack of a network equipment. In MONITOR mode, if a 0 dB signal is received, the CODE ERR LED will light red. This often happens when the set is plugged into an OUT jack. In this case, choose TERM instead. If you are uncertain if a jack is bridged or protected, try BRIDGE first. 6) XMT CLOCK Options: L1-RX (F1), INTERN (F2), L2-RX (F3), DDS (more, F1), TTL-L2 (more, F2) The XMT CLOCK is used to time the transmit signal. L1-Rx (F1): Choose L1-Rx, and the test set uses the timing from the signal received on Line 1 as the clock source. INTERN (F2): INTERN uses the internal timing of the test set. This timing is not synchronized to the network. You should use internal timing in loopback testing where synchronization is not required. L2-Rx (F3): In this mode, timing is received from the signal received on Line 2. DDS (more, F1): The unit uses a digital synthesizer to shift the transmit frequency in 1, 10, 100, or 1000 Hz steps. Shift up to +/- 50,000 hz (25K ppm). You will enter the following screen: 36 SunSet E20 Version 1.01 MEAS 12:30:55 TEST CONFIGURATION DDS SHIFT: 2.048M+40 SCALE : X10 INC DEC Figure 11 DDS Shift 1) Set the DDS SHIFT between 0 and 50,000 Hz by using the INCrease (F1) and DECrease (F2) keys. 2) Set the SCALE of the shift by using the INCrease (F1) and DECrease (F2) keys. Choose among 1, 10, 100, and 1000. For example, a shift of 3 Hz with a SCALE of 10 would shift the frequency 13 Hz. TTL-L2 (more, F2): In this mode the set uses a G.703 sinusoidal clock plugged into Line 2 RX as its timing source. 2.2 E1DUAL Mode E1DUAL Mode allows you to use both LINE 1 and LINE 2 ports Use this mode to perform applications such as full duplex drop and insert and bi-directional monitoring. See Figure 12 for a sample configuration screen, and Figure 13 for a sample graphic screen. Configure the following items: Ch.3 Menus 37 23:22:10 TEST CONFIGURATION TEST MODE : Tx/INSERT : Rx/DROP : Tx SOURCE : FRAMING : CRC-4 : TEST RATE : L1-Rx Port: L2-Rx Port: XMT CLOCK : E1SINGL E1DUAL E1DUAL L1-Tx L1-Rx TESTPAT PCM-30 YES 2.048M TERM TERM INTERN E1-MUX more Figure 12 E1DUAL Mode 01:34:25 E1DUAL Line 2 TERM R T Line 1 Rx T Tx Tx R Rx TERM FRAMING: PCM30CRC CODING: HDB3 PAT: 2e15 TEST RATE: 2048 Kbps Figure 13 E1 Dual Graphic 1) Tx/INSERT Options: L1-TX (F1), L2-TX (F2) Select the 2.048 Mbps test line onto which you insert the test signal. • This determines where the 2.048 Mbps test pattern, Nx64 kbps 38 SunSet E20 Version 1.01 test pattern, Nx64 kbps multiplexed signal, or voice frequency channel will be inserted. For example, if Tx/INSERT is L2-Tx and you are talking on the test set, then your voice will be inserted on line 2. • Select either L1-Tx (F1 selects Line 1) or L2-Tx (F2 selects Line 2) 2) Rx/DROP Options: L1-RX (F1), L2-RX (F2) Select the received test signal from either L1-Rx or L2-Rx. • This selection configures bit error rate, 2.048 Mbps line frequency, E-bit error measurements, M.2100/550 measurements, voice channel frequency, voice channel level, voice channel Rx ABCD, view received data, view FAS words, view MFAS words, etc. For example, if you are doing a bit error rate test on the received signal from line 1, then you should choose Rx/DROP as L1-Rx. 3) Tx SOURCE Options: THRU (F1), TESTPAT (F2) • THRU (F1) is used for full duplex drop and insert testing on an inservice line. In this case the signal received on the Rx jack will be transmitted out the Tx jack for Line 1 and Line 2. You will be inserting a signal on one or more channels on the line you chose in Tx/INSERT. The channels and corresponding ABCD bits on that line that are not being used will be passed through the set unchanged from Rx to Tx. •TESTPAT (F2) is used for out-of-service bit error rate testing. In this case, a test pattern will be transmitted on the selected Tx/INSERT jack. During Nx64 or VF CHANNEL ACCESS testing, an idle code will be inserted on the unused channels. On the line that is not selected, the channels and ABCD bits are passed through unchanged from Rx to Tx. Ch.3 Menus 39 4) FRAMING Options: PCM-30 (F1), PCM-31 (F2), UNFRAME (F3) Choose the framing that is appropriate for the circuit under test. • If you are unsure of the proper framing, push the AUTO key. Use the combination which synchronizes properly and/or allows error free measurement results. •PCM-30 means the set will synchronize on both Frame Alignment Signal (FAS) and MultiFrame Alignment Signal (MFAS). •PCM-31 means that the set will synchronize only on Frame Alignment Signal (FAS). Notes: a) If the framing and CRC-4 state of the received signal do not exactly match the framing and CRC-4 settings, theSunSet will display Loss of Frame condition and may display loss of CRC DET. b) HDB3 is the default line code. The line code can be configured for AMI or HDB3 in: MAIN MENU/ SYSTEM PARAMETERS/ MEAS CONFIGURATION. 5) CRC-4 Options: YES (F1), NO (F2) • Choosing YES allows the SunSet to measure CRC-4 errors on the incoming signal and to transmit the CRC-4 bits on the outgoing signal. CRC-4 works with PCM-31 and PCM-30 framing only. • If UNFRAME has been selected for framing, the SunSet will force the CRC-4 configuration to NO. 6) TEST RATE Options: 2.048 (F1), Nx64K (F2) • 2.048M (F1) configures the set for full rate testing. • Nx64 (F2) configures the set for fractional testing. • If you are unsure which one to choose, press the F1 key for full rate testing at 2.048 Mbps. • Upon pressing (F2), you will enter the SELECT TIME SLOT, screen. In this screen, you may choose each timeslot for testing. A sample screen is shown in Figure 10. 40 SunSet E20 Version 1.01 To Manually Select the Timeslots: 1) Place cursor on desired timeslot by pressing the respective arrow keys, then press the SELECT (F2) key. a) Repeat until you have selected all the necessary timeslots. Selected timeslots remain highlighted, as shown in Figure 10. b) Press UN-SEL (F3) key to deselect a timeslot. Pressing the CLR-ALL (F4) key erases all selections. Press (F4) if you want to start the selection process over again. To Automatically select the Timeslots: 1) Press AUTO (F1) a) If you are receiving a signal which is already formatted in the N (or M) x64Kbps fractional E1 format, the quickest method for selecting time slots is to press the AUTO (F1) key. Press ENTER to set your choices, and return to the MAIN MENU. • In AUTO, the SunSet will automatically configure the timeslots by looking for active data. It will configure the transmit side to be the same as the active timeslots on the receive side. The set determines which timeslots are active by first determining which timeslots are idle. Any timeslot that is not idle is assumed to be active. The set determines that a timeslot is idle when it finds the line's idle code (specified in the MAIN MENU, SYSTEM PARAMETERS, MEAS CONFIGURATION, IDLE CHNL CODE). Note: In PCM-31 framing, timeslots 1 through 31 correspond to channels 1 through 31. In PCM-30 framing, timeslots 1 through 15 correspond to channels 1 through 15, and timeslots 17 through 31 correspond to channels 16 through 30. In PCM-30, timeslot 16 is used for the multiframe alignment signal. Fractional E1 is not offered with unframed signals, because framing is required to determine the location of timeslots. The time slots specified for transmit and receive need not be the same. Also, the number of selected timeslots can differ from the Tx side to the Rx side. The SunSet will assume that all incoming data is received byte by byte in ascending channel order. Ch.3 Menus 41 7) L1-Rx Port and L2-Rx Port Options: TERM (F1), BRIDGE (F2), MONITOR (F3) Configures the two 2.048 Mbps receivers. • These settings let the SunSet electrically decode a 2.048 Mbps signal under a wide range resistive or cable losses. These settings also determine which electrical load will be placed on the circuit by the SunSet. These settings have no effect on the transmitters. On a 2.048 Mbps circuit, there must always be exactly one receiver that applies the low impedance (75 ohm/ 120 ohm) termination. There should never be two or more receivers applying a low impedance termination. • See the L1-Rx port description for E1SINGL mode for a description of each of these choices. 8) XMT CLOCK Options: L1-RX (F1), INTERN (F2), L2-RX (F3), DDS (F4) The XMT CLOCK is used to time the Tx/INSERT signal. The other Tx signal uses the timing recovered from its Rx signal. L1-Rx: a) Choose Tx/INSERT L1-Tx and INTERN as your XMT CLOCK, and the L1-Tx signal will use the internal timing of the test set. The L2-Tx signal will use the recovered timing from L2-Rx. b) Choose XMT CLOCK=L1-Rx, and the test set receives its timing from the signal received on Line 1. Figures 14, 15, and 16 portray three different timing scenarios possible when L1-Rx is selected. Figure14 represents slave timing. Here, XMT CLK=L1-Rx, but the signal received on L1-Rx is timed off of the L1-Tx source. Thus, there is no true clock source. In this case, the transmit signal may die. 42 SunSet E20 Version 1.01 Slave L1-Rx 1x0 MUX Slave L1-Tx TxINSERT =L1-Tx TxSOURCE=TESTPAT XMT CLK =L1-Rx Figure 14 Slave to Slave Timing Figure 15 depicts loop or slave timing. Tx/INST and XMT CLK are set for the same line. Loop timing is necessary when transmitting toward an exchange or other network element that requires synchronous signals. This network element must be configured to be a master timing source in relation to your signal, lest you have slave to slave timing. Slave Master L1-Rx Exchange or other timing source L1-Tx TxINSERT =L1-Tx TxSOURCE=TESTPAT XMT CLK =L1-Rx Figure 15 Loop/Slave Timing Ch.3 Menus 43 Figure 16 depicts external timing. External timing uses an external clock source to time the Tx/INSERT signal. The external clock source should be configured for the opposite line from the Rx/DROP selection. In this case, Rx/DROP and Tx/INSERT are set for Line 2. Therefore, XMT CLK is set for Line 1 (L1-Rx). Exchange or other timing source L2-Rx MUX 1x0 L2-Tx L1-Rx TxINSERT =L2-Tx TxSOURCE=TEST PAT XMT CLK =L1-RX Figure 16 External Timing NOTES: In the past three graphics, TxSOURCE has always been set for TESTPAT. The XMT CLK setting is ignored if TX SOURCE is set for THRU. In THRU, both Lines 1 and 2 pass timing from Rx to Tx. INTERN (F2): INTERN uses the internal timing of the test set. This timing is not synchronized to the network. You should use internal timing in loopback testing where synchronization is not required. • If you set TX/INSERT as L1-Tx, and choose INTERN, the L1-Tx signal will use the internal timing of the test set. In DUAL mode, the L2-Tx signal will use the timing recovered from L2-Rx. DDS ( F4): The unit uses a digital synthesizer to shift the transmit frequency in 1, 10, 100, or 1000 Hz steps. Shift up to +/- 50,000 hz (250K ppm). You will enter the following screen: 44 SunSet E20 Version 1.01 MEAS 12:30:55 TEST CONFIGURATION DDS SHIFT: 2.048M+40 SCALE : X10 INC DEC Figure 17 DDS Shift 1) Set the DDS SHIFT between 0 and 50,000 Hz by using the INCrease (F1) and DECrease (F2) keys. 2) Set the SCALE of the shift by using the INCrease (F1) and DECrease (F2) keys. Choose among 1, 10, 100, and 1000. For example, a shift of 3 Hz with a SCALE of 10 would shift the frequency 13 Hz. 2.3 E1-MUX Mode E1-MUX provides multiplexing capabilities between the different rate signals. Use this mode to make the SunSet E20 emulate a terminal multiplex, or an add/drop multiplex. This mode allows you to send a test pattern in either direction. The E1-MUX configuration screen is shown in Figure 18. Ch.3 Menus 45 2:31:03 TEST CONFIGURATION TEST MODE : E1-MUX E1 Tx/INSERT: L1-Tx Rx/DROP : L1-Rx FRAMING : PCM-30 CRC-4 : YES L1-Rx Port: TERM L2-Rx Port: TERM XMTCLK : L1-RX L1-Tx DATACOM TYPE : RS232 TxSRC: E1DRP MUX B-LED: E1DRP E1INS: DTCM E1T/S: Nx64 L2-Tx Figure 18 E1-MUX Menu E1 If necessary, you may refer to the more detailed descriptions of each E1 configuration selection in Section 2.1 of this chapter. 1) Tx/INSERT Options: L1-TX (F1), L2-TX (F2) Determines where the Nx64 Kbps multiplexed signal will be inserted. • For example, if Tx/INSERT is L2-Tx, and you are inserting a received V.35 signal onto the line, then it will be inserted on line 2. 2) Rx/DROP Options: L1-RX (F1), L2-RX (F2) Select the 2.048 Mbps signal to be used for dropping an Nx64 Kbps signal to the multiport. • If you want to drop out a 64 Kbps signal to V.35 from line 1, then choose Rx/DROP as L1-Rx. • This selection configures 2.048 Mbps line frequency, E-bit error measurements, View received data, View FAS words, View MFAS words, etc. 46 SunSet E20 Version 1.01 3) FRAMING Options: PCM-30 (F1), PCM-31 (F2) • Choosing PCM-30 means the set will synchronize on both Frame Alignment Signal (FAS) and MultiFrame Alignment Signal (MFAS) • Choosing PCM-31 means the set will synchronize only on Frame Alignment Signal. • If the framing and CRC-4 state of the received signal do not exactly match the framing and CRC-4 settings, the SunSet will display Loss of Frame condition and may display loss of CRC DET • Choose the framing that is appropriate for the circuit under test. • If you are unsure of the proper framing, push the AUTO key. • Use the combination which synchronizes properly and/or allows error free measurement results. Note that HDB3 is the default line code. The line code is configured in the following menu: MAIN MENU/ SYSTEM PARAMETERS/ MEAS CONFIGURATION. 4) CRC-4 Options: YES (F1), NO (F2) CRC-4 YES allows the SunSet to measure CRC-4 errors on the incoming signal and to transmit the CRC-4 bits on the outgoing signal. •If you are unsure of the proper framing, push the AUTO key 5) L1-Rx Port and L2-Rx Port Options: TERM (F1), BRIDGE (F2), MONITOR (F3) • L1-Rx Port and L2-Rx Port configure the two 2.048 Mbps receivers. • These settings let the SunSet E20 electrically decode a 2.048 Mbps signal under a wide range of resistive or cable losses. • They determine which electrical load will be placed on the circuit by the SunSet. • A 2.048 Mpbs line requires exactly one low impedance termination. • These settings have no effect on the transmitters. Ch.3 Menus 47 WARNING! IF YOU ARE UNCERTAIN, CHOOSE BRIDGE. THIS WILL PROTECT THE 2.048 CIRCUIT UNDER TEST. The TERM mode terminates the received signal with a 75 ohm or 120 ohm impedance termination. The tested signal has been transmitted over real cable at a level between approximately +6 and -43 dB. Usually, you should use TERM when you will disrupt the circuit for testing. In the BRIDGE mode, the SunSet E20 applies high-impedance isolation resistors to the circuit under test. This isolation circuit will protect the signal from any possible disruption. The tested signal has been transmitted over regular cable at a level of approximately +6 and -43 dB. The MONITOR mode should be used when a measurement is made at a protected monitoring point, at a level between -15 and -30 dB. The signal is provided from the protected MONITOR jack of a network equipment. In MONITOR mode, if a 0 dB signal is received, the CODE LED will light red. This often happens when the set is plugged into an OUT jack. In this case, choose TERM instead. If you uncertain if a jack is bridged or protected, try BRIDGE first. 6) XMT CLK Options: No options. This is set at L1-Rx. DATACOM The datacom settings configure the multiport. 1) TYPE Options: V.35 (F1), RS449 (F2), X.21 (F3), G.703 (more, F1), RS232S (more, F2) TYPE determines the electrical interface at the multiport. 2) TxSRC Options: PATT (F1), E1DRP (F2) Tx Source sets the transmit source for the multiport. • Choose PATT to send a test pattern out the multiport. 48 SunSet E20 Version 1.01 • Choose E1DRP to send the dropped NX64 Kbps signal out the multiport. MUX The MUX settings define where the BERT will be performed. 1) B-LED Options: E1DRP (F1), (F2) DTCM (F2) Determines the side Bit Error Rate Test measurements are performed on and the side the PAT SYNC LED will apply to. • E1DRP means the E1 side will be bit error tested, and the PAT SYNC LED will refer to the E1 synchronization. • DTCM is the datacom type selected above : RS232, G.703, etc. Choosing DTCM means the signal coming from the low speed side will be tested, and the PAT SYNC LED will refer to the low speed (datacom) side. 2) E1 INS Options: LOOP (F1), DTCM (F2) is the datacom type selected above, PATT (F3) Determine which signal will be inserted into the 2.048 Mbps line. It may be changed only if TxSRC is set to E1DRP. • LOOP (F1) means all 30 or 31 channels will be looped through from 2.048 Mbps receive to 2.048 Mbps transmit. Nothing will be inserted. • DTCM means the low speed Nx64 Kbps signal will be inserted on the 2.048 Mbps transmit. • PATT (F3) means that the TEST PATTERN will be inserted on the 2.048 Mbps transmit signal. 3) E1T/S Options: Nx64K Select which Nx64 Kbps channels to insert or drop the signal on. • Press Nx64K (F1) to enter the Select Time Slot screen. • Refer to E1 T/S in Section 2.1 for further details on selecting time slots. Ch.3 Menus 49 2.4 MUXTEST MODE MUXTEST provides testing through a multiplex from either the low speed datacom side to the high speed 2.048 Mbps side or from the high speed 2.048 Mbps side to the low speed datacom side. Figure 19 shows the MUXTEST configuration screen. 3:10:31 TEST CONFIGURATION TEST MODE : MUXTEST E1 Tx/INST: L1-Tx Rx/DROP: L1-Rx FRAMING: PCM-30 CRC-4 : YES L1-Rx Port: TERM L2-Rx Port: TERM XMT CLOCK : INTERN L1-Rx INTERN DATACOM TYPE : RS232S BERT E1T/S: Nx64K B-LED: E1 L2-Rx Figure 19 MUXTEST Menu MULTIPORT L1-Rx L1-Tx 1x0 MUX Loop Timing Datacom Side 64 Kbps E1 Side 2.048Mbps Transmit out E1 port & Transmit out Datacom Receive from DATACOM Receive on E1 port Figure 20 MUXTEST Configuration E1 SIDE Refer to Section 2.1 for a more detailed description of each E1 50 SunSet E20 Version 1.01 configuration selection. 1) Tx/INSERT Options: L1-TX (F1), L2-TX (F2) Determines where the Nx64 Kbps multiplexed signal will be inserted. For example, if TX/INSERT is L2-Tx and you are inserting a received V.35 signal onto the line, then it will be inserted on line 2. 2) Rx/DROP Options: L1-RX (F1), L2-RX (F2) Select the 2.048 Mbps signal to be used for dropping a Nx64 Kbps signal to the multiport. • If you want to drop out a 64 Kbps signal to V.35 from Line 1, then you should choose L1-Rx as Rx/DROP. • This selection configures 2.048 Mbps line frequency, E-bit error measurements, View Received Data, View FAS Words, View MFAS Words, etc. 3) FRAMING Options: PCM-30 (F1), PCM-31 (F2) Choose the framing that is appropriate for the circuit under test. • PCM-30 means the set will synchronize on both Frame Alignment Signal (FAS) and MultiFrame Alignment Signal (MFAS). • PCM-31 means the set will synchronize only on Frame Alignment Signal. It will disregard MultiFrame Alignment Signal. • If the framing and CRC-4 state of the received signal do not exactly match the settings, the SunSet will display a LOSS OF FRAME condition, and may display loss of CRC DET. • If you are unsure of the proper framing, push the AUTO key. Use the combination which synchronizes properly and/or allows error free measurement results. Note that HDB3 is the default line code. The line code can be configured for AMI or HDB3 in the following menu: MAIN MENU, OTHER FEATURES, MEAS CONFIGURATION. 4) CRC-4 Options: YES (F1), NO (F2) Ch.3 Menus 51 • CRC-4 YES to measure CRC-4 errors on the incoming signal and to transmit the CRC-4 bits on the outgoing signal. • CRC-4 works with PCM-31 and PCM-30 framing only. If UNFRAME has been selected for framing, the SunSet will force the CRC-4 configuration to NO. 5) L1-Rx Port and L2-Rx Port Options: TERM (F1), BRIDGE (F2), MONITOR (F3) L1-Rx Port and L2-Rx Port configure the two 2.048 Mbps receivers. • These settings let the SunSet E20 electrically decode a 2.048 Mbps signal under a wide range of resistive or cable losses. These settings also determine which electrical load will be placed on the circuit by the SunSet. These settings have no effect on the transmitters • TERM mode terminates the received signal with a 75 ohm impedance termination for BNC and 1.6/5.6 mm connectors. A 120 ohm termination is used for BR2 and 3-pin banana connectors. Usually, you should use TERM when you will disrupt the circuit for testing. • In the BRIDGE mode, the SunSet E20 applies high-impedance isolation resistors to the circuit under test. This isolation circuit will protect the signal from any possible disruption. •The MONITOR mode should be used when a measurement is made at a protected monitoring point. The signal is provided from the protected MONITOR jack of a network equipment WARNING! IF YOU ARE UNCERTAIN, CHOOSE BRIDGE. THIS WILL PROTECT THE 2.048 SIGNAL 6) XMT CLOCK Options: L1-RX (F1), INTERN (F2), L2-RX (F3) The XMT CLOCK is used to time the Tx/INSERT signal. •INTERN (F2) configures the set for master timing. Here, the set supplies the timing source, but the source is not synchronized to the network. Figure 21 depicts internal timing. 52 SunSet E20 Version 1.01 Datacom Mux Test Mode INTERNAL TIMING MULTIPORT 1x0 MUX Loop Timing L1-Rx Datacom Side 64 Kbps L1-TX Transmit out E1 port Receive from DATACOM XMT CLOCK: INTERN Figure 21 Internal Timing Figure 22 displays slave timing. Datacom Mux Test Mode SLAVE TIMING MULTIPORT 1x0 MUX Internal Timing L1-Rx Datacom Side 64 Kbps L1-TX E1 Side 2.048 Mbps Tx/INST: L1-Tx XMT CLK: L1-Rx Figure 22 Slave Timing • To configure the set for slave timing, where the MUX supplies the timing source, set the XMT CLK for the same line as Tx/INST. Ch.3 Menus 53 • If Tx/INST is L1-Tx, then XMT CLK should be L1-Rx. Conversely, if Tx/INST is L2-Tx, then XMT CLK should be L2-RX. DATACOM SIDE 1) TYPE Options: V.35 (F1), RS449 (F2), X.21 (F3), G.703 (more, F1), RS232 (more, F2) Determines the electrical interface at the multiport. BERT SIDE 1) E1T/S Options: Nx64 Select which Nx64 Kbps channels to insert or drop the signal on. • Pressing the (F1) key on this slot will lead you to the SELECT TIME SLOT screen. Here you may select your transmit/receive time slots. a) Cursor to the desired timeslot, then press SELECT (F2). This timeslot will remain highlighted. Continue selecting timeslots as needed. b) You may un-select the timeslot highlighted by the cursor by pressing UN-SEL (F3). Pressing CLR-ALL (F4) will erase all the selections and allow you to start the process over. Figure 10 provides the SELECT TIME SLOT screen for E1 mode. 2) B-LED Options: E1 (F1), DTCM (F2), which is the datacom type selected above (e.g. RS449) Determines the side Bit Error Rate Test measurements are performed on and the side the PAT SYNC LED will apply to. • E1DRP means the E1 side will be bit error tested, and the PAT SYNC LED will refer to the received E1 signal. • DTCM is the datacom type selected above : RS232, G.703, etc. Choosing DTCM means the signal coming from the low speed datacom side will be tested, and the PAT SYNC LED will refer to the datacom side. 54 SunSet E20 Version 1.01 Figure 23 displays the configuration associated with the above graphic. The B-LED is set to DTCM (RS232, the DATACOM TYPE selected). Both the E1 and DATACOM ports will transmit the test pattern and perform a BERT when receiving the test pattern on the other side of the multiplex. In other words, the SunSet E20 will perform a mux and a demux test simultaneously. Simply switch the B-LED selection in order to view results for each side. 3:10:31 MEAS TEST CONFIGURATION TEST MODE : MUXTEST E1 Tx/INST: L1-Tx Rx/DROP: L1-Rx FRAMING: PCM-30 CRC-4 : YES L1-Rx Port: TERM L2-Rx Port: TERM XMT CLOCK : INTERN L1-Tx INTERN DATACOM TYPE : RS232 BERT E1T/S: Nx64 B-LED: DTCM L2-Tx Figure 23 MUXTEST Configuration Ch.3 Menus 55 3.0 Send Test Pattern From the Main Menu, enter Test Pattern. The screen displays a list of the patterns available for transmitting/ receiving. It also reports the received pattern. Figure 24 shows the Test Pattern screen. 15:03:27 MEAS TEST PATTERN 2e23 2047 1111 QRS 2e20 511 1010 1-4 2e15 127 0000 1-8 20ITU 63 FOX 3-24 PATTERN: 2e23 INVERTED USER NORMAL Figure 24 Test Pattern Screen 3.1 Standard Patterns To send one of the standard patterns shown above in Figure 24: 1) Use the arrow keys to highlight the desired pattern. • As each pattern is highlighted, the SunSet E20 begins transmitting that pattern. 2) Press INVERT (F2) to send the pattern with an inverted polarity (1s and 0s reversed). Press NORMAL (F2) to send the pattern with a normal polarity. 3) At the MEASURE MODE line in your MEAS CONFIGURATION, you have the option of selecting BER (F1) to have the SunSet E20 look for a BERT pattern, or LIVE (F2), where the SunSet does not look for a pattern, and tests live traffic. If LIVE is selected, the PAT SYNC LED will turn off. 56 SunSet E20 Version 1.01 Pattern Definitions Here are the test patterns: 2m-1, where m=15, 20, 23: are pseudo random bit sequences. The signal is formed from a 15, 20 or 23-stage shift register and is not zero-constrained. The patterns conform to the ITU O.151 technical standard. 20ITU: 20ITU is the 2e20-1 pseudo random bit sequence. This signal is formed from a 20-stage shift register and is not zeroconstrained. This pattern conforms to the ITU O.153 technical standard. This pattern is not identical to 2e20, because different feedback mechanisms are used when the patterns are produced by means of shift registers. 20ITU suppresses consecutive sequences of more than 18 ZEROS, as opposed to 14 ZEROS in 2e20. 2047: This is the 2047 bit code, also known as 2e-11. Conforms to ITU-T O.152. 511: This is the 511 bit code, also known as 2e-9. Conforms to ITUT O.152. 1111: The all 1s pattern is used for stress testing circuits. If the pattern is sent unframed, it will be interpreted as an AIS (Alarm Indication Signal). 1010: 1010 is the alternating ones and zeroes pattern. The pattern is frame aligned with “f” showing the location of the framing bit. The pattern is: f 0101 0101 0000: 0000 is the all zeroes pattern. If the circuit is AMI, the pattern synch and/or signal will be lost. FOX: The FOX pattern, which is used in data communications applications. The ASCII translation of the pattern is the "Quick brown fox jumps over the lazy dog 1234567890" sentence. The hexadecimal pattern is frame aligned to ensure proper ASCII translation of the bits. Hex is a 16-digit number system. These digits are: 0, 1, 2, 3, 4, 5, 6, 7, 8, 9, A, B, C, D, E, and F. It is recommended that the pattern be sent with framed signals; otherwise, ASCII translation is not possible. Here is the pattern: Ch.3 Menus 57 2A, F2, CA, 82, AC, 12, EA, 04, 5A, 6C, A2, 04, 8A, AA, 92, C2, D2, 72, 04, 62, F2, 1A, 04, 52, F2, 6A, A2, 4A, 04, 2A, 12, 9A, 04, 22, F2, E2, 04, 8C, EC, 1C, 9C, 0C, B0, 50 04, AA, A2, 4C, 42, B2, 04, CC, 4A, 0A, 32, 2C, QRS: This is the Quasi Random Signal pattern. It is formed from a 20-stage shift register and is zero-constrained for a maximum of 14 consecutive zeroes. When transmitted in a framed signal, up to 15 consecutive zeroes will occur, in accordance with AMI minimum density requirements. 1-4, 1-8, or 3-24: These patterns are used for stress testing circuits. The patterns are frame aligned (“f” is the framing bit), as shown in its binary form; as an example, 1-4 : f 010 3.2 User Test Patterns In addition to these standard patterns, you may program and send a user pattern. 1) Press USER (F1) in the TEST PATTERN screen (Figure 25). • The user test pattern screen now appears listing any stored patterns. • Create, edit, view, send, or delete a pattern. 15:03:27 0. 1. 2. 3. 4. 5. 6. 7. 8. 9. 10. USER TEST PATTERN CURRENT- CREATE Figure 25 User Test Pattern Screen 58 SunSet E20 Version 1.01 Sending a User Test Pattern 1) In the TEST PATTERN screen, press USER (F1). 2) The test set will present a list of stored USER patterns. a) Use the Up/Down arrow keys to cursor to the desired pattern. 3) Press ENTER. Viewing a User Test Pattern 1) From the USER TEST PATTERN screen, move your cursor down to the desired test pattern. 2) Press VIEW (F1). 3) You will see your selected pattern on the screen (in binary). a) When you are finished viewing, press ESCAPE to return to the USER TEST PATTERN screen. Creating User-Defined Patterns To program a user test pattern, follow this procedure: 1) In the SEND TEST PATTERN menu, press the F1 key (USER) to enter the USER TEST PATTERN screen. 2) Cursor down to a blank position on the user pattern list. 3) Choose CREATE (F1). The cursor appears at the LABEL position on the USER TEST PATTERN screen, as in Figure 26. 4) Choose TOGGLE (F3). The letter A will begin to flash on and off in the alphabet grid. 5) Use the arrow keys to move the flashing indicator to the desired letter. a) Choose SELECT (F4). The letter appears next to the label. b) Repeat until you have the label as desired. 6) Choose TOGGLE (F3) to move out of the alphabet grid and back to the LABEL item. Ch.3 Menus 59 17:03:38 USER TEST PATTERN LABEL: AF No : A H O V INSERT B I P W C J Q X DELETE D K R Y E L S Z F M T - G N U / TOGGLE SELECT Figure 26 User Test Pattern Screen 7) Press the Down Arrow key to move to the pattern entry (No.) area. a) Press the SHIFT-lock key. • You may enter up to 24 bits long to make up the desired pattern. • Use the INSERT (F1) and DELETE (F2) keys if you need to make corrections to the pattern. b) Press the SHIFT-lock key again when you are finished. • Verify that the SHIFT indicator no longer appears in the upper left corner of the screen. 8) Press the ENTER key to store the pattern and to return to the USER TEST PATTERN screen. • Your new code will now be displayed for you in the menu. • Move the cursor to the pattern and press ENTER. Your new pattern is now being transmitted. Editing a User Test Pattern Label Use this procedure to edit the label of a test pattern that you have created: 60 SunSet E20 Version 1.01 1) From the SEND TEST PATTERN menu, press F1 (USER) to move into the USER TEST PATTERN screen. 2) Move your cursor to the code that you want to edit and select EDIT (F2). 3) When the cursor is placed on the LABEL code, press TOGGLE (F3). A letter within the alphabet grid will flash on and off. a) To replace a particular letter, cursor to it, press INSERT (F1), arrow to the desired replacement letter, then press TYPOVR (F1). b) Press DELETE (F2) to remove a letter. c) If you need to add letters to the label, choose TOGGLE (F3) to return to the alphabet grid with the flashing letter. Cursor over to the desired letter and press SELECT (F4). Repeat this until the LABEL is complete. 4) Choose TOGGLE (F3) to move out of the alphabet grid and back to the LABEL item. a) If the LABEL is now correct, press ENTER and you are done. b) Arrow down to edit the pattern itself. Correcting a Mistake in the Pattern While Entering the Pattern Use the following procedure to correct any mistakes made while entering the pattern. This procedure assumes you are starting from step 7 of the Creating User-Defined Patterns procedure. 1) While entering the 1s and 0s, you notice an incorrect digit. Press the SHIFT to remove the SHIFT indicator in the screen. a) Cursor back to the incorrect digit and press the SHIFT key to display the SHIFT indicator. 2) Enter the correct digit. Press the SHIFT key to remove the SHIFT indicator. a) Cursor to the end of the line. b) Press the SHIFT key again to display the SHIFT indicator. c) Enter in the rest of the digits. d) Edit the code's label using the "Correcting a Mistake..." procedure. Ch.3 Menus 61 3) Press ENTER to store the pattern. Deleting a User Test Pattern Follow this procedure to delete a user test pattern you no longer want: 1) From the SEND TEST PATTERN menu, press the F1 key (USER) to enter the USER TEST PATTERN screen. 2) Move the cursor to the test you want to delete and select DELETE (F3). The pattern is deleted and you are finished. Press ESCAPE to return to the main menu 4.0 Measurement Results To observe MEASUREMENT RESULTS: 1) Select MEASUREMENT RESULTS from the MAIN MENU. 2) Page-Down through the screens. 3) Press the ESCAPE key when you are finished. The SunSet E20 continuously performs measurements on its received signal(s). While a measurement is being made, the MEAS status indicator appears in reverse video at the top of the screen. When the measurement is stopped, the indicator will disappear. Measurement results are stored when your press STOP (F3) when PRINT RESULT is set to LAST in SYSTEM PARAMETERS/ MEAS CONFIGURATION, or when a TIMED measurement finishes. Events are stored when PRINT EVENT is ENABLED, also in MEAS CONFIGURATION. You do not need to access the Measurement Results menu for results to be compiled. Measurements are automatically restarted every time the configuration is significantly changed. The Measurement Results screens allow you to view the accumulated measurements and restart the measurement process. The actual measurement results screens and the values displayed depend upon the Test Mode chosen in TEST CONFIGURATION. There are, however, some common features in all the Measurement Results screens. Figure 27 displays a sample Measurement Results screen. 62 SunSet E20 Version 1.01 16:47:42 MEAS HOLD ET : 000:24:37 RT : CONTINU FRM : PCM-30/C TxCk: INTERN PATT: 1-4 RATE: 2.048M LINE 1 - SUMMARY CODE- 0 RATE - 0.00E+00 BIT - 0 RATE - 0.00E+00 CRC - 0 RATE - 0.00E+00 EBIT- 0 RATE - 0.00E+00 FE - 0 RATE - 0.00E+00 MFE - 0 RATE - 0.00E+00 RxCLK:2048009 +RxLVL:-0.1 dB Hz/PPM:-0.0 -RxLVL:-0.1 dB PAGE-UP PAGE-DN STOP MORE Figure 27 Measurement Results Screen Measurements may have a count number displayed on the left hand side and the corresponding rate or percentage displayed on the right hand side of the same line. For example, in Figure 27, CODE appears on the left and RATE on the right. A key concept for the measurement result screens is availability. A circuit is available for use only when the bit error rate is low enough that the signal can get through and be understood. A circuit is said to be unavailable at the beginning of 10 consecutive severely errored seconds. Errors, errored seconds, and severely errored seconds are not accumulated when the circuit is unavailable. Therefore, if you start continuously injecting errors to the test set at a 2x10⁻³ error rate, you will see increasing bit errors, errored seconds, and severely errored seconds for the first 9 seconds. At the tenth second, all the counts will decrease back to the values they had before the error injection was started, and the unavailable counter will increase by 10. Once a circuit is unavailable, it becomes available only after 10 consecutive seconds without severe errors. To continue the previous example, if you turn the severe error injection off, and then insert 1 or 2 errors during the next 5 seconds, you will observe that the unavailable second counter continues to increase for the first 9 seconds while the error counter does not change. Then at the tenth second, the unavailable second counter suddenly decreases by 10 and the error counter increases by the 1 or 2 errors Ch.3 Menus 63 that you inserted. You may wish to practice this for yourself so that you will not be confused while taking actual measurements. The following F-key options are shared by all Measurement Results screens: PAGE-UP (F1), PAGE-DN (F2) : These keys allows you to view each of the pages of available measurement results. STOP/START (F3): Press to stop the test. Pressing START restarts the measurement process from within this menu. HOLDSCR/CONTINU (more, F1): HOLDSCREEN freezes all of the measurement displays so they may be easily observed. The measurement count is still proceeding, but the counts are updated only in memory. You may now read the previous counts clearly. A HOLD message will appear in reverse video when this function is invoked. When you have finished viewing the screen, press the CONTINU (F1) key to view your updated measurement results. LOCK/UNLOCK (more, F2):: Press LOCK to disable the keypad. The measurement process continues as usual, but keypad strokes have no effect on the test set. This is useful if you are running a long-term test and do not wish to have the test disturbed. Pressing the F2 key (UNLOCK) again will re-enable the test set’s keypad. Using the LOCK will not disturb any of your measurement results. In addition, to the actual measurement data, the following information is displayed in the upper portion of the measurement screens: CURRENT TIME: The current time of day is displayed in the upper right-hand corner of the screen. ET: Elapsed Time is the time that has passed since the test was started or restarted. RT: Remaining Time is the time that remains until the end of testing. The factory default condition is that the test runs continuously until the user stops it. CONTINU is displayed in 64 SunSet E20 Version 1.01 the RT field to denote a continuous test. However, in the SYSTEM PARAMETERS/ MEAS CONFIGURATION menu item, you may specify the length of test time. In this case, the remaining time will count down to zero during the measurement. FRM: The transmitted framing is displayed here. TxCK: The transmit clock source is displayed here. PATT: The transmitted test pattern is displayed here. RATE: The exact test rate is displayed here. 4.1 E1 Results and General Definitions E1 Mode Measurement Results contain several screens of data. Which screens are displayed depend on which mode you are in, SINGL or DUAL. Screen 1, which appears when you first enter Measurement Results, is the status page. This screen simply displays the status of each line in use. In large font, a status message is displayed for both lines 1 and 2. These messages (for example: NO ERRORS, FRM LOSS, SIG LOSS, ERROR DET) represent the condition of the line during testing. MEASUREMENT RESULTS Definitions The following measurements are displayed in the E20 screens. The definitions are listed here in alphabetical order. IMPORTANT NOTE: Each measurement is proprietary to its screen; e.g. “error” refers to E-Bit errors in the E-BIT screen, and to all Summary errors in the SUMMARY screen, etcetera. AISS : Alarm Indication Signal Seconds is a count of the number of seconds in which AIS was detected. AS: This is the count of Available Seconds since the beginning of the test. Available Seconds equals the length of the total test time minus any Unavailable Seconds. %AS: This is the percentage of Available Seconds since the Ch.3 Menus 65 beginning of the test. BIT: This is a count of bit errors that have occurred since the beginning of the test. Bit errors are not counted during unavailable time. BER: The Bit Error Rate is the total number of bit errors divided by the total number of bits during available time since the beginning of the test. CLKSLIP: This is the number of clock slips that have occurred since the beginning of the test. CODE: This is a count of the number of line Code Errors (Bipolar Violations that violate the coding rules) that have occurred since the beginning of the test. In HDB3 coding, a Code Error is a bipolar violation that is not part of a valid HDB3 substitution. (CODE) RATE: This is the average BiPolar Violation error rate since the beginning of the test. CRC: This is a count of the number of CRC-4 block errors that have occurred since the beginning of the test. This measurement is reported as N/A when the SunSet is not synchronized on a received CRC-4 check sequence. (CRC) RATE : This is the average CRC-4 block error rate since the beginning of the test. This measurement is reported as N/A when the SunSet is not synchronized on a received FAS or MFAS signal. DGRM: This is the count of DeGRaded Minutes since the beginning of the test. A Degraded Minute occurs when there is a 10-6 bit error rate during 60 available, non-severely bit errored seconds. %DGRM: This is the percentage of summary degraded minutes since the beginning of the test. EBIT: EBIT count shows the number of E-bit errors that have occurred. EBER: This is the average E-bit error rate since the beginning of the test. 66 SunSet E20 Version 1.01 EFS: This is a count of number of Error Free Seconds since the beginning of the test. %EFS: This is the percentage of summary Error Free Seconds since the beginning of the test. A summary Error Free Second is a second in which the signal is properly synchronized and no errors or defects occur. ES: This is a count of the number of Errored Seconds that have occurred since the beginning of the test. An errored second is any second with at least one BPV, bit error, FBE, errored block,or CRC-4 error. An errored second is not counted during an Unavailable Second. %ES: This is the percentage of errored seconds that have occurred since the beginning of the test. FALM: Frame ALarM seconds is a count of seconds that have had far end frame alarm (FAS Remote Alarm Indication, RAI) since the beginning of the test. FE: This is a count of the number of Frame bit Errors that have occurred since the beginning of the test. This measurement is reported as N/A when the SunSet has not synchronized on a known framing pattern within the received signal. Hz/PPM: The Hertz/part per million count records any variance from 2.048 Mbps in the received frequency. LOFS: Loss of Frame Seconds is a count of seconds since the beginning of the test that have experienced a loss of frame. LOSS: Loss Of Signal Seconds is a count of the number of seconds during which the signal has been lost during the test. +LVL: Positive LeVeL is the level of positive pulses being received by the SunSet. Measurements are displayed in both Volts (V) and decibels variance from G.703 specified level (dB). -LVL : Negative LeVeL is the level of negative pulses being received by the SunSet. Measurements are displayed in both Volts (V) and decibels variance from G.703 specified level (dB). Ch.3 Menus 67 Lpp : Peak-to-peak Level is the peak-to-peak level of negative and positive pulses being received by the SunSet. Measurements are displayed in decibels variance from DSX level (dB). MAX Hz: This is the maximum frequency measured since the beginning of the test. MIN Hz: This is the minimum frequency measured since the beginning of the test. MFAL: MultiFrame ALarm seconds is a count of seconds that have had far end multiframe alarm (MFAS Remote Alarm Indication, RAI) since the beginning of the test. MFE : This is a count of the number of Multi-Frame bit Errors that have occurred since the beginning of the test. This measurement is reported as N/A when there is no framing pattern within the received signal. RxCLK: This is the received clocking frequency. +/- RxLVL: This is the positive or negative level of pulses being received by the SunSet E20 . RCV Hz: This is the current frequency measured during the last second. SES: This is the count of Severely Errored Seconds since the beginning of the test. A severely errored second has an error rate of 10-3 or higher. Severely errored seconds are not counted during unavailable time. %SES: This is the percentage of seconds since the beginning of the test that are Severely Errored Seconds. SLIP: This is the count of Bit Slips. A slip occurs when the synchronized pattern either loses a bit or has an extra bit stuffed into it. UAS: This is the count of UnAvailable Seconds that have occurred since the beginning of the test. Unavailable time begins at the onset of 10 consecutive severely errored seconds. The displayed 68 SunSet E20 Version 1.01 value of unavailable seconds updates after the tenth consecutive severely errored second occurs. Unavailable time also begins at a loss of signal or loss of frame. %UAS: This is the percentage of unavailable seconds since the beginning of the test. +WANDR: This is the total positive phase difference between the measured frequency and the reference frequency since the beginning of the test. The +WANDR value increases whenever the measured frequency is larger than the reference frequency. -WANDR: This is the total negative phase difference between the measured frequency and the reference frequency since the beginning of the test. The -WANDR increases whenever the measured frequency is less than the reference frequency. Following is a description of the available results screens: Line 1 and Line 2 SUMMARY Screens Screens 2 and 3 contain the summary results for Lines 1 and 2, respectively, if both lines are in use. Figure 28 displays the Summary screen for Line 1. The Summary screens present the most significant measurement results. These screens contain data related to the specific types of impairments, like code errors, CRC-4 block errors, framing, and multi-framing bit errors. 16:47:42 MEAS HOLD ET : 000:24:37 RT : CONTINU FRM : PCM-30/C TxCk: INTERN PATT: 1-4 RATE: 2.048M LINE 1 - SUMMARY CODE- 0 RATE - 0.00E+00 BIT - 0 RATE - 0.00E+00 CRC - 0 RATE - 0.00E+00 EBIT- 0 RATE - 0.00E+00 FE - 0 RATE - 0.00E+00 MFE - 0 RATE - 0.00E+00 RxCLK:2048009 +RxLVL:-0.1 dB Hz/PPM:-0.0 -RxLVL:-0.1 dB PAGE-UP PAGE-DN STOP MORE Figure 28 Line 1 Summary Screen (E1 Mode) Ch.3 Menus 69 RESULTS-FREQUENCY Screen The next Measurement Results is the Frequency screen, which shows relevant frequency information. • The bar graph indicates how fast the signal is slipping in relation to the reference clock. In the TEST CONFIGURATION, RxDROP determines which line measurements are taken on. The other (not selected) line is the reference clock. For example, if RxDROP is L1-Rx, L1 will be measured, and the reference clock will be derived from the L2-Rx signal. •It is important to know the source of the reference clock, to meaningfully interpret your graph results. • Note that the bar graph slips most rapidly at the center position and then gradually slows down as the length of the bar increases. • A count of the number of clock slips is kept at the end of the bar. • At 256 clock slips the graph resets itself. • One clock slip occurs when the measured frequency deviates from the reference frequency by one unit interval. A unit interval is equal to 488 nano seconds. • The bar graph is only valid when both L1-Rx and L2-Rx have valid signals. If, for example, L2-Rx has no signal it will show a NO LINE 2 REF SIGNAL, and no graph will be shown. • Figures 29 and 30 show the Line Frequency screen used for E1 Mode. 70 SunSet E20 Version 1.01 MEAS ET : 000:50:21 FRAM: PCM-30 PATT: P15 17:13:40 RT : CONTINU TxCK: INTERNAL RATE: 2.048M LINE 1 - FREQUENCY NEG 0 POS -+--+--+----+----+--+--+<<<<< 051 RCV/Hz: 2047999 MAX/Hz: 2047999 MIN/Hz: 2047999 PAGE-UP PAGE-DN CKSLIP: 51 +WANDR: 0 -WANDR: 51 STOP more Figure 29 Line Frequency Screen (E1 Mode) MEAS ET : 000:14:19 FRM : PCM-30/C PATT: 1-4 20:50:45 RT : CONTINU TxCK: INTERN RATE: 2.048M LINE 1 - FREQUENCY NO LINE 2 REF RCV/Hz: 2048003 MAX/Hz: 2048003 MIN/Hz: 2048002 PAGE-UP PAGE-DN CKSLIP: N/A +WANDR: N/A -WANDR: N/A STOP more Figure 30 Line Frequency/No Ref Signal Note: When no reference clock signal is present, the test set will default to its internal clock, for the measurement of MAXimum, MINimum, and current ReCeiVed bit rates of the selected signal. Ch.3 Menus 71 Refer to the Measurement Definitions section as needed LINE 1 and Line 2 G.821 Screens The G.821 screens presents the measurement parameters specified in ITU G.821. Figure 31 provides a sample screen. MEAS ET : 000:56:49 FRM : PCM-30 PATT : 63 BIT : ES : SES : EFS : AS : UAS : SLIP: 17:20:11 RT : CONTINU TxCK: INTERN RATE: 2.048M LINE 1 - G.821 0 BER : 0 %ES : 0 %SES : 3541 %EFS : 3541 %AS : 0 %UAS : 0 PAGE-UP PAGE-DN 0.0e-10 00.000 00.000 100 100 00.000 STOP MORE Figure 31 G.821 Logical Screen Refer to the Measurement Definitions section as needed. Line 1 and Line 2 ALM/SIG Screens This screen presents alarm and measurement parameters relating to the E1 signal. Refer to Figure 32. Refer to the Measurement Definitions section as needed. 72 SunSet E20 Version 1.01 MEAS ET : 001:02:26 FRM : PCM-30 PATT: 1-4 17:25:41 RT : CONTINU TxCK: INTERN RATE: 2.048 LINE 1 - ALM/SIG LOSS: AISS: LOFS: FALM: MFAL: 0 0 0 0 0 +LVL : -0.69 dB -LVL : -0.69 dB Lpp : 4.73 dB PAGE-UP PAGE-DN STOP MORE Figure 32 ALM/SIG Screen (E1 Mode) Line 1 and Line 2 M2100/550 Screens This screen provides pass/fail measurements in accordance with ITU M.2100/550 specifications. This specification is used where a 2.048 Mbps circuit passes through international boundaries. It allocates a certain allowable error rate to each nation that carries the circuit. The technician merely needs to enter the appropriate percentage that is to be allowed for the line under test. The SunSet E20 makes the M.2100/ 550 calculations and reports whether the line passed or failed. Refer to Figure 33. The definitions following pertain particularly to this results screen. Ch.3 Menus 73 00:34:29 MEAS ET : 000:09:07 RT : CONTINU FRAM: PCM-30 TxCK: INTERN PATT: P15 RATE: 2.048M LINE 1 - M.2100/550 PERIOD P/F %ES %SES 01-01 00:27/00:29 P 0.0 0.0 01-01 00:29/00:31 P 0.0 0.0 01-01 00:31/00.33 P 0.0 0.0 01-01 00:33/00:35 P 0.0 0.0 PAGE-UP PAGE-DN STOP more Figure 33 Line 1- M.2100/550 screen (E1 Mode) PERIOD: Identifies the date and time interval of each of the reported pass or fail results. The period interval used in Figure 33 is 2 minutes. You may change this interval in the SYSTEM PARAMETERS, MEAS CONFIGURATION, page 2. Valid entries may range from 00 to 99 minutes. P/F: Shows whether the test result was a pass or fail during the period. %ES: This is the percentage of M.2100 Errored Seconds since the beginning of the test. An errored second is any second with a Code, Bit, Frame, Multiframe or CRC error. %SES: This is the percentage of Severely Errored Seconds since the beginning of the test. An M.2100 Severely Errored Second is any second with >10-3 bit error rate, 10-3 code error, excessive frame, multiframe or CRC bit errors, loss of frame, loss of pattern, synchronization, or loss of signal. 74 SunSet E20 Version 1.01 LINE 1 and Line 2 G.826 Screens The next screens of E1 Mode’s Measurement Results shows the G.826 results. Refer to Figure 34. 01:19:54 MEAS ET : 000:14:25 FRM : PCM-30/C PATT: 1-4 RT : CONTINU TxCK: INTERN RATE: 2.048M Line 1 - G.826 EB BBE ES SES UAS EFS : : : : : : 4 4 4 0 0 1001 PAGE-UP %EB %BBE %ES %SES %UAS %EFS PAGE-DN : : : : : : STOP 01.1111 00.0004 00.0004 00.0000 00.0000 99.93 MORE Figure 34 Line 1- G.826 Screen (E1 Mode) Note: You must turn on G.826 measurements in SYSTEM PARAMETERS, MEAS CONFIGURATION (page 2). This ITU standard, a replacement of the earlier G.821, specifies required performance characteristics of 2.048 Mbps lines. The parameter definitions given in G.826 are block-based. This makes in-service measurement convenient. The following definitions are specific to this screen: BBE: A Background Block Error is an errored block not occurring as part of a SES (Severely Errored Second). %BBE: The percentage of errored blocks since the beginning of the test, excluding all blocks during SES and unavailable time. EB: An Errored Block is a block containing one or more bit errors. %EB: This is the percentage of errored blocks since the beginning of the test. SES: A Severely Errored Second is a one second period which contains greater or equal to 30% errored blocks. Ch.3 Menus 75 %SES: This is the percentage of Severely Errored Seconds since the beginning of the test. 4.2 E1-MUX Mode Measurement Results E1-MUX Mode Measurement Results presents the Line 1 and Line 2 Summary Results. See the Measurement Definitions section as needed. Three additional datacom screens are shown in this mode. See Chapter 5, Datacom, for the results definitions. Figure 35 shows the Datacom Bit Error screen, Figure 36 shows the Datacom Bit results, and Figure 37 shows the Block Error screen. MEAS ET - 000:01:27 15:12:46 RT - CONTINU DATACOM-SUMMARY TYPE - V.35 TxHz - 48k PAT - 2e15 MODE - DCE RxHz - 48000 RxDL - 0 PATL - 0 BIT - 0 RxDLS - 0 PATLS - 0 BER - 0 PAGE-UP PAGE-DN STOP MORE Figure 35 Datacom Summary Results (E1-MUX Mode) 76 SunSet E20 Version 1.01 06:45:12 MEAS ET - 000:04:55 RT - CONTINU TxHz- 48k RxHz - 48001 PAT - 511 DATACOM BIT ERROR BIT - 0 ES - 0 SES - 0 EFS - 295 AS - 295 UAS - 0 SLIP- 0 PAGE-UP PAGE-DN RATE %ES %SES %EFS %AS %UAS - 2.3e-06 00.000 00.000 100 100 00.000 STOP MORE Figure 36 Datacom Bit Error Results 15:12:46 RT - CONTINU RxHz - 48000 ET - 000:01:27 PAT- 2e15 DATACOM BLOCK ERROR MEASUREMENT BLOCK SIZE # OF BLOCK BLOCK ERROR BLK ERR RATE PAGE-UP - PAGE-DN 1000 68688 0 0.0e-05 STOP MORE Figure 37 Datacom Block Error Measurement 4.3 MUXTEST Mode Results The Measurement Results for MUXTEST Mode are exactly the same as those of E1-MUX Mode. Please refer to Section 4.1, E1 Mode, for descriptions of all the screens, except for the Datacom results. The Datacom screens may be found in Section 4.2 and Chapter 5. Ch.3 Menus 77 4.4 DATACOM Mode Measurement Results The Datacom Measurement Results contain three pages of data. Figures 35 to 37 show sample screens. See Chapter 5 for further information. 5.0 Other Measurements The Other Measurements Menu list is displayed in Figure 38. 01:25:25 OTHER MEASUREMENTS VIEW RECEIVED DATA VIEW FAS WORDS VIEW MFAS WORDS PULSE MASK ANALYSIS X.50 ANALYSIS C-BIT ANALYSIS HISTOGRAM ANALYSIS PROPAGATION DELAY Figure 38 OTHER MEASUREMENTS Most of these menu choices are described here in Section 5. Note that Datacom is described in Chapter 5, and X.50 has its own chapter. 5.1 View Received Data Refer to Figure 39, View Received Data, for a typical screen display. This display refers to the Rx/DROP setting in the TEST CONFIGURATION. In DATACOM Mode, the data displayed will be for the received signal in the TEST CONFIGURATION. 78 SunSet E20 Version 1.01 12:12:47 MEAS VIEW RECEIVED DATA PAGE:01 T/S BINARY 00 00011011 01 10001110 02 01000100 03 11011010 04 01100101 05 00100010 06 10100001 07 00110000 PAGE-UP PAGE-DN PAGE-UP PAGE-DN HEX 1B 8E 44 DA 65 22 A1 30 PAUSE PAUSE ASCII ( ) (q) D (Ó) ([) e ( ) Ò (D) ( ) 0 ( ) PRINT Figure 39 View Received Data To view this screen, use the following procedure: 1) Cursor to the OTHER MEASUREMENTS item in the MAIN MENU and press ENTER. 2) Cursor to the VIEW RECEIVED DATA item. Press ENTER. 3) View the live presentation of the data. 4) Choose PAUSE (F3) to trap the current data on the E1 line. a) Press PRINT (F4) to send the data to the serial port for printing. 5) Choose PAGE-UP (F1) or PAGE-DN (F2) to view more data. • Note the PAGE number in the upper left-hand portion of the screen. • 64 pages of data are available; which is equal to 16 frames or one multiframe. 6) When you have finished, press the ESCAPE key twice to return to the MAIN MENU. The following display definitions are used in this screen: Ch.3 Menus 79 PAGE: Indicates which of the available 64 pages of data is currently being displayed. T/S: Specifies the Time Slot being viewed. BINARY: This column shows the binary data actually being received on the line. Each line represents the 8-bit time slot. HEX: This column shows the hexadecimal representation of the 8 bits being transmitted in each time slot. ASCII: This column displays the ASCII representation of the 8-bit binary framing word which has been received. The character displayed to the left of the parentheses represents the 8-bit framing words translated in their present order. The character displayed within the parentheses represents the 8 bits translated in reverse order. 5.2 View FAS Words • View FAS Words may be accessed via the OTHER MEASUREMENTS menu. • Valid framing is required to enter this screen. • View FAS Words allows you to view the live presentation of E1 framing binary words. Time slots 0 of frames 0 through 15 are displayed in this screen. • Refer to Figure 40, FAS Frame Words. • See the Technology chapter for further information. • The presented data refers to the Rx/DROP selection in the TEST CONFIGURATION. • This feature is not available for the DATACOM TEST MODE. 1) Press PAUSE (F1) to freeze the presentation of data; press RESUME (F1) to return to a live FAS word display. 80 SunSet E20 Version 1.01 MEAS 08:07:56 FAS FRAME WORDS FRM 0 2 4 6 8 10 12 14 12345678 c0011011 10011011 00011011 10011011 10011011 00011011 00011011 10011011 10011011 FRM 1 3 5 7 9 11 13 15 12345678 i1asssss 01011111 01011111 11011111 01011111 11011111 11011111 11011111 11011111 RESUME Figure 40 FAS Frame Words The even frames, 0 through 14, contain the FAS, Frame Alignment Signal, in bits 2 through 8. As shown in Figure 40, FAS is represented by 0011011. The odd frames do not contain the frame alignment signal. The top row of these frames in Figure 40 shows the allocation of bits 18 in these frames. The figure represents an undisturbed condition. When you have set your framing at PCM-30 Multiframe, there is a slight variation in the odd framing bits, those not containing the frame alignment signal. Bit 1 is used to transmit the 6-Bit CRC-4 multiframe alignment signal and 2 CRC-4 error indication bits. The CRC-4 multiframe alignment signal has the form 001011. Figure 41 shows the FAS frame words seen when in PCM-30 framing. Ch.3 Menus 81 MEAS 07:31:55 FAS FRAME WORDS FRM 0 2 4 6 8 10 12 14 12345678 c0011011 00011011 10011011 00011011 00011011 10011011 00011011 00011011 00011011 FRM 1 3 5 7 9 11 13 15 12345678 ilasssss 01011111 11011111 11011111 11011111 11011111 01011111 01011111 11011111 PAUSE Figure 41 FAS Words In Figure 41, the first bits of frames 1-11 (odd) send the pattern 001011, the CRC-4 multiframe alignment signal. 5.3 View MFAS Words In View MFAS Words, you may view the live presentation of Timeslot 16, Frames 0-15. You need to select PCM-30 framing in the TEST CONFIGURATION menu to enter this screen. Refer to Figure 42. The data comes from the Rx/DROP selection in the TEST CONFIGURATION. This feature is not available for the DATACOM TEST MODE. To enter View MFAS Words: 1) From the MAIN MENU, select OTHER MEASUREMENTS. 2) Select View MFAS words. 3) Press PAUSE (F1) to freeze the presentation of data; press RESUME (F1) to return to a live MFAS word display. a) When the display is in PAUSE mode, you may press PRINT (F2) to send the results to the serial port. 82 SunSet E20 Version 1.01 13:00:02 MEAS MFAS FRAME WORDS LINE #: 1 FRM 12345678 FRM 12345678 0000xyxx ABCDabcd 0 00001011 1 11011101 2 11011101 3 11011101 4 11011101 5 11011101 6 11011101 7 11011101 8 11011101 9 11011101 10 11011101 11 11011101 12 11011101 13 11011101 14 11011101 15 11011101 RESUME Figure 42 MFAS Frame Words In the Multiframe, timeslot 16 is used for either common channel or channel associated signalling, as required. Please note that in figure 42, the template for the even frames (0000xyxx) applies only to Frame 0. All other frames follow the template shown above the odd frames (ABCDabcd). As seen in Figure 42, in frame 0, MFAS is 0000. The rest of the frames contain signalling channels designated a, b, c, and d. Frame 1 contains channels 1 and 16, frame 2 contains channels 2 and 17, and so forth until frame 15, which contains channels 15 and 30. 5.4 Pulse Mask Analysis The Pulse Mask Analysis option enables you to measure the quality of an E1 wave form. The measured results compare favorably with pulse shape measurements obtained from testing with a digital oscilloscope. • The Pulse Mask Analysis is performed for any received test pattern or live signal, and line interface mode. • The received signal shape is displayed on the SunSet's LCD screen. • The ITU G.703 pulse mask can be superimposed for fast Ch.3 Menus 83 inspection. • The SunSet will store the present pulse shape for later viewing. • Note that if you start analysis while measurements are running, the unit will stop the measurements. When Pulse Mask Analysis is complete, the unit will restart the measurements. • The Pulse Mask Analysis menu is shown in Figure 43. MEAS 08:07:06 PULSE SHAPE ANALYSIS LINE 1 START NEW ANALYSIS VIEW LAST PULSE SHAPE Figure 43 Pulse Shape Analysis Menu • Start a new analysis. • View the last analysis made by the SunSet E20 . 84 SunSet E20 Version 1.01 5.4.1 Start New Analysis Enter Pulse Shape Analysis to start a new analysis. Figure 44 provides a sample screen. 15:46:55 1 0 - Width 219 ns Rise Time 27 ns Fall Time 22 ns Ovr Shoot 7.0 % Und Shoot 5.0 % Level -0.6 dB 50 ns/div G.703 RESTART PRINT Figure 44 Pulse Shape Analysis Follow this procedure to start a new pulse shape analysis: 1) Select the correct line interface in the TEST CONFIGURATION menu. 2) In the Main Menu, cursor to OTHER MEASUREMENTS; press ENTER. 3) Enter PULSE MASK ANALYSIS. 4) Press START NEW ANALYSIS. In three to five seconds, the captured pulse shape will be displayed on the screen. In this screen, there are three F-key choices: G.703 (F1): Displays the ITU G.703 mask with the captured signal. This key then becomes NO-MASK (F1); press to remove the G.703 mask. RESTART (F2): Starts a new pulse shape capture and analysis. PRINT (F3): Print the pulse shape screen on the Sunrise Thermal Printer. Ch.3 Menus 85 Definitions for this screen are: Width - Pulse Width, in ns Rise Time- in ns Fall - Fall Time, in ns Ovr Shoot - Over Shoot, percentage Und Shoot - Undershoot, percentage Level - Signal level, in dB 5.4.2 View Last Pulse Shape • View the last pulse shape captured by the SunSet E20. • You may view this pulse shape at any time, even after the SunSet has been turned off for an extended period of time. Follow this procedure: 1) In the Main Menu, move the cursor to OTHER MEASUREMENTS; press ENTER. 2) Cursor to PULSE MASK ANALYSIS; press ENTER. 3) Move the cursor to VIEW LAST PULSE SHAPE; press ENTER. • The last pulse shape will be displayed on the screen, along with the G.703 and PRINT F-keys. • See the previous section (5.4.1) for the results definitions. Note that X.50 Analysis is available in its own chapter. 5.5 C-Bit Analysis The C-Bit Analysis option allows the user to send and receive C-Bit frames. To enter C-Bit Analysis: 1) From the MAIN MENU, enter OTHER MEASUREMENTS. 2) Select C-BIT ANALYSIS. You may receive C-bits on both Line 1 and Line 2, but you may transmit C-bits on only one line. This will be the line set for Tx/ INSERT in the TEST CONFIGURATION menu. Refer to Figure 45, C-Bit Analysis. 86 SunSet E20 Version 1.01 23:08:38 MEAS C-bit SEND/RECEIVE L1-Tx T/S:01 L1-Rx T/S:01 SEND bits RECEIVED LINE-1 LINE-2 NEXT TRANSMIT :IDLE L2-Rx T/S:01 123456789012345 S10001000010001 S10001000010001 C-BIT NOT FOUND PREVIUS Figure 45 C-bit Analysis Note: The SunSet will transmit IDLE pattern upon entering the Cbit Analysis screen. The following programmable fields are available in this screen: 1) L1-Tx T/S Options: 1-15, 17-31 Select the transmit timeslot on which to send C-bits. • Press NEXT (F1) or PREVIUS (F2) as necessary. • To send C-bits on Line 2 (and thus, this item changes to L2-Tx T/ S): a) Set Tx/INSERT to L2-Tx in the TEST CONFIGURATION screen • As PCM-30 framing is required for this C-bit analysis, you may not select timeslot 16. 2) TRANSMIT Options; USER (F1), IDLE (F2) This setting determines bit 2. • IDLE (F2) sends logic 1 as bit 2. When 1 is placed in this spot, Cbit framing will be ignored. Ch.3 Menus 87 • USER (F1) activates the C-bit framing and sets the user programmable bits. a) Cursor down to the SEND bits. b) At each bit, press the SHIFT key and enter either 0 or 1. The cursor automatically moves one spot to the right once a bit is entered. When the cursor highlights a specific bit, information about this C-bit will be displayed at the bottom of the screen. 3) L1-Rx Options: 1-15, 17-31 Select the Line receive timeslot on which to receive C-bits. •Press NEXT (F1), or PREVIUS (F2) as needed. Because PCM-30, MFAS, framing is required, you may not select timeslot 16. This screen also shows the received C-bits for both Lines 1 & 2. If C-bits are not found on a line, a C-BIT NOT FOUND message will be displayed for that line. Definitions of C-bits 2-15 are shown below: 88 SunSet E20 Version 1.01 Bit # Assignment bit 2 ESCAPE 0 - C-Frame active 1 - C-Frame ignored bit 3 2Mb loops 0 - Subscriber 1 - Network bit 4 Loop 2 or Loop 3 0 - Subscriber 1 - Network bit 5 Loop 2 instruction 0 - Active 1 - Non-active bit 6 Loop 3 instruction 0 - Active 1 - Non-active bit 7 HDB3 command 0 - Active 1 - Non-active bit 8 Loop acknowledge 0 - Acknowledge 1 - No acknowledgment bit 9 Not defined... bit 10 Local Fault 0 - Active 1 - Non-active bit 11 Remote/ Line fault 0 - Active 1 - Non-active bit 12 C Frame loss 0 - Active 1 - Non-active bits 13-15 Spare Figure 46 C-bit Definitions Ch.3 Menus 89 5.6 Histogram Analysis • View/print either the current file, or a previously saved one (if you have an additional memory card). • Figure 47 shows the Histogram Analysis menu, which appears upon entering this item. Note: Interrupting your timed measurement to view results will result in a new histogram analysis beginning when you return to measuring. 15:38:29 HISTOGRAM ANALYSIS CURRENT HISTOGRAM SAVED HISTOGRAM Figure 47 Histogram Analysis Menu 5.6.1 Current Histogram Use this procedure: 1) From the MAIN MENU, enter the OTHER MEASUREMENTS menu. 2) Select HISTOGRAM ANALYSIS. 3) Enter CURRENT HISTOGRAM. • The Current Histogram start and stop date and time will be displayed, as depicted in Figure 48. 4) The CURRENT date and time correspond to the last time you entered MEASUREMENT RESULTS. 90 SunSet E20 Version 1.01 a) Select VIEW (F1) to view the current histogram. Figure 49 shows a sample histogram screen. b) Pressing STORE (F2) will erase any previously stored data. You must have a second SRAM card to store data. • Your CURRENT histogram data is also being stored, but it will be erased the next time you enter MEASUREMENT RESULTS. • If you do not want to save the current file and erase the one already saved, simply press ESCAPE instead of ENTER at the warning message screen. 09:28:06 MEAS CURRENT HISTOGRAM STARTING TIME STAMP 1998-01-16 08:39:26 ENDING TIME STAMP 1998-01-16 09:29:32 VIEW STORE Figure 48 Current Histogram Menu 15:30:00 CURRENT HISTOGRAM TYPE: BIT LINE:1 DATE: 1998-04-24 100k 10k 1k 100 10 0 HR 12 TYPE 14 16 18 LINE1/2 20 ZOOM 22 JUMP Figure 49 View Current Histogram Ch.3 Menus 91 The following function keys are available for the histogram analysis: TYPE (F1): Select the measurement parameter type. E1SINGL/DUAL, E1-MUX, MUXTEST Mode error types: EBIT, CRC, FAS, MFAS, CODE: See Measurement Definitions section if necessary. LOS: Loss of Signal LOF: Loss of Frame AIS: Alarm Indication Signal FASRAI: FAS Remote Alarm Indication MFASRAI: MFAS Remote Alarm Indication BERT_LOPS: Loss of Pattern Synchronization BERT_BIT: Bit errors DATACOM mode error types: BERT_LOPS, BERT_BIT • The history of each error type is displayed individually. • The error type is specified in the upper portion of the screen. • Pressing TYPE automatically changes the type options displayed. In Figure 49, bit error was selected as the error type. In this manner you may examine the history of certain errors or parameters depending on the test mode. LINE 1/2 (F2): Selects the parameters of either E1 Line 1, E1 Line 2, or Datacom; depending on the setup. • When the set is configured to the DATACOM, MUXTEST, or E1MUX test mode, the datacom's parameters will automatically be selected and you will not be given the LINE 1/2 option. ZOOM (F3): Changes the resolution to the next lower time period at the cursor location. • Select a minute, hour, or day interval as your time period JUMP (more, F1) Moves the display cursor by 10 steps in the display period. • Use the left or right arrow keys on the keypad to move the cursor one period at a time 92 SunSet E20 Version 1.01 PRINT (more, F2): Press to send the results to the serial port. Notes: • The HISTOGRAM ANALYSIS will display either the current or saved results. • Each time MEASUREMENTS RESULTS is entered, the SunSet will replace the file in the CURRENT HISTOGRAM data. • For each file, the HISTOGRAM ANALYSIS feature will store the most recent 24 hours of data with a display resolution (PERIOD) of 1 minute. • For each file, the HISTOGRAM ANALYSIS feature will store both the present 60 hours and the previous 60 days of histogram data with a resolution (PERIOD) of one hour. 5.6.2 Saved Histogram Enter the SAVED HISTOGRAM to view, print, or give a label to a saved Histogram Analysis. If you attempt to enter SAVED HISTOGRAM without an extra memory card, you will see a ‘No SRAM Memory Card Installed’ message. See section 5.6.1 for an explanation of the data. See the following figure for a Saved Histogram screen: 12:37:15 SAVED HISTOGRAM File Size: 2 1K Mem Avail:1002K No. LABEL START/END TIME 1 . MALC 1998-12-31 11:48:10 1998-12-31 12:48:10 2 . NONE 1998-12-31 13:03:00 1999-01-01 13:03:00 VIEW PAGE-UP PAGE-DN MORE Figure 50 Saved Histogram Screen F-keys available on this screen are: VIEW (F1): Press to enter the selected record. Ch.3 Menus 93 PAGE-UP (F2)/ PAGE-DN (F2): Press to scroll through the screens of saved histograms. DELETE (more, F1): Press to delete the highlighted histogram. LOCK/UNLOCK (more, F2): Press LOCK to freeze the record, so that it may not be deleted or otherwise changed. Press UNLOCK to open the record. LABEL (more, F3): Press this key to enter a screen where you can give the histogram a label (name). a) Use the TOGGLE (F3) key to access the letters, then choose the letters by pressing SELECT (F4). b) Use INSERT (F1) and DELETE (F2) when you need to add or remove a letter. c) Press TOGGLE (F3) again when you are done. d) Press ENTER, and you will return to the SAVED HISTOGRAM screen, where the new label will be on the record, under the LABEL heading. e) See the Create a User Test Pattern section of this chapter if you need additional help. CLR-ALL (more, F1): Press to delete all of the saved histograms (save for any that are LOCKed). 94 SunSet E20 Version 1.01 5.7 Propagation Delay • View the propagation delay of a looped back signal. See Figure 51. • You may enter this screen only in a full-rate mode. • The set measures the number of unit intervals it takes for the signal to return. A unit interval is the amount of time it takes to transmit one bit (488 nS for a E1 signal). This number is translated into an exact number of microseconds of round trip delay. MEAS 01:44:02 PROPAGATION DELAY ROUNDTRIP DELAY: 460000 UI ROUNDTRIP TIME: 220000 uS OFFSET:0 RESTART UI CALIB Figure 51 Propagation Delay • Press CALIB (F2) if you have more than one piece of looped equipment on the line, and want to recalibrate the measurement to see the propagation delay between two devices, not including the SunSet E20. Observe the OFFSET to see the delay between only the two pieces of equipment (taking the E20 to Equipment 1 measurement out of the delay measurement). Continue as necessary to press CALIB to take measurements further down the line. • Press RESTART (F1) to stop and restart a propagation delay test. • The display will be for the Rx/DROP selection in the TEST CONFIGURATION. Ch.3 Menus 95 Note: Each item in the PROTOCOLS menu has its own chapter later in this manual. 6.0 VF Channel Access The VF CHANNEL ACCESS menu performs a variety of talk/ listen functions. Do not attempt to enter the VF CHANNEL ACCESS menu if the PCM-31 LED or the PCM-30 LED is not lit green. Green LEDs indicate that the framing found on the received signal matches the framing selected in the TEST CONFIGURATION menu. It is impossible to talk, listen, or perform other channelized functions in the absence of frame synchronization, since channels can be identified only within a framed signal. Refer to Figure 52 for the VF CHANNEL ACCESS menu list. 08:22:56 VF CHANNEL ACCESS VF & NOISE MEASUREMENTS VIEW LINE CAS CALL ANALYSIS VIEW/PRINT TRACER CALL EMULATOR SUPERVISION SETUP DIAL PARAMETERS SIGNAL MEANINGS Figure 52 VF CHANNEL ACCESS Menu Note: During VF CHANNEL ACCESS, when the TEST CONFIGURATION TxSOURCE is set to TESTPAT, idle channel code and signalling (A/B/C/D bits) will be inserted into the unselected channels. The idle channel code and signal can be programmed in the MAIN MENU/ SYSTEM PARAMETERS/ MEAS CONFIGURATION/ IDLE CHNL CODE and IDLE CHNL A/B/C/D menu items. 96 SunSet E20 Version 1.01 6.1 VF & Noise Measurements The VF & Noise MEASUREMENTS menu lets you choose: • which channel to test for both transmitting and receiving • whether to talk, send a tone, or place quiet termination on the transmit signal • the transmitted frequency and level • which signalling bits to send • to listen on both or either line It also tells you: • the received signalling bits • the received 8-bit data • the received frequency and level • noise measurements on the received frequency Note that there are some differences in setting up for E1SINGL or E1DUAL mode. Refer to Figure 53, VF Measurements. 12:00:00 MEAS VF & NOISE MEASUREMENTS MEASUREMENT SETUP Tx-1 : 01 TxMODE :TONE Rx-1/2:01/01 TxFREQ :1020 TxABCD:1001 TxLVL(dBm):3 IN/DROP:L1/L2 SPEAKER :L1+L2 MEASUREMENT RESULTS RxFREQ =800 OFFSET=+10 Rx(dBm) =01 PEAK =+127/-127 RxABCD =0101 RxDATA=10011001 S/N(dB) =60.0 PSOP(dBm)=-33.6 3K(dBm) =-9.5 1010(dBm)=-68.9 NEXT PREVIUS Figure 53 VF Measurements Figure 53 is an example of an E1Dual setup. Tx -1 is set for timeslot 1. Tx is Line 1, since Tx/INSERT was set for Line 1 in the TEST CONFIGURATION screen. To insert on Line 2 (and consequently see Tx-2 on this screen), select Tx/INSERT: L2-TX in TEST CONFIGURATION. Rx-1/2 shows the selected receive timeslot for each line. The MEASUREMENT RESULTS come from the IN/DROP selection Ch.3 Menus 97 further down this menu. 1) Tx-T/S (E1SINGL) or Tx-1 (E1DUAL) Options: 1-31 Choose the transmit timeslot. • Press NEXT (F1) or PREVIUS (F2) as needed. • Tx-1 normally should be the same as the Rx-1, but you do have the option to set them for different channels. • Upon selecting a timeslot, approximately three seconds pass before actually inserting on the timeslot. 2) Rx-1 (E1SINGL) or Rx-1/2 T/S (E1DUAL) Options: 1-31 Choose the receive timeslot for E1 Line 1 (E1SINGL mode) or E1 Lines 1 and 2 (E1DUAL mode). • Use the appropriate F-keys, NEXT (F1) or PREVIUS (F2) as needed • To receive on Line 2, be sure to select L2-Rx for the DROP item. 3) TxABCD Options: IDLE (F1), SEIZE (F2), manually set Change the signalling bits transmitted with the associated transmit channel. These bits will be transmitted only if the set is using MFAS (PCM-30) framing. 1) Pressing IDLE (F1) or SEIZE (F2) will place that signal onto the A/B/C/D position. • Program the IDLE or SEIZE signal in the VF CHANNEL ACCESS/SUPERVISION SETUP. To change these bits manually: 1) Press/release the SHIFT key and press the 1 and 0 keys as desired to enter the signalling bits. 2) Press ENTER to send the ABCD bits. 4) IN/DROP (E1DUAL) Options: L1 (F1), L2 (F2) Determine on which line to Insert and Drop the signal. • Insert determines the line onto which you insert the test signal. • Drop determines which line will report Measurement Results. 98 SunSet E20 Version 1.01 5) TxMode Options: THRU (F1), TALK (F2), QUIET (F3), TONE (F4) • Press THRU (F1) to pass all of the received channels out on the transmit signal. • Press TALK (F2) to talk on the selected transmit channel; the SunSet will transmit speech from the microphone. • Press QUIET (F3) to place a quiet termination on the transmit signal. • Press TONE (F4) to insert a tone on the selected transmit channel. If you select TONE, use the next two settings to set the tone frequency and level. 6) TxFREQ Options: 50 Hz- 3950 Hz If you selected TONE as your TxMode, choose the tone frequency here. a) Press the SHIFT key. b) Entering the value from the keypad. 7) TxLVL Options: -60 to 3 dBm If you selected TONE as your TxMode, choose the transmit tone level here. a) Press the SHIFT key. b) Entering the value from the keypad. You may select any value from -60 to +3 dBm. • Press MINUS (F1) to achieve negative values. 8) Speaker (E1DUAL) Options: L1 (F1), L2 (F2), L1+L2 (F3) Select the line you want to hear on the speaker. • Select L1 to listen on Line 1. • Select L2 to listen on Line 2. • Select L1+L2 to listen on both lines. Measurement Results The last five lines pertain to received data. As the equals sign indicates, they are for viewing only, and may be neither edited nor Ch.3 Menus 99 changed. 1 ) RxFREQ View the received frequency of the selected channel in hz. 2) Rx(dBm) View the received level in dBm. 3) RxABCD View the received Channel Associated Signalling System (CAS) bits. Note: These bits are meaningful only if the PCM-30 LED is lit green. Ignore these bits if this LED is not green. 4) S/N (dB) Observe the Signal to Noise measurement, in decibels. This measurement is updated every second. 5) 3K (dBm) Observe the Noise 3-K Flat measurement, in dBm. This measurement is updated every second. 6 ) OFFSET Observe the coder Offset. 7) PEAK Observe the coder peak from +127 to -127, using A-law. 8) RxDATA View the live 8-bit channel data as it is received from the selected line. 9) PSOP (dBm) Observe the Noise Psophometric measurement in dBm. This measurement is updated every second. 10) 1010 (dBm) Observe the Noise 1010 Hz measurement, in dBm. This measurement is updated every second. 100 SunSet E20 Version 1.01 6.2 View Line CAS • View the signalling bits for all of the 30 channels for either Line 1 (E1SINGL) or Lines 1 and 2 (E1DUAL). • You must select PCM-30 framing in TEST CONFIGURATION. • The PCM-30 LED must be lit green in order for the signalling bits to be displayed. • Time slots 1 through 5 are shown on the first line, 6 through 10 are shown in the second line, etc. • Figure 54 shows a sample screen. T/S ABCD L 01 0000 I 06 1101 N 11 1101 E 17 1101 1 22 1101 27 1101 T/S ABCD L 01 0000 I 06 1101 N 11 1101 E 17 1101 2 22 1101 27 1101 STATUS ABCD 1101 1101 1101 1101 1101 1101 ABCD 1101 1101 1101 1101 1101 1101 ABCD 1101 1101 1101 1101 1101 1101 ABCD 1101 1101 1101 1101 1101 1101 07:31:55 ABCD ABCD 1101 1101 1101 1101 1101 1101 1101 1101 1101 1101 1101 1101 ABCD ABCD 1101 1101 1101 1101 1101 1101 1101 1101 1101 1101 1101 1101 Figure 54 View Line 1 & 2 CAS • Press the STATUS (F1) key to see a decode of each ABCD state. Information will be displayed when a match of state for forward/ backward conditions are met, as specified in SUPERVISION SETUP. Here are the definitions: IDLE= IDLE SEIZ= SEIZE ACKW= SEIZE ACKNOWLEDGMENT ANSW= ANSWER CLRB= CLEAR BACK CLFR= CLEAR FORWARD BLCK= BLOCK ????= UNKNOWN; no state or no match detected • Note that some states will change too quickly for the E20 to display Ch.3 Menus 101 and detect. Therefore, only constant states which are detected when the screen is refreshed will be displayed. • Press ABCD (F1) to display the ABCD information. 6.3 Call Analysis • The SunSet E20 must be configured for E1DUAL mode, using PCM-30 framing, to use this feature. • The unit monitors the digits and states sent between two pieces of equipment. • Note that you must follow your supervision setup precisely for Call Analysis to work properly. • The unit must see a Seize and a Seize Acknowledgment before it will capture digits. 1) TYPE Options: MFR1SS5 (F1), MFR2 (F2), DTMF (F3), PULSE (F4) Select the type of signal you will be analyzing. • Select F1 to analyze SS#5 signalling. • Select F2 to analyze MFR2 and MFR2 compelled signalling. • Select F3 to analyze DTMF signalling. • Select F4 to analyze Pulse signalling. 2) Rx-1 T/S Options: 1-31, or AUTO (F3) Select the Line 1 timeslot to receive the signal on. • Use the NEXT (F1) and PREVIUS (F2) keys to select the timeslot. • If you select AUTO, the unit scans all channels for the TRIGGER event (line 4). • You will also be presented with two additional choices; see items 4 and 5. Figure 55 shows a Call Analysis sample setup screen. Figure 56 shows a sample DTMF analysis screen. 102 SunSet E20 Version 1.01 10:16:30 CALL ANALYSIS TYPE : DTMF Rx-1 T/S : 31 Rx-2 T/S : 31 X.50 SETUP press ENTER to start NEXT PREVIUS AUTO Figure 55 Call Analysis 03:31:27 CALL ANALYSIS Rx-1 Rx-2 DTMF Time/s TS1 TS1 Label 0000.027 1001 1001 Idle 0003.660 0001 Seize 0011.426 1101 SeizeAck 0004.315 1 Digit 1 0000.200 2 Digit 2 0000.200 6 Digit 6 0000.200 5 Digit 5 0000.200 4 Digit 4 0000.200 1 Digit 1 0000.200 2 Digit 2 STOP ABSOLUT RELATIV Figure 56 DTMF Call Analysis Sample 3) Rx-2 T/S Options: 1-31, or AUTO (F3) Select the Line 2 timeslot to receive the signal on. • Use the NEXT (F1) and PREVIUS (F2) keys to select the timeslot. • If you select AUTO, the unit will scan for the Line 2 receive timeslot. • You will also be presented with two additional choices: Ch.3 Menus 103 4) TRIGGER Options: CAS (F1), STATE (F2) • Select CAS (F1) to have the unit begin capturing after it detects specific CAS bits. a) An ABCD line will appear. Use the SHIFT and number keys to enter the bits you want the unit to match. b) When the unit sees the set ABCD bits, it will report them on the CALL ANALYSIS screen. • Select STATE (F2) to have the unit begin capturing information after it sees the selected state, as chosen in the next line. 12:38:40 CALL ANALYSIS TYPE Rx-1 T/S Rx-2 T/S TRIGGER SUPERVISION : : : : : DTMF AUTO OFF STATE SEIZE press ENTER to start IDLE SEIZE ACKW MORE Figure 57 Call Analysis, with Trigger 5) SUPERVISION Options: IDLE (F1), SEIZE (F2), ACKW (F3), ANSW (more, (F2), CLR-BK (more, (F2), CLR-FW (more, (F2), BLOCK (more, F1) Determine what signal trigger state must be met for the unit to start capturing. • IDLE looks for an idle signal. • SEIZE looks for a seizure. • ACKW looks for a backward seize acknowledgment. • ANSW looks for an answer signal. • CLR-BK looks for a Clear-Back signal. • CLR-FW looks for a Clear-Forward signal. • BLOCK looks for a Block signal. 104 SunSet E20 Version 1.01 6) When you have determined the settings, press ENTER. Observe the real-time analysis. Options: STOP/RESTART (F1), ABSOLUT (F2), RELATIV (F3) • Press STOP to stop the CALL ANALYSIS in process. Here is a sample MFR2 CALL ANALYSIS screen: 03:31:27 CALL ANALYSIS Rx-1 Rx-2 MFR2 Time/s TS2 TS2 Label 0000.023 1001 1001 Idle 0003.056 0001 Seize 0004.326 1101 SeizeAck 0004.345 1 Digit 1 0000.200 2 Digit 2 0000.200 6 Digit 6 0000.200 5 Digit 5 0000.200 4 Digit 4 0000.200 1 Digit 1 0000.200 2 Digit 2 STOP ABSOLUT RELATIV Figure 58 MFR2 Call Analysis Screen Additional F-keys will be presented to you on the stopped screen: PAGE-UP (F1): page up one page PAGE-DN (F2): page down one page ANALYZE (F3): analyzes the digits; see DIGIT ANALYSIS RESTART (more, F1): restarts CALL ANALYSIS ABSOLUT (more, F2): shows timestamps in Absolute mode; the absolute time since start. RELATIV (more, (F2), shows timestamps in Relative mode; the time relative to the last change. • Toggle between the ABSOLUTe and RELATIVe modes to see the timestamp for each. Notes: •When SS#5 is selected (MFR1SS5), the SS#5 tones will be detected. The Label decode will be supplied automatically. • When MFR2 is selected, MFR2 tones will be detected, and the choices will appear. Line 1 Rx is always in the Forward Ch.3 Menus 105 direction, and Line 2 Rx is in the backward direction. • To differentiate between CAS line signalling and PULSE digits in the PULSE CALL ANALYSIS, PULSE will be displayed before a detected pulse digit sequence of IDLE/SEIZE. 6.3.1 Digit Analysis To access the Digit Analysis function, press STOP (F1) in the CALL ANALYSIS screen, then press ANALYZE (F3). You will enter the digit analysis screen, as in the following sample figures. • Digit Analysis will record the last 32 digits for analysis when CALL ANALYSIS is stopped. • If a TRIGGER is set (in CALL ANALYSIS), then up to 32 digits from the stopping point back to the trigger points will be stored and analyzed. 03:31:27 CALL ANALYSIS Line 1# 1 DIG# 1 : 1 INTD: 105 ms H/L Hz 697 /0700 PERD: 102 ms dBm -7.1/-4.8 TWST: 1.9 DIG# 2 : 2 H/L Hz 699 /1366 dBm -6.7/-5.1 INTD: 101 ms PERD: 102 ms TWST: 1.6 DIG# 3 : 3 INTD: H/L Hz 770 /1482 PERD: dBm -7.0/-4.9 TWST: PAGE-UP PAGE-DN LINE-2 101 ms 096 ms 1.7 RETURN Figure 59 DTMF Digit Analysis Screen Here are the screen definitions: H/L Hz – the high and low frequencies of the digit, in hz dBm– the dBm level INTD: Interdigit period – the time between digits. PERD: Period – the dial period TWIST: Twist – the difference between the two frequencies 106 SunSet E20 Version 1.01 03:31:27 CALL ANALYSIS Line 1# 1 No. DIGIT PPS PPRD %BRK 1 3 8 120 58 2 6 8 120 58 3 3 8 120 58 4 8 8 120 57 5 0 8 120 58 6 0 8 119 57 PAGE-UP PAGE-DN INDT --510 510 510 512 510 LINE-2 RETURN Figure 60 Pulse Digit Analysis The Pulse Digit Analysis screen (see figure 60) definitions also include: PPS: Pulses per second PPRD: Pulse Period This screen also has additional F-keys: LINE-1/2 (F3): Press to toggle between the lines. RETURN (F4): Press to return to the Call Analysis screen. 6.4 Call Emulator This menu allows a user to place and receive calls. The user may select one of the 10 predefined sequences that will follow the standard or may input a user defined sequence. Notes: • To run the user call emulator, you must press START in the User Call Emulator menu. If you escape from the menu to the Call Emulator menu, then press the START key, you will be running the Q.441 spec instead of the one you defined. • When you edit your own sequence, no default Q.441 timer value will be provided for PERD (periodic timer). You need to enter a value according to the Q.441 spec or any other desired value to make the sequence work. Ch.3 Menus 107 6.4.1 Standard Emulations In this screen you may select a standard emulation to use. 11:46:23 CALL EMULATOR 1. Q.441 MFCR2 RECEIVE 2. Q.441 MFCR2 CALL 3. Q.140 SS#5 RECEIVE 4. Q.140 SS#5 CALL 5. DTMF RECEIVE 6. DTMF CALL 7. MFR2 RECEIVE 8. MFR2 CALL 9. PULSE RECEIVE 10. PULSE CALL USER VIEW START Figure 61 Call Emulator List Here are the F-keys: USER (F1): Press to enter the USER CALL EMULATOR screen where you may create, edit, or use a User emulation sequence. See the next section. VIEW (F2): Press to enter a screen which shows a sample sequence of the selected emulation. Here is a sample DTMF sequence screen. Note that for DTMF RECEIVE, you will emulate the RECEIVE side only. 12:16:44 DTMF TRACER SEND RECEIVE ABCD=1011/IDLE ABCD=1011/IDLE ABCD=0011/SEIZ-> <-ABCD=1111/ACK DTMF= 03 -> DTMF= 06 -> DTMF= 03 -> Figure 62 DTMF Receive Sequence 108 SunSet E20 Version 1.01 START (F4): Press to begin the highlighted emulation. 6.4.2 Place a Call • For CALL emulation, you will enter a screen where you setup and place a call. Here is a sample screen: 11:46:23 Q.441 MFCR2 CALL CHANNEL: 02 CALL NUMBER 4083638000 CALLING NUMBER CALLING PARTYS CATEGORY: A=10/0 B=11 C=12 D=13 E=14 F=15 CALL Figure 63 Call Emulation/MFCR2 Call Screen a) CHANNEL: Choose the timeslot to place the call on. Select from 1-15, 17-31; use the NEXT (F1) and PREVIUS (F2) keys to select the channel. b) CALL NUMBER: Use the SHIFT and number keys to enter the digits for the number you want to call. The A-F keys, corresponding to the digits, are also available. For some emulation sequences the following items will also be available to configure: c) CALLING NUMBER: This is the number you are dialing from. Use the SHIFT and number keys to enter the digits. d) CALLING PARTY’S CATEGORY: The Calling Party Category deals with the category of the calling party as defined by Q.441 (or user defined by the Signal Meanings) Forward Group II, i.e. the user can be a subscriber without priority II1, subscriber with priority II-2, etc. Use the SHIFT and number keys to enter the digits. Ch.3 Menus 109 e) Press the CALL (F4) key when you are ready to place the call. You will enter the appropriate CALL screen. Here is a sample figure: 11:46:23 PULSE CALL Tx#1 Rx#1 Time/s Send Recv 0000.065 1001 1001 0000.093 0001 0011.862 1101 0011.917 F5 0016.468 B1 0016.530 F5 0016.668 B1 0016.729 F5 0016.868 B1 STOP ABSOLUT Label Idle Seize Seize AC I-5 A-1 I-5 A-1 I-5 A-1 RELATIV HANG-UP Figure 64 Call Emulation/Sample Call Here is the information on this screen: Time/s: Time sent; the time the digits were sent Send: The CAS or Register signalling sent Recv: The CAS or Register signalling received Label: The meaning of the sent or received CAS or Register signalling, as defined by Supervision Setup or Signal Meanings. Here are the F-keys: STOP/RESTART (F1): Stops and restarts the CALL or RECEIVE. ABSOLUT (F2): Displays Time stamp in absolute mode RELATIVE (F3): Displays Time stamp relative to initial event HANG-UP (F4): Releases the call in progress. 6.4.3 Receive a Call • For RECEIVE emulation, you will enter a screen where you setup to receive a call. Here is a sample screen: 110 SunSet E20 Version 1.01 11:46:23 Q.441 MFCR2 RECEIVE CHANNEL :01 No. DIGITS EXPECTED: 7 NEXT PREVIUS RECEIVE Figure 65 Receive Setup Configure the following: a) CHANNEL: Use the NEXT (F1) and PREVIoUS (F2) keys to select from 1-15, 17-31 for the receive channel. b) No. DIGITS EXPECTED: Use the SHIFT and number keys to enter the number of digits you expect the unit to see and capture. The range is from 1-20 digits. c) Press RECEIVE (F4) when you are ready to receive a call. You will enter the RECEIVE screens, where you can see the call trace. Here is a sample screen: 11:46:23 Q.441 MFCR2 RECEIVE Tx#1 Rx#1 Time/s Send Recv Label 0000.064 1001 0001 ???? 0007.597 1001 Idle 0007.747 0001 Seize 0007.750 1101 Seize Ac STOP ABSOLUT RELATIV HANG-UP Figure 66 Receive Screen Sample Ch.3 Menus 111 The information presented and F-keys available are the same as that for the CALL screen. 6.4.4 User Emulation Enter this screen to create, edit, or use a User emulation sequence. Follow this procedure: 1) In the CALL EMULATION screen, press USER (F1). You will enter the USER CALL EMULATOR screen. This screen features a list of any stored user emulations as well as allows you to begin creating a new sequence. 00:41:42 USER CALL EMULATOR 1. 2. 3. 4. 5. 6. 7. 8. 9. 10. DTMF1 DTMF2 DP0000 TESTA EDIT DELETE RENAME START Figure 67 User Call Emulator Screen Here are the F-keys available in this screen: EDIT (F1): Press to edit your sequence. DELETE (F2): Press to delete the highlighted sequence. RENAME (F3): Press to enter the CALL EMULATOR PROFILES screen, where you may rename the highlighted sequence. Use the Label procedure further in this section. START (F4): Press to start the highlighted emulator sequence. 2) Press EDIT (F1). You will enter the Edit Emulator screen. When you enter this screen, the cursor will highlight ‘LABEL’ on the first line. 3) Press EDIT (F1) again to enter the CALL EMULATOR PROFILES screen, where you may give your call sequence a label 112 SunSet E20 Version 1.01 (name). 17:03:38 CALL EMULATOR PROFILES LABEL : M A H O V INSERT B I P W C J Q X DELETE D K R Y E L S Z F M T - G N U / TOGGLE SELECT Figure 68 Call Emulator Profiles Follow this procedure to give your sequence a label: a) Press TOGGLE (F3) to enter the alphabet grid. b) Use the arrow keys to move the flashing cursor to the desired letter. c) Press SELECT (F4). d) Continue steps 2 and 3 until you have completed your label. When you have finished, press TOGGLE (F3) to escape from the alphabet grid. e) If you make a mistake while entering the letters, highlight the letter with your cursor, then press DELETE (F2). • You may also use the SHIFT key and the alphanumeric digits available on the keypad for entering the label. f) When your label is complete, press the ENTER key to return to the Edit Emulator screen. See Figure 69. Ch.3 Menus 113 00:52:08 LABEL: MFC CHANNEL 01 SEND RECEIVE No.TYPE CODE PERD TYPE CODE TOUT 1 CAS 1100 > <CAS 0100 70 NONE CAS DTMF MORE Figure 69 Edit Emulator Use the arrow keys to move the cursor to the desired field. 4) Cursor down to CHANNEL. a) Press NEXT (F1) and PREVIUS (F2) to select the timeslot to use (both Rx and Tx) during emulation, in the 1-15, 17-31 range. 5) SEND Side The Send side refers to the Line or Register signalling which will be sent by the SunSet E20 on whichever line has been selected as Tx/INSERT in TEST CONFIGURATION. Three items are available for sending: a) TYPE Options: NONE (F1), CAS (F2), DTMF (F3), MF-F (more, F1), MFB (more, F2), DP (more, F3) Determines the type of signalling used. • Press the desired F-key: NONE (F1) Channel Associated Signalling (F2) Dual Tone Multi-Frequency (F3) Multi-frequency-forward (more, F1) Multi-frequency-backward (more, F2) 114 SunSet E20 Version 1.01 Dial Pulse (more, F3) b) CODE Options: any keypad alphanumeric digits; four digits maximum for CAS. 20 digits maximum for all other types. These are the actual bits to be transmitted by the E20. • Press the SHIFT key and enter the desired signalling bits c) PERD Options: up to 9999 ms PERD determines the elapsed time before proceeding to the next step in the emulation. 6) RECEIVE Side The receive side refers to the Line or Register signalling which you require to be received by the E20, before progressing to the next step. Three items are available for the receive side; the first two, Type and Code, work in the same manner as in the send side. a) TOUT Options: NONE (F1), up to 9999 ms TOUT refers to Time Out. This determines the length of time which the SunSet will wait for its received digits/CAS before aborting the signalling sequence. 1) To select a time limit, press the SHIFT key and enter the desired number digits up to 9999 (ms). 2) Press either the ENTER or ESCAPE key to exit the editor screen and save the settings. 7) To begin an emulation sequence, highlight the sequence you want to use in the USER CALL EMULATOR Screen. a) Press START (F4). The screen which appears upon entering is shown in Figure 70. Ch.3 Menus 115 16:08:17 Time/s 0000.063 0000.066 0000.069 0004.790 0004.795 0007.796 0010.796 0013.766 0016.796 DTMFA Tx#1 Rx#1 Send Recv 1001 1001 0001 1101 5 5 5 1 2 Label Recv Ok Recv Ok STOP ABSOLUT RELATIV Figure 70 Start User Emulation Here are the F-keys: STOP/RESTART (F1): Stops and restarts the CALL or RECEIVE. ABSOLUT/RELATIV (F2): Presents time stamps in absolute or relative mode (view at Time/s line) Observe the time digits are sent or received, and their label. 116 SunSet E20 Version 1.01 6.5 Supervision Setup In this screen you may define the IDLE, SEIZE, ACKNOWLEDGMENT, CLEAR BACKWARD and CLEAR FORWARD VF Supervision bits manually, or invoke the ITU Q.422 standard. definitions. NAME 09:52:31 SUPERVISION SETUP : Q.422 SUPERVISION DIR ABCD(F) ABCD(B) IDLE F/B 1001 1001 SEIZE F 0001 1001 SEIZE ACK B 0001 1101 ANSWER B 0001 0101 CLEAR BACK B 0001 1101 CLEAR FORW1 F 1001 0101 CLEAR FORW2 F 1001 1101 BLOCK F/B 1001 1101 press ENTER to save Q.422 USER1 USER2 USER3 Figure 71 Supervision Setup Screen 1) Name Options: Q.422 (F1), USER1 (F2), USER2 (F3), USER3 (F4) Select standard ITU Q.422 or User-defined signalling. • Select Q.422, and the unit will use the ITU Q.422 standard signal definitions. You may view them on the screen. a) Press ENTER to invoke the settings. • Select a USER option, and you enter the supervision bits manually. a) Use the SHIFT and number keys to make each entry. b) Cursor between line items. c) When your entries are complete, press ENTER. The settings will be saved as well as invoked. Here are the supervision definitions: DIR: Direction; Forward or Backward ABCD (F): Forward ABCD signalling bits ABCD (B): Backward ABCD signalling bits IDLE F/B: Idle Forward or Backeard bits: Ch.3 Menus 117 In the idle state the outgoing end (forward) sends af=1, bf=0. The incoming end (backward) replies with af=1, af=0, if it is also idle. These four supervision bits will be placed on the CAS bits for the timeslot being transmitted when the IDLE F-key is chosen. All other transmit channels will have the ABCD bits passed through the set when THRU is selected as Tx SOURCE. When SOURCE is selected for Tx SOURCE, the idle channels will have the CAS bits specified in SYSTEM PARAMETERS/ MEAS CONFIGURATION page 2/ IDLE CHNL A/ B/C/D. SEIZE F: Forward seizure signal transmitted at the beginning of a call to initiate circuit operation. SEIZE ACK B: Backward acknowledgment of a seizure signal. ANSWER B: The answered state must be established on the preceding link immediately after it is recognized. CLEAR BACK B: Clear Back is an idle condition from the called subscriber’s line telling the incoming switch to release the call. CLEAR FORW1F/FORW2F: Clear Forward sends a cleared condition from the calling subscriber’s line, or it is the release from the calling switching equipment. Note that there are two conditions. BLOCK: Block an idle circuit from outgoing and incoming calls. 118 SunSet E20 Version 1.01 6.6 Dial Parameters • Set parameters used for your VF dialing. Refer to Figure 72. MEAS 15:59:59 DIAL PARAMETERS DIAL PERIOD : SILENT PERIOD : INTERDIGIT PRD: TONE LEVEL : B-BIT : PULSE (10pps): % BREAK : 150 ms 200 ms 500 -5 dBm NO 60 Figure 72 Dial Parameters 1) DIAL PERIOD Options: 1 ms to 999 ms Specify the dial period in milliseconds used for DTMF and MF dialing. The factory default value is 100 ms. • Press the SHIFT key, and enter the desired value from the keypad. Select any value between 30 ms and 999 ms. 2) SILENT PERIOD Options: 1 ms to 999 ms Specify the silent period in milliseconds used for MFR2, DTMF and MF dialing. The factory default value is 100 ms. • Press the SHIFT key, and enter the desired value from the keypad. 3) INTERDIGIT PRD Options: 1 ms to 999 ms Select the interdigit period for pulse dialing. • Press the SHIFT key, and enter the desired value from the Ch.3 Menus 119 keypad. 4) TONE LEVEL dbm Options: -20 to -5 dbm Select the tone level. • Press the MINUS (F1) key to attain a negative value, then use the SHIFT and numeric keys to enter the digit(s). 5) B-BIT Options: YES (F1), NO (F2) • B-Bit dialing applies to pulse calls. When B-bit dialing is enabled and you place a call, the B supervision bit of the selected timeslot toggles between 0 and 1. • Before you call, change the transmit CAS bits to the seizure condition. When dialing, the set pulse the B-bit according to the timing selected in %BREAK and INTERDIGIT period. When the dialing is complete, the set remains in the seizure condition. 6) PULSE (10pps) Dial pulse is permanently set to 10 pps. This item is for viewing only, and may not be changed. 7) % BREAK Options: 40% (F1), 50% (F2), 60% (F3) Select the desired BREAK percentage • Percent break is the ratio of the break (IDLE) interval to the total pulse cycle interval. It is used in Pulse dialing. 120 SunSet E20 Version 1.01 6.7 Signal Meanings • Use the ITU-T Q.441 (F1) standard signal definitions for Groups I, II, A and B. • Set your own signals under one of the three USER (F2, F3, F4) labels. • Select USER and you will enter a setup screen, where you can make selections via the F-keys, as in Figure 73. • To set a signal, choose the F-key corresponding to your choice, from Digit 1- Digit 9, and Code 10 - Code 15. • The F-key abbreviations correspond to the appropriate label definitions; for example, on the Group II Forward screen, SubWOP corresponds to the Group II Forward labels item Subscriber without Priority. As different countries may have slight differences in their definitions and/or use of digits, this feature allows you to define your own digits. MEAS 11:35:11 MEAS CONFIGURATION Group Group Group Group Q.441 I Forward : II Forward: A Backward: B Backward: USER1 Q.441 Q.441 Q.441 Q.441 USER2 USER3 Figure 73 Signal Meanings Screen The following tables and screens present the screens and their corresponding Label tables. Ch.3 Menus 121 MEAS 11:50:33 GROUP I FORWARD I-1: I-2: I-3: I-4: I-5: I-6: I-7: I-8: I-9: Digit1 Digit2 Digit3 Digit4 Digit5 Digit6 Digit7 Digit8 Digit9 Digit1 Digit2 I-10: I-11: I-12: I-13: I-14: I-15: Digit10 Code11 Code12 Code13 Code14 Code15 Digit3 MORE Figure 74 Group 1 Forward Signals Group I Forward Labels I-1 I-2 I-3 I-4 I-5 I-6 I-7 I-8 Digit 1 Digit 2 Digit 3 Digit 4 Digit 5 Digit 6 Digit 7 Digit 8 I-9 I-10 I-11 I-12 I-13 I-14 I-15 Digit 9 Digit 0 Code 11 Code 12 Code 13 Code 14 Code 15 Figure 75 Group 1 Labels 122 SunSet E20 Version 1.01 MEAS 11:56:06 GROUP II FORWARD II-1: II-2: II-3: II-4: II-5: II-6: II-7: II-8: II-9: SubWOP SubWOP SubWP Mainteq Spare Operatr DataTrx Subwoft DataTrx Subwp SubWP II-10: II-11: II-12: II-13: II-14: II-15: Mainteq Opwftf Spare Spare Spare Spare Spare MORE Figure 76 Group II Forward Screen Group II Forward Labels Signal II-1 II-2 II-3 II-4 II-5 II-6 II-7 II-8 II-9 II-10 II-11 II-12 II-13 II-14 II-15 Label Sub w/o p Sub w pri Maint Eqp Spare Operator Data Tran Sub woft Data Tran Sub w pri Opr wftf Spare Spare Spare Spare Spare Meaning Subscriber without priority Subscriber with priority Maintenance equipment Spare Operator Data Transmission Subscriber (or operator without forward transfer facility) Data Transmission Subscriber with priority Operator with forward transfer facility Spare Spare Spare Spare Spare Figure 77 Group II Forward Labels Ch.3 Menus 123 MEAS 12:01:09 GROUP A BACKWARD A-1: A-2: A-3: A-4: A-5: A-6: A-7: A-8: A-9: SENDn+1 SENDn-1 AdrcmpB CONGnat SENDcpc Adrcmp SENDn-2 SENDn-3 Spare SENDn+1 SENDn-1 A-10: A-11: A-12: A-13: A-14: A-15: Spare SENDcci SENDlan SENDnoc REQinfo CONGint AdrcmpB MORE Figure 78 Group A Backward Signals Screen Group A Backward Labels Signal Label Meaning A-1 A-2 A-3 A-4 A-5 A-6 A-7 A-8 A-9 A-10 A-11 A-12 A-13 A-14 A-15 Send (n+1) Send (n-1) Adr cmp B Cong Nat Send CPG Adr cmp S Send (n-2) Send (n-3) Spare Spare Send CCI Send LoDD Send NOC Req. info Cong Int Figure 79 124 Send next digit (n+1) Send last but one digit (n-1) Address-complete, changeover to reception of Group B signals Congestion in the national network Send calling partys category Address-complete, charge, set-up speech conditions Send last but two digits (n-2) Send last but three digits (n-3) Spare Spare Send country code indicator Send language or discriminating digit Send nature of circuit Request for information on use of an echo suppressor Congestion in an international exchange or at its output Group A Backward Signals Labels SunSet E20 Version 1.01 MEAS 12:06:07 GROUP B BACKWARD B-1: B-2: B-3: B-4: B-5: B-6: B-7: B-8: B-9: Spare Spare SendSIT SubLB CONgest Unaloc# SubLFC SubLNFC SubLOO Spare SendSIT B-10: B-11: B-12: B-13: B-14: B-15: SubLB Spare Spare Spare Spare Spare Spare MORE Figure 80 Group B Backwards Signals Screen Group B Backward Labels Signal Label Meaning B-1 B-2 B-3 B-4 B-5 B-6 B-7 B-8 B-9 B-10 B-11 B-12 B-13 B-14 B-15 Spare Send SIT Sub LB Congestion Unalloc# Sub LFC Sub LFNC Sub LOOO Spare Spare Spare Spare Spare Spare Spare Spare Send special information tone Subscriber line busy Congestion Unallocated number Subscriber line free, charge Subscriber line free, no charge Subscriber line out of order Spare Spare Spare Spare Spare Spare Spare Figure 81 Group B Backwards Labels Ch.3 Menus 125 7.0 Other Features Refer to Figure 82 for the OTHER FEATURES Menu. 08:22:56 MEAS OTHER FEATURES ERROR INJECTION ALARM GENERATION VIEW RESULTS RECORD SEND FRAME WORDS Figure 82 Other Features Menu 7.1 Error Injection Figure 83 displays the ERROR INJECTION screen. 11:41:45 MEAS ERROR INJECTION TYPE MODE COUNT CODE BIT : BIT+COD : BURST : 1 BIT+COD MORE Figure 83 Error Injection Screen 126 SunSet E20 Version 1.01 • To start error injection, press the ERR INJ key. The test set will insert errors as you specify below. • If the error injection is set to RATE mode, a reverse video ERRINJ indicator will be displayed on the screen. 1) TYPE Options: CODE (F1), BIT (F2), BIT + CODE (F3), CRC-4 (more, (F2), FRAME (more, F2), E-BIT (more, F3) This item specifies the type of errors to be inserted. 2) MODE Options: BURST (F1), RATE (F2) This item specifies the mode of error injection. • RATE mode applies only to CODE and BIT errors. Errors are injected at a constant rate. • Other types of errors may be inserted one at a time under BURST mode. Errors injects a set number of errors. 3) COUNT Options: 1 to 9999 For BURST MODE, choose the COUNT of errors to be inserted. • Press the SHIFT key, then type in any number between 1 and 9999. The errors will be inserted in approximately 1 second or less, and will cause from 1 to 3 errored seconds. • Applies only to BIT and CODE errors. All other errors will be injected singly. 4) RATE Options: 1e-9 to 2e-3 For RATE MODE, choose the error RATE number and exponent. • The errors will be inserted at a continuous rate as specified in this entry, and a ERR INJ display will appear at the top of the screen. Programming a Burst of 10 Errors Here is a sample procedure for programming a burst of 10 CODE errors: Ch.3 Menus 127 1) From the MAIN MENU, use the cursor keys to move the cursor to OTHER FEATURES, and press ENTER. 2) In the OTHER FEATURES menu, cursor to ERROR INJECTION and press ENTER. 3) Choose CODE (F1) to select the error type. 4) The cursor automatically moves down to MODE selection. Press BURST (F1) key. 5) The cursor automatically moves down to COUNT. Press the SHIFT-lock key once to display the SHIFT indicator. 6) Press the 1 key followed by 0 key. The COUNT should show 10. a) Release the SHIFT key. 7) Press ENTER; you have just programmed the set to inject 10 CODE errors each time you press the ERR INJ key. Programming a 10-6 Bit Error Rate Use this procedure to program a 10-6 error rate: 1) From the MAIN MENU, cursor to OTHER FEATURES, and press ENTER. 2) In the OTHER FEATURES menu, move the cursor to ERROR INJECTION, and press ENTER. 3) Choose BIT (F2) to select the error type. 4) The cursor automatically moves down to MODE selection. Choose RATE (F2). 5) The cursor automatically moves down to RATE. Press the SHIFT-lock key once. Verify that the SHIFT indicator is shown on the upper left corner of the screen. Your key pad now allows you to enter the numeric number. 6) Press the '1' key once. The multiplier position is showing '1'. The cursor moves to the exponent position. 128 SunSet E20 Version 1.01 7) Press the '6' key once. A '6' is entered. a) Press SHIFT key to remove the SHIFT-lock indicator. 8) Press ENTER. You have just programmed the set to inject Bit errors at 1x10⁻⁶ rate each time you press the ERR INJ key. • To turn off the error rate injection, press the ERR INJ key once, and verify that the ERR INJ indicator on the screen has turned off. 7.2 Alarm Generation Figure 84 depicts the ALARM GENERATION screen. 17:31:55 ALARM GENERATION FAS DISTANT MFAS DISTANT AIS T/S-16 AIS ENABLE : : : : ENABLE ENABLE DISABLE DISABLE DISABLE Figure 84 ALARM GENERATION • View a listing of the alarms you may transmit. • These alarms allow you to test the response of various network equipment to alarms and thus, ensure that the network is performing as expected. To Invoke an Alarm: 1) Move the cursor down to the desired alarm and choose ENABLE (F1). • Some alarms conflict with the transmission of other alarms or Ch.3 Menus 129 selected framing. • The test set will transmit the enabled alarm after you exit the ALARM GENERATION menu. • You can continue to transmit alarms while making measurements, viewing data, performing talk/listen, etc. • If you do not intend to transmit alarms when you exit this screen, be sure to DISABLE (F2) all the alarms first. Notes on the Alarms: FAS DISTANT • The test set transmits a 1 in every third bit of each timeslot 0 frame that does not contain frame alignment signal. • FAS DISTANT alarm may be transmitted only with PCM 30 or PCM 31 framing. MFAS DISTANT • The test set transmits a 1 in the sixth bit of each time slot 16 in the zero frame. • The MFAS distant alarm may be transmitted only with PCM framing. AIS • The test set transmits all ones in an unframed signal. • This alarm overrides the framing choice in the TEST CONFIGURATION menu. For instance, even though you have selected MFAS framing, generating an AIS alarm will cause the set to transmit an unframed signal (all ones). T/S-16 AIS • The test set transmits all ones in timeslot 16 of all frames frames. • T/S-16 AIS overwrites the MFAS, MultiFrame Alignment Signal. • A test set or network equipment that receives this alarm will lose PCM-30 framing. • This alarm should be transmitted only when the test set is configured for FAS framing. • Voice frequency signalling bits can’t be transmitted while sending this alarm, because the T/S-16 AIS signal overwrites all the channel associated signalling (CAS) information. 130 SunSet E20 Version 1.01 7.3 View Results Records A total of ten Measurement Results with Histograms may be stored in this menu, in addition to the CURrent Results. Figure 85 displays the VIEW RESULTS RECORDS screen. Records are stored by setting the PRINT RESULT to LAST and PRINT EVENT to ENABLE in the SYSTEM PARAMETERS/MEAS CONFIGURATION screen. 03:31:27 MEAS VIEW TEST RECORD REC NAME TYPE STATUS 01 NONE START STOP RECORD UNLOCKED 2000-11-23 11:48:31 2000-11-23 12:10:14 02 NONE START STOP RECORD LOCKED 2000-11-23 17:50:45 2000-11-23 17:55:44 PAGE-UP PAGE-DN EDIT more Figure 85 View Test Record • The Measurement Results numbers are shown in accordance with the events and results that are in memory. Events are errors and alarms. 1) Scroll to select the Measurement Result you want to view. 2) Press VIEW (F1). In addition to PAGE-UP (F2) and PAGE-DN (F3), the following additional F-keys are available: EDIT (F1): Allows you to label the highlighted record. You will enter the following screen: Ch.3 Menus 131 27:03:10 MEAS VIEW TEST RECORD RECORD: 3 LABEL : TEST-LPBCK A H O V INSERT B I P W C J Q X D K R Y DELETE E L S Z F M T - G N U / TOGGLE SELECT Figure 86 Memory Record Label • Press TOGGLE (F3). The first letter in the alphabet grid will begin to blink. • Cursor to each letter you want to select, and press ENTER, until you have the label you want. • Use the INSERT (F1) and DELETE (F2) keys if you need to correct an error. • Press ENTER to return to the VIEW RESULTS RECORDS screen. VIEW (more, F1): Press to view the highlighted record. You will enter the Results screen. Press ESC or ENTER to return to the VIEW TEST RECORD screen. LOCK (more,F2)/ UNLOCK (more, F3): Press to lock the record, so it can not be deleted. Press UNLOCK to open the record. DELETE (more, F1): Press to delete the highlighted record. If 10 records are already stored, you will need to Delete a record before storing a new one. CLR-ALL (more, F2): Press to clear all of the records, except the CURrent record. PRINT (more, F3): Press to send the record to the serial port for printing. 132 SunSet E20 Version 1.01 7.4 Send Frame Words • Manually specify the E and Sa bit states, and the MFAS ABCD. • Transmit the desired FAS and MFAS framing information. • Refer to Figure 87, Send Frame Words. 19:27:02 MEAS SEND FRAME WORDS CRC: YES E-BIT: 11 FAS WORD C0011011 MFAS WORD 00001011 MFAS ABCD 1101 SET=0 SET=1 NFAS WORD S S S i 1 A a a C 1 0 1 1 C 1 0 1 1 C 1 0 1 1 C 1 0 1 1 C 1 0 1 1 C 1 0 1 1 1 1 0 1 1 1 1 0 1 1 DEFAULT S a 1 1 1 1 1 1 1 1 S a 1 1 1 1 1 1 1 1 S a 1 1 1 1 1 1 1 1 AUTO Figure 87 Send Frame Words • You may not change certain items in this screen. • The cursor will land on and highlight only those items which can be changed. • Use the left and right arrow keys to move the cursor to the desired location. You cannot enter the left-hand side of the screen by continuously pressing the right arrow key. • DEFAULT will set the bits to the factory default setttings. • AUTO is only displayed for E-bit selections. • The bits will be sent as soon as the function key is pressed. The following information is shown on this screen: 1) CRC Options: for viewing only View the CRC option chosen in TEST CONFIGURATION. • Change the CRC option in the TEST CONFIGURATION screen, from the Main Menu Ch.3 Menus 133 2) E-BIT Options: SET=0 (F1), SET=1 (F2), DEFAULT (F3), AUTO (F4) • The E-bit item may be changed only if CRC is activated in TEST CONFIGURATION, and consequently, YES is displayed in the CRC slot in this screen. • If E-bit is set to AUTO, the E-bits will be transmitted on the TX/ INSERT side any time a CRC error is received on the Tx/ INSERT side Rx. • Refer to Figure 88, Automatic E-BIT Transmission. L1Rx 1 CRC Error 1 E-bit Error L1Tx TxINST =L1-Tx Rx/DROP=L1-Rx or L2-Rx E-bit =AA Figure 88 Automatic E-Bit Transmission To Manually Transmit the E-bits: 1) Use the SET=0 (F1) and SET=1 (F2) keys to enter the two bits. • 11 is used for no E-bit errors. • 10 or 01 for 500 E-bit errors per second. • 00 for 1000 E-bit errors per second. • The default setting is for 11. 3) FAS WORD FAS WORD displays the FAS (Frame Alignment Signal0011011) Words. This line is for viewing only. 134 SunSet E20 Version 1.01 4) MFAS WORD Set bits 5-8 to any combination. • Bits 5-8 have the pattern xyxx, where x represents spare bits; they should be set to 1 when not used. • Y is used for the MFAS remote alarm; it should be set to 1 if MFAS synchronization is lost. 5) MFAS ABCD These are the default ABCD bits used for channels 1 through 30 in PCM-30 Framing. • They are transmitted in timeslot 16 of frames 2 through 16 of the MFAS. • Avoid using 0000 which will cause false framing for PCM-30 6) NFAS WORDS These are the Non Frame Alignment Signal words. See the Tecnology chapter for the definitions. Press ENTER at any time to send your selections. 8.0 System Parameters 19:37:03 SUNSET-E20 MAIN MENU TEST CONFIGURATION TEST PATTERN MEASUREMENT RESULTS OTHER MEASUREMENTS VF CHANNEL ACCESS OTHER FEATURES SYSTEM PARAMETERS LANGUAGE SELECTION Figure 89 Main Menu/System Parameters Ch.3 Menus 135 Figure 90 displays the System Parameters menu. MEAS 05:28:22 SYSTEM PARAMETERS VERSION/ OPTION SYSTEM PROFILES MEAS CONFIGURATION GENERAL CONFIG ERASE NV RAM SELF TEST CLR PRINT BUFFER FACTORY DEFAULTS MEMORY ALLOCATION Figure 90 SYSTEM PARAMETERS Menu 8.1 Version/Option This screen displays the Software version, type, serial number, and options installed in your SunSet E20. PAGE-UP (F1) and PAGEDN (F2) as necessary. Figure 91 depicts a sample Version/Option screen. 22:09:42 Version 1.00 S/N: 000962 OPTION : A : DATACOM module B : Frame relay C : GSM analysis D : Call analysis E : View/print tracer F : Call emulator PAGE-UP PAGE-DN PAGE-UP PAGE-DN Figure 91 Version/ Option Screen 136 SunSet E20 Version 1.01 8.2 System Profiles You may save up to 10 System Profiles in the test set. These profiles can save you time in configuring the test set for your applications. The test set can store the current configuration as a system profile. You provide a name for the profile so that it may be conveniently recalled at a later time. Items that are stored in the profile are: TEST CONFIGURATION, TEST PATTERN, ERROR INJECTION, ALARM GENERATION, GENERAL CONFIG (except for date and time), SUPERVISION SETUP, SIGNAL MEANINGS, DIAL PARAMETERS, and MEAS CONFIGURATION. See Figure 92. NOTE: The SYSTEM PROFILES menu does not operate like the user pattern menus. You may not edit an existing system profile in the SYSTEM PROFILES menu. If you wish to modify an existing profile, use the modification procedure described in this section. 03:31:27 MEAS SYSTEM PROFILES 0. CURRENT-NONE NONE 1. TEST1 2. 3. 4. 5. 6. 7. 8. 9. 10. DELETE CLR-ALL LOAD PRINT Figure 92 System Profiles List Enter a New System Profile 1) From the MAIN MENU, select SYSTEM PARAMETERS, SYSTEM PROFILES. 2) Cursor down to a blank line. 3) Press the STORE (F1) key. You will enter the LABEL screen. Ch.3 Menus 137 4) Type in the LABEL you wish to give the profile. Do this by pressing TOGGLE (F3) to toggle to the alphabet grid with the flashing A. a) Cursor to the desired letter and press SELECT (F4). b) Repeat this as necessary until the desired label is spelled. c) PressTOGGLE (F3) to leave the alphabet grid. MEAS 12:00:00 SYSTEM PROFILES LABEL : SU A H O V INSERT B I P W C J Q X DELETE D K R Y E L S Z F M T - G N U / TOGGLE SELECT Figure 93 System Profiles Label 5) Press ENTER to store the SYSTEM PROFILE. Invoke a Stored System Profile 1) Enter the SYSTEM PROFILES menu. 2) Cursor down to the desired system profile. 3) Press the LOAD (F3) key. Activate the Default Profile This is a way to return all the E20’s settings to the factory defaults. 1) Enter the SYSTEM PROFILES menu. 2) Select the DEFAULT (F3) key, then press ENTER. The test set's configuration will be set to the factory default. 138 SunSet E20 Version 1.01 Delete a Profile 1) Enter the SYSTEM PROFILES menu. 2) Cursor down to the desired profile. 3) Press the DELETE (F1) key. • Press the CLEAR-ALL (F2) key to delete all of the stored system profiles. Modify an Existing Profile NOTE: The SYSTEM PROFILES menu does not operate like the user pattern menus. You may not edit an existing system profile in the SYSTEM PROFILES menu. If you wish to modify an existing profile, you must change the settings in the original menus and then restore the profile. Refer to the following modification procedure: 1) Enter the SYSTEM PROFILES menu. 2) Cursor down to the desired system profile 3) Press the LOAD (F3) key to invoke this profile. This will also exit you from the screen. 4) Move to the other menus within the test set where you will change the setup items. 5) Enter the SYSTEM PROFILES menu. 6) Press the STORE (F2) key. 7) Give the profile a new name. If you want, you can give this modified profile the same name as the original, but pay close attention to which file number it is stored under so that you will be able to tell which profile is old, which is new. 8) Press ENTER to return to the SYSTEM PROFILES menu. 9) Cursor down to the old version of the profile which you no longer need. 10) Press the DELETE (F1) key. Ch.3 Menus 139 11) Cursor to the new profile. 12) Press the LOAD (F3) key. You are finished. 8.3 MEAS Configuration There are two Measurement Configuration screens. As shown in Figure 94, the user may adjust several Measurement Configuration items in this screen. MEAS 21:59:33 MEAS CONFIGURATION MEAS DURATION: START : PROG DATE YMD: PROG TIME HMS: CODE CONFIGUR: MEASURE MODE : BLOCK SIZE : PRINT RESULT : PRINT EVENT : TIMED Figure 94 CONTINU MANUAL --:--:---:--:-HDB3 BER 1000 LAST DISABLE CONTINU Measurement Configuration Screen Configure the following items. Press the respective F-key to choose the desired option. 1) MEAS DURATION Options: TIMED (F1), CONTINU (F2) Set the MEASurement Duration. • A timed measurement will stop when the specified amount of time has elapsed. This option is useful for making measurements of a specified length; 15 minute and 1 hour tests are commonly used in the industry. • When a timed test is in progress, the Remaining Time (RT) counter shows how much time is left before the end of the test. • If you choose TIMED, press the SHIFT-lock key to display the 140 SunSet E20 Version 1.01 SHIFT indicator. Then enter a number between 1 min to 999 hr: 59 min. • A CONTINUous test will run indefinitely until you press the RESTART key, or until you change some other setting on the test set that restarts the test. 2) START Options: PROGRAM (F1), MANUAL (F2) Select the method to begin your test measurements. • PROGRAM (F1) allows you to program a specified time in the future to begin taking measurements. Once you have selected PROGRAM, you must enter the desired time in the next two items. • In MANUAL (F2), you must manually begin the test measurements at the desired time. 3) PROG DATE YMD Applies if you have selected PROGRAM for START above. • Enter the Year, Month, and Day to begin measurements, by pressing the SHIFT and number keys. 4) PROG TIME HMS Applies if you have selected PROGRAM for START • Specify the Hour, Minute, and Seconds to begin measurements, using the SHIFT and numeric keys. 5) CODE CONFIGUR Options: HDB3 (F1), AMI (F2) Select the line coding. HDB3 line coding is used almost everywhere throughout the world in 2.048 transmission. A detailed explanation of the related technology is located in the Technology Overview chapter. 6) MEASURE MODE Options: BER (F1), LIVE (F2) • Select BER to search for the test pattern, and make bit error measurements with all other measurements. Ch.3 Menus 141 • Choose LIVE to ignore the test pattern and make all measurements, except for bit error measurement. • Most people leave the test set in BER mode, even when they are monitoring live, in-service circuits. In this case, they expect the PAT SYNC light to remain RED, because there is no pattern synch. The bit error measurements will also show 100% UAS. • If the LIVE mode is selected, the PAT SYNC LED is turned OFF and the bit error measurement screen is not displayed in MEASUREMENT RESULTS. 7) BLOCK SIZE Options: 1000 (F1), 2e15-1 (F2), 2e11-1 (F3), 2e9-1 (more, F1), 2e6-1 (more, F2) Determines the block size used in the Block Error Ratio measurement. One block is typically 1000 bits long • BLER (Block Error Ratio) is the fraction of blocks in error (the number of blocks received with one or more bit errors divided by the total number of blocks transmitted). 8) PRINT RESULT Options: TIMED (F1), LAST (F2) • Select TIMED to have the test results printed every 1 to 99 minutes. Press the SHIFT key, then enter the number of minutes (between 1 and 99 minutes). • In LAST mode, the test results are printed only at the end of a timed test, or a continuous test that has ended due to a RESTART. 9) PRINT EVENT Options: ENABLE (F1), DISABLE (F2) • Choose ENABLE if you would like the printer to print out a time and date-stamped error message every second that one or more errors occur. • Choose DISABLE if you do not want the printer to print out a result each time. Cursor down to enter the second Measurement Configuration screen. 142 SunSet E20 Version 1.01 This configuration screen relates to ITU standards for 2.048 Mbps transmission, G.821, G.826, and M.2100. Refer to Figure 95. MEAS --- MEAS G.821 : G.826 : M.2100 : 00:58:29 CONFIGURATION 2 --ON ON ON -- M.2100/550 PARAMETERS -MEAS PERIOD : 015 min HRP MODEL % : 040.0 ----- G.821 PARAMETERS ----G.821 ALLOC : ITU SES : 1.0E-3 DGRM : 1.0E-6 ITU USER Figure 95 MEAS Configuration, Screen 2 The first three items relate to ITU standards on measurements and performance characteristics for 2.048 Mbps. 1) G.821 Options: ON (F1), OFF (F2) • When the G.821 Measurement is turned ON, the Line 1 Bit Error screen is shown in the Measurement Results. • This Bit Error screen presents the measurement parameters specified in ITU G.821. 2) G.826 Options: ON (F1), OFF (F2) • When the G.826 Measurement is turned on, the G.826 screen is displayed in MEASUREMENT RESULTS. • This G.826 screen presents the measurement parameters defined in G.826. 3) M.2100 Options: ON (F1), OFF (F2) Ch.3 Menus 143 • When M.2100 is turned on, the M.2100 screen is shown in MEASUREMENT RESULTS. • This section refers to ITU specifications used when a 2.048 Mbps circuit passes through international boundaries. It allocates a certain allowable error rate to each nation that carries the circuit. The technician merely needs to enter the appropriate percentage allowed for the line under test. • The SunSet makes the M.2100/550 calculations and reports whether the line passed or failed in the MEASUREMENT RESULTS, M.2100/550 screen. The next two settings refer to the M.2100/550 measurements: 4) MEAS PERIOD Options: 01-99 min. This setting controls how often a new result is displayed in MEASUREMENT RESULTS, LINE 1(2) – M.2100/550. • Use the SHIFT key and the numeric keys to set the period. 5) HRP MODEL % Options: .1 to 99.9 % • Refer to M.2100, or to the older M.550, for information on how to select the Hypothetical Reference Performance model percent (HRP %). 6) IDLE CHNL CODE Options: Any 8-bit pattern Program the idle code to be any 8-bit pattern. • This code is used during VF channel access operations, when the TxSource is set to the TESTPAT mode. • The idle code is also used in fractional E1 testing to fill up the unused channels. 7) IDLE CHNL A/B/C/D Options: Any 4-bit pattern Program the idle channel signalling bits of channels 1 through 30 in the MFAS framing mode. • These signalling bits are found in time slot 16 of frames 1 through 15. 144 SunSet E20 Version 1.01 • The factory default, 1101, is set in accordance with ITU G.704. 8.4 General Configuration • Set the correct time and date. • Set the backlight duration. • Set several printing options. Figure 96 depicts a sample screen. MEAS 20:21:11 GENERAL CONFIGURATION DATE (Y-M-D) : 1999-01-03 TIME (H:M:S) : 20:13:24 BACK LIGHT : PRINTER BAUD RATE : PARITY : STOP BIT : BITS/CHAR : CR/LF INSRT: TIMED CONTINU 9600 NONE 1-BIT 8-BIT CR+LF CONTINU Figure 96 General Configuration Screen The following items are available for configuration: 1) DATE (Y- M - D) • Set the current date by pressing the SHIFT key and the appropriate number keys for the year, month and day. The test set inserts the hyphens for you. Numbers that are out of range will be rejected. • Press the SHIFT-lock key again to remove the SHIFT indicator 2) TIME (H :M :S) • Set the time by pressing the SHIFT key and appropriate number keys, for the hour, minute, and second. Ch.3 Menus 145 The test set inserts the colons for you. Numbers that are out of range will be rejected. • Press the SHIFT-lock key again to remove the SHIFT indicator 3) BACK LIGHT Options: TIMED (F1), CONTINU (F2) This timer controls how long the backlight will stay lit when you press the LIGHT key. • Choosing CONTINU (F2) means that the backlight will stay on continuously until you press the LIGHT key again. CONTINU is the default setting. • Choosing TIMED (F1), and the backlight will automatically turn itself off after the indicated number of minutes. a) Press the SHIFT-lock key to display the SHIFT indicator. b) Type in any number of minutes between 1 and 99. c) Press the SHIFT-lock key again to remove the SHIFT indicator. Printer items: The factory default settings work with the printer supplied by the factory. However, you can alter these settings if you want to use the SunSet E20 with another printer. Figure 97 shows the pinto-pin assignments of the DIN to EIA 232-C cable supplied by Sunrise Telecom Incorporated. You are free to use this information to attempt to set the SunSet E20 up with another printer. However, Sunrise Telecom Incorporated does not warrant the operation of the test set with any printer other than the one supplied by Sunrise Telecom Incorporated. 146 SunSet E20 Version 1.01 6 7 8 3 4 5 1 2 2 1 3 5 4 DIN 8-PIN 6 7 8 9 DB9 ------ PIN-TO-PIN CONNECTIONS ----DIN 8-PIN PIN# DESCRIPTION 2 DSR 3 TX 4 RX 5 GND 6 CTS 8 DTR EIA-232-C D-SUB PIN# DESCRIPTION 6 DSR 3 TXD 2 RXD 5 GND 8 CTS 4 DTR Figure 97 Printer Cable SS115B Pin Assignments 4) BAUD RATE Options: 1200 (F1), 2400 (F2), 9600 (F3) The Baud rate determines the number of shortest signalling elements per second on a transmission medium. • The default setting is 9600; this setting is recommended for remote control operations • 1200 and 2400 will not support remote control features. 5) PARITY Options: NONE (F1), EVEN (F2), ODD (F3) An extra bit, known as a parity bit, is added to the data as an accuracy check. • In Odd Parity (F3), the total number of ones (including the added parity bit) is odd. • In even parity, the total number of ones (including the added parity bit) is even. • The receiving element checks the parity bit, and indicates an Ch.3 Menus 147 error if the total number of ones does not add up to the correct total. • None (F1), the factory default setting, signifies no parity checking. 6) STOP BIT Options: 1-BIT (F1), 2-BIT (F2) In asynchronous transmission, the stop bit is the last transmitted character which permits the receiver to come into an idle condition before accepting another character. • Select 1-BIT (F1) or 2-BIT (F2). • The factory default setting is 1-BIT. 7) BITS/CHAR Options: 7-BIT (F1), 8-BIT (F2) BITS/CHAR determines the number of bits per character. • Press (F1) to select 7 bits per character. • Press (F2) to select 8 bits per character. 8) CR/LF INSRT Options: CR (F1), CR+LF (F2) • Press CR (F1) to select carriage return. • Press CR+LF (F2) for carriage return and line feed. • In carriage return and line feed, an extra line space is inserted after every line. 8.5 Erase NV Ram • ERASE NV (Non Volatile) RAM erases all the user-storable information entered into the test set. • This operation should always be performed when inserting a new Software cartridge. • This operation can also be tried as a last resort if the set is not performing properly. If this is the case, you should initiate Erase NV RAM, only after attempting to correct the problem by: 1) Making sure that the test set is properly configured for the application being attempted. 148 SunSet E20 Version 1.01 2) Turning the power switch off and on. 3) Performing a self test and turning the power off and on again WARNING Performing the NV RAM ERASE operation will erase all the user-storable information the user has entered into the test set. All user transmit patterns, telephone numbers, and system profiles will be erased. Use the following procedure to perform ERASE NV RAM : 1) From the main menu, enter the SYSTEM PARAMETERS/ERASE NV RAM menu item. 2) Press ENTER again after the warning message is displayed. A WORKING message will be displayed. 3) When the test set is finished with the operation, turn the power off for 5 seconds, then turn the power back on. 4) Reconfigure the set for the operations you need to perform. TEST CONFIGURATION, TEST PATTERNS, and all other areas of the set will be restored to the factory defaults. 8.6 Self Test • Use the SELF TEST to perform a hardware test. • If an error message is shown after the SELF TEST is completed, please contact Sunrise Telecom Incorporated Customer Service at 1 408 363 8000 (telephone) or 1 408 363 8313 (fax) for assistance. • Press ENTER to run the SELF TEST. • Press a key, as prompted, when the test completes. 8.7 CLR Print Buffer •Prevent unwanted printing by clearing the print buffer before using the printer. • To clear the print buffer, enter CLR PRINT BUFFER. You will see the screen flash quickly. The print buffer is now erased. Ch.3 Menus 149 8.8 Factory Defaults • Resets all settings to the factory default settings Upon pressing ENTER at the FACTORY DEFAULTS line, the unit resets itself to the facotry default settings. There is no Factory Defaults screen, and this process does not include a second step. Therefore, do not press the ENTER key on the Factory Default selection, unless you want all the settings to return to the default settings. 9.0 Language Selection • Select the test set’s working language. MEAS 20:00:39 SELECTION LANGUAGE SELECTION LANG.: FRANC. ANGLAIS FRANC. ITALIEN ESPAGNL Figure 98 Language Selection Screen Press the corresponding F-key to select a language: • • • • English (F1) French (F2) Italian (F3) Spanish (F4) All menu choices and settings will be shown in the language selected. 150 SunSet E20 Version 1.01 Chapter 4 Applications 1.0 Connecting the Cords ................................ 153 2.0 2.1 2.2 2.3 2.4 2.5 Basic Applications ..................................... 156 Accept a New Circuit .................................. 156 Monitor an In-Service Circuit .................... 157 Checking for Frequency Synchronization 160 Measure Signal Level ................................. 161 Run a Timed Test ........................................ 164 2.5.1 Manual Start ..............................................................164 2.5.2 Auto Start .................................................................. 164 2.6 Observe Network Codes or Channel Data 165 2.7 Monitor a Voice Frequency Channel ......... 167 2.8 Simple Talk/Listen ...................................... 168 2.9 Send a Tone................................................. 170 2.10 Nx64 kbps Testing .................................... 171 2.11 Using the Battery and AC Charger ......... 173 2.12 Using the Serial Port ................................ 175 2.12.1 Serial Port Settings ................................................. 175 2.12.2 Configuring for Printing .........................................175 2.13 Using the Remote Control ....................... 180 2.13.1 Using Remote Control from Windows 95 ..............185 3.0 Advanced Applications .............................. 186 3.1 In Service Dual Drop and Insert THRU Testing ......................................................... 186 3.2 Testing a Terminal Multiplex ...................... 189 3.3 Emulating a Terminal Multiplex ................. 191 3.4 Emulating an Add/Drop Multiplexer .......... 194 SunSet E20 Version 1.01 SunSet E20 Version 1.01 1.0 Connecting the Cords WARNING! Plugging into a live E1 circuit may cause a loss of service for multiple customers. Be sure you are properly trained before proceeding. WARNING! To perform a BRIDGE access, do not plug into the circuit until you have pre-selected the L1/2-Rx Port = BRIDGE level. The SunSet will not place isolation resistors on the line unless this Rx Port is specified. Figures 99 through 101 show various ways in which to connect the SunSet to the circuit. Right Side Connector Panel 75Ω 120Ω L1-TX 75Ω 120Ω L1-RX SUNRISE SUNRISE Rx EQUIPMENT SUNRISE Tx SUNRISE MON Figure 99 Plugging in- TERM Mode Ch.4 Applications 153 PCM 31 PCM 30 ERROR CRC DET SIGNAL PCM 31 BIT ERROR CODE ERR RxDCE RxDTE ERROR PCM 30 RTS AIS USER1 CTS CRC DET USER2 ALARM AIS POWER ALARM BATTERY PAT SYNC SunSet E20 12:34:41 VIEW RECEIVED DATA : 01 BINARY HEX ASCII 11011111 DF ( 11000100 C4 (#) 01000010 42 B (B) 00011110 1E (x) 01100101 65 e ( 00101110 2E . (t) 11010100 D4 (+) 11000101 C5 ( PAGE T/S 000 001 002 003 004 005 006 007 PAGE-UP PAGE-DN F1 F2 PAUSE SUNRISE SUNRISE SIGNAL CODE ERR PRINT F3 F4 SUNRISE TELECOM I N C O R P O R A T E D A B C D F1 F2 F3 F4 E* 1 2 3 PRINT Z GRAPH ERR INJ F# 4 5 6 MEAS LED AUTO 7 8 9 0 SHIFT ESC ENTER POWER SUNRISE SUNRISE MON MON Tx Tx Rx Rx EQUIPMENT EQUIPMENT Figure 100 Plugging in – Monitor Mode 154 SunSet E20 Version 1.01 6 SIGNAL PCM 31 AIS POWER CODE ERR PCM 30 ALARM BATTERY ERROR CRC DET PAT SYNC SIGNAL PCM 31 BIT ERROR CODE ERR RxDCE RxDTE ERROR PCM 30 RTS AIS USER1 CTS CRC DET USER2 ALARM SUNRIS E RIS SUN E Line 2 RX 2 SunSet E20 Line 1 RX PAGE-UP PAGE-DN F1 PAUSE F2 PRINT F3 F4 RIS SUN 5 Line 2 TX E 12:34:41 VIEW RECEIVED DATA : 01 BINARY HEX ASCII 11011111 DF ( 11000100 C4 (#) 01000010 42 B (B) 00011110 1E (x) 01100101 65 e ( 00101110 2E . (t) 11010100 D4 (+) 11000101 C5 ( PAGE T/S 000 001 002 003 004 005 006 007 1 SUNRISE TELECOM I N C O R P O R A T E D Line 1 TX Note: Cable SS210 A B C D F1 F2 F3 F4 E* 1 2 3 PRINT Z GRAPH ERR INJ F# 4 5 6 MEAS LED AUTO 7 8 9 0 SHIFT ENTER ESC N S E SU IS UN R 3 7 SE RI POWER Tx Rx EQUIPMENT IN CROSS CONNECT JACKS R SUN 8 ISE RI N SU 4 SE Tx RX EQUIPMENT Figure 101 Plugging in – THRU Mode Notes: 1) L1-Rx Port = TERM 2) Plug in the cords in the order shown. Ch.4 Applications 155 2.0 Basic Applications 2.1 Accept a New Circuit Here is a procedure for accepting a new circuit. The setup is illustrated in Figure 102. 1) Verify that the span is not in service. This acceptance test will disrupt service. Ensure that there is a loopback device at the far end of the span. 2) From the MAIN MENU, enter the TEST CONFIGURATION menu. Use the following configuration: - TEST MODE - Tx SOURCE - FRAMING - CRC-4 - TEST RATE - L1-Rx Port - XMT CLOCK : : : : : : : E1SINGL TESTPAT as specified by the circuit design as specified by the circuit design 2.048M TERM INTERN a) Press the ENTER key when all of the settings are correct. 3) Cursor to the TEST PATTERN menu item and press ENTER. a) Highlight the pattern you want to send. b) Press ENTER. 4) Connect the SunSet to the circuit in order as shown in Figure 102. a) Press the LED key to acknowledge any blinking history lights and turn them off. b) Verify that the PAT SYNC LED is lit green. 5) Enter the MEASUREMENT RESULTS menu item. a) Press the START (F3) key. b) Verify that the circuit performs to your company’s requirements for the service delivered. If necessary, refer to the Measurement Definitions section for an explanation of the MEASUREMENT RESULTS parameters. 156 SunSet E20 Version 1.01 CUSTOMER PREMISES EXCHANGE Right Side Connector Panel MULTIPORT 75W L1-TX 120W 75W L1-RX 120W MON OUT IN EQUIPMENT LOOPBACK DEVICE Figure 102 Accept a New Span a) Use the PAGE-UP (F1) and PAGE-DN (F2) to access each of the individual measurement screens. 6) When your MEASUREMENT RESULTS have been completed, press the ESCAPE key to return to the MAIN MENU. 7) Remove the loop at the far end of the circuit. 2.2 Monitor an In-Service Circuit Here is a procedure for monitoring a span that is in-service. The setup is illustrated in Figures 103 and 104. 1) This test may be performed while the span is carrying live customer traffic. 2) From the MAIN MENU, move your cursor to the TEST CONFIGURATION menu item and press ENTER. Use the following configuration: - TEST MODE : - Tx SOURCE : - FRAMING : - CRC-4 : - TEST RATE : Ch.4 Applications E1DUAL TESTPAT as specified by the span design as specified by the span design 2.048M 157 - L1-Rx PORT : MONITOR or BRIDGE - L2-Rx PORT : MONITOR or BRIDGE - XMT CLOCK : INTERN NOTE: If you are not sure what RX Port level to use, then use BRIDGE. MONITOR should be used when you have a Protected Monitoring Point (PMP) access. a) Press the ENTER key when all of the settings are correct. 3) Connect the SunSet to the circuit as shown in Figure 103 or 104. a) Press the LED key to acknowledge any blinking history lights and turn them off. Line 2 RX Line 1 RX E1 TERMINAL EQUIPMENT MON MON OUT OUT IN IN E1 TERMINAL EQUIPMENT Figure 103 Monitor an In-Service Circuit, Monitor Mode 158 SunSet E20 Version 1.01 Right Side Connector Panel 75W L1-TX 120W 75W L1-RX 120W SUNRISE Figure 104 Monitor an In-Service Circuit, Bridge Mode with Alligator Clips 4) Examine the LEDs for both lines and the GRAPHIC screen for information about the circuit under test: • The SIGNAL LED should be lit green. • Valid framing type should be indicated. • A steady ERROR or CODE light will tell you that the circuit is working but is experiencing trouble. • Red SIGNAL is an indication of no signal. • An ALARM indication will show a problem on the other side of the circuit. • AIS may indicate a trouble condition where a network element transmitting to the test set has lost its incoming signal and has replaced it with the AIS signal. • The graphic will confirm your test setup. 5) To make a basic measurement: a) From the MAIN MENU, move your cursor to the MEASUREMENT RESULTS menu item. Press the ENTER key. b) Press the START (F3) key. c) Verify that the span performs to your company's requirements for the service delivered. Ch.4 Applications 159 2.3 Checking for Frequency Synchronization Frequency synchronization can be a problem when: - the customer purchases a channelized E1 circuit - the customer’s circuit passes through a synchronous network element such as an exchange, PBX, or a digital crossconnect system - the E1 circuit passes through more than one carrier. Frequency synchronization problems result in bit slips, a major source of service impairment. Referring to Figure 105 for the setup illustration, use this procedure to identify frequency synchronization problems: 1) This test may be performed while the span is carrying live customer traffic. 2) Obtain a 2.048 Mbps reference frequency source. On a 2.048 Mbps circuit, one side will usually be known to generate a synchronized signal. This side can be used as the reference. The other side can be measured for frequency synchronization. 3) Move to the MAIN MENU by pressing the ENTER key. Enter the TEST CONFIGURATION menu item by pressing the ENTER key. a) Set the screen settings to: - TEST MODE : E1SINGL - Tx SOURCE : TESTPAT - FRAMING : as specified by the span design - CRC-4 : as specified by the span design - TEST RATE : 2.048M - L1-Rx PORT : MONITOR - XMT CLOCK : L2-Rx b) Press the ENTER key when all of the settings are correct. 5) Plug the reference E1 signal into the Line 2 RX jack. • This is usually the MONITOR jack of the known synchronized signal. 6) Plug the Line 1 RX jack into the MONITOR jack of the side to be 160 SunSet E20 Version 1.01 tested. PCM 31 SIGNAL CODE RX PCM 30 ERROR AIS POWER ALARM BATTERY PAT SYNC CRC SIGNAL PCM 31 BIT ERROR CODE ERR RxDTE ERROR PCM 30 RTS AIS USER1 CTS CRC DET USER2 ALARM RX SunSet E20 12:34:41 VIEW RECEIVED DATA : 01 BINARY HEX ASCII 11011111 DF ( ) 11000100 C4 (#) 01000010 42 B (B) 00011110 1E (x) 01100101 65 e ( ) 00101110 2E . (t) 11010100 D4 (+) 11000101 C5 ( ) PAGE T/S 000 001 002 003 004 005 006 007 PAGE-UP PAGE-DN F1 F2 PAUSE PRINT F3 F4 SUNRISE TELECOM I N C O R P O R A T E D A F1 E* MON E1 TERMINAL EQUIPMENT B F2 1 PRINT Z F# 4 AUTO E1 SPAN 7 OUT C F3 2 GRAPH D F4 3 ERR INJ 5 6 MEAS LED 8 9 ESC MON E1 SPAN E1 TERMINAL EQUIPMENT OUT 0 SHIFT ENTER POWER IN IN EQUIPMENT EQUIPMENT Figure 105 Frequency Synchronization 7) Press the LED key to acknowledge any blinking history lights and turn them off. 8) From the MAIN MENU move your cursor to the MEASUREMENT RESULTS menu item and press the ENTER key. a) Press START (F3). b) Press the PAGE-DN (F2) key until you are reviewing the FREQUENCY screen. c) Observe if the frequency value varies from the 2.048 MHz reference frequency. You will see >>> or <<< indicating the rate of frequency slippage. d) Note the WNDR value. This will provide an indication of any lowfrequency variation in the E1 signal's frequency. 2.4 Measure Signal Level A signal level measurement can be performed by itself or in conjunction with one of the other tests. 1) Choose the L1-Rx Port level you want to use. • You can make the measurement in TERM, MONITOR, and BRIDGE modes. • An all ones pattern in L1-Rx Port TERM and BRIDGE provides the most accurate results. • MONITOR may be the most convenient mode. • TERM will also disrupt service. • BRIDGE measurement result may be degraded by a low-quality Ch.4 Applications 161 termination at the network element terminating the E1 line. • MONITOR measurement should generally show a result of about -20 dB or -30 dB. The rest of this procedure will use the TERM mode for illustrative purposes. Verify that the span is not in service. Using the TERM method described here will disrupt service. 2) From the main menu, enter the TEST CONFIGURATION menu. a) Set the parameters as follows: - TEST MODE : E1SINGL - Tx SOURCE : TESTPAT - FRAMING : as specified by the circuit design - CRC-4 : as specified by the circuit design - TEST RATE : 2.048M - L1-Rx PORT : TERM - XMT CLOCK : INTERN b) Press ENTER to return to the main menu. 3) Plug the set into the circuit as shown in Figure 106. a) Press the LED key to acknowledge the blinking history lights and turn them off. 4) Move the cursor to the MEASUREMENT RESULTS menu item and press ENTER. a) Press the START (F3) key. 162 SunSet E20 Version 1.01 MON MON Tx E1 TERMINAL EQUIPMENT Tx I NR SU SE Rx Rx EQUIPMENT EQUIPMENT Right Side Connector Panel 75W L1-TX 120W 75W L1-RX 120W SUNRISE Figure 106 Measuring Signal Level 5) Press the PAGE-DN (F2) key until you move to the LINE 1 - ALM/ SIG screen. a) Read the signal level. • Note that separate readings are given for the positive and negative signals so that you can get more accurate information on a faulty regenerator. Ch.4 Applications 163 2.5 Run a Timed Test Many network tests require the use of an exact time period such as 15 minutes, 1 hour, or 24 hours over which to conduct a test. In this section you will configure the timer for one of these tests. Use the following procedure: 2.5.1 Manual Start 1) Use the desired procedure from Application 2.1 or 2.2 as the basis for your test. 2) ENTER the SYSTEM PARAMETERS menu item. 3) Cursor to the MEAS CONFIGURATION and press ENTER. 4) At the MEAS DURATION menu item, press TIMED (F1) 5) Press the SHIFT-lock key to display the SHIFT indicator in the upper left-hand portion of the screen. a) Enter in the number of hours and minutes that you want the test to run. Use the arrow keys to move within the entry. b) When you are satisfied that the entry is correct, release the SHIFT key. 6) Cursor down to START, and make sure MANUAL is selected. a) Press the ESCAPE key until you have returned to the MAIN MENU. 7) Proceed with the test procedure outlined in Application 2.1 or 2.2. • When you perform the MEASUREMENT RESULTS, the test will now be timed. • Observe the remaining time by viewing the RT (Remaining Time) indicator in the upper right-hand portion of the screen. 2.5.2 Auto Start To program the test set to begin measuring at a future date and time, use the following procedure: 1) In the MEAS CONFIGURATION, MEAS DURATION item, press TIMED (F1). 164 SunSet E20 Version 1.01 2) Press the SHIFT key. 3) Press the SHIFT-lock key to display the SHIFT indicator in the upper left-hand portion of the screen. a) Enter in the number of hours and minutes that you want the test to run. Use the arrow keys to move within the entry. b) When you are satisfied that the entry is correct, release the SHIFT key. 4) Cursor to START, and press PROGRAM (F1). 5) Cursor down to PROG DATE YMD, and enter the Year, Month, and Day you wish the timed test to begin, using the SHIFT and number keys. 6) At PROG TIME HMS, enter the Hour, Minute, and Second you wish the test to begin. Release the SHIFT key when you are finished. • The test set will begin measuring at your programmed time. 2.6 Observe Network Codes or Channel Data Observe live data: • Binary • Hexadecimal • ASCII translations • Decode E1 network control codes that are in use • Verify the content of individual channels Refer to Figure 107. Ch.4 Applications 165 12:12:47 MEAS VIEW RECEIVED DATA PAGE:01 T/S BINARY 00 00011011 01 10001110 02 01000100 03 11011010 04 01100101 05 00100010 06 10100001 07 00110000 PAGE-UP PAGE-DN PAGE-UP HEX 1B 8E 44 DA 65 22 A1 30 PAUSE PAGE-DN ASCII ( ) (q) D (”) ([) e ( ) “ (D) ( ) 0 ( ) PAUSE PRINT Figure 107 View Received Data Use this procedure: 1) From the MAIN MENU, enter the TEST CONFIGURATION menu. 2) Configure the settings: a) Mode: • In service: Use BRIDGE or MONITOR mode • Out of Service: Use the TERM mode b) Specify the other settings as desired. The SunSet must detect valid framing on the received signal. 3) Connect the SunSet to the circuit as shown in Figure 103 or 104. a) Press the LED key to acknowledge the blinking history lights and turn them off. 4) Press ESCAPE to arrive at the MAIN MENU. 5) Move your cursor to the OTHER MEASUREMENT menu item and press the ENTER key. 6) Enter the VIEW RECEIVED DATA menu. You will now receive a live display of the E1 data. Scroll down through 64 pages of information 166 SunSet E20 Version 1.01 Observe the changes which have occurred over time Note that valid framing is required in order to enter the VIEW RECEIVED DATA menu item. 7) Review the live data as it is displayed. a) When the codes that you are interested in appear, press the PAUSE key (F3) to trap 64 pages of data. b) Press PAGE-DN (F2) to scroll through the data. The data is presented as it appears in the E1 bit stream. The data is broken out into timeslots for you. • View control information in time slot 00 for FAS framing. • View control information in time slots 00 and 16 for MFAS framing. • All other channels (time slots) should contain actual voice/data signals (or your the received test pattern). 2.7 Monitor a Voice Frequency Channel Here is a procedure for monitoring a voice frequency channel within an E1 circuit. The setup is illustrated in Figure 103 or 104. 1) This test may be performed while the span is carrying live traffic. 2) From the MAIN MENU, enter the TEST CONFIGURATION menu . a) Use the following configuration: - TEST MODE : E1SINGL - Tx SOURCE : TESTPAT - FRAMING : as specified by the circuit design - CRC-4 : as specified by the circuit design - TEST RATE : 2.048M - L1-Rx Port : MONITOR or BRIDGE - XMT CLOCK : INTERN b) Press the ENTER key when all of the settings are as desired. 3) Plug the set into the circuit as shown in Figure 103 or 104. a) Press the LED key to acknowledge the blinking history lights and turn them off. b) Verify that the PCM-30 or PCM-31 LED is lit. Ch.4 Applications 167 5) Press ESCAPE as necessary until you arrive at the MAIN MENU. 6) Enter the VF CHANNEL ACCESS menu. 7) Move the cursor to VF & NOISE MEASUREMENTS, and press ENTER. 8) Enter the desired transmit and receive timeslots. • The channel number will bypass any time slots containing the E1 framing information. • In FAS framing, no access is granted to time slot 00 • In MFAS framing, access to time slots 00 and 16 is denied. 9) Use either TALK or TONE for TxMODE and L1 for the IN/DROP items (if you are in E1DUAL mode). 10) Adjust the volume to the desired level by pressing the volume key, then using the UP (F1) or DOWN (F2) key. NOTE: If you are not able to monitor the channel: a) Verify that the AUTO framing of the test set was able to synch on a recognized framing pattern b) Press the AUTO key to restart the auto framer if a valid frame pattern is not shown. c) If this doesn't work, try unplugging and re-plugging the receive cord. This will positively verify that there is no recognizable framing at this moment. 2.8 Simple Talk/Listen Here is the simplest procedure for talking and listening on an E1 circuit. The setup is illustrated in Figure 103. However, instead of having a loopback at the far end of the circuit, your setup may have another test set, a channel bank, a switch, or other E1 terminating network element. Use this procedure: 1) Verify that the span is not in service. This test will disrupt service for all of the channels you are not using. If a hitless drop insert 168 SunSet E20 Version 1.01 is required, read Application 3.1, Dual Drop and Insert THRU Testing. 2) From the MAIN MENU, enter the TEST CONFIGURATION menu by pressing the ENTER key. a) Configure the interface as follows: - TEST MODE - Tx SOURCE - FRAMING - CRC-4 - TEST RATE - L1-Rx Port - XMT CLOCK : E1SINGL : TESTPAT : as specified by the span design : as specified by the span design : 2.048M : TERM : INTERN b) Press the ENTER key when all the settings are as desired. • It is not possible to perform talk and listen on an unframed signal. • One of the framing LEDs must light for this procedure to work. 3) Connect the SunSet to the circuit as shown in Figure 99. a) Press the LED key to acknowledge the blinking history lights and turn them off. 4) Press ESCAPE to get to the MAIN MENU. 5) Enter the VF CHANNEL ACCESS menu item. 6) Press the ENTER key on the VF & NOISE MEASUREMENTS menu item. 7) Select the receive (listen) and transmit (talk) channels (they are usually the same channel number). 8) Choose TALK for the TxMODE. You can now talk and listen on the channel which you have selected. Adjust the volume to the desired level by using the volume key. Ch.4 Applications 169 2.9 Send a Tone Here is a procedure for sending a tone: 1) This is an intrusive test. Be sure the E1 line is not carrying traffic or that it will be able to withstand any hits that this procedure will introduce. If a hitless drop insert is required, you may wish to read Application 3.1. 2) Enter the TEST CONFIGURATION menu. a) Configure as follows: - TEST MODE - Tx SOURCE - FRAMING - CRC-4 - TEST RATE - L1-Rx Port - XMT CLOCK : : : : : : : E1SINGLE TESTPAT as specified by the span design as specified by the span design 2.048M TERM INTERN b) Press the ENTER key when all the settings are as desired. 3) Connect the SunSet to the circuit as in Figure 99. a) Press the LED key to acknowledge the blinking history lights and turn them off. 4) Press ESCAPE until you reach the MAIN MENU. 5) Move the cursor down to the VF CHANNEL ACCESS menu item and press ENTER. 6) Press ENTER on the VF & NOISE MEASUREMENTS menu item. 7) Use the NEXT (F1) or PREVIUS (F2) to set up the receive and transmit channels (timeslots) correctly. Select the rest of the menu items as follows: - Tx A/B/C/D : change as required - TxMODE : TONE - TONE FREQ : enter the desired frequency - Tx LVL (dBm) : enter the desired tone level - LISTEN SIDE : L1+L2 (if in E1Dual Mode) 170 SunSet E20 Version 1.01 • You are now transmitting a tone on the selected channel • View the received Frequency and noise measurements. 2.10 Nx64 kbps Testing Fractional E1 circuits are circuits of data rate Nx64 kbps, where N can be anywhere from 1 to 31 channels. N channels of the E1 line are dedicated to the fractional E1 circuit, and the remaining channels of the E1 line are either filled with an idle code, other revenue traffic or framing information. Use the following procedure: 1) Verify that the fractional circuit is not in service. This test will disrupt service. If a hitless drop insert is required, you may wish to read Application 3.1, Dual Drop and Insert THRU Testing. 2) Press the ENTER key to move to the MAIN MENU. 3) Enter the TEST CONFIGURATION menu by pressing the ENTER key. a) Configure the interface as follows: - TEST MODE : E1SINGL - Tx SOURCE : TESTPAT - FRAMING : as specified by the span design - CRC-4 : as specified by the span design - TEST RATE : Nx64K - L1-Rx Port : TERM - XMT CLOCK : INTERN • Note that when you press Nx64K, the SunSet will display a fractional SELECT TIME SLOT screen. • Manually configure the timeslots as desired. • If the timeslot configuration is not known, AUTO configure to the active channels. AUTO configuration may not yield the proper channels if: • Any of the active channels are transmitting an idle code • The idle code (set up in the SYSTEM PARAMETERS/ MEAS CONFIGURATION page 2, IDLE CHNL CODE) item is not the same as the idle code of the circuit being tested. Ch.4 Applications 171 To Observe the Idle and Active Channels: • Plug the set in using the 2.048 Mbps test rate • Go to OTHER MEASUREMENTS, VIEW RECEIVED DATA This will allow you to double check the information being transmitted on a channel-by-channel basis. b) Press the ENTER key when the timeslot settings are as desired. This will return you to the TEST CONFIGURATION menu. c) When the TEST CONFIGURATION menu settings are as desired, press the ENTER key. 4) Connect the SunSet to the circuit as shown in Figure 108. 5) Ensure that a loop is in place at the far end of the circuit. 6) Press the LED key to acknowledge any blinking history lights, and turn them off. 7) Enter the MEASUREMENT RESULTS menu item to perform your acceptance test. a) Press START (F3). b) Verify the fractional service performs to your company’s requirements for the service delivered. 172 SunSet E20 Version 1.01 CENTRAL OFFICE Right Side Connector Panel 75Ω 75Ω 120Ω 120Ω MULTIPORT L1-TX L1-RX MON OUT IN LOOPBACK DEVICE Figure 108 Fractional E1 Testing 2.11 Using the Battery and AC Charger Warning! Do not use any charger other than the one provided by Sunrise Telecom with the SunSet E20. Using another charger will cause permanent damage and will void the Sunrise Telecom warranty. The test set is powered by an internal 9-cell NimH battery pack, which is field replaceable. The battery is designed to provide ample power for portable testing applications. The SunSet battery is charged by a custom-designed charger for optimum performance. This charger is powerful enough to run continuously while keeping the battery charged. The charger contains a special fast-charge feature which recharges the battery quickly. This enables the user to return to the field as soon as possible. This fast-charging action causes no damage to the battery. The SS138C charger operates at: • 120 VAC-240 VAC, 50/60 Hz Ch.4 Applications 173 The charger recognizes when the battery is fully charged. At this point, the charger switches from fast-charging to a tricklecharging mode. Trickle-charging completes the charging cycle for maximum battery output. This trickle-charging mode does not damage the battery over long periods of time. However, to get maximum life from your battery, remove it from the charger when it is fully charged. Here are some tips for obtaining the best performance out of your SunSet battery: 1) Use the backlight only if it is needed. At room temperature, the SunSet may operate for 4.5 hours with a fully charged battery, when the backLIGHT is turned off. It may however operate for less than 4 hours when the backLIGHT is on. Extremes of temperature will also affect battery life. 2) Turn the power key off when the set is not in use. 3) Use the Cigarette Lighter Battery Charger (SS104C) when transporting the SunSet in the field. This will help maintain a full battery charge when AC power is not available. This charger operates at a trickle charge, and will not fully charge the battery pack in any reasonable length of time. 4) If you are going to perform extended testing and you are not sure if the battery will last, plug the charger in at the beginning of the test so the set will run indefinitely. If you wait until the battery is low during the middle of the test to plug the charger in, the set’s processor may reset and drop the current test as the charger is plugged in. 5) Recharge the battery between uses, even if the time available for a recharge is short. The AC Battery Charger’s two-stage design charges the battery to approximately 80% of its full capacity in just a few hours. The set will fully in approximately four hours. 6) Do not use any other charger with the SunSet. Other chargers will damage the SunSet and will void the Sunrise Telecom warranty. 7) Let the battery pack charge overnight, if possible, to ensure it is fully charged when you begin testing. 174 SunSet E20 Version 1.01 2.12 Using the Serial Port The test set is equipped with a standard serial port, for both printing and remote control operations. 2.12.1 Serial Port Settings The Serial Port is configurable for: baud rate, parity, stop bit, bits/character and carriage return/line feed. • These settings are configured from within SYSTEM PARAMETERS, GENERAL CONFIG. • In general, the SunSet’s serial port settings will need to match the settings of your printer. Configuring the SunSet 's serial port is described in detail in the procedures which follow. 2.12.2 Configuring for Printing The test set may be ordered with an optional High Capacity Thermal Printer (SS118B or 118C). This printer operates by an 8bit serial RS-232C method, and uses thermal paper (i.e. it has no ink cartridge or ribbon which needs to be replaced). Many other serial printers are available to the user; however, not all of these printers will operate correctly with the SunSet. You are free to use this information to attempt to set up the test set with another printer. However, Sunrise Telecom does not warrant the operation of the test set with any printer other than the one supplied by Sunrise Telecom. If you wish to connect to a mode or other brand of printer, you may find the SS122 Null Modem Adaptor useful. Refer to Figure 109. Ch.4 Applications 175 8 5 5 4 3 2 3 2 ------ PIN-TO-PIN CONNECTIONS ----DB-9 FEMALE PIN# DESCRIPTION 5 SG 8 CTS 3 RD 2 TD DB-9 FEMALE PIN# DESCRIPTION 5 SG 4 DTR 2 TD 3 RD Figure 109 SS122A Null Modem Pin-Outs To begin printing, follow this procedure: 1) Connect the Sunrise Telecom DIN-8 to RS232C Printer Cable (SS115B) to the SunSet. Figure 110 displays the cable pin assignments of the DB9 Printer Cable. 176 SunSet E20 Version 1.01 6 7 8 3 4 5 1 2 2 1 3 5 4 DIN 8-PIN 6 7 8 9 DB9 ------ PIN-TO-PIN CONNECTIONS ----DIN 8-PIN PIN# DESCRIPTION 2 DSR 3 TX 4 RX 5 GND 6 CTS 8 DTR EIA-232-C D-SUB PIN# DESCRIPTION 6 DSR 3 TXD 2 RXD 5 GND 8 CTS 4 DTR Figure 110 SS115B Printer Cable Pin Assignments 2) If you are using a Sunrise Telecom printer, skip this step. a) Otherwise, you may need to connect the Sunrise Telecom Null Modem Adapter (SS122) to the free end of the Printer Cable. 3) Confirm that the SunSet 's serial port settings match those of your printer. a) The switches to configure your printer's serial port and print characteristics are usually located on the back or bottom of the printer. b) If you are using the Sunrise Telecom thermal printer, refer to Figure 111 for the correct switch settings. Ch.4 Applications 177 DIP SWITCH 1 POSITION DIP SW SETTING PARAMETERS 1 OFF INPUT SERIAL 2 ON PRINTING SPEED HIGH 3 ON AUTO LOADING ON 4 OFF AUTO LINE FEED OFF 5 ON SETTING COMMAND ENABLE 6 OFF PRINTING DENSITY 7 ON 8 ON PARAMETER SETTING 100% DIP SWITCH 2 POSITION DIP SW SETTING PARAMETERS PARAMETER SETTING 1 ON PRINTING COLUMNS 40 2 ON USER FONT BACK-UP ON 3 ON CHARACTER SELECT NORMAL 4 ON ZERO NORMAL 5 ON 6 ON INTERNATIONAL CHARACTER SET ENGLISH 7 OFF 8 OFF DIP SWITCH 3 POSITION DIP SW SETTING PARAMETERS PARAMETER SETTING 1 ON DATA LENGTH 8 BITS 2 ON PARITY SETTING NO 3 ON PARITY CONDITION ODD 4 ON BUSY CONTROL H/W BUSY 5 OFF BAUD RATE SELECT 9600 bps 6 ON 7 ON 8 ON Figure 111 SS118B/C Printer Switch Settings The test set’s factory default serial port settings are: BAUD RATE: 9600 PARITY: NONE STOP BIT: 1-BIT BITS/CHAR: 8-BIT If you need to reconfigure the SunSet's serial port settings to match the settings of your printer, use the following procedure: a) From the MAIN MENU, select the SYSTEM PARAMETERS item. b) Select the GENERAL CONFIG item. 178 SunSet E20 Version 1.01 c) Use the Down Arrow key to access the BAUD RATE setting. Three selections are available: 1200 (F1), 2400 (F2), and 9600 (F3). • These settings determine the rate at which the SunSet transmits data (characters) to the printer. • This setting must match the setting on your printer; otherwise random characters will appear on your printout. d) Access the PARITY setting. Three options are available here: NONE (F1), EVEN (F2), and ODD (F3). This setting must match with the configuration of your printer. e) Access the STOP BIT setting. Two options are available: 1-BIT (F1) and 2-BIT (F2). This setting must match with the configuration of your printer. Normally this is configured as 1-BIT. f) Access the BITS/CHAR setting. Two options are available: 7BIT (F1) and 8-BIT (F2). This setting must match with the configuration of your printer. Normally this is configured as 8BIT. g) At the CR/LF item, choose the setting opposite of the printer setting. 4) Set up printer’s printing instructions in the SYSTEM PARAMETERS, MEAS CONFIGURATION screen. PRINT RESULT TIMED: Choose TIMED (F1) if you would like to have the printer print out results at a regular interval during a MEASUREMENT RESULTS. • The default time is 15 minutes. • You may enter any interval between 1 hour and 999 hourss, 59 minutes. • To change the interval, press the SHIFT-lock key to display the SHIFT indicator. • Enter the desired numbers from the keypad. • Press SHIFT-lock again to remove the SHIFT indicator. LAST: Choose LAST (F2) if you would like the printer to print out a result only at the conclusion of a test. PRINT EVENT ENABLE: Choose ENABLE (F1) if you would like the printer to print out a result every time an error or alarm condition is reported. DISABLE: Choose DISABLE (F2) if you do not want the printer to Ch.4 Applications 179 print out a result every time an error or alarm condition is reported. • Each result can only be printed once. The printer buffer is then emptied. • PRINT RESULT and PRINT EVENT must be ENABELed in order for results and events to be stored in MEASUREMENT RESULTS. 5) Confirm that the DIP switch settings (or other switch settings) on your printer correspond to those of the SunSet’s serial port above. • If you have changed the DIP switch settings, switch the printer off and then on before continuing. 6) Ensure that the printer is powered up and "on-line". 7) Ensure that the SunSet is not displaying its GRAPHIC screen. This screen is non-printable. 8) Press the PRN SCRN (print screen) key on the SunSet’s keypad. 9) The SunSet’s current screen should now print. • If it doesn't, check the connections, configuration, and switch settings. 2.13 Using the Remote Control The SunSet E20 comes with an optional remote control feature. Controlling the SunSet through the remote control is similar to controlling the SunSet directly. The remote control allows a remote user and a local user to use the test set together at the same time. This simultaneous-usage feature can help a team of people fix a problem faster. Refer to Figure 110 for a diagram of the pin-to-pin assignments of the DIN to DB-9 cable supplied by Sunrise Telecom. Refer to Figure 109 for the pin-to-pin assignments of the Sunrise Telecom Null Modem Adapter. You may need a break-out box, null modem, patch-box and other RS-232C communications tools if you wish to set up your own serial communications. Here are some helpful hints. The test set is configured as a DTE. You will need a modified null modem 180 SunSet E20 Version 1.01 cable if you wish to connect directly to a terminal. See Figure 112. See Figure 113 for a more typical remote site layout. It often is successful if pin 4 (DTR) of the modem or terminal is connected to pin 8 (CTS) of the test set DB25 connector. Pin 5 of the test set DB25 connector must show green on a breakout box in order for the test set to print. To begin remote operation, follow this procedure: 1) Connect the Sunrise Telecom DIN-8 to DB9 Printer Cable (SS122A) to the SunSet E20’s serial port. 2) If you are plugging directly into a terminal, connect the Sunrise Telecom Null Modem Adapter (SS122) to the free end of the Printer Cable. a) Connect the Null Modem Adapter. b) Skip steps 3,4,6,7 3) Connect the printer cable’s DB9 end into a modem. A 9600 baud error-correcting modem is highly recommended. Some functions such as VF MEASUREMENTS will only work properly if a 9600 baud modem is used. Refer to Figures 109 and110 for cable pinouts. You may need a breakout box, appropriate tools, and training to make sure the test set is appropriately connected to the modem the first time you set it up. 4) If not already connected to an analog phone line, plug the modem into the telephone network (usually done with an RJ-4 cable). 5) Confirm that the SunSet's serial port settings correspond to those of your communications software or terminal. The SunSet's factory default settings are: BAUD RATE: 9600 PARITY: NONE STOP BIT: 1-BIT BITS/CHAR: 8-BIT If you need to reconfigure the SunSet's serial port settings, use the following procedure: a) From the MAIN MENU, select SYSTEM PARAMETERS b) Select the GENERAL CONFIG item. Ch.4 Applications 181 c) Use the Down Arrow key to access the BAUD RATE setting. Three selections are available: 1200 (F1), 2400 (F2), and 9600 (F3). These settings determine the rate at which the SunSet transmits data (characters) to the computer or terminal. This setting must match the setting on your computer or terminal, otherwise random characters will appear on your remote screen. d) Access the PARITY setting. Three options are available here: NONE (F1), EVEN (F2), and ODD (F3). This setting must match with the configuration of your remote control. e) Access the STOP BIT setting. Two options are available: 1BIT (F1) and 2-BIT (F2). This setting must match with the configuration of your remote control. Normally this is configured as 1-BIT. f) Access the BITS/CHAR setting. Two options are available: 7-BIT (F1) and 8-BIT (F2). This setting must match with the configuration of your remote control. Normally this is configured as 8-BIT. serial port SIGNAL PCM 31 AIS POWER CODE PCM 30 ALARM BATTERY ERROR CRC PAT SYNC SIGNAL PCM 31 BIT ERROR CODE ERR RxDTE ERROR PCM 30 RTS AIS USER1 CTS CRC DET USER2 ALARM printer cable gender changer SunSet E20 12:34:41 F2 PAUSE PRINT F3 F4 Printer, Terminal F1 Test Set Cord PAGE-UP PAGE-DN Null Modem Adaper VIEW RECEIVED DATA : 01 BINARY HEX ASCII 11011111 DF ( ) 11000100 C4 (#) 01000010 42 B (B) 00011110 1E (x) 01100101 65 e ( ) 00101110 2E . (t) 11010100 D4 (+) 11000101 C5 ( ) PAGE T/S 000 001 002 003 004 005 006 007 null modem adapter terminal cable SUNRISE TELECOM I N C O R P O R A T E D terminal equipment A B C D F1 F2 F3 F4 E* 1 PRINT Z F# 4 AUTO 7 2 GRAPH 3 ERR INJ 5 6 MEAS LED 8 9 0 SHIFT ESC ENTER POWER Figure 112 Direct Connection 182 SunSet E20 Version 1.01 6) Set up a terminal to dial up the far modem and commence communications. Any terminal or personal computer with VT100 terminal emulation software should work. 7) Call up the far modem with your terminal. 8) Once communication has been established with the far modem, log on to the SunSet E20 by typing in: logon You do not need to press the return key after typing the letters. The test set will automatically repaint the screen with the main menu and other information. If you make a mistake while typing logon, just type it again. Remote Site serial port Modem RS232 cable telephone line PSTN Host Location ¥ logon Modem Figure 113 Typical Setup Note: If you log into the set while it is in graphic mode, the graphic may be distorted. Simply press the return key on your terminal and then P (for graphic) to see the graphic in its proper form. Ch.4 Applications 183 9) Use the SunSet E20 just like you would use it locally. The same menus will be presented to you. • The key options are listed under the Status Panel heading. • The letter presented in bold is the key you push to initiate the command. The cursor commands are: Up, doWn, lefT and Right. In addition, you may find that the arrow keys on your computer/terminal will work. RefreSh repaints the screen, which is useful if the screen appearance becomes skewed. Quit functions as the ESCAPE key. Other key functions are Inj err, History, and resYnch. Pressing the Return key on your computer/terminal is the same as pressing the ENTER key on your test set. F-key functions are provided by the - (F1), = (F2), [ (F3), and ] (F4) keys. When you wish to enter letters or numbers in a setup screen, instead of using the SHIFT key and the orange test set key labels, just type in the numbers or letters directly from your computer/ terminal keyboard. 10) When you are finished with the SunSet E20, type: logoff 11) Then terminate the phone connection by hanging up your nearend modem. Note that you can use a variety of asynchronous communications in addition to modems over the public switched telephone network. Direct local connection, dedicated line, and packet are other communication alternatives. In remote control, you have access to most of the test set's capability. However, you will notice a few differences, such as the following: • You will not have access to the GRAPHIC screen or the AUTO key. • The PULSE MASK ANALYSIS mask graphic will not appear; however, the set will report the applicable data. 184 SunSet E20 Version 1.01 • The MEASUREMENT RESULTS screen will be updated about once every 5 seconds instead of once each second. • Local usage of print commands is not recommended during a remote control session because both the printer and the remote control use the same printer port. For instance, if a remote user is logged on, pressing the PRNTR key will log the user off. • Talk/listen is not supported remotely. • In OTHER MEASUREMENTS, HISTOGRAM ANALYSIS is not supported. 2.13.1 Using Remote Control from Windows 95 Here’s a brief rundown on how to get your SunSet to work by remote control, when you are operating out of Windows 95. 1) From Accessories, start HyperTerminal a) Click to open the Hyper Terminal window 2) Double click on Hypertrm 3) At New Connection, enter “Sunrise Remote” a) Select an icon b) Click on Ok 4) In the Phone Number screen, click on the down arrow of the “Connect using:” box a) Select the modem or com port number you are using (note: if you are connected directly to a com port, you will need to use a Null Modem Adaptor) b) Click Ok 5) At the Port Settings, configure the settings as follows (matching those of your SunSet as set in the General Config screen): Bits per second: 9600 Data (or Char) bits: 8 Parity:none Stop bits: 1 Flow Control: none a) Click Ok when done 6) In the HyperTerminal screen, click on VIEW (IMPORTANT!) Ch.4 Applications 185 7) Highlight and click on FONT 8) Highlight Terminal a) Set the Style and Size as you wish 9) Type “logon” 10) Remote control should work! 3.0 Advanced Applications 3.1 In Service Dual Drop and Insert THRU Testing To conduct a dual drop and insert THRU mode test on a line that is in service, make sure all the connections are made in accordance with the numbering procedure in Figure 114 to ensure the least amount of interruption on the live circuits. In service drop and insert testing is useful for : a) Placing a telephone call on a single channel b) Sending and receiving tones to test channels c) Sending and receiving test patterns to test Nx64 Kbps circuits WARNING: only experienced technicians should do this procedure. Any mistakes will disrupt service. Use the following procedure. If performed properly, this test should disrupt the service for a duration of few hundred milliseconds. 1) From the MAIN MENU, enter the TEST CONFIGURATION. Configure the interface as follows: - TEST MODE : E1DUAL - Tx/INSERT : L1-Tx - Rx/DROP : L2-Rx - Tx SOURCE : THRU - FRAMING : as specified by the circuit design - CRC-4 : as specified by the circuit design - TEST RATE : 2.048M or Nx64K ( fractional E1) - L1-Rx Port : MONITOR, BRIDGE - L2-Rx Port : MONITOR, BRIDGE 186 SunSet E20 Version 1.01 - XMT CLOCK : L1-Rx 2) Connect theSunSet to the circuit as shown in Figure 114 or 115. Figure 114 provides a BNC-BNC diagram, while Figure 115 shows bantam to BNC cables. • This mode allows an in-service 2.048 Mbps circuit to pass through the test set. • Be sure to plug in the cords in the order shown in the two diagrams. a) First plug in cords one through 6. b) Verify that the test Line 1 and Line 2 LEDs show proper framing, coding, and no errors. c) Verify that the Graphic shows the test set is in THRU mode. d) Finally, plug in cords seven and eight. Warning! You might want to practice on an out-of-service circuit first to make sure you can perform this procedure correctly. 4 SIGNAL PCM 31 CODE ERR PCM 30 ERROR CRC DET SIGNAL PCM 31 BIT ERROR CODE ERR RxDCE RxDTE ERROR PCM 30 RTS AIS USER1 CTS CRC DET USER2 ALARM AIS POWER ALARM BATTERY PAT SYNC 2 SunSet E20 12:34:41 6 VIEW RECEIVED DATA : 01 BINARY HEX ASCII 11011111 DF ( 11000100 C4 (#) 01000010 42 B (B) 00011110 1E (x) 01100101 65 e ( 00101110 2E . (t) 11010100 D4 (+) 11000101 C5 ( PAGE T/S 000 001 002 003 004 005 006 007 PAGE-UP PAGE-DN F1 F2 PAUSE PRINT F3 F4 SUNRISE TELECOM I N C O R P O R A T E D 5 A B C D F1 F2 F3 F4 E* 1 PRINT Z F# 4 AUTO 7 2 GRAPH 3 ERR INJ 5 6 MEAS LED 8 9 0 SHIFT ESC ENTER POWER MON OUT LINE 1 2.048 Mbps 1 3 LINE 2 2.048 Mbps OUT OUT IN LINE 2 EQUIPMENT 7 8 IN LINE 1 IN EQUIPMENT Figure 114 Dual Drop and Insert THRU Mode Test (BNC-BNC) Ch.4 Applications 187 4 SIGNAL PCM 31 AIS POWER CODE ERR PCM 30 ALARM BATTERY ERROR CRC DET PAT SYNC SIGNAL PCM 31 BIT ERROR CODE ERR RxDCE RxDTE ERROR PCM 30 RTS AIS USER1 CTS CRC DET USER2 ALARM 2 SunSet E20 12:34:41 VIEW RECEIVED DATA : 01 BINARY HEX ASCII 11011111 DF ( 11000100 C4 (#) 01000010 42 B (B) 00011110 1E (x) 01100101 65 e ( 00101110 2E . (t) 11010100 D4 (+) 11000101 C5 ( PAGE T/S 000 001 002 003 004 005 006 007 6 PAGE-UP PAGE-DN F1 F2 PAUSE PRINT F3 F4 SUNRISE TELECOM I N C O R P O R A T E D 5 A B C D F1 F2 F3 F4 E* 1 PRINT Z F# 4 AUTO 7 2 GRAPH 3 ERR INJ 5 6 MEAS LED 8 9 0 SHIFT ESC ENTER POWER 1 OUT MON 3 LINE 1 2.048 Mbps LINE 2 2.048 Mbps OUT LINE 1 IN OUT IN LINE 2 7 8 IN EQUIPMENT EQUIPMENT Figure 115 In Service Dual Drop and Insert THRU (BNC to Bantam) Note: The circuit will be disrupted for two or more seconds while the cords are moved. 3) Depending on the test application you may wish to do the following: For Talk and Listen: a) Press ESCAPE to get to the MAIN MENU. b) Move your cursor to the VF CHANNEL ACCESS menu item and press the ENTER key. c) Press the ENTER key on the VF & NOISE MEASUREMENTS menu item. d) Select the receive (listen) and transmit (talk) channels (they are usually the same channel number). 188 SunSet E20 Version 1.01 e) Choose TALK for the TxMODE and L1 (or L1+L2) for the SPEAKER. You can now talk and listen on the channel you have selected. To Send and Receive a Tone: a) Press ESCAPE until you reach the MAIN MENU. b) Move the cursor down to the VF CHANNEL ACCESS menu item and press ENTER. c) Press ENTER on the VF & NOISE MEASUREMENTS menu item. d) Use the NEXT (F1) or PREVIUS (F2) to set up the receive and transmit channels correctly. e) Select the rest of the menu items as follows: - TxMODE : TONE - Tx FREQ : enter desired tone frequency - TxLVL (dbm) : enter desired tone level - Tx ABCD : pick or enter desired supervision bits - SPEAKER : L1+L2 • You are now transmitting a tone on the selected channel. • You can also view the received Level, Frequency, and noise measurements. To Test Nx64 Kbps, Fractional E1: a) Make sure the TEST RATE is set for Nx64K in the TEST CONFIGURATION. b) Press ESCAPE to get to the MAIN MENU. c) Enter the MEASUREMENT RESULTS menu item, press START, and perform your acceptance test. d) Verify that the fractional E1 service performs to your company’s requirements for the service delivered. 3.2 Testing a Terminal Multiplex The SunSet E20 can perform an out-of-service through multiplex test. Here is the procedure. 1) Connect the SunSet E20 according to the Figure 116, E20 MUXTEST Setup. Ch.4 Applications 189 Datacom Muxtest Mode MASTER and Transmit out E1 port Receive from DATACOM MULTIPORT Transmit out Datacom Receive from E1 port L1 RX L1 TX 1X0 MUX Datacom Loop Side Timing 64 Kbps E1 Side 2.048 Mbps Figure 116 MUXTEST Setup 2) Enter the TEST CONFIGURATION menu a) Select MUXTEST (more, F1) for the Test Mode 3) Set the configuration according to the Figure 117, MUXTEST Configuration. 3:10:31 TEST CONFIGURATION TEST MODE : MUXTEST E1 Tx/INST: L1-Tx Rx/DROP: L1-Rx FRAMING: PCM-30 CRC-4 : YES L1-Rx Port: TERM L2-Rx Port: TERM XMT CLOCK : INTERN L1-Rx INTERN DATACOM TYPE : RS232S BERT E1T/S: Nx64K B-LED: E1 L2-Rx Figure 117 E20 MUXTEST Configuration NOTES: • In this procedure the multiplex must be DCE. The SunSet E20 is DTE. The above figure uses RS232S as the Datacom Type. You may also select G.703, V.35, RS449, or X.21. • The test set transmits an idle code out the multiport. 4) Set the XMT CLK to INTERN, if the multiplex receives timing from the test set’s 2.048 Mbps TX. 190 SunSet E20 Version 1.01 a) Set the XMT CLK to L1-Rx, if the test set should receive timing from the multiplex. 5) Verify that the PAT SYNC LED is green, depending on your BLED setting; i.e., if the B-LED is set to E1, then you are verifying the E1 side with the LED, and vice versa. a) Press the ERR INJ key to insert a bit error. You should see flashing red LEDs for both ERROR and BIT ERROR to indicate that a bit error has taken place. You have just injected an error from the E1 side through the multiplex to the datacom port. b) Press the LED key to stop the blinking. 6) Check to see if you can inject an error from the datacom port through the multiplex to the E1 side. a) Set the BERT B-LED to DTCM; this is the datacom type that you selected in DATACOM TYPE. 7) Verify that the PAT SYNC LED is green. a) Inject one bit error by pressing the ERR INJ key once. You should now see the flashing red LEDs for both ERROR and BIT ERROR indicating one bit error has occurred. b) Press the LED key to stop the blinking. 8) If more comprehensive tests are required, you may wish to change the test patterns and other settings in TEST CONFIGURATION such as XMT CLK. 3.3 Emulating a Terminal Multiplex In the E1-MUX Mode, the SunSet E20 emulates a 64Kbps to 2Mbps multiplexer. Use the following procedure to multiplex one 64Kbps signal onto a 2Mbps signal. 1) From the Main Menu, enter TEST CONFIGURATION. a) Select E1-MUX for Test Mode b) Configure the rest as follows: E1-MUX Tx/INSERT : L1-Tx Rx/DROP : L1-RX FRAMING : As specified by the span design Ch.4 Applications 191 CRC-4 : As specified by the span design L1-Rx Port : TERM L2-Rx Port : TERM XMT CLK : L1-RX DATACOM TYPE : Select the datacom interface type that will provide the 64Kbps frame. TxSRC : E1DRP MUX B-LED E1INS E1T/s : E1drp : DTCM : Nx64: Select the 64Kbps timeslot to be multiplexed from the datacom to the E1 side: a) Press Nx64K (F1) to enter the SELECT TIME SLOT screen. b) Use the arrow keys to move the flashing cursor to the desired receive timeslot. c) Once your desired timeslot is flashing, press SELECT (F2). d) Press UN-SEL (F3) to deselect a particular timeslot e) Press CLR-ALL (F4) to erase all the selected timeslots and start with a clear screen. f) Repeat this procedure for the Transmit timeslot, if necessary. You may select only one receive and one transmit timeslot at a time. The receive and transmit timeslots are normally be set to the same number. 2) Connect the E20 to the circuit according to Figure 118. a) Press the LED key to acknowledge any blinking history lights and turn them off. b) Verify that the PAT SYNC LED is lit green. 192 SunSet E20 Version 1.01 2.048 Mbps Nx64 Kbps Multiport L1-Rx DTE Terminal Equipment OUT IN L1-Tx E1-MUX DCE Figure 118 Emulating a Terminal Multiplex The DTE supplies the 64Kbps signal, which is transmitted to the SunSet E20 through the multiport. The E20 multiplexes this 64Kbps signal onto a 2 Mbps signal, which is then transmitted out the E1 L1-Tx jack. In Figure 118, the test set is connected to a IN/OUT monitor jack. The 2M signal is passed from the IN to the OUT jack and back to the L1-Rx jack on the test set. This setup allows you to check the multiplexed signal. The following steps outline the procedure for checking the multiplexed 2M signal. 3) Inject an error from the Data Terminal Equipment. a) Make sure that the B-LED setting in TEST CONFIGURATION is set to E1DRP. This means that the PAT SYNC LED will show information about the signal received on the E1-L1Rx port. b) Upon injecting the error, a red error PAT SYNC LED should light up on the test set; verify you recorded a Bit Error in the Measurement Results Line 1 Summary and Datacom Summary screens. If it does, you have just verified the proper multiplexing ability of the SunSet E20. You may also want to check the results for the other side. To do so, keep the same setup as shown in Figure 118, only this time you insert an error from the 2.048 Mbps terminal equipment. Change the B-LED setting in TEST CONFIGURATION to DTCM. Ch.4 Applications 193 3.4 Emulating an Add/Drop Multiplexer The SunSet E20 has the capability to emulate an Add/Drop Multiplex. Use the following procedure to drop and insert 64Kbps timeslots between a datacom device and E1 lines. 1) From the Main Menu, enter TEST CONFIGURATION. a) Select E1DUAL Mode and configure the other settings as follows: Tx/INST : L1-TX RX/DROP : L2-RX TxSOURCE : THRU FRAMING : As provisioned CRC-4 : As provisioned TEST RATE : Nx64k L1-Rx Port : TERM L2-Rx Port : TERM XMTCLK : L1-RX 2) Connect the test set to two terminal equipments in the order shown in Figure 119. a) Plug into the OUT jack of Equipment 1; connect the same cord to Line 1 RX on the test set. b) Plug a second BNC cord to The OUT jack on Equipment 2; connect this cord to Line 2 RX on the test set. c) Plug your third BNC cord to Line 1 TX of the test set d) Plug a fourth cord into Line 2 TX. NOTE: Do not connect either of these cords to the Terminal equipment yet. e) Verify that the E20’s LEDs for Line 1 and Line 2 show proper framing, and no errors. • You should see green LEDs for CODING, framing, and you should see no red LEDs. f) Press the GRAPHic key and verify that you are in THRU Mode. g) Connect the cord from Line 2 TX to the IN jack of Equipment 1. h) Connect the cord from Line 1 TX to the IN jack of Equipment 2. Note: The circuit will be disrupted for two or more seconds while the cords are moved. 194 SunSet E20 Version 1.01 4 L2-Rx Line 2 L2-Tx 6 2 L1-Rx Line 1 L1-Tx 5 Test Equipment 1 Test Equipment 2 1 IN MON Test Pattern: 0000 3 OUT OUT IN 7 8 MON Test Pattern: 1-4 Figure 119 Emulating an Add/Drop Multiplex 3) Press the LED key to acknowledge any blinking lights and turn them off. a) Verify that the PAT SYNC LED is lit green. 4) Press the ESCAPE key to return to the Main Menu. a) Enter OTHER MEASUREMENTS, VIEW RECEIVED DATA. Since you selected Rx/DROP= L2-Rx in TEST CONFIGURATION, the data displayed here is from Line 2 Rx. b) Verify that the pattern sent by Equipment 2 is shown here on all the timeslots. According to Figure 119, you should see the 1-4 pattern. You have just ascertained that Line 2 is being received properly by the SunSet E20. 5) Press the ESCAPE key to return to the Main Menu. Enter TEST CONFIGURATION. Change Rx/DROP to L1-Rx. 6) Escape back to the Main Menu. a) Enter OTHER MEASUREMENTS, VIEW RECEIVED DATA. The data displayed refers to Line 1 Rx. b) Verify that the pattern transmitted by Equipment 1 is shown on all available timeslots in this screen. Ch.4 Applications 195 With reference to Figure 120, you should see the ALL ZEROES pattern on all timeslots. You have just verified the Line 1 signal is being received properly by the SunSet E20. Now you are ready to connect the test set to the Datacom device. 7) Escape to the Main Menu. Enter TEST CONFIGURATION. Select E1-MUX Mode and configure the other settings as follows: E1 TX/INST RX/DROP FRAMING CRC-4 L1-Rx Port L2-Rx Port XMTCLK DATACOM TYPE TxSRC MUX B-LED E1INS E1T/S : L1-TX : L2-RX : as provisioned : As provisioned : TERM : TERM : L1-RX : Interface type of connector : E1DRP : DTCM : E1DRP : As required 8) Connect the test set to the datacom device through the multiport. Refer to Figure 120. 196 SunSet E20 Version 1.01 Test Pattern: 511 L2-Rx Datacom Device L2-Tx L1-Rx DTE MULTIPORT Test Equipment 1 MON OUT IN Test Pattern: 0000 L1-Tx Test Equipment 2 MON OUT IN Test Pattern: 1-4 Figure 120 Emulating Add/Drop MUX 9) Press the LED key to acknowledge any blinking lights and turn them off. a) Verify that the PAT SYNC LED is lit green and no red error LEDs appear. 10) Escape to the Main Menu. a) Enter OTHER MEASUREMENTS, VIEW RECEIVED DATA. • Verify that the SunSet E20 is receiving DTE’s test pattern on its multiport. Since you have selected the datacom type for BERT on TEST CONFIGURATION, the pattern received on the multiport should be displayed in this screen. • For Figure 120, you should see 511. • Even if you have selected only a few Nx64 timeslots in TEST CONFIGURATION, expect to see the datacom pattern on all timeslots here. 11) In the previous steps, you have verified that the SunSet is receiving a proper signal on both E1 Line receive jacks, as well as on the TX/multiport. Next, you must verify that the SunSet E20 is inserting the datacom’s signal on the selected timeslots. On Line 1, the SunSet E20 transmits the signal received on L1-Rx, but it inserts the signal received on the multiport on the Ch.4 Applications 197 Nx64K timeslots selected in TEST CONFIGURATION on L1Tx. For this reason, Equipment 2 is the best place to check the SunSet’s insert capability. Equipment 2 should receive the Datacom’s pattern, here 511, on the selected timeslots and Equipment 1’s pattern, here ALL ZEROES, on all the other timeslots. 12) If Test Equipment 2 is not capable of displaying its received data, you will need to plug a second SunSet E20 into the monitor jack. a) Turn the second SunSet E20 on and enter TEST CONFIGURATION. b) Configure this second E20 as follows: TEST MODE: E1DUAL Tx/INSERT : L1-TX RX/DROP : L1-RX TXSRC : TESTPAT FRAMING : As required CRC-4 : As required TEST RATE : 2.048M L1-Rx Port : MONITOR L2-Rx Port : MONITOR XMTCLK : INTERN 13) Connect Line 1 RX to the MON jack of Equipment 2. a) Press the LED key to acknowledge any blinking lights and turn them off. 14) Escape to the Main Menu. a) Enter OTHER MEASUREMENTS, VIEW RECEIVED DATA. b) Verify that the Datacom’s pattern is on the selected timeslots and that Equipment 1’s pattern is on the other timeslots. 15) You have just verified the proper insert operation of the SunSet E20. 198 SunSet E20 Version 1.01 Chapter 5 Datacom 1.0 1.1 1.2 1.3 1.4 1.5 1.6 Datacom Technology Overview ................. 201 Introduction ................................................ 201 Communication Components ................... 201 Transmission Basics .................................. 202 Data Networks ............................................ 203 Call Control Procedure .............................. 204 Physical Layer Protocol ............................. 205 2.0 DATACOM Menus ........................................ 207 2.1 DATACOM Mode Test Configuration ......... 207 2.1.1 DATACOM Test Mode ............................... 208 2.2 Datacom Interface ...................................... 212 2.2.1 Live Tracer ................................................ 213 2.3 View/Print Buffer ......................................... 217 2.4 DATACOM Measurement Results .............. 218 2.5 Other Measurements.................................. 221 2.5.1 View Received Data ................................ 222 2.5.2 Propagation Delay ................................... 222 2.6 Protocols ..................................................... 224 3.0 Datacom Interface Pin-outs ....................... 224 4.0 Applications ................................................ 228 4.1 Point-to-Point Datacom Testing ................. 228 4.2 Testing the Datacom Port of a 2M Multiplex ...................................................... 231 4.3 Datacom Monitoring ................................... 232 4.4 Fault Location with Remote & Local Loopbacks .................................................. 234 SunSet E20 Version 1.01 SunSet E20 Version 1.01 1.0 Datacom Technology Overview 1.1 Introduction Data communication touches upon every area of our lives. Since the rapid technological development in the areas of ICs (Integrated Circuits), almost every form of communication can be transmitted digitally. Most people associate data communication with computers; however, recent applications of data communication include voice, video and image digitization. Due to the accuracy and cost effectiveness of digitizing, it is important to understand the components and the process in a data communications network. 1.2 Communication Components In digital computers, data is stored in individual bits. These bits can have two defined states- 1 (on) and 0 (off). On the other hand, analog logic has a range of possible states. When graphed, analog signals are sine waves, while digital signals are square. Sound, since it is always changing, is analog. Therefore, phone lines carry analog signals. In order for a computer to send its digital data over the phone line, this data must be converted into an analog signal. A modem reads the computer’s digital signals and converts them into tones that can be sent over the phone line. The modem on the other end picks up these tones and turns them back into digital signals that are sent to the receiving computer. Modulation is the process of converting the digital waveform into an analog signal suitable for phone line transmission; demodulation is the inverse, analog to digital. A Modem (as in Modulation/ Demodulation) carries out these processes. The three major components of data communication are: the terminal, the modem, and the host computer. At the terminal, analog information (meaning information from the outside world) is translated into digital format. This digital data is then transmitted to a host computer. A host computer is a large computer system which is able to run programs from several different users at the same time. The terminal equipment is referred to as DTE (Data Terminal Equipment). The Modem is called DCE (Data Communication Equipment) and sometimes Data Set. Figure 121 depicts the Ch.5 Datacom 201 relationship between these data communication terms and your everyday equipment. Analog Facilities DTE DCE DCE Host Computer DTE Terminal Telephone Line Modem Modem Figure 121 Data Communication Facilities 1.3 Transmission Basics The communications medium is composed of a primary channel and a secondary channel. A secondary channel is not always present in modems. A channel has the capacity to transfer data in either direction; each channel actually has two signals, one for each direction. When both directions can be active simultaneously, then the channel is called full-duplex. When only one direction can be active at a time, the channel is half-duplex. The channel’s capacity is equal to the number of bits per second it can carry. The secondary channel’s capacity is always less than that of the primary channel. Another associated concept is that of carrier. A carrier is a continuous sine wave signal that passes over the medium. This is the actual pipeline that allows the data to travel from DCE to DCE. The presence of carrier does not necessarily mean that there is data transfer. In order to send data from DCE to DCE, the data must be modulated. 202 SunSet E20 Version 1.01 1.4 Data Networks Here is a brief introduction to the various options available in data networks. Circuits can differ in the following ways: 1) The direction of transmission 2) The number of devices that are connected to the network 3) The method of customer payment 4) The method of transmission The Direction of Transmission A simplex channel transmits data in only one direction. A halfduplex channel transmits in either direction; however, only one direction can be active at a time. A full-duplex channel can send data in both directions simultaneously. The Number of Connected Devices A Point-to-Point circuit connects two devices. For example, a line connecting two modems is Point-to-Point. A Point-to-Multipoint circuit can connect several different devices. The Method of Payment In a Switched circuit, a customer is charged for the setup, duration, and termination of the call. A normal telephone call uses a switched circuit. A dedicated, also called leased, line maintains a permanent connection between two points. The customer pays a fixed rate for this connection. The Method of Transmission In asynchronous transmission, data is coded into a series of pulses with a start and stop bit. A start bit is sent by the sending modem to say that it is going to send a character. It then sends the character and follows with a stop bit which states that the transfer is complete. After transmission of the character, the line can send the next character with start/stop bits or can go into an idle state (here it remains in the mark, 1, position). In synchronous transmission, data is sent via a bit stream, which sends groups of characters in a single stream. Modems gather groups of characters into a buffer, where they are prepared to be sent in a stream. In order for this stream to be sent, the modems must be in perfect synchronization with each other. The idle time between characters is eliminated. The first bit of a character immediately follows the last bit of the previous character; Ch.5 Datacom 203 there are no start/stop bits. 1.5 Call Control Procedure A standard call procedure is outlined in Figure 122 and described below. This procedure pertains to a full-duplex circuit. Since both carriers can be present simultaneously in a full-duplex circuit, it does not matter which side turns on RTS first. In Figure 122, the West DTE happens to be first. For half-duplex circuits, the side to transmit first must be arranged beforehand. The West DTE sends RTS to the West DCE. RTS, Request To Send, tells the modem to activate its outgoing carrier. RTS results in two steps for the West DCE. It turns on the Eastbound carrier, as shown in Figure 122, and also sends CTS back to the West DTE. CTS, Clear To Send, indicates that the carrier has been turned on and so the DTE may begin to transmit its data. The East DCE senses that the Eastbound carrier from the West DCE is now present. Consequently, it sends CAR_DET to the East DTE. CAR_DET, Carrier Detect, means that the DCE has sensed an incoming carrier. This alerts the East DTE that it should shortly receive data from the West. The East DTE also turns on its RTS. This results in the same steps as outlined above for the West. The RTS is received by the East DCE. The East DCE now activates its Westbound carrier and thus, both carriers are present. It also sends CTS back to East DTE. The West DCE, recognizing the incoming (Westbound carrier) turns on the CAR_DET to the West DTE. At this stage, both carriers are active, but no modulation or data transfer has taken place. When the West and East DTE recognize that the CTS signal is on, they can begin to transmit data on the Transmit Data wire. When the West DTE places data on its Tx wire, the West DCE begins to modulate its carrier. The data is sent to the East DTE, where it is demodulated and sent on the Receive data wire. The East DTE receives exactly what was sent by the West DTE. A similar procedure takes place when the East DTE places data on its Tx wire. The East DCE begins modulation and sends the analog information to the West DCE. The West DCE demodulates this data and sends it to the West DTE on the Rx wire. When the West (or East) DTE has sent all its data, it turns off its TX wire and the East DTE turns off its Rx wire. The West DTE 204 SunSet E20 Version 1.01 turns off RTS. The West DCE turns off CTS and deactivates its carrier. The East DCE senses the loss of carrier and turns off CAR_DET. When the East DTE has finished transmitting its data, the same steps are followed. RS232 Cable Digital West DTE RTS On Phone Line Analog RS232 Cable Digital West DCE East DCE Activate CAR_DET Carrier On CTS On Eastbound Carrier Present East DTE RTS On Tx Data On Modulate Carrier Rx Data On Demodulate Carrier Modulation Both CAR_DET Carriers On Present Demodulate Carrier Rx Data On Modulate Carrier Tx Data On Rx Data Off Tx Data Off RTS Off CTS On CAR_DET Off Figure 122 Full-Duplex Call Procedure 1.6 Physical Layer Protocol As discussed in the ISDN Overview, the data communication process involves protocol. The OSI standard is commonly used. At the upper layer protocol, some frequently used standards are TCP/IP, HDLC and X.25, etc. The physical level also has an extensive suite of standards available. For the physical layer functions, V.35 is the more dominant standard used internationCh.5 Datacom 205 ally. For discussion, we will use a V.35 DB-34 pin connector to illustrate the physical layer functions. Also for the purpose of discussion, DCE and DTE are represented by a modem and a computer respectively. Figure 123 shows the pin assignment of a V.35 interface. Here is a brief description of each pin function: • Pin B - Provides for grounding • Pins P,S and R,T - The DTE transmits data on pins P,S, and receives data on pins R,T. This is reversed for the DCE. • Pins C and D - The DTE can use RTS (Request to Send) on pin C, and receives CTS (Clear to Send) on pin D, from the DCE. • Pins E and H - When the DCE is powered on, and is not in test mode, the DTE receives a DSR (Data Set Ready) on pin E. When terminal is ready, it transmits a DTR (Data Terminal Ready) on pin H. • Pin F - The modem asserts DCD (Data Carrier Detect) whenever it receives a signal on the telephone line that meets its internal criteria for amount of energy at the carrier frequency. • Pin N - Initiates a remote loopback (RL) • Pin L - Initiates a local loopback (LL) • Pin Y,AA - Used for the transmit clock • Pin V,X - Used for the receive clock 206 SunSet E20 Version 1.01 V.35 DB-34 Interface NN JJ DD Z V LL FF BB X MM HH CC Y R T U KK EE AA W S L N P F B J D K M E H A C PIN # Function TxD P,S RTS C DTR H T CLK U,W RxD R,T TxCLK Y,AA DSR E RxCLK V,X CTS D DCD F RL N LL L GND B Figure 123 V.35 DB-34 Interface The following pin connections are required as minimum between a DTE and DCE: P,S; R,T; Y,AA; V,X; and B. • Pin P,S and R,T are for the DTE to transmit and receive data. • Pin Y,AA and V,X are used for clocking purposes. • Pin B is the signal ground between the DTE and the DCE. 2.0 DATACOM Menus 2.1 DATACOM Mode Test Configuration The DATACOM Test Mode provides testing using standard protocols V.35, RS449, X.21, G.703, and RS232. • The 2.048 Mbps interfaces are ignored. • You test only the low speed synchronous/asynchronous signal on the MULTIPORT. • Figure 124 displays the DATACOM Configuration screen. Ch.5 Datacom 207 15:12:46 TEST CONFIGURATION TEST MODE INTERFACE MODE TEST RATE TxDATA CLK CLK POLAR USER LED 1 USER LED 2 V.35 RS449 : : : : : : : : DATACOM V.35 DCE 38.4k INTERN NORMAL DCD DSR X.21 MORE Figure 124 DATACOM Mode 2.1.1 DATACOM Test Mode The following items should be configured for the DATACOM Mode: 1) INTERFACE Options: V.35 (F1), RS449 (F2), X.21 (F3), G.703 (more, F1), RS232S (more, F2), RS232A (more, F3) Type determines the electrical interface at the multiport. • Press the F-key corresponding to the desired interface type: RS449 (F2) is analogous to V.36 X.21 (F3) to V.11 RS232 (more, F2 and F3) to V.24 • For RS232, A is Asynchronous and S is Synchronous. 2) MODE Options: DTE (F1), DCE (F2), MON (F3) The MODE options depend upon the specific TYPE chosen in the slot above: For V.35, RS449, X.21, RS232A/S: • Choose DTE (F1) to emulate Data Terminal Equipment to plug the test set into DCE equipment. 208 SunSet E20 Version 1.01 • Select DCE (F2) to emulate Data Circuit Equipment, to plug the set into DTE equipment. For G.703, Mode is forced to CO-DIR Note: Make sure to use connectors specific to the SunSet E20 (SS253/Y, SS254/Y, SS255/Y, SS256B, SS262, SS267/Y); other connectors may look similar (such as those provided for the SunSet E8 or SunSet E10), but they can vary considerably. Specifically, do not use the SS252 for SunSet E20 DTE or DCE testing. Notes: • In some cases the SunSet E20 may overload datacom signals in the bidirectional monitor mode. • For V.35 and RS449 monitoring, the unit will present a terminating resistor to the line which could cause a double termination, and affect signal amplitude. 3) TEST RATE Options: The TEST RATE options available to you depend upon the MODE selected above: TEST MODE V.35 RS449, RS232A, RS232S, & X.21 F1 F2 300 600 2400 4800 14.4k 19.2k 48k Nx56k F3 1200 9600 38.4k Nx64k F4 more more more more For G.703 Mode, you are given only the Nx64K option. Select from (1-8)x64k test rates. • Choose the desired rate for the circuit being tested by pressing the corresponding F-key for Modes V.35, RS449, and X.21. RS232 supports only 1x64K. 1) Cursor to the desired rate. For example, if you select 10, as in the figure above, you will have an 10x64K (or x56K) rate. 2) Press ENTER or ESCAPE to return to the TEST CONFIGURATION screen. Ch.5 Datacom 209 • If you select Nx56K or Nx64K, you will enter the SELECT RATE screen: MEAS 14:52:45 TEST CONFIGURATION SELECT RATE 01 09 17 25 02 10 18 26 03 11 19 27 Figure 125 04 12 20 28 05 13 21 29 06 14 22 30 07 15 23 31 08 16 24 32 Select Fractional Rate Note that when you are in G.703 Mode if you attempt to select a rate of 9 or above you will see a ‘Not valid for G.703” message. 4) TxDATA CLK Options: INTERN (F1), RECEIVE (F2). Determines the transmit signal clock source Note: Clocking applies only to synchronous transmission. Thus, for RS232 Asynchronous signals. For X.21 (where DTE is automatically receive and DCE is automatically internal), this item will not appear in the menu. • Press INTERN (F1) to select the test set’s internal clock. The set is the master timing source on the circuit. • Press RECEIVE (F2) to use the signal received at the multiport as the transmit signal clock source. The test set is then in slave timing. • For DCE, the TxDATA CLK is set by default to INTERN. • For DTE, the TxDATA CLK is set by default to RECEIVE. 210 SunSet E20 Version 1.01 5) CLK POLAR Options: NORMAL (F1), INVERT (F2) • The Clock POLARity affects both TX and RX at the same time. • When the CLK POLAR is INVERTed, the set will assume data is received with 180 degree phase difference with the clock, and the set will transmit data with 180 degree phase difference with the clock. • When the CLK POLARity is NORMAL, the set will receive and transmit data in alignment with the clocking. The following three items apply only to asynchronous datacom transmission. They appear in the menu if the RS232A Mode is selected: 15:12:46 TEST CONFIGURATION TEST MODE : INTERFACE : MODE : TEST RATE : BIT/CHAR : STOP BITS : PARITY : USER LED 1: USER LED 2: 14.4K 19.2K DATACOM RS232A DTE 38.4k 8 1 NONE DCD DSR 38.4K MORE Figure 126 Datacom RS232A Config Screen 6) BIT/ CHAR Options: 6 (F1), 7 (F2), 8 (F3) Determines how many bits will be transmitted for each character of information. 7) STOP BITS Options: 1 (F1), 2 (F2) Determines how many stop bits will be transmitted for each character of information. Ch.5 Datacom 211 • A stop bit signifies the end of a byte. 8) PARITY Options: EVEN (F1), ODD (F2), NONE (F3) Determines how many parity bits are transmitted for each character of information. Parity is a method of checking the accuracy of transmitted or stored data. An extra bit, known as a parity bit is added to the data as an accuracy check: • In Odd Parity (F2), the total number of ones (including the added parity bit) is odd. • In Even Parity (F1), the total number of ones (including the added parity bit) is even. • None (F3) signifies no parity checking The receiving element checks the parity bit and indicates an error if the total number of ones does not add up to the correct total. 9) USER LED 1/2 Options: Depends on your TYPE and MODE; see the following table. See Section 2.2 for further explanation. Select the lead states you want the USER LEDs to show. DTE/DCE Async Synchronous Leads RS232 RS232/V.24 V.35 X.21 RS449/V.36 EIA 530/RS422 DSR X X X X X DTR X X X X X DCD X X X X X T(REF)CLK X X X X TxCLK X X X X RxCLK X X X X RL X X X X X LL X X X X X C X I X S X 2.2 Datacom Interface When you have selected E1-MUX, MUXTEST, or DATACOM Mode in TEST CONFIGURATION, the DATACOM INTERFACE menu item appears in the Main Menu. 212 SunSet E20 Version 1.01 15:32:21 SunSet-E20 MAIN MENU TEST CONFIGURATION TEST PATTERN MEASUREMENT RESULT PROTOCOLS DATACOM INTERFACE OTHER FEATURE SYSTEM PARAMETERS LANGUAGE SELECTION Figure 127 Main Menu/Datacom Interface When you enter DATACOM INTERFACE, you will go into the DATACOM TIMING ANALYSIS screen. 15:40:53 DATACOM TIMING ANALYSIS LIVE TRACER VIEW/PRINT BUFFER Figure 128 Datacom Timing Analysis Menu 2.2.1 Live Tracer The LIVE TRACER screen displays the Mode and Type selected in Test Configuration, as well as the received signals. It also allows you to turn on/off the transmit signals. Refer to Figure 129. Ch.5 Datacom 213 22:36:15 MEAS DATACOM INTERFACE TYPE - RS232 MODE - DTE XMT: RTS - ON DTR - ON RL - ON LL - ON RTS CTS DTR DSR DCD RL LL ON OFF FREEZE MORE Figure 129 Datacom Interface Screen, Graph •Signals available in this screen depend on the selected MODE and TYPE: For example, when the Mode is set to DTE (as in Figure 129), the test set emulates Data Terminal Equipment. • For DCE, in V.35, RS449, and RS232, the available transmit signals to set are: CTS (Clear To Send) DSR (Data Set Ready) DCD (Data Carrier Detect) • For DTE, in V.35, RS449, and RS232, the received signals available to monitor are: RTS (Ready To Send) DTR (Data Terminal Ready) RL (Remote Loopback) LL (Local Loopback) • For V.35, RS449, and RS232, when the Mode is set to DTE, the test set emulates Data Terminal Equipment. The receive and transmit signals are reversed: CTS, DSR, and DCD are now the receive signals to monitor RTS, DTR, RL, and LL may be set for transmitting 214 SunSet E20 Version 1.01 • For X.21, the transmit and receive signals change: Signal C, Control, is used as the receive signal for DCE Mode and as the transmit signal for DTE Mode. Signal I, Indication, is the transmit signal for DCE and the receive signal for DTE. Note: When the Test Mode is E1-MUX, the test set always emulates Data Circuit Equipment (DCE). Thus, CTS, DSR, and DCD will always be the transmit signals for E1-MUX Mode. When the Test Mode is MUXTEST, the test set always emulates Data Terminal Equipment (DTE). Thus, RTS, DTR, RL, and LL will always be the transmit signals for MUXTEST Mode. When G.703 Type is chosen in the Test Configuration screen, the Datacom Interface screen is not available. Datacom Timing The timing in Datacom Analysis is often a critical issue. This feature allows the user to change the status the control leads, and observe the response time of the system. The user may also observe how long each datacom lead was active, and in which state. Refer to Figure 130. a) Observe each lead, and its On/Off state; indicated by the height of the graph line. The arrowhead on the graph line indicates when the SunSet is capturing traces. • The leads available to observe depend on your TYPE and MODE settings. b) You may change the status of the RTS, RL, DTR, and LL leads: • Move the cursor to the control leads you want to change, using the arrow keys. • Press the ON (F1) or OFF (F2) key to change the state. The following F-keys are available: • On (F1), OFF (F2): press to change the state of the highlighted lead. • FREEZE/RESUME (F3): press to stop or restart the reporting of lead state data. • TABLE/GRAPH (F4): press this key to change the presentation of the data. See Figure 130 for the Table screen: Ch.5 Datacom 215 22:36:15 MEAS DATACOM INTERFACE TYPE - RS232 MODE - DTE XMT: RTS - ON DTR - ON RL - ON LL - ON PAGE : 011 RTS ON 22:36:12.473 CTS OFF 22:36:12.473 DTR ON 22:36:12.473 DSR OFF 22:36:12.473 DCD OFF 22:36:12.473 RL ON 22:36:12.473 LL ON 22:36:12.473 ON OFF FREEZE MORE Figure 130 Datacom Interface, Table • In the TABLE mode, you will also see the TIME the state of a lead last changed. • TRIGON (more, F1 ): Press this key to set a Trigger; this way the SunSet will only capture the specific data you are looking for. For example, your trigger could be a loss of data; a change of state at the DTR falling edge. 15:12:46 DATACOM TIMING ANALYSIS TRIGGER LEAD : CTS EDGE : RISING Press Enter to START the TRIGER RISING FALLING Figure 131 Start Trigger 216 SunSet E20 Version 1.01 Start Trigger 1) LEAD: Determine which Lead you want to capture. Options: RTS (F1), CTS (F2), DTR (F3), DSR (more, F1), DCD (more, F2), RL (more, F3), LL (more, F1) 2) EDGE: Determine which edge to look at for a change of state. Options: RISING (F1), FALLING (F2) 3) Press ENTER and the unit will begin to look for a change of state as defined by the LEAD and EDGE parameters above. You will return to the display screen. The word Trig will be present in reverse video at the top of the screen, indicating the set is in TRIGGER mode. Press ESCAPE to return to the display with out setting a trigger. a) When a change of state is found, the SunSet E20 will present the data. c) When FREEZE is selected, new F-keys appear: • Use the PREVIUS (F1) and NEXT (F2) keys to scroll through the pages of data. A page is available for each change of state. 2.3 View/Print Buffer Observe or print the stored captured data; the last 40 seconds of captured control lead status for the Graphic mode, and up to 100 pages of control lead state changes and status with time stamp for the Table mode. The total number of pages of data is presented on this screen. See the following figure for an example screen: Ch.5 Datacom 217 15:12:46 DATACOM TIMING ANALYSIS VIEW/PRINT TRACER TOTAL OF PAGES - 100 FROM : 10 TO : 35 MODE GRAPHIC : GRAPHIC TABLE Figure 132 View/Print Buffer 1) Select the number of pages you want to view, at the FROM and TO lines. 2) Select whether to review the results in GRAPHIC (F1) or TABLE (F2) format. 3) Select what action to take: press CLR ALL (F1) to delete all of the results, press PRINT (F2) to print all of the stored results, or press VIEW (F3) to look at the results. Refer to section 2.2 for an explanation of the data. 2.4 DATACOM Measurement Results • Observe results for both directions of the datacom signal. • 3 pages of measurement results are available for Datacom. • See Chapter 3 for Measurement Results Definitions. Figure 133 shows you the Datacom Summary screen. See Figure 134 for page 1 bit error results, and Figure 135 for page 2 block error results. The results screen present some common information: TYPE:: This is datacom type, as selected in the Test Configuration. 218 SunSet E20 Version 1.01 MODE: This is the selected mode, as set in the Test Configuration. TxHz: This is the transmitted data rate, in kilohertz. RxHz: This is the received data rate, in hertz. MEAS ET - 000:01:27 15:12:46 RT - CONTINU DATACOM-SUMMARY TYPE - V.35 TxHz - 48k PAT - 2e15 MODE - DCE RxHz - 48000 RxDL - 0 PATL - 0 BIT - 0 RxDLS - 0 PATLS - 0 BER - 0 PAGE-UP PAGE-DN STOP MORE Figure 133 Datacom Summary Results Here are the definitions specific to this screen: RxDL: This is a count of the number of occurrences of received Data Loss. RxDLS: This is the number of seconds during which data was lost. PATL: This is a count of the number of occurrences of PATtern Loss. Ch.5 Datacom 219 PATLS: PATtern Loss Seconds indicates the number of seconds during which pattern was lost. 06:45:12 MEAS ET - 000:04:55 RT - CONTINU TxHz- 48k RxHz - 48001 PAT - 511 DATACOM BIT ERROR BIT - 0 ES - 0 SES - 0 EFS - 295 AS - 295 UAS - 0 SLIP- 0 PAGE-UP PAGE-DN RATE %ES %SES %EFS %AS %UAS - 2.3e-06 00.000 00.000 100 100 00.000 STOP MORE Figure 134 Datacom Measurement Results, pg. 2 Results definitions specific to this screen are: SLIP: This is the number of pattern slips which have occurred. 15:12:46 RT - CONTINU RxHz - 48000 ET - 000:01:27 PAT- 2e15 DATACOM BLOCK ERROR MEASUREMENT BLOCK SIZE # OF BLOCK BLOCK ERROR BLK ERR RATE PAGE-UP - PAGE-DN 1000 68688 0 0.0e-05 STOP MORE Figure 135 Datacom Measurement Results, pg. 3 220 SunSet E20 Version 1.01 Definitions specific to this screen are: # of BLOCKS: This shows the total number of blocks received BLOCK ERROR: Block error shows the number of blocks which contain any number of bit errors. BLK ERR RATE: The block error rate refers to the fraction of blocks in error- the number of blocks received with 1 or more bit errors (BLOCK ERROR) divided by the total number of blocks received (# of BLOCKS). Here is the DATAMON Summary screen: MEAS 15:12:46 ET - 000:01:27 RT - CONTINU DATAMON - SUMMARY TYPE - RS449 DTE DCE RxHz - 1200 RxHz - 1200 RxPa - 1010 TxPa - 1010 RxDL - 1 RxDL - 1 RxDLS- 66 RxDLS- 2 PATL - 1 PATL - 0 PATLS- 10 PATLS- 0 BIT - 1 BIT - 0 BER - 0.10 BER PAGE-UP PAGE-DN STOP MORE Figure 136 DATAMON Results Here is the measurement specific to this screen: RxPA: This is the received pattern; 1010 in Figure 136. DATAMON presents you with a G.821 Bit Error screen, similar to Figure 134, for both the DTE and DCE sides. 2.5 Other Measurements See the X.50 chapter for information on using X.50. Ch.5 Datacom 221 2.5.1 View Received Data • Observe the digits for each byte. • Use the PAGE-UP (F1) and PAGE-DN (F2) keys to scroll through the results. • Press PAUSE (F3) to freeze the results for easy viewing, then RESUME (F3) to continue the live presentation of data. MEAS 15:12:46 VIEW RECEIVED DATA INTERFACE - V.35 FROM - DTE PAGE - 01 BYTE BINARY 00 00011011 01 00001110 02 01000100 03 11011010 04 01001010 05 00100010 06 10100001 07 00110000 PAGE-UP PAGE-DN PAUSE Figure 137 Datacom View Received Data 2.5.2 Propagation Delay The Propagation Delay screen shown in Figure 138 displays the propagation delay on a looped back signal. The circuit must be looped back at the far end in order for the test set to perform this measurement. 222 SunSet E20 Version 1.01 MEAS 01:44:02 PROPAGATION DELAY ROUNDTRIP DELAY: 460000 UI ROUNDTRIP TIME: 220000 uS OFFSET:0 RESTART UI CALIB Figure 138 Propagation Delay The test set measures the number of unit intervals required for the signal to travel down the line and then return. This number is translated into an exact number of microSeconds of round trip delay. A UI (Unit Interval) equals .488 uS (microSeconds), at 2.048 Mbit/s. The unit will be able to measure delays of up to five seconds at a rate of 2.048 Mbit/s; representing 10240000 unit intervals at 2.048 Mbit/s. Use this procedure: 1) From the MAIN MENU, move the cursor to OTHER MEASUREMENTS; press ENTER. 2) Move the cursor to PROPAGATION DELAY; press ENTER. 3) The propagation delay measurement will automatically be performed, then displayed. Ch.5 Datacom 223 • Press CALIB (F2) if you have more than one piece of looped equipment on the line, and want to recalibrate the measurement to see the propagation delay between two devices, not including the SunSet E20. Observe the OFFSET to see the delay between only the two pieces of equipment (taking the E20 to Equipment 1 measurement out of the delay measurement). Continue as necessary to press CALIB to take measurements further down the line. • Use the RESTART (F1) key to perform another propagation delay measurement, if necessary. 2.6 Protocols Frame Relay Please see the Frame Relay manual for directions on using the Frame Relay functions. 3.0 Datacom Interface Pin-outs The following figures on the next pages depict all the datacom interface pin-outs. The available interfaces are: • V.35 (ISO 2593) • G.703 Kbps co-directional • RS-449 (ISO 4902) • X.21 (ISO 4903) • RS-232 (ISO 2110) • RS-530 (ISO 2110) 224 SunSet E20 Version 1.01 Figure 139 V.35 Pin-out Diagram CONECTION BETWEEN PINS R S - 2 3 2 D C E HDI-30 DB-37 19 18 17 16 15 14 13 12 11 10 9 8 7 6 5 4 3 2 1 37 36 35 34 33 32 31 30 29 28 27 26 25 24 23 22 21 20 13 12 11 10 9 8 7 6 5 4 3 2 1 25 24 23 22 21 20 19 18 17 16 15 14 CONNECTOR DB-37 CONNECTOR DB-25 PIN# 2 14 17 4 6 16 8 9 12 27 28 29 30 FUNCTION RxD TxD RTS CTS DSR DTR DCD TxCLK RxCLK RL LL GND REFCLK RS-232 DB-25 FUNCTION PIN# RxD 23 TxD 42 4 RTS 20 5 CTS 24 DSR 36 DTR 520 DCD 68 TxCLK 815 17 RxCLK 15 21 RL 17 19 LL 21 24 GND 18 7 REFCLK 7 CONECTION BETWEEN PINS R S - 2 3 2 D T E DB-37 HDI-30 PIN# 2 4 6 8 14 17 16 20 22 24 25 26 29 FUNCTION TxD RTS DTR TCLK RxD CTS DSR DCD TxCLK RxCLK RL LL GND RS-232 DB-25 FUNCTION PIN# TxD 2 RTS 4 DTR 20 TCLK 24 RxD 3 CTS 5 DSR 6 DCD 8 TxCLK 15 RxCLK 17 RL 21 LL 18 GND 7 Figure 140 RS232 Pin-outs Ch.5 Datacom 225 CONNECTION BETWEEN PINS X . 2 1 D C E 19 18 17 16 15 14 13 12 11 10 9 8 7 6 5 4 3 2 1 HDI-30 PIN# FUNCTION 13,14 TxD 2,30 RxD 3,4 Control 17,18 Indicaci—n 5,6 S 29 GND 37 36 35 34 33 32 31 30 8 7 6 5 4 29 28 27 26 25 3 2 1 15 14 13 12 11 10 9 CONNECTION BETWEEN PINS X . 2 1 D T E 24 23 22 21 20 HDI-30 PIN# FUNCTION 2,30 TxD 13,14 RxD 17,18 Control 3,4 Indicaci—n 15,16 S 29 GND CONNECTOR DB-37 CONNECTOR DB-15 Connections Between Pins X.21 DCE Connections Between Pins X.21 DTE DB-37 Pin # 14 13 2 30 18 17 4 3 6 5 29 DB-37 Pin # 2 30 14 13 4 3 18 17 16 15 29 X.21 DB-15 Pin # 2 9 4 11 3 10 5˜ 12˜ 6 13 8 X.21 DB-15 FUNCTION PIN# TxD 2,9 RxD 11,14 Control 3,10 Indicaci—n 5,12 S 6,13 GND 8 X.21 DB-15 FUNCTION PIN# TxD 2,9 RxD 11,14 Control 3,10 Indicaci—n 5,12 S 6,13 GND 8 X.21 DB-15 Pin # 2˜ 9 4 11 3 20 5 12 6 13 8 Figure 141 X.21 Pin-outs 36 19 18 17 16 15 14 1 13 12 11 10 9 8 7 6 5 4 3 2 1 SCSI-36 37 36 35 34 33 32 31 30 29 28 27 26 25 24 23 22 21 20 1 19 18 17 16 15 14 13 12 11 10 9 8 7 6 5 4 3 2 1 37 36 1 35 34 33 32 2 3 31 30 29 28 27 26 25 24 1 23 22 21 20 2 2 3 CONECTOR DB-37 CONEXION ENTRE PINES G . 7 0 3 D T E HDI-30 PIN# FUNCION 25 TxTIP 26 TxRIN 27 28 RxTIP RxRIN Figure 142 226 Dual DB-3 FUNCION PIN# TxTIP 1 Plug 1 TxRIN 2 Plug 1 RxTIP RxRIN CONECTOR DB-3 1 Plug 2 2 Plug 2 G.703 Pin-outs SunSet E20 Version 1.01 Figure 143 RS-449 Pin-outs RS530/EIA530 19 18 17 16 15 14 13 12 11 10 9 8 7 6 5 4 3 2 1 37 36 35 34 33 32 13 12 11 10 9 8 7 6 5 4 3 2 1 31 30 29 28 27 26 25 24 23 22 21 20 25 24 23 22 21 20 19 18 17 16 15 14 CONNECTOR DB-37 CONNECTOR DB-25 CONNECTIONS BETWEEN PINS R S - 5 3 0 D C E HDI-30 RS-530 DB-25 FUNCTION RxD CTS DSR DCD RxCLK TxCLK TxD RTS DTR T CLK RL LL GND PIN# FUNCTION RxD 2,30 CTS 3,4 DSR 5,6 DCD 7,8 RxCLK 9,10 TxCLK 11,12 TxD 13,14 RTS 15,16 17,18 DTR 19.20 T CLK 27 RL LL 28 GND 29 PIN# 3,16 5,13 6,22 8,10 17,9 15,12 2,14 4,19 20,23 24,11 21 18 7 CONNECTIONS BETWEEN PINS R S - 5 3 0 D T E HDI-30 PIN# 2,30 3,4 5,6 7,8 13,14 15,16 17,18 19,20 21,22 23,24 25 26 29 FUNCTION TxD RTS DTR T CLK RxD DSR CTS DCD TxCLK RxCLK RL LL GND RS-530 DB-25 FUNCTION PIN# 2,14 TxD 4,19 RTS 20,23 DTR 24,11 T CLK 3,16 RxD 6,22 DSR 5,13 CTS 8,10 DCD 15,12 TxCLK 17,9 RxCLK 21 RL 18 LL 7 GND Figure 144 RS530 Pin-outs Diagram Ch.5 Datacom 227 4.0 Applications 4.1 Point-to-Point Datacom Testing Data communication uses a standard interface in order for two equipment elements to communicate with each other. For example, V.35 is a commonly used interface. In this test, we will use the V.35 as the data communication interface. • Use the SunSet E20 to send an receive the signals with another data communication equipment. Use the following procedure: 1) Verify that the datacom circuit is not in service. This test will disrupt the service. 2) From the MAIN MENU, enter the TEST CONFIGURATION. 3) Configure the interface as follows: - TEST MODE - TYPE - MODE - TEST RATE - TxDATA CLK - CLK POLAR - USER LED 1/2 : DATACOM : V.35 : DTE : as specified by the span design : RECEIVE : as specified by the span design : as desired Note: If the test set must supply the clock then select INTERN for TxDATA CLK. If the test set should follow timing from the network select RECEIVE. 4) Connect the SunSet E20s to the circuit as shown in Figure 145. 228 SunSet E20 Version 1.01 Figure 145 V.35 Datacom Test Ch.5 Datacom 229 75W L2-RX 120W x 36 pin SCSI connection DATACOM HEADPHONE V.35 DTE Interface 75W-L2-TX SunSet E20 Left Side Connector Panel Modem V.35 DCE Interface V.35 DCE Interface 75W Modem x L2-RX 75W-L2-TX V.35 DTE Interface 120W SunSet E20 x Left Side Connector Panel 36 pin SCSI connection DATACOM HEADPHONE x 5) Press ENTER to return to the MAIN MENU. a) Select DATACOM INTERFACE and press ENTER. b) Enter LIVE TRACER. 6) Examine the status of the control leads. The terms are defined as follows: - CTS - DSR - DCD : Clear to Send : Data Set Ready : Data Carrier Detect 7) On the transmit side, turn the following signals ON or OFF, to test whether the other data communication equipment is receiving the SunSet's signal: - RTS - DTR : Ready to Send : Data Terminal Ready 8) Verify that the PAT SYNC LED is lit green on both sets. 9) Escape to MAIN MENU, cursor down to MEASUREMENT RESULTS, press ENTER. View the measurement information. a) Verify the RxHz matches the TxHz. b) Verify there are no slips or errors. 10) Verify that you can inject a bit error: a) Press the ERR INJ key. b) Confirm that the error was received by the far SunSet E20. 230 SunSet E20 Version 1.01 4.2 Testing the Datacom Port of a 2M Multiplex • Test the low speed datacom port of a 2M multiplex using the E20 in DATACOM mode. 1) Turn your SunSet E20 on using the red POWER key located on the bottom left of the keypad. 2) From the Main Menu, enter TEST CONFIGURATION. Select DATACOM Test Mode. Configure the other settings as follows: TYPE: Select whichever datacom interface type you are using MODE : DTE TEST RATE : as desired TxDATA CLK : RECEIVE CLK POLAR : as specified by the span design USER LED 1/2 : as desired 3) When your settings are correct, press ENTER. 4) Connect the test set to the circuit as shown in Figure 146. MULTIPORT 2M MUX Figure 146 Testing the Datacom Port of a 2M Multiplex • Press the LED key to acknowledge any blinking lights and turn them off. 5) From the Main Menu, enter DATACOM INTERFACE. a) Enter the LIVE TRACER. Ch.5 Datacom 231 b) Verify that DATA on the receive side says LIVE. 6) Inject an error from the test set using the ERR INJ key. • You can verify that this error returns to the test set by seeing if the BIT ERROR LED lights red. • You may also want to enter MEASUREMENT RESULTS (from the Main Menu) and make sure that an error has been recorded. 7) You have just checked the low-speed datacom port of the 2M multiplex. 4.3 Datacom Monitoring It can be very useful to monitor both sides of a datacom transmission. We will use RS449 as the interface for this sample. Remember that in RS449 and V.35 monitoring a terminating resistor will be present, which could cause a double termination and affect signal amplitude. Follow this procedure: 1) Configure the test set as follows: TEST MODE : DATACOM INTERFACE : RS449 MODE : MON USER LED1/2 : as desired a) Press ENTER. 2) Connect the SunSet E20 to both the DCE and the DTE equipment, using a Y cable (SS255Y for RS449), as in Figure 147. 232 SunSet E20 Version 1.01 DTE DCE Multiport TE ST TE CO IN ST NF IG MO TE MO UR US DE RFA DE AT US ER : CE: : IO ER LE N DA LE D 1 D V. TA : 2: MO 35 COM DS N RL R Figure 147 Monitoring Datacom 3) Enter the DATACOM INTERFACE/ LIVE TRACER. a) Observe the control lead changes. The terms are defined as follows: - RTS : Ready to Send - CTS : Clear to Send - DTR : Data Terminal Ready - DSR : Data Set Ready - DCD : Data Carrier Detect - RL : Remote Loopback - LL : Local Loopback b) If desired, press TRIGON (F2), and select Trigger states; LEAD and EDGE, such as the DCD lead on a RISING edge to see when Data Carrier Detect goes On, then press enter. Observe the Trigger events. 4) Enter MEASUREMENT RESULTS. a) Verify the RxHz. b) Verify that there has been no loss of data, and that there are no errors. c) Page through the results screens using the F1 and F2 keys. Observe the DTE and DCE results. You should see one Bit Error recorded on the DCE screen. Ch.5 Datacom 233 d) Repeat the procedure, this time injecting from the DCE to the DTE, and looking at the DTE G.821 screen. 4.4 Fault Location with Remote & Local Loopbacks This application provides a troubleshooting procedure using the remote and local loopback capabilities of the SunSet E20. Figure 148 shows a remote and local loopback. Local Loopback Modulator Output RS-449 DTE DCE Demodulator Output Remote Loopback West East RCV DATA Phone Line RS-449 DTE DCE ... DCE DTE XMT DATA Figure 148 Local and Remote Loopback 1) From the Main Menu, enter TEST CONFIGURATION. a) Select TEST MODE: DATACOM. b) Configure the rest as follows: TYPE: per interface MODE: DTE RATE: per modem TxDATA CLK: INTERN CLK POLAR: NORMAL USER LED 1/2: As desired c) When your settings are complete, press ENTER. 2) Connect the test set to the modem under test. 234 SunSet E20 Version 1.01 3) From the Main Menu, enter DATACOM INTERFACE. a) Make sure that the transmit leads RTS and DTR are turned on. If not, place the cursor on the lead and press the ON (F1) key. b) Cursor to LL, Local Loop, and press ON (F1). This should activate a loop on your modem; the receive data LED should light up. If the Received data LED of the modem lights up, but not the Transmit data LED, then the modem under test is faulty because it can’t transmit the received data back to the E20. 4) Escape back to the Main Menu and enter MEASUREMENT RESULTS. a) Verify that the RxHz is equivalent to your Test Rate. If there is a discrepancy, your modem has a problem retransmitting the clock. 5) Make sure that the receive and transmit patterns are the same and that your PAT SYNC LED is lit green. If it isn’t, try pressing the AUTO key. If the LED is still red, your local modem may have a problem regenerating the pattern. 6) Test the validity of your loop by pressing the ERR INJ key. a) Verify that these errors come back to you. The BIT ERROR LED should light red and a bit error should be recorded in MEASUREMENT RESULTS. 7) If you have completed the above steps successfully, then your local modem is not at fault. a) Return to the DATACOM INTERFACE screen and turn off the Local Loop. Now that you have established that the problem does not lie with your local modem, you now should test the far end modem using a remote loopback. 8) To test the remote loopback, make sure that the far end modem has a loopback capability at the interface (make sure the modem can loop TxDATA to the RxDATA and also TxCLK, RxCLK, and TCLK). 9) To use the modem, it may be necessary to connect a computer to dial out. Once the connection is in place, disconnect the computer and replace it with the SunSet E20 datacom connector. Ch.5 Datacom 235 Note: It may also be necessary to set DTR to be always on by using the computer so you don’t drop the line when switching from the computer to E20 datacom connector. 10) Escape to the Main Menu. a) Enter DATACOM INTERFACE. b) Make sure that the transmit leads RTS and DTR are turned on. If not, place the cursor on the lead and press the ON (F1) key. c) Cursor to RL and press the ON (F1) key. 11) Escape back to the Main Menu and enter MEASUREMENT RESULTS. a) Verify that the RxHz is equivalent to your Test Rate. If you have a low RxHz, then the clock is not being received properly from the far end modem. 12) Check the PAT SYNC LED. It should be green. a) If it is, you can perform a BERT test by pressing the ERR INJ key. b) Verify that these errors come back to you. The BIT ERROR LED should light red and a bit error should be recorded in MEASUREMENT RESULTS. If this is successful, then the phone line and the far end modem are working properly. 13) If your BERT test is not successful, this points to a problem with either the phone line or the far end modem. To test the far end modem, you need to perform a local loopback on that end, following the procedure outlined in steps 4 - 9. If there are n problems with this local loopback, then the problem is with th phone line. If there are problems, the modem is at fault. 236 SunSet E20 Version 1.01 Chapter 6 Technology Overview 1.0 1.1 1.2 1.3 1.4 1.5 1.6 1.7 1.8 1.9 E1 Technology Overview ........................... 239 Introduction ................................................ 239 Technical Standards ................................... 239 Basic Definitions ........................................ 239 Converting a Voice Signal .......................... 240 2.048 Mbps Data Rate ................................ 241 Line Coding................................................. 241 Signal Levels .............................................. 244 2.048 Mbps Framing ................................... 245 MFR2/DTMF/DP Technology ...................... 250 SunSet E20 Version 1.01 SunSet E20 Version 1.01 1.0 E1 Technology Overview 1.1 Introduction E1 Technology Overview covers the fundamental concepts in 2.048 Mbps technology: sampling a signal, converting this information into a bitstream, and dividing the bitstream into segments (channels). This section also touches upon the basics of signalling technologies like MFR2 and CAS. 1.2 Technical Standards E1 transmission technology is defined by a number of technology standards. Such standards allow equipment designers and service providers to ensure that various pieces of equipment are compatible and that networks operate in a predictable, reliable manner. The following standards cover many of the important aspects of E1 transmission technology: - ITU G.703 Physical/electrical characteristics of interfaces - ITU G.704 Synchronous frame structures - ITU G.706 Frame alignment and CRC - ITU G.821 Error performance of an international connection - ITU G.826 - ITU M.550/M.2100 Bringing an international connection into service - Q.140 - Q.400 Consult these standards when you need detailed information on particular aspects of E1 transmission technology. 1.3 Basic Definitions Binary Data: A signal which has been converted into a format of 0s and 1s. Bit Stream: Binary Data which has been placed in a sequence at a fixed rate. Ch.6 Technology Overview 239 Channel: A single portion of the bit stream which is available for bidirectional communication. 1.4 Converting a Voice Signal To transmit voice in a digital medium, such as a 2.048 Mbps line, we first need to encode the analog voice signal in a binary format. Then we must convert it to a bit stream suitable for digital transmission. This conversion can be achieved through Pulse Code Modulation. Refer to Figure 149. voice-frequency signal ... 11101101 11100000 10101001 00010001 ... resulting 64Kbps bit stream time Figure 149 Converting a Voice Signal The Nyquist theorem requires that the signal be sampled at twice the signal's maximum frequency in order for the signal to be reproduced without a loss of information. For voice signals, the maximum frequency is approximately 4000 Hz. This provides adequate clarity while conserving transmission bandwidth. Thus, we must sample our 4000 Hz voice signal at a frequency of 8000 Hz (8000 samples/second). The amplitude of the analog voice signal is sampled 8000 times per second. Each amplitude value is expressed as an 8-bit code "word". These 8-bit words occurring 8000 times per second 240 SunSet E20 Version 1.01 form a 64 Kbps digital bit stream. The 8-bit code word is formed by comparing the amplitude of the analog sample to a “companding characteristic.” The companding characteristic is a formula which translates the amplitudes of the samples into the 8-bit code words. Internationally, a companding characteristic known as “A-law” is used. The purpose of A-law is to provide optimum signal to noise performance over a wide ranger of transmission levels. Linear encoding provides a poorer signal to noise ratio at the -20 dB level typical of speech. In North America, the encoding is done according to the Mu-Law. Therefore, the companding law used for encoding the voice signal must match that for decoding, for distortion-free transmission. 1.5 2.048 Mbps Data Rate The E1 signal (bitstream) is transmitted at a rate of 2.048 Mbps (2 048 000 bits per second). This transmission rate is achieved by combining 32 individual 64 Kbps bitstreams: 64 (Kbps/Channel) x 32 (Channels) = 2048 Kbps = 2.048 Mbps This 2.048 Mbps signal is the overall E1 transmission rate. 1.6 Line Coding Two common types of line coding are defined for use in a E1 network: AMI or HDB3. AMI This is the simplest of the two line coding formats. AMI stands for Alternate Mark Inversion, and is used to represent successive 1 values in a bitstream with alternating positive and negative pulses. Figure 150 depicts these alternating pulses. AMI is not used in most 2.048 Mbps transmission because synchronization loss occurs during long strings of data zeros. Ch.6 Technology Overview 241 1 1 0 1 0 0 0 1 2.37V 0V time -2.37V Figure 150 AMI Line Coding HDB3 The HDB3 line coding format was adopted in order to eliminate these synchronization problems occurring with AMI. In the HDB3 format, a string of four consecutive zeros is replaced with a substitute string of pulses containing an intentional bipolar violation. As the far end equipment receives the E1 signal, it examines the bit stream for these intentional bipolar code violations. It will then extract the code and reconstruct the original data. The HDB3 code substitutions provide high pulse density so that the receiving equipment is always able to maintain synchronization with the received signal. For example, in the code 1000 0000, HDB3 coding substitutes bipolar violations for the string of zeroes. Figure 151 portrays the HDB3 format. 242 SunSet E20 Version 1.01 1 0 0 0 0 0 0 0 0 2.37V AMI rule violation 0V time AMI rule violation -2.37V Figure 151 HDB3 Line Coding General rules apply to the substitutions. The particular substitution made is governed by the polarity of the last inserted bit, as well as the number of pulses following the previous violation bit. If there is an odd number of pulses, 000V is substituted; the polarity of V is the same as that of the bit immediately preceding it. If there is an even number of pulses, B00V is inserted; the polarity of B is opposite to that of the bit immediately preceding it and the polarity of V is the same as that of B. Refer to Figure 152 to see the types of HDB3 zero substitution codes. Ch.6 Technology Overview 243 Polarity of Previous Pulse Number of Pulses (since last substitution) 1 0 0 1 0 0 0 1 1 0 0 1 Even (Substitute B00V) 0 0 0 1 Odd (Substitute 000V) Figure 152 HDB3 Encoding The SunSet E20 is configured to detect the two types of HDB3 substitution codes, even if they are not matched to the proper number of pulses since the last substitution. 1.7 Signal Levels Once a signal has been encoded into a binary format and assembled into a bit stream, the pulses in the bit stream are then converted to actual voltage levels suitable for E1 transmission. Referring to Figures 149 and 150, we see that a typical signal level for an E1 pulse with 75 ohm impedance is either +/- 2.37 volts (for a binary "1" value) or 0 volts (for a binary "0" value). Real-world signal values would typically be +/- 10%. Ideally, each pulse transmitted would be perfectly symmetrical. However, in a real-world situation, each pulse becomes slightly distorted when it is generated and when it travels down the E1 line. Refer to Figure 153 for the shape of an "ideal" pulse vs. an actual pulse that would be encountered on an E1 line. An E1 pulse may be required to conform to a standardized 244 SunSet E20 Version 1.01 pulse shape. This is often determined by comparing it to a specified "mask". A common pulse mask is given by the ITU-T G.703 recommendation. Note: For an E1 pulse with 120 ohm impedance, the signal level is either +/- 3 volts (for a binary "1" value) or 0 volts (for a binary "0" value) with real world values typically be +/- 10%. Ideal Pulse Actual Pulse Figure 153 Pulse Shape 1.8 2.048 Mbps Framing E1 transmission utilizes two main types of framing: Frame Alignment Signal (FAS) and MultiFrame Alignment Signal (MFAS). Framing is necessary so that the equipment receiving the E1 signal is able to identify and extract the individual channels. PCM31 uses FAS framing and PCM-30 uses MFAS framing with FAS framing. Frame Alignment Signal (FAS) The 2.048 Mbps frame consists of 32 individual time slots (numbered 0-31). As described previously, each time slot consists of an individual 64 Kbps channel of data. PCM-31 uses FAS. In the FAS format, time slot 0 of every other frame is reserved for the frame alignment signal (FAS) pattern. Alternate frames contain the FAS Distant Alarm indication bit and other bits reserved for National and International use. Hence, there are 31 time slots into which we can place data. Refer to Figure 154, FAS Framing Format. The FAS format does not accommodate voice channel signalCh.6 Technology Overview 245 ling. The first bit (c or Si) of these frames is reserved for international use. It can be used for the CRC-4, Cyclic Redundancy Check-4, when enhanced performance monitoring is required. Therefore, when CRC is enabled in the TEST CONFIGURATION screen, these bits depend upon the CRC calculation and should continually change between 0 and 1. When CRC-4 is not enabled, these bits are set to 1. In FAS framing, the odd frames do not contain the frame alignment signal. The bits are defined as follows: i: When CRC is enabled, bit 1 is used for the Cyclic Redundancy Check-4 performance monitoring. When CRC is enabled, this bit may not be changed here. It may be changed when CRC is disabled. 1: The second bit is always set to 1 to avoid FAS signal simulations. A: Bit A is used for the Remote (FAS) Distant Alarm. Set this bit to 1 to indicate an alarm condition. For undisturbed operation, this bit is set to 0. a (bits 4-8): Spare bits; they should be set to 1 for crossing an international border, when not in use, as defined by ITU-T G.704. The first bits of frames 13 and 15 transmit the two E-bits, which are CRC-4 error indication bits. A zero in this bit denotes received errored sub-multiframes; a one represents received frames free of errors. 246 SunSet E20 Version 1.01 ONE 2.048 MBPS FRAME TIME SLOT 0 1 ... 31 BITS Even Frame: Contains Frame Alignment Signal (FAS) Odd Frame: Does Not Contain Frame Alignment Signal (NFAS) 1 2 3 4 5 6 7 8 E 0 0 1 1 0 1 1 E 1 A Sa Sa Sa Sa Sa Sa= Bit Reserved for National use E= Error Indication Bit A=Remote Alarm (FAS Remote Alarm Indication) Frame Alignment Signal = 0011011 8 bits per timeslot x 8000 frames per second = 2.048 Mbps transmission rate Figure 154 FAS Framing Format MultiFrame Alignment Signal (MFAS) MFAS framing provides Channel-Associated Signalling (CAS) to transmit A/B/C/D bit supervision information for each channel. This method uses the 32 timeslot frame format including timeslot 0 for the FAS. This method also uses timeslot 16 for the MultiFrame Alignment signal and the Channel Associated Signalling. It takes 16 frames to make up a MultiFrame. When we transmit the MFAS frame, we leave all of our individual FAS frames and framing information intact. We merely assemble 16 FAS frames together, dedicate timeslot 16 of the first frame to our MFAS framing information, then dedicate timeslot 16 of the remaining 15 frames to our A/B/C/D bits. Refer to Figure 155. Frame 0, timeslot 16: 8-bit MFAS signal Frames 1-15, timeslot 16: (4 signalling bits/channel) x (30 channels) / (8 signalling bits/frame timeslot 16) = 15 frames of timeslot 16 signalling Ch.6 Technology Overview 247 FRAME 0 TS 0 - - - - TS 16 FRAME 1 - - - - TS 31 FRAME 2 TS 0 - - - - BITS 1 0 2 0 3 0 4 0 5 TS 16 FRAME3 ----- - - - - TS 31 TS 0 - - - - BITS 6 7 X Y X 8 1 2 3 X A B C Channel 1 TS-1) 4 5 FRAME 15 TS 16 - - - - TS 31 BITS 6 7 8 D A B C Channel 16 (TS-17) D Frame 0 TS 16 bits: MFAS=0000 NMFAS=XYXX X=spare bits (=1 if not used) Y=MFAS remote alarm (=1 if MFAS synchronization is lost) 1 2 3 4 5 6 7 8 A B C D A B C D Channel 15 Channel 30 (TS-15) (TS-31) Note: 1) Frames are transmitted with 30 voice channels in timeslots 1-15 and 17-31 2) Timeslot 16 (TS16) contains A/B/C/D bits for signalling (CAS) 3) MFAS multiframe consists of 16 frames Figure 155 MFAS Framing Format CRC-4 Error Checking in a MultiFrame Format A Cyclic Redundancy Check-4 (CRC-4) is often used in E1 transmission to identify possible bit errors. CRC-4 allows us to detect errors within the 2.048 Mbps signal while it is in service. CRC-4 is based on a simple mathematical calculation performed on each submultiframe of data. The equipment which originates the E1 data calculates the CRC-4 bits for one submultiframe. Then it inserts the CRC-4 bits in the CRC-4 positions in the next submultiframe. The receiving equipment then performs the reverse mathematical computation on the submultiframe. It examines the CRC-4 bits which were transmitted in the next submultiframe, then it compares the transmitted CRC-4 bits to the calculated value. If there is a discrepancy in the two values, a CRC-4 error is reported. There are two things to remember when using CRC-4 errors to determine the performance of an E1 circuit. Each individual CRC4 error does not necessarily correspond to a single bit error. Multiple bit errors within the same submultiframe will lead to only one CRC-4 error for the block. Also, it is possible that errors could occur such that the new CRC-4 bits are calculated to be the same as the original CRC-4 bits. CRC-4 error checking provides a convenient method of identifying bit errors within an in-service system. On an in-service system, it is generally not possible to measure the actual bit errors because there is no pattern synch. Bit error measurement is used on an out-of-service system because the results are slightly more 248 SunSet E20 Version 1.01 precise. CRC-4 also uses a multiframe structure consisting of 16 frames, as shown in Figure 156. However, the CRC-4 multiframe is not necessarily aligned with the MFAS multiframe. Each CRC4 multiframe can be divided into 2 sub multiframes (SMF). These are labeled SMF#1 and SMF#2 and consist of 8 frames apiece. We associate 4 bits of CRC information with each submultiframe. The CRC-4 bits are calculated for each submultiframe, buffered, and inserted into the following submultiframe to be transmitted across the E1 span. When the terminating equipment calculates an error using CRC-4, it should transmit an E-bit to the far end, thus informing the far end equipment of the error. TIME SLOT 0 Bits Multiframe Sub-Multiframe Frame# bit1 SMF #1 SMF #2 0 1 2 3 4 5 6 7 8 9 10 11 12 13 14 15 c1 0 c2 0 c3 1 c4 0 c1 1 c2 1 c3 E c4 E bit2 0 1 0 1 0 1 0 1 0 1 0 1 0 1 0 1 bit3 0 A 0 A 0 A 0 A 0 A 0 A 0 A 0 A bit4 1 Sa4 1 Sa4 1 Sa4 1 Sa4 1 Sa4 1 Sa4 1 Sa4 1 Sa4 bit5 1 Sa5 1 Sa5 1 Sa5 1 Sa5 1 Sa5 1 Sa5 1 Sa5 1 Sa5 bit6 0 Sa6 0 Sa6 0 Sa6 0 Sa6 0 Sa6 0 Sa6 0 Sa6 0 Sa6 bit7 bit8 1 1 Sa7 Sa8 1 1 Sa7 Sa8 1 1 Sa7 Sa8 1 1 Sa7 Sa8 1 1 Sa7 Sa8 1 1 Sa7 Sa8 1 1 Sa7 Sa8 1 1 Sa7 Sa8 Figure 156 CRC-4 Multiframe Format E-bit Performance Monitoring When the terminal equipment of a 2.048 circuit is optioned for CRC-4 transmission, E-bit transmission may also be enabled. Ebit performance monitoring of the circuit is now possible. The terminating equipment transmits an E-bit error on the 2.048 Mbps line, when it receives a CRC-4 error. However, E-bit error transmission is a relatively new feature in 2.048 transmission. Therefore, it is likely that the embedded equipment does not transmit the E-bit error information correctly. You should check the specifications of your network. Refer to Figure 157. Ch.6 Technology Overview 249 SunSet E20 No Errors PULSES PCM-31 AIS PULSES CODE ERR PCM-30 ALARM CODE ERR ERROR CRC DET PULSES PCM-31 BIT ERROR CODE ERR PCM-30 AIS ERROR CRC DET ALARM PAT SYNC 1 SunSet E10 F1 F2 F3 F4 SINRISE TELECOM F1 A RESYNC E AUTO F2 B LIGHT F3 F4 C D GRAPHIC ERR INJ 1 VOL UP 4 5 6 7 ESCAPE 8 9 ENTER POWER PRN SCRN Protected Monitor Point Trouble Point (Error Source) 2 3 VOL DN HISTORY F SHIFT 0 Network Terminal Equipment A CRC Error Terminal Equipment B Protected Monitor Point E-bit Error SunSet E20 2 E-bit Errors Figure 157 E-bit Performance Monitoring, In-service Circuit When this type of terminal equipment detects an incoming CRC-4 error, it will respond by transmitting an E-bit error toward the other terminal. Test set 2, shown in Figure 157, will be able to see the E-bit errors by plugging into a protected monitoring point. Note that the test set can not see the actual code errors, framing bit errors and CRC errors introduced at the trouble point. The test set can see only the E-bit errors transmitted by Terminal B. Thus, E-bit error transmission allows a 2.048 Mbps in-service circuit to be reliably monitored for transmission performance from any point on the circuit. Without E-bit error transmission, only a complete circuit failure can be reliably determined at any point on the circuit. With a complete circuit failure, the test set will see either loss of signal, alarm indication signal, or remote alarm indication. 1.9 MFR2/DTMF/DP Technology There are a number of signalling methods used by public telephone networks. The methods are divided between the local loop and interoffice signalling. Referring to Figure 158, the signalling applied for each environment is as follows: 250 SunSet E20 Version 1.01 LOCAL LOOP: • Pulse • DTMF (Dual Tone Multi-Frequency) • ISDN (Integrated Services Digital Network) INTEROFFICE: • MFR2 (Multi-Frequency) • MFC (Multi-Frequency Compelled) • SS#7 (Signalling System #7) ☎ Pulse DTMF ISDN MF MFC SS#7 Local Loop Inter Office Local Loop ☎ Figure 158 Local Loop and Interoffice Signalling Methods Local Loop In the local loop environment, a common signalling method is DTMF. It uses two tones, a high and a low, to represent a digit. The frequency chart is indicated in Figure 159. High Frequency (Hz) 1209 1336 1477 697 1 2 3 770 Low Frequency 852 4 5 6 7 8 9 941 * 0 # Figure 159 DTMF Frequency Key Pad For example, if the number 5 button is pressed, frequencies of 1336 Hz and 770 Hz are generated. DTMF registers, converters, or receivers then recognize these tones as representing the digit 5 and translate them into digital signals. Ch.6 Technology Overview 251 Pulse signalling is an older technology than DTMF, and was originally used for rotary phone sets. When a number is dialled, a series of short IDLE/SEIZURE signals are created with specific timing, usually 10 pulses per second. If a number 3 is dialled, the wheel will send 3 IDLE/SEIZURE signals with a specific inter-digit timing between the digits. The switch will interpret the number of IDLE/SEIZURE signals, and the inter-digit duration to determine the digit that has been dialled. B-bit dialing is used to toggle the B-bit when seizing the line. In the seizure state, the B supervision bit is toggled (ABCD ˆ ABCD). If the number 463 is dialled, the B bit will flash 4 times, then rest for approximately one second, toggle six times, rest again, and toggle 3 times. ISDN provides digital services to end users with regular phone lines. Interoffice Signalling MFR2 is a common signalling method used in the interoffice environment. Similar to DTMF, MFR2 uses two tones for each digit being dialled. However, these tones are selected from a group of only six frequencies. A and B bit signalling is used to seize and acknowledge the line. The references can be found in the following standards tables: • ITU Q.441 Tables 5 to 9 MFC (Multi Frequency Compelled) dialling allows the two exchanges to send digits to each other in both the forward and backward direction. This helps ensure accurate transmission of the digits in a noisy environment. 252 SunSet E20 Version 1.01 Chapter 7 Troubleshooting 1.0 Troubleshooting .......................................... 255 2.0 Calibration .................................................. 257 3.0 Customer Service ....................................... 260 SunSet E20 Version 1.01 SunSet E20 Version 1.01 1.0 Troubleshooting Here are some helpful suggestions for when your test set is not performing as expected. Here is a general troubleshooting procedure: a) Check the manual for instructions on how to perform the desired procedure. b) Verify that the Test Configuration is set up properly. c) Check that cords are connected properly to the right jacks. d) If the set still does not behave as expected, try turning the power off, then on. e) If the set still does not behave properly, try an ERASE NVRAM in SYSTEM PARAMETERS. Note: This will erase all user programmed information. Turn the power off for 5 seconds, then turn it back on. Here are some helpful suggestions for specific problems which might occur. Problem: CODE light, frame loss light, and other error lights are on, but there should be no problem. Suggestion: 1) TEST CONFIGURATION MODE may be wrong. Try, TERM, BRIDGE, MONITOR. 2) Check the cords - they may be loose or dirty. 3) Try reversing the TX and RX cords. Problem: CODE ERR LED is lit continuously for no apparent reason Suggestion: 1) The Line Code might accidentally be set to AMI, even though the received code is HDB3. Try pressing the AUTO key to automatically reconfigure the line code. Or, you may manually configure the line code in SYSTEM PARAMETERS, MEAS CONFIGURATION, CODE CONFIGUR. Problem: Keys do not work properly. Suggestion: 1) Verify shift status by pressing and releasing the SHIFT-lock key. Press and release the SHIFT-lock key until the SHIFT status indicator in the upper left hand side of the screen Ch.7 Troubleshooting 255 achieves the desired condition. 2) Do not press SHIFT-lock key simultaneously with another key. 3) Press the key again. The set may not have registered it the first time. 4) Verify the LOCK indicator is not on. If it is, from MEASUREMENT RESULTS, press F2 to UNLOCK the keypad. Problem: Test set will not power up properly. Suggestion: 1) Make sure the battery is charged or the charger is plugged in. 2) Make sure the software cartridge is inserted firmly and seated correctly. Problem: SunSet shows Security Violation when switched on. Suggestion: 1) Make sure the serial number of the software cartridge matches the serial number of the SunSet. Problem: Set performs improperly. Suggestion: 1) Try switching the set off, then switching it on again. 2) Try the ERASE NV RAM menu option. NOTE: this will erase all user-programmed information and history buffers within the SunSet. When the ERASE NV RAM has completed, switch off the SunSet for 5 seconds, then switch it on. Problem: Measurements are not working properly (Loss of Signal, no Pattern Synch). Suggestion: 1) Verify signal interface and mode settings in the TEST CONFIGURATION menu. 2 ) Verify that all jacks are connected properly, according to the circuit graphic. 3) Twist the connectors inside of the jacks and ensure that all connectors are inserted fully. Problem: Test Patterns will not synch. Suggestions: 1) Press AUTO to force the SunSet to resynchronize on the Pattern, Framing type, and line Coding type. 2) Verify that desired pattern is being sent in the SEND TEST PATTERN menu. 256 SunSet E20 Version 1 .01 Problem: Test patterns will not synch with another test set. Suggestions: 1) Verify that PATTERN INVERSION is DISABLED in the TEST PATTERN screen. 2) Use VIEW RECEIVED DATA to examine the pattern being received. If you are still having difficulty, contact your distributor directly or contact Sunrise Telecom at Tel: 1 408 363 8000 or Fax: 1 408 363 8313. 2.0 Calibration The SunSet E20 calibrates itself every time a full self test is performed. This auto calibration should take care of all the adjustment that the set will need during normal circumstances. However, once per year the set may also be given this calibration test procedure. If the test set fails any part of this procedure, then you should contact Sunrise Telecom Customer Service or your national distributor for further advice about possible repairs. This acceptance test procedure may be used as part of an equipment maintenance program. 1) Connect a cable from LINE 1 Tx to LINE 1 Rx. a) Turn on the set and go to SYSTEM PARAMETERS, SELF TEST. b) Check that all LED's (except POWER and BATTERY) function correctly. They should turn green first and then red during the self test. c) Verify that no error codes are displayed on the SELF TEST COMPLETE screen. d) Verify that no error codes are displayed in the upper left hand corner of the screen during power-up. e) Perform ERASE NV RAM. Turn the power off for 5 seconds, and then turn the power back on as directed on the test set screen. 2) Verify that the backlight and contrast control both work. 3) Configure the TEST CONFIGURATION for E1SINGL, TESTPAT, PCM-30, YES, 2.048M, TERM, INTERN. a) Escape back to the SunSet E20 MAIN MENU. b) Configure SEND TEST PATTERN for 2e23. Ch.7 Troubleshooting 257 4) Verify that line 1 LED's are correct (press the LED key if necessary): SIGNAL, PCM-30, CRC DET, and PAT SYNC are green; all other line 1 LED's should be off. The line 2 LED's don't matter. 5) Enter the MEASUREMENT RESULTS section a) Press the ERR INJ key 3 times. b) Verify that 3 code errors were detected. c) Page down to the LINE 1 - FREQUENCY screen. d) Verify that RCV/hz is 2048000. e) Page down to the LINE 1 - G.821 screen. e) Verify that 3 BIT errors were detected. f) Page down to the LINE 1 - ALM/SIG screen. • FOR BNC (75 ohm) CONNECTORS ONLY: Verify that +LVL and -LVL are both +/- 1 db. 6) Enter the OTHER MEASUREMENTS, PULSE MASK ANALYSIS screen. a) Select START NEW ANALYSIS. b) Select G.703 (F1). c) Verify that the pulse shape does not fall outside the template boundaries by more than 2 pixels. 7) Return to the MAIN MENU. a) In SEND TEST PATTERN, change the pattern to FOX. b) Verify that the LED's are as they were in step 4. c) Return to the MAIN MENU. d) Enter the OTHER MEASUREMENTS, VIEW RECEIVED DATA screen. e) Press the PAUSE (F3) key, then PAGE-DN key several times. f) Verify that the FOX pattern is displayed correctly in the ASCII column inside the parentheses. (THE QUICK BROWN FOX JUMPS OVER THE LAZY DOG 1234567890). g) Note that the message is not displayed in time slots 00 and 16. 8) Return to the MAIN MENU. a) Enter the VF CHANNEL ACCESS, VF & NOISE MEASUREMENTS screen. b) Change TxMODE to TONE. c) Listen to the speaker and verify that the volume control keys work. d) Verify that Rx-1 FRQ is between 1019 and 1021 (working withe the default 1020 hz tone), and that Rx-1 LVL is between -00.5 258 SunSet E20 Version 1 .01 and +00.5. 9) Change INSERT TYPE to TALK. a) Check the microphone by blowing into it and hearing it on the speaker. 10) Connect a cable from LINE 2 TX to LINE 2 RX. 11) From the MAIN MENU , set the TEST CONFIGURATION for E1DUAL, L2-Tx, L2-Rx, TESTPAT, PCM-30, YES, 2.048M, TERM, TERM, INTERN. 12) Verify that line 2 LEDs are correct (press the LED key if necessary): SIGNAL, PCM-30, and CRC DET are green; all other line 2 LED's should be off. a) Verify that the PAT SYNC LED is green and the BIT ERROR LED is off. The line 1 LED's don't matter. 13) Obtain another, known good SunSet E20. Connect an SCSI36 to DB37 (female) interface cable to the first test set, which should be configured for DCE. a) To this cable, connect an RS449/V.36 DCE adapter cable (DB37 male to DB37 female). b) To this cable, connect a Sunrise Telecom RS449/V.36 DTE adapter cable (DB37 male to DB37 male). c) Make sure that the ends of the cables with the labels are together (they should be the ends without the nuts). d) Finally, connect another SCSI-36 to DB37 (female) cable between the second SunSet E20 and the other cables. e) The PAT SYNC LED should be green; all other LED's should be off (press the LED key as needed). 14) Enter the MEASUREMENT RESULTS screen for both sets a) Press the RESTART key on each. b) Inject 3 errors from each set and verify that both sets report 3 BIT's. 15) Check each key to make sure it works. 16) Return to the MAIN MENU. a) If you purchased a printer with the test set, plug the printer into the test set, press the SHIFT key to display the SHIFT indicator Ch.7 Troubleshooting 259 in the window, then press the PRN SCRN key, and observe the main menu being printed on the printer. 17) The procedure is now complete. 3.0 Customer Service Sunrise Telecom Customer Service is available from 7:30 AM to 5:00 PM Pacific Standard Time (California). Customer Service performs the following functions: - Answers customer questions over the phone on such topics as product operation and repair - Repairs malfunctioning SunSets promptly - Provides information about product upgrades The warranty period covering the SunSet E20 is 1 year from the date of shipment. A Return Merchandise Authorization (RMA) number is required before any product may be shipped to Sunrise Telecom for warranty repair. All SunSets are "burn-in" tested for 24 hours after repair. All repairs are warranted for 90 days. Out-ofwarranty repairs require both an RMA and a Purchase Order before the unit is returned. Please contact Customer Service if you need additional assistance: Customer Service Sunrise Telecom Incorporated 22 Great Oaks Blvd. San Jose, CA 95119 U.S.A. Tel: 408-363-8000 or 1-800-701-5208 Fax: 408-363-8313 Technical Support (24 hours) 1 800 701 5208 E-mail: [email protected] Internet: http://www.sunrisetelecom.com 260 SunSet E20 Version 1 .01 Chapter 8 Specs & Configs 1.0 Main Specifications .................................... 263 2.0 Configurations ............................................ 270 3.0 Access Network Options Specifications .. 275 4.0 Cellular Network Options Specifications . 278 5.0 Frame Relay Network Options Specifications ............................................. 280 6.0 Switching Network Options Specifications ............................................. 282 SunSet E20 Version 1.01 SunSet E20 Version 1.01 1.0 Main Specifications CONNECTORS/PORTS 2.048 Mbit/s bi-directional E1 interfaces Line 1 Tx, Line 1 Rx, Line 2 Rx: 75 ohm unbalanced BNC (f) and 120 ohm balanced/3-pin banana (CF) 75 ohm (option): Replaces BNC (f) with 1.6/5.6 mm (f) Line 2 Tx: 75 ohm unbalanced BNC (f) 75 ohm (option): Replaces BNC (f) with 1.6/5.6 mm (f) Serial port: 8-DIN, RS232C (V.24), DTE Datacom interface: SCSI-36 pin connector DC input for charging internal battery Stereo headphones port Connector: 3.5 mm jack Impedance: 220 ohm STATUS/ALARM INDICATORS Power and low battery LED indicators 16 dual-color LED indicators for Line 1 & Line 2 Current status and alarm history for: signal, code error, PCM-30, PCM-31, AIS, alarm, CRC detected, error 6 dual-color LED indicators for datacom (dual function with Line 2) Pattern sync and bit error LED indicators TEST PATTERN GENERATOR General: All 1, All 0, 1010…, 1-in-4, 1-in-8, 3-in-24, FOX PRBS: 2n-1, n= 6, 7, 9, 11, 15, 20, 23; QRS, 220-1 ITU-T Conforms to ITU-T O.151, O.152, O.153 Programmable: 10 user patterns, 24 bits long with userdefinable labels Selectable test pattern inversion Automatic pattern synchronization ERROR/ALARM INJECTION Code and/or bit error; programmable burst of 1 to 9999 error manually, or continuous rate of 2x10⁻³ to 1x10⁻⁹ CRC-4, FAS, E-bit: single error Generate AIS, TS16-AIS (PCM-30), MFAS RAI (PCM-30), FAS RAI (PCM-30 & 31) alarms Specs & Configs 263 E1 GENERAL Bit error test rates: 2.048 Mbit/s, N (contiguous) and M (non-contiguous) x 64 kbit/s (N & M=1 to 31) Full duplex drop and insert to internal test circuitry, datacom interface, Nx64 kbit/s test pattern; or 64 kbit/s A-law decoded & encoded VF channel to/from built-in speaker or optional headphones (SS149)/microphone Automatic configuration, Automatic pattern synchronization Line coding: HDB3, AMI Framing: Unframed, PCM-30, PCM-31, with or without CRC-4, conforms to ITU-T G.704 Programmable send frame words: Manual/auto E-bits, MFAS word bit 5, bit 6 (MFAS RAI), bit 7, bit 8, MFAS ABCD, FAS RAI, display and print & send and receive FAS/NFAS and MFAS/ NMFAS words, auto CRC-4 generation, freely settable Sa4, Sa5, Sa6, Sa7, Sa8, bits to 1 or 0 for 8 frames Set idle channel code and ABCD bits (PCM-30) E1 TRANSMITTERS Clock source Internal: 2.048 MHz (± 5 ppm). L1 Tx frequency adjustable over ± 50 kHz (± 25 kppm) with resolution 1 Hz (individually adjustable) External: Through Line 1 Rx or Line 2 Rx, selectable AMI or HDB3 Loop: Recovered through Line 1 Rx or Line 2 Rx signal, selectable AMI or HDB3 Pulse shape: 3.0 Vbp (± 10%) at 120 ohm , 2.37 Vbp (± 10%) at 75 ohm. Conforms to ITU-T G.703 E1 RECEIVERS Frequency: 2.048 Mbit/s ± 6000 bit/s Input sensitivity Terminate, bridge: +6 to -43 dB with Auto Line Build Out Monitor: -15 to -30 dB resistive Impedances Terminate, monitor: Line 1 & 2, 75 ohm unbalanced, 120 ohm balanced Bridge: > 5000 ohm Jitter tolerance to ITU-T G.823 Conforms to ITU-T G.823 264 SunSet E20 Version 1 .01 MEASUREMENTS Error Type: Code, bit, CRC-4, FAS, MFAS, E-bit errors, slips Typical error type reports: error count, error rate, ES, %ES, SES, %SES, UAS, %UAS, EFS, %EFS, AS, %AS ITU-T G.821 Analysis, error type reports: Bit error and rate, ES, %ES, SES, %SES, EFS, %EFS, UAS, %UAS, AS, %AS, SLIP ITU-T G.826 bi-directional analysis, CRC-4 block based; error type reports: EB, BBE, %BBE, ES, %ES, SES, %SES, UAS, %UAS, EFS, %EFS Alarm statistics: LOS sec, LOF sec, AIS sec, FAS RAI sec, MFAS RAI sec Frequency (Max hold, Min hold, Current), clock slips, wander Signal level (Vbp+, Vbp- in dBdsx) +7 to -36 dB Print on event (Enable/Disable) Print at timed interval (selectable over 1 to 9999 minutes) or at end of test Measurement duration continuous or timed; settable up to 999 hours, 59 minutes Programmable measurement with selection of start and stop TIME and DATE OTHER MEASUREMENTS Pulse mask analysis Scan period, 500 ns On screen pulse shape display with G.703 pulse mask verification Displays pulse width, rise time & fall time in ns, % overshoot, % undershoot Pulse mask storage and printing Histogram analysis Graphical display of accumulated errors (Bit, Code, EBit, CRC, FAS/MFAS) events for L1 Rx or L2 Rx and alarms (LOS, AIS, LOF, FAS RAI, MFAS RAI, LOPS) events for L1 Rx and L2 Rx Stores and prints 60 days by hour and 24 hours by minute Storage of one complete histogram & current (base unit) Storage of up to 15 histogram with user-definable labels (requires SW2510 or SW2515) Propagation delay Measures propagation delay in micro-seconds and UIs (Unit Interval) Maximum delay measurement (at 2.048 Mbit/s): 8 seconds Specs & Configs 265 View received data View live traffic 4096 bits long (16 full frames/one multi-frame) in PCM-30/31 Displays 8 time slots per screen Stores 64 scrollable screens, hold screen, print Information displayed in ASCII, reverse ASCII, Binary, and HEX View time slot 16 (MFAS, NMFAS ABCD) in PCM-30: 16 Frames View time slot 0 (FAS, NFAS, CRC, MFAS/CRC words, E-bits Sa4 to Sa8, A-bit) in PCM-30 & 31: 16 Frames Save test results of measurement runs, error and alarms events Save up to 20 test results Save up to 1000 events Saved record can be locked Save at timed interval (selectable over 1 to 9999 minutes) Simultaneously view bi-directional 30 channels CAS (ABCD bits PCM-30) E1 VOICE FREQUENCY Companding: A-Law View channel data 1 byte long (binary format) Built-in microphone for talk Monitor speaker or optional headphones (SS149) for line 1, 2, or both with volume control Signal to noise ratio measurement Noise measurements with 3.1 kHz flat, psophometric weighting, 1010 Hz notch Tone generation: 50 to 3950 Hz, res. 1 Hz; +3 to -60 dBmO, res. 1 dB Level and frequency measurement: 50 to 3950 Hz, +3 to -60 dBmO Coder offset and peak code measurements ABCD bits monitor & transmit in selected channel (PCM-30) Simultaneously view bi-directional 30 channels in ABCD bits (PCM-30) Programmable ABCD states for IDLE, SEIZE, SEIZE ACK, ANSWER, CLEAR BACK, CLEAR FORWARD, BLOCK ABCD; Default (Conforms to Q.422) or 3 user defined setups Labelling setup and display of Group I/II Forward, Group A/B Backward digits Q.441 or 3 user defined setups 266 SunSet E20 Version 1 .01 DATACOM TESTING (SS600) Connectors/Ports Datacom Multiport via SCSI-36 connector Adapters for DTE (male) and DCE (female) modes: V.35 (34 pins-ISO 2593), V.11/X.21 (DB15-ISO 4903), V.24/RS-232 (DB25-ISO 2110), V.36/RS-449 (DB37-ISO 4902), RS-530 (DB25-ISO 2110), G.703 co-directional (3-pin CF for Tx and Rx) Y cable Adapter for MONITOR mode: V.35 (34 pins-ISO 2593), V.11/X.21 (DB15-ISO 4903), V.24/RS-232 (DB25-ISO 2110), V.36/RS-449 (DB37-ISO 4902) Interfaces V.35, V.11/X.21, V.24/RS-232, V.36/RS-449, RS-530, G.703 co-directional Modes DTE, DCE Emulation for all interfaces Bi-directional data in service transmission monitoring (V.35, V.11/ X.21, V.24/RS-232, V.36/RS-449) Rates V.24/RS-232 Asynchronous: 50, 150, 300, and 600 bit/s, 1.2, 2.4, 4.8, 9.6, 14.4, 19.2, and 38.4 kbit/s, 6/7/8 data bits, 1/ 2 stop bits, odd/ even/none parity V.24/RS-232 Synchronous: 300 bits to 48 kbit/s, 56, and 64 kbit/s V.35, V.11/X.21, V.36/RS-449: 300 bit/s to 48 Kbit/s, Nx56, and Nx64 kbit/s (N= 1 to 32) G.703 co-directional: Nx64 kbit/s (N= 1 to 8) Tx data clock selectable (internal or receive) for V.35, V.24/RS232, V.36/RS-449, G.703 co-directional Clock polarity selectable (normal or inverse) for V.35, V.24/RS232, V.36/RS-449 Test pattern generator V.24/RS-232 Asynchronous: 2047, 511, 127, 63, ALL1, ALL0, and FOX (for 7 and 8 data bits) All other modes: All available patterns supported (refer to the main test pattern section) Selectable test pattern inversion Automatic pattern synchronization Bit error injection Measurements ITU-T G.821 analysis, error type reports: Bit error count and rate, ES, %ES, SES, %SES, EFS, %EFS, AS, %AS, UAS, Specs & Configs 267 %UAS, SLIP Block error measurement: received block count, error block count and rate Measurement of Data Loss, Data Loss Seconds, Pattern Synchronization Loss, Pattern Synchronization Loss Seconds Histogram analysis Graphical display of accumulated errors (Bit, Loss of Pattern Seconds) Stores and prints 60 days by hour and 24 hours by minute Storage of one complete histogram & current (base unit) Storage of up to 15 histogram with user-definable labels (requires SW2510 or SW2515) Datacom Timing Analysis Change of state of the following control leads is displayed and recorded (table or graphic mode) V.24/RS-232 (Asynchronous: DTE, DCE, Synchronous: DTE, DCE, MONITOR), V.35 (DTE, DCE, MONITOR), V.36/RS-449 (DTE, DCE, MONITOR): RTS, CTS, DTR, DCD, RL, LL V.11/X.21 (DTE, DCE, MONITOR): C, I Transmit control leads (selectable ON/OFF) V.24/RS-232 (Sync and Async), V.35, V.36/RS-449 (DTE): RTS, DTR, RL, LL V.24/RS-232 (Sync and Async), V.35, V.36/RS-449 (DCE): CTS, DSR, DCD V.11/X.21 (DTE): C V.11/X.21 (DCE): I Trigger on RTS, CTS, DTR, DSR, DCD, RL, LL; falling or rising edges Storage capability Graphical mode: Last 40 seconds of captured control lead status Table mode: 100 pages of control lead state change and status with time stamp X.50 64 kbps TESTING (SW606) Conforms to ITU-T X.50 Division 2 and 3 Bit error rate testing with ITU-T G.821 analysis Test rate: Nx600 bit/s, N = 1 to 8 within 64 kbit/s signal Hitless bi-directional E1 64 kbit/s channel drop/insert to multiport Standard or random selection of octets 268 SunSet E20 Version 1 .01 View and transmit housekeeping bits A to H, and status S-bit Programmable idle pattern, BERT and IDLE S-bit, X.50 signal (ABCD bits) Bit or frame error injection Histogram analysis Modes Datacom (64 kbit/s, X.50 Formatted signal) Muxtest (Test 2.048 Mbit/s/64 kbit/s multiplex) MUX (Emulate 2.048 Mbit/s/64 kbps multiplexed within X.50 format) E1 (Send/Receive X.50 formatted channels inside 2.048 Mbit/ s signal) C-bit FRAME TESTING (SW602) Send and receive C-bits 2 through 15 (ESCAPE, 2 MB loops, loop 2 or loop 3, loop 2 instruction, loop 3 instruction, HDB3 command, loop acknowledge, not defined, local fault, remote/ line fault, C frame loss, spare) Bit level decoding Loopback channel OTHER OPTIONS Frame Relay Network Options (SW603 & SW603N) See Individual Specification Sheet Cellular Network Options (SW604, SW605, SW644-requires SW640) See Individual Specification Sheet Access Network Options (SW610, SW611, SW612, SW613, SW614, SW615, SW630) See Individual Specification Sheet Switching Network Options (SW601A, SW601E, SW640, SW641, SW642, SW645) See Individual Specification Sheet GENERAL 512 kbyte internal NVRAM data buffer Internal Battery: 9-cell NimH battery pack Battery operation time: 4.5 hours nominal 16 lines x 32 character graphic LCD with backlight Heavy-duty long-lasting keyboard 4 Mbyte field upgradable PCMCIA memory card 2nd memory card slot for future expansion or unit memory s t o r Specs & Configs 269 age (Histograms and Protocols traces - requires SW2510 or SW2515) AC Adapter/battery charger: +90-240V 50/60 Hz Languages: English, French, Italian, Spanish Stores up to 10 user configurations (profiles) with alphanumeric labels VT100 Remote Control Printer/communication port 8-DIN, RS232 (V.24 DTE) serial port Text: standard ASCII escape sequence code Graphics: standard mode (dot matrix) Operating temperature: 0C to 50C Storage temperature: -20 ½C to 70C Humidity: 5% to 90% non-condensing Size: 10.5 cm x 6.5 cm x 27 cm Weight: 1.3 kg (approx) 2.0 Configurations TEST SET SSE20 SunSet E20 Configured with 2 Rx & 2 Tx 2.048 Mbit/s ports with BNC (f) & 3-pin banana (CF) connectors Note 1: Standard accessories include: Programmed software cartridge, SS140 Battery Pack, Protective card for 2nd Memory slot, SS138D AC adapter, SS429 2pin Euro-style power cord, SS266 User’s Manual. All other accessories including datacom adapters must be ordered separately Note 2: Alternate power cord can be substituted at N/C (please specify) HARDWARE OPTIONS -A Replace all 75 ohm BNC (f) with 1.6/5.6 mm (f) 75 ohm unbalanced connectors SS600 Datacom software/hardware Includes SS308 Datacom cable. Requires additional adapters or adapters package from Datacom Adapters section 270 SunSet E20 Version 1 .01 Note 3: Please inquire about alternate connectors SOFTWARE OPTIONS SW600VT VT100 Remote Control SW601A VF Call Analysis SW601E VF Call Emulation SW602 Cbit Analysis SW603 Frame Relay SW603N Frame Relay NNI Requires SW603 SW604 GSM Voice and TRAU Access SW605 GSM Abis Protocol Analysis SW606 X.50 Analysis SW607 V.110 Analysis SW610 ISDN Analysis and Emulation Required for ISDN Protocols when ordering SW611SW615 SW611 ETSI (EuroISDN) Protocol Requires SW610 SW612 Aussi Protocol Requires SW610 SW613 QSIG Protocol Requires SW610 SW614 DPNSS Protocol Requires SW610 SW615 DASS2 Protocol Requires SW610 SW630 V5.x Analysis (ETSI Recommendations) SW640 SS#7 Analysis (MTP, SCCP, TCAP) Required for SS7 Analysis when ordering SW641SW646 SW641 TUP Analysis ITU Standard Requires SW640 SW642 ISUP Analysis ITU Standard Requires SW640 SW644 Mobile Application Part BSSAP (DTAP+MAP) Requires SW640 SW645 ISUP Analysis Chinese Standard Requires SW640 SW2510 256 Kbyte SRAM memory card with battery back-up to increase the storage capacity of the test set SW2515 1 Mbyte SRAM memory card with battery back-up to Specs & Configs 271 increase the storage capacity of the test set Note 4: Software cartridges may be upgraded to include additional options at any time Note 5: Inquire for Availability ACCESSORIES General SS101 Carrying Case SS104C Cigarette Lighter Battery Adapter To be used with SunSets equipped with NimH battery pack SS115 DIN-8 to DB25 RS232C Printer Cable Replacement printer cable for earlier serial printers such as SS118 SS115B DIN-8 to DB-9 Printer Cable Included when either SW600VT or SS118B/C is ordered SS117A Printer Paper, 5 rolls, for SS118B/C SS118B Thermal Printer With internal rechargeable battery. Includes cable (SS115B) for connection to SunSet and 110 VAC charger SS118C Thermal Printer With internal rechargeable battery. Includes cable (SS115B) for connection to SunSet and 220 VAC charger SS122 Null Modem Adapter DTE (m) to DCE (f), DB25 conversion SS122A Null Modem Adapter DTE (m) to DCE (f), DB9 conversion. Included with SW600 SS123A SunSet Jacket Provides additional weather protection for SunSets (SS123B included) SS143 SunSet Rubber Holster Provides additional protection for SunSet. Not compatible with SS123A SS149 Headphone for SunSet E20 SSE20CC Certificate of calibration/compliance. Must be specified 272 SunSet E20 Version 1 .01 at the time of order SSE20CCM Certificate of calibration/compliance with measurement data. Must be specified at the time of order SSE20W SunSet E20 Extended Warranty Extends standard 1 year warranty period to 3 years. Excludes battery and accessories, which are waranted for 1 year 2 Mbit/s Cables SS211 Cable, BNC (m) 75 ohm to BNC (m) 75 ohm, 2m SS212 Conversion Cable, BNC (m) 75 ohm to Bantam 120 ohm, 2m SS216 Conversion cable, BNC (m) 75 ohm to BR2 (m) 120 ohm, 2m SS217 Cable, 1.6/5.6 mm (m) 75 ohm to 1.6/5.6 mm (m) 75 ohm, 2m SS220 Cable, BNC (m) 75 ohm to 1.6/5.6 mm (m) 75 ohm, 2m SS221 Cable, 3-pin banana (CF) 120 ohm to 3-pin banana (CF) 120 ohm, 2m SS223 Cable, BR2 120ý to 3-pin banana 120 ohm, 2m SS227 Conversion Cable BNC (m) 75 ohm to two probe clips 120 ohm, 2m SS228 Cable, 3 pin banana (CF) 120 ohm to probe clips, 2m SS436 Conversion Cable, RJ-48 (m) 120ý to two BNC (m) 75 ohm connectors Datacom Adapters SS253 X.21/V.11 DTE (SS253T) and DCE (SS253C) Interface Adapters DB37 to ISO 4903 DB15 connectors SS253Y X.21/V.11 Datacom Monitor Y-cable DB37 to male and female ISO 4903 DB15 connectors SS254 RS232/V.24 DTE (SS254T) and DCE (SS254C) Interface Adapters DB37 to ISO 2110 DB25 connectors SS254Y RS232 Datacom Monitor Y-cable DB37 to male and female ISO 2110 DB25 connectors SS255 RS449/V.36 DTE (SS255T) and DCE (SS255C) Interface Adapters DB37 to ISO 4902 DB37 connectors SS255Y RS449 Datacom Monitor Y-cable Specs & Configs 273 DB37 to male and female ISO 4902 DB37 connectors SS256B G.703 64 Kbit/s co-directional/banana 3-pin Adapter DB37 to CF 3-pin banana TX and RX connectors SS262 RS530 DTE (SS262T) and DCE (SS262C) Interface Adapters DB37 to ISO 2110 DB25 connectors SS267 V.35 DTE (SS267T) and DCE (SS267C) Interface Adapters DB37 to ISO 2593 34 pin connectors SS267Y V.35 Datacom Monitor Y-cable DB37 to male and female ISO 2593 34 pin connectors Replacement SW2504 Protective PCMCIA Cartridge SS123B Carabiner hook for SunSet Jacket SS138D SunSet AC Adapter, input 100 - 240 VAC, 50/60 Hz, output 15 VDC @ 2.6A. Only for use with SunSets equipped with NimH battery pack SS140 9-cell NimH Battery Pack 10.8 VDC, 1.8 Ahr SS266 SunSet E20 User’s Manual, English SS308 Datacom Cable, SCSI-36 to DB37 Interface Cable, 2m SS429 2 pin Euro-style Power Cord SS431 3-prong Power Cord For use in North America and Asia SS437 3-prong South African Power Cord 274 SunSet E20 Version 1 .01 3.0 Access Network Options Specifications ISDN PRIMARY RATE TESTING (SW610) Interfaces: Dual E1 Tx and Rx Modes: TE, NT, MONITOR LAYER 1 TESTING Please refer to the main specification sheet for more details CALL SETUP Settings: Caller phone number and sub-address, called phone number and sub-address, layer 2 TEI, signalling time slot (16 by default), automatic or manual answer, loop or terminate Call Type: Speech, DATA-64, DATA-56, Nx64 kbit/s, 3.1 kbit/ s Audio, 7 kbit/s (ETSI and AUSSI only) Perform a BER testing with a data call towards loopback number or in self-call mode (G.821 measurements) AUTOMATIC SUPPLEMENTARY SERVICES TEST Automatically tests the provisioning of the following supplementary services: CLIP, CLIR, COLP, COLR, CFU CFB, CFNR, SUB, MSN, DDI, CH, UUS, TP, AOC-S, -D, -E, MCID,CUG AUTOMATIC TELE SERVICES TEST Automatically tests the provisioning of the following bearer services, Tele services, and HLC call types: SPEECH, DATA64, DATA-56, 3.1 kbit/s Audio, 7 kbit/s, Telephony 3.1 kbit/s, Telephony 64 kbit/s, Fax group 2/3, Fax group 4, MIX Mode, PROC Form, VIDEOTEXT, OSI Mode Local (test toward the local switch) or distant mode (test toward a remote switch) SEQUENTIAL CALL Calls each channel one by one with a hold time (0 to 9999 seconds), SPEECH or DATA-64, self-call or towards a distant number PROTOCOL ANALYSIS Capture and store D-channel messages for decoding and protocol analysis Capture layer 1 events (alarms), capture and decode l a y e r Specs & Configs 275 2, and 3 protocol messages, display in HEX or English decoded format, with decoding of the Information Elements Capture and storage in emulation mode or monitoring mode Filters: PRE (monitor mode only) and POST for layer 1, layer 2 (SAPI and TEI), layer 3 (called number, calling number, call reference, message type) Detailed trace (HEX and/or decoded messages) printing via serial port to printer or to computer Message storage capacity Base unit: 90 kbyte, stores approximately 1200 messages Optional SRAM card: 1 Mbyte card, stores approximately 10 sets of traces of 1200 messages each (requires SW2515) Standards/Protocols Options (Requires SW610) SW611 SW612 SW613 SW614 SW615 ETSI/ITU-T Conforms to ETSI Recommendations ETS 300 102 & ETS 300 402 and ITU-T Q.921 & Q.931 AUSSI Conforms to AUSTEL Technical Standard 014 Q.SIG Conforms to ECMA Recommendations ECMA 141, ECMA 142/143, ECMA 165, ETSI Recommenda tions ETS 300 402, ETS 300 171/172, ETS 300 239 and ITU-T Q.921, Q.931 DPNSS Conforms to BTNR 188 series DASS2 Conforms to BTNR 190 series V5.X PROTOCOL ANALYSIS (SW630) Interfaces: Dual E1 Rx 75 or 120 ohm Standards Supports ITU-T/ETSI V5.1, V5.2, and LAPV5 V5.1 conforms to ETSI Recommendations ETS 300 324 and ITU-T Recommendations G.964 V5.2 conforms to ETSI Recommendations ETS 300 347 and ITU-T Recommendations G.965 LAPV5 conforms to ETSI Recommendations ETS 300 125 and ITU-T Q.920, Q.921 Mode: MONITOR Capture and store messages for decoding and protocol analysis Capture layer 1 events (alarms), capture and decode layer 2, and 3 protocol messages, display in HEX or English decoded format, with decoding of the Information Elements 276 SunSet E20 Version 1 .01 Filters: PRE filtering for layer 1, layer 2, layer 3 (ISDN, PSTN, Control, BCC, Protect, and Link) ISDN: EF Address PSTN: Establish, Establish Ack, Signal, Signal Ack, Status, Status Enquiry, Disconnect, Disconnect Complete, Protocol Parameter Control: Port Control, Port Control Ack, Common Control, Common Control Ack BCC: Allocation, Allocation Comp, Allocation Reject, DeAllocation, De-Allocation Comp, De-Allocation Rej, Audit, Audit Complete, AN Fault, AN Fault Ack, Protocol Error Protect: Switch-Over Req, Switch-Over Com, OS-SwitchOver Com, Switch-Over Ack, Switch-Over Reject, Protocol Error, Reset SN Com, Reset SN Ack Link: Link Control, Link Control Ack Detailed trace (HEX and/or decoded messages) printing via serial port to printer or to computer Message storage capacity Base unit: 8 kbyte, stores approximately 200 messages Optional SRAM card: 1 Mbyte card, stores approximately 10 sets of traces of 1200 messages each (requires SW2515) STATISTIC ANALYSIS (bi-directional) Layer 2: SABME, UA, DM, RR, REJ, I, and Total frames (count, %) Layer 3: PSTN, BCC, Control, Protect, Link, and Total messages (count, %) Specs & Configs 277 4.0 Cellular Network Options Specifications GSM Voice & trau access (Sw604) Interfaces: Dual E1 Tx and Rx Standards: Conforms to ETSI Recommendations for GSM Phase 2+ GSM 08.60 CHANNELS MONITORING Bi-directional drop/monitor of 16 kbit/s GSM channels/sub-channel Identify UPLINK and DOWNLINK directions automatically Automatic frame type detection of any 16 kbit/s sub-channel (SPEECH, DATA, IDLE, O&M, Signalling, Unknown) Identify 64 kbit/s and 16 kbit/s signalling channel for A-bis Voice decoded bi-directionally Support Full Rate and Enhanced Full Rate (EFR) Encoding Decoded via built-in speaker or optional headphones (SS149UPLINK /one ear, DOWNLINK /one ear) Statistics: PCM Level, control bits decoding, counters for BFI, DTX, and UFE (when applicable) TRAU ACCESS Settings: Time slot (1 to 31), and Sub-channel (1 to 4), Type (Speech Full Rate, Speech EFR, Idle speech, Pattern - ALL 0, ALL 1, 1010, 2n-1, n = 9, 11, 15), Link direction (UPLINK, DOWNLINK), Idle code, Time alignment Results: Received control bits (C1 to C21), Elapsed time*, Bit error count and rate*, ES*, SES*, EFS*, UAS, LOSS* (*if test pattern is selected) GSM A-bis protocol analysis (SW605) Interfaces: Dual E1 Rx 75 or 120 ohm Standards: Conforms to ETSI Recommendations for GSM Phase 1, 2, and 2+ GSM 04.08, GSM 08.56, and GSM 08.58 Mode: MONITOR Signalling rate: 64 kbit/s or 16 kbit/s Supports Layer 2 modulo 8 or modulo 128 Layer 2 SAPI and TEI in HEX or decimal format Capture and store A-bis messages for decoding and protocol analysis Capture layer 1 events (alarms), capture and decode layer 2, and 3 protocol messages, display in HEX or English decoded 278 SunSet E20 Version 1 .01 format, with decoding of the Information Elements Filters: PRE and POST for layer 1, layer 2, layer 3 (Message Discriminator, Message type, Channel number, Time slot number, IMSI) Message discriminator: RLL management, DC management, CC management, TRX management, Reserved Detailed trace (HEX and/or decoded messages) printing via serial port to printer or to computer Message storage capacity Base unit: 90 kbyte, stores approximately 1200 messages Optional SRAM card: 1 Mbyte card, stores approximately 10 sets of traces of 1200 messages each (requires SW2515) GSM APPLICATION PART (MAP-BSSAP) PROTOCOL ANALYSIS (SW644) Requires SW640 - please refer to SS#7 specification sheet for more details Supports protocol analysis for GSM Mobile Application Part (MAP), Direct Transfer Application Part (DTAP), and BSSAP for interfaces A to G Interfaces: Dual E1 Rx 75 or 120 ohm Standards: Conforms to ETSI Recommendations for GSM Phase 1, 2, and 2+ GSM 04.08, GSM 04.11, GSM 04.80, GSM 08.06, GSM 08.08, and GSM 09.02 Mode: MONITOR OPC and DPC in HEX or decimal format Capture and store messages for decoding and protocol analysis Capture layer 1 events (alarms), capture and decode layer 2, 3, and 4 protocol messages, display in HEX or English decoded format, with decoding of the layer 4 Filters: PRE and POST for layer 1, layer 2, layer 3 (DPC, OPC, SI, SSN, Address signal, Address number, TCAP OTID,TCAP DTID, INVOKE ID) SCCP SSN: MSC, HLR, VLR, EIR, AUC, OMAP, MANAG, BSSAP Detailed trace (HEX and/or decoded messages) printing via serial port to printer or to computer Message storage capacity Base unit: 90 kbyte, stores approximately 1200 messages Optional SRAM card: 1 Mbyte card, stores approximately 10 sets of traces of 1200 messages each (requires SW2515) Specs & Configs 279 5.0 Frame Relay Network Options Specifications FRAME RELAY BASIC (Sw603) Interfaces: E1, V.11/X.21, V.35, V.24/RS-232, V.36/RS-449,G.703 co-directional LMI Standards: ITU-T Q.933, ANSI T1.617, LMI (DLCI 1023, GOF Vendors), NO LMI Modes: UNI DTE, UNI DCE Rates E1: 2.048 Mbit/s, N (contiguous) and M (non-contiguous) x 64 kbit/s (N & M = 1 to 31) Datacom: Nx56 kbit/s, Nx64 kbit/s (N = 1 to 32) LMI Analysis Settings: T391 Status Inquiry, T392 Status, N391 Full Status Polling, N392 Error Threshold, N393 Monitor Events Results: Link OK Total, Link Errored Total, Time Out Error, Response Sequence Number, Wrong Message PVC Status: New, Active, or Inactive DLCI indication (keep the status for up to 60 DLCI) PING Test Settings: DLCI Header length (2/3/4 bytes), DLCI Value, Local IP @, Destination IP address, Network Layer Protocol Identifier (NLPID: IP or SNAPIP), Time Out, Number of PINGs Results: Number of PINGs, Number of PINGs sent, PING status (Received, Unreached, Errored), Round Trip Time (Current, Average, Maximum, Minimum) InARP support Conform to RFC2390 (IETF) Settings: Mode [Timed (selectable), Manual Request, No InARP], Time Out (selectable) InARP Statistics: InARP requests sent, InARP response received, InARP response Time Out, InARP requests received, InARP response sent, last IP address assigned Echo PING Echo/response to PING request to local IP address Results: Total PING request received, IP address of PING requestor, Number of PING requested by IP address time stamped FOX Test Settings: DLCI Header length (2/3/4 bytes), DLCI Value, CIR, 280 SunSet E20 Version 1 .01 Frame length (Nx64 bytes N = 1 to 64), Forward Explicit Congestion Notification (FECN), Backward Explicit Congestion Notification (BECN), Discard Eligibility (DE) Results: PVC Status, Current Rate, Errored Frames, RSN Error, SSN Error, Frequence Check Sequence (FCS) Error, Count of Frame Received with FECN, withBECN,with DE, Count of transmit frames, Count of received frames Statistics Analysis E1 monitoring via dual receiver, datacom monitoring via Y cable adapters [requires SS253Y (V.11/X.21), SS267Y (V.35), SS267Y (V.36/RS-449), SS254Y (V.24/RS-232)] Selectable short frame length, long frame length Frame relay performance: Avg/Max/Min Utilization (%),Avg/ Max/Min Throughout (%), Avg/Max/Min Frame/Second Frame relay statistics: Avg octet, Total frame, FECN frames, BECN frames, DE frames, Short frames, Long frames, Aborted frame, FCS errors DLCI analysis: Total active DLCI count, Active DLCI listing (up to 100 DLCI) DLCI statistics: Avg octet, Total frames, FECN frames, BECN frames, DE frames, Short frames, Long frames, Aborted frames, FCS errors FRAME RELAY NNI (SW603N) Requires SW603 Interfaces: E1, V.11/X.21, V.35, V.24/RS-232, V.36/RS-449, G.703 co-directional LMI Standards: ITU-T Q.933, ANSI T1.617, LMI (DLCI 1023, GOF Vendors), NO LMI Modes: NNI USER, NNI NETWORK Rates E1: 2.048 Mbit/s, N (contiguous) and M (non-contiguous) x 64 kbit/s (N & M = 1 to 31) Datacom: Nx56 kbit/s, Nx64 kbit/s (N = 1 to 32) Lmi Analysis, PING Test, FOX Test, Statistic Analysis as described in Frame Relay Basic (see above) Specs & Configs 281 6.0 Switching Network Options Specifications VF CALL ANALYSIS AND EMULATION (SW601A, sw601e) Interfaces: Dual E1 Tx and Rx Modes: Analysis, Emulation Standards: Conforms to ITU-T Q.422, ITU-T Q.441, ITU-T Q.140 series Programmable ABCD states for IDLE, SEIZE, SEIZE ACK, ANSWER, CLEAR BACK, CLEAR FORWARD, BLOCK ABCD; Default (conforms to Q.422) or 3 user defined setups Labelling setup and display of Group I/II Forward, Group A/B Backward digits Q.441 or 3 user defined setups VF CALL ANALYSIS (SW601A) Bi-directional analysis of MFR1, MFR2/MFR2C, SS#5, DTMF, Pulse (DP) Bi-directional CAS (ABCD signalling) transition analysis Manual (on selected time slot) or Automatic scan trigger (MFR2/ MFR2C, DTMF, and DP only) Automatic trigger: CAS (ABCD selectable), STATE (IDLE, SEIZE, ACKNOWLEDGE, ANSWER, CLEAR FORWARD, CLEAR BACKWARD, BLOCK) Tracer with time stamp (resolution 1 ms) in relative or absolute values Recorded digits decoded on labels settings MFR2/DTMF frequency/level/twist/tone period/interdigit period received digit decode and analysis Pulse (DP) %break/pps/period received digit analysis VF CALL EMULATION (SW601E) Programmable dial 1 to 15 digits Dial parameters Dial tone period, Silent period, Interdigit period, Dial tone level (from -5 to -20 dBm, resolution 1dB) Dial pulse %break/period Receive or call mode Call setup (receive or call) with on-line call progress status (Tx and Rx) display (ABCD bits, STATE, and Digits) with Time stamp (resolution 1 ms) in relative or absolute values. Programmable caller ID and category User call emulator 10 sets of stored user signalling emulation setups 282 SunSet E20 Version 1 .01 Each signalling emulation holds up to 50 total events Programmable send and receive signalling (CAS), digits (MFR2, DP, DTMF), Wait and Time Out periods Send period from 0 to 999 ms, Time Out for response from 0 to 999 ms, program up to 20 digits (MFR2, DP, and/or DTMF) SS#5 Conforms to ITU-T Q.140 series Support 2400 Hz, 2600 Hz, 2400+2600 Hz SS#5 line signalling Control frequencies decode: Socotel - 1700 Hz, 1900 Hz, AON - 425 Hz, 500 Hz, Echo suppressor/canceller-2100 Hz SS#7 PROTOCOL ANALYSIS (SW640) Supports protocol analysis for SS#7 TUP, ISUP, SCCP, SNM, and SNT messages Supports ITU-T Q.700 series (General, Message Transfer Part, SCCP, TUP, ISUP, TCAP), Chinese (14 and 24 bits) standards Interfaces: Dual E1 Rx 75 or 120 ohm Mode: MONITOR OPC and DPC in HEX or decimal format Capture and store messages for decoding and protocol analysis Capture layer 1 events (alarms), capture and decode layer 2, 3, and 4 protocol messages, display in HEX or English decoded format, with decoding of the layer 4 Filters: PRE and POST for layer 1, layer 2, layer 3 (DPC, OPC, SI) SI: SNM, SNT, SCCP, TUP, ISUP For SNT, SNM: SLS Code, HEAD CODE For TUP: CIC, HEAD CODE, Address signal, Address number For ISUP: CIC, Message type, Address signal, Address no. For SCCP: SSN, SLS Code, Message type, Address signal, Address number, TCAP OTID, TCAP DTID, INVOKE ID (when applicable based on the SCCP SSN type) Detailed trace (HEX and/or decoded messages) printing via serial port to printer or to computer Message storage capacity Base unit: 90 kbyte, stores approximately 1200 messages Optional SRAM card: 1 Mbyte card, stores approximately 10 sets of traces of 1200 messages each(requires SW2515) User Part Options (Requires SW640) SW641 TUP ITU-T SW642 ISUP ITU-T SW644 GSM MAP/DTAP/BSSAP. Please refer to the Cellular Network Specification Sheet for more details SW645 ISUP Chinese Specs & Configs 283 284 SunSet E20 Version 1 .01 Abbreviations A AC - Alternating Current. A continuously variable current usually following a sinusoidal growth and decay curve. ACK - Acknowledge. A control character signalling that the receiver is ready to accept the next block. AFBER - Average Framing Bit Error Rate AIS - Alarm Indication Signal. Indicates an all ones signal on the active receive jack. AISS - Alarm Indication Signal Seconds. The count of the number of seconds in which AIS was detected. ALM - Alarm AMI - Alternate Mark Inversion. A method of transmitting binary digits, in which successive “marks” are of alternating polarity. AS - Available Second AVBER - Average Bit Error Rate AVCER - Average CRC-4 block Error Rate AVG - Average B B Channel- Bearer Channel. A 64 Kbps ISDN user channel which carries digital data, PCM-encoded digital voice, or a mixture of lower-speed data traffic. BATT - Battery BERT - Bit Error Rate Testing BIB- Backward Indicator Bit. Bit inverted for the negative acknowledgment of the BSN message. BIT - Bit Error BPV - Bipolar Violation BRI - Basic Rate Interface BSC- Base Station Controller. Part of the GSM network; manages the radio resources for one or more BTS. BSN- Backward Sequence Number. Indication of the last message received. BSS- Base Station Subsystem. A major component of the GSM network; contains the radio link with the Mobile Station. BTS- Base Transceiver Station. Part of the BSS; contains the radio transmitters and receivers. BTSLP - Bit Slip. Occurs when the synchronized pattern either loses a bit or gains an extra bit through stuffing. Abbreviations 285 BUFF - Buffer. A device that stores data temporarily from a faster device. C CAS - Channel Associated Signalling CC- Connection Confirm CCH - Control Channels CER - CRC-4 Error Rate CIC- Circuit Identification Code. A label for circuit-related messages. CK- Checksum. The total of a group of data items used for error checking purposes. CLKSLP - Clock Slip COD - Code CONFIG - Configuration CR- Connection Request. C/R- Command/ Response. A field bit indicating whether the frame transmitted is a command or response. CR - Carriage Return CRC-4 - Cyclic Redundancy Check Code - 4 D D Channel - Demand Channel; carries signalling information DASS2 - Digital Access Signalling System 2 dB - decibel dBdsx - decibel referenced to G.703 power level DC - Direct Current DCE - Data Circuit Equipment DCS - Digital Cross-connect System DET - Detected DGRM - Degraded Minute DIG - Digital DN - Down DPNSS - Digital Private Network Signalling System DTE - Data Terminal Equipment DTMF - Dual Tone Multi Frequency E E1 - 2.048 Mbps signal EBER - E-bit Error Rate EBIT - E-bit EIR - Equipment Identity Register 286 SunSet E20 Version 1 .01 ERR INJ - Error Injection ES - Errored Second ESF - Extended Super Frame ET - Elapsed Time EXTERN - External F FALM - Frame Alarm FAS - Frame Alignment Signal FBE - Framing Bit Error FBER - Framing Bit Error Rate FE - Frame Error FREQ - Frequency FRM - Frame G GSM - Global System for Mobile communications H HDB3 - High Density Bipolar Three HEX - hexadecimal HOLDSCRN - Hold Screen HLR - Home Location Register Hz - Hertz I INTERN - Internal INV - Inverted ISDN - Integrated Services Digital Network ISUP - ISDN User Part K Kbps - KiloBits Per Second L LAP-B - Link Access Protocol - Balance LBO - Line Build Out LED - Light Emitting Diode LOFS - Loss of Frame Second LOG - Logical Error (BIT error) LOS - Loss of Signal Abbreviations 287 LOSS - Loss of Signal Second Lpp - Level peak-to-peak LVL - Level M MAX - Maximum Mbps - megabits per second MFAL - Multiframe Alarm Seconds MFAS - Multiframe Alignment Signal MFC - Multi-Frequency Compelled MFE - Multiframe Bit Error MIN - Minimum MSC - Mobile Switching Centre MON - Monitor msec - 1 millisecond (1/1000 of a second) µ-law - mu-law; voice companding law µsec - 1 microsecond (1 millionth of a second) N nsec - nano second (one billionth of a second) NE - Network Element NT - Network Termination NV RAM - Non Volatile Random Access Memory P P/F - Pass/Fail PAT - Pattern PBX - Private Branch Exchange ppm - parts per million PRBS - Pseudo Random Bit Sequence PRI -Primary Rate Interface PRN SCRN - Print Screen PRNT - Print PRNTR - Printer Q QRS - Quasi Random Signal R R - Receive RAI - Remote Alarm Indication 288 SunSet E20 Version 1 .01 RCV - Receive REF - Reference RESYNCH - Resynchronization RLL - Radio Link Layer RT - Remaining Time RX - Receive S SABME - Set Asynchronous Balanced Mode Extended SAPI - Service Access Point Identifier SCCP - Signalling Connection Control Part SCRN - Screen SES - Severely Errored Second SF - Super Frame SIG - Signal SLIPS - Clock Slips SS - SunSet SW - Software SYNC - Synchronized T T - Transmit TCH - Traffic Channels TE - Terminal Equipment TEI - Terminal Endpoint Identifier TERM - Terminated T/S - Time Slot TS-16 - Time Slot 16 TERM - Terminated TRAU - Transcoder and Rate Adaptation Unit TX - Transmit U UAS - Unavailable Second UI - Unit Interval V V - Volts VAC - Volts AC VF - Voice Frequency Abbreviations 289 W WNDR - Wander X XMT - Transmit 290 SunSet E20 Version 1 .01 EXPRESS LIMITED WARRANTY A. Hardware Coverage. COMPANY warrants hardware products against defects in materials and workmanship. During the warranty period COMPANY will, at its sole option, either (i) refund of CUSTOMER’S purchase price without interest, (ii) repair said products, or (iii) replace hardware products which prove to be defective; provided, however, that such products which COMPANY elects to replace must be returned to COMPANY by CUSTOMER, along with acceptable evidence of purchase, within twenty (20) days of request by COMPANY, freight prepaid. B. Software and Firmware Coverage. COMPANY warrants software media and firmware materials against defects in materials and workmanship. During the warranty period COMPANY will, at its sole option, either (i) refund of CUSTOMER’S purchase price without interest, (ii) repair said products, or (iii) replace software or firmware products which prove to be defective; provided, however, that such products which COMPANY elects to replace must be returned to COMPANY by CUSTOMER, along with acceptable evidence of purchase, within twenty (20) days of request by COMPANY, freight prepaid. In addition, during the warranty period, COMPANY will provide, without charge to CUSTOMER, all fixes, patches, new releases and updates which COMPANY issues during the warranty period. COMPANY does not warrant or represent that all software defects will be corrected. In any case where COMPANY has licensed a software product “AS-IS,” COMPANY’S obligation will be limited to replacing an inaccurate copy of the original material. C. Period. The warranty period for Hardware, Software and Firmware will be One (1) Year from date of shipment to CUSTOMER. The COMPANY may also sell warranty extensions or provide a warranty term of three years with the original sale, which provide a longer coverage period for the test set chassis, software and firmware, in which case the terms of the express limited warranty will apply to said specified warranty term. D. Only for CUSTOMER. COMPANY makes this warranty only for Warranty w-i the benefit of CUSTOMER and not for the benefit of any subsequent purchaser or licensee of any merchandise. E. LIMITATION ON WARRANTY. THIS CONSTITUTES THE SOLE AND EXCLUSIVE WARRANTY MADE BY COMPANY WITH RESPECT TO HARDWARE, SOFTWARE AND FIRMWARE. THERE ARE NO OTHER WARRANTIES, EXPRESS OR IMPLIED. COMPANY SPECIFICALLY DISCLAIMS THE IMPLIED WARRANTIES OF MERCHANTABILITY AND FITNESS FOR A PARTICULAR PURPOSE. COMPANY’S LIABILITY UNDER THIS AGREEMENT WITH RESPECT TO A PRODUCT, INCLUDING COMPANY’S LIABILITY FOR FAILURE AFTER REPEATED EFFORTS TO INSTALL EQUIPMENT IN GOOD WORKING ORDER OR TO REPAIR OR REPLACE EQUIPMENT, SHALL IN NO EVENT EXCEED THE PURCHASE PRICE OR LICENSE FEE FOR THAT PRODUCT, NOR SHALL COMPANY IN ANY EVENT BE LIABLE FOR ANY INCIDENTAL, CONSEQUENTIAL, INDIRECT, OR SPECIAL DAMAGES OF ANY KIND OR NATURE WHATSOEVER, ARISING FROM OR RELATED TO THE SALE OF THE MERCHANDISE HEREUNDER, INCLUDING BUT NOT LIMITED TO DAMAGES ARISING FROM OR RELATED TO LOSS OF BUSINESS, LOSS OF PROFIT, LOSS OF GOODWILL, INJURY TO REPUTATION, OVERHEAD, DOWNTIME, REPAIR OR REPLACEMENT, OR CHARGE-BACKS OR OTHER DEBITS FROM CUSTOMER OR ANY CUSTOMER OF CUSTOMER. F. No Guaranty, Nonapplication of Warranty. COMPANY does not guaranty or warrant that the operation of hardware, software, or firmware will be uninterrupted or error-free. Further, the warranty shall not apply to defects resulting from: (1) Improper or inadequate maintenance by CUSTOMER; (2) CUSTOMER-supplied software or interfacing; (3) Unauthorized modification or misuse; (4) Operation outside of the environmental specifications for the product; (5) Improper site preparation or maintenance; or (6) Improper installation by CUSTOMER. w-ii SunSet E20 Version 1.01 SUNRISE TELECOM I N C O R P O R A T E D Certificate of Origin To Whom It May Concern: We, Sunrise Telecom, with principle location of business at 22 Great Oaks Blvd., San José CA 95119, do hereby certify that the following product is manufactured in the United States of America. Model SSE20 Name SunSet E20 All versions of software. Copyright 2001 Sunrise Telecom Incorportated This device uses software either developed by Sunrise or licensed by Sunrise from third parties. The software is confidential and proprietary. The software is protected by copyright and contains trade secrets of Sunrise or Sunrise’s licensors. The purchaser of this device agrees that it has received a license solely to use the software as embedded in the device, and the purchaser is prohibited from copying, reverse engineering, decompiling, or disassembling the software. Warranty w-iii w-iv SunSet E20 Version 1.01 Index Symbols %AS 65 %BBE 75 %EFS 67 %ES 67 %SES 68 %UAS 69 (CRC) RATE 66 +/- RxLVL 68 +LVL 67 +WANDR 69 -LVL 67 -WANDR 69 0000 57 1-4 58 1010 57 1010 (dBm) 100 1111 57 15 VDC 26 2047 57 20ITU 57 2e23, 2e20, 2e15 57 3-24 58 3-K Flat measurement 100 3K (dBm) 100 511 57 A Abbreviations Abbrevs-285 AC Battery Charger 22 AC Charger using 173 acceptance test 257 Addressing 250 AIS 57, 130 LED 23 AISS 65 Alarm Alarm Generation 129 Alarm Generation 129 Index ALARM LED 24 Alarms AIS 130 FAS DISTANT 130 MFAS DISTANT 130 T/S-16 AIS 130 ALM/SIG screen 72 AMI 141, 241 Applications Accept a New Circuit 156 advanced 186 Basic 156 Checking for Frequency Synchronization 160 Connecting the Cords 153 Datacom 228 Datacom Monitoring 232 Emulating a Terminal Multiplex 191 Emulating an Add/Drop Multiplexer 194 Fault Location with Loopbacks 234 In Service Dual Drop and Insert THRU Testing 186 Measure Signal Level 161 Monitor a Voice Frequency Channel 167 Monitor an In-Service Circuit 157 Nx64 kbps Testing 171 Observe Network Codes or Channel Data 165 Point-to-Point Datacom Testing 228 Run a Timed test 164 Send a Tone 170 Simple Talk/Listen 168 Testing a Terminal Multiplex 189 Testing the Datacom Port of a i-1 2M Multiplex 231 Using the Battery and AC Charger 173 Using the Remote Control 180 Using the Serial Port 175 AS 65 ASCII 80 AUTO key 20, 31 Automatic configuration 20 availability 63 B B-Bit dialing 120 B-bit dialing 252 B-LED 49, 54 Back light 18 backlight 146 Bandwidth, voice channel 240 bar graph 70 Battery Charging 9 LOW BATT LED 22 replacing 11 using 173 Battery Charger 9 Battery charger port 26 BBE 75 BER 66 BINARY 80 Binary Data 239 Bipolar Violation 242 Bipolar violations Code errors 66 BIT ERR 22 BIT ERR Light 22 Bit Error LED 22 Bit Stream 239 BLK ERR RATE 221 BLOCK 118 BLOCK ERROR 221 Block Error Ratio Block Size 142 Block Errors Block Size 142 i-2 BPV 66 BREAK percentage 120 bridge 153 C C-Bit Analysis 86 C-Bit analysis framing 87 C-bits Definitions 89 CALIB 95 Calibration 257 Call Analysis 102 Digit Analysis 106 Call Control Procedure 204 Call Emulation 107 Standard Emulations 108 User emulation 112 CAS 100, 118 CASS 247 Certificate of Origin w-iii Channel 240 Channel Bandwidth 240 Channel data 100, 165 Clear Back 118 Clear Forward 118 Clear Print Buffer 149 Clear to Send 206 CLK POLAR 211 CLKSLIP 66 clock slips 70 CODE ERR 23 Code error CODE ERR LED 23 CODE errors 66, 241 coder Offset 100 coder peak 100 Coding 141, 241 Compelled Dialing 250 Configuration General 145 Connecting the Cords 153 Connector Panel 24, 24–26 CONTINU 64 contrast key 20 SunSet E20 Version 1 .01 Converting a Voice Signal 240 CRC 66, 133 CRC DET LED 23 CRC-4 33, 40, 47, 51, 81, 246, 248 CRC LED 23 CTS 24, 204, 206 Current Histogram 90, 93 cursor keys 20 Customer Service 260 customer service 260 Cyclic Redundancy Check Code 248 D Data Carrier Detect 206 Data Networks 203 Data Rate 241 Data Set Ready 206 Data Terminal Ready 206 DATACOM 48 Datacom CLK POLAR 211 DATACOM Test Mode 208 Equipment 201 Interface pins 206 LEDs 24 LIVE TRACER 213 Measurement Results 218 Monitoring 232 Point to Point Testing 228 Propagation Delay 222 RS232 Pin-outs 225 Technology 201 Timing 215 Trigger 216 TxDATA CLK 210 View Received Data 222 View/Print Buffer 217 Datacom Interface 212 DATACOM mode measurement results 78 test configuration 207 Date 145 DCD 206 DDS 36 Index Definitions, Basic 239 Degraded Minutes 66 DGRM 66 Dial Parameters 119 Dial Pulse 250 Dialing Technology 250 DL Datacom 219 DP 250 DSR 206 DTMF 102, 250 DTR 206 Dual Drop & Insert THRU mode 186 E E-BIT 134 E-bit Performance Monitoring 249 E-bit error transmission 249 E1 INS 49 E1 Measurment Results 65 E1 Mode CRC-4 33 E1 pulse quality 83 E1 Test Mode 32 E1-Mux BERT 49 E1-MUX Mode configuration 45 Measurement Results 76 E1-Mux Mode Datacom side 48 E1 side 46 MUX side 49 E1DRP 49 E1DUAL Mode configuration 37 E1T/S 49, 54 EB 75 EBER 66 EC DECLARATION OF CONFORMITY 2 Edit Emulator Send side 114 i-3 Edit emulator receive side 115 Emulating a Terminal Multiplex 191 Emulating an Add/Drop Multiplexer 194 ENTER key 20 Erase NV Ram 148 ERR INJ key 20 Error LED 23 Error Injection configuration 126 ERR INJ Key 20 Programming Bit Error Rate 128 Programming Burst of 10 Errors 127 error injection ERR INJ LED 20 ES 67 ESCAPE key 20 ET 64 EXPRESS LIMITED WARRANTY w-i external timing 44 F Factory Defaults 150 FALM 67 FAS 245 FAS DISTANT 130 FAS WORD 134 FE 67 Figure 01 Cartridge Installation 10 02 Replacing the Battery Pack 11 03 SunSet E20 Front View 16 04 F-Keys 18 05 Graphic Screen, Example 19 06 Connector Panels 24 07 Top of the SunSet E20 26 08 Test Configuration Menu i-4 31 E1 Mode Graphic 32 Select a Timeslot 34 DDS Shift 37 E1DUAL Mode 38 E1 Dual Graphic 38 Slave to Slave Timing 43 Loop/Slave Timing 43 External Timing 44 DDS Shift 45 E1-MUX Menu 46 MUXTEST Menu 50 MUXTEST Configuration 50 21 Internal Timing 53 22 Slave Timing 53 23 MUXTEST Configuration 55 24 Test Pattern Screen 56 25 User Test Pattern Screen 58 26 User Test Pattern Screen 60 27 Measurement Results Screen 63 28 Line 1 Summary Screen (E1 Mode) 69 29 Line Frequency Screen (E1 Mode) 71 30 Line Frequency/No Ref Signal 71 31 G.821 Logical Screen 72 32 ALM/SIG Screen (E1 Mode) 73 33 Line 1- M.2100/550 screen (E1 Mode) 74 34 Line 1- G.826 Screen (E1 Mode) 75 35 Datacom Summary Results (E1-MUX Mod 76 36 Datacom Bit Error Results 77 37 Datacom Block Error Measurement 77 38 OTHER MEASUREMENTS 78 09 10 11 12 13 14 15 16 17 18 19 20 SunSet E20 Version 1 .01 39 40 41 42 43 View Received Data 79 FAS Frame Words 81 FAS Words 82 MFAS Frame Words 83 Pulse Shape Analysis Menu 84 44 Pulse Shape Analysis 85 45 C-bit Analysis 87 46 C-bit Definitions 89 47 Histogram Analysis Menu 90 48 Current Histogram Menu 91 49 View Current Histogram 91 50 Saved Histogram Screen 93 51 Propagation Delay 95 52 VF CHANNEL ACCESS Menu 96 53 VF Measurements 97 54 View Line 1 & 2 CAS 101 55 Call Analysis 103 56 DTMF Call Analysis Sample 103 57 Call Analysis, with Trigger 104 58 MFR2 Call Analysis Screen 105 59 DTMF Digit Analysis Screen 106 60 Pulse Digit Analysis 107 61 Call Emulator List 108 62 DTMF Receive Sequence 108 63 Call Emulaiton/MFCR2 Call Screen 109 64 Call Emulation/Sample Call 110 65 Receive Setup 111 66 Receive Screen Sample 111 67 User Call Emulator Screen 112 68 Call Emulator Profiles Index 113 69 Edit Emulator 114 70 Start User Emulation 116 71 Supervision Setup Screen 117 72 Dial Parameters 119 73 Signal Meanings Screen 121 74 Group 1 Forward Signals 122 75 Group 1 Labels 122 76 Group II Forward Screen 123 77 Group II Forward Labels 123 78 Group A Backward Signals Screen 124 79 Group A Backward Signals Labels 124 80 Group B Backwards Signals Screen 125 81 Group B Backwards Labels 125 82 Other Features Menu 126 83 Error Injection Screen 126 84 ALARM GENERATION 129 85 View Test Record 131 86 Memory Record Label 132 87 Send Frame Words 133 88 Automatic E-Bit Transmission 134 89 Main Menu/System Parameters 135 90 SYSTEM PARAMETERS Menu 136 91 Version/ Option Screen 136 92 System Profiles List 137 93 System Profiles Label 138 94 Measurement Configuration Screen 140 95 MEAS Configuration, Screen 2 143 96 General Configuration i-5 Screen 145 97 Printer Cable SS115B Pin Assignment 147 98 Language Selection Screen 150 99 Plugging in- TERM Mode 153 100 Plugging in - Monitor Mode 154 101 Plugging in - THRU Mode 155 102 Accept a New Span 157 103 Monitor an In-Service Circuit, Monito 158 104 Monitor an In-Service Circuit,Bridge 159 105 Frequency Synchronization 161 106 Measuring Signal Level 163 107 View Received Data 166 108 Fractional E1 Testing 173 109 SS122A Null Modem Pin-Outs 176 110 SS115B Printer Cable Pin Assignment 177 111 SS118B/C Printer Switch Settings 178 112 Direct Connection 182 113 Typical Setup 183 114 Dual Drop and Insert THRU Mode Test 187 115 In Service Dual Drop and Insert THR 188 116 MUXTEST Setup 190 117 E20 MUXTEST Configuration 190 118 Emulating a Terminal Multiplex 193 119 Emulating an Add/Drop Multiplex 195 120 Emulating Add/Drop MUX 197 121 Data Communication Facilities 202 i-6 122 Full-Duplex Call Procedure 205 123 V.35 DB-34 Interface 207 124 DATACOM Mode 208 125 Select Fractional Rate 210 126 Datacom RS232 Config Screen 211 127 Main Menu/Datacom Interface 213 128 Datacom Timing Analysis Menu 213 129 Datacom Interface Screen, Graph 214 130 Datacom Interface, Table 216 131 Start Trigger 216 132 View/Print Buffer 218 133 Datacom Summary Results 219 134 Datacom Measurement Results, pg. 2 220 135 Datacom Measurement Results, pg. 3 220 136 DATAMON Results 221 137 Datacom View Received Data 222 138 Propagation Delay 223 139 V.35 Pin-out Diagram 225 140 RS232 Pin-outs 225 141 X.21 Pin-outs 226 142 G.703 Pin-outs 226 143 RS-449 Pin-outs 227 144 RS530 Pin-outs Diagram 227 145 V.35 Datacom Test 229 146 Testing the Datacom Port of a 2M Mu 231 147 Monitoring Datacom 233 148 Local and Remote Loopback 234 149 Converting a Voice Signal 24015 Loop/Slave SunSet E20 Version 1 .01 Timing 43 150 AMI Line Coding 242 151 HDB3 Line Coding 243 152 HDB3 Encoding 244 153 Pulse Shape 245 154 FAS Framing Format 247 155 MFAS Framing Format 248 156 CRC-4 Multiframe Format 249 157 E-bit Performance Monitoring, In-ser 250 158 Local Loop and Interoffice Signalling 251 159 DTMF Frequency Key Pad 251 FOX 57 Fractional Datacom 210 Fractional E1 189 Fractional E1 Testing 173 Frame Alignment Signal 81, 245 Frame Error 67 Frame Words Send frame words 133 FRAMING 33, 40, 47, 51, 245 FALM 67 LOFS 67 MFAL 68 MFE 68 Multiframe 83 PCM-30 35, 41 PCM-31 35, 41 VF Analysis 96 frequency 68, 100 Frequency synchronization 160 FRM 65 Front View Description 15 G.821 72, 239 G.821 Measurements Configuration 143 G.821 Screen 72 G.826 75 G.826 Measurements Configuration 143 G.826 screen 75 Graphic key 18, 31 Graphic Screen 19, 32 G K G.703 83, 239, 245 G.703 Pulse Mask 85 G.704 239 G.706 239 Keys 15–21 0, 1, 2, 3, 4, 5, 6, 7, 8, 9 21 A, B, C, D, E*, F# 21 arrow 20 Index H HDB3 47, 51, 141 HDLC 205 HEADPHONE port 25 headphone 25 HEX 80 Hexadecimal keys 21 Histogram Analysis 90 Current Histogram 90, 93 HOLDSCR 64 HRP MODEL % configuration 144 I idle 87, 118 idle channel signalling 144 idle code 144 idle signal 96 In-service testing 157, 248 Integrated Circuits 201 Intentional BPV 242 interdigit period 119 Interface Pins 206, 224 internal timing 36, 44 INVERT 56 ITU 239 ITU-T Q.441 121 i-7 AUTO 20 contrast 20 ERR INJ 20 Error inject 20 ESCAPE 20 F-keys 17 GRAPHIC 18 LED 20, 22 LIGHT 18 MEAS 20 POWER 21 PRINT 18 RxDTE 24 shift 21 volume 20 description 22 Line 1 TX 25 Line 2 RX 25 Line 2 TX 25 Line code 47, 51 Line Coding 241 LINE FREQUENCY screen 70 Line1 RX 26 Live Tracer 213 LL 206 Local Loop 251 Local Loopback 206 LOCK/UNLOCK 64 LOFS 67 LOSS 67 L M L1+L2 99 Language 150 LED ERROR 23 LED key 20, 22 LEDs 22 AIS 23 Alarm 24 Battery 22 BIT ERR 22 Code error 23 CRC Detect 23 CTS 24 Datacom 24 green 22 PAT SYNC 22 PCM-30 23 PCM-31 23 POWER 22 red 22 RTS 24 RxDCE 24 Signal 23 USER1 & USER 2 24 User1/User2 212 level 100 Level, 2.048 Mbps signal 244 LIGHT key 18 Lights M.2100 239 M.2100 Measurements Configuration 143 M.2100/550 73 M.550 239 M2100/500 screen 73 MAX Hz 68 MEAS CONFIGURATION 140 MEAS key 20 MEASURE MODE 141 Measurement Definitions 65 Measurement Results 62, 65 datacom 218 E1-MUX mode 76 F-keys 64 MUXTEST mode 77 VF 99 Measurements Duration of 140 Start 141 menu tree 29 MF 250 MFAL 68 MFAS 245, 247 MFAS Framing Bits 82 MFAS ABCD 135 MFAS DISTANT 130 MFAS DISTANT Alarm 130 i-8 SunSet E20 Version 1 .01 MFAS WORD 135 MFC 250, 252 MFE 68 MFR2 102, 252 microSecond (uS) 223 MIN Hz 68 more 17 MultiFrame Alignment Signal 245, 247 Multiplex Testing a Terminal Mulitplex 189 Testing the datacom port of, 231 MUXTEST mode 50 BERT side 54 Datacom side 54 E1 side 50 measurement results 77 timing 52 Off hook signalling 252 On hook signalling 252 OSI standard 205 OTHER FEATURES 126 Other Measurements 78 Datacom 221 Pattern synchronization 22 PCM 240 PCM 30 87 PCM-30 23, 33, 40, 245 PCM-31 33, 40, 245 Percent Errored Seconds 67 PERD 115 PERIOD 74 Physical Layer Protocol 205 Pin-outs G.703 226 RS-449 227 RS530 227 V.35 225 X.21 226 Power LED 22 POWER Key 21 PRINT EVENT 179 PRINT RESULT 142, 179 Printer 175 Automatic printing 179 settings 146 Switch Settings 177 Printer Cable Pin Assignments 147 Printer port 26 Printing 175 Configurations 142 Propagation Delay 95 Datacom 222 PSOP 100 Pulse 120 Pulse Code Modulation 240 Pulse Mask Analysis 83 View Last Pulse Shape 86 Pulse Shape 245 Pulse signalling 102 Purchase Order 260 P Q P/F 74 PAT SYNC 22 PAT SYNC LED 22 PATL Datacom 219 Q.422 117 Q.441 252 QRS 58 Quasi 58 N Network codes 165 NFAS WORDS 135 Noise 1010 Hz measurement 100 Noise Psophometric measurement 100 Nx64 kbps Testing 171 Nyquist Theorem 240 O Index i-9 R RATE errors 66 RCV Hz 68 reference clock 70 Remote Control 180 Windows 95 185 Remote Loopback 206 Replacing the battery pack 11 Request to Send 206 Return Merchandise Authorization 260 RL 206 RMA 260 RS-232 interface 26 RT 64 RTS 24, 204, 206 RX port 25 Rx/DROP 39, 46, 51 RxCLK 68 RxDCE LED 24 RxDTE 24 S S/N (dB) 100 seizure 118 SELECT TIMESLOT screen 34, 40 SELF TEST 149 Send a Tone 170 send and receive a tone 189 Send Frame Words 133 Send Test Pattern 56 Serial Port 26 Communications 180 Settings 175 SES 68, 75 SHIFT key 15, 21 SHIFT-lock key 15, 21 Signal level 161 SIGNAL LED 23 Signal Level 244 Signal Meanings 121 Signal to Noise measurement i-10 100 signalling 101, 117, 250 slave timing 42 SLIP Datacom 220 SLIPS 66 SRAM card 90, 93 SRAM memory card 11 SS#5 102 Start Trigger Datacom 217 Stop Bit 148 Summary Results Datacom 219 SUMMARY Screens 69 Sunrise Telecom address/phone 260 Software 15 cartridge 148 cartridge install 9 Serial number 10 Options 136 Version 136 supervision 117 Supervision Setup 117 System parameters 135 System Profiles 137 Default 138 Delete 139 enter a new profile 137 Modify 139 Stored 138 T T/S 80 T/S-16 AIS alarm 130 talk and listen 188 Talk/Listen 168 TCP/IP 205 Technical Standards 239 Technology Overview 239 Terminal Multiplex Testing 189 TEST CONFIGURATION 31 Test Configuration Datacom Mode 207 SunSet E20 Version 1 .01 Test Pattern 57 Send Test Pattern 56 standard 56 User Test Patterns 58 TEST RATE 33, 40 Testing Datacom (point to point) 228 Testing new circuit 156 TESTPAT 32, 39, 96 THRU 32, 39 time 145 Time slots 245 Timed Test 164 Auto Start 164 Manual Start 164 Timeslot 171 timing 42 Datacom 215 tone level 120 top connectors 26 TOUT 115 Transmission Basics 202 TRIGGER 104, 216 TRIGON 216 Troubleshooting 255 TTL-L2 37 Tx SOURCE 32, 39 Tx/INSERT 38, 46, 51 TYPE 48, 54 V U X.21 Datacom Interface 215 XMT CLOCK 36, 42, 48, 52 INTERN 44 UAS 68 unit interval 95 Unit Interval (UI) 223 Unpacking 9 User Emulation 112 USER LED 1/2 212 User Test Pattern delete 62 sending 59 User Test Patterns 58 Creating a test pattern 59 Editing a user pattern 60 Viewing 59 USER1 & USER 2 LEDs 24 Index V.35 205, 228 V.35 Pin-out 225 Version 136 VF & Noise Measurements 97 VF Channel Access 96 Dial Parameters 119 View CAS 101 View FAS Words 80 View Line CAS 101 View MFAS words 82 View Received Data 78 Datacom 222 View Results Records 131 View/Print Buffer Datacom 217 Voice bandwidth 240 Voice frequency channel monitor 167 Volume key 20 W Warnings 15, 35, 52, 149 WARRANTY w-i warranty 260 Warranty Registration 9 X i-11 i-12 SunSet E20 Version 1 .01