1
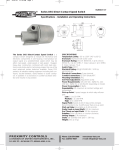
Stock Class Sterling
User Manual
Arrow Precsion Limited
Unit 7 Elliott Industrial Park,
Eastern Road,
Aldershot,
Hampshire, GU12 4TE,
United Kingdom
Tel: (01252) 408 552
Fax: (01252) 408 551
E-mail: [email protected]
www.arrow-prescision.com
You must read this manual carefully
before attempting to use this marker!!
It contains important safety information
and operating instructions.
Assembly and Disassembly
Notes
Contents
Contents
Page 1
Introducing the Sterling
Page 2
Warning
Page 3
Power Sources
Page 4-5
Basic Operation
Pages 6
Velocity Adjustment
Page 7
Servicing
Pages 9
Troubleshooting
Page 10
Assembly and Disassembly
Pages 11 - 15
Parts Diagram and Parts Numbers
Page 16 - 20
1
22
Assembly and Disassembly
Congratulations on the purchase of your Paintball marker.
Introducing the Sterling- known as the Rolls Royce of pumps.
Notes
The Sterling comes in three models - the Bronze, the STP and the Stock Class
The Bronze is supplied with a set of 10 washers and two springs to allow velocity adjustment, the washers are used as
spring packers.There is also a spring spares kit comprising of three main springs and three valve springs.
The STP- Specially Tournament Prepared differs from the Bronze in a number of respects.The internals, hammer, pickup,
pickup rod, pickup guide, cocking arm and sear are polished.There is a power adjuster to make velocity adjustment more
convenient. It comes fitted with a bottom line and hose, which is highly finished.
The valve body is modified to take the hose, the bolt is better finished and has a larger gas hole for better flow.
The STP is fitted with a 45 aluminium grip frame, with an improved trigger fitted with plated trigger shoe.
The bores of the body and the barrel are honed.
The body comes in either a bead blast or polished bright anodised finish and is fitted with a wire ball detent.
The Stock Class is the evolution of the STP.The paint loading system is adaptable for horizontal or vertical paint feed and
the gas delivery is via internal hard pipe to the valve body.The gas can be delivered from a 12 gram powerlett, a CO2
bottle or a regulated air system in various configurations.
The Sterling has a reputation unsurpassed within paintball.The STP has a pedigree that extends back to the early pump
days when it earned its reputation as the finest pump paintball marker available worldwide.
The Sterling has been manufactured using the latest CNC Machinery and high-grade materials.The body, barrel and grip
are machined from aircraft grade Aluminium Alloy.
Stainless steel is utilised for the internals, correctly maintained, it will give you many years of trouble free use, each marker
is thoroughly inspected and tested prior to leaving the factory.
21
2
Assembly and Disassembly
WARNING
The Sterling Paintball Marker is not a toy. Misuse may cause serious injury or death.The user and any person within range
must wear eye protection designed specifically for Paintball use.You must be 18 years of age to purchase, 14 years of age
to use with adult supervision, or 10 years of age to use on a paintball field meeting ASTM standard 1777-97. Obey all
local, state and federal laws. Keep out of reach of children!
Follow the rules of safe Paintball marker handling. Read this operators manual before use.
Always have barrel plug inserted in the barrel of the marker when not involved in actual play.Treat every marker as if it
were loaded. Never point the marker at anything you don’t wish to shoot. Keep marker uncocked until ready to fire.
Always remove gas source before assembly or disassembly. Store marker unloaded and de-gassed in a locked place.
Follow warnings listed on gas source for handling and storage. Always wear eye, face and ear protection designed
specifically for Paintball. Never point at or shoot animals, or any person who is not wearing eye protection designed
specifically for Paintball.
Always measure your marker’s velocity with a chronograph before playing Paintball. Never shoot at velocities in excess of
300 feet per second. Muzzle energy the legal maximum of 12 ft/lbs.This marker is designed to use .68 caliber paintballs.
Always carry your marker covered with a suitable cover in public places
Do not act irresponsibly and damage yourself, others or the sport!
3
22
Assembly and Disassembly
Power Source Information
This marker can be used with Air, Carbon Dioxide(CO2) or Nitrogen.
Air vs. CO2
In the past, CO2 was the most common gas used by paintball players. However, in recent years the use of CO2 has
declined in favor of a growing preference for high-pressure air or nitrogen.
There are a number of reasons for this:
Cleanliness – Because CO2 is stored in liquid form, it has to “boil off ” in order to escape.This process can lead to liquid
CO2 getting into the internal workings of the paintball marker. Conversely, compressed air is a naturally clean gas, so
internal marker components remain free of damaging material.
Marker jamming – Another CO2 downside: as gas boils off it absorbs heat from its surroundings to do so.This can cause
freezing, which can damage and jam a paintball marker. Compressed air, on the other hand, is stored in a non-liquid
gaseous state. Air is released from a cylinder at a constant pressure, enhancing marker accuracy and stability.
Temperature – CO2 is also temperature-sensitive, which can affect the speed and trajectory of a propelled paintball.
Extreme temperatures can greatly reduce the performance of markers powered by CO2.
Environmental – Compressed air is a more environmentally friendly gas than CO2.
Important CO2 safety information: Always get cylinders filled by authorised knowledgeable technicians. Correct fill levels are critically important, do not try
and fill yourself.
G
Regularly inspect cylinders, reject any damaged cylinders, take care of your cylinder.
G
Observe any local laws regarding compressed gases and the transportation there of.
G
G
19
Keep Cylinders out of direct sunlight as this can cause sudden rise in pressure. Cylinders should be fitted with
burst disc safety devices to prevent over pressurization of the cylinder and gun.
Always exercise great care when attaching or removing cylinders from your marker.
When ambient temperature rises, it may be necessary to check paintball velocity has not risen above the legal
maximum of 300 fps.This may involve clipping or changing the mainspring, or adjusting tension.
4
Assembly and Disassembly
Power Source Information (continued)
If you are using regulated air, set the output pressure of the regulator for 600/700 psi.
IF using CO2 use cylinder fitted with anti siphon tube.
1. REGULATED. You will need a reliable regulator approved for use with CO2. Ensure that your tank is fitted
with an anti-siphon to prevent liquid CO2 entering the regulator and causing malfunction.
2. EXPANSION TANK. This would normally be used on a vapour set up in place of the regulator. The expansion
tank allows liquid CO2 to boil off into a vapour state, helping to keep a steady supply pressure.
3. REMOTE SET UP. This configuration will allow gas vapour to be drawn from the top of the cylinder. Used in
conjunction with a remote expansion system should ensure that no liquid will be drawn into the marker.
Note, NO anti siphon tube is required on the cylinders.
4. LIQUID ONLY. You will need to fit a siphon tube to the cylinder with this set up. This can be a clunk tank
setup, that is with the internal feed being made of a flexible tube with a weighted end, sometimes incorporating
a filter. Or a solid tube bent down into the liquid, so only liquid is fed to the gun.
Note Using liquid can result in much higher velocities if the gun has originally been set to use vapour, so you will need
to clip or change mainspring. Seal damage and greater wear on the gun may also result from using liquid CO2.
Once you have selected your preferred method, fit the cylinder to the marker exercising great care.
Wear gloves and eye protection.
ALWAYS: Use A Barrel Plug (Use one that actually fits the Barrel tight)
ALWAYS: Check before Dry firing, you have not got a ball loaded in the barrel. This marker
uses a closed bolt system (Means a ball is loaded into the Barrel after one has been fired)
DO NOT LOOK DOWN THE BARREL if you are not sure remove the Barrel and CHECK!!
5
18
Basic operation of the Sterling
The Sterling fires from a closed bolt on single shot.
The Sterling also has rapid slam fire. Slam fire is when the trigger is held in and for every manual pump cycle a ball will
be discharged.
Getting Your Gun Ready For Use.
First install a barrel plug so as to prevent any accident due to a negligent or accidental discharge.
Then attach the paint feed system.
Your gun is now ready to fire.
Pull the pump back until it stops. This operation does two jobs simultaneously; it allows a ball to drop into the breach and
also for the pickup to engage the hammer.
Move your pump forward, the ball will be loaded into the breach and the hammer will be in the cocked position.
Pull the trigger and your paintball will be on it’s way to your target. Now you will need to check the velocity of the
marker, for this you will need a correctly calibrated chronoscope. Failure to check may result in you running hot, risking
disqualification in a game, injury to other players and is ILLEGAL! Ignorance is no excuse!
Always Observe the Paintball Player Code
“As a responsible paintball player, I understand and assume all the risks I may encounter while playing paintball.”
Responsible paintball playing duties include:
Playing within the limits of my ability.
Treating every marker as if it were loaded and never pointing the marker at anything I don’t wish
to shoot.
G Keeping the marker on “safe” until ready to shoot.
G Keeping the barrel sock in the marker’s nozzle when not shooting.
G Always removing gas source before disassembly.
G Storing the marker unloaded and depressurized in a locked place.
G Following warnings listed on the gas source for handling and storage.
G Not shooting fragile objects, such as windows.
G Not shooting porous surfaces.
G Always wearing eye, face and ear protection designed specifically for paintball.
G Never shooting a person who is not wearing proper protection.
G Never shooting at velocities in excess of 90 metres (300 feet) per second.
G Accepting responsibility for my own safety in every game.
G Being environmentally conscious in every game.
G
G
17
6
Assembly and Disassembly
Velocity Adjustment
Velocity is increased by increasing spring tension.
Velocity is decreased by decreasing spring tension.
To adjust the spring tension is simple, requiring no disassembly.
(Removal of the barrel will make adjustment easier)
Insert the long 3/32 Allen key into the front of the pump. (A small 3mm hole in the front of the pump)
Turn this clockwise to reduce and anti-clockwise to increase velocity. 6.5 turns of adjustment are available,
anything more than this being needed will require disassembly and a change of the mainspring.
Changing Main Spring
Remove the Front Field Screw, disconnect the Pump Rod from the bolt found at the rear of the body.
Remove pump rod from the bolt and turn pump rod counter clockwise 90 degrees.
Pull out bolt from the upper rear chamber.
This will ensure easy removal of the whole assembly.
Slide the pump, pump assembly together with the Pump Rod off of the barrel.
Remove main spring from inside the lower chamber. (The spring sits inside the hammer)
Replace the main spring with one that is slightly heavier in its compression. (Supplied with marker)
Reverse strip procedure.
At this point ensure that the bolt is synchronised with the pickup, you must pull the pump back to its stop
position and look into the direct feed collar, the front of the bolt must have cleared the rear of the feed collar.
This position is set at the factory and should not need adjusting.
Now check your gun over a chronograph to measure the velocity.
IMPORTANT – the MAXIMUM safe velocity is
300 feet per second. It is illegal to exceed this velocity.
Changing Exhaust Valve
IMPORTANT NOTE:You must remove the power source, and cycle action or serious injury may occur.
Remove the Rear Field Screw. Pull the valve body out from the lower chamber leaving the pipe in place.
Unscrew the brass valve guide positioned at the front of the Valve body using some wooden doweling to
prevent damage, inside you will find the exhaust valve and spring. Ensure the sealing surface of the exhaust valve is clean
and free from any grit or swarf(metal particles), also check the valve assembly is still firmly
attached to the shaft. Then reverse the procedure ensuring the smooth entry of the pipe into the connector to avoid
damage to the seal inside.
Now check your gun over a chronograph to measure the velocity.
IMPORTANT - remember the MAXIMUM safe velocity is
300 feet per second. It is illegal to exceed this velocity.
7
16
Assembly and Disassembly
Servicing
Vertical Feed Assembly
All repairs and adjustments must carried out by a fully competent person. If you are unsure return marker to the factory
to have work carried out.
Any damage resulting from attempts to do it yourself are not covered under warranty and may render the
marker unsafe!
Your Sterling will require little more than cleaning and regular lubricating. However it is recommended to
replace all the ‘O’ rings on the marker once a year as a preventative measure and ensure efficient function.
Always ensure your gun is clean and free from mud or dust. Lightly oiled internals will give you a more
consistent velocity.
We recommend Arrow Precision LLCs own brand, called STP LUBE, which has been formulated specially
for Sterlings, and is available from your dealer.
To disassemble your Sterling for servicing you need to remove both front and rear knurled field screws. This will detach
the grip frame from the body.
The valve body may now be removed from the main body.
Disconnect pump rod from the bolt by flexing the rod out of bolt, slide pump over the barrel, complete with pickup and
pickup guide assembly.
Remove bolt from body, slide out hammer and spring from bodies lower chamber.
You have now disassembled your gun into its main sub-assembles.
Bottom line – 12 Gram Assembly
Servicing of the sub-assemblies:
A. Pump and Assembly
Pump Assembly requires only cleaning and light oiling.
B. Valve body and valve
Valve body has the valve guide and exhaust valve with valve spring inside.
Unscrew valve guide to reveal exhaust valve and spring. Check exhaust valve and
remove any debris which may have embedded itself on the seal face.
If you continue to get a leak of gas through the barrel you may have to replace the exhaust valve.
C. Body and barrel
Clean and lightly oil both upper and lower chambers.
D. Bolt
Check ‘O’ rings are clean and lightly oil. Spare ‘O’ rings for bolt available in Sterling service kit.
Front Bottle Mounting Assembly
E. Hammer and Main Spring
Ensure SEAR has free movement, clean with solvent and lightly lubricate with oil.
15
F. Grip assembly with spacer bar
Grip assembly requires only a few drops of oil introduced around SEAR. The spacer bar which is mounted on the top
of grip frame has a seal, this is called the space bar O-ring. Ensure this is in place - if not a spare is included in the
service kit.
8
Assembly and Disassembly
Servicing (Continued)
G. Barrel
Inspect the barrel and remove any nicks or burrs that may have occurred during use, paying particular at tention to
the muzzle, as this is the most likely place for damage to occur and has the greatest effect on ball breakages. Use fine
emery paper to remove damage and polish afterwards, this will remove anodised finish, so small areas can be
re-touched with a permanent black marker pen, anything larger will require re-anodising of the part.
Always make sure your barrel is clean, remove any gelatine and paint residue with a damp swab or cotton
tail pull through.
To remove barrel, turn counter clockwise and pull out from body of gun.
If you have just serviced your gun and have oiled the internals, fire off 6 shots without paintballs. This will in
troduce oil into the barrel. This must be cleaned out otherwise your accuracy will suffer. Silicone oil may be
used internally on the barrel, however is not recommended for gun lubrication.
The barrel may be cleaned without the need to remove it from the body, this is achieved by removing bolt
rod from the bolt and turn bolt rod counter clockwise 90 degrees. Pull out bolt from the upper
rear chamber.
Grip Frame Assembly
Insert pull through or cleaning rod through rear body upper chamber and clean body and barrel
simultaneously. Alternatively, a stick squeegee may be used.
Re-assemble the gun in the reverse of the procedure described above then dry fire the gun five six times to
blast through any excess lubricant.
H. Paint feeds
Always ensure paint parts are clean and dry before reloading. The feed head mounting can be removed by undoing
the clamp screw and sliding screw and sliding it off the body after removing the barrel. It can be replaced either way
allowing the horizontal feed to be mounted forward to rear facing. Check bolt and breech area for paint residue or
gelatine shell, clean and dry as necessary.
Horizontal Feed Assembly
9
14
Assembly and Disassembly
Troubleshooting
If you suspect anything is wrong with your Sterling, stop using it straight away! Remove paintballs, de-gas and perform an
inspection. If you have any doubts return your Sterling to Arrow Precision, LLC.
SYMPTOM
The valve body and Q-nector assembly
The valve body and Q-nector disassembled
13
REMEDY
Gas leaking down Barrel. Can hear gas escaping/hissing.
Check exhaust valve and spring for damage, check valve
seating for damage, replace as necessary.
Gas blowing out of feed bore.
Timing incorrect-rest timing: return to Arrow-Precision.
Gas leaking from top of Grip Frame.
The space bar O ring has failed and needs replacing.
Sudden drop in velocity.
Check tank pressure. If shooting in cold weather could be
freeze down, so warm up tank.
Damaged valve - replace
Weak or damaged mainspring - replace.
Damaged ‘o’ rings - replace.
Paintballs getting frequently chopped.
Timing incorrect-Cocking arm needs re-timing.
Paintballs not exiting barrel.
Feed mounting not correctly aligned with feed bore.
No gas pressure.
No paintballs.
Can’t cock marker.
Pickup has loosened - return to Arrow-Precision
No gas pressure - try gassing up to see if the problem is
resolved.
Can’t tighten knurled field screws.
Threads have stripped – fit a helicoil or replace part.
Keep finding red welts and paint marks on body.
Get better!
Rattling sound from marker
Cocking arm loose/worn - replace.
Pickup has become detached - return to Arrow-Precision.
Broken hammer or sear - replace.
10
Assembly and Disassembly
Assembly and Disassembly
Bolt assembly
Body with ball retainer spring assembly.
The velocity adjuster is located in the hammer and is
adjustable through the hole in the pump, using long reach
allen key provided. Adjustment may be archieved by
removal of the barrel only.
Internals with body removed
11
12