1
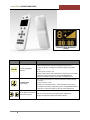
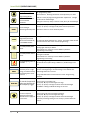
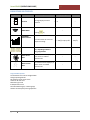
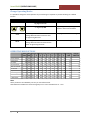
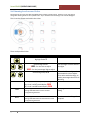
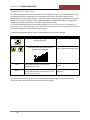
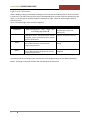
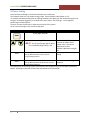
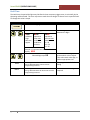
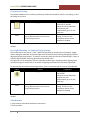
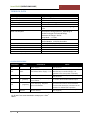
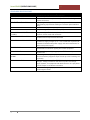
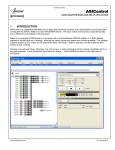
SmartSENSOR[OPERATIONS GUIDE] v2.0 Non programming mode : Non programming mode : Dimmer buttons Dimmer buttons. Allowing the Dimmer to be adjusted up or down Programming Mode: Increase or Decrease set level of selected parameter Used for a variety of programming parameter adjustments. Changes the value of the selected digit. Cycling from 9 to 0 by key or from 0 to 9 by key for selected digit Use the, ►, ◄, keys to select digits to change Use the, , , keys to change the IR power level the parameter. IRPWR For increasing or decreasing Infrared power Parameter is from 1 to 31 as maximum power. For sending the programme parameter values and commands by IR to SENSOR module Pressing once this key to send The LED send display will flash for 1 second. The Fitting’s RED LED will Flash two times to show it has received programming Press once to enable if it is disable (icon appears on the LCD screen). Pressing again this key to disable. Once Selected it is necessary to Press SEND to upload the programming to the Fitting Press once to enable if it is disable (icon appears on the LCD screen). To enable/disable motion Press again to disable. sensor Once Selected it is necessary to Press SEND to upload the programming to the Fitting To enable/disable photo sensor To toggle lighting status of On / Off Lighting Fitting. Use send to turn on/off 1 fitting or BRCST on / off All fittings in the luminaire area. BRCST HOLD TIME To broadcast parameters, previously set in a single fitting, to all luminaires by transmitting from sensor to sensor Pressing causes the programming entered to a fitting to be broadcast from the receiving fitting to all other fittings in the defined area. SEND image flashes for 1 second Fitting’s RED LED Flashes for 60 seconds to show “Programming Received” To control the period of Press to enter in to holding time lights stay ON after the Use the, ►, ◄, keys to select digits to change last occupancy trigger Use the, , , keys to change the levels of the selected digits Use SEND to 1 fitting or BRCST All fittings in the area. To enter into/finish setting the percentage dimmed value to apply for a Circle level. 9 Press to enter into Circle Level setting function. Use the, ►, ◄, keys to select digits to change Use the, , , keys to change the levels of the selected digits Terminate percentage setting if no arrow key is pressed within 60 seconds.