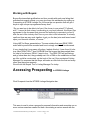
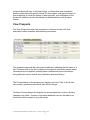
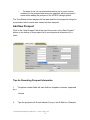
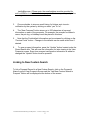
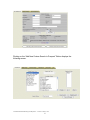
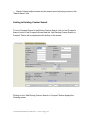
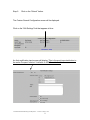
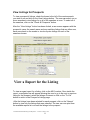
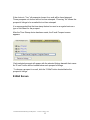
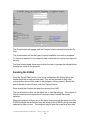
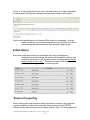
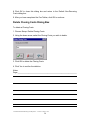
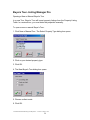
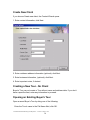
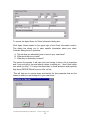
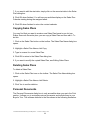
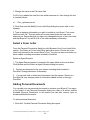
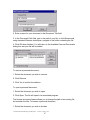
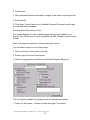
1
Working with Buyers
C:\Winnt\Profiles\Dak\Working with Buyers.doc 3/24/05 2:58 PM
1
Dak
Working with Buyers:
Buyers like immediate gratification and love e-mails with each new listing that
matches their search criteria, you may give them this satisfaction by setting up
Prospecting in NTREIS Listings. Do you know the one question that will get a
buyer to sign a buyer rep agreement every time?
“Do you want me to be able to tell you if the house is over priced?” Followed
with,” I cannot do that unless I am working in your best interests, this Buyer Rep
agreement is the document that gives me the authority to represent you and it
tells the rest of the industry that I am on your side in this transaction. It actually
spells out how we may work together to get you the best price and terms based
upon your financial situation, of course.”
Using LMP for Buyer presentations. The one mistake that most REALTORS
make with buyers will be revealed and how to simply avoid it will be discussed.
It is so simple that it may seem silly when I explain this but, I have found it to be
true: Most REALTORs™ don’t ASSUME that the buyers that have asked them
for help to find a home, REALLY want to buy. The REALTOR will pull listings
and go show them but, they probably won’t do a CMA on the subdivision so that
an offer could be constructed, on the trunk of the car if they so desired! Listing
Manager Pro assumes that the Buyer will make an offer from the first and every
other time they show property.
We will visit the Buyers Tour in Listing Manager Pro today.
Accessing Prospecting in NTREIS Listings
Click Prospects from the NTREIS Listings Navigation bar.
This area is used to store a prospect’s personal information and associate one or
more custom searches created for them. Associating a custom search with the
C:\Winnt\Profiles\Dak\Working with Buyers.doc 3/24/05 2:58 PM
2
Dak
prospect allows the user to find new listings, or listings that have changed in
status or price that meet specific criteria for the prospect, and gives an option to
print a report(s) or e-mail the listings to each prospect. Auto-notification of the
prospect’s matches can also be activated or deactivated from the Prospect
screen.
View Prospects
The View Prospects screen lists prospects in a line item format, with their
associated custom searches and summary information.
The prospect’s name will be colored and underlined, indicating that the name is a
link. Point and click on the link to display the prospect’s information screen where
information can be updated, including name, address and phone information,
along with their custom search, auto notification and email history.
The E-mail address of the prospect also displays as a link. Click on the E-mail
link to send a prospect a personal E-mail without listings.
Clicking a Custom Search link displays the customized search criteria, allowing
changes to be made. A search of the entire database can also be made from
this screen without regard to any date range.
C:\Winnt\Profiles\Dak\Working with Buyers.doc 3/24/05 2:58 PM
3
Dak
·
For ease of use, we recommended creating one or more custom
searches for the prospect and saving the searches with the prospect’s
name before adding the prospect to the NTREIS Listings system.
The Time Stamp column displays the last date and time the prospect’s listings for
a particular custom search were viewed and time stamped.
Add New Prospect
Click on the “New Prospect” tab at the top of the screen or the “New Prospect”
button on the bottom of the prospect list to record personal information for a
client.
Tips for Recording Prospect Information
1.
The phone number fields will each hold two telephone numbers, separated
by a
comma.
2.
Type the prospects full E-mail address (if any) in the E-Mail box. (Example:
C:\Winnt\Profiles\Dak\Working with Buyers.doc 3/24/05 2:58 PM
4
Dak
[email protected].) Please note: the email address must be provided for
auto notification to send emails to a prospect. Sent once per day early in the
morning.
3.
Choose whether to store an email history for listings sent via autonotification by the system by clicking on either “yes” or “no”.
4.
The “New Comment” button stores up to 255 characters of personal
information on each of the prospects. For example, the prospect’s children’s
name, the pet dog, or birthdays could be placed in this area.
5.
Note that the Portal default information can be reviewed by clicking on the
“Preview Portal” button. Changes to the defaults can be made at this time if
desired.
6.
To save prospect information, press the “Update” button located under the
Stored Search box. This will save the information for later viewing in the View
Prospects screen. Every time prospect configuration information is added or
changed the “Update” button must be pressed.
Linking to New Custom Search
To link a Prospect Record to a New Custom Search, click on the Prospect’s
Name from the View Prospects Screen and the “Add New Custom Search to
Prospect” Button will be displayed at the bottom of the screen.
C:\Winnt\Profiles\Dak\Working with Buyers.doc 3/24/05 2:58 PM
5
Dak
Clicking on the “Add New Custom Search to Prospect” Button displays the
following screen.
C:\Winnt\Profiles\Dak\Working with Buyers.doc 3/24/05 2:58 PM
6
Dak
• Search Criteria maybe chosen and the search saved by keying a name in the
“Search Name” field.
Linking to Existing Custom Search
To link a Prospect Record to an Existing Custom Search, click on the Prospect’s
Name from the View Prospects Screen and the “Add Existing Custom Search to
Prospect” Button will be displayed at the bottom of the screen.
Clicking on the “Add Existing Custom Search to Prospect” Button displays the
following screen.
C:\Winnt\Profiles\Dak\Working with Buyers.doc 3/24/05 2:58 PM
7
Dak
Step 1:
Click the down arrow next to Stored Search and all saved Custom
Searches will be displayed. One may be chosen from the list.
Step 2:
Click on the “Submit” button.
Auto-notification
The Auto-notification function allows the NTREIS Listings system to automatically
search and email matching listings on a daily basis.
Step 1:
“Yes.”
Activate auto-notification by clicking on the radio button preceding
C:\Winnt\Profiles\Dak\Working with Buyers.doc 3/24/05 2:58 PM
8
Dak
Step 2:
Click on the “Submit” button.
The Custom Search Configuration screen will be displayed.
Click on the “Edit Settings” link that appears in blue.
An Auto-notification input screen will display. This is the most important button in
the entire Prospect function! It defaults to NO! So watch for it!
C:\Winnt\Profiles\Dak\Working with Buyers.doc 3/24/05 2:58 PM
9
Dak
Step 1:
you.
Indicate that you want email notifications sent to your client and/or
Step 2:
Key information in Subject and Body.
Step 3:
Click on the report that you’d like to display the listing within.
Step 4:
Click on the “Submit” button.
An email containing links to properties that meet your prospect’s criteria will be
sent daily and you will be copied if you choose. Auto-notification may be
deactivated at any time by choosing the “No” option next to Activate Autonotification.
NTREIS Listings will time stamp so that duplicate properties will not be sent in
the future. However, the Search Date will not be changed in the prospect record
and the emails will not be listed if email history for auto-notification was not
selected
Delete Prospect
To delete a prospect, click on the prospect’s name and then click the “Delete”
button located to the left of “Update” in the prospect information screen. The
system will ask for confirmation of the request to delete the prospect information,
click “OK” to confirm or “Cancel” to discontinue the deletion.
This will delete the prospect, but not the custom search. If the user desires to
delete the custom search they must go to the custom search section and delete
the search from there.
C:\Winnt\Profiles\Dak\Working with Buyers.doc 3/24/05 2:58 PM
10
Dak
View Listings for Prospects
To view a prospect’s listings, check the boxes to the left of the custom search
you wish to run and click on the View Listings button. The user can select one or
more searches to view listings for or all of the searches at once. To select all of
the searches, click on the “Check All Prospects” button.
After the “View Listings” button has been clicked, a new screen appears with the
prospect’s name, the search name and any matching listings that are either new,
have come back on the market or involve a price change for each of the
searches chosen.
View a Report for the Listing
To view an agent report for a listing, click on the MLS number. Once inside the
report, a navigation bar will appear allowing the user to go to the next or previous
listing for the prospect, select the listings of interest or click on the “To List”
button to return to the Prospect’s Listings page.
After the listings have been selected for each prospect, click on the “Narrow”
button to view only the listings that were selected. The user can now print from
the available reports list or e-mail the listings to the prospect.
C:\Winnt\Profiles\Dak\Working with Buyers.doc 3/24/05 2:58 PM
11
Dak
Print a Report for the Prospect.
The Available Reports box will list the reports available for printing, including
custom reports corresponding to the property type of the listings. After selecting
the listings, select the report to be printed.
How to Time Stamp the Prospect(s) Listings
Time Stamping sets the current date and time as the starting point for the next
time the prospect’s listings are checked. To update the time stamp for printed
reports, click once on the “Time Stamp” button located at the bottom of the
search results screen. The next time “View Listings” is selected for the prospect,
only the properties that have been added to NTREIS Listings since the previous
time stamp will be shown along with any listings that have been changed, for
example, a status or price change.
This feature is used to provide a continuous update of new listings that meets
prospects’ criteria and to keep from viewing old listings.
* It is important to remember that if you intend to e-mail listings and the “Time Stamp”
button below the Available Reports box is clicked, there will be no listings to send. If
you intend to e-mail, use the “Time Stamp” button that appears after the “E-Mail
Listings” button is clicked.
E-Mail a Prospect's Listings
Once listings have been selected to E-mail, click on the “E-mail Listings” button
and the Time Stamp Confirmation Screen will appear with following options.
C:\Winnt\Profiles\Dak\Working with Buyers.doc 3/24/05 2:58 PM
12
Dak
If the choice is “Yes,” all prospects chosen for e-mail will be timed stamped.
Those prospects not chosen will not be time stamped. Choosing “No” allows the
prospect’s listings to be e-mailed but not time stamped.
It is recommended that the time stamp feature be used on a regular basis as a
type of Hot Sheet for the prospect.
After the Time Stamp choice has been made, the E-mail Prospect screen
appears.
Each selected prospect will appear with the selected listings beneath their name.
An “E-mail” button will be located below each prospect’s listings.
To choose a prospect to e-mail, click the “E-Mail” button located below the
prospect’s listings.
E-Mail Screen
C:\Winnt\Profiles\Dak\Working with Buyers.doc 3/24/05 2:58 PM
13
Dak
The E-mail screen will appear with the Prospect’s name already listed in the To:
field.
The E-mail screen will list the types of reports available for e-mail to prospects.
To choose a report(s) for a prospect to view, check the box next to each report to
be sent.
The links located under these reports allow the user to preview the listings before
sending the e-mail to the prospect.
Sending the E-Mail
Click the “Send E-Mail” button once and a confirmation will display letting the
sender know that e-mail has been sent. They will be returned to the E-mail
screen and an entry will be made to the prospect’s History section. Should the
user to decide to cancel E-mail, click the “Cancel” button.
What should the Prospect do when they receive the LINK?
The e-mail recipient clicks on the report link to view the listing(s). The number of
links the client receives depends on how many report formats the sender
selected.
When the recipient clicks on any of the report link(s) they will be taken to the live
NTREIS Listings site and shown only the listing(s) the NTREIS Listings user has
selected for them to view. The recipient may re-open the e-mail at a later date
C:\Winnt\Profiles\Dak\Working with Buyers.doc 3/24/05 2:58 PM
14
Dak
(for up to 30 days) and click on the report link and receive up to date information
on the listing(s) including any changes that have been made to the listing(s).
Some e-mail applications do not display URLs as links in messages. In those
cases, recipients of the e-mail listings should copy the URL from the email message and paste them into their browser’s Address bar.
E-Mail History
Each time a user sends listings to a prospect via e-mail (including auto
notification) and time stamps the results of their search, a history may
be built at the bottom of the prospect screen, providing that the email
history choice is set to “yes.” The date and time of the message will
be displayed along with a link to what was sent.
Reverse Prospecting
Once a listing agent has entered a listing and saved it as active, they may then
reverse prospect to locate other users who have prospects in the NTREIS
Listings system with matching custom search criteria. Note: The listing agent will
C:\Winnt\Profiles\Dak\Working with Buyers.doc 3/24/05 2:58 PM
15
Dak
NOT see the prospect’s name, but rather, they will see the other user’s name
and a prospect id.
To reverse prospect:
Step 1: Click the Reverse Prospecting tab, which appears in the Prospect
area, or can be accessed by pointing at Prospects on the Navigation Bar and
then clicking on Reverse Prospecting.
Step 2: Choose a listing(s) to view potential prospects for by clicking in the
checkboxes in front of your active listings OR click the “Check All Listings” button
and then click “Search.”
If no matching prospect information was found, the system notifies you with a
short prompt.
Step 3: To contact the potential prospect, click the other agent’s name link and
their Information Screen will appear. You could either phone the agent, or click
the agent’s email link and send an email message.
C:\Winnt\Profiles\Dak\Working with Buyers.doc 3/24/05 2:58 PM
16
Dak
Step 4: Clicking the agent’s email address link will open your email client
software, with the prospect agent’s name already typed in the “To:” field.
Exporting/Importing Contact Information
Prospect information from the NTREIS Listings system can be exported to a file,
which can be used by other programs or imported from Outlook.
To export prospect information:
Step 1:
Click on the “Export” button on the Prospect List screen.
Step 2: When the File Download box appears on the screen, choose whether
to open or save the file. To export and open in another application, choose
“save.”
C:\Winnt\Profiles\Dak\Working with Buyers.doc 3/24/05 2:58 PM
17
Dak
Step 3:
If saving the file, designate the location to store the file.
Step 4: Open the application you want to import the information into and
follow that application’s import procedure.
To import contact information from Outlook:
Step 1:
given:
Click the Import button on the Prospect List and follow the instructions
• In Microsoft Outlook, go to “File” and click "Import and Export."
• Select "Export to a file" and click "Next."
• Select "Tab Separated Values (Windows)" and click "Next."
• Select the Contacts you wish to export and click "Next."
• Select where you wish to save the contacts on your computer and click "Next."
• Click "Finish."
Step 2: On the NTREIS Listings Import page, click "Browse..." and select the
file you just saved.
C:\Winnt\Profiles\Dak\Working with Buyers.doc 3/24/05 2:58 PM
18
Dak
Step 3:
Click "Import."
==============================================
Listing Manager Pro Buyers Tour
Choosing Menu Commands
The right angle bracket symbol (>) denotes the path for menu items. Items will be
in boldface type.
For Ex:To choose the Address Book function under Contact Database which is
in the Setup menu, the instruction would be: Click Setup > Contact Database >
Address Book.
Mouse Clicking
When a mouse click is required, the default is left-click. If a right-click is required,
it will be stated in the documentation.
For Example:Click Get Photos button means left-click. Right-click Get Photos
means, obviously, right-click.
Help Information
There are five types of Help in this program. They are as follows:
1 Smart Help - Dialog Box - Access by clicking the Help button on the dialog box.
This opens the main help file, with full help text and images, to the topic that
relates to the open dialog box.
2 What’s This? - Identify components of a dialog box using the following method:
a. Click the question mark in the top right corner of the dialog box or click Shift
+ F1.
b. Drag the question mark to the area in question.
c. Click once on the area. This opens a small text-only popup box with a brief
description of the component.
d. Click on the text box to close it when finished.
C:\Winnt\Profiles\Dak\Working with Buyers.doc 3/24/05 2:58 PM
19
Dak
3. Smart Help - Menu - Access by selecting a menu function with your mouse.
Instead of clicking on your mouse to execute the function, press the F1 button on
your keyboard. This opens the main help file with full help text and images.
4. Smart Help - Button - Access by selecting a menu function with your mouse.
Instead of clicking on your mouse to execute the function, press the Shift + F1
button on your keyboard, or do the following:
a. Click on the Standard toolbar.
b. Place the what’s this symbol over the desired function.
c. Click again.
5.General Access - This accesses the entire Help file, not a specific topic as 1-4
do. Click Help > Help Topics to access the Index. In the field #1, enter a key word
and click Display. To access the Table of Contents, click Contents.
Technical Support
When you call, please be at your computer with Buyer’s Tour running and have
your serial number and this manual within easy reach.
We can serve you better if you have the following information available when you
call:
1. The version of Buyer’s Tour you are running. (Go To Help>About)
2. The type of hardware you are using. Specifically:
PC model
Video card model
Printer model
3. A clear description of what happened when you encountered the problem.
4. The exact wording and number of the error message.
5. A summary of any attempts that you made to try to solve the problem.
C:\Winnt\Profiles\Dak\Working with Buyers.doc 3/24/05 2:58 PM
20
Dak
Loading Properties
There are two methods for importing properties from the Property Listings Table
to Buyer’s Tour:
Method 1:
1. Display the desired properties in the Property Listings Table.
2. Download any desired photos.
3. Click Buyer’s Tour on the toolbar or click Tools > Buyer’s Tour.
4. Open a New or Manual Tour. See Opening Contacts and Tours in Contact
Mode for more. After you create a new Tour and select your Contact data, click
Yes to confirm importing the properties from the Property Listings Table into your
Tour.
Method 2:
1. Display the desired properties in the Property Listings Table.
2. Download any desired photos.
3. Open Buyer’s Tour using any standard Windows method.
4. Open a New or Manual Tour. See Opening Contacts and Tours in Contact
Mode for more.
5. Click on the Properties tab.
6. Click Edit > Replace Properties. Click Yes to confirm importing the properties
from the Property Listings Table into your Tour.
Tour supports the inclusion of up to 40 comparable properties in any Tour report.
If your search results contain more than 40 properties, a warning dialog box will
open when you create a new Tour:
If this occurs, and you want properties other than the first 40 listed imported into
your Tour, then mark the properties that you wish to include in the Tour report by
doing the following:
1. Close Tour.
2. Click with your mouse in the M column on the Property Listings Table.
C:\Winnt\Profiles\Dak\Working with Buyers.doc 3/24/05 2:58 PM
21
Dak
3. Click Edit > Delete Unmarked Records(s).
4. Click Tour on the Quick Access toolbar to reopen it.
5. After you create a new Tour and select your Contact data, click Yes to confirm
importing the properties from the Property Listings Table into your Tour.
Contact Database
The Contact Database is the same throughout the entire program. Please refer to
the Contact Database section in the User Manual for more information.
Contact Mode
Contact Mode is a state where all actions performed are associated with the
open Contact. When you open a Tour, contact information is imported into the
Contact/Client information section. When you save a Tour, it is associated with
the open contact.
Opening Contacts and Tours in Contact Mode
If you open Buyer’s Tour, through the Quick Access toolbar, while you are in
Contact Mode, you will remain in Contact mode and the saved Tour will be
associated with the open Contact.
1. Click File > Open Client/Contact or click Open Client
Standard toolbar. The Open Contact dialog box opens.
2. Select a contact name using one of three methods:
on the
Click on a contact name in the Select Contact column. If the contact
name isn’t visible, scroll down to the name.
Click on the first letter button of the contact’s last name.
Enter the first few characters of the contact’s last name in the
Search on Last Name field.
3. Highlight the contact's name in the Select Contact from List section.
C:\Winnt\Profiles\Dak\Working with Buyers.doc 3/24/05 2:58 PM
22
Dak
4. In the Associated Files list, double-click on the file that you want to open.
5. Click Open. The contact's name will appear in the title bar at the top of your
screen.
Note:
button
If there are no contacts in the contact database, the Open Client
will be disabled.
Exiting Contact Mode
You must leave Contact mode if you want to create Buyer’s Tours that will not be
associated with the open Contact. If you decide to associate them with a contact,
see Associating Files with a Contact.
To leave Contact mode:
Click
Close Tour
Associating Files with a Contact
The Associate w/ Contact option lets you associate a Buyer’s Tour with a
particular contact. To do this:
1.
Open the Buyer’s Tour file you want to associate with your contact.
2.
Click File > Associate w/ Contact.
3. The Contact Address Book opens. Click on the contact name that you want
to associate with the Buyer’s Tour.
Note: In version 5.0, you can associate multiple reports with a contact.
4. Click Associate.
C:\Winnt\Profiles\Dak\Working with Buyers.doc 3/24/05 2:58 PM
23
Dak
5. If the contact in the owner information window is different than the contact
with whom you want to associate the Buyer’s Tour, a warning dialog box
opens:
Viewing Associated Files
To see a list of the files associated with a contact:
1. Click File > Open Client or click Open Client.
2. The Open Contact Buyer’s Tour dialog box opens. Highlight the contact's
name in the Contact Names section.
3. Click Files in the lower right corner. The Files List section will open and list all
of the files associated with that contact.
Un-associating Files with a Contact
The Un-associate w/ Contact option lets you un-associate a Buyer’s Tour with a
particular Contact. To do this:
1. Open the Contact from which you want to un-associate the file.
2. Click File > Un-associate w/ Contact.
3. A warning dialog box opens. Click Yes to un-associate the file from the
Contact.
C:\Winnt\Profiles\Dak\Working with Buyers.doc 3/24/05 2:58 PM
24
Dak
Setting Up the Default for Closing Costs
Buyer’s Tour has a Default Closing Costs which allows you to enter the following
information for your contact:
*Loan Information
*Prepaid Items
*Non-Recurring Costs
*Monthly Payments
Default Closing Costs
Buyer’s Tour has Default Closing Costs which allows you to enter the following
information:
Loan Information
Prepaid Items
Non-Recurring Costs
Monthly Payments
You may find that in general, the closing costs information is the same for all your
contacts. If this is the case, you can use this information in all of your closing
costs. If they don’t work for a particular contact, you can modify the default costs
for that contact. These fees have been setup for this area. You may want to
check them for accuracy several times a year. They may be modified as seen
below.
Modify Closing Costs
From the information entered in this dialog box, Buyer’s Tour calculates all
closing costs for the selected properties. To set up your Default sheet:
1. Click Setup > Modify Closing Costs.
C:\Winnt\Profiles\Dak\Working with Buyers.doc 3/24/05 2:58 PM
25
Dak
2. Click OK to open the Default dialog box.
Add Closing Costs Dialog Box
If you do business in more than one jurisdiction, you may need to maintain
several closing costs sheets to account for differing tax rates. The Add Closing
Costs dialog box provides you with an area to enter the new closing costs sheet
name and base it on a previously-saved closing cost sheet.
To access closing costs
1. Click Setup > Add New Closing Costs when in the main window of Buyer’s
Tour.
C:\Winnt\Profiles\Dak\Working with Buyers.doc 3/24/05 2:58 PM
26
Dak
2. After you have selected a name and an existing closing costs sheet to base
the new one on, click OK to open the New Closing Cost dialog box.
3. Complete the information in this dialog box.
4. Enter all of your Buyer’s loan information, recurring costs and payments.
Payments may either be based on a % of Price, or a Fixed Cost. To add any
non-recurring costs, click Non-Recurring Costs on the lower left (see above) to
open the Default Non-Recurring Costs dialog box.
5. Enter any additional costs, their amounts, and types in these fields.
6. You can enter up to 16 Additional Costs. For each cost, choose the type of
cost from the drop-down menu.
7. Title Insurance and Escrow Fee tables are provided. You can choose whether
to calculate based on 100%, 50%, or None. You can click Change to open the
Fee Table dialog box to edit these three tables as needed.
C:\Winnt\Profiles\Dak\Working with Buyers.doc 3/24/05 2:58 PM
27
Dak
8. Click OK to close this dialog box and return to the Default Non-Recurring
Costs dialog box.
9. After you have completed the Fee Tables, click OK to continue.
Delete Closing Costs Dialog Box
To delete a Closing Costs:
1. Choose Setup> Delete Closing Costs.
2. Using the down arrow, select the Closing Costs you wish to delete.
3. Click OK to delete the Closing Costs.
4. Click Yes to confirm the deletion.
Notes
Page:____________________________________________________________
C:\Winnt\Profiles\Dak\Working with Buyers.doc 3/24/05 2:58 PM
28
Dak
Buyers Tour- Listing Manager Pro
Opening a New or Manual Buyer's Tour
In a new Tour, Buyer’s Tour will import property listings from the Property Listing
Table. In a manual tour, you must enter the properties manually.
To open a new or manual Buyer's Tour:
1. Click New or Manual Tour. The Select Property Type dialog box opens.
2. Click on your desired property type.
3. Click OK.
4. The New Buyer's Tour dialog box opens.
5. Choose a client mode.
6. Click OK.
C:\Winnt\Profiles\Dak\Working with Buyers.doc 3/24/05 2:58 PM
29
Dak
Create New Client
If you choose Create new client, the Contact Wizard opens.
1. Enter contact information; click Next.
2. Enter residence address information (optional); click Next.
3. Enter business information, (optional); click Next.
4. Enter important notes, if desired.
Creating a New Tour - No Client
Buyer’s Tour can not create a Tour without name and address data. If you don’t
have a specific client, enter any information to proceed.
Opening an Existing Buyer's Tour
Open a saved Buyer’s Tour by doing one of the following:
Enter the Tour’s name in the File Name field; click OK.
C:\Winnt\Profiles\Dak\Working with Buyers.doc 3/24/05 2:58 PM
30
Dak
Double-click on the desired file in the File Name list box
Entering Client Info and Property Search Criteria
The first window of Buyer’s Tour is used to: enter contact information, property
search criteria, and Agent notes. If you select Create a New Client or Use
Existing Client, then the contact information will automatically import into this
window.
1. Enter your contact name and address information into the Client Information
section.
2. In the Property Search Criteria section at the bottom of the dialog box, enter
specific details about your contact’s property in the field’s provided.
3. In the Key Feature fields, enter the important features your contact is looking
for, such as a pool or garage.
4. In the Client Notes on Desired Feature section, enter more for your contact's
desired property features.
C:\Winnt\Profiles\Dak\Working with Buyers.doc 3/24/05 2:58 PM
31
Dak
To access the Agent Notes for Client Information dialog box:
Click Agent Notes located in the upper right of the Client Information section.
This dialog box allows you to enter specific information about your client.
Consider asking those 3 questions:
A. Tell me what you absolutely have to have in your new home?
B. What would be nice to have?
C. What do you absolutely not want?
This serves 2 purposes. It will save you from having to show a lot of properties
and if you ever get to the point where a buyer is asking you, “I don’t know which
one would you buy?” You may refer them back to these questions and hopefully
help them DECIDE! Which house to offer on first.
“This will help me to narrow down and identify the few properties that are the
closest to what you are looking for in your new home. “
C:\Winnt\Profiles\Dak\Working with Buyers.doc 3/24/05 2:58 PM
32
Dak
Add/Edit/Delete Properties
The Props section displays the properties imported into Buyer’s Tour. You can
append, replace add, edit, or delete any of these properties as needed for your
Buyer’s Tour. Only the properties you choose are included in the Buyer’s Tour
report.
Adding Properties
The Add Properties dialog box provides you with an area in which you can add
other properties to your properties list.
Above is an example. Your MLS may have different fields.
To add properties:
C:\Winnt\Profiles\Dak\Working with Buyers.doc 3/24/05 2:58 PM
33
Dak
1. Click the ADD icon.
2. Enter the new property information.
3 . Click Add to add the current property and continue adding more properties.
4 .Click OK when finished adding properties.
Editing Properties
In the Edit Comparables dialog box you can edit the property information for any
property in your list. This box can also be opened by double-clicking on the
desired property on the Property Listing Table.
C:\Winnt\Profiles\Dak\Working with Buyers.doc 3/24/05 2:58 PM
34
Dak
To edit properties:
1. Click the Edit icon.
2. Edit the property information.
3. Click Prev or Next to modify the property and continue editing more properties.
4. Click OK if you are finished editing properties.
Deleting Properties
To delete properties:
1. Highlight the desired property.
2. Click the Delete icon.
Note:
Select Edit > Undo Delete to restore the deleted property.
View Search Criteria
This feature allows you to review the search criteria that you set for the Property
Listings table.
C:\Winnt\Profiles\Dak\Working with Buyers.doc 3/24/05 2:58 PM
35
Dak
Replacing MLS Photos for Tour Properties
You can add or substitute a photo for any of the Tour property photos that were
downloaded from the MLS system. To include a different property photograph in
your Tour:
1. Scan the photo and save the image as a BMP, TIF, GIF, or PCX file.
2. Save the picture to the picture folder.
3. Rename the first photo so that it matches the MLS number of the desired
listing and add a .000 extension. If your graphics program can’t do this then do
the following:
a. Open Windows Explorer.
b. Right-click on the image and select Rename.
c. Delete the current suffix and enter .000.
4. Rename the second photo with a .001 extension.
For Example: If you want to replace a photo for a property with an MLS# of
908233, you must name the first photo: 908233.000, the second 908233.001 etc.
Then move it into the picture folder.
C:\Winnt\Profiles\Dak\Working with Buyers.doc 3/24/05 2:58 PM
36
Dak
Appending Properties
You can add additional properties that are based on new search criteria in the
Property Listings Table to a saved Buyer’s Tour. To do this:
1. In the Properties window, click Edit > Append Comparables. If the listings are
not current, a dialog box opens to alert you and to confirm using them.
2. If they are current, a dialog box opens asking to confirm that you want to
append your Buyer’s Tour with the current listings.
3. Click Yes to confirm append.
Note: If you click No, then return to the Property Listings Table and run a new
search to update your listings.
4. Buyer’s Tour will then add the properties that were just imported from the
Property Listings Table to your comparables list.
5. You can now print the Buyer’s Tour with all of the previously saved settings.
6. Everything that relates to comparables - graphs, market analysis, comparable
property pages - will be reflected in your new criteria.
Replacing Properties in a Saved Tour
To replace the properties in a saved Buyer’s Tour without changing the search
criteria:
1. Go to the Properties window and click Edit > Replace Properties. If the listings
are not current, a dialog box opens to alert you and to confirm using them..
C:\Winnt\Profiles\Dak\Working with Buyers.doc 3/24/05 2:58 PM
37
Dak
2. Click Yes to confirm replacing the properties.
Note: If you click No, then return to the Property Listings Table and run a new
search to update your listings.
3. Buyer’s Tour will then replace the properties in your Tour with those that were
just imported.
4. You can then print the Tour with all of the previously saved settings, and
everything that relates to comparables - graphs, the market analysis page, and
comparable property pages - will be automatically updated.
Scheduling Tasks
The calendar displays the current month and can be used to schedule various
tasks. You can schedule events up to nine months in advance by simply clicking
on the next month button. You can scroll back for up to three months.
You might notice that this function is exactly the same as the CMA calendar. We
recommend that you start with the move date and work backwards. Mark 30 days
prior to the move date for the “UNDER CONTRACT DATE” This will add urgency
and even if your affiliates can get a property closed faster, You just look better if
it has to happen that way so plot the time and then schedule the showing date(s).
Give them reminders along the way about the lender and create a new calendar
when you are under contract remember to remind them about insurance and if
they are going to be there for the inspections try to put the date on the calendar.
If there are additional funds due on the down payment and you have deadlines,
include them as well. These calendars usually end up on the fridge so if you use
magnets, now is a good time to hand some out.
C:\Winnt\Profiles\Dak\Working with Buyers.doc 3/24/05 2:58 PM
38
Dak
1 Double-click on the day you want to schedule an activity. You can include
up to two activities per day.
2. In the Activity combo box, type in the name of the activity or choose from a list
of pre-defined activities by clicking on the down arrow and selecting a topic.
3. Enter a start and finish time for this activity.
C:\Winnt\Profiles\Dak\Working with Buyers.doc 3/24/05 2:58 PM
39
Dak
4. If the event will be recurring weekly or monthly, check the appropriate radio
button and enter a duration into the field.
5. Enter information for a second activity if desired.
6. Click clear if you make an error and want to delete the contents of the box.
7. Once you have completed this dialog box, click OK to re-display the current
month with the added activity.
Note:You may scroll through up to three additional months and add activities as
needed.
Modifying Calendar Activities
If the list box doesn’t contain appropriate categories, you can modify the list and
add your own categories.
You may add these additional items by simply typing them in the box. Be
cautious about the upper case/lower case as it will print as you type! Watch your
spelling as well. To edit follow the following procedures:
1 Click Edit.
2 The Modify Calendar Activities dialog box opens.
C:\Winnt\Profiles\Dak\Working with Buyers.doc 3/24/05 2:58 PM
40
Dak
3. Enter your desired activity.
4. Click Add.
5. Add more activities in the same manner or click OK to return to the Tasks
dialog box.
Clearing the Calendar
To delete all activities from the calendar:
1. Click Clear on the vertical toolbar. A dialog box opens:
2. Click Yes to confirm the deletion.
Sales Plan
You may find that for each contact, you have the same methodology for selling
their property.
For Ex:Every Monday: Open House 9am - 12pm. Every Tuesday - Listing
Review 11:30am.
C:\Winnt\Profiles\Dak\Working with Buyers.doc 3/24/05 2:58 PM
41
Dak
Instead of entering these plans in each Buyer’s Tour file, you can make a Sales
Plan, and import it into every Buyer’s Tour. The Sales Plan allows you to define
and record a typical pattern of activities and then display them in a calendar with
one action.
To insert a Sales Plan:
1. Click
to open the Sales Plan dialog box.
2. Click on the starting day on the calendar in the Select Starting Sunday section.
This instructs Buyer’s Tour on which date to begin your pattern of activities.
3. Click Create to open the Sales Plan Name dialog box.
4. Enter a name for your Sales Plan.
5. Click OK to open the calendar.
C:\Winnt\Profiles\Dak\Working with Buyers.doc 3/24/05 2:58 PM
42
Dak
6. Double-click on the day that you want your activities to begin. The Activities
dialog box will open.
7. Enter information in the dialog box in the same manner that you did when you
were scheduling a task for the individual contact. See Scheduling Tasks for
more. The only difference between the two dialog boxes is the heading. The
Sales Plan Task dialog box has the day and week stated in the upper-right
corner; the Contact Task dialog box has the date.
Editing Sales Plans
To edit any Sales Plan, do the following:
1. Click
to open the Sales Plan dialog box opens.
2. If you want to add activities that with a different starting day, click on the new
starting day on the calendar in the Select Starting Sunday section.
3. Click once on the Sales Plan that you wish to edit.
4. Click Edit.
5. Double-click on a day and modify your activity. See Modifying Calendar
Activities for more.
6. Click OK twice when finished to return the contact calendar.
C:\Winnt\Profiles\Dak\Working with Buyers.doc 3/24/05 2:58 PM
43
Dak
7. If you want to edit the start date, simply click on the new start date in the Sales
Plan dialog box.
8. Click OK when finished. You will see your activities display on the Sales Plan
Calendar starting during the assigned week.
9. Click OK when finished to return the contact calendar.
Copying Sales Plans
You may find that you want to create a new Sales Plan based on an old one.
Rather than redo the entire plan, you can copy a Sales Plan and then edit it. To
do this:
1. Click on the Sales Plan button on the toolbar. The Sales Plan Name dialog box
opens.
2. Highlight a Sales Plan Name; click Copy
3. Type in a name for a new Sales Plan.
4. Click OK to return to the Sales Plan dialog box.
5. If you want to modify the copied Sales Plan, see Editing Sales Plans.
Deleting Sales Plans
To delete a Sales Plan:
1. Click on the Sales Plan icon on the toolbar. The Sales Plan Name dialog box
opens.
2. Highlight a Sales Plan Name; click Delete.
3. Click Yes to confirm deletion.
Personal Documents
The Personal Documents dialog box is only accessible when you are in the Print
section. It allows you to customize various documents and include them in your
Buyer's Tour. The software defaults to the files shown in the following illustration.
C:\Winnt\Profiles\Dak\Working with Buyers.doc 3/24/05 2:58 PM
44
Dak
1. To access Personal Documents, click Setup > Personal Documents or click
Setup on the Print Window.
2. To edit any of the documents shown above, click Edit or Open. For the Agent
Resume, the file opens in WordPad. The cover letter body opens in the following
dialog box.
Note:You should not modify the default cover letter body unless you are sure that
you will not want to use the original version in the future. You can create as many
additional cover letter bodies as you need.
3. Click OK to go back to the Personal Documents dialog box.
Creating a New Cover Letter Body
Buyer's Tour should display the following name, or something very similar to it, in
the File Name edit field of the Cover Letter Body section of the Personal
Documents dialog box:
c:\…\Tour_rpt\coverltr.txt
If you want to create a new cover letter body, do the following:
C:\Winnt\Profiles\Dak\Working with Buyers.doc 3/24/05 2:58 PM
45
Dak
1. Change the name in the File name field.
For Ex:If you wanted the new file to be called newcover.txt, then change the text
to read as follows:
c:\ …\Tour_rpt\newcover.txt
2. Click Open and the Modify Cover Letter Body dialog box opens with no text
showing.
3. Type in whatever information you wish to include in your Buyer’s Tour cover
letter and click OK. This new letter will now be saved under the new name
newcover.txt. Remember that you have only changed the body of the cover letter
and that Buyer’s Tour will fill in all of the other necessary information.
Select a Cover Letter
From the Personal Documents dialog box click Browse in the Cover Letter Body
section. The Select an Cover Letter Body dialog box opens. Choose the cover
letter body desired for the current Buyer's Tour. You can use any cover letter you
have created, including documents created in WordPad.
Select an Agent Resume
1. The Agent Resume section is located in the same folder as the cover letter.
Click Browse and the Select an Agent Resume dialog box opens.
2. Choose any document to be your resume including those created in
WordPad. Change directories if necessary.
3. You can add, edit or delete any information from the resume. Since it is a
WordPad file, any changes made or information added is done so through
WordPad.
Adding Personal Documents
You can add your own personal documents to enhance your Buyer’s Tour report.
In the bottom of the Personal Documents dialog box, there is a section entitled
Available Personal Documents. In this section you can add, remove, open or
browse additional documents.
To add a personal document:
1. Click Add. The Add Personal Document dialog box opens.
C:\Winnt\Profiles\Dak\Working with Buyers.doc 3/24/05 2:58 PM
46
Dak
2. Enter a name for your document in the Document Title field.
3. In the Document Path field, type in the path of your file, or click Browse and,
using standard Windows techniques, navigate to the folder containing the file.
4. Click OK when finished. You will return to the Available Personal Documents
dialog box and your file will be added.
To remove a personal document:
1. Select the document you wish to remove.
2. Click Remove.
3. Click Yes to confirm the deletion.
To open a personal document:
1. Select the document you wish to open.
2. Click Open. The file will open in its associated program.
The browse document feature allows you to change the path of an existing file,
but maintain the title. To browse a personal document:
1. Select the document you wish to browse.
C:\Winnt\Profiles\Dak\Working with Buyers.doc 3/24/05 2:58 PM
47
Dak
2. Click Browse.
3. Using standard Windows techniques, navigate to the folder containing the file.
4. Select the file.
5. Click Open. You will return to the Available Personal Documents section and
the new path will be displayed.
Choosing which Documents to Print
This screen displays all of the available pages that may be included in your
Buyer’s Tour. There are four report configurations: Mini, Standard, and Long and
Default.
Note: If no pages are selected, a warning dialog box opens.
You can select a report in one of three ways:
1. Click on a button in the toolbar on the left.
2. Select a report from the Format menu.
3. Click in the appropriate checkboxes in the Select Reports dialog box.
The four options available for printing contain the following documents:
1. Option #1: Mini report - Contains Contact and Agent Tour sheets.
C:\Winnt\Profiles\Dak\Working with Buyers.doc 3/24/05 2:58 PM
48
Dak
2. Option #2: Standard report - All mini-report forms, plus the Property Request
Criteria with Agent notes.
3. Option #3: Long report - Includes all page options available.
4. Option #4: Default report - Saves the current settings as your user-defined
default.
For Ex:If you always print the Tour Cover Page, and the Calendar, you can set
them to default so that they will always be selected when you open the print
window.
To print:
1. Click on the Print Tab.
2. In the print window, check the boxes next to the reports that you want to print,
or click on the Long, Mini or Standard buttons on the toolbar.
3. Click Save As Default
default report.
if you want to set these reports as your
4. This default setting is saved globally so if you want to use these settings on
any other Tour, click Default to restore those settings.
The Clear button removes all of the checkmarks on the display screen. You can
customize your Buyer’s Tour by including or excluding any of the available pages
or options.
Print Dialog Box
Once you have configured the Buyer’s Tour to your satisfaction, you can do the
following:
1. Print it
2. Preview it
3. Change the printer
4. Choose the number of copies to print
5. Change the print quality
To print the report:
C:\Winnt\Profiles\Dak\Working with Buyers.doc 3/24/05 2:58 PM
49
Dak
1.Click Print Tour.
2. Click OK.
To preview the report:
1. Click Print Tour.
2. Click Preview.
3. Click Next to scroll through your report pages.
4. Click Zoom to magnify your report if needed.
5. Click Close when finished or click Print to print the report.
To change the printer:
1. Click File > Set Up. The System Printer List dialog box opens:
2. After selecting which printer to change to, click OK.
3. Once you have set up your printer (you may never have to do this), click OK to
return to the Buyer’s Tour dialog box.
4. Click OK to print your Buyer’s Tour.
To choose the number of copies to print:
1. Click Print > Tour.
2. In the Copies section, delete the current number and type in your desired
number.
3. In the Print Quality section, click on the arrow on the list box and choose a
quality. Remember that the higher the number, the better the print quality and the
larger the file.
Customizing the Default Buyer’s Tour Reports
Buyer’s Tour has the following default pages:
C:\Winnt\Profiles\Dak\Working with Buyers.doc 3/24/05 2:58 PM
50
Dak
You can customize any of the other reports described above using Report Writer.
In that program, you can do the following to a Buyer’s Tour report:
1. Add your photo
2. Add your Company logo
3. Insert Clip art
4. Reformat the layout
5. Add data fields
6. Subtract data fields
To edit these reports, please refer to the Report Writer’s User's Guide.
Notes:___________________________________________________________
________________________________________________________________________
C:\Winnt\Profiles\Dak\Working with Buyers.doc 3/24/05 2:58 PM
51
Dak