1
..................................
Sphericall
TM
Sphericall Desktop User
Manual
...................................
Sphericall Desktop User
Manual
H T T P : / / W W W . S P H E R E C O M . C O M
P A R T
N U M B E R
V E R S I O N
6 1 0 - 3 2 1 R 1
5 . 1
SPHERICALL DESKTOP USER MANUAL
iv
610-321r1
Sphericall Desktop User Manual
C ONTENTS
...................................
....
Contents
1
Using The Telephone.................................................................1-1
Sphericall Desktop Phone Features..................................................................1-1
Placing Calls from the Telephone .....................................................................1-2
To place an external call ............................................................................1-2
To place an internal call .............................................................................1-2
Programmable Phones..................................................................................1-2
Answering Calls from the Telephone ................................................................1-2
To answer a call.........................................................................................1-2
Placing a Call on Hold ...................................................................................1-2
To place a call on hold using FLASH/LINK................................................1-2
Transferring Calls from the Telephone..............................................................1-3
To complete a call (a blind transfer)...........................................................1-3
To complete a call (an attended transfer) ..................................................1-3
Conferencing Calls Using the Telephone..........................................................1-3
To place a conference call .........................................................................1-3
Flash Codes for Telephone Functionality..........................................................1-4
Sphere Telephone Set Star Code Commands..................................................1-5
Authorization PINs and the Phoneset ...............................................................1-7
Overview........................................................................................................1-7
Implementation ..............................................................................................1-8
To apply individual dialing permissions to a restricted station ...................1-8
2
Sphericall Desktop Software ....................................................2-9
To start the Sphericall Desktop application................................................2-9
Extensions List ................................................................................................2-10
To place a call using the Sphericall Desktop ...........................................2-10
Using the Sphericall Desktop ..........................................................................2-11
Choosing a Line...........................................................................................2-11
Answering Calls...........................................................................................2-11
Extension Search ........................................................................................2-12
To search for an extension/contact..........................................................2-12
Transferring Calls ........................................................................................2-13
To transfer calls using the Sphericall Desktop.........................................2-13
To speed transfer calls (for operators).....................................................2-13
To transfer a call to a user’s voice mailbox..............................................2-13
To transfer a call to your own voice mailbox............................................2-14
A Note On Monitoring ..................................................................................2-14
To monitor individual extensions..............................................................2-14
Conferencing Calls ......................................................................................2-15
To place a conference call .......................................................................2-15
Sphericalll Desktop User Manual
Contents
1
CONTEN TS
Using the Conference Bridge ......................................................................2-15
Managing Calls............................................................................................2-16
To manage multiple calls .........................................................................2-16
Language Selection.....................................................................................2-17
To select a different language..................................................................2-17
Toolbar Icons...............................................................................................2-17
To configure toolbar icon order and presence .........................................2-18
Title Bar Buttons ..........................................................................................2-19
Taskbar Status area icons...........................................................................2-19
Taskbar Status area icons (Outside of the Sphericall Desktop ...................2-20
3
Sphericall Desktop Options ....................................................3-21
Options Windows ............................................................................................3-21
General Tab.................................................................................................3-21
To set general options .............................................................................3-21
Personal Details ..........................................................................................3-23
Audio Tab ....................................................................................................3-23
To set audio options.................................................................................3-23
Calls Tab .....................................................................................................3-25
To set call options ....................................................................................3-25
Extensions Tab............................................................................................3-26
To set extension options ..........................................................................3-26
Outlook Tab .................................................................................................3-27
To set Outlook options .............................................................................3-28
PC Phone Tab .............................................................................................3-29
To set PC Phone options .........................................................................3-29
Phonebook Tab ...........................................................................................3-30
To set phonebook options........................................................................3-30
Presence Tab ..............................................................................................3-30
To set Presence options ..........................................................................3-31
Recent Calls Tab .........................................................................................3-31
To set recent call options .........................................................................3-31
Video Tab ....................................................................................................3-32
To set Video setting options.....................................................................3-32
Text Messaging...............................................................................................3-33
Functionality ................................................................................................3-34
Initiating Text messaging Sessions .............................................................3-34
To send a text message from the Extensions tab....................................3-34
Sphericall Desktop Integration with Microsoft Outlook....................................3-36
Overview......................................................................................................3-36
Configuring the Microsoft Outlook Dialer.....................................................3-37
To configure the telephony settings on a workstation..............................3-37
To configure the Microsoft Outlook dialer ................................................3-37
To test the integration ..............................................................................3-39
The Sphericall Desktop and Microsoft Outlook Contacts ............................3-39
To create a Microsoft Outlook contact from the Sphericall Desktop ........3-39
Journaling Calls ...........................................................................................3-41
To configure Microsoft Outlook for journaling ..........................................3-41
To journal calls while using the Sphericall Desktop .................................3-44
Miscellaneous Microsoft Outlook Functionality............................................3-44
Integration Notes .........................................................................................3-44
2
Contents
Sphericalll Desktop User Manual
.....
CONTENTS
Forwarding ......................................................................................................3-45
Forwarding...................................................................................................3-45
To set forwarding conditions ....................................................................3-45
Advanced Forwarding..................................................................................3-46
To configure Advanced Forwarding features ...........................................3-47
Profiles.........................................................................................................3-47
Forwarding - Everyday situations ................................................................3-51
Multiple Extensions with Forwarding ...........................................................3-51
To set multiple extensions .......................................................................3-51
Number Specific Forwarding .......................................................................3-51
Handset Forwarding ....................................................................................3-53
Outlook Calendar Integration.......................................................................3-53
Queuing .......................................................................................................3-54
To use the queuing feature ......................................................................3-54
Do Not Disturb.................................................................................................3-54
Phonebook Entries and Folders......................................................................3-55
The Phonebook pane ..................................................................................3-55
To add a personal folder ..........................................................................3-55
Park Zones......................................................................................................3-57
To place calls into a park zone ................................................................3-57
To retrieve calls from the park zone.........................................................3-58
DIRECTED Park..........................................................................................3-58
Park Extensions...........................................................................................3-58
To park calls into park extensions............................................................3-59
To retrieve calls from park extensions .....................................................3-59
Pickup .............................................................................................................3-59
To pickup a call using the Sphericall Desktop .........................................3-59
To pickup a call using the telephone set..................................................3-59
To pickup a call ringing at a particular extension .....................................3-59
Call Log ...........................................................................................................3-60
To configure the Call Log.........................................................................3-60
Line Details .....................................................................................................3-60
To View Line Details ................................................................................3-61
Enter A Number To Dial ..................................................................................3-61
To dial from the Sphericall Desktop .........................................................3-61
4
Sphericall Voice Mail ...............................................................4-65
Sphericall Voice Mail.......................................................................................4-65
Voice Mail and the Sphericall Desktop ........................................................4-65
To access Sphericall Voice Mail ..............................................................4-65
Employee Directory Lookup ........................................................................4-67
L ...............................................................................................................4-68
To play back voice mail messages in Microsoft Outlook from your desktop 469
To adjust audio settings from the voice mail playback window................4-70
To set up a password in Microsoft Outlook for accessing Sphericall Voice Mail
4-70
To set your Extended Absence Greeting from Outlook ...........................4-71
To save your voice messages in Outlook ................................................4-71
To sort your voice messages in Outlook..................................................4-71
To delete voice messages from Outlook..................................................4-72
Sphericalll Desktop User Manual
Contents
3
CONTEN TS
To playback voice messages from a mobile device.................................4-72
5
Sphericall Desktop Softphone................................................5-73
Sphericall Desktop Softphone.........................................................................5-73
Overview......................................................................................................5-73
Softphone User Determination........................................................................5-73
Sphericall Softphone Local User.....................................................................5-73
Verification...................................................................................................5-74
Sphericall Desktop Softphone Remote User...................................................5-74
Verification...................................................................................................5-74
PC Phone Settings..........................................................................................5-75
To set PC Phone Setting options.............................................................5-75
Switching between modes of operation.......................................................5-76
To configure options for alerting of an inbound call .................................5-76
To switch audio devices during a call ......................................................5-79
To access the touch tone feature.............................................................5-80
6
Additional Settings ..................................................................6-81
In this chapter, you will learn about..........................................................6-81
Call Recording.................................................................................................6-81
On Demand Recording................................................................................6-81
Recording Notification .................................................................................6-82
To record a call from the Sphericall Desktop ...........................................6-82
Call Recording Playback .............................................................................6-83
To playback a recorded call .....................................................................6-83
Conference Bridge ..........................................................................................6-85
To add calls to the Conference Bridge.....................................................6-85
Sphericall Desktop Video ................................................................................6-86
Overview......................................................................................................6-86
Camera Configuration .................................................................................6-86
To configure camera settings...................................................................6-87
Video Configuration .....................................................................................6-87
To configure video settings ......................................................................6-87
Video Operation...........................................................................................6-88
To enable/disable video during an active call ..........................................6-89
To enable/disable local video...................................................................6-89
To enable standalone video.....................................................................6-89
Three Party Video Conference ....................................................................6-90
Error Handling .............................................................................................6-90
Troubleshooting...........................................................................................6-90
Sphericall Desktop Updates............................................................................6-90
To run the Sphericall Desktop update......................................................6-90
User Images in the Sphericall Desktop ...........................................................6-92
To view a user image in the Sphericall Desktop ......................................6-92
Phonebook Export/Import ...............................................................................6-92
To export phonebook entries ...................................................................6-92
To import phonebook entries ...................................................................6-93
Web Browser Dialing.......................................................................................6-93
To dial from a web browser......................................................................6-93
4
Contents
Sphericalll Desktop User Manual
.....
CONTENTS
A
Help and Online Handbook ...................................................... A-1
Online Help ...................................................................................................... A-1
Contact Sphere Communications ........................................................................ 1
Document Revision History .............................................................................. 1
Notices ................................................................................................................. 2
Document Feedback Form..................................................................................-2
Document Information .....................................................................................-2
Index.............................................................................................I-1
Sphericalll Desktop User Manual
Contents
5
CONTEN TS
6
Contents
Sphericalll Desktop User Manual
U SING THE T ELEPHONE
...................................
1
....
We welcome you as a new user of the Sphericall Desktop. As a Sphericall Desktop
phone user, you must learn a few basics to get started.
This manual is designed with you in mind. If you follow each of the steps, you can
answer, transfer, place, receive, or conference calls with the Sphericall Desktop.
Refer to your voice mail user manual for any questions regarding voice mail system
functionality.
Note: Some of the Sphericall Desktop features are dependent upon what features
your system administrator has enabled for your particular phone. Please ask
your system administrator for details about your organization’s Sphere system.
SPHERICALL DESKTOP PHONE FEATURES
...........................................................
Distinctive Ringing
If a call comes to your phone from within your organization’s Sphere system, you will
hear two short rings. If a call comes to your phone from outside your organization’s
Sphere system, you will hear one long ring.
Caller ID
If your Sphere system has caller ID enabled, the caller’s information will appear on
your display phone. If the caller does not have caller ID, no information will be
displayed. If your Sphere system has not been enabled for external caller ID, you will
only receive caller ID information on internal calls.
Call Waiting
If your telephone set has been enabled for call waiting, a tone will sound in your
handset when another call is coming in while you are on the current call. Press
FLASH/LINK on your telephone to access the second call.
Message Waiting
If your telephone is equipped with a message waiting light and the system
administrator has enabled this feature, the light flashes when a message is waiting in
your voice mailbox. A stutter dial tone may also sound to indicate you have a
message (when you pick up the handset).
Sphericall Desktop User Manual
1-1
U S I N G T H E TE L E P H O N E
Placing Calls from the Telephone
PLACING CALLS FROM THE TELEPHONE
...........................................................
How do I place a normal call?
To place an external call
1
Pick up the handset.
2
Dial the outside service number (typically 8).
Outside service your organization’s Sphere system uses: _______
3
Dial the number you wish to call.
To place an internal call
1
Pick up the handset.
2
Dial the extension.
PROGRAMMABLE PHONES
Programmable phones can be used in your organization’s Sphere system. Program
each number by first inputting the outside service number then the desired number
(for example, 82478200).
ANSWERING CALLS FROM THE TELEPHONE
...........................................................
The phone associated with the Sphericall Desktop operates just like any other phone:
if it rings, you answer it!
To answer a call
The phone rings...
1
Pick up the handset.
The Sphericall Desktop supports distinctive ringing, caller ID, and call waiting.
PLACING A CALL ON HOLD
To place a call on hold using FLASH/LINK
1
Press FLASH/LINK on the telephone to place the call on hold.
2
Press FLASH/LINK on the telephone again to retrieve the call from hold.
The only way a caller hears Music-on-Hold, if your organization incorporates Musicon-Hold into its Sphere system, is if you press the FLASH/LINK button on the
telephone. If you place the caller on hold using the HOLD button, the caller will not
hear Music-on-Hold.
1-2
Sphericall Desktop User Manual
.....
U S I N G T H E TE L E P H O N E
Transferring Calls from the Telephone
TRANSFERRING CALLS FROM THE
TELEPHONE
...........................................................
Once I have answered a call, how do I transfer it to another extension?
Blind Transfer
Immediate transfer to other extension.
Attended Transfer
Allows you to announce the call prior to the
transfer. When using attended transfer, the caller
being transferred does not hear you announce
the call. If your organization’s Sphere system
has Music-on-Hold, the caller hears music
during the transfer.
Note: A blind transfer can be completed by using Star Codes. This option may be
preferred when used with a programmable phone. Refer to the Star Code table
later in this chapter for further information.
To complete a call (a blind transf er)
1
Press FLASH/LINK on the telephone.
You will hear dial tone.
2
Dial the extension.
Note: If you misdial or determine that you do not want to transfer the call, Press
FLASH/LINK, prior to the call being answered, to return to the active call.
3
Hang up the handset.
To complete a call (an attended transfer)
1
Press FLASH/LINK on the telephone.
2
Dial the extension.
Note: If you misdial or determine that you do not want to transfer the call, Press
FLASH/LINK, prior to the call being answered, to return to the active call.
3
Announce the call.
4
Hang up the handset to complete the transfer.
CONFERENCING CALLS USING THE
TELEPHONE
...........................................................
Now that I am talking to someone, how do I conference another person into our call?
To place a conference call
With one call already connected:
1
Press FLASH/LINK on the telephone to place the current call on hold.
2
Dial the extension number or an outside number (outside service plus the desired
number).
Sphericall Desktop User Manual
1-3
U S I N G T H E TE L E P H O N E
Flash Codes for Telephone Functionality
3
Press FLASH/LINK to place the new call on hold.
4
Dial *95.
The conference call is now in progress.
NETWORK-SPECIFIC NOTES
• You may conference yourself plus five other callers in a conference call depending
on available resources in an ATM-based network
• You may conference yourself plus two other callers (from your phone or Sphericall
Desktop) in a conference depending on available resources in an IP-based
network. With the addition of the Sphericall MeetingHub conference bridge, twenty
concurrent 3-party conferences or any combination of conferences totalling 60
participants is available.
Note: Consult your organization’s Sphere system Administrator for information on
your organization’s networking environment.
FLASH CODES FOR TELEPHONE
FUNCTIONALITY
...........................................................
The Sphericall system uses the FLASH/LINK function on the telephone set to enable
a single-line phone to function as a multi-line phone.
Pressing the FLASH/LINK key on the telephone set allows you to “toggle” or cycle
between calls to transfer or make consultative calls.
Table 1.1
Flash/Link Functions
Action
1-4
Flash Explanation
Making a call
• Pick up your phone receiver
• Dial the number you wish to call
N/A
Placing a call on/off Hold
• Press Hold on the phoneset (no Music-on-Hold).
or
• Press FLASH/LINK (Music-on-Hold, if available).
Dialing an Outside Number
___________ (outside service provided by administrator)
Answering an incoming call while the phone is
already off-hook
(A call waiting tone will be generated)
Press FLASH/LINK.
Placing a call on Hold to make a second, third,
fourth, etc., call
(The maximum number of calls allowed is
determined by your system administrator.)
Press FLASH/LINK, wait for dial tone, dial another
number.
Sphericall Desktop User Manual
.....
U S I N G T H E TE L E P H O N E
Sphere Telephone Set Star Code Commands
Action
Flash Explanation
Retrieving a second, third, fourth, etc., call on
Hold
Press FLASH/LINK until the desired party is connected.
• Continue to press FLASH/LINK to cycle through the
calls as they were presented to you.
• Pressing FLASH/LINK will provide dial tone to allow
you to manage the last connected party (i.e. for transfer, conference, call parking, etc.). If applying call waiting, you will press flash and receive a call immediately
without the dial tone.
Transferring the connected party (attended
transfer)
Press FLASH/LINK, dial the extension, announce the
call, hang up.
• A hold reminder, a very brief ring, will notify you if you
have left another call on hold. Pick up the phone to
connect to the next person on hold.
Transferring the connected party (blind
transfer)
Press FLASH/LINK, dial the extension, hang up.
• A hold reminder, a very brief ring, will notify you if you
have left another call on hold. Pick up the phone to
connect to the next person on hold.
Note: Sphericall Desktop “tent cards” provide users with quick tips for applying star
code commands and FLASH key function. Consult your organization’s Sphere
system administrator for these reference cards.
SPHERE TELEPHONE SET STAR CODE
COMMANDS
...........................................................
The Sphericall Desktop is enabled with several star code commands that you can use
directly from a telephone set. Use the following star code commands to set features
and perform functions from any telephone.
Table 1
Sphere System Star Code Commands
Code
Authorization PIN
Blind Transfer
Action
Explanation
*99
+ PIN
+#
+ number to be dialed
Allows you to apply permissions from your user profile to another line
and make calls from the associated phone.
FLASH/LINK
+ *96
+ extension
Completes a blind transfer to another extension.
Note: A confirmation tone will sound after applying this star code
command.
Sphericall Desktop User Manual
1-5
U S I N G T H E TE L E P H O N E
Sphere Telephone Set Star Code Commands
Code
Call Forwarding Setup
Action
Explanation
*72
+ number
Activates the station number to which all calls are to be forwarded.
• The number can be an extension on the Sphere system or an outside
telephone number with the appropriate outside service (i.e.
85551234).
• If the number is not already on the call forwarding setup, it will be
added and enabled.
• Only a single, handset-entered forwarding number is entered at a
time. Calls may be forwarded to multiple numbers (example: *72 +
extension, hang up; *72 + another extension, hang up).
Note: A confirmation tone will sound after applying this star code
command.
Note: Calls can be forwarded to one or more internal addresses, or one
or more external addresses. Calls cannot be forwarded to a
combination of internal and external addresses. If such a combination
is configured, the Sphericall Manager will forward calls to the first
established address.
*73
Clears the telephone’s existing call forwarding conditions. Once this
star code is invoked, you must add any appropriate forwarding
conditions back to the extension.
Note: A confirmation tone will sound after applying this star code
command.
Transfer Directly to
Voice Mail
Flash + *74 + extension
Phone sets can transfer a party directly to another voice mailbox.
Call Detail Record
*75 + Code + # + number
Code is stored with the rest of the call information for retrieval and
accounting purposes. Codes are assigned by your system
administrator.
Intercom from nonintercom phone to
intercom enabled
phone
*76 + extension
Callers without intercom can enter this star code to intercom a phone
equipped with intercom.
Conferencing
With a call connected:
FLASH/LINK
+ extension or number
+ FLASH/LINK
+ *95
Conferences parties using FLASH/LINK and star code command.
Directed Park
With a call connected:
FLASH/LINK
*94
+ extension
Places a call to a specific station, giving the user the ability to return to
that station to retrieve the call.
Do Not Disturb
Activation
*78
Activates Do Not Disturb for all calls bound to this extension. When Do
Not Disturb is activated, the station is not alerted to any calls.
Forwarding and/or Coverage behaves as usual.
Note: A confirmation tone will sound after applying this star code
command.
Do Not Disturb
Deactivation
*79
De-activates Do Not Disturb for all calls to this extension.
Note: A confirmation tone will sound after applying this star code
command.
Drop Last Call
FLASH/LINK
+ *77
Drops the last active call before the FLASH operation.
If used during a conference call, the last caller who was added to the
conference is dropped from that conference call.
Note: A confirmation tone will sound after applying this star code
command.
Call Forwarding
Deactivation
1-6
Sphericall Desktop User Manual
.....
U S I N G T H E TE L E P H O N E
Authorization PINs and the Phoneset
Code
Pickup
Action
Explanation
*93
+ extension
Retrieves a ringing call or an on-hold call at the entered extension.
*92
Retrieves a ringing call from anywhere within the predefined Group
Pickup area.
Park
FLASH/LINK
+ *8
+ the number of the park
zone as announced (by
operator)
Places a call into a park zone, or an address/area where calls can be
retrieved from any telephone on a Sphere system.
Unpark
*91
+ the number of the park
zone as announced (by
operator)
Retrieves a call from the park zone extension entered.
If there is more than one call in the zone, it will take the oldest call in the
zone.
Paging
Number determined by
your Sphere system
administrator.
Contact your system administrator for information regarding your
organization’s paging system.
Group Pickup
AUTHORIZATION PINS AND THE PHONESET
...........................................................
OVERVIEW
Authorization PINs provide users with the ability to apply individual dialing
permissions, permissions that were originally associated with a user profile, to
general lines throughout a Sphere system. These general lines may or may not have
been configured with stricter dialing permissions.
When users apply their individual dialing permissions to a restricted station within a
Sphere system, the new dialing privileges that correspond to the PIN will be activated
only for that call session. Once the call is completed, the station’s dialing permissions
and privileges return to their configured defaults.
Consider the following example:
One Sphere system is configured within a school in which each classroom and each
teacher requires separate extensions. Teachers are assigned PINs that provide them
the ability to place telephone calls from classroom extensions—extensions that have
previously been configured only for emergency number dialing permissions. The
PINs also provide teachers the ability to place telephone calls from any station
throughout the organization as opposed to the single station within their classroom.
Note: Sphere system Administrators must supply users with their Authorization PINs
if that feature has been enabled within a Sphere system. If users lose or forget
their PIN, the administrator must assign a new authorization code.
Sphericall Desktop User Manual
1-7
U S I N G T H E TE L E P H O N E
Authorization PINs and the Phoneset
IMPLEMENTATION
To apply individual dialing permissions to a restricted station
From any telephone throughout a Sphere system:
1
Dial *99.
2
Dial the PIN.
3
Dial #.
4
Dial the appropriate telephone number.
Note: If you are using the Sphericall Desktop to place a telephone call, you have
already been granted the appropriate dialing permissions for all call sessions.
As long as you are logged on to the network (and your machine) with your user
account (i.e. Domain_Name\User_Name) and have the Sphericall Desktop
application open, you will maintain these dialing permissions.
1-8
Sphericall Desktop User Manual
2
SPHERICALL D ESKTOP SOFTWARE
...................................
....
How do I use my telephone in conjunction with the Sphericall Desktop?
Use this chapter if your Sphere system administrator has integrated your telephone
with the Sphericall Desktop. The following is an overview of the features you have
access to on your computer.
Note: Even if your computer is not turned on, you have access to the telephone and
can receive and place calls from your telephone set.
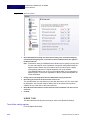
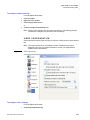
To start the Sphericall Desktop application
From the Start menu:
1
Click Start\Programs\Sphericall\Desktop.
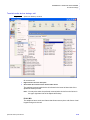
The Sphericall Desktop opens and integrates with your telephone set.
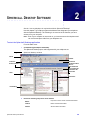
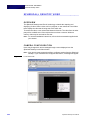
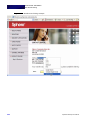
Figure 2.1
Sphericall Desktop window
Menu
Toolbar
Presence
Preferred
Communication
Device
Active Call Pane
Phonebook tab
Recent Calls tab
Extensions tab
Video tabs
Calls
Extensions
Forwarding
2
Review the following major areas of the window
Sphericall Desktop User Manual
Menus
Drop-down menus contain commands and tasks.
Toolbar
Button commands and tasks.
Folders
Stored number information.
2-9
SPHERICALL DESKTOP SOFTWARE
Extensions List
Presence
Indicates the activity status of a Sphericall
Desktop user.
Active Call pane
Live information about calls in-progress.
Phonebook, Recent Calls, Extensions
tab
Phonebooks and organization number directories.
Local & Network Video
Controls the configuration and activity of video.
Calls
The Active Call icon which can be dragged to
transfer, right-clicked for more tasks and options,
etc.
Forwarding and Do Not Disturb Status
Indicates when Forwarding and Do Not Disturb
are enabled.
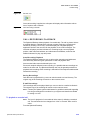
EXTENSIONS LIST
...........................................................
Clicking the Extensions tab of the Sphericall Desktop window allows you to view all
the extensions listed for your organization. However, the Extensions tab provides
more than just names and numbers. It is a “smart directory” that functions as a
window to the availability and productivity of coworkers.
Figure 2.2
Sphericall Desktop window
To place a call using the Sphericall Desktop
From Phonebook or Extensions tab:
•
2-10
Double-click any name or number.
Sphericall Desktop User Manual
.....
SPHERICALL DESKTOP SOFT WA RE
Using the Sphericall Desktop
USING THE SPHERICALL DESKTOP
...........................................................
CHOOSING A LINE
When users are assigned rights to multiple lines, they have the ability to select which
line to open at the beginning of each Sphericall Desktop session:
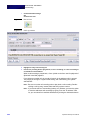
Figure 2.3
Choose a line window
ANSWERING CALLS
In the Calls window, new calls will appear when the telephone rings.
• New calls appear with a yellow ringing bell image.
Figure 2.4
Ringing Bell image
• Connected calls appear with a red handset image.
Figure 2.5
Call Connected image
During an active call, you can right-click in the Calls pane to perform many call
activities.
Sphericall Desktop User Manual
Answer
Transfer
Complete Transfer
Send To Voice Mail
Hold
Park
2-11
SPHERICALL DESKTOP SOFTWARE
Using the Sphericall Desktop
Hangup
Conference
Transfer Participant
Drop Participant
Send Text Message
Keypad
Switch Device (Softphone)
Call Log
Adjust Volume
View In Outlook
Save Contact Details
Create Journal
Show Journal
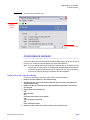
EXTENSION SEARCH
Users of the Sphericall Desktop can place calls from three different areas of the
Sphericall Desktop:
• The Extensions tab
• The Phonebook tab
• The integrated Outlook Contacts folder (in the Phonebook tab)
The Sphericall Desktop includes a search tool to ease the burden of locating a
particular extension/contact.
To search for an extension/contact
1
Figure 2.6
Click File\Search
Search window
In the Search for field:
2
Type in the last name of the person you would like to call.
In the example above, typing the letters “P” and “a” are adequate to conduct a search
for the last name.
2-12
Sphericall Desktop User Manual
.....
SPHERICALL DESKTOP SOFT WA RE
Using the Sphericall Desktop
In the Search in field:
3
Select any or all of the check boxes to use for conducting the search.
Note: To allow the Search tool to locate Outlook Contacts, you must have already
loaded your Outlook Contacts onto the Sphericall Desktop
For more information on Outlook and its integration with the Sphericall
Desktop, refer to the Sphericall Desktop Options chapter.
4
Click Start Search.
The results will appear in the Search Results area. You may receive mulitple
matches. For example, if you search for a user who has a business number and a
mobile number (located in Outlook Contacts), both numbers will appear.
5
Double-click the extension or click Dial to place a call to that extension/contact.
TRANSFERRING CALLS
To transfer calls using the Sphericall Desktop
1
Place the call on hold by clicking the Hand icon on the Sphericall Desktop toolbar.
2
Double-click the number in the Extensions tab.
or
Drag and drop an active call to the appropriate number in the Extensions tab.
Users who transfer calls frequently can also click once in the Extensions tab then type
the first letter of the person’s last name to whom they wish to transfer the call. This will
automatically jump the Extensions list to that alphabetical section. Double-clicking the
appropriate name will complete the transfer.
Note: If you have attended transfer set in Configure\Options, you must click
Complete Transfer to complete the transfer. This is not necessary for blind
transfers.
3
Hang up the handset.
The call is transferred.
To speed transfer calls (for operators)
Users who transfer calls frequently will find it helpful to “jump” to the alphabetical letter
of the person to whom they wish to transfer calls.
1
Click once in the “white space” of the Extensions tab.
Using the keyboard:
2
Type the first letter of the last name of the person to whom you are transferring a call.
This will automatically jump the extensions list to that alphabetical section.
3
Double-click the appropriate name to complete the transfer.
To transfer a call to a user’s voice mailbox
1
Answer a call.
2
Right-click the extension for the intended transfer.
3
Click “Transfer to this user’s Voice Mailbox.”
The call you transferred will proceed to the voice mailbox.
Sphericall Desktop User Manual
2-13
SPHERICALL DESKTOP SOFTWARE
Using the Sphericall Desktop
Note: A voice mail system must be installed on the Sphere system in order to use
this function.
To transfer a call to your own voice mailbox
1
Answer a call.
2
Right-click your own extension in the Extensions tab.
3
Click “Transfer to this user’s Voice Mailbox.”
Or
Right-click on the call and select “Sent To Voice Mail.”
The call you transferred will proceed to your voice mailbox.
Note: A voice mail system must be installed on the Sphere system in order to use
this function.
A NOTE ON MONITORING
Your organization’s Sphere system administrator has the ability to grant monitoring
rights to more than a user’s own line. Using the Sphericall Desktop, an operator, for
example, can place the mouse pointer over extensions and view user call information.
This information includes the caller’s name, if the call is inbound or outbound, caller
ID (if available), and call length.
MONITORING INDIVIDUALS
Sphericall Desktop users, with the appropriate permissions, have the ability to select
extensions and isolate their presence status. The monitor window will appear in the
lower righthand side of their computer monitor (near the system tray).
To monitor individual extensions
From the extensions tab:
1
Right-click the desired extension.
2
Select Monitor.
Note: There is no limit to the number of users that can be monitored. When a
monitored user’s presence status has changed, their information will appear
bold.
3
Figure 2.7
Right-click on the extension and select Stop Monitoring to disable the monitoring
feature.
Monitor window
NOTIFY ON IDLE
Users that have monitoring rights may also choose to be notified when a user within
the Sphere system is no longer on a call. The Notify on Idle feature allows a user to
2-14
Sphericall Desktop User Manual
.....
SPHERICALL DESKTOP SOFT WA RE
Using the Sphericall Desktop
right-click on an extension (involved in an active call) in the Extension pane and select
“Notify Me When Idle”. If this feature is enabled, a message will appear near the
system tray when that extension no longer has an active call. The user will only be
able to monitor one address at a time.
Figure 2.8
Notify on Idle window
Note: The Notify on Idle message will only appear for 30 seconds and can be
cleared by clicking on the window.
CONFERENCING CALLS
Conferencing calls with the Sphericall Desktop is very easy to do.
To place a conference call
1
Answer or initiate a call.
2
Place the call on hold.
3
Place a call to the new extension.
4
Drag either call onto the other call in the Calls window.
The conference call will be connected.
Note: This process works when the Attended Transfer option is set up in Configure\
Options.
Figure 2.9
Conference Call image
USING THE CONFERENCE BRIDGE
You may use your phone and/or Sphericall Desktop to initiate/participate in
conference calls with a maximum of three participants. However, if your organization
has a VG3 MeetingHub (conference bridge), users can transfer callers into the
conference bridge and include up to 60 participants.
For example, if you are part of a conference call of which you are the only participant
within the Sphere system, you can do the following:
• Transfer the outside callers to a conference bridge extension
• Hang up the recently-transferred call and dial the conference bridge extension
• Have additional users dial the conference bridge extension
Sphericall Desktop User Manual
2-15
SPHERICALL DESKTOP SOFTWARE
Using the Sphericall Desktop
Note: Calls into a conference bridge CANNOT be conferenced in. This will not work.
Calls must be transferred in.
MANAGING CALLS
When multiple calls arrive at your desk, the Sphericall Desktop allows you to
effectively manage these calls.
Figure 2.10 Sphericall Desktop window
Call #1
Call #2
To manage multiple calls
While on an active call and another call comes in:
1
Click the incoming call from the Calls window.
The incoming call is now the active call and the other call will be automatically placed
on hold.
2
Repeat as necessary for additional incoming calls.
Note: Observe the Calls window for current call activity.
2-16
Sphericall Desktop User Manual
.....
SPHERICALL DESKTOP SOFT WA RE
Using the Sphericall Desktop
LANGUAGE SELECTION
The Sphericall Desktop supports the following languages:
English
Italian
French {Canada}
Spanish {Mexico}
French {France}
Spanish {Spain}
German
To select a different language
•
Click File\Change Language.
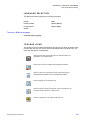
TOOLBAR ICONS
The toolbar icons on the Sphericall Desktop give the user the ability to perform many
functions with the click of a mouse. Below is the default order of toolbar icons. The
order and appearance is configurable..
Click the Place Call icon to initiate a call to an extension within your
organization or an outside number.
Click the Text Chat icon to initiate a text message conversation.
Click the Answer icon to answer the phone without picking up the
handset (Requires headset or phone equipped with speaker).
Click the Hangup icon to terminate a call.
Click the Hold icon to place an active call on hold. The Hold icon can
be used to initiate a transfer or conference call.
Click the Conference icon to create a conference call.
Sphericall Desktop User Manual
2-17
SPHERICALL DESKTOP SOFTWARE
Using the Sphericall Desktop
Click the Transfer icon to initiate a transfer call.
Click the Complete icon to complete a transfer call.
Click the Park icon to initiate the placing of a call into a “virtual parking
lot” or park zone.
Click the Recording icon to initiate a recording of your phone call.
Note: Certain user rights are required. Contact your Sphere
admnistrator.
Click the Pickup icon to pick up a call from another extension within
your pickup group.
Click the DND icon (also referred to as Do Not Disturb) to disable
sending notification of inbound calls to the station and Sphericall
Desktop. When the Do Not Disturb feature is enabled, a watermark
will appear in the Calls pane.
To configure toolbar icon order and presence
1
Figure 2.11
2-18
Click Configure\Toolbar.
Configure Toolbar window
Sphericall Desktop User Manual
.....
SPHERICALL DESKTOP SOFT WA RE
Using the Sphericall Desktop
2
Select the Dial checkbox if you want the Dial icon to appear on the Sphericall Desktop.
3
Repeat the previous step for each icon.
4
Highlight a specific icon and click the Up or Down button to determine the order in
which the icon will appear on the Sphericall Desktop toolbar.
5
Click OK.
TITLE BAR BUTTONS
The title bar buttons are located at the upper right of the Sphericall Desktop.
Menu button - Click to retain only the Sphericall Desktop
menu.
Minimize button - Click to reduce the Sphericall Desktop
window size.
Maximize button - Click to restore the Sphericall Desktop
window to full image size.
Hide button - Hides the Sphericall Desktop application.
The program will continue to run in the taskbar (near the
clock) so you can be notified of phone calls and instant
messages.
TASKBAR STATUS AREA ICONS
Taskbar status area icons are located in the lower right of the Sphericall Desktop.
Status Area Shortcut - Opens the Sphericall
Desktop window.
Status Area Call Indicator - Indicates call(s)
received.
Message Waiting - Indicates that a message has
been left on your third-party voice mailbox
(where available).
Sphericall Desktop User Manual
2-19
SPHERICALL DESKTOP SOFTWARE
Using the Sphericall Desktop
TASKBAR STATUS AREA ICONS (OUTSIDE OF THE
SPHERICALL DESKTOP
Taskbar status area icons are located in the lower right of the Sphericall Desktop.
Do Not Disturb- Indicates on your computer’s
desktop when Do Not Disturb is enabled.
2-20
Sphericall Desktop User Manual
SPHERICALL D ESKTOP OPTIONS
...................................
3
....
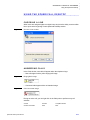
OPTIONS WINDOWS
...........................................................
The Sphericall Desktop provides several option windows for configuring and adjusting
call settings, including appearance and functionality.
Option Window
Description
General
• Toolbar Style
• Type of Transfer
• Personal Details
Audio
General Ringing Characteristics
Calls
• Incoming/Outgoing Calls
• General Call Activity
Extensions
•
•
•
•
Extension Sorting
Extension Display
Zone Appearance
Mouse Action
Outlook
•
•
•
•
•
Incoming Calls
Outgoing Calls
Journalling
Contract Groups in Phonebook tab
Meeting Calendar
PC Phone Settings
Sphericall Softphone Configuration
Phonebook
General Phonebook Characteristics
Presence
Presence Display and Configuration
Recent Calls
Recent Calls Determination and color appearance
Video
Video Enablement and Device Declaration
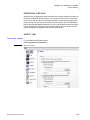
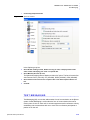
GENERAL TAB
To set general options
From the Sphericall Desktop window:
1
Click Configure\Options\General.
Sphericall Desktop User Manual
3-21
SPHERICALL DESKTOP OPTIONS
Options Windows
Figure 3.1
Options window
In the Toolbar Style group box:
2
Select the Small or Large radio button to change the size of the Sphericall Desktop
toolbar buttons.
3
Select Show text under button to include text under the toolbar buttons.
In the Default Type Of Transfer group box:
4
Select the Attended Transfer radio button to announce transferred calls.
or
Select the Blind Transfer radio button to transfer calls without an announcement.
Keep in mind that by selecting attended transfer, you cannot double-click on an
extension to transfer an active call. This places the active call on hold. If you have
opted for attended transfer, you can still blind transfer. Right-click blind transfer on the
extension to which you want to transfer the call.
In the Keypad Layout group box:
5
Select the Standard or Numeric radio button to set the dial pad layout.
In the Personal Details text box:
6
Type the name that will be used when creating shortcuts or hyperlinks for other people
to call you.
7
Select Show splash screen when starting to enable the appearance of the Sphericall
logo splash when starting the Sphericall Desktop.
8
Select Keep this on top of all windows to allow the Sphericall Desktop to take
precedence over other applications on your dekstop.
9
Select Save my hardware specific settings as default for all new users to allow the
Sphere system administrator to define system parameter default files that will be used
for any users that use this PC.
10
3-22
Click OK.
Sphericall Desktop User Manual
.....
SPHERICALL DESKTOP OPTIONS
Options Windows
PERSONAL DETAILS
Sphericall uses an application called URLdialer.exe to support telephone numbers on
the Sphericall Desktop and the Internet. The information entered in this field allows
users to drag and drop their own telephone number into other desktop applications.
Drag and drop your URL phone information from the inactive, blue Call Information
pane to the Microsoft Windows desktop or to any e-mail or Microsoft Word document.
If users receiving this document are on a Sphere system, they can click on the link
and the URLdialer.exe application will dial from their desktop.
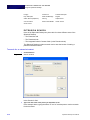
AUDIO TAB
To set audio options
From the Sphericall Desktop window:
1
Figure 3.2
Click Configure\Options\Calls\Audio.
Options window
Sphericall Desktop User Manual
3-23
SPHERICALL DESKTOP OPTIONS
Options Windows
AUDIO OPTIONS
Check Box
Description
Ring my phone when
a new call arrives
Select this check box to enable the phone to ring when a new call
arrives.
When a new call
arrives, play the
following through the
specified audio
device
• Play ringing tone - Select this radio button to play the familiar ringing
tone.
• Play this sound - Select this radio button to enable the speakers to
broadcast a .wav file. when a user receives a call. Click Browse to
select the appropriate .wav file.
Device: Select the appropriate audio device from the drop-down list box.
If a second call
arrives, play the
following through the
specified audio
device
• Play ringing tone - Select this radio button to play the familiar ringing
tone.
• Play this sound - Select this radio button to enable the speakers to
broadcast a .wav file. when a user receives a call. Click Browse to
select the appropriate .wav file.
Device: Select the appropriate audio device from the drop-down list box.
NEW CALL ARRIVAL
Microsoft Windows 2000 and XP Operating Systems
Figure 3.3
New Call
When a new call arrives to the Sphericall Desktop, a message containing caller ID
information, call state, transfer information, precedence information (if available), and
the called party will appear in the system tray.
Figure 3.4
Missed Call
When a call is dropped or unanswered, a missed calls window appears in the system
tray. The window displays time, date, and caller ID information. The missed call
window clears when the user hovers their mouse pointer over the Sphericall Desktop
icon.
3-24
Sphericall Desktop User Manual
.....
SPHERICALL DESKTOP OPTIONS
Options Windows
DISTINCTIVE RINGING
The Sphericall Desktop allows you to play .wav files on inbound calls. Your
organization’s Sphere system administrator can set up .wav files for all employees in
a directory so that any time you place a call to an employee, a specific .wav file will
play.
For example, you have enabled the Ring through my speakers when a new call
arrives check box; Joe Murphy places a call to your extension; Instead of the
telephone ringing, a .wav file plays, “Joe Murphy is calling from extension 271.” in
your computer’s speakers.
Note: The Sphere system administrator would need to set up a .wav file for that
particular employee (i.e. 271.wav).
In the Outgoing Calls group box:
2
Select Popup if minimized to specify how outgoing calls appear within your Sphericall
Desktop.
In the General group box:
3
Select Close window after hanging up last call to hide the Sphericall Desktop at the
completion of a phone call.
4
Define, in seconds, the time it takes the Sphericall Desktop to close after the completion
of a phone call.
5
Select Automatically switch call focus when a call is hung up
6
Click OK.
CALLS TAB
To set call options
From the Sphericall Desktop window:
1
Click Configure\Options\Calls.
Sphericall Desktop User Manual
3-25
SPHERICALL DESKTOP OPTIONS
Options Windows
Figure 3.5
Options window
In the Incoming Calls group box:
INCOMING CALLS OPTIONS
Check Box
Description
Popup if minimized
If the Sphericall Desktop is minimized, the window will popup when a call
is received.
Pop up a message in
the system tray on
missed calls
Select this check box to provide caller ID information in the system tray
when a call is missed.
Popup a message in
the system tray when
a new call arrives
Select this check box to provide caller ID information in the system tray
when a new call arrives.
Automatically answer
an incoming call
when the following
key is pressed
Select this check box to give the keyboard to ability to answer when a
new call arrives.
Automatically answer
call after n rings
Select this check box if you wish the call to be answered after a defined
number of rings.
EXTENSIONS TAB
To set extension options
From the Sphericall Desktop window:
3-26
Sphericall Desktop User Manual
.....
SPHERICALL DESKTOP OPTIONS
Options Windows
1
Figure 3.6
Click Configure\Options\Extensions.
Options window
In the Sorting group box:
2
Select the Phone Number, Last Name, or First Name radio button to sort Extensions.
In the Display group box:
3
Select Display last name first, Show the entries number, Show an icon next to the entry
to establish how entries display in the Extension tab, or Show Park extensions in a
separate tab.
Note: Refer to the Park Zones section of this chapter for more information on Park
extensions.
In the Mouse Action group box:
4
Select Always dial the entry or Transfer to this entry if a transfer is possible, otherwise
dial the entry to specify the action taken when an entry in the extension list is doubleclicked.
5
Click OK.
OUTLOOK TAB
Note: Microsoft Outlook is only used with systems which are integrated with
Microsoft Exchange Server. If you orgnaization’s Sphere system is integrated
with Microsoft Outlook, you can click the Outlook tab on the Sphericall Desktop
to select and set your preferences for importing Outlook Contacts, Journaling,
etc.
Sphericall Desktop User Manual
3-27
SPHERICALL DESKTOP OPTIONS
Options Windows
To set Outlook options
From the Sphericall Desktop:
1
Figure 3.7
Click Configure\Options\Outlook.
Options window
In the Incoming Calls group box:
2
Select Popup last call entry or Popup contact entry.
This opens a dialogue window in Outlook with the user’s contact information.
In the Outgoing Calls group box:
3
Select Popup last call entry or Popup contact entry.
This opens a dialogue window in Outlook with the user’s contact information.
In the Journal group box:
4
Select Journal incoming calls, Journal outgoing calls, Journal calls between extensions,
or Journal conference calls.
In the Contact Groups in Phonebook group box:
Select Group by Outlook category, Group contacts in the same country, Group into
alphabetic folders ABC, DEF, etc., or Group contacts in the same company.
In the Meeting Calendar group box:
5
Select Use Outlook’s calendar to set my presence to “In A Meeting”, Show me as
“Away”, and Provide the following additional presence information.
In the Sphericall Voice Mail group box:
3-28
6
Select the Show Sphericall Voice Mail menu options checkbox.
7
Click OK.
Sphericall Desktop User Manual
.....
SPHERICALL DESKTOP OPTIONS
Options Windows
PC PHONE TAB
This tab is used for configuration of the Sphericall Softphone, an endpoint option that
allows telecommuters and employees extensions to follow them as needed.
To set PC Phone options
From the Sphericall Desktop:
1
Figure 3.8
Click Configure\Options\PC Phone.
Options window
In the Options group box:
2
Select Automatically switch my communication device to my phone when I pick up the
handset on the phone.
3
Select Use settings for a low bandwidth link when making a call if voice quality is a
concern and you are operating over a low bandwidth link.
This option uses a particular codec associated with your station which improves voice
quality.
In the Preferred Communication Device group box:
4
Select the PC or Phone radio button to specify the communication device to use with the
Sphericall Softphone.
Note: This option is configurable from the main Sphericall Desktop window too.
In the PC Communication Devices group box:
5
Select the device the user will use to speak into the softphone in the Speaking Device
list box.
6
Select the device that the user will use for listening with the softphone in the Listening
Device list box.
7
Click OK.
Sphericall Desktop User Manual
3-29
SPHERICALL DESKTOP OPTIONS
Options Windows
PHONEBOOK TAB
To set phonebook options
From the Sphericall Desktop window:
1
Figure 3.9
Click Configure\Options\Phonebook.
Options window
In the Default Tree Entries group box:
2
Select Show Outlook Contacts, Show Exchange Phonebook, or Show these Zones to
specify how you wish to view numbers in the Phonebook.
In the Number Entries group box:
3
Select the First name or Last name radio button to sort Phonebook entries.
4
Select Show phone number as well as name, Show company as well as name, or For
calls, display name instead of Caller ID to specify how you prefer your Phonebook
entries to appear.
In the Mouse Action group box:
5
Select Always dial the entry or Transfer to this entry if a transfer is possible, otherwise
dial the entry to specify the action taken when an entry in the extension list is doubleclicked.
6
Click OK.
PRESENCE TAB
Presence makes it possible for users to locate and identify another user’s availability.
The Sphericall Desktop provides a number of presence definitions based upon colors
and states. A Sphericall Desktop user can define and declare their presence.
3-30
Sphericall Desktop User Manual
.....
SPHERICALL DESKTOP OPTIONS
Options Windows
To set Presence options
From the Sphericall Desktop window:
1
Click Configure\Options\Presence.
Figure 3.10 Options window
In the Display area:
2
Choose how presence information should appear in your Extension list.
3
Click OK.
RECENT CALLS TAB
To set recent call options
From the Sphericall Desktop window:
1
Click Configure\Options\Recent Calls.
Sphericall Desktop User Manual
3-31
SPHERICALL DESKTOP OPTIONS
Options Windows
Figure 3.11
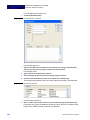
2
Options window
Select Unanswered incoming calls, Answered incoming calls, Unanswered outgoing
calls, Answered outgoing calls, or Precedence calls to establish which calls appear in
the Recent Calls tab.
Note: Precedence calling (a CallNOW feature) allows users to specify a priority level
for each call based on need, importance, and profile configuration within the
Sphere system. Based on the precedence level, the call receives a higher
routing priority than that of a regular telephone call on the network.
The CallNOW feature may or may not be enabled within your organization’s
Sphere system. Consult your organization’s Sphere system administrator for
further information.
3
Change colors in the drop-down list box to differentiate varying recent calls.
4
Select bring the recent call to the front when I miss a call.
This is helpful when you step away from your desk and miss a call. The recent calls
list will appear. You have the ability to double click on the missed call to perform
callback (or any of the calls on the recent calls list).
5
Select Show the time format in 12 hour format for a more traditional view of the recent
callers list.
6
Click OK.
VIDEO TAB
This tab enables the sending and receiving of video to the Sphericall Desktop.
To set Video setting options
From the Sphericall Desktop:
3-32
Sphericall Desktop User Manual
.....
SPHERICALL DESKTOP OPTIONS
Text Messaging
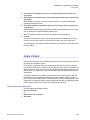
1
Click Configure\Options\Video.
Figure 3.12 Options window
In the Options group box:
2
Select Enable sending of video, Enable receiving of video, or Display toolbar under
video window and Dispaly your video in a separate tab.
3
Select Maxium video size to send.
The Sphericall Desktop offers a “Maximum video size” option. The list will contain four
video formats: QCIF (176x144), CIF (352x288), QVGA (320x240), VGA (640x480).
4
Select the device the user will use to capture video in the Video Caputure Device list
box.
5
Click OK.
TEXT MESSAGING
...........................................................
Text Messaging (IM), or text chat, adds another form of communication to the Sphere
system. Instant Messaging is a less obtrusive form of communication that can be
used in place of voice or video calls. It can also supplement audio conference calls by
establishing side conversations with one or more of the conference participants or
parties not on the call.
Sphericall Desktop User Manual
3-33
SPHERICALL DESKTOP OPTIONS
Text Messaging
Text Messaging sessions are supported between Sphericall Desktops on the same
SIP domain. SIP clients that reside on a different SIP domain than Sphericall, cannot
send Text Messages to each other when using Sphericall as their communication
source.
FUNCTIONALITY
Instant Messaging is available from a Sphericall Desktop that has a station line
opened. If a second Sphericall Desktop opens the same line, Instant Messaging for
this Sphericall Desktop is disabled. The Sphericall Manager hosting the opened
station line is used as the SIP proxy for Instant Messaging.
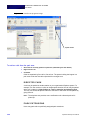
Figure 3.13 Media Capabilities
1000 J eff F ish er
O n line
C apa bilities:
The Sphericall Desktop receives and displays presence information indicating if the
Text Messaging feature is supported.
Note: The Sphericall Desktop prohibits instant messages to Sphericall Desktops that
have their presence set to “off-line”.
INITIATING TEXT MESSAGING SESSIONS
As is the case with many features of the Sphericall Desktop, a Text Message can be
initiated from several different areas.
To send a text message from the Extensions tab
1
Right-click on an extension and select “Send Text Message”.
or
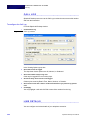
Figure 3.14 Text Message Button
2
3-34
Highlight an extension and click the Text Msg toolbar button.
Sphericall Desktop User Manual
.....
SPHERICALL DESKTOP OPTIONS
Text Messaging
Figure 3.15 Send a Text Message window
3
Click OK.
Note: A user’s presence state determines whether he can receive instant messages.
Sphericall Desktop User Manual
3-35
SPHERICALL DESKTOP OPTIONS
Sphericall Desktop Integration with Microsoft Outlook
Figure 3.16 Text Message window
SPHERICALL DESKTOP INTEGRATION WITH
MICROSOFT OUTLOOK
...........................................................
OVERVIEW
The Sphericall Desktop can utilize the Microsoft Outlook application to place requests
in a call journal for:
• The storage and retrieval of contact information
• The recording of telephone call information via the ActiveX automation interface
The Sphericall Desktop is a real-time application that does not automatically launch
Microsoft Outlook in order to satisfy these storage/retrieval requests. As such, you
must start Microsoft Outlook prior to utilizing the Sphericall Desktop in order to take
advantage of this integration functionality.
3-36
Sphericall Desktop User Manual
.....
SPHERICALL DESKTOP OPTIONS
Sphericall Desktop Integration with Microsoft Outlook
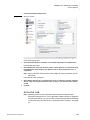
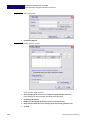
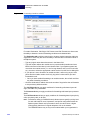
CONFIGURING THE MICROSOFT OUTLOOK DIALER
In order to integrate the Sphericall Desktop with Microsoft Outlook, you must
configure the Microsoft Outlook dialer associated with the appropriate user account(s)
and workstation(s).
To configure the telephony settings on a workstation
Before you can configure the Microsoft Outlook dialer, you must configure the
telephony settings of the workstation associated with the appropriate user/user
account. These settings define how the computer is to behave as more of a telephone
between Microsoft Outlook and the Sphericall Desktop.
On a Microsoft Windows 2000 Professional or XP workstation:
Step
Action
1
Click Start\Settings\Control Panel\Phone and Modem Options\Advanced.
2
Select Sphericall Service Provider.
3
Click Configure.
4
Click OK to confirm that the TAPI service provider has been configured.
5
Click the Dialing Rules tab.
6
Click edit.
7
Type the outside service that users in your organization’s Sphere system must dial in
order to place external calls.
8
Click OK.
9
Click OK.
10
Close the Control Panel window.
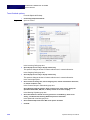
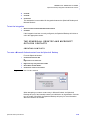
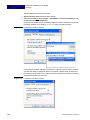
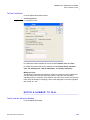
To configure the Microsoft Outlook dialer
On any Microsoft Windows 2000 Professional or XP workstation:
1
Open the Microsoft Outlook application.
In the Outlook Today folder list:
2
Click Contacts.
From the Toolbar:
Figure 3.17 Microsoft Outlook Dialer button
3
Click the Dialer icon.
Sphericall Desktop User Manual
3-37
SPHERICALL DESKTOP OPTIONS
Sphericall Desktop Integration with Microsoft Outlook
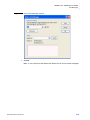
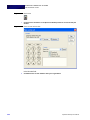
Figure 3.18 New Call window
4
Click Dialing Options.
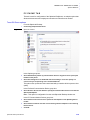
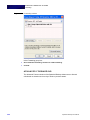
Figure 3.19 Dialing Options window
In the Connect using line area:
5
Select the appropriate line to use for telephone number dialing from the list.
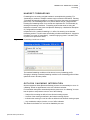
In the Settings for phone number formatting and dialing area:
3-38
6
Click Dialing Properties.
7
Double-click the appropriate location instance in the display area.
8
Verify that the outside service is correctly set for local and long distance calls.
9
Click OK.
Sphericall Desktop User Manual
.....
SPHERICALL DESKTOP OPTIONS
Sphericall Desktop Integration with Microsoft Outlook
10
Click OK.
11
Click OK.
12
Click Close.
This workstation is now enabled for integration between the Sphericall Desktop and
Microsoft Outlook.
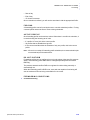
To test the integration
1
Select a contact created within Microsoft Outlook.
2
Click Dial.
If the integration has been correctly configured, the Sphericall Desktop will initiate a
call to the appropriate contact.
THE SPHERICALL DESKTOP AND MICROSOFT
OUTLOOK CONTACTS
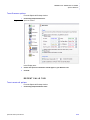
CREATING CONTACTS
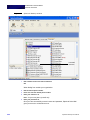
To create a Microsoft Outlook contact from the Sphericall Desktop
From the Sphericall window:
1
Click the Recent Calls tab
or
Right-click on an active call.
2
Right-click any entry listed in the table.
3
Select Save Contact Details.
4
Click Yes to create a new contact.
Figure 3.20 New Contact window
When attempting to create a contact entry in Microsoft Outlook, the Sphericall
Desktop will query if the intended contact is an individual or an organization. Once the
type of contact is specified, the Sphericall Desktop will query for more information
about the contact to be created.
Sphericall Desktop User Manual
3-39
SPHERICALL DESKTOP OPTIONS
Sphericall Desktop Integration with Microsoft Outlook
Figure 3.21 Contact Details window
The Sphericall Desktop, then, creates and populates the contact fields as listed in the
following table:
Table 3.1
Sphericall Desktop and Microsoft Outlook Contact Information
Field Name
Description
Personal Contact (Individual)
Subject
Individual’s name
Full Name
Individual’s full name (first and last)
Note: If a station on a Sphere system receives a call with caller ID number
information but no caller ID name information, the caller ID number is used
as the name in the contact. This information can later be modified to include
the appropriate contact name.
File As
Determines how contact will be filed (by first name, by last name, etc.): the
Sphericall Desktop uses this information as its primary lookup key when
searching for the appropriate contact
Company Contact (Organization)
Company Name
Name of the company
Note: If a station on a Sphere system receives a call with caller ID number
information but no caller ID name information, the caller ID number is used
as the name in the contact. This information can later be modified to include
the appropriate contact name.
File As
Determines how contact will be filed
Notes
Although the information within other fields can be changed, the information within the
File As and Caller ID fields should match for this contact. If the information in these
two fields does not match, the Sphericall Desktop may be unable to locate the contact
record and will subsequently create a new (and unnecessary) contact record.
If a Microsoft Outlook contact already exists for an individual or an organization, you
can associate it with the Sphericall caller ID information by typing the caller ID name
or number information in that contact’s File As field. The syntax of the information
3-40
Sphericall Desktop User Manual
.....
SPHERICALL DESKTOP OPTIONS
Sphericall Desktop Integration with Microsoft Outlook
included in the File As field, however, must match exactly the value that will be
received by the Sphericall Desktop.
LOCATING CONTACTS
If configured to do so, the Sphericall Desktop will attempt to locate a contact in
Microsoft Outlook using the caller ID information as a key to search the contacts list:
• The Subject field is searched first
• The Full Name field is searched second
• The File As field is searched third
• The Company Name field is searched last
Note: If information changes in Outlook, a user should refresh the Sphericall Desktop
by right-clicking on the Outlook folder in the Phonebook tab and selecting
Refresh.
IU P D A T I N G C O N T A C T S
Once a contact exists in Microsoft Outlook, the Sphericall Desktop’s Save Contact
Details command—invoked by right-clicking an entry listed in the Recent Calls tab—
allows users to update or create a telephone number field against that contact (with
users able to select the appropriate telephone number category). This allows for the
saving of a telephone number in such a way that Microsoft Outlook can use it at a
later date.
Note: The Sphericall Desktop will query users regarding their desired method of
saving a telephone number to a contact.
An issue exists with all v3.x Sphericall Desktops, however, in that when a
contact is created, the Sphericall Desktop does not update the Phone Number
field.
As such, users either must invoke the Save Contact Details command after the
Sphericall Desktop creates the contact or they must open the contact as it
appears in Microsoft Outlook and manually add the telephone number
information.
JOURNALING CALLS
The journal in Microsoft Outlook automatically records activities relating to contacts
selected from the Outlook contact list. Each entry in the journal represents one
activity (i.e. a telephone call when discussing the Sphericall Desktop). Entries are
recorded based upon the time and date of the activity.
Before Microsoft Outlook can journal calls for the Sphericall Desktop, you must
configure both applications to be able to support and recognize the appropriate
activities (i.e. telephone calls within a Sphere system).
To configure Microsoft Outlook for journaling
1
Open the Microsoft Outlook application.
From the Toolbar:
2
Click Tools\Options.
3
Click the Preferences tab.
Sphericall Desktop User Manual
3-41
SPHERICALL DESKTOP OPTIONS
Sphericall Desktop Integration with Microsoft Outlook
In the Contacts area:
4
Click Journal Options.
Figure 3.22 Journal Options window
In the Also record files from display area:
5
Select the Sphericall check box.
6
Click OK.
7
Click OK.
Note: Microsoft Outlook, not the Sphericall Desktop, manages the journal records.
The Sphericall Desktop can be configured, in the Options window\Outlook tab, to
pass the appropriate information to Microsoft Outlook for the call journaling.
Figure 3.23 Journal area
When a user completes a call, an entry is logged in the Microsoft Outlook journal that
includes the time and date of the call, its duration, as well as the contact name and/or
telephone number. A hyperlink (via URLdialer.exe) is also included as an attachment
that, when clicked, will dial that contact. All journal entries appear in Outlook’s Journal
folder under “Entry Type: Phone call.”
3-42
Sphericall Desktop User Manual
.....
SPHERICALL DESKTOP OPTIONS
Sphericall Desktop Integration with Microsoft Outlook
Figure 3.24 Journal display area
Because the Sphericall Desktop creates an internal identifier for the last created
journal entry, users can invoke the Last Journal Entry command to review the last
recorded entry.
Figure 3.25 Journal Entry window
Moreover, the Sphericall Desktop’s Phone Call Journal command requests that
Microsoft Outlook display its journal category of the same name. Because the
Sphericall Desktop cannot request Microsoft Outlook to open the phone call (i.e. the
Entry Type) header, users must open the header manually.
Sphericall Desktop User Manual
3-43
SPHERICALL DESKTOP OPTIONS
Sphericall Desktop Integration with Microsoft Outlook
Options have been added so that you can view a journal for an active call or create a
new journal entry for a call from the Sphericall Desktop.
To journal calls while using the Sphericall Desktop
While on an active call:
1
Right-click on the call in the Active Call pane.
2
Select Create Journal or Show Journal.
MISCELLANEOUS MICROSOFT OUTLOOK
FUNCTIONALITY
Integrating the Sphericall Desktop with Microsoft Outlook provides the additional
feature functionality:
• Given a specific contact entry and its corresponding contact entry form, Microsoft
Outlook can place a call to the contact using TAPI.
Figure 3.26 New Call window
• The Sphericall Desktop, in the Phonebook tab\Outlook Contacts directory, allows
users to browse their Microsoft Outlook contacts. However, only those contacts
that have telephone numbers defined in one of their tagged telephone number
fields (e.g. Business, Business2, Home, etc.) will be listed: having a telephone
number in the File As, Subject, Full Name, or Company Name fields is not
sufficient.
INTEGRATION NOTES
The performance of these Sphericall Desktop features is rather dependent upon the
performance of Microsoft Outlook. Because Microsoft Outlook’s automation interface
is not designed for speed, some scenarios may surface where some features do not
perform as expected:
• The machine may have slower processor, lower memory, or smaller hard drive
specifications
• Microsoft Outlook may have a large number of defined contacts
3-44
Sphericall Desktop User Manual
.....
SPHERICALL DESKTOP OPTIONS
Forwarding
• The machine may be running multiple applications in addition to the Sphericall
Desktop and Microsoft Outlook (i.e. CPU utilization is at a maximum level)
• Sphericall Desktop users may receive a large number of telephone calls, causing a
great deal of journaling activity within Microsoft Outlook
Some experimentation is necessary in order to find an appropriate balance of these
features based upon system and user constraints.
In order to reduce as much burden as possible, the Sphericall Desktop limits the fields
it analyzes during its searches and only looks for exact matches within those fields.
For example, the telephone number 847-2478200 as listed in the File As field will not
be matched with a caller ID of 8472478200.
FORWARDING
...........................................................
Forwarding options must be set for each user. If you have the Sphericall Desktop, you
can establish the settings for forwarding yourself.
FORWARDING
Forwarding, or the temporary "follow me" feature of the Sphere system, rings both
your extension and other internal extensions where the call is forwarded.
Note: Calls can be forwarded to external numbers, however, the phone will only ring
at the number to which calls are forwarded.
Note: Calls can be forwarded to one or more internal addresses, or one or more
external addresses. Calls cannot be forwarded to a combination of internal
and external addresses. If such a combination is configured, the Sphere
system will forward calls to the first address listed in the Forwarding area (be it
an internal or an external address).
To set forwarding conditions
The Forwarding window provides a summary of configuration. From this window,
navigation to forwarding conditions and advanced forwarding features may be
accomplished. However, to simply forward your calls to Voice Mail, for example, a
profile is not necessary.
From the Sphericall Desktop window:
1
Click Configure\Forwarding.
Sphericall Desktop User Manual
3-45
SPHERICALL DESKTOP OPTIONS
Forwarding
Figure 3.27 Forwarding window
In the Forwarding group box:
2
Select the Enable forwarding check box to enable forwarding.
3
Click OK.
ADVANCED FORWARDING
The Advanced Features window of the Sphericall Desktop allows users to forward
calls based on situations such as day of week or presence status.
3-46
Sphericall Desktop User Manual
.....
SPHERICALL DESKTOP OPTIONS
Forwarding
To configure Advanced Forwarding features
Figure 3.28 Forwarding window
1
Click Configure\Forwarding.
2
Click Advanced Forwarding.
PROFILES
Profiles are buckets used to specify how incoming calls to a station should be routed.
A forwarding profile contains one or more forwarding conditions, each of which
identifies a number and rules of when it should be applied. Forwarding profiles can be
scheduled, forced to be currently active, or disabled by the user.
The following table includes a number of scenarios for invoking profiles for
forwarding.
Profile Name
Sphericall Desktop User Manual
Forwarding Conditions
Monday Sales Call
• Monday, February 16
• 9:00 AM to 10:00 AM
• Presence Status: Appear Offline
Home Office on Friday
• Friday - Continues forever
• All Day
• Regardless of presence status
Lunch
• Monday thru Thursday - Continues forever
• 11:30 AM to 12:30 PM
• Presence Status: Out To Lunch
3-47
SPHERICALL DESKTOP OPTIONS
Forwarding
3
Click New Profile (and give it a name) or use the Default profile.
NAME
The user can name forwarding profiles. Names are typically chosen based on the
user activity during the period. For example, “In the office”, “Out to lunch”, “In a
meeting”, “Out of the office”.
SCHEDULING
Figure 3.29 Schedule window
From the drop-down menu next to the Schedule button:
4
Select the activity of the respective Profile.
Profile activity can be configured with the following settings:
• This profile is disabled
• This profile is scheduled
• This profile overrides all schedules
5
Click Schedule.
Note: The Schedule window automatcally appears after creating a profile.
A forwarding profile can be scheduled. A schedule is weekly based with each day
having a start and stop time along with an enable/disable flag. A schedule can be
configured to run forever (reoccurring weekly), or to run only between a set of dates.
Scheduling rules are available in the following increments:
3-48
Sphericall Desktop User Manual
.....
SPHERICALL DESKTOP OPTIONS
Forwarding
• Start of day
• End of day
• 15 minute increments
Once a schedule is defined, you will need to associate it with the appropriate Profile.
FORCING
A forwarding profile can be forced by the user to override scheduled profiles. Forcing
a second profile causes the first to revert to being scheduled.
ACTIVE PROFILE
One forwarding profile can be active at a time. When there is a conflict in schedules, it
is resolved using the following set of rules:
• If a profile is Forced, this is the current profile.
• All profiles that are Disabled are ignored.
• If the current time falls within the schedule of only one profile, this is the current
profile.
Note: If there is an overlap of forwarding profile schedules, the newest schedule (the
one created last) will be made active.
DO NOT DISTURB
Forwarding profiles can be configured to not ring the phone during specific presence
states. The forwarding profile DND state is managed separately from the manual
DND flag.
The presence states that effect DND can originate from either being manually or
automatically set.
When the forwarding profile’s DND is set, users who are capable of monitoring will
see the monitored client as being unreachable for voice calls.
FORWARDING CONDITIONS
6
Click Add Forwarding.
Sphericall Desktop User Manual
3-49
SPHERICALL DESKTOP OPTIONS
Forwarding
Figure 3.30 Forwarding Condition window
Four tabs: Destination, Call Origin, Call Presence and Call Precedence, allow users
the ability to determine various forwarding conditions and characteristics.
The Destination tab provides a search tool to locate a desired extension within the
organization. Users may also have the ability to forward calls to numbers outside of
the Sphere system.
• Type any logical name that makes sense in the Name field.
• Type the number without the outside service (use the default outside service as
listed in the Service field above) in the Number field. If your Sphere system has
more than one outside service (i.e. one for long-distance calls, one for local calls,
etc.), be sure to select the appropriate outside service from the Service dialog box.
• If your phone is set to forward to an outside number, it will not ring at your desk
phone and the outside number. It will only ring at the number where you have
forwarded the call.
• Once you have enabled forwarding to an outside number, the call will not follow
any other forwarding conditions.
• Once the destination is added, choose the number of rings before the call forwards
to this previously-defined number.
The Call Origin tab lets you apply conditions for forwarding calls based upon call
origin, and caller I.D. presentation.
The Presence tab lets you apply conditions for forwarding calls based upon presence
status.
The Call Precedence tab lets you apply conditions for forwarding based upon priority
calls, non-priority calls, or all calls.
Note: Precedence calling (a CallNOW feature) allows users to specify a priority level
for each call based on need, importance, and profile configuration within the
Sphere system. Based on the precedence level, the call receives a higher
routing priority than that of a regular telephone call on the network.
The CallNOW feature may or may not be enabled within your organization’s
3-50
Sphericall Desktop User Manual
.....
SPHERICALL DESKTOP OPTIONS
Forwarding
Sphere system. Consult your organization’s Sphere system Administrator for
further information.
7
Click OK.
FORWARDING - EVERYDAY SITUATIONS
Here is a realistic scenario for forwarding calls based on presence. Typically,
Sphericall Desktop users have their calls forwarded to voice mail after three or four
rings. A user can have another forwarding condition to go to voice mail immediately
when he is on the phone.
Figure 3.31 Forwarding Profiles
MULTIPLE EXTENSIONS WITH FORWARDING
At the top of the Forwarding window is a drop-down list box with your name in the
user field.
To set multiple extensions
If you have been given "ownership" of more than one extension or group extension:
1
Click the drop-down list box with your name in the user field to view each of the lines of
which you have ownership.
For example, it is common for one user in a Sales or Support group to have
ownership of the Sales or Support number; this person can set its forwarding and
coverage options.
2
Set the forwarding options for that extension.
3
Click OK to return to the main Sphericall Desktop window.
NUMBER SPECIFIC FORWARDING
Users can route calls based on caller ID name and number ranges. If the incoming
caller name contains the string, it will be a match. For example, a specification string
of "Sphere" will trigger a match for inbound calls with caller name of "Spherecom",
"Redsphere", "Thesphereishere", etc.
A specification string of "184779396" will trigger a match for inbound calls with caller
numbers of "8477939600-8477939699" and not "2184779396".
Sphericall Desktop User Manual
3-51
SPHERICALL DESKTOP OPTIONS
Forwarding
You can establish the following condition:
•
•
Sphericall Desktop Presence set to “Out to Lunch”
Calls received from this phone number, “18474040540” will forward immediately to your
cellular phone number, “18474927527”
In order for the number specific forwarding feature to function, the Caller ID field in the
Call Origin window, must include a “1” or a “+1” before the phone number.
Figure 3.32 Forwarding Condition window
In the previous scenario, calls are forwarded from a specific phone number. However,
you have the ability to forward all calls from all phone numbers within an area code.
For example, typing 1847 into the Caller ID area of the Call Origin window includes all
calls placed from the 847 area code.
Figure 3.33 Forwarding Condition window
3-52
Sphericall Desktop User Manual
.....
SPHERICALL DESKTOP OPTIONS
Forwarding
HANDSET FORWARDING
Forwarding from an analog or digital handset is accomplished by pressing *72+
<forwarding to number> #. Multiple numbers may be entered in this fashion. Pressing
*73 deletes all forwarding conditions no matter from where they were set (handset or
phone GUI). The forwarding button on IP phones allows entry of a single number.
Pressing the forwarding button for a second time duplicates the *73 functionality by
deleting all forwarding conditions. Forwarding numbers that were set using the
handset are denoted in the phone and Sphericll Desktop by a destination description
of “Configured from handset”.
In Sphericall v4.0+, handset forwarding is, in effect, like entering a new handset
forwarding number. This will create a forwarding condition with defaults of: “Apply this
Condition” ring count of “immediately”, “continue ringing my phone” is enabled, and
no presence or precedence filters.
Figure 3.34 Forwarding Conditions window
The handset forwarding conditions will be shown in every forwarding profile.
Changing or deleting a handset forwarding condition in one forwarding profile will also
update the view in all other profiles.
OUTLOOK CALENDAR INTEGRATION
Outlook integration allows Sphericall Desktop presence to automatically be set to “In
a Meeting” based on appointments in the user’s Outlook calendar.
For times when the system automatically sets the presence to “In a Meeting”, the user
has the option to set presence notes to one of the following:
• Subject of the meeting as defined in the Outlook meeting request
• Location of the meeting as defined in the Outlook meeting request
• Indication the meeting is out of the office as defined in the Outlook meeting request
• Any combination subject, location, or out of office indication
This feature is defaulted “on” and can be disabled by the user.
Sphericall Desktop User Manual
3-53
SPHERICALL DESKTOP OPTIONS
Do Not Disturb
QUEUING
Queuing is the act of “stacking” or holding calls to be handled by a specific person or
group of people. Sphericall supports group addresses that are used, in many cases,
to set up small groups of agents to handle many calls. An environment such as a help
desk benefits from the queue feature.
To use the queuing feature
Note: The queuing feature must be enabled by your organization’s Sphere system
administrator.
Note: A queuing announcement must be associated with your extension.
Note: In order for the Queuing feature to function, maximum calls for a line must be
set to 1.
From the Sphericall Desktop:
1
Click Configure\Forwarding.
2
Click New Profile to create a queuing profile.
In the Schedule-Queuing window:
3
Determine the schedule for which queuing will apply.
4
Click Queue Call to set the queuing conditions for this profile.
5
Click OK.
6
Click OK.
DO NOT DISTURB
...........................................................
The Do Not Disturb button on the toolbar of the Sphericall Desktop window allows you
to "silence" your phone: the phone will not ring at your desk. All calls go directly to
your forwarding options.
If no forwarding options are set, the phone will ring a “fast busy.”
CAUTION!
3-54
PHONE MANUFACTURERS HAVE DIFFERING WAYS OF INDICATING
THAT DO NOT DISTURB IS ACTIVATED, AND IT IS EASY TO
FORGET THAT YOU HAVE DO NOT DISTURB ACTIVATED.
REMEMBER TO DEACTIVATE IT TO RESUME NORMAL CALL
ACTIVITY.
Sphericall Desktop User Manual
.....
SPHERICALL DESKTOP OPTIONS
Phonebook Entries and Folders
PHONEBOOK ENTRIES AND FOLDERS
...........................................................
THE PHONEBOOK PANE
The Phonebook pane on the Sphericall Desktop window displays your personal
extensions. By default, extensions on your organization’s Sphere system will be listed
in a "tree" format. If you expand the tree, you will see all of the users on your system
divided by groups.
This allows you to set up your personal folders on your Sphericall Desktop. All you
need to do to place a call is double-click an entry in the Phonebook. Information in the
Phonebook is stored on your local PC. If you want to transfer those numbers to a new
PC, you must contact your Sphere system administrator.
To add a personal folder
From the Sphericall Desktop window:
Figure 3.35 Sphericall Desktop window
1
Click the Phonebook tab.
2
Right-click the Phonebook directory to select New Folder.
3
Type a logical name for the folder.
4
Press Enter.
A new folder has been created. Now you can add entries to the folder.
5
Highlight the new folder.
Sphericall Desktop User Manual
3-55
SPHERICALL DESKTOP OPTIONS
Phonebook Entries and Folders
From the Sphericall Desktop menu:
6
Click Phonebook\New Entry.
Figure 3.36 Phonebook Entry window
In the Details group box:
7
Type the First Name and Last Name for the person you are adding to the Phonebook
entry. If only using one word, type the word in the Last Name field.
For example, Home.
8
Type a name in the Company field if desired.
9
Select the Image check box if you have a bitmap image of someone.
10
Click the associated button to browse your computer for a bitmap image.
The bitmap image appears in the Active Calls pane when placing or receiving calls.
Figure 3.37 Numbers group box
In the Numbers group box:
11
Enter a number in the Number column to associate with the Type of phonebook entry.
Phonebook entry Types are Business, Business2, Home, Home2, Car, Mobile, Other,
Pager, Radio, ISDN, Company, Callback, and Assistant.
3-56
Sphericall Desktop User Manual
.....
SPHERICALL DESKTOP OPTIONS
Park Zones
12
Select Inside in the Address Type column to specify phonebook entries within your
organization.
13
Select Outside in the Address Type column to specify phonebook entries outside of your
organization.
When Outside is selected, country code and area code (+1(XXX)) automatically
populate the Number column.
14
Select Special Outside in the Address Type column to specify entries not following the
+1(XXX) format.
Special Outside numbers bypass internal processing and are placed as is as a normal
call. An example of a Special Outside number is 411.
Note: Emergency numbers should not be configured in the phonebook.
15
Click OK.
You will now see this new entry in the recently-created folder. Whenever you call or
receive a call from this number, you will see this image in the Active Calls pane.
You can drag or copy Outlook Contact information and Default Zone information into
personal folders.
PARK ZONES
...........................................................
Park zones place calls in “hold” parking lots where user’s can retrieve these calls from
any phone on the Sphere system.
For example, an operator within your organization answers a call from a customer
who needs to speak to you. However, you are away from your desk. The operator can
place the caller in a park zone, and use your organization’s paging system to tell you
that the caller is in a park zone. You can retrieve the call from any phone within your
organization.
The Sphere system has a number of park zones to aid in placing calls on hold and
retrieving them from another phone within the system: instead of placing a call on
hold, you can use the Park feature. This allows you to summon another person in the
organization to unpark the call by using the Sphericall Desktop or by applying the star
code command *91 plus the number of the appropriate park zone.
To place calls into a park zone
From the Sphericall Desktop window:
1
Click the Park button.
or
Right-click the call in progress.
2
Select Park.
Sphericall Desktop User Manual
3-57
SPHERICALL DESKTOP OPTIONS
Park Zones
Figure 3.38 Park Zones progress image
10 park zones
To retrieve calls from the park zone
1
Select the call currently parked in a park zone (identified by the Park button).
2
Right-click the call.
3
Click Park.
Calls are unparked by first call in, first call out. The person holding the longest in a
park zone will be the first caller unparked from a single zone.
DIRECTED PARK
A call may be parked at another station on your organization’s Sphere system. For
example, if a user receives a call at an inappropriate location, the call may be parked
at the user’s station by right-clicking on a user’s extension and selecting park.
The user can access the parked call at the extension to which the call was parked by
going off-hook.
Note: The telephone set provides a tone notification until a directed park call is
picked up.
PARK EXTENSIONS
Users may park calls to specifically-assigned park extensions.
3-58
Sphericall Desktop User Manual
.....
SPHERICALL DESKTOP OPTIONS
Pickup
Note: A separate Park Zone tab may be added in the Options\Extensions tab. Refer
to the Extensions tab section in this chapter for more information on Park Zone
tab configuration.
To park calls into park extensions
1
Drag and drop the active call to the desired park extension.
or
2
Right-click the park extension to which you want to park the call.
3
Click Park At.
To retrieve calls from park extensions
1
Select the call currently parked in a park extension.
2
Click Pickup.
PICKUP
...........................................................
The Pickup feature of Sphericall Desktop allows you to answer a ringing phone at
someone else’s desk. If you hear a ringing phone, follow this procedure.
To pickup a call using the Sphericall Desktop
From the Sphericall Desktop window:
Figure 3.39 Pickup button
1
Click the Pickup button.
Or
Switch to another Pickup Group by clicking the arrow next to the Pickup button.
or
2
Right-click the extension that you wish to pick up.
3
Select Pickup.
You should now be connected to the person dialing the other person’s desk.
To pickup a call using the telephone set
1
Dial *92 from your telephone keypad.
This retrieves a call that is ringing within your geographical Pickup Group area.
To pickup a call ringing at a particular extension
Dial *93 and the appropriate extension number.
Sphericall Desktop User Manual
3-59
SPHERICALL DESKTOP OPTIONS
Call Log
CALL LOG
...........................................................
Sphericall Desktop users can use the Call Log to review the most recent calls made to
and from their extension.
To configure the Call Log
From the Sphericall Desktop window:
1
Click View/Call Log.
Figure 3.40 Call Log window
In the Viewing Options group box:
2
Select which calls are logged.
The drop-down list box options are All, Inbound, or Outbound.
3
Select the number of days to log calls.
Calls may be logged from one to thirty days.
4
Sort the order by which calls are to be logged.
Calls may be sorted by Date & Time, Name, Number, or Duration.
5
Select Limit to calls with a name or number that matches if you prefer to log specific
calls.
6
Click Apply.
You may highlight a call and click Dial to auto-dial a number from the log.
LINE DETAILS
...........................................................
You can configure and review details of your telephone extension.
3-60
Sphericall Desktop User Manual
.....
SPHERICALL DESKTOP OPTIONS
Enter A Number To Dial
To View Line Details
From the Sphericall Desktop window:
1
Click Configure\Line.
Figure 3.41 Line Details window
Line Detail information available for review includes Address, Port, and Zone.
Line Detail information that can be changed includes Pickup Group, maximum
calls, call waiting tones, caller ID information, and Primary extensions.
Maximum Calls
The Maximum Calls field is the maximum number of concurrent calls a station/user
can have before inbound calls stop being offered. This field is not used when
originating calls. For example, a user that has “max calls” set to 2 will not receive any
more calls if he already is managing 2 active calls although the user may originate a
third, fourth, etc. call.”
ENTER A NUMBER TO DIAL
...........................................................
To dial from the Sphericall Desktop
From the Sphericall Desktop:
Sphericall Desktop User Manual
3-61
SPHERICALL DESKTOP OPTIONS
Enter A Number To Dial
Figure 3.42 Dial button
1
Click the Place Call button on the Sphericall Desktop toolbar to access the dial pad
window.
Figure 3.43 Place a new call window
In the Number field:
2
3-62
Click Extensions to view numbers within your organization.
Sphericall Desktop User Manual
.....
SPHERICALL DESKTOP OPTIONS
Enter A Number To Dial
Figure 3.44 Choose An Extension window
3
Highlight the appropriate extension to dial.
or
4
Click Services to select an Outside Service number for dialing numbers outside of your
organization.
5
Highlight the appropriate Outside Service number.
6
Click OK.
7
In the Number box, select a previously dialed number or enter a number you wish to dial.
Or
Using the mouse pointer, click the numbers on the Keypad to dial a desired number.
8
Click Dial.
Sphericall Desktop User Manual
3-63
SPHERICALL DESKTOP OPTIONS
Enter A Number To Dial
3-64
Sphericall Desktop User Manual
SPHERICALL V OICE MAIL
...................................
4
....
SPHERICALL VOICE MAIL
...........................................................
Sphericall Voice Mail is a user-friendly, feature-rich application that includes
voicemail/auto attendant and unified messaging.
VOICE MAIL AND THE SPHERICALL DESKTOP
To access Sphericall Voice Mail
When dialing from inside your organization:
Sphericall Desktop User Manual
4-65
S P H E R I C A L L VO I C E M A I L
Sphericall Voice Mail
Figure 4.1
Sphericall Desktop window
Voice Mail
Extension
1
Dial or double-click on the desired extension.
OR
When dialing from outside your organization:
2
Dial the desired phone number.
3
Press # or enter the desired phone number.
4
Enter your extension + #.
Note: At your own phone, press # only.
5
Enter your password + #.
Once you have successfully entered a name and password, Sphericall Voice Mail
gives you access to a subscriber menu.
4-66
Sphericall Desktop User Manual
.....
S P H E R I C A L L VO I C E M A I L
Sphericall Voice Mail
EMPLOYEE DIRECTORY LOOKUP
Upon dialing into Sphericall Voice Mail for the first time, you will be asked to enter a
new password. You will also be prompted to record your name for association with the
employee directory lookup feature.
Sphericall Desktop User Manual
4-67
S P H E R I C A L L VO I C E M A I L
Sphericall Voice Mail
L
4-68
Sphericall Desktop User Manual
.....
S P H E R I C A L L VO I C E M A I L
Sphericall Voice Mail
To play back voice mail messages in Microsoft Out look f rom your desktop
1
Figure 4.2
Double-click the message in your Microsoft Outlook Inbox.
Voice Mail Form window
Time Stamp
Volume
Control
Note: When you pick up a message in Microsoft Outlook, the time and date for the
message that was left are stamped in the Received column. When you play
back the message, the time and date are stamped in the Sent field of the play
back form. These times may vary depending on system resources.
A form will appear that provides you with a way to listen and respond to voice mails.
From the form, you can choose which playback and recording device to use. The
length of the message and the current playback position are displayed in seconds.
A tracking bar is available to place the current position anywhere in the file.
Messages can be forwarded, replied to, or deleted. You are also presented with an
option to record an introduction when forwarding and replying to voice messages.
A volume control on the lower right hand side of the form allows you to adjust the
volume to a desired level.
Table 4.1
2
Click Configure\AGC (Automatic Gain Control) to attempt to play back all voice mail
messages at a constant volume level.
3
Click Configure\Volume to adjust the volume levels of a voice mail message.
Sphericall Voice Mail Form Commands
Button Feature
Sphericall Desktop User Manual
Action
To record a message
Press the red sphere
To stop recording
Press the black square box
To save the recording
Press the diskett button
To close the window
Press File/Exit or X in the upper right corner
4-69
S P H E R I C A L L VO I C E M A I L
Sphericall Voice Mail
To adjust audio settings from the voice mail playback window
1
Select Configure from the menus.
Select or de-select AGC (Automatic Gain Control).
A feature that attempts to playback voice mail messages through the PC at a constant
volume level.
To set up a password in Microsoft Outlook for accessing Sphericall Voice Mail
If a user forgets his password for accessing Sphericall Voice Mail from his telephone
set, he can create a new password in the Microsoft Outlook application. However,
before doing so, the user must activate this feature on the Sphericall Desktop.
1
Open the Sphericall Desktop.
From the toolbar:
2
Click Configure\Options.
3
Click the Outlook tab.
Figure 4.3
Options window
In the Sphericall Voice Mail area:
4
Select the Show Sphericall Voice Mail menu options check box.
5
Click OK.
6
Open the Microsoft Outlook application.
From the Toolbar:
7
4-70
Click Tools\Voice Mail\Configuration.
Sphericall Desktop User Manual
.....
S P H E R I C A L L VO I C E M A I L
Sphericall Voice Mail
Figure 4.4
Voice Mail window
In the Password area:
8
Type a password for accessing Sphericall Voice Mail through the telephone set in the
Password field.
9
Re-type the password in the Confirm Password field.
10
Click OK.
Note: For further information on integrating Microsoft Outlook with Sphericall Voice
Mail, confer with your organization’s Sphericall system Administrator.
To set your Extended Absence Greeting from Outlook
In Microsoft Outlook:
1
Click Tools\Voice Mail\Configuration.
2
Click the I am out of the office. Play the Extended Absence Greeting radio button.
3
Click OK to exit.
To save your voice messages in Outlook
In Microsoft Outlook:
1
Leave voice messages in your inbox to save them and access them from either the
Outlook application or from the telephone.
To sort your voice messages in Outlook
In Microsoft Outlook:
1
Creat a Voice Mail folder (or any other appropriate name) in your Personal folders area.
2
Drag and drop voice messages to this folder to save.
Note: These messages are no longer accessible from the telephone.
Sphericall Desktop User Manual
4-71
S P H E R I C A L L VO I C E M A I L
Sphericall Voice Mail
To delete voice messages from Outlook
1
Highlight the voice message in the folder.
2
Press the Delete key on the keyboard OR right click and select the Delete option.
Note: Messages deleted in Outlook are not longer available by telephone. Messages
deleted via the telephone are no longer available for listening in Outlook.
To playback voice messages from a mobile device
4-72
1
If you are trying to play Sphericall Voice Mail on a hand-held device, then you may need
some additional software.
2
There are several open source, free Media Players that support both Palm OS and
Windows Mobile - http://tcpmp.corecodec.org. These players are robust and well
supported.
3
Once installed the only change required is to select the WAV file under the list of
supported file formats. Opening a voice mail message and clicking on the attachment
cause the audio to be automatically played.
Sphericall Desktop User Manual
SPHERICALL D ESKTOP SOFTPHONE
...................................
5
....
SPHERICALL DESKTOP SOFTPHONE
...........................................................
OVERVIEW
The Sphericall Desktop Softphone is an endpoint option that proves valuable for
telecommuters and employees who need their extensions to follow them to other
locations. The Sphericall Softphone turns a networked PC into a virtual business
telephone, with features just like any other extension on the system. Using Sphericall
Desktop software and the PC’s sound card or a USB headset, there is no need for a
conventional phone.
SOFTPHONE USER DETERMINATION
...........................................................
The Sphere system administrator must consider how the softphone user is going to
be using his phone:
Local Softphone User
• This user has a physical station/phone
• This user has User Rights configured for this station/phone
Remote Softphone User
• This user exists without a physical station/phone
• This user requires the configuration of a softphone line
The administrator needs to determine this before any further planning can
continue. Once this is determined, the paths for softphone line creation
differentiate.
The option to install the Sphericall Desktop Softphone feature may be available
from a user’s Sphericall Desktop. However, it is highly recommended that your
administrator perform all administrarive tasks as they relate to the softhphone.
SPHERICALL SOFTPHONE LOCAL USER
...........................................................
This mode lets a user control a Media Gateway station line. As calls are presented to
the Media Gateway, a representation is also presented to the Sphericall Desktop.
Sphericall Desktop User Manual
5-73
SPHERICALL DESKTOP SOFTPHONE
Sphericall Desktop Softphone Remote User
Both the Media Gateway and the Sphericall Desktop control the same call which
allows a user to toggle between their handset and a USB headset.
VERIFICATION
Before creating a Sphericall Desktop Softphone line, the Sphere system administrator
should verify that certain elements are in place:
• Verify that the user (for whom you are creating a softphone line) has an
extension number and an associated station.
• Verify that the user has user rights to the appropriate station in order to open
their Sphericall Desktop.
• Test the user’s Sphericall Desktop
• Verify that the appropriate USB and sound card drivers required for
softphone use are installed on the local machine. Refer to the Sphericall
Desktop Softphone System Specifications table for recommended PC
Communication devices.
• Test the functionality of the USB headset.
After verifying these elements, please refer to thePC Phone
Settings topic in this chapter for further information related to
the Sphericall Desktop Softphone feature.
SPHERICALL DESKTOP SOFTPHONE REMOTE
USER
...........................................................
This mode provides an independent gateway and call control interface within one
application. In this mode, the Sphericall Desktop Softphone has no physical station.
An example of a remote user would be an organization who has a sales
representative with an office in his home. With the appropriate network connections
(see Sphericall Desktop Softphone System Specifications), his personal computer
can act as an extension within the organization.
VERIFICATION
Before creating a Sphericall Desktop Softphone line, the Sphere system administrator
should verify that certain elements are in place:
• Verify that the user has Local Administration rights, or the right to install
software on their local machine.
• Verify that the appropriate USB and sound card drivers required for
softphone use are installed on the local machine. Refer to the Sphericall
5-74
Sphericall Desktop User Manual
.....
SPHERICALL DESKTOP SOFT PHONE
PC Phone Settings
Desktop Softphone System Specifications table for recommended PC
Communication devices.
• Test the functionality of the USB headset.
Please refer to the PC Phone Settings topic in this chapter for
further information related to the Sphericall Desktop Softphone
feature.
At this point, except for a few minor points, where noted, the
documentation does not differ between a local user and a
remote user..
PC PHONE SETTINGS
...........................................................
You can configure a number of communication/phone options in the PC Phone
Settings tab on the Sphericall Desktop.
To set PC Phone Setting options
From the Sphericall Desktop:
1
Figure 5.1
Click Configure\Options\PC Phone.
Options window
In the Options group box:
2
Select Automatically switch my communication device to my phone when I pick up the
handset on the phone.
Sphericall Desktop User Manual
5-75
SPHERICALL DESKTOP SOFTPHONE
PC Phone Settings
In the Preferred Communication Device group box:
3
Select the PC or Phone radio button to specify the communication device to use with the
Sphericall Desktop Softphone.
In the PC Communication Devices group box:
4
Select the device the user will use to speak into the softphone in the Speaking Device
list box.
5
Select the device that the user will use for listening with the softphone in the Listening
Device list box.
6
Click OK.
Figure 5.2
Volume Settings window
Dial Pad
While on an active call, you can adjust the volume of the either the microphone or
speakers from the Sphericall Desktop. As well, you can click on the keypad the dial
additional numbers (an extension, for example) while on a call.
SWITCHING BETWEEN MODES OF OPERATION
When the softphone is started, the user is presented with a list of lines to which the
logged in user has rights (unless the user only has rights to one extension). Choosing
a hardware MG line will put the softphone in gateway call control mode. If the PC
supports audio hardware, the switch device command is available, thus denoting the
availability of dual mode operation.
ALERTING
Depending on which mode is established on the softphone, an inbound call will alert
the softphone, the MG station or both.The softphone provides options for alerting of
inbound calls:
• ring the telephone
• play a predefined audio file
• ring the telephone and play a predefined audio file
• no audio indication - visible animated ringing phone icon
These options are configured in the Calls tab on the Sphericall Desktop
To configure options for alerting of an inbound call
From the Sphericall Desktop:
1
5-76
Click Configure\Options\Calls.
Sphericall Desktop User Manual
.....
SPHERICALL DESKTOP SOFT PHONE
PC Phone Settings
Figure 5.3
Options window
In the Incoming Calls group box:
Sphericall Desktop User Manual
5-77
SPHERICALL DESKTOP SOFTPHONE
PC Phone Settings
INCOMING CALLS OPTIONS
Check Box
Description
Popup if minimized
If the Sphericall Desktop is minimized, the window will popup when a call
is received.
Ring my phone when
a new call arrives
Select this check box to enable the phone to ring when a new call
arrives.
When a new call
arrives, play the
following through the
specified audio
device
• Play ringing tone - Select this radio button to play the familiar ringing
tone.
• Play this sound - Select this radio button to enable the speakers to
broadcast a .wav file. when a user receives a call. Click Browse to
select the appropriate .wav file.
Device: Select the appropriate audio device from the drop-down list box.
If a second call
arrives, play the
following through the
specified audio
device
• Play ringing tone - Select this radio button to play the familiar ringing
tone.
• Play this sound - Select this radio button to enable the speakers to
broadcast a .wav file. when a user receives a call. Click Browse to
select the appropriate .wav file.
Device: Select the appropriate audio device from the drop-down list box.
2
Pop up a message in
the system tray on
missed calls
Select this check box to provide caller ID information in the system tray
when a call is missed.
Popup a message in
the system tray when
a new call arrives
Select this check box to provide caller ID information in the system tray
when a new call arrives.
Automatically answer
call after n rings
Select this check box if you wish the call to be answered after a defined
number of rings.
Click OK.
ANSWERING
Either the MG station or the softphone can answer an inbound call. You can configure
the preferred audio device on the Sphericall Desktop/Softphone in the PC Phone
Settings tab. When you answer a call by double-clicking on the call, the preferred
audio device will be used. Though, you have the ability to switch audio devices during
a call.
5-78
Sphericall Desktop User Manual
.....
SPHERICALL DESKTOP SOFT PHONE
PC Phone Settings
To switch audio devices during a call
Figure 5.4
Sphericall Desktop window
On an active call:
1
Right-click the call in the Calls pane.
2
Select either PC or Phone for the desired audio device.
The preferred communication device is indicated in the lower left hand side of the
Sphericall Desktop window.
Note: You may also select the preferred communication device from the list box in
the upper right hand side of the Sphericall Desktop.
DIALING
The softphone has a touch tone feature that allows users to place calls from a virtual
keypad during an active call.
Sphericall Desktop User Manual
5-79
SPHERICALL DESKTOP SOFTPHONE
PC Phone Settings
To access the touch tone feature
On an active call:
1
Right-click the call in the Calls pane.
2
Select Keypad.
Figure 5.5
3
Place a New Call window
Type the appropriate digits using the computer’s keypad.
Note: You will need to dial the appropriate outside service to place calls when using
the touch tone feature.
5-80
Sphericall Desktop User Manual
A DDITIONAL SETTINGS
...................................
6
....
In this chapter, you will learn about
• Call Recording
• The Conference Bridge
• Sphericall Desktop Video
• Sphericall Desktop Updates
• User Images in the Sphericall Desktop
• Phonebook Export/Import Feature
• Web Browser Dialing
CALL RECORDING
...........................................................
ON DEMAND RECORDING
The Sphericall Desktop allows users to playback call recordings that were initiated on
demand.
• If an on-demand recording is initiated while a Sphericall Desktop has the line open,
the username will be stored with the call recording. This applies whether an on
demand call recording was initiated from an IP phone or by the Sphericall Desktop
application.
• If an on-demand recording is only initiated from an IP phone when no Sphericall
Desktop has the line open, no username will be stored against the recording.
The Sphericall Desktop user is allowed to access on-demand recordings for playback
that match both their primary extension and username. Playback is restricted for call
recordings that are from a user’s primary extension but have usernames that do not
match the current logged-in user "viewable" in the call log list. Any person who has
privileges to open a station can view the call log for the primary extension, but only
users that made the call are allowed to play back the recording. A user that can
playback an on-demand recording can also delete the recording.
Sphericall Desktop User Manual
6-81
ADDITIONAL SETTINGS
Call Recording
RECORDING NOTIFICATION
In the United States, State laws, which govern use of recordings, vary. Many states
require both parties to be notified when a call is being recorded. If an inbound call is to
be recorded, it is recommended the call first go through an auto-attendant that
informs the caller the conversation may be recorded.
Given the notification requirements of some states, the Sphere system administrator
must decide if it's appropriate for any outbound calls to be automatically recorded.
Recipients of outbound calls should be notified by the caller before the on-demand
recording feature is invoked.
Call recording is generally done for quality monitoring, workforce management,
training, evaluation, verification, dispute resolution and for accurate incident
reconstruction. When considering call recording in your enterprise, it is helpful to
know the laws in your country or state before you commence recording. Many
countries mandate that you notify one or more parties that the call is being recorded.
Sample Notification Statement:
“Thank you for calling ABC Medical, your call may be monitored for training or quality
assurance purposes.”
Please consult your system administrator for an approved Recording Notification.
Some countries or localities may require by law specific notification statements..
Visual Indication of Recording:
IP phone and Sphericall Desktop users will be provided with a visual indication that
their call is being recorded as follows:
• On-Demand Recordings
Sphericall Desktops will have an active Call Recording button on the toolbar for users
who have permission to do on-demand recording.
• Only the caller who initiates an on-demand recording will have an icon indicating that
they are recording.
• IP phones enabled for on-demand recording have a “record” softkey available. Phones
without this button, do not have the capability to record on demand.
• IP phones that have the “record” softkey can record on demand. If recording, the only
indicator that there is a recording in progress is the availability of the softkey “End
Recording.”
• Unless other parties are notified, they will not know that they are being recorded (auto
record or on demand) by another caller.
• Automatic Recordings
If the system is enabled for a station or line to have an AutoRecord Indicator, you will
see an icon indication that a call is being recorded.
• If the system is not enabled for AutoRecording Indicator, you may not know if or when
the system is auto recording.
• If a phone or user is set to AutoRecord, this user cannot also do on-demand recording.
To record a call from the Sphericall Desktop
While a call is active:
• Click the Record icon located on the Sphericall Desktop toolbar.
6-82
Sphericall Desktop User Manual
.....
ADDITIONAL SETTINGS
Call Recording
Figure 6.1
Record icon
Once call recording is applied, the calls pane will display caller information with an
icon of a phone and a cassette.
Figure 6.2
Call Recording indicator
CALL RECORDING PLAYBACK
The Sphericall Desktop allows playback of recorded calls. The call log viewer list has
a modified display to indicate which calls are recorded. Selecting a recorded call
followed by invoking a new "Play" command displays an integrated playback
application similar to the one used for the playback of voice mail messages. The
recorded call player provides indications for recording length, current playback
position, caller name and address, and called name and address, as well as the
traditional buttons for play, stop and pause.
Auto-Recording Playback
The Sphericall Desktop allows the user to select other extensions and addresses
over which they have been given permission to view and playback calls.
Auto-recorded calls cannot be deleted by the user.
Since each endpoint initiates its own recording, it is possible that two recordings are
made for the same call. The Sphericall Desktop user may be granted permission to
playback both recordings. Each recording is indexed from the endpoint's address that
initiated the recording.
Saving Recordings
Calls that can be played back by a user can also be saved to a local directory. The
original copy of the recording will remain on the resource server.
E-mail Recordings
Call recordings that can be played back by a user can also be e-mailed via Outlook.
The original copy of the recording will remain on the resource server.
Note: Contact your Sphere system administrator for guidelines and details regarding
how long recordings will be archived on your system and therefore available
for saving or e-mail.
To playback a recorded call
Note: The icon for playback of a recorded call is the same for initiating a recorded
call. The text below the icon changes from “View” to “Record” when a call is
active.
From the Sphericall Desktop:
Sphericall Desktop User Manual
6-83
ADDITIONAL SETTINGS
Call Recording
1
Click View\Call Recordings.
OR
Click the View icon.
Figure 6.3
Record icon
Figure 6.4
Call Log window
2
Highlight an entry in the Call Log list.
3
Use the call recording tools to play, delete, or save a recording, or e-mail a recording to
an individual’s e-mail address.
When a call recording is played back, a form (similar to the form used for playback of
Sphericall Voice Mail) appears.
If you delete a recorded call, the record will remain in the window until it is purged.
The purging of call logs is a system-wide setting, and is defined by your system
administrator.
Note: Be sure to use the call recording tools to play back a call recording. Double-
clicking a call log entry, instead, dials that entry’s phone number.
Note: If you are the owner of a secondary (tertiary, etc.) address, you have the option
to view the addresses call recordings by typing it into the “for address” field.
Or, you can select from available addresses by clicking the Addresses button.
6-84
Sphericall Desktop User Manual
.....
ADDITIONAL SETTINGS
Conference Bridge
Figure 6.5
1
Call Recording Playback form
2 3
1.Play
2.Pause
3.Stop
4
4.Volume Control
CONFERENCE BRIDGE
...........................................................
Conference addresses, associated with the Sphere MeetingHub, allow up to 60 users
to dial-in to a conference call managed by the Sphericall Softswitch.
Note: If you are adding callers to the Conference address from an IP phone, you can
use the drag and drop feature of the Sphericall Desktop application. Because
the Sphere system will interpret this as a "conference" call, you will be limited
in the use of the drag and drop functionality with the integration.
To add calls to the Conference Bridge
For the user who will be forwarding calls to the Conference address:
1
Initiate a call to the address (i.e. dial extension 530).
2
As additional calls are received for the conference, place the calls to the address (i.e.
extension 530) on hold.
3
Double-click the call represented in the Sphericall Desktop application to answer the
incoming call.
4
Right-click the new incoming call.
and
Select Transfer.
OR
Click the Transfer button on the toolbar.
and
Type the Conference address.
and
Press enter/click Transfer.
5
Double-click the on-hold call in order to return to the conference call.
Sphericall Desktop User Manual
6-85
ADDITIONAL SETTINGS
Sphericall Desktop Video
SPHERICALL DESKTOP VIDEO
...........................................................
OVERVIEW
The Sphericall Desktop uses DirectX technology to handle the capturing and
displaying of video. When a video call is in progress, a user selects the Local Video
tab to display the video that is being sent to the other user.
To receive the video, a user selects the Network Video tab. The video from the other
party will be available even if the recipient does not have a camera. Without a
camera, video may be received but not sent.
Note: For camera installation instructions, refer to the documentation supplied with
your camera.
CAMERA CONFIGURATION
Users may change their camera settings through a menu displayed over the
Sphericall Desktop Local Video window.
Note: Your camera must support the ability to configure settings from the Sphericall
Desktop. If your camera does not support this feature, a message will appear.
Figure 6.6
6-86
Local Video tab
Sphericall Desktop User Manual
.....
ADDITIONAL SETTINGS
Sphericall Desktop Video
To configure camera settings
From the Sphericall Desktop:
1
Click Local Video.
2
Right-click in the window.
3
Click Configure Video Source.
or
4
Click the Configure Video Settings icon.
Note: Camera video settings vary from camera to camera. The following property
windows are examples of a particular camera’s settings.
VIDEO CONFIGURATION
Several options for sending and receiving of video are configured in the Video options
tab.
Note: The Video options tab is not available if Video is disabled in the profile
assigned to the user. For further information, consult your organization’s
Sphere system administrator.
Figure 6.7
Video options tab
To configure video settings
From the Sphericall Desktop:
1
Click Configure\Options\Video.
Sphericall Desktop User Manual
6-87
ADDITIONAL SETTINGS
Sphericall Desktop Video
In the Options group box:
2
Select Enable sending of video, Automatically send video when call is connected,
Enable receiving of video, Automatically receive video when call is connected, or
Display toolbar under video window.
3
Select Maxium video size to send.
The Sphericall Desktop offers a “Maximum video size” option. The list will contain four
video formats: QCIF (176x144), CIF (352x288), QVGA (320x240), VGA (640x480). If
the user’s camera cannot support the video format, then the format will not be offered.
4
Select Display local video in a separate tab.
5
Select the number of Frames Per Second.
This setting represents frames per second the user is sending, not receiving.
The range is 5 to 30.
CAUTION!
6
FRAMES PER SECOND AFFECTS BANDWIDTH USAGE WHEN A
VIDEO CALL IS MADE. THE HIGHER THE FRAMES PER SECOND,
THE MORE BANDWIDTH USED.
Select the Video Capture Device in the drop-down box.
VIDEO OPERATION
NETWORK VIDEO WINDOW
Figure 6.8
6-88
Network Video
Sphericall Desktop User Manual
.....
ADDITIONAL SETTINGS
Sphericall Desktop Video
The Network Video window displays the video being sent from the other user. Users
have the ability to control video after a call has been established. While a call is in
progress, users may select a variety of options through an integrated menu that
displays over the Sphericall Desktop Network Video window.
Note: Video from the other party will appear on the Sphericall Desktop, even if you
do not have a camera, provided the other party is transmitting video.
To enable/disable video during an active call
From the Sphericall Desktop:
1
Click Network Video.
2
Right-click in the window.
3
Click Start Video or Stop Video.
4
Click Window Size to change the size of the video window.
Window size options are small and large.
5
Click Options to be directed to the Video options tab.
Note: Buttons appear under the Network Video window that allow the user to start or
stop video. To add these buttons, Click the Display toolbar under video window
check box located in Configure/Options/Video.
The Local Video window displays the video that is being sent to the other user. Users
have the ability to control video. While a call is in progress, users may select a variety
of options through an integrated menu that displays over the Sphericall Desktop Local
Video window.
To enable/disable local video
When a video call is in progress:
1
Select the Local Video tab.
The video from your camera is sent to the called party.
2
Right-click in the window.
3
Click Start Video or Stop Video.
4
Click Window Size to change the size of the video window.
Window size options are small and large.
5
Click Configure Video Source to be directed to the Video options tab.
STANDALONE VIDEO WINDOW
The Standalone Video window is available if you have chosen not to display local
video in a separate tab.
To enable standalone video
From Configure/Options/Video:
1
Clear the Display local video in a separate tab check box.
From the Network Video tab
2
Right-click Show My Video.
A local video window will appear.
Sphericall Desktop User Manual
6-89
ADDITIONAL SETTINGS
Sphericall Desktop Updates
THREE PARTY VIDEO CONFERENCE
The Sphericall Desktop allows for three party video conferencing. Setting up the
conference is identical to initiating a normal audio conference with the additon of
sending and receiving of video.
Note: For more information on conferencing, refer to the conferencing topic in this
manual.
ERROR HANDLING
FAILURE TO LOAD VIDEO FILTERS
It the Sphericall Desktop application is started and fails to load the video filters, a
message stating that the video is unavailable appears. The option to enable video will
still be available and the Sphericall Desktop will retry to load the filters. If the
Sphericall Desktop cannot load the filters, an error message will be displayed above
the Local Video window.
CAMERA NOT RESPONDING
If the camera is not responding, an error message will display above the Local Video
window notifying the user of a problem.
TROUBLESHOOTING
If the Sphericall Desktop Video is not functioning properly, your organization’s Sphere
system administrator may need to add a Trace tab to your Sphericall Desktop. The
Trace tab creates a log of all activity and communication between the Sphericall
Manager and the Sphericall Desktop.
CAUTION!
LOCAL AND NETWORK VIDEO FUNCTIONALITY SHOULD NOT BE
ENABLED WITHIN ANY SPHERICALL DESKTOP APPLICATION THAT
WILL BE RUNNING ON ANY SPHERICALL MANAGER THROUGHOUT
A SPHERE SYSTEM.
SPHERICALL DESKTOP UPDATES
...........................................................
Software updates to the Sphericall Desktop can be enabled with the click of a button.
Most likely, you will be notified of software updates by your organization’s Sphere
system administrator.
To run the Sphericall Desktop update
1
Open the Sphericall Desktop.
If an update is available within the Sphere system, the following window appears:
6-90
Sphericall Desktop User Manual
.....
ADDITIONAL SETTINGS
Sphericall Desktop Updates
Figure 6.9
2
Sphericall Update Available window
Click Start Transfer.
The appropriate files will be downloaded to the Sphericall Desktop.
Figure 6.10 Sphericall Update Available window
Once the transfer is complete (as noted within the Sphericall Update Available
window):
3
Click Close.
Sphericall Desktop User Manual
6-91
ADDITIONAL SETTINGS
User Images in the Sphericall Desktop
USER IMAGES IN THE SPHERICALL DESKTOP
...........................................................
The Sphericall Desktop can display a user image along with the active telephone call
during a call session on a Sphere system.
Figure 6.11
Sphericall Desktop Active Call Pane
When users place telephone calls via the Sphericall Desktop, an attempt will be made
to match the dialed caller name/number with an image file (if one exists), and the
Sphericall Desktop will display the appropriate image (if available).
To view a user image in the Sphericall Desktop
1
Click the image file that appears in the Active Call Pane of the Sphericall Desktop during
a call session.
or
Right-click a user extension listed in the Extensions tab of the Sphericall Desktop and
select View Picture.
PHONEBOOK EXPORT/IMPORT
...........................................................
The Sphericall Desktop provides a feature which allows users to export their
phonebook entries into a .txt file and import phonebook entries from a previouslyexported .txt file.
For example, if you plan on rebuilding the computer on which the Sphericall Desktop
resides, instead of re-adding your phonebook entries, you can export the entries to a
desired location and import them back onto your Sphericall Desktop.
The export/import feature also allows users to have identical phonebooks on their
Sphericall Desktops. Create the phonebook on one user’s Sphericall Desktop, export
those entries to a .txt file and import the file onto another user’s PC.
To export phonebook entries
In the Phonebook tab:
6-92
1
Right-click on the Phonebook.
2
Select Export.
3
Click Browse.
4
Designate the appropriate destination location for the saved export file.
5
Click Save.
6
Click Export.
7
Click OK.
Sphericall Desktop User Manual
.....
ADDITIONAL SETTINGS
Web Browser Dialing
To import phonebook entries
In the Phonebook tab:
1
Right-click on the Phonebook.
2
Select Import.
3
Select the Overwrite existing entries check box if you want to file to be imported to
overwrite the entries presently in the Phonebook.
4
Click Browse.
5
Locate the *.txt file containing the phonebook information to be imported into your
Sphericall Desktop.
6
Highlight the *.txt file you wish to import.
7
Click Open.
8
Click Import.
9
Click OK.
...........................................................
WEB BROWSER DIALING
The Sphericall Desktop allows dialing of telephone numbers from an Internet Explorer
v5.0 or later web page. The Sphericall Desktop must be running to use this feature.
To dial from a web browser
1
Highlight a number on any web page.
2
Right mouse click on the selection and select “Sphericall Dial”.
The Sphericall Desktop will attempt to dial the number.
The format of the number dictates how it is dialed. Numbers in the format of <+1 (area
code) number> or <(area code) number> are assumed to be PSTN numbers and are
dialed without any other user input. All other numbers are displayed in a pop-up
dialog box where the user has the option to manipulate them. For example, a
selection of 847-793-9600 will pop a prompt box asking the user for verification.
Selections +1(847)793-9600 and (847)793-9600 will be dialed directly.
Note: This function is governed by an Internet Explorer setting. To get the “dial
prompt box” to display, users must enable the "Allow active content to run in
files on My Computer" under Tools->Internet Options->Advanced.
Sphericall Desktop User Manual
6-93
ADDITIONAL SETTINGS
Web Browser Dialing
Figure 6.12 Web Browser Dialing example
6-94
Sphericall Desktop User Manual
H ELP AND ONLINE HANDBOOK
...................................
A
....
ONLINE HELP
...........................................................
Think of your Help files for the Sphericall Deskop as an online handbook. Help is
always available from the Help menu or from Help buttons located on some of the
command windows.
Figure A.1
Help menu
The Help files allow you to answer your own questions on using Sphericall Desktop.
Refer to the Sphericall Desktop Phone Keypad Tips card for further instructions on
phone set commands. Refer to the voice mail vendor reference guide for voice mail
instructions.
Sphericall Desktop User Manual
A-1
HELP AND ONLINE HANDBOOK
Online Help
A-2
Sphericall Desktop User Manual
CONTACT SPHERE COMMUNICATIONS
...........................................................
MAILING ADDRESS
Sphere Communications Inc.
300 Tri-State International Suite 150
Lincolnshire, IL 60069 USA
Phone 1-847-793-9600; Toll Free Phone 1-888-774-3732; Fax 1-847-793-9690
TECHNICAL SUPPORT TELEPHONE NUMBERS
Note: Your Sphere Certified Partner should be your first point-of-contact.
If you have a support agreement with Sphere Communications, please contact our
Technical Assistance Center at the following phone number(s):
• 1-888-774-3732 option 4 (toll-free in the United States)
• 1-847-793-9600 option 4 (outside the United States)
You will need to provide the following information when contacting Sphere
Communications Technical Support:
• Your technical support certification level
• The appropriate part number and/or serial number for the device you are
referencing
• Your customer site setup information
• The version of Sphericall software your organization is using
Sphere Customer Support Web Site
www.spherecom.com
e-mail
[email protected]
DOCUMENT REVISION HISTORY
610-321r0
15 February 2006
Release of Sphericall v5.0
610-321r1
25 July 2006
Release of Sphericall v5.1
NOTICES
...........................................................
Sphere CSE (Communications Services Engine), Sphericall, Sphericall Voice Mail,
Sphericall Manager, Sphericall Desktop, PhoneHub, COHub, BranchHub,
MeetingHub, VG3, and the Sphere logo are trademarks of Sphere Communications
Inc.
SoundPoint® is a registered name of Polycom.
Windows, Windows 95, Windows 98, Windows NT, Windows 2000, Windows 2003,
Windows XP, Outlook, and Exchange are trademarks or registered trademarks of
Microsoft Corporation. Other products mentioned in this document are also subject to
copyright, trademark, and intellectual property protection as applicable by law.
Written permission is required prior to reproduction of any of the work covered here
by copyright.
Sphere Communications Inc. is continually upgrading and developing the products
described in this publication. The information contained herein is specifically designed
for the Sphericall v5.1 release. The information in this document is subject to change
without notice.
For warranty information, see the License Agreement on the Sphericall software DVD
media.
U.S. Patent Numbers 5,892,764 and 6,735,208 and related Foreign Patents. Other
U.S. and Foreign Patents Pending.
©2006 Sphere Communications Inc. All Rights Reserved. Printed in USA.
DOCUMENT FEEDBACK FORM
...........................................................
We welcome your comments, suggestions and questions about a particular Sphere
document. To send comments with your name and contact information to:
Sphere Technical Publications
Sphere Communications
300 Tri-State International Suite 150
Lincolnshire, IL 60069
847-793-9600
[email protected]
DOCUMENT INFORMATION
Document Name and Product Number:
________________________________________________________
Sphere Communications Inc.
300 Tri-State International Suite 150
Lincolnshire, IL 60069
© 2006 Sphere Communications Inc.
All rights reserved Printed in the USA
I NDEX
...................................
....
A
Alpha Caller ID Based Call Routing 3-51
Answer icon 2-17
Answering calls
from the Sphericall Desktop 2-11
from the telephone 1-2
Attended Transfer 1-3
audio settings 4-70
Automatic Gain Control 4-70
B
Blind Transfer 1-3
C
Call Log 3-60
Call Recording 6-83
call recording
auto-recording playback 6-83
email recordings 6-83
notification 6-82
on demand recording 6-81
sample statement of notification 6-82
saving recordings 6-83
visual indication 6-82
Call Waiting 1-1
Caller ID 1-1
Choosing a line
from the Sphericall Desktop 2-11
Complete Icon 2-18
Complete Transfer button 2-13
Conference Bridge 6-85
conference bridge 2-15
Conference calls
from the phoneset 1-3
Conference icon 2-17
Contact search 2-12
D
delete voice messages 4-72
Dialing permissions 1-8
Directed park 3-58
Distinctive Ringing 1-1
Do Not Disturb 3-54
Do Not Disturb icon 2-18
E
Enter A Number To Dial 3-61
Error handling 6-90
Export phonebook entries 6-92
Sphericall Desktop User Manual
Extension search 2-12
Extensions
forwarding conditions 3-47
Extensions list 2-10
placing calls 2-10
O
F
P
Flash Codes 1-4
FLASH/LINK key 1-4
Forwarding 3-45
multiple extensions 3-51
forwarding
handset forwarding 3-53
Outlook Integration 3-53
profiles 3-47
Forwarding conditions
advanced 3-46
configuring 3-47
number specific 3-51
schedule 3-48
setting 3-45
H
Hangup icon 2-17
Hold icon 2-17
I
Import phonebook entries 6-92
J
Online Help A-1
Operators 2-13
Outlook 4-71
Outlook Dialer 3-37
Park extensions 3-58
Park Zones 3-57
Personal Details 3-23
URLdialer.exe 3-23
Phone set star codes 1-5
Phonebook Entries and Folders 3-55
Phonebook pane 3-55
Pickup 3-59
Pickup icon 2-18
PINs 1-7
dialing permissions 1-8
Place call icon 2-17
Placing a call on hold 1-2
Placing an external call 1-2
Placing an internal call 1-2
Placing calls from the phoneset 1-2
playback voice messages from a mobile
device 4-72
Presence 3-30
Programmable phones 1-2
Q
Queuing 3-54
Journaling calls 3-41
R
L
Recording Notification 6-82
language selection 2-17
Line Details 3-60
S
M
save your voice messages 4-71
Search for extensions 2-12
set your Extended Absence Greeting 4-
Managing calls
from the Sphericall Desktop 2-16
Maxiumum Active Calls 3-61
Message Waiting 1-1
Microsoft Outlook
journaling calls 3-41
Monitoring Rights 2-14
71
Software updates 6-90
sort your voice messages 4-71
Speed transfer 2-13
Sphericall Desktop
integration with Microsoft Outlook 337
N
Notify on Idle 2-14
Index
Microsoft Outlook contacts 3-39
toolbar icons 2-17
window features 2-9
Sphericall Desktop Options
I-1
INDEX
Calls tab 3-25
General tab 3-21
Phonebook tab 3-30
Recent Calls tab 3-31
Video tab 6-88
Sphericall Desktop Video 6-86
camera configuration 6-86
Local Video 6-89
Network Video 6-89
troubleshooting 6-90
video configuration 6-87
Sphericall Softphone 5-73
alerting of inbound calls 5-76
answering calls 5-78
dialing 5-79
local user 5-73
PC phone settings tab 5-75
remote user 5-74
switching audio devices 5-79
switching between modes of
operation 5-76
user determination 5-73
Sphericall Voice Mail
access 4-65
message playback on Microsoft
Outlook 4-69
Microsoft Outlook integration 4-70
Sphericall Desktop 4-65
System specifications 4-72
Star Code Commands 1-5
T
Taskbar status area icons 2-19, 2-20
Telephone set star codes 1-5
Text Message icon 2-17
Text Messaging 3-33
Three Party Video Conferencing 6-90
Title bar buttons 2-19
toolbar icons 2-17
touch tone feature 5-79
Transfer icon 2-18
Transferring calls
attended transfer 1-3
blind transfer 1-3
from the phoneset 1-3
from the Sphericall Desktop 2-13
U
User images
displaying in the Sphericall
Desktop 6-92
V
voice mail playback window 4-70
volume level 4-70
W
web browser dialing 6-93
I-2
Index
Sphericall Desktop User Manual