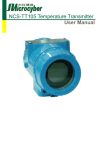
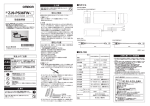
Download NCS-PT105Ⅱ Series Smart Pressure Transmitter User Manual
Transcript
NCS-PT105Ⅱ Series Smart Pressure Transmitter User Manual Microcyber Inc. Add:No.19, Feiyun Road, Hunnan New District, Shenyang, China 110179 Tel:+86-24-83602051 Fax:+86-24-83602985 Http://www.microcyber.cn Company Introduction Microcyber Inc. established as a high-tech enterprise by the Shenyang Institute of Automation Chinese Academy of Sciences, mainly engages in advanced industrial control systems, equipments, instruments and chips for industrial process automation control solutions in the research, development, production and application. Microcyber undertakes a number of national scientific and technical key task and “863” project, and has Liaoning Province networked control systems engineering research center. The company successfully developed the FF H1 fieldbus protocol stack which is number one to be approved internationally in China, and the Industrial Ethernet Protocol(HSE) which is number one to be approved in China, and the domestic first fieldbus instrument which has a function of national-level intrinsically safe explosion--proof and safety barrier. Also Microcyber participated in the drafting of the domestic first Ethernet-based industrial automation protocol standards (Ethernet for Plant Automation, EPA). As a result, serial products are composed of configuration, control software, embedded software, control system, instrument chip to the OEM board, and make Microcyber be an industrial automation products provider in full range, and also further Microcyber‟s leading position in the field of fieldbus technology. Microcyber is the FF member, the HART member and the Profibus National Organization (PNO) member. Microcyber passes the Authentication of ISO 9001 Quality System, and has an outstanding innovative R&D team, plentiful practical experiences of design of the Automatic engineering, a leading product series, a huge market network, a strict quality management system and an excellent enterprise culture. All these further a solid foundation of entrepreneurship and sustainable development for Microcyber. Microcyber Inc. is looking forward to the long-term smooth and close cooperation with you. Content Chapter 1 Introduction ........................................................................................................................ - 1 Chapter 2 Installation .......................................................................................................................... - 4 2.1 Transmitter Installation .......................................................................................................... - 4 2.2 Inlet Pressure Pipe Installation ............................................................................................... - 4 2.3 Wiring .................................................................................................................................... - 6 2.4 Re-Calibration Tesing ............................................................................................................ - 6 2.5 Installation of Explosion-proof Type Transmitters ................................................................ - 7 Chapter 3 Working Principle and Structure ........................................................................................ - 9 3.1 Introduction for Working Principle ........................................................................................ - 9 3.2 Construction Introduction .................................................................................................... - 10 Chapter 4 Adjusting in Workplace .................................................................................................... - 12 4.1 Operation Instruction for Magnetic Sticks ........................................................................... - 12 4.2 Adjusting for HART Smart Transmitter ............................................................................... - 13 4.3 Adjusting for FF Smart Transmitter ..................................................................................... - 17 4.4 Adjusting for PA Smart Transmitter ..................................................................................... - 19 4.5 Return instrument data to factory data ................................................................................. - 25 Chapter 5 Configuration of HART Smart Transmitter ...................................................................... - 27 5.1 Topologic Connection .......................................................................................................... - 27 5.2 Function Configuration ........................................................................................................ - 28 5.3 Jump-pin Configuration ....................................................................................................... - 30 Chapter 6 Configuration of FF Smart Transmitter ............................................................................ - 32 6.1 Topologic Connection .......................................................................................................... - 32 6.2 Function Block..................................................................................................................... - 32 6.3 Function Configuration ........................................................................................................ - 33 6.4 Jumper-pin Configuration .................................................................................................... - 36 7.2 Function Block..................................................................................................................... - 36 Chapter 7 Configuration of PA Smart Transmitter ............................................................................ - 37 7.1 Topology Connection ........................................................................................................... - 37 7.3 Function Configuration ........................................................................................................ - 38 7.4 Jump-pin Configuration ....................................................................................................... - 44 Chapter 8 Maintain ........................................................................................................................... - 46 Chapter 9 Technical Specifications ................................................................................................... - 47 9.1 Basic Parameter ................................................................................................................... - 47 9.2 Performance Index ............................................................................................................... - 48 9.3 Physical Properties ............................................................................................................... - 48 Appendix 1 Smart Transmitter Selection .......................................................................................... - 50 Appendix 2 Optional Components .................................................................................................... - 51 - Microcyber Inc Chapter 1 Introduction NCS-PT105Ⅱ series Smart Pressure Transmitter with advanced, mature, reliable 3151 capacitance sensors has been designed meticulously by combining advanced microprocessor technology and digital capacitance measurement technology. The powerful functions and high-speed computing capability of the microprocessor make it have excellent qualifications such as smart, high precision, high reliability, stable zero and so on. Its LCD can display many physical parameters (e.g. pressure, temperature, current and so on). It can realize the functions such as zero adjustment, range settings by key-press operation, and it is easy for field testing. NCS-PT105Ⅱ series Smart Pressure Transmitter supports HART, FF, and PA protocol and can measure pressure, differential pressure, liquid level, flow, and other industrial parameters. It can be widely used in the petroleum, chemicals, electricity, and metallurgical industries, etc.. According to the type of measurable pressure: Model Pressure type NCS-PT105ⅡSR Micro-differential pressure transmitter NCS-PT105ⅡSG Gauge pressure transmitter NCS-PT105ⅡSA Absolute pressure transmitter NCS-PT105ⅡSD Differential pressure transmitter NCS-PT105ⅡSH Differential pressure transmitter for high static pressure According to the protocol: Model Communication Protocol type NCS-PT105ⅡH HART NCS-PT105ⅡF FF H1 NCS-PT105ⅡP PROFIBUS PA As a transitional communication protocol in fuildbus, HART protocol achieves digital transmission on the existing analog transmission lines, and is compatible with existing analog signal control system. Either FF H1or PROFIBUS PA is a new generation of digital communication protocol, used in field connection, and linking field devices. International Standard IEC61158-2 is used in physical layer. Therefore, either FF H1or PROFIBUS PA is fieldbus actually. As following, Smart Transmitter with HART protocol is named as HART Smart Transmitter; Smart Transmitter with FF H1 protocol is named as FF Smart Transmitter; Smart Transmitter with PROFIBUS PA protocol is named as PA Smart Transmitter, All of these (Transmitters with the three types of fieldbus protocol) are named as Smart Pressure Transmitters or Smart Transmitters. In addition, HART Smart Transmitter has passed explosion-proof certification from National Supervision and Inspection Center for Explosion Protection and Safety of Instrumentation (NEPSI). Smart Transmitters Size shown as Figure 1-1: - 1 - Microcyber Inc Figure 1-1 Smart Transmitter Size(Unit:mm) Smart Transmitter Structure shown as Figure 1-2: Figure 1-2 Smart Transmitter Structure 1 Front 2 O-ring 3 cover 5 Location Name plate 4 hosing 6 Column 9 Display card Communication 7 Wiring hole card 8 board 10 Z/S hole LCD Name plate screw 11 Electric 12 Pin board 16 Brand housing 13 Rear cover 14 Lock screw 15 Brand plate screw 17 Screw 18 Terminal board 19 Exhaust/outlet plate 20 Bolt - 2 - Microcyber Inc valve 21 Flange 22 Transition joint 23 Bolt 24 O-ring 25 Vent/flange 26 Sensor 27 O-ring 28 Screw adapter 29 Instrument card wire Note: The terminal board and communication board for FF Smart Transmitter are identical to those of PA Smart Transmitter, but the components are different from the components of HART Smart Transmitters. The size is the same as that of HART, as well as the installation except for the fixed screw position of terminal cards. Therefore, there is no structure shown for FF Smart Transmitter and PA Smart Transmitter. - 3 - Microcyber Inc Chapter 2 Installation The measurement accuracy of the smart transmitter depends largely on the correct installation of the smart pressure transmitter and the pressure inlet tube. In particular, the measurement of the flow mainly relates to the correct installation of a measurement device. 2.1 Transmitter Installation For transmitter installation, three types of bracket are provided (pipe mounting flat bracket, pipe mounting angle bracket, and plate mounting angle bracket). Accordingly there are three installation methods as the following. The installation of pipe mounting flat bracket: the typical installation as Figure 2-1 shows. Fix transmitter in flat bracket using four bolts provided, and then fix the flat bracket on the vertical pipe of Φ50mm around with the U-shape bolt provided. The installation of pipe mounting angle bracket: the typical installation as Figure 2-2 shows. Fix transmitter in angle bracket using four bolts provided, and then fix the angle bracket on the horizontal pipe of Φ50mm around with the U-shape bolt provided. The installation of plat mounting angle bracket: the typical installation as Figure 2-3 shows. Fix transmitter in angle bracket using four bolts provided, and then fix the angle bracket on the plate with the M10 bolt. Figure 2-1 The installation of pipe platmounting flat bracket Figure 2-2 The installation of pipe mounting angle bracket Figure 2-3 The installation of mounting angle bracket 2.2 Inlet Pressure Pipe Installation The correct installation of pipeline depends on the measurment medium. Smart transmitter can measure liquid, steam or other gases. The pressure port, smart transmitter and related position of flow pipe are different according to different measurment medium. Liquid: The pressure port must be selected on side of the flow pipe to avoid slag deposition. Smart transmitter should be installed under the pressure port, so that the gas can be drained into flow pipe. As shown in Figure 2-4. Stream: The Inlet pressure pipe must be installed on the side of the flow pipe, and smart transmitter must be installed under the pressure port. The inlet pressure pipe should be filled with water to prevent the direct contaction between smart transmitter and stream. Smart transmitter should not exceed the working temperature limit when stream or other high temperature medium is measured. As shown in Figure 2-5. Gas: The pressure port should be installed on the top or on the side of the flow pipe. Smart transmitter - 4 - Microcyber Inc should be installed on the top of the pressure port, so that the liquid can be drained into flow pipe. As shown in Figure 2-6. Figure 2-4 Installation for liquid medium connection Figure 2-5 Installation for stream medium connection Figure 2-6 Installation for gas medium connection Notes: 1) The inlet pressure pipe should be as short as possible in the case of meeting the needs. 2) Corrosive or overheated medium should not be contacted with the transmitter directly. 3) The inlet pressure pipe should be installed in the place where the temperature gradient is low and fluctuation is small. 4) Working temperature limit must be paid attention to when high temperature medium 5) is to measure. For differential pressure transmitter, the two inlet pressure pipes should be kept at the same temperature, and the hydraulic height should be kept balance (For differential 6) type). The inlet pressure pipe should use large-diameter pipe as far as possible in case of the friction effect. 7) For differential pressure transmitter, the liquid-level of the two inlet pressure pipes should be kept at the same height when isolating gas is used. 8) When injection system is used, the system should be as close as possible to the pressure port of flow pipe. And the purifying liquid should get through from the pipes of the same size, length of pipes to the transmitter. Also the injection liquid through transmitter should be avoided (For differential type). - 5 - Microcyber Inc 2.3 Wiring The power and signal of Smart Transmitter are sharing one pair of cables (Bus Cable). The ordinary cables can be selected by HART smart transmitter, but FF, PA Smart Transmitter is suggested to use specific Fieldbus cable the IEC61158-2 recommended. The terminal is at the rear cover, the terminal wiring board could be seen after screwing the rear cover (indicated “FIELD TERMINAL”). Figure 2-7 FF、PA Smart Transmitter wiring Figure 2-8 HART Smart Transmitter wiring The left terminal of the terminal wiring board is “+” signal terminal, the right terminal is testing“+” terminal, and the middle terminal is “-” signal and testing “-” terminal (sharing). Power supply is provided to smart transmitter with signal wire. The testing terminal is only used in HART smart transmitter to connect the testing instrument. Signal wires should be holed to wire terminal through the wiring hole. And “+” signal wire should be connected to the “+” signal terminal (left), the “-” signal wire should be connected to the “-” signal terminal (middle) (Figure 2-7). Signal wires shielded layer can be floating ground, is also available for single-point grounding at any point in the signal circuit. When the testing instrument is connected to test the analog signal of the HART smart transmitter, thread method is also in the same way of the signal wire, but the “+” test wire should be connected to the right terminal of the terminal wiring board in HART smart transmitter, and the “-” test wire should be connected to the middle terminal (Figure 2-8). Caution: When connecting the HART smart transmitter, do not connect the signal wire to the testing terminal. It will damage the diodes. But when the diodes are burnt, the emergency response is to short the circuit of the two testing terminal. The Bus Cable of smart transmitter should not share the line pipe or trunkings with other device, and should be away from high-power device. 2.4 Re-Calibration Tesing Before smart transmitter is used, re-calibration testing should be done in lab or in the field. Figure 2-9 shows the operation procedure: - 6 - Microcyber Inc repair Calibration start In testing room? yes N o Set Engineering Unit Measure range Output mode Damping time N o Pressure testing Meet technical index yes Install on spot: check jumper install on spot Confirm configuration Zero Trim run Figure 2-9 Calibration Procedure The content of smart transmitters re-calibration includes function testing and pressure testing. Please refer to the following chapter about the methods in detail. 2.5 Installation of Explosion-proof Type Transmitters HART Smart Transmitter has passed the national-level intrinsically safe explosion-proof certification, and this type includes “IC” in its product type name. The description of this section is just about this type. Smart transmitter must be connected to safety barrier when used in dangerous places, where the explosive mixtures could be in it. The selection about the type and parameter of safety barrier must be referred to the table below. Suffixes X of Explosion-proof certification number indicates that this product must be composed of the intrinsically safe explosion-proof system with isolated safety barrier, or every ground point of the intrinsically safe explosion-proof system, where this product is exactly in, must kept in equal-potential balance. National Supervision and Inspection Center for Explosion Protection and Safety of Instrumentation (NEPSI) certified parameter of smart transmitter as following: Certification number GYB071520X Maximum input-voltage 30V DC Explosion-Proof Mark Ex ia IIC T4 Maximum input-current 100 mA Environment temperature -30 ~ +60 ℃ Maximum input-power 0.8 W Measurable medium temperature -40~ +110 ℃ Maximum internal capacity About 0 Maximum internal inductor 0.11 mH Certification number GYB071520X Maximum input-voltage 28V DC Explosion-Proof Mark Ex ia IIC T4 Maximum input-current 93mA Environment temperature -30 ~ +50 ℃ Maximum input-power 0.66 W Measurable media temperature -40~ +70 ℃ Maximum internal capacity About 0 Maximum internal inductor 0.11 mH Notes: 1) The housing of smart transmitter must be grounded well. 2) As for the circuit of the smart transmitter, user could not disassemble or replace components. - 7 - Microcyber Inc 3) The calculation of maximum distributed parameter of signal wire must be referred to the parameter of safety barrier and parameter of explosion-proof selected. 4) The cable of smart transmitters signal must be isolated from other cable, and shielded by steel pipe or trunkings. 5) The shielded layer of smart transmitters signal wire must be single-point grounded or float grounded. 6) The safety barrier must be installed on the frame at the outlet of safety area. - 8 - Microcyber Inc Chapter 3 Working Principle and Structure The measurement principle of smart transmitter based on the 3151 capacitive pressure sensor, using advanced micro-controller technology, sensor digital measurement technology and high accuracy algorithm to ensure the high-precision pressure measurement. The advanced HART, FF H1 and PROFIBUS PA Fieldbus technologies are used respectively by the communication interface of smart transmitter. The logical structure of smart transmitter, which is the same, can be divided into five parts: sensor, instrument card, communication card, LCD card and port card, as Figure 1-2 and Figure 3-1 shows. The FF, PA Smart Transmitters are identical in terms of hardware due to the same physical layer specification, the communication card and port card of the FF, PA Smart Transmitters are different from those of Hart, but other parts are the same. sensor Instrument card Bus cable Communication card LCD card Port card Figure 3-1 Structure 3.1 Introduction for Working Principle The widely used 3151 capacitive pressure sensors, which were developed by Rosemount initially in USA, have been produced on a large scale in China. The core of its sensor is differential capacitive membrane, as Figure 3-2 shows. There are two measurement capacitances CH and CL distributed in differential capacitive membrane. The two measurement capacitances are almost equal to two plate capacitances because of their mechanical structure. The two measurement capacitances share one polar plate, which is a measure membrane in the center. And the other polar plate is fixed on the two sides. When the pressures of two sides are equal, the measure membrane is in the center, the capacitances of two sides are equal too. But when the pressure of high pressure side is higher than that of low pressure side, the guide pressure liquid filled in the membrane guides the differential pressure, so that the measure membrane moves to low pressure side. As a result, the capacitance of high pressure side is lower than that of the low pressure side. Figure 3-2 Sensor Capacitance Membrane When the displacement of the Measure Membrane is shorter than the thickness of its own, there will - 9 - Microcyber Inc be a linear relationship between the displacement and the differential pressure. d K1 (3-1) The capacitance of the plate capacitor has a reciprocal relationship with the distance of the polar, that is, a nonlinear relationship. However, when the differential capacitance structure is used, the distance has a linear relationship with the radio of the difference between the measure capacitance and the sum of the measure capacitance. (CL CH ) /(CL CH ) dK 2 (3-2) Take the (3-1) into (3-2): (CL CH ) /(CL CH ) K1K 2p K1K 2 is the constant determined by the membrane structure. Therefore, the result isthat there is a linear relationship between the differential pressure p and the radio of the difference between the measure capacitance and the sum of the measure capacitors. (CL CH ) /(CL CH ) is obtained. If the radio is got, the differential pressure can be got. The instrument board of smart transmitter is responsible for measuring the radio referred above. The instrument board, using digital technology, translates the change of the capacitance of the two measure capacitors into the change of the counting value firstly, and then calculates the radio ( NL NH ) /( NL NH ) . The instrument board is also responsible for real-time temperature acquisition, and uploads it with radio to the communication board. The communication board are not only responsible for the communication between the smart transmitter and the Protocol Fieldbus, but also upload the differential pressure which is calculated using the data supplied by the instrument and the calibration parameter, to the device in the upper layer via separate protocol. The communication board of HART smart transmitter can control the output of D/A according to the differential pressure calculated, to carry out the control of analog current signals. The communication board can control LCD board to carry out present condition and measurement pressure value of the smart transmitter. Terminal board supplies a simple signal interface for the communication board. 3.2 Construction Introduction The differential capacitance membrane is encapsulated in the sensor, and through three capacitance polar cables which are extracted. The capacitance polar are welded on the measurement membrane and fixed polar separately. And the Flange is tightly-ferruled on the both sides of the sensitive device by four bolts. As a result, the sensor is formed, as Figure 3-3 shows. Figure 3-3 Sensor and Instrument Board Figure 3-4 Sensor and Instrument Board The instrument board is installed in the sensitive device of the smart transmitter. The capacitance polar - 10 - Microcyber Inc of the sensitive device is welded on the interface of the measurement capacitance in the instrument board. The pouring sealant, which has effects of insulation and conduction, fixes the instrument board in the cavity reserved by the sensitive device. And the four-core cable of instrument board is reserved outside, which can be used to connect the communication board. Three capacitance-through-center with thread are wringed in the hole of the housing, one polar is extended to the cavity of instrument and connected to the terminal board, and the other one is weld on the three terminals on the terminal block separately. The bus signal is supplied to the terminal board through capacitance-through-center, as Figure 3-4 shows. The terminal board is fixed on the bottom layer of the housing in the cavity of the instrumentand welded capacitance-through-center. The communication board is inserted in the terminal board, and fixed by the bolts. The Four-core cable of the instrument board is extended into the cavity of the instrument and inserted in the communication board, as the Figure 3-5 shows. Figure 3-5 The connection of the Instrument Board Figure 3-6 The Finished Product After the LCD board is fixed on the communication board, the cover of the instrument can be screwed on to form a finished product, as Figure 3-6 shows. As the core of the smart transmitter, the communication board connects the terminal board, instrument board and LCD board. The communication board is fixed in the housing behind the terminal board. And the LCD board which can be rotated in four angles is fixed on the communication board, as Figure 3-6 shows. 0% 50 % 0% PV 50% 100% PV 100 % Figure 3-7 the structure of the Meter - 11 - Microcyber Inc Chapter 4 Adjusting in Workplace 4.1 Operation Instruction for Magnetic Sticks The adjusting in workplace can be realized by inserting magnetic sticks into the holes named as “SPAN” or “ZERO”, which are on the top of the transmitter housing, shown as figure 4.1. Figure 4.1 Location of magnetic sticks inserted holes and full-scale LCD The following will show how to utilize different combinations of magnetic sticks inserting to simulate four virtual key buttons, which is good for description of adjusting in workplace. According to different functions, the four virtual key buttons are defined as Mode (M), Input adjusting ([↑], [↓]) and Confirmation ([Enter]). Mode (M): It can be switched in all operational modes. Input adjusting [↑]: Increment operation. Input adjusting [↓]: Degression operation Confirmation [Enter]: Confirmation operation. The detailed info for operations of (M), [↑], [↓] and [Enter] are shown as following: Mode(1) [M] Input adjusting(1) [↓] [↑] Confirmation [Enter] ) Insert the magnetic sticks into “Zero” and “Span” at the same time(2) Insert “Zero” and Zero Span “Span” for 2s, get them out(2) Notes: 1) Insert / Get out the magnetic sticks in Mode (M) and Input adjusting is considered as ([↑], [↓]) button operation once, also, inserting the magnetic sticks for long can be considered as long operation. In a button operation, it is suggested that user should insert the magnetic sticks for 1s, and then get it out. Otherwise, the operation can‟t be tested. The long operation is carried out automatically every two seconds. 2) In order to avoid the collision between Confirmation and Mode, when user is carrying out the confirmation operation, when the process is 100%, it means that the magnetic sticks are inserted for 2s, and then get the two magnetic sticks out to make sure the confirmation operation. When the process is 100%, the magnetic sticks are not gotten within 3s, which means to carry out switch operation. When the process is not 100%, user shall get the magnetic sticks out without operation. - 12 - Microcyber Inc 4.1.1 General Adjusting Method Following is the general adjusting method, please refer to specific description for info in detail. In the measurement value display mode, press Mode [M] to do mode switch. When it is displayed in mode needs to be adjusted, get out the two magnetic sticks, the present value to be adjusted will be displayed in the LCD. Press [↑] or [↓] to adjust, after that, press [Enter] to confirm. Press [M], switch to measurement value display mode. Notes: 1. It is not necessary to confirm for some functions. After adjustment, it is saved at the same time. 2. If there is no button operation within 1 min (There is no magnetic sticks inserted in the two holes), it will return to normal display mode. 4.2 Adjusting for HART Smart Transmitter In this section, we describe the adjusting steps of HART smart transmitter. By adjusting in the workplace, you can regulate zero point, unit, the upper limit and lower limit of the transmitters. The functions and operation are shown as following in detail. Function Mode [M] Button Function [↑] [↓] [Enter] Function Display Display, description Display the Measurement measurement value value selected display in display mode 11 Failure! the Failure When transmitter is in failure, it display will display the reason. Lower limit Upper limit 03 04 —— —— —— —— Implementation Fun03 of the calibration LOWER Implementation Fun04 of the calibration UPPERPER Set the lower limit of primary value range Set the upper limit of primary value range Time constant, Electronic damping 05 Ascending Fun05 Decreasing DAMP and the unit is second. Setting range: 0.0 to32.0 Manual setting Lower limit of passive range 06 Pre-setting Pre-setting decreasing ascending Implementation Fun06 of lower limit of PVLRV primary value range - 13 - Microcyber Inc Mode Function Button Function [↑] [M] [↓] Function Display [Enter] Display, description Manual setting Upper limit of 07 passive range Pre-setting Pre-setting decreasing ascending Implementation Fun07 of upper limit of PVURV primary value range Set zero point Zero point of —— 08 primary value —— Implementation Fun08 of primary of the calibration ZERO value with current value Transfer function 10 Decreasing Ascending Implementation Fun10 Set linear or FUNCT square root Display the Measurement value display 11 Select from varieties of Fun11 expected the possibilities DISP measurement source result Physical unit 12 Fun12 Select UNIT Physical unit When the user is doing adjusting in workplace, press [M] for long, it can be switched among the functions above. Measurement Value Display (NORM) [M] Lower Limit (LOWER) Primary Variable Zero Point (ZERO) [M] [M] Upper Limit (UPPER) Transfer Function (FUNCT) [M] [M] Electric Damping (DAMP) Measurement Value Display Source (DISP) [M] No-source Lower [M] No-source Upper [M] Limit (PVLRV) [M] Physical Unit (UNIT) Limit (PVURV) [M] Figure 4.2 Image for adjusting function In the status of switch mode, the digital display will display function code, i.e. “Fun 03”. The digital display will display function description as above, i.e. “LOWER”. It is not necessary to confirm the mode “10, 11, 12”. After adjustment, it is saved at the same time. 4.2.1 Measurement value display In the function of measurement value display, it will display configuration info of DSP display blocks. 4.2.2 Error Display In the course of local operation, the following error info may occur: Display NumEr FNErr Lock Explanation Number Error Mode Number Error The jump-pin is set as configuration protection. - 14 - Microcyber Inc 4.2.3 Operation steps for setting lower limit—Mode 03 The present pressure value is used to set the lower limit of primary value. Please confirm that the value input to lower limit of smart transmitter is stable. You shall set the lower limit of primary value according to the following steps: --Select Mode 03, the current value and unit of primary value will be displayed on LCD. Special symbol area will display the downward arrow, indicating that it is in the lower limit currently, --Press [Enter] to set. If the setting is successful, it will show “OK”, otherwise, it will show “Err”, --Use [M] to do mode switch. 4.2.4 Operation steps for setting upper limit—Mode 04 The present pressure value is used to set the upper limit of primary value. Please confirm that the value input to upper limit of smart transmitter is stable. You shall set the upper limit of primary value according to the following steps: --Select Mode 04, the current value and unit of primary value will be displayed on LCD. Special symbol area will display the upward arrow, indicating that it is in the upper limit currently, --Press [Enter] to set. If the setting is successful, it will show “OK”, otherwise, it will show “Err”, --Use [M] to do mode switch. 4.2.5 Operation steps for setting electronic damping—Mode 05 Setting the time constant of electronic damping, the range is from 0 to 32s. You shall set the electronic damping according to the following steps: --Set mode 05, --Select damping via [↑] or [↓], --Use [M] to do mode switch, The damping only affects the output of analog input function block. 4.2.6 Operation steps for lower limit of passive range-- Mode 06 Passive range replacement sets lower limit of primary variable. You shall set the lower limit of primary variable according to the following steps: --Select mode 03, LCD will display the value and unit of current lower limit of primary variable, --Adjust the lower limit of primary variable via [↑] or [↓], --Press [Enter] to set. If the setting is successful, it will show “OK”, otherwise, it will show “Err”, --Use [M] to do mode switch. 4.2.7 Operation steps for upper limit of passive range-- Mode 07 Passive range replacement sets upper limit of primary variable. You shall set the upper limit of primary variable according to the following steps: --Select mode 04, LCD will display the value and unit of current upper limit of primary variable, --Adjust the upper limit of primary variable via [↑] or [↓], --Press [Enter] to set. If the setting is successful, it will show “OK”, otherwise, it will show “Err”, - 15 - Microcyber Inc --Use [M] to do mode switch. 4.2.8 Operation steps for zero point of primary value -- Mode 08 Present pressure value is used for setting zero point of primary value. When the transmitter is installed already and ready to operate, the outer effect such as installation location, surrounding temperature and allowable pressure related to installation (i.e. pressure column leading to pressure pipe of pressure transmitter) may cause the initial zero point to displace. You shall calibrate zero point according to the following steps: --Create a pressure scale, --Set mode 08, --Press [Enter] to set. If the setting is successful, it will show “OK”, otherwise, it will show “Err”, --Use [M] to do mode switch. Switch to pressure value display mode, 0 will be in display area. 4.2.9 Operation steps for setting transfer function -- Mode 10 Setting current output mode: Linear output (for pressure measurement) or square root output (for flow measurement). You shall set transfer function according to the following steps: --Select mode 10, LCD will display type of current transfer function. --Select the type of transfer function via [↑] or [↓], --Use [M] to do mode switch. 4.2.10 Operation steps for setting measurement value display type-- Mode 11 In this mode, you shall select the value to be displayed. You shall select the source of measurement value according to the following steps: --Select mode 11, LCD will display value and description of present display source, --Select the display source of measurement value via [↑] or [↓], --Use [M] to do mode switch. Following is display source of supported measurement value. Measurement value display type LCD display description [0] Primary variable value output PV [1] Second variable value output SV [2] Primary variable current output CU [3] Primary variable percentage output PN [4] Primary variable and current circle output LOOP 4.2.11 Operation steps for primary variable unit-- Mode 12 In this mode, you shall modify the primary variable unit. You shall select the source of measurement value according to the following steps: --Select mode 12, LCD will display present unit identifier and the corresponding unit descriptions, - 16 - Microcyber Inc --Select a unit via [↑] or [↓], --Use [M] to do mode switch. 4.3 Adjusting for FF Smart Transmitter In this section, we describe the adjusting steps of FF smart transmitter. By adjusting in the workplace, you can regulate zero point, unit, the upper limit and lower limit of the transmitters. The functions and operation are shown as following in detail. Function Mode [M] Button Function [↑] [↓] [Enter] Function Display Display, description Display the Measurement configuration value info displayed by display DSP display block Failure! When the transmitter is Failure in failure, it will display display the reason. For pressure, differential pressure, flow,. The liquid level transmitter Zero point of primary Implementation 15 —— —— value of the calibration Fun15 ZERO discharges to vacuum, the absolute pressure transmitter is in vacuum. The unit for measured value is pressure unit. Lower limit Upper limit 16 17 Pre-setting Pre-setting ascending decreasing Pre-setting Pre-setting ascending decreasing Implementation of the calibration Implementation of the calibration Set the lower Fun16 limit of LOWER characteristic curve Set the upper Fun17 limit of UPPERPER characteristic curve Time constant, Electronic damping 05 Ascending Decreasing Fun05 DAMP and the unit is second. Setting range: 0.0 to32.0 - 17 - Microcyber Inc Function Mode [↓] 06 [Enter] Pre-setting Pre-setting decreasing ascending 07 Pre-setting Pre-setting decreasing ascending Implementation Implementation 08 —— —— of the calibration 10 PVLRV primary value Fun07 upper limit of PVURV primary value Fun08 primary value ZERO with current value Fun10 Set linear or FUNCT square root Select from varieties of Fun11 expected the possibilities DISP measurement Decreasing Ascending Implementation Display the Measurement 11 source Physical unit lower limit of Set zero point of Implementation value value display Fun06 range Zero point of function description Manual setting of range Transfer Display, range Upper limit primary Function Display Manual setting of range of passive [↑] [M] Lower limit of passive Button Function result 12 Fun12 Select UNIT Physical unit When the user is doing adjusting in workplace, press [M] for long, it can be switched among the functions above. [M] Primary Variable [M] Measurement Value Display (NORM) Zero Point (ZERO) Lower Limit (LOWER) [M] Upper Limit (UPPER) [M] Figure 4.3 Image for adjusting function 4.3.1 Measurement value display In the function of measurement value display, it will display configuration info of DSP display blocks. 4.3.2 Error Display In the course of local operation, the following error info may occur: Display NumEr FNErr Lock Explanation Number Error Mode Number Error The jump-pin is setting as configuration protection. 4.3.3 Operation steps for zero point of primary value -- Mode 15 When the transmitter is installed already and ready to operate, the outer effect such as installation location, surrounding temperature and allowable pressure related to installation (i.e. pressure column - 18 - Microcyber Inc leading to pressure pipe of pressure transmitter) may cause the initial zero point to displace. You shall calibrate zero point according to the following steps: --Create a pressure scale, --Set mode 15, --Press [Enter] to set. If the setting is successful, it will show “OK”, otherwise, it will show “Err”, --The calibration is successful, return to the measurement value display mode. 0 will be in display area. 4.3.4 Operation steps for lower limit of range-- Mode 16 In this mode, you shall modify the slope of characteristic curve. The characteristic curve is rolling around the high setting point, which replaces the zero point calibration (Mode 08). You shall implement the calibration of lower limit according to the following steps: --Select mode 16, LCD will display the calibrated process value last time and related unit, --If you just would like to check the info, press [M] to do mode switch. Otherwise, you may use the reference pressure, --Input the reference pressure value starting from this point via [↑] or [↓], --Press [Enter] to set. If the setting is successful, it will show “OK”, otherwise, it will show “Err”, --Use [M] to do mode switch. 4.3.5 Operation steps for upper limit of range-- Mode 17 In this mode, you shall modify the slope of characteristic curve. The characteristic curve is rolling around the low setting point. You shall implement the calibration of upper limit according to the following steps: --Select mode 17, LCD will display the calibrated process value last time and related unit, --If you just would like to check the info, press [M] to do mode switch. Otherwise, you may use the reference pressure, --Input the reference pressure value starting from this point via [↑] or [↓], --Press [Enter] to set. If the setting is successful, it will show “OK”, otherwise, it will show “Err”, --Use [M] to do mode switch. 4.4 Adjusting for PA Smart Transmitter In this section, we describe the adjusting steps of PA smart transmitter. By adjusting in the workplace, you can regulate bus address, display variable type, point position, zero point, unit, the upper limit and lower limit of the transmitters,etc. The functions and operation are shown as following in detail. Function Mode [M] Button Function [↑] [↓] [Enter] Function Display Display, description Display the Measurement measurement value value display displayed in Mode 11 Failure Failure! When display the transmitter - 19 - Microcyber Inc Function Mode [M] Button Function [↑] [↓] [Enter] Function Display Display, description is in failure, it will display the reason. Time constant, Electronic damping 05 Ascending Fun05 Decreasing DAMP and the unit is second. Setting range: 0.0 to32.0 Display the Measurement value display 11 source Physical unit Select from various of Fun11 expected the possibilities DISP measurement result 12 Fun12 Select UNIT Physical unit User address Bus address 13 Ascending Decreasing Implementation Fun13 from ADDR PROFIBUS (0---126) Point 14 Modify Fun14 Point position DECPT in display area For pressure, differential pressure, flow,. The liquid level transmitter discharges to Zero point of primary value 08 —— —— Implementation Fun08 vacuum, the of the calibration ZERO absolute pressure transmitter is in vacuum. The unit for measured value is pressure unit. Setting the Lower limit of range 16 Pre-setting Pre-setting ascending decreasing Implementation Fun16 lower limit of LOWER characteristic curve Upper limit of range 17 Pre-setting Pre-setting ascending decreasing Implementation Fun17 Setting the UPPER upper limit of - 20 - Microcyber Inc Function Mode Button Function [↑] [M] [↓] Display, Function Display [Enter] description characteristic curve Lower limit of input range No-source 18 Pre-setting Pre-setting ascending decreasing Implementation Fun18 setting the IN 0% lower limit of input range Upper limit of input range No-source 19 Pre-setting Pre-setting ascending decreasing Implementation Fun19 setting the IN 100% upper limit of input range Lower limit of output range No-source 20 Pre-setting Pre-setting ascending decreasing Implementation Fun20 setting the OUT 0% lower limit of output range Upper limit of output range No-source 21 Pre-setting Pre-setting ascending decreasing Implementation Fun20 setting the OUT100% upper limit of output range Press [M] for long, it can be switched among the functions above. Measurement Value Display (NORM) [M] Electric Damping (DAMP) Lower Limit (LOWER) [M] [M] Measurement Value Display Source (DISP) Upper Limit (UPPER) [M] [M] Physical Unit (UNIT) Input Lower Limit (IN 0%) [M] [M] Bus Address (ADDR) Input Upper Limit (IN 100%) [M] [M] Decimal (DECPT) Output Lower Limit (OUT 0%) [M] Primary Variable [M] Zero Point (ZERO) [M] Output Upper Limit (OUT 0%) (OUT 100%) [M] Figure 4.4 Image for adjusting function 4.4.1 Measurement value display In the function of measurement value display, it will display the measurement value selected in Mode 11. The physical unit is set in Mode 12. Point position is set in Mode 14. 4.4.2 Error Display In the course of local operation, the following error info may occur: Display NumEr FNErr UNErr Lock Explanation Number Error Mode Number Error Unit doesn‟t match The jump-pin is setting as configuration protection. - 21 - Microcyber Inc 4.4.3 Operation steps for setting electronic damping -- Mode 05 It is about setting time constant of electrical damping, the range is from 0 to 32s. You shall set electrical damping according to the following steps: --Set mode 05, --Select damping via [↑] or [↓], --Use [M] to do mode switch, The damping only affects the output of input function block of analog parameters. 4.4.4 Operation steps for setting measurement value display source--Mode 11 In this mode, you may select the value to be displayed. In SIMATIC PDM, it is the parameter of “Transmitter Type”. You shall select the display source of measurement value according to the following steps: --Set mode 11, --Select the display source of measurement value via [↑] or [↓], --Use [M] to do mode switch. In Mode 12, the distributed physical unit depends on the display source of measurement value. Following is the supportive measurement value display source. Display source of measurement value Auxiliary info of LCD [0]Primary value output of pressure transducer block PRIM [1]Second value output of pressure transducer block SEC1 [2]AI function block output AIOUT [3]Sensor original value of pressure transducer block SENS [4]Sensor temperature value of pressure transducer block TEMP [5]TOT function block output TOTAL 4.4.5 Operation steps for setting physical unit--Mode 12 The physical unit can be set by selecting in the list. The selected unit depends on the display source of measurement value (Mode 11). You shall set the physical unit according to the following steps: --Set mode 12. When the mark of present value appears in the display area, the related text will be in the unit display area. --Select the a unit via [↑] or [↓], --Use [M] to do mode switch. Following is a list about physical unit can be used in every measurement type: Pressure Unit: Code 1130 Code 1131 1132 1133 1134 1135 Unit Pa GPa MPa KPa mPa μPa Code 1140 1141 1142 1143 1144 1145 Unit atm psi psia psig g/cm2 kg/cm2 Code 1150 1151 1152 1153 1154 1155 Unit mmH2O(4℃) mmH2O(68℃) ftH2O ftH2O(4℃) ftH2O(68℃) inHg - 22 - Microcyber Inc Code 1136 Code 1137 1138 1139 Unit hPa bar mbar torr Code 1146 1147 1148 1149 Unit inH2O inH2O(4℃) inH2O(68℃) mmH2O Code 1156 1157 1158 Unit inHg(0℃) mmHg mmHg(0℃) Volume Unit: Code 1034 1035 1036 1037 1038 1039 1040 Unit m3 dm3 cm3 mm3 L cL mL Code 1041 1042 1043 1044 1045 1046 1047 Unit hL IN3 FT3 Yd3 mile3 Pint Quart Code 1048 1049 1050 1051 1052 Unit GAL ImGAL BUSHL bbl bblli Code 1088 1089 1090 Unit KG G mg Code 1091 1092 1093 Unit Mg T oz Code 1094 1095 1096 Unit lb STon LTon Unit G/S G/min G/h G/d KG/s KG/m KG/h KG/d Code 1326 1327 1328 1329 1330 1331 1332 1333 Unit T/S T/min T/h T/d lb/S lb/m lb/h lb/d Code 1334 1335 1336 1337 1338 1339 1340 1341 Unit ST/S ST/m ST/h ST/d LT/S LT/m LT/h LT/d Unit m3/S m3/m m3/h m3/d L/S L/min L/h Code 1354 1355 1356 1357 1358 1359 1362 Unit L/d ML/d CFS CFM CFH CFD GAL/S Code 1363 1364 1365 1371 1372 1373 1374 Unit GPM GAL/h GAL/d bbl/S bbl/m bbl/h bbl/d Weight Unit: Weight Flow Unit: Code 1318 1319 1320 1321 1322 1323 1324 1325 Volume Flow Unit: Code 1347 1348 1349 1350 1351 1352 1353 4.4.6 Operation steps for setting bus address--Mode 13 In mode 13, you shall set the user address of the device in PROFIBUS. The admitted range is from 0 to 126. You shall set the PROFIBUS address according to the following steps: --Set mode 13. The present user address will be displayed in measurement value display area. --Press [Enter] to set. If the setting is successful, it will show “OK”, otherwise, it will show “Err”, --Use [M] to do mode switch. 4.4.7 Operation steps for setting point--Mode 14 The measurement value can display the precision of 5 bits. You shall set the point position according to the following steps: --Set mode 14. The present point format will be displayed in measurement value display area. --Select the expected display format via [↑] or [↓], - 23 - Microcyber Inc 8.88888 88.8888 888.888 8888.88 88888.8 888888 --Use [M] to do mode switch. 4.4.8 Operation steps for zero point of primary value -- Mode 15 When the transmitter is installed already and ready to operate, the outer effect such as installation location, surrounding temperature and allowable pressure related to installation (i.e. pressure column leading to pressure pipe of pressure transmitter) may cause the primary zero point to displace. You shall calibrate zero point according to the following steps: --Create a pressure scale, --Set mode 15, --Press [Enter] to set. If the setting is successful, it will show “OK”, otherwise, it will show “Err”, --The calibration is successful, it will return to display mode of measurement value. 0 will be in display area. 4.4.9 Operation steps for lower limit of range-- Mode 16 In this mode, you shall modify the slope of characteristic curve. The characteristic curve is rolling around the high setting point, which replaces the zero point calibration (Mode 08). You shall implement the calibration of lower limit according to the following steps: --Select mode 16, LCD will display the calibrated process value last time and related unit, --If you just would like to check the info, press [M] to do mode switch. Otherwise, you may use the reference pressure, --Input the reference pressure value starting from this point via [↑] or [↓], --Press [Enter] to set. If the setting is successful, it will show “OK”, otherwise, it will show “Err”, --Use [M] to do mode switch. 4.4.10 Operation steps for upper limit of range-- Mode 17 In this mode, you shall modify the slope of characteristic curve. The characteristic curve is rolling around the low setting point. You shall implement the calibration of upper limit according to the following steps: --Select mode 17, LCD will display the calibrated process value last time and related unit, --If you just would like to check the info, press [M] to do mode switch. Otherwise, you may use the reference pressure, --Input the reference pressure value starting from this point via [↑] or [↓], --Press [Enter] to set. If the setting is successful, it will show “OK”, otherwise, it will show “Err”, --Use [M] to do mode switch. 4.4.11 Operation steps for lower limit of input range-- Mode 18 In this mode, you shall set the lower limit of input range. You shall do implement the calibration of lower limit of input range according to the following steps: --Select mode 18, LCD will display the calibrated process value last time and related unit, - 24 - Microcyber Inc --Input the reference value starting from this point via [↑] or [↓], --Press [Enter] to set. If the setting is successful, it will show “OK”, otherwise, it will show “Err”, --Use [M] to do mode switch. 4.4.12 Operation steps for upper limit of input range-- Mode 19 In this mode, you shall set the upper limit of input range. You shall do implement the calibration of upper limit of input range according to the following steps: --Select mode 19, LCD will display the calibrated process value last time and related unit, --Input the reference value starting from this point via [↑] or [↓], --Press [Enter] to set. If the setting is successful, it will show “OK”, otherwise, it will show “Err”, --Use [M] to do mode switch. 4.4.13 Operation steps for lower limit of output range-- Mode 20 In this mode, you shall set the lower limit of input range. You shall do implement the calibration of lower limit of input range according to the following steps: --Select mode 20, LCD will display the calibrated process value last time and related unit, --Input the reference value starting from this point via [↑] or [↓], --Press [Enter] to set. If the setting is successful, it will show “OK”, otherwise, it will show “Err”, --Use [M] to do mode switch. 4.4.14 Operation steps for upper limit of output range-- Mode 21 In this mode, you shall set the upper limit of input range. You shall do implement the calibration of upper limit of input range according to the following steps: --Select mode 21, LCD will display the calibrated process value last time and related unit, --Input the reference value starting from this point via [↑] or [↓], --Press [Enter] to set. If the setting is successful, it will show “OK”, otherwise, it will show “Err”, --Use [M] to do mode switch. 4.5 Return instrument data to factory data Returning instrument data to factory data is a special operation, there is no function code. After the operation, all the configured data will disappear and will return to factory data. Please pay more attention when you do like this. You may return instrument data to factory data according to the following steps: --Turn off the power supply with instrument, --Insert two magnetic bars into “Zero” and “Span” holes at the same time, --Turn on the power supply for instrument, the LCD will display “RST?”, --If you would like to return instrument data to factory data, get the two magnetic bars out, and then insert two magnetic bars, when the process is 100%, get the two magnetic bars out again, the LCD will display “R_OK”, which means the return is successful. -- If you wouldn‟t like to return instrument data to factory data, get the two magnetic bars out, and wait for 5 seconds, it will back to normal. - 25 - Microcyber Inc Notes: For FF smart transmitter or PA smart transmitter, following the steps above, if there is RAT jump-pin, it will return to factory data without “RST”. When the process is not 100%, if you get the two magnetic bars out, it may cancel the operation of returning instrument data to factory data. - 26 - Microcyber Inc Chapter 5 Configuration of HART Smart Transmitter 5.1 Topologic Connection The connection of the HART smart transmitter includes Point-to-Point connection and Multi-Point connection. Point-to-Point(Figure 5-1) Figure 5-1 Point-to-Point Connection Feature: 1) Can be connected to the control system above through common AI input module and HART communication device, 2) 3) Mixed use of the analog and digital communication, The device address is 0. Multi-Point(Figure 5-2) Figure 5-2 Multi-Point Connection Feature: 1) Can be connected to the control system above through HART communication device; 2) Only use HART system digital function , and the fixed current on wire is 4mA; 3) Support 15 devices in short address mode. - 27 - Microcyber Inc 5.2 Function Configuration Smart transmitter can be configured by the HART configuration software, including three functions: 1) Basic information configuration: configure the basic information of device online , including tag, address, date, assemble number and so on; 2) Configurable information configuration: configure the configurable information of device online, includingprimary variable range, damp and so on; 3) Current calibration: Can calibrate 4~20mA current, using two-point calibration (4mA and 20mA),and user can set fixed current output mode, to test current accuracy. Configuration environment 1) PC with serial, the OS is Windows 2000 or Windows XP; 2) 3) HART Modem and serial wire; Matching resistance 250~550 ohm; 4) Standard pressure source. Basic information configuration Through the dialog of basic information, the basic information of the smart transmitter can be read or modified, including device address, message, description, date, assemble number, alarm, write protection, manufacturer ID, device type, device ID, long address and version info(Figure 5-3) . After information modification, click the “Apply” button to download it into device. If not send successfully, the information of the device will be not modified. If give up modification, select the “exit” button to exit basic information operation. 1) The maximum length of the tag is 8 characters; 2) The maximum length of the description is 16 characters; 3) 4) Message can be input 32 characters at most; The address selection range is 0~15; 5) Assemble number is 6 characters at most. Configurable information configuration Through the dialog of configuration information, the configuration information of smart transmitter can be read or modified, including the value and unit of the primary variable and second variable (pressure and temperature), current value, percentage, output info of the primary variable (damp value, unit, upper limit of the range, range lower limit, output transfer function), sensor info (serial number, upper limit, lower limit, minimum range, unit) and so on (Figure 5-4) . Primary variable unit configuration:The vary of the primary variable has a direct influence on the variable related to unit, such as the upper/lower limit of range, the upper/lower limit of sensor and minimum span. When you modify the unit, you can‟t modify the value of the upper/lower limit of primary variable range at the same time. Damp configuration:The range is 0~15 s. Calibrate the lower limit of range:Make the measurement primary variable value as the lower limit of range, and the range should be not changed (the upper limit of range is modified accordingly). If the adjustment of the upper limit of range exceeds the upper limit of sensor range, make the upper limit of sensor as the adjusted upper limit of range, and then the range is changed sequencely. Calibrate the upper limit of range:Make the measurement primary variable value as the upper limit of range, and the lower limit of range should not be changed, so the range is changed. if the adjustment of the upper limit of range exceeds the upper limit of sensor range, make the upper limit of sensor as the adjusted - 28 - Microcyber Inc upper limit of range.Calibrate the zero of the primary variable:Calibrate the zero displacement of primary variable due to installation location. Figure 5-4 Dialog of configuration information6) Calibrate the range: After the displacement, you should calibrate the upper/lower limit of range, following are the steps: ① Add standard pressure of the range lower limit to transmitter, when the pressure is stable, select the calibration point “lower range”, as Figure 5-5 shows. And then click the button “get current value”, the calibration data is displayed in “adjustment value”. Complete the calibration by clicking the button “download”. Nowthe practical pressure value is the pressure value of range lower limit, and the current output is 4mA. Figure 5-5 Calibration of rangelower limit ② Add practical pressure of the up limit of the range on the Transmitter, select the calibration point of “up-limit of range”, Add standard pressure of the range upper limit to transmitter, when the pressure is stable, select the calibration point “upper range”,as Figure 5-6 shows. And then click the button “get current value”, the calibration data is displayed in “adjustment value ”. Complete the calibration by clicking the button “download”. Nowthe practical pressure value is the pressure value of range upper limit, and the current output is 4mA. - 29 - Microcyber Inc Figure 5-6 Calibration of rangeupper limit Current calibration and fixed current output User can calibrate the analog output current 4mA and 20mA and output fixed current. In the operation, the rolling address of the smart transmitter must be 0. And other rolling addresses will prompt error message “in multi-point mode”. In addition, an ammeter, with the 5 1/2 digit precision, should be series-wounded in the output loop of the smart transmitter. Calibrate 4mA and 20mA current:In Figure 5-7, select the current value needed to calibrate, when the output current is stable, and input the practical value of current (the value of the ammeter) to the edit “adjustment value”, and then click the button “apply”. Note whether the output current is satiafied to the requirements, if not, follow the steps above to adjust again. Fixed current output: In Figure 5-7,input the value of the current thesmart transmitter will be fixed on, to “fixed current value”, and click the button “enter/exit fixed current mode” to enter or exit the mode of fixed current output. The text of the button can display “exit fixed current mode” and “enter fixed current mode” in turn, to tell users what to do. Figure 5-7Calibrate current Saturable fixed output(Set by manufacturer, do not calibrate) In the run of the HART smart transmitter, compare the value of the primary variable and range upper/lower limit of the of the primary variable continuously. When the value of the primary variable exceeds the range of the primary variable, the smart transmitter will output fixed current to indicate that the value of the primary variable is exceeded. When it is over the upper limit, the smart transmitter output fixed current 20.8mA;When it is less than the lower limit, output 3.9mA. 5.3 Jump-pin Configuration HART smart transmitter has two hardware jumpers, as Figure 5-8 shows. The threepoints on bottom are failure alarm current setting jumpers, and the top three points are calibration protection setting jumpers. - 30 - Microcyber Inc Failure Alarm Current Jumper HART smart transmitter has self-diagnosis function. When a failure is tested out, the transmitter will output alarm current automatically. The alarm current mode depends on failure alarm current jumper setting on the right side of the communication board. When the jumpers are in the two points marke with “Hi”, it will be the high level alarm (≧21.75mA). When the jumpers are in the two points marke with “Lo”, it will be the low level alarm (≦3.75mA). Calibration Protection Setting Jumper HART smart transmitter supplies the calibration protection jumper setting or not, shown asFigure 5-8. When the jumper is at the right side of two points marked with “WRD”, it will be the calibration protection. And in that time, the HART smart transmitter does not allow any operation about modifying device configuration. When the jumper is at the right side, the HART smart transmitter allows the operation about modifying device configuration. Figure 5-8 HART Smart Transmitters Hardware Jumpers - 31 - Microcyber Inc Chapter 6 Configuration of FF Smart Transmitter 6.1 Topologic Connection FF transmitter supports many net topologies shown as Figure 6-1. . shows the bus connection of FF instrument is shown in Figure 6-2, in order to ensure the bus signal quality,the terminal matching resistances should be connected to the 2 ends of the bus. The bus maximum length is 1900m, with a repeater, the length can be extended to 10 kilometers. Master controller Fieldbus I/O Data Transfer Switch FF Bus Point To Point Bus With Branch daisy-chain Tree Figure 6-1 the Topology of FF Bus Max1900M FF Bus Power FF Bus Supply For Fieldbus THE LOCALE OF FF MASTER CONTROLLER DEVICE Figure 6-2 FF Bus Connection 6.2 Function Block FF smart transmitters carries out the FF standard function blocks, shown was the table below. Please refer to related FF protocol document for detailed info about configutaion methods of function blocks. Function Block name Description Resource block is used to describe the device identity in the field, such as device name, RES manufacture, serial number. There is no input or output parameter in the resource block. Generally, there is only one resource block for each device. Transducer block is used to read sensor hardware data, or write the data in the field to TRD related hardware.Transducer block includes the info such as range, sensor type, linearization, I/O data, etc. DSP DSP block is used to configure display info in LCD. PID PID function block has the function of PID control and setting point adjustment, process - 32 - Microcyber Inc value(PV) filtering and alarm, output tracking, etc. Analog input function block is used to achieve transducer block input data and transfer AI to other function blocks, has the function of range conversion, square root, cut mantissa,etc. LLAG RA LLAG function block is used for feedforward control. RA function block is used to control the proportion between inputs. 6.3 Function Configuration Smart transmitter supports FF Configuration Software and NCS4000 Configuration Software from Microcyber , NI-FBUS Configurator from NI, DeltaV from Rosemont and other general FF Configuration Software for configuration. The following example which uses the Microcyber‟s FF HMI explains the configuration of the Smart transmitter. Take FF Configuration Software as an example to explain the configuration method: Configuration environment 1) PC with Windows2000 or Windows XP; 2) NCS3000 gateway device, H1 bus power, H1 terminator 3) 4) FF Configuration Software; Standard pressure source; Primary variable zero configurationAdd operationing pressure value at zero point to transmitter, set as “Sensor Zero Trim” (shown as Figure 6.3) via transducer block calibration parameter ENABLE_LIN_CURVE, to finish the sensor zero calibration. Read the PRIMARY_VALUE of transducer block, it would be zero. Figure 6-3 ENABLE_LIN_CURVE configuration Lower range limit configurationAdd operationing pressure value at lower range limit to transmitter, set as “Zero Trim” via transducer block calibration parameter ENABLE_LIN_CURVE, to finish lower range limit calibration, set present sensor output as primary variable lower limit, read the XD_SCALE of AI function block, it should be the same as the present output. - 33 - Microcyber Inc Upper range limit configuration Add operationing pressure value at higher range limit to transmitter, set as “Span Trim” via transducer block calibration parameter ENABLE_LIN_CURVE, to finish full range calibration, set present sensor output as primary variable upper limit, read the XD_SCALE of AI function block, it should be the same as the present output. Secondary linearity adjusting User can achive instrument second linearization calibration all by himself via transducer block parameters LIN_CURVE_X and LIN_CURVE_Y. The steps shown as following: (1)The intelligent transmitter supports 6 calibration points input, they are parameters of transducer block. For LIN_CURVE_Y array, user should write pressure value to calibrate into array and select the unit sequencely. For example, for 3 points calibration, user should choose 10Kpa, 20Kpa, 30Kpa as the calibration points, and then write them to LIN_CURVE_Y array, shown as Figure 6-4: Figure 6-4 LIN_CURVE_Y configuration (2)Input standard pressure via pressure source, and open related transducer block in configuration software, read separately PRIMARY_VALUE, and write the data to LIN_CURVE_X array. For example, if write the read data 10.2,20.5,30.4 to LIN_CURVE_X array, shown as Figure 6-5, all the calibration is finished. - 34 - Microcyber Inc 1) Figure 6-5 LIN_CURVE_X configuration (3)User sets the transducer block parameter ENABLE_LIN_CURVE as “Enable Curve”, to enmake sure the smart transmitter works in normal after the calibration. LCD display configuration In default, smart transmitter displays transducer block PRIMARY_VALUE from the first channel shown as Figure 6-6.If the user would liketo display other parameter info of function block, they can configure the parameter according to the following the steps(X means 1, 2, 3, 4. There are 4 groups of parameters in total,each group can be configured separately. The smart transmitter will display the info of 4 groups cyclely). If there is aconfiguration error, the smart transmitter will only display CONFIG_ERR. Write the display function block status as OOS before right configuration, and write as AUTO after configuration, which makes the configuration is effective.. 1) BLOCK_TAG_X: This parameter defines function blocksname which to display. For example, user would like to display a certain PT-AI1 parameter,he should configure the BLOCK_TAG_X at first, define parameter value as PT-AI1. Notes: It must be 32 bytes, otherwise padded the ‟space‟ align 32 byte. For example, if wants to input “PT-AI1” the following should be wrote in HMI: “PT-AI1”. BLOCK_TAG_X requires input is 32 bytes. If it is less than 32 bytes, it shall be added, For example, you should write “PT-AI1” in configuration software for the “PT-AI1” mention above. 2) RELATIVE_INDEX_X: This parameter defines display function block parameter index. For example, if the user would like to display PT-AI1 output value, define the parameter as 8(The index of PT_AI1‟s OUT parameter is 8). More information can be referred to in the part of FF fieldbus functions block protocol. 3) SUB_INDEX_X: This parameter defines display function block parameter index (if exist). For example, if the user would like to display PT-AI1 output value, define the parameter as 8 and define SUB_INDEX_X as 2 (The sub index of OUT parameter value is 2). 4) MNEMONIC_X: This parameter is used to display parameter name, it can be input by user - 35 - Microcyber Inc at random, but it can‟t be longer than 16 bytes. 5) DECI_PNT_NUMB_X: This parameter defines display value precision. For example, you should define the value as 3 if you would like to display the last 3 bits after the decimal. 6) ACTIVE_X: This parameter value is as FALSE or TRUE, after finish setting other parameters, set this parameter to TURE to activation all configuration. Write it as TRUE when other parameters are confifured already, therefore, you can active all the configured parameters and the transmitter will display all the related parameter info in the group. Figure 6-6 the display parameter configuration 6.4 Jumper-pin Configuration There are 3 hardware jumpers in FF smart transmitter shown as Figure 6-7. SIM Jumper: Simulattion jumper can achieve simulation function. WP Jumper: Write protection jumper can refuse any write operation for FF smart transmitter, which can avoid the vicious modification for instrument data. RST Jumper:Reset jumper will reset the transmitter data back to factory. Please make the transmitter powered off, insert the jumper to RST, and then power the transmitter on, the data will be back to factory data. ure 7-2 PROFIBUS PA BUS CONNECTIONS 7.2 Function Block PA Smart Transmitter realizes the PA standard function block, as the table shown as the table below. Please refer to PROFIBUS PA specification for function block configuration methods. Function Block Name Physical Block Description Physical block ( PB ) describes the information of device specific hardware info, recognization info and diagnose info including device bit number, software version, - 36 - Microcyber Inc hardware version, installation date,etc. Transducer block separates the function block from instrument input/output characteristic. It carries out the function of input/output data calibration and linearization,etc, and transfer the J1 J2 J3 data to AI function block via inner channel. Figure 6-7 FF Smart transmitters jumper Chapter 7 Configuration of PA Smart Transmitter 7.1 Topology Connection Transmitter topology connection A PROFIBUS PA transmitter supports many net topologies shown as Figure 7-1. . shows the bus connection of PA instrument is shown in Figure 7-2, in order to ensure the bus signal quality,the terminal matching resistances should Transducer Block be connected to the 2 ends of the bus. The bus maximum length is 1900m, with a repeater, the length can be extended to 10 kilometers. PLC Main station Parameter configuration tool PROFIBUS DP BUS PLC Main station Parameter configuration tool connector/ coupling PROFIBUS DP BUS connector/ coupling junction box junction box PROFIBUS PA BUS P to p P to p Lateral of BUS PROFIBUS PA Crossed wired Lateral of BUS Tree style BUS Crossed wired Tree style Figure 7-1 PROFIBUS PA Network Topology - 37 - Microcyber Inc Max 1900M PA Bus PA Bus Terminal Terminal Fieldbus power 供电电源 Connector Field PA Device Fig Analog Input Block Totalizer Block Analog input block achieves analog process value via inner channel and process the value, and then provides the right measurement value to master device via bus communication. Totalizer block achieves flow instantaneous value via inner channel and cumulates value, and then provides the cumulated value to master device via bus communication. 7.3 Function Configuration Please refer to 4.2 Adjusting for PA Smart Transmitter for detailed info about range setting, zero setting, bus address and data recovery of PA smart transmitter. Environment Settings 1) PC with Windows 2000 or Windows XP, 2) 3) SIEMENS Step7 configuration software,SIEMENS PDM device management software, DP/PA coupler or connector, 4) Class 1 master station such as PLC,Class 2 master station such as CP5611 board, 5) 6) PA Terminal matcher, Standard pressure source. Transducer block parameter configuration The transmitter block separates the function block, sensor and special I/O device, it relys on device manufacture to access or control I/O device. Through the access to I/O device, the transducer block can achieve input data or set output data. Generally, the transducer block has the function of linearization, specialization, temperature compensation, control and exchange data,etc. The structure is shown as Figure 7-3. - 38 - Microcyber Inc Figure 7-3 Transducer Block Structure Parameter description as following: Parameter Description The allowable minimum calibration span is necessary to ensure that calibration is CAL_MIN_SPAN done well, and the two calibration points (highest and lowest) are not too close together. The unit is decided by SENSOR_UNIT. When the calibration is at the highest point, it will transfer the pressure signal at the CAL_POINT_HI highest point to sensor, and the sensor will write the value to parameter as the highest value at the calibration point. The unit is decided by SENSOR_UNIT. CAL_POINT_LO When the calibration is at the lowest point, it will transfer the pressure signal at the lowest point to sensor, and the sensor will write the value to parameter as the lowest value at the calibration point. The unit is decided by SENSOR_UNIT. FLOW_LIN_SQRT_P OINT LIN_TYPE LOW_FLOW_CUT_O FF MAX_SENSOR_VAL UE MIN_SENSOR_VALU E MAX_TEMPERATUR E MIN_TEMPERATURE PRIMARY_VALUE Flow calculation coefficient Linearization type Little signal cut value Sensor maximum pressure value, and unit is decided by SENSOR_UNIT. Sensor minimum pressure value, and unit is decided by SENSOR_UNIT. Sensor maximum temperature value, the unit is Celsius. It holds the minimum temperature. Sensor minimum temperature value, the unit is Celsius. Transmitter measurement value and status, are available to AI function block. The unit is decided by PRIMARY_VALUE_UNIT. - 39 - Microcyber Inc Transmitter measurement value type, code as following: 0: Pressure 1: Flow PRIMARY_VALUE_T 2: Level YPE 3: Volume 4-127: Reversed > 128: Manufacturer specific By now, it only supports 0 and 1. PRIMARY_VALUE_U Transmitter measurement value engineering unit code NIT PROCESS_ CONNECTION_MAT Process connection material code ERIAL PROCESS_ CONNECTION_TYPE Process connection material type code SCALE_IN Sensor input range, the unit is decided by SECONDARY_VALUE_1_UNIT. SCALE_OUT Sensor output range, the unit is decided by SECONDARY_VALUE_1_UNIT. This parameter contains the Pressure value and status available to the Function SECONDARY_VALU Block. E_1 Measurement value and status after modification and unit exchange, are available to AI function block. SECONDARY_VALU E_1_UNIT SECONDARY_VALU E_2 SECONDARY_VALU E_2_UNIT SENSOR_DIAPHRAG M_ MATERIAL SENSOR_FILL_FLUI D SECONDARY_VALUE_1 engineering code Percentage value after input range exchange is available to AI function block. SECONDARY_VALUE_2 engineering code Sensor diaphragm type code Sensor fill-liquid type code SENSOR_HI_LIM Sensor physical upper range SENSOR_LO_LIM Sensor physical lower range SENSOR_MAX_STAT IC_PRESSURE SENSOR_O_RING_ MATERIAL SENSOR_SERIAL_ NUMBER Sensor maxmimum static pressure Type code for O ring between sensor diafhragm and process connection Sensor serial number SENSOR_TYPE Sensor type SENSOR_UNIT Sensor original data unit SENSOR_VALUE Sensor original data value TEMPERATURE Sensor temperature value - 40 - Microcyber Inc TEMPERATURE_UNI T TRIMMED_VALUE Sensor temperature value unit, now it is Celsius. Pressure valus after calibration PROFIBUS Cycle Data Communication Confuguration PROFIBUS DP cycle data communication means Class 1 master station and slave station exchang input and output data in the polling method. The method is unconnected. In each cycle period, Class 1 master station sends data exchange request, and slave station responses the request. Cycle data communication is mainly used for configuration between slave station and PLC master station ,due to the cycle data communication, master station PLC gets input data from slave station real-time, or transfer the output data to the slave station. PA smart transmitter cycle data communication configurationis the same as PROFIBUS DP slave, we only need to add a coupler or a linker between PA BUS and DP BUS. PA smart transmitter cyber data comes from AI function block parameter in the device.There are 5 bytes in total, including 4 bytes for pressure value floating-point data and 1 byte status data. There are 2 standard function blocks, AI and TOT, as well as a vacant function block. If there is only one function block is necessary, you should configure the vacant function block. For example, is only AI function block is necessary, you should configure AI function block and the vacant function block. For cyber communication, transmiitter supports many identifiers. For AI, there are long and short identifiers. For TOT, there are Total,Mode_Total and Set_ Total identifiers, shown as following: Short 0x94 AI Long 0x42,0x84,0x08,0x05 TOT Total 0x41,0x84,0x85 Total, Mode_Total 0xC1,0x80,0x84,0x85 Total, Mode_Total, Set_ Total 0xC1,0x81,0x84,0x85 User may use SIEMENS Step7 for PROFIBUS PA configuration cycle data communication .Open SIMATIC Manager, select PLC master station and create a new project,shown asFigure 7-4. Double click to configure hardware Figure 7-4 Select PLC master station,and create new project Click hardware twice to open Hardware Configuration in HW Configuration Software. On the menu of Option, select “Install GSD” in Option list, shown as Figure 7-5. - 41 - Microcyber Inc Figure 7-5 Install GSD file When GSD files is successfully installed, at the right side of HW Configuration software you can see the device we have just installed from PROFIBUS-PA. Using your mouse to select and drag it to PROFIBS DP BUS, shown as Figure 7-6. After installing GSD file, PA instrument is shown in catalog of PROFIBS-PA Figure 7-6 Drag PA device to the PROFIBUS DP Bus Select Download configuration information to PLC master station in the PLC list. It is the last step for the communicarion configuration between PA instrument and master station cyber data, shown as Figure 7-7. Drag PA instrument into the fieldbus of PROFIBUS DP Figure 7-7 Download the configuration to PLC PROFIBUS non-cycle data communication configuration PROFIBUS DP non-cycle data communication meansfacing linking data communication between - 42 - Microcyber Inc Class 2 master station and slave station. It is under the circumstance without affection cyber data communication and in the non-cycle period. Non-cycle data is mainly PA function block parameter, recognization and diagnoseinfo,etc. Non-cycle data communication is mainly applied in PA device management, diagnose, recognization, calibration, maintenance,etc. User may use SIEMENS device management software SIMATIC PDM for non-cycle data communication configuration of PROFIBUS PA transmitters. Here is an example: Before the configuration,please add manufacture info. Find manufacturer.csv file in ...\Siemens\Step7\S7BIN. Add “Microcyber Inc.;Microcyber Inc.;;;;Microcyber Inc.;0x016C” Open SIMATIC PDM Lifelist Software; select Start Scan DP bus from Scan list, shown as Figure 7-8. Figure 7-8 Start LifeList After the bus is scanned, the slave devices in DP bus will be listed, at the same time the device ID and some diagnose info will be shown, shown as Figure 7-9. Figure 7-9 Scan DP bus list PA devices Click PA device twice will start SIMATIC PDM software. According to this software, you can write / read parameter and diagnose PA device. At the popup box, for PA instrument type, choose Device Catalog, to aff GSD file. If it‟s NCS-PT105 II PA transmitter, you may choose Microcyber Inc\NCS-PT105II shownas figure 7-10. - 43 - Microcyber Inc Figure 7-10 Select device type When device type is selected, click “OK”, now you have finished the configuration. According to the functions of download and upload of PDM software, you can complete writing and reading parameters, shownas figure 7-11 . Figure 7-11 Use PDM software to manage device 7.4 Jump-pin Configuration PA smart transmitter has three hardware jumpers, at present you can use two of them, shown as Figure 7-12 , J3 is non-used. RST Jumper:Reset jumper will reset the transmitter data back to factory. It is the same as the operation for data back to factory with magnetic bars shown as Chapter 5.4. Please make the transmitter powered off, insert the jumper to RST, and then power the transmitter on, the data will be back to factory data, shown as Figure 7-13. - 44 - Microcyber Inc Attention: After the operation for data back to factory with RST jumper, please turn off instrument power again, pull out the RST jumper, then use the instrument normally. Otherwise if you keep RST jumper like this, when next time you restart the instrument, all data will be back to factory. the configuration info before power off will be lost. J1 J2 J3 Figure 7-12 PA smart transmitter hardware jumpers 0% 50% 100% 0% 50% 100% 0% 50% 100% 0% 50% 100% Figure 7-13 PA smart transmitter data back to factory WP Jumper: Write protection jumper can refuse any write operation for FF smart transmitter, which can avoid the vicious modification for instrument data. - 45 - Microcyber Inc Chapter 8 Maintain Simple maintain Number 1 Display Reason Output current value a. power failure a. modify power is 0 b. wire cutting b. check wire HART 2 Methods transmitter smart output current value exceeds Failure connection between the sensor and the circuit board. Check the connection. limit HART transmitter 3 smart current a. instrument in multi-point fixed on mode 4mA , add pressure b. leakage a. modify slaves address in single mode b. check the connection of gas pipe the output,no change. Smart 4 communication failure transmitter a. connection failure a. check the wire loop b. multi-mode b. check net Daily maintenance:Only clean. Failing repair:Please return it back. - 46 - Microcyber Inc Chapter 9 Technical Specifications 9.1 Basic Parameter Measure object liquid、gas、stream 9~32V DC(FF,PA) 9~32V dc (FF, PA Explosion-proof instrument) Power 11.9~42 V DC(HART) 11.9~30 V DC(HART Explosion-proof instrument) Analog:2 wire 4~20mA Output Digital:HART,FF and PA signal 0~1500ohm(common) Load resistant 250~550ohm(with HART) Insulation Input and output insulating voltage:500Vrms(707VDC) Display Optional 6 bits digital number or 5 bits characters LCD display Work temperature:-40 ~ 85℃ (No display) -30 ~ 70℃ (display) -30 ~ 60℃ (Explosion-proof) Temperature scale Store temperature: -40 ~ 100℃(No display) -40 ~ 85℃ (display) -40 ℃ ~ 110 ℃(Type name include „IC‟) Allowed media temperature measured -40 ℃ ~ 149 ℃ (silicone oil); -40 ℃ ~ 204 ℃ (sylthlem800); -18 ℃ ~ 204 ℃ (inert liquid) -40 ℃ ~ 104 ℃ (others) Humidity scale 5%~100%RH Start time ≤ 5 seconds Refresh time 0.2 seconds Dump adjusting Time constant 0~15 seconds Change of cavity < 0.16 cm3 SR Range 2:1000psi(6.89MPa) SD Range 3~8:2000psi(13.8MPa) Range 3~8:2000psi(13.8MPa) Static pressure limit SG Range 9:4500psi(31.0MPa) Range 0:7500psi(51.7MPa) Range 4:58psi(400kPa) SA Range 5:218psi(1500kPa) Range 6:435psi(3000kPa) - 47 - Microcyber Inc SH Range 4~7:4500psi(31.0MPa) 9.2 Performance Index For range 2 ±0.1% of Span is for 0.5 URL≤Span ≤ URL; ±[0.05+0.025 ×(URL / Span)]% of Span is for Span <0.5 URL. Precision For other ranges ±0.075% of Span is for 0.1 URL≤Span ≤ URL; ±[0.025+0.005 ×(URL / Span)]% of Span is for Span <0.1 URL Total effects per 28℃(50℉)change: For range 2 ±[0.05% URL +0.25% Span] Temperature effect For other ranges Span≥0.1 URL:±[0.019% URL +0.125% Span] Span<0.1 URL:±[0.025% URL +0.125% Span] Long time stability In 12 months, ±0.1% of maximum range For range 2 ±1% / 13.8MPa For range 3 Static pressure effect ±0.5% / 13.8Mpa For other ranges ±0.25%/13.8MPa Location installed The maximum of the zero point movement is 0.24kPa effect Power effect < 0.005%/V of range calibrated Explosion-proof intrinsically safety Ex ia II C T4 Explosion-proof level IP65 or IP67 Vibration effect Meet GB/T 2423-1995 Electromagnetic Meet GB/T 17626-1998(IEC 61326-1:1997) compatibility 9.3 Physical Properties Electrical connection 1/2-14NPT thread in. Process connection 1/4-18 NPT thread in. Range 2~5,distance of center is 2.122 inch (53.9mm) Drawing connector pressure Range 6,distance of center is 2.176 inch (55.3mm) Range 7,distance of center is 2.197 inch (55.8mm) - 48 - Microcyber Inc Range 8,distance of center is 2.236 inch (56.8mm) Range 9,distance of center is 2.260 inch (57.4mm) Range 0,distance of center is 2.291 inch (58.2mm) Isolated Membrane and exhaust/outlet valve:316 stainless steel; Flange and connector:316 stainless steel; O-ring:fluororubber; Filled liquid:silicon oil or fluorocarbon oil; Structural materials Bolt:zinc plating carbon steel; (the material above should be selected at order, if has other requirement, please report in advance) Housing:low copper of albronze; Coating:dion epoxy resin。 Display type:3.5kg Height No display type:3.3kg - 49 - Microcyber Inc Appendix 1 Smart Transmitter Selection ● supply ○not supply model Type SR SG SA SD SH NCS-PT105ⅡSR Remote differential pressure transmitter ● ○ ○ ○ ○ NCS-PT105ⅡSG Gauge pressure transmitter ○ ● ○ ○ ○ NCS-PT105ⅡSA Absolute pressure transmitter ○ ○ ● ○ ○ NCS-PT105ⅡSD Differential pressure transmitter ○ ○ ○ ● ○ NCS-PT105ⅡSH Differential pressure transmitter for high line pressure Range ○ ○ ○ ○ ● SR SG SA SD SH 2 0.03kPa ~1.5kPa ● ○ ○ ○ ○ 3 0.075kPa ~7.5kPa ○ ● ○ ● ○ 4 0.374kPa ~37.4kPa ○ ● ● ● ● 5 1.86kPa ~186.8kPa ○ ● ● ● ● 6 6.9kPa ~690kPa ○ ● ● ● ● 7 20.68kPa ~2068kPa ○ ● ● ● ● 8 68.9kPa ~6890kPa ○ ● ● ● ○ 9 206.8kPa ~20680kPa ○ ● ○ ○ ○ 0 413.7kPa ~41370kPa ○ ● ○ ○ ○ SR SG SA SD SH Code Code Type of communication H HART ● ● ● ● ● F FF ● ● ● ● ● P PA ● ● ● ● ● SR SG SA SD SH ● ● ● ● ● SR SG SA SD SH ● ● ● ● ● ● ● ● ● ● Structure material Code 22 Flange 316 stainless steel Vent/Drain Isolated Filled valve Membrane liquid 316 316 stainless stainless steal steel Code M5 D42 Silicon oil Option LCD display Transition connector(316 stainless steel,number 2□) DA Ex d IIC T6 ● ● ● ● ● IC Ex ia IIC T4 ● ● ● ● ● NCS-PT105ⅡSG4H-22M5D42 IC Selection example Notes:The component is not listed, please reference to the table of optional - 50 - Microcyber Inc Appendix 2 Optional Components ● supply ○not supply Optional components list of NCS-PT105Ⅱ serials Optional components Code Model Mounting bracket SR SG SA SD SH B1 Pipe mounting bracket (angle type) ● ● ● ● ● B2 Plate mounting bracket (angle type) ● ● ● ● ● B3 Pipe mounting bracket (flat type) ● ● ● ● ● Vent/ Drain valves SR SG SA SD SH D1 On top of the Flange side. ● ● ● ● ● D2 On bottom of the Flange side. ● ● ● ● ● Transition connector SR SG SA SD SH 316 stainless steel,number 2□ ● ● ● ● ● Drawing pressure connector SR SG SA SD SH ● ● ● ● ○ ● ● ● ● ○ ● ● ● ● ● Code Code D42 Code C21 C22 C41 1/2—14NPT,pressing sleeve seal,nickel plating carbon steel 1/2—14NPT,pressing sleeve seal,stainless steel 1/2—14NPT,welded seal,nickel plating carbon steel C42 1/2—14NPT,welded seal,stainless steel ● ● ● ● ● C60 T type,M20,welded seal,stainless steel ● ● ● ● ● Display SR SG SA SD SH M5 LCD model ● ● ● ● ● tag Type of explosion-proof SR SG SA SD SH DA Ex d IIC T6 ● ● ● ● ● IA Ex ia IIC T6 ● ● ● ● ● IB Ex ia IIC T5 ● ● ● ● ● IC Ex ia IIC T4 ● ● ● ● ● Material of O-ring SR SG SA SD SH W2 Butadience-arylonitrile rubber ● ● ● ● ● W3 Ethylene propylene ● ● ● ● ● Material of bolt SR SG SA SD SH L1 1Cr18Ni9 ● ● ● ● ● L2 0Cr17Ni4Cu4Nb ● ● ● ● ● L3 42CrMo ● ● ● ● ● Code Three valves SR SG SA SD SH T1 Carbon steel ● ○ ○ ● ● T2 Stainless steel ● ○ ○ ● ● Code Code Code Note:If the range is not noted, the range is the maximum range. - 51 -


