1
Owners manual
V1.4.3
System H-5000™
D33 0414
WARRANTY
This user manual is a guide for the System 5000™. For more information, updated manuals, brochures,
technical notes, and supporting software on the System 5000™, please refer to waterlog.com or
contact your sales representative.
For additional assistance, please contact us at +1.435.753.2212 or [email protected]
Warranty
“WATERLOG™ PRODUCTS MANUFACTURED BY YELLOW SPRINGS INSTRUMENTS CO., INC.
are warranted by Yellow Springs Instruments Co., Inc. (“YSI”) to be free from defects in materials
and workmanship under normal use and service for twelve (12) months from date of shipment
unlessotherwise specified in the corresponding YSI pricelist or product manual.
WaterLOG™ products not manufactured, but that are re-sold by YSI, are warranted only to the
limits extended by the original manufacturer. Batteries, desiccant, and other consumables have
no warranty. YSI’s obligation under this warranty is limited to repairing or replacing (YSI’s option)
defective products,which shall be the sole and exclusive remedy under this warranty.
The customer shall assume all costs of removing, reinstalling, and shipping defective products to YSI.
YSI will return such products by surface carrier prepaid within the continental United States of America.
To all other locations, YSI will return such products best way CIP (Port of Entry) INCOTERM® 2010,
prepaid. This warranty shall not apply to any products which have been subjected to modification,
misuse, neglect, improper service, accidents of nature, or shipping damage. This warranty is in lieu
of all other warranties, expressed or implied. The warranty for installation services performed by YSI
such as programming to customer specifications, electrical connections to products manufactured by
YSI, and product specific training, is part of YSI’s product warranty. YSI EXPRESSLY DISCLAIMS AND
EXCLUDES ANY IMPLIED WARRANTIES OF MERCHANTABILITY OR FITNESS FOR A PARTICULAR
PURPOSE. YSI is not liable for any special, indirect, incidental, and/or consequential damages.”
A complete TERMS AND CONDITIONS OF SALE can be viewed at:
http://www.ysi.com/terms-and-conditions.php
1
CONTENTS
WaterLOG® Warranty..........................................................1
Chapter 1: Introduction.......................................................4
System 5000™ Overview................................................... 5
Features............................................................................... 5
Models and Option Cards................................................ 6
Unpacking the System 5000™.......................................... 6
Additional Support and Documentation........................ 6
Chapter 2: Hardware overview.........................................7
Top View.............................................................................. 8
Touch Screen Interface................................................. 8
LED Indicators............................................................... 8
SD Card Slot.................................................................. 8
Front Panel.......................................................................... 8
View Status Button........................................................ 8
USB Ports........................................................................ 9
Ethernet Port................................................................... 9
RS-232 Ports................................................................... 9
SDI-12 Ports.................................................................. 10
Switched +12 Volt Excitation..................................... 10
Power Connection...................................................... 10
AC Input....................................................................... 10
Digital I/O.................................................................... 10
Analog Input Section.................................................. 11
4 to 20 Milliamp (4-20mA) Output............................ 11
Option Cards.................................................................... 12
Precision Pressure Sensor Module............................ 12
Analog/Digital Expansion Module........................... 12
Installing Plug-in Option Modules............................. 13
Chapter 3: Menu Orientation..........................................14
The Main Menu................................................................. 15
Screen Design and Layout.............................................. 15
System Familiarization..................................................... 16
Chapter 4: Managing Tasks..............................................17
Concept of a Task............................................................. 18
Time vs. Event-driven Tasks........................................ 18
Manage Tasks Screen...................................................... 18
Creating/Editing a Task................................................... 19
Naming a Task.................................................................. 19
Selecting/Editing an Input.............................................. 19
Adjusting the Scan Rate............................................. 20
Advanced Scanning Options..................................... 21
Setting Precision, Slopes, and Offsets...................... 22
Calibrating Sensors..................................................... 23
Using Custom Functions............................................ 24
Adding Outputs................................................................ 28
Output Rates and Conditions.................................... 28
Removing Outputs........................................................... 29
Running a Task.................................................................. 30
Deleting a Task.................................................................. 30
2
Chapter 5: Inputs................................................................31
Input Properties Screens................................................. 32
AC-In.................................................................................. 33
Analog In........................................................................... 33
Basic Program (Input)...................................................... 34
Battery Voltage................................................................. 35
Digital In............................................................................ 36
Level.............................................................................. 36
Frequency..................................................................... 37
Event Counter............................................................... 37
Quad Counter...............................................................38
Internal Temperature........................................................ 38
Modbus Master (Input).....................................................38
Modbus Slave (Input)....................................................... 39
SDI-12 Sensor................................................................... 39
User-Defined Task............................................................. 40
Chapter 6: Outputs.............................................................41
Output Properties Screen................................................ 42
Log To File......................................................................... 42
Create a New Log File................................................ 43
Using an Existing Log File........................................... 43
Log to File Properties.................................................. 44
Configuring the Log File............................................. 44
Advanced Logging Options.................................... 47
GOES..................................................................................48
Configuring the GOES Radio..................................... 49
GOES Self-Timed Options.......................................... 52
Self-Timed Data Settings.......................................... 53
Self-Timed Data Setup.............................................. 56
GOES Random Options.............................................. 60
Random Data Setup..................................................61
GOES Radio Diagnostics............................................ 61
GOES Miscellaneous................................................... 63
Common GOES Terms................................................ 63
Understanding Binary Data........................................ 65
Julian Day Tables......................................................... 69
Deciphering Downlink Message Headers................ 71
Basic Program (Output)................................................... 73
4-20mA Out...................................................................... 73
Digital Out........................................................................ 75
Modbus Master (Output)............................................... 76
Modbus Slave (Output).................................................. 77
Switched 12V Out........................................................... 77
Chapter 7: Basic 5000......................................................79
Basic 5000 Overview.........................................................80
Basic Features....................................................................80
Basic Program Management........................................... 81
Installing a Basic 5000 Program...................................... 81
Editing Basic Program Options....................................... 82
Contents
Debugging a Basic Program............................................83
Chapter 8: Modbus............................................................84
Modbus Overview............................................................ 85
Supported Function Codes........................................ 85
Configuring Modbus........................................................ 85
Determining Modbus Master or Modbus Slave...... 85
Creating a New Port.................................................... 86
Using an Existing Port.................................................. 87
Port Settings..................................................................87
Configuring Modbus Registers.................................. 88
Chapter 9: Data File Manager..........................................90
File Operations................................................................. 91
Archiving Log Files........................................................... 92
Saving/Loading System 5000 Configurations...............92
Updating System 5000 Firmware................................... 93
Chapter 10: System Setup - General Setup..................94
General Setup Screen...................................................... 95
Date & Time...................................................................... 95
Diagnostics Menu............................................................. 96
Analog & 4-20mA Testing........................................... 96
Digital Testing.............................................................. 96
Mainboard Testing....................................................... 97
Miscellaneous Testing................................................. 97
Serial Ports Testing....................................................... 97
Help & Documentation.................................................... 98
Password Protection......................................................... 98
System Information.......................................................... 99
System Settings...............................................................100
Global Task Options.................................................. 101
System Timeouts........................................................ 102
System Cut-offs.......................................................... 102
Chapter 11: System Setup - Communications...........104
Communications Screen................................................105
Direct PC Connect.......................................................... 105
GOES Configuration...................................................... 105
Listening Ports Setup..................................................... 106
Listening Port Programs............................................ 106
Configuring Network Listening Ports..................... 107
Configuring Serial Listening Ports........................... 107
Network Setup............................................................... 108
Remote Assistance......................................................... 109
SDI-12 Transparent Mode............................................. 109
Using Extended Commands.....................................111
Chapter 12 System Setup - Inputs & Outputs...........112
Inputs & Outputs Screen................................................113
Basic Program Management........................................ 113
Log File Configuration.................................................. 114
Tasks Overview............................................................... 114
View Status Screen........................................................ 115
Chapter 13: Connecting with a PC..............................116
Direct PC Connect.......................................................... 117
Configuring the System 5000.................................. 117
Connecting via Network (Ethernet) Port................. 117
Connecting via USB or Serial (COM) Port............... 118
USB Virtual Serial Port Driver Installation............. 118
PC Networking Setup............................................. 119
Acting as an External USB Hard Drive.................. 124
Using a Web Browser................................................ 125
Using VNC (Virtual Network Computing)............... 126
Chapter 14: Maintenance and Troubleshooting.......127
Maintenance....................................................................128
Touchscreen Calibration............................................128
Troubleshooting............................................................. 129
General Data Collection............................................129
SDI-12 Communications........................................... 129
GOES Transmissions..................................................129
Chapter 15: Appendix Section.....................................130
Appendix A - System 5000 Specifications...................131
Appendix B - Pressure Sensor Module Specifications132
Appendix C - Analog/Digital Module Specifications.133
3
01 /
4
INTRODUCTION
Introduction
The System 5000™ is the next generation data logger / data collection platform (DCP) using a
touch screen interface for standard and advanced data logging applications. Optional plug-in
modules allow the data logger to be configured for a wide variety of monitoring, data logging,
and SCADA applications. Current option modules include:
• Analog/Digital expansion module
Multiple configurations are available using additional expansion cards and an internal GOES
transmitter. Specifications for System 5000™ and all option modules are available in the Appendices.
Features
• Easy to read 5.7” 1/4 VGA TFT color touch screen display with LED backlight
• GUI built in help menus - no external device (e.g. laptop) required for setup, programming, or data retrieval
• Simple expandability for additional analog channels, digital ports, RS-232 ports, and pressure sensors using
plug-in option modules
• Low power usage
• LINUX operating system
• 32-bit, 192-MHz, Arm-9 processor
• 1 Gigabyte internal data logging memory (expandable to 4Gigabytes)
• 10/100Mbit/s Ethernet port for remote programming and data retrieval
• MM/SD Card slot for simple data retrieval or firmware upgrading
• Two (2) USB Host ports for fast and simple data retrieval or firmware upgrading
• USB Device port to allow the System 5000™ to appear as a mass storage device
• Two (2) RS-232 serial ports with variable baud rates up to 115.2 Kbps
• Built in speaker with digital audio
• View Status/Push-to-read button (view data without opening the cover)
• Temperature compensated real time clock with lithium backup battery
• Plug-in terminal strip connectors
• Fiberglass enclosure with lexan window
• Operates over a wide temperature range: - 40EF to +140EF (- 40EC to +60EC)
• Quick data retrieval via SD, USB (12Mbit/s) or Ethernet (10/100Mbit/s)
• Four general purpose analog input channels
• Four digital I/O ports
• Switch closure event counters
• AC frequency counter allows direct input for wind speed sensors, etc
• Designed to output a 4-20 mA signal (No external module required)
• SDI-12 Master mode
• Common interface support for 100, 300, and 1200 Baud GOES Transmitters
• Multi-tasking design (ability to configure system while measurements occur)
• Programmable, independent scan rates, offsets, start times, stop times and output conditions fully supported
• Time and event-driven (via digital ports) operations
• Ability to record to multiple non-volatile data/log files
• Support for basic to complex math operations for non-linear sensors
• Built-in BASIC language interpreter integrates user-created Basic 5000 programs for custom/advanced
5
operations
• MODBUS Master and Slave support (RTU, ASCII, and TCP)
INTRODUCTION
Models and Option Cards
The System 5000™ comes in a variety of configurations to support simple to complex setups. The
following base models are currently available:
• System 5000™
• System 5000S
• System 5000Plus™ (Integrated with a High Data Rate GOES Radio Transmitter)
The System 5000S allows one plug-in option while the System 5000™ and System 5000Plus™
both allow up to three plug-in option modules to be added for simple expandability and are field
upgradable. The following plug-in option module is currently available:
• Analog/Digital expansion module (adds one RS-232 port, 8 analog channels, one +5 Volt reference,
one AC-In, four digital ports, and one 4-20mA signal output).
More detailed information regarding the individual option modules can be found in Chapter 2.
Unpacking the System 5000™
When unpacking the System 5000™, make
sure all the components ordered are received
and are in working condition. The basic
configuration of the System 5000™ includes
the following:
Main Deliverables:
• The System 5000™ base unit
• Sensor connection terminal blocks
• Hard copy of the “Getting Started Guide”
• 6FT USB 2.0 Cable (Data Cable)
Optional Items:
• Expansion Module(s)
• Cables
• Sensors
• SD Memory Card
• USB Thumb Drive
Additional Support and Documentation
The web page at http://www.waterlog.com will provide ongoing support for the System 5000™
data loggers and DCP products. This includes additional manuals (e.g. Basic 5000 User Manual),
new versions of the main manual, new firmware updates, brochures, technical notes, PC support
software, example Basic programs, etc.
6
02 /
HARDWARE
OVERVIEW
7
HARDWARE OVERVIEW
Touch Screen Interface
Primary access to the System 5000™ Software is managed through the ¼ VGA touch screen display
on top of the unit. The touch screen is used to view, edit, and configure the system settings and
operations.
LED Indicators
Three LEDs exist on the top panel: the
Power LED, the Active LED, and the SD Card
LED. The Power and Active LED indicate the
general status of the System 5000™ during
normal operations. The Power LED blinks
every five seconds while power is applied
to the unit. TheActive LED illuminates when
the unit is taking measurements, collecting
data or performing other background
tasks. While navigating the menus of the
System menus of the System 5000™, if any
scanning or other background operations
occur,he Active LED will blink continuously
until the scan or operation has completed.
The SD Card LED only blinks when SD
Card activity occurs.
Top View
SD Card Slot
The SD memory card slot is used to transfer data and other files to and from the System 5000™.
Once a card has been placed in the slot, the data can be accessed through the Data File Manager.
Front Panel
8
Hardware Overview
View Status Button
The View Status button allows quick access to the system status screen without opening the lid.
The status screen shows the current Tasks on the system along with their last measurement date,
time, and value. A simple press of the View Status button selects the next Task on the screen. A new
measurement of the selected Task can be retrieved by holding down the View Status button. If no
Task is selected, holding the View Status button will request a new measurement for all Tasks. New
measurement data is reported onscreen as it occurs.
USB Ports
A total of three USB connections exist on the front panel. The two USB-A connectors are
provided to connect an external USB “Device”, such as a USB Flash drive, for downloading or
uploading data to the System 5000™ internal memory using the Data File Manager. The USB-B
connector is provided to allow a direct connection from the System 5000™ to a computer. When
connected in this manner, the System 5000™ can be seen as an external hard disk on the connected
computer, allowing data files to be easily downloaded or firmware files uploaded using drag and
drop. The port can also be used as a virtual serial port, enabling the same menu system that exists
on the touchscreen to be available on the connected computer.
Ethernet Port
The Ethernet port is a 10/100 BaseT port allowing the System 5000™ to connect to a Local Area
Network or a Wide Area Network (Internet). Remote operation and file transferring, System 5000™
programming, and ports listening for incoming connections (e.g. simple web pages) can all be done
through this port. The port is only active when the system is not in its low-power sleep and indicates
its status via two LEDs in the top corners of the port.
RS-232 Ports
Two RS-232 ports are provided to connect to a PC, GOES Transmitter, modem, remote display,
or other standard serial communication equipment. These ports are configured as a DTE type of
device. This means they will plug directly into a modem (DCE type device), but will require a NULL
modem adaptor and possible gender changer if connected to a PC (DTE type device). The NULL
modem cable crosses the communication lines allowing two similar devices to communicate. The
pin out for the RS-232 ports is shown on page 10.
9
HARDWARE OVERVIEW
The pin out for the RS-232 ports is shown below.
Serial Port Pin-Out
PIN
DIRECTION
NAME
1
2
3
4
5
6
7
8
9
Input
Input
Output
Output
N/A
Input
Output
Input
Input
Data Carrier Detect
Receive Data
Transmit Data
Data Terminal Ready
Ground
Data Set Ready
Request To Send
Clear To Send
Ring Indicator
(DCD)
(RD)
(TD)
(DTR)
(GND)
(DSR)
(RTS)
(CTS)
(RI)
SDI-12 Ports
The SDI-12 Ports are provided to connect
SDI-12 compatible sensors. Standard SDI12 sensors have a minimum of three wires,
which are +12V, Data, and Gnd. There are
two SDI-12 ports, as shown above, for ease
of connecting multiple SDI-12 sensors.
Switched +12 Volt Excitation
The Switched +12 volt excitation is
provided to power sensors and, by default,
this port is always on. There are sensors
that only need to be powered when being
measured. To save on power consumption,
this port can be programmed to turn on
only during scans.
Power Connection
The Power connection is the main System 5000™ power and ground. The power LED on the front
panel will blink every five seconds when sufficient power is connected.
10
Hardware Overview
AC Input
The AC Input is provided to connect sensors that have a low level AC output like wind speed
sensors. A wind speed sensor has at least two connections: Signal (ACIn) and Reference (Dgnd).
Digital I/O
The Digital I/O connections can be
configured independently as inputs or
outputs. In the input mode, the signal has
an internal pull up resistor of 47K Ohms.
This allows a switch closure to ground to
activate the input. It can also be driven
using normal logic levels. As an output,
a 100-Ohm protection resistor limits
the drive capability. The output will still
be about 4.0 volts with a 10.0mA or less
load. When a pair of digital I/O pins is
configured as inputs, they may be used as
a quadrature shaft encoder input.
Analog Input Section
The lower right terminal strip is used for analog input functions. This includes four analog inputs, two
analog grounds, and one +5Vref excitation connection.
Analog Input Channels
There are four analog input channels labeled Vin1 to Vin4. The standard input range for all channels
is 0 to 5 volts; however, because the Analog to Digital converter is highly accurate, it
can accurately measure low level ranges as well. Differential measurements can also be made on
channels Vin1 and Vin2 or on channels Vin3 and Vin4.
Analog Grounds
There are two analog ground connection points. In order to preserve signal integrity, it is
important to use the analog grounds only for sensors connected to the analog section. The current
flowing through an analog sensor is relatively small and normally very stable. If a digital sensor
has its ground connection tied into the analog ground, the currents from the digital sensor will
flow through the analog circuitry causing voltage level shifts and noise based on digitalswitching.
There should be sufficient digital ground connection points for the digital sensors.Power grounds
should not be connected to analog grounds.
11
HARDWARE OVERVIEW
Switched +5.00 Volt Reference Excitation
The +5Vref output is used for analog sensors requiring a precision reference voltage. The maximum
output current is 10 milliamps. The Analog to Digital converter uses this excitation for
its reference to provide a ratio-metric relationship for sensors using this excitation.
4 to 20 Milliamp (4-20mA) Output
The 4-20mA output connection points are at
the far right of the lower terminal strip. Several
instrumentation applications use sensors that
provide an industry standard 4-20 milliamp output
signal. The System 5000™ data logger / DCP
can output a 4-20mA signal based on any of its
inputs. For example, a user may want to connect
a temperature probe to the System 5000™ and
convert the temperature value into a 4-20mA
output. A temperature probe on Analog Channel
1 that produces a 0 to 5 volt output representing
0 to 100 degrees Celsius could easily be setup to
produce a 4-20 mA output that represents the 0 to
100 degrees. The System 5000™ does not actually
output a 4-20mA signal, but rather controls the
current in an isolated externally powered loop.
The following figure shows a basic connection
diagram.
Option Cards
If more options are needed in addition to the base configuration of the System 5000™, option
cards/modules can be used to quickly and simply expand the functionality of the unit. Three
expansion slots allow any combination of the plug-in modules below to be added or removed
when needed, whether when initially ordered or in the field.
Analog / Digital Expansion Module
The Analog/Digital Expansion Module provides a generous expansion to the built-in analog and
digital ports available on a base System 5000™ unit. An RS-232 serial port is also provided for
additional serial connectivity and communications. The module includes two digital grounds, an
AC-In, four digital I/O ports, a +5V reference, a 4-20 milliamp output, two analog grounds, an AC-In,
four digital I/O ports, a +5V reference, a 4-20 milliamp output, two analog grounds, and eight analog
channels that can be used as four differential channels.
12
Hardware Overview
The height of the card is that of a normal
slot. Up to three Analog/Digital modules
can be installed into a base System
5000™ unit if no other modules are
installed.
Analog / Digital Expansion Module
Installing Plug-in Option Modules
Installing the System 5000™ option
modules is a quick and simple process.
After verifying power
has
been
disconnected from the unit, remove the
two screws holding the slot plate in place
and remove the plate. Insert the option
module into the opening, verifying the
card is secured within the guide rails
inside the System 5000™.
Press the card firmly into the System 5000™
and replace the screws. Reconnect the
power. Once the unit has fully booted, the
new options will be available within the
appropriate menus (e.g. Select Input, Add
Output, etc), labeled according to the Slot
in which they were installed.
13
03 /
14
MENU ORIENTATION
Menu Orientation
All setups and configurations can be performed using the built-in touch screen
display. After the System 5000™ has fully
booted, touch anywhere on the screen
to turn the display on. The screen to the
right will appear.
Manage Tasks
The Manage Tasks section is used
to set up and maintain the System
5000™’s Inputs and Outputs (Tasks).
Data File Manager
The Data File Manager section is used to
view, copy, rename, and delete data files on the System 5000™ or an attached USB thumb drive
or SD memory card. System configuration saving/loading, Firmware updating, and other options
are also performed here.
System Setup
The System Setup section is used to manage general system options and system-wide settings
such as the Site ID, date, and time.
Turn Display Off
The Turn Display Off button turns off the touch screen. To turn the display on again, simply touch
anywhere on the screen.
Enable / Disable Scanning
The Scanning indicator shows if scanning is enabled or disabled. The indicator is green when
scanning is enabled and red when disabled. Thescanning status (running of Inputs and Outputs)
can be toggled by pressing this button.
Screen Design and Layout
The images on page 16 show the basic layout for all screens used within the System 5000™. All
screens contain a header, consisting of the current screen’s title along with a Help button, and
footer, containing either an OK/Cancel button combination or a unique function button and Exit
button.
15
MENU ORIENTATION
Help Button
The Help button is available on all
screens within the System 5000™.
The Help button can provide valuable
insight regarding options on the
current screen.
OK Button
Screens with OK/Cancel buttons have
options that may need to be saved
before returning to the previous menu.
The OK button saves any changes to
the current screen. When changes are
detected, the OK label turns blue.
Cancel Button
The Cancel button discards
changes made to that screen.
any
Exit Button
Screens with Exit buttons save
changes automatically.
Run Task Button
Screens with Exit buttons also contain
a unique function button that applies
to that screen only.
System Familiarization
The best way to become familiar with the system is to explore the system options and features.
Turn the unit on, move through the menus, create simple and complex setups, and make changes
to some of the options in order to experiment with the system. Do not worry about misprogramming
the unit as the “Restore Defaults” option available on the System Settings screen
(within System Setup) will set the unit back to the default settings.
16
04 /
MANAGING TASKS
17
MANAGING TASKS
The Concept of a Task
The System 5000™ takes a new approach to data logging. During setup, measurement
parameters are assigned logical names (labels) such as AirTemp or Battery. These names are
referred to as Tasks in the System 5000™. Each Task can be assigned an input or source, such as
an SDI-12 sensor or an A/D channel, as well as one or more outputs or destinations, such as a log
file or GOES transmission. The value retrieved from the input becomes the Task’s primary value
and will be passed along to any outputs assigned to that Task. In this manner, inputs and their
values can be easily identified by their Task names in both simple and more advanced setups.
Time vs. Event-driven Tasks
Most Tasks on the System 5000™ will probably be set up and used based on a common scan
rate. If a scan rate of 15 minutes was chosen and all Tasks were setup as such, every 15 minutes
the desired Inputs would be measured and the Outputs would be run. These events are based
purely on the time of day and are most common in data logging applications.
Unique to the digital ports on the System 5000™ is the ability to be event-driven rather than
time-driven. This means that if a digital port is assigned as the Input for a Task and designated
as Event-driven (based on the falling or rising edge), the Outputs for that Task would only be run
when the chosen port detected a falling or rising edge. A rain bucket, for example, that momentarily
closes a switch could be set as Event-driven with a log file as an Output. Every
time the rain bucket closes the switch, the date and time of the exact edge change would be
recorded.
Manage Tasks Screen
The Manage Tasks screen is the primary
location for setup and configuration
of the System 5000™ and is directly
accessible from the Main Menu. All Inputs
(measurements, calculations, etc) and
Outputs (recordings, transmissions, etc)
are configured through the creation and
use of Tasks on the system.
The left-most area shows the current
Tasks and the order in which they will be
executed upon each scan by the System
5000™.
18
Managing Tasks
Task Options
Tasks are created, edited, and deleted with the options provided here. Some options may be
grayed out if a Task is not selected. Only existing, selected Tasks may be modified or deleted.
Task Priority
The priority of Tasks can be changed through use of the Move Up and Move Down buttons. The
order of the Tasks indicates the order in which they will be executed, from top to bottom. All Task
Inputs are run first, followed by all Task Outputs, both according to Task Priority.
Tasks may also be individually Disabled or Enabled through the Disable Task/Enable Task function
button. A disabled Task will not be measured nor have any Outputs run. Disabled Tasks appear red
with a strike through their name.
Creating / Editing a Task
To create a new Task, press the New Task
button on the Manage Tasks screen. To
Edit an existing Task, select the desired
Task and press the Edit Task button on
the Manage Tasks screen. Both the New
Task and Edit Task buttons open the Edit
Task screen shown above, displaying
information pertinent to the new or
existing Task.
Naming a Task
Task Label
Task label defines the unique name used
for this Task throughout the system. To change the Task name, press the Edit Label button on the
Edit Task screen.
As the Task Label is frequently referred to, use a name that will allow the Task to be easily identified.
For example, if recording the Battery Voltage, the Task could be labeled “Battery”. Once a new
name has been entered, press the OK button to save the new label.
Selecting / Editing an Input
Each Task contains a single Input or Source, typically performing a measurement or retrieving a
value. The value from the Input will be passed to all associated Outputs and used wherever the Task
label is specified (e.g. in Custom Functions). To select a new Input, press the Select Input button. 19
To
edit the properties of the existing Input, press the Edit Input button.
MANAGING TASKS
Available Inputs are shown on the Select
Input screen. If an option card is installed,
additional Inputs may be available and are
designated by their slot within the system.
The screen to the right depicts an Analog/
Digital expansion module installed in Slot
1.
Select the desired Input and press the
OK button to open the Properties for that
Input. Deselecting the checkbox at the
bottom of the Select Input screen causes
the Edit Task screen to be displayed
rather than the selected Input’s Properties
screen. Each Input typically has distinct
properties applicable only to itself. An
example Analog In Properties is shown
below. After modifying the Properties for
an Input, press the OK button to save the
changes.
Adjusting the Scan Rate
Each Input can have its own individual
Scan Rate as shown on the Task’s Input
Properties page. Input Properties screens
are accessed through either selecting
a new Input or pressing the Edit Input
button on the Edit Task screen. Simple
scan rates can be edited by pressing the
Edit button next to the current Scan Rate.
Advanced Scanning Options such as
Scan Offsets, Start/Stop Times and Scan
Intervals can be attributed to individual
Tasks by pressing the Advanced (Adv)
button.
Scan Rate
20
The Scan Rate defines the interval at which the Task will acquire a new measurement or retrieve
a new value. This value is based off a 24-hour format with 00:00:00 indicating 24 hours. The
format is HH:MM:SS.
Managing Tasks
Advanced Scanning Options
Each Input can have its own individual
Scan Rate as shown on the Task’s Input
Properties page. Input Properties screens
are accessed through either selecting
a new Input or pressing the Edit Input
button on the Edit Task screen. Simple
scan rates can be edited by pressing the
Edit button next to the current Scan Rate.
Advanced Scanning Options such as
Scan Offsets, Start/Stop Times and Scan
Intervals can be attributed to individual
Tasks by pressing the Advanced (Adv)
button.
Offset
Defines the offset (positive or negative) for the Task’s specified scan rate. This value is
based off a 24-hour format with 00:00:00 indicating zero seconds. The format is HH:MM:SS.
The Offset must be less than the Scan Rate.
A Scan Offset can be set either before or after the given rate to offset the measuring of data. For
example, an Offset of negative 30 seconds (-00:00:30) in the above scenario would cause the
Batt Task to take measurements at 00:14:30, 00:29:30, 00:44:30, etc.
Scan Offsets allow a common Scan Rate to persist despite unconventional scanning times. If the
Scan Rate was set to 00:14:30 in the above example (with an Offset of 00:00:00), the Task would
scan at 00:14:30, 00:29:00, 00:43:30, etc as the interval would increase each time by 00:14:30
rather than an even 00:15:00. All scan rates, regardless of interval, start each day at 00:00:00.
Custom Task Schedule
Allows a scanning schedule to be
defined for individual Tasks. The Task
Schedule determines when a Task
should be making measurements
and running Outputs on a daily
basis. Each day begins at midnight
(00:00:00) and runs until 23:59:59.
The default Action of Enable Task
Scanning at Time 00:00:00 refers to
starting the Task measurements at the
beginning of the day. All Tasks (unless
an Offset is applied) will have their first
measurement occur at midnight. The
Add, Edit, and Remove buttons can
be used to alter the Task Schedule.An
example Task Schedule is detailed to
the right.
21
MANAGING TASKS
The Task Schedule to the right shows a
Task beginning measurements at 6am,
running until noon (12pm), then starting
again at 6pm. As no relating Disable Task
Scanning Action follows the last Action,
the Task will continue scanning until
midnight and then stop again until 6am
the following day where the schedule will
be repeated.
If any errors are found within the Task
Schedule, an error message will be
displayed when the OK button is pressed.
All errors must be corrected before a Task
Schedule can be used. There are no limits
to the number of Actions and Times that
can exist within a Task Schedule.
Scan Times
Lists the scan times for the Task dependent on the Scan Rate, Scan Offset, and Task Schedule. To
view a full day’s listing of Scan Times, press the View All button.
Setting Precision, Slopes, and Offsets
Precision, Slopes, Offsets, and Custom Functions can be attributed to individual Tasks through use
of the Math & Data Options (Edit) button available in the bottom right of all Input Properties screens.
Math & Data Options
Defines additional elements to apply
after retrieving a Task value.
Precision (digits)
Defines the maximum number of
characters to appear after the decimal
point of the Task value. For example,
if the Precision is set to 3 and the Task
had measured a battery voltage of
12.64534, the value of 12.645 would
be stored. If a shorter value was
retrieved, 12.5 for example, only 12.5
would be stored.
22
Managing Tasks
Options
Either a simple slope and offset or more complex custom function can be assigned toeach Task.
A default Slope of 1.0 and Offset of 0.0 will cause the Task value to remain unchanged. To change
which option to use, select the radio button next to the desired option.
Slope / Offset
Each Input has an optional slope (multiplier) and offset (additive) that can be used to perform
linear conversions. The Slope multiplies the measured value by the specified number and the
Offset adds to that resulting value. The default Slope value is 1.0; Offset is 0.0.
An example would be to convert an Analog voltage to wind direction. A simple wind direction
sensor uses a continuous turn potentiometer excited by the 5.00 volt excitation giving an output
of 0 to 5 volts for a wind direction of 0 to 360 degrees. In this case the slope would be 72 (360
degrees / 5 volts = 72). Leaving the offset at 0.0 will convert the voltage to a wind direction.
Calibrating Sensors
The calibration screen enables a sensor to
automatically calculate an offset based
on an expected value. As the Calibration
menu uses the specified Slope, first verify
or adjust the Slope to the expected value,
then enter the Calibration menu.
Measure Sensor
A sensor can be continuously
measured by pressing the Start
button. Once measuring has started,
a Stop button will become available to
stop the measurement operation. As
each measurement is time stamped
according to when the measurement
was retrieved, a history of values will be displayed in the action Log window.
Auto-Set Value
An Offset can be automatically calculated at any time for the given sensor. By pressing the Edit
button and entering the expected value, a new measurement will be retrieved and the needed
Offset will be calculated. The results of these actions will be recorded in the Action Log. Any
newly calculated Offset will be set on the previous Math & Data Options screen.
The resulting measurements, calculated offsets and operations performed can be viewed
in the Action Log window. All output shown in the Action Log can be saved by pressing the Save
23
Log button.
MANAGING TASKS
Using Custom Functions
More complex mathematical operations
can be performed through use of
Custom Functions. Custom Functions
can not only utilize advanced arithmetic
operators, but also other Task values in
their calculations. The Custom Function
screen is accessed by first pressing the
radio button next to the Custom Function
option, then pressing the Edit button next
to the existing Custom Function on the
Math & Data Options page.
The Custom Function screen has three
buttons that provide access to extended
operations: Operators, Functions, and
Created Tasks. The existing custom
function will be listed in the top area,
where an Evaluate button can be used to
test the function itself.
Operators
Built-in operators provide the base for
arithmetic and logical equations. They are
of lower precedence than built-in functions
and can be accessed by pressing the
Operators button.
Powers
x^y: 24
x raised to the power of y, 3^5 = 243
Multiplication / Division
Addition / Subtraction
x * y: x / y:
x + y: x - y: x multiplied by y, 20 * 30 = 600
x divided by y, 20 / 30 = 0.666667
x added to y, 20 + 30 = 50
x subtract y, 20 - 30 = -10
Managing Tasks
Low Level Logic
x == y: x!=y: x > y: x >= y: x < y: x <= y: x & y: Is x equal to y (Notice double equal signs) 1 if true 0 if false
Is x not equal y 1 if true 0 if false
Is x greater than y 1 if true 0 if false
Is x greater than or equal to y 1 if true 0 if false
Is x less than y 1 if true 0 if false
Is x less than or equal to y 1 if true 0 if false
Logical AND operation. If x does not equal 0.0 AND y does not equal 0.0 then
return 1.0, else return 0.0. For example, (A1>2.5)&(A2>3.5) returns 1.0 if Task A1 is
greater than 2.5 AND Task A2 is greater than 3.5, else it returns 0.0
x | y: Logical OR operation. If x does not equal 0.0 OR if y does not equal 0.0 then return 1.0,
else return 0.0. For example, (A1>2.5)|(A2>3.5) returns 1.0 if Task A1 is greater than 2.5
OR if Task A2 is greater than 3.5, else it returns 0.0
Functions
Built-in functions provide easy access to
advanced trigonometric, logarithmic, and
mathematical equations.
Priority Ordered (Highest to Lowest)
Built-in functions provide easy access to
advanced trigonometric, logarithmic, and
mathematical equations.
Trigonometric Functions
sin(x)
Sine of x based on
degrees, SIN(30) = 0.5
cos(x) Cosine x based on
degrees, COS(30) =
0.866025
tan(x)
Tangent x based on
degrees, TAN(30) = 0.57735
asin(x) Arc sine x based on degrees, ASIN(0.5) = 30.0
acos(x)Arc cosine x based on degrees, ACOS(0.5) = 60.0
atan(x) Arc tangent x based on degrees, ATAN(0.5) = 26.565051
sinr(x) Sine of x based on radians, SINR(1) = 0.841471
cosr(x)Cosine x based on radians, COSR(1) = 0.540302
tanr(x) Tangent x based on radians, TANR(1) = 1.557408
asinr(x) acosr(x) atanr(x) Arc sine x based on radians, ASINR(0.5) = 0.523599
Arc cosine x based on radians, ACOSR(0.5) = 1.047198
Arc tangent x based on radians, ATANR(0.5) = 0.46348
25
MANAGING TASKS
Logarithmic Functions
log(x) ln(x) exp(x) Log base 10 of x, LOG(1000) = 3.0
Natural log of x, LN(1000) = 6.90775
Natural log base of 2.718282 raised to the power of x,
EXP(3) = 20.08554
Basic Math Functions
abs(x) sqrt(x)
Absolute value of x, ABS(-55.67) = 55.67
Square root of x, SQRT(100) = 10.0
Logical Functions
if(x,y,z) If condition x is true then return y else return z
IF(Batt>12.5,10,-10) = 10.0 if Batt is greater than 12.5
= -10.0 if Batt is less than 12.5
Built In Specific Sensor Functions
When a sensor is used in several applications it may be easier to build an equation into the
operating system for that sensor rather than have customers enter the equation every time
the sensor is used. The following temperature equations are for thermistor based temperature
probes. When using one of these temperature probes see the app note for its full details.
h377c (AnalogX)
Convert the voltage on analog channel X (specified in Task AnalogX) from the H-377 thermistor
probe to temperature in degrees Celsius. The following is the actual equation used:
h377f (AnalogX)
Convert the voltage on analog channel X (specified in Task AnalogX) from the H-377
thermistor probe to temperature in degrees Celsius. This function uses the same equation as
the function above, but uses the following conversion from degrees C to degrees F:
tp20b (AnalogX)
26
Convert the voltage on analog channel X (specified in Task AnalogX) to a temperature based
on the built in voltage to temperature equation TP20B. The following is the actual equation:
Managing Tasks
tp20m (AnalogX)
Convert the voltage on analog channel X (specified in Task AnalogX) to a temperature based
on the built in voltage to temperature equation TP20M. This is a temperature probe used by
the Maine district of the United States Geological Survey. The actual equation is:
Created Tasks
The Created Tasks button allows
measurement values from other Tasks as
well as the current Task to be used. The
current Task value will appear as RawValue
in the list. Note that some values may not
appear in the list and can thus cause an
ERR or erroneous value to appear when
pressing the Evaluate button. To avoid
this, verify that each Task being used in the
equation has a Value, and if not, select the
Task and press the Measure button.
System Constants
There are a few constants the system recognizes. They are implemented to the highest precision
possible.
pi e
The value for pi is 3.14159265359.
The value for e is 2.71828182846.
27
MANAGING TASKS
Adding Outputs
Each Task can have zero or more Outputs
as shown on the Edit Task screen. Outputs
typically take the value retrieved from
the Input/Source and use that value in
recording to a data/log file, transmitting
via a radio, setting a 4-20mA current,
etc. To add a new Output, press the Add
Output button. To edit the properties of
an existing Output, select the desired
Output and press the Edit Output button.
Available Outputs are shown on the
Add Output screen. If an option card
is installed, additional Outputs may be
available and are designated by their
slot within the system. The above screen depicts an Analog/Digital expansion module installed in
Slot 1.
Select the desired Output and press the OK button to open the Properties for that Output. Deselecting
the checkbox at the bottom of the Add Output screen causes the Edit Task screen to be displayed
rather than the selected Output’s Properties screen.
Some Outputs, such as log files or GOES transmissions, include multiple Tasks as part of their
processing. Each Task that is a part of that process will have an Output associated with the Output.
Oftentimes it is simpler to first create all necessary Tasks with their assigned Inputs,
Output Rates and Conditions
Outputs have a variety of options available
through their Properties screens. The
Properties screens are accessed through
either adding a new Output or pressing
the Edit Output button, after selecting the
desired Output, on the Edit Task screen.
Type
The majority of Outputs run on the
same schedule as their Inputs. This
option can be changed, however, if
the Output should be run at a different
28
rate and/or based on the true/false
evaluation of a Conditional statement.
Managing Tasks
Run with Input
Sets the Output to run on the same schedule as the Input. The Input’s measurement schedule can
be viewed by pressing the View button.
Timed Rate
Sets the Output to run on a specified schedule, regardless of the Input Scan Rate. Note that this
interval should be a multiple of the Input’s Scan Rate. If the Timed Rate is faster than the Input’s
Scan Rate, values may not be available for the Output to use. To modify the Timed Rate (or other
Advanced Scanning Options), press the Edit button next to the listed rate. Rates are in a 24-hour
format of HH:MM:SS. Timed Rates can be useful, for example, with a Log To File Output when
processing functions (such as minimums and maximums) are being used. An Input could be set
at a 1-minute (00:01:00) Scan Rate with a Log To File Timed Rate set to 5-minutes (00:05:00). In
the Properties for the Log File, the Tasks could be given functions to avg, min, or max the previous
five (1-minute) values.
Conditional
A Conditional statement can be used to determine if the Output should be run. If the resulting
value is greater than zero, the Output will proceed. Otherwise, the Output will not be run and
the next Output or Task will be processed. A logical statement that evaluates to true or false (e.g.
Battery > 0) can also be used and is processed accordingly. The setup of a Conditional statement
is nearly identical to that of a Custom Function, minus the RawValue reading of the current Task
(as the measurement will have already been made and calculated at this stage).
Removing Outputs
An Output can be removed from a Task
by selecting the desired Output on
the Edit Task screen and pressing the
Remove Output button. A prompt will
appear verifying this is correct. Removing
an Output from a Task will only affect that
Task. For example, removing a Log To
File Output from myTask will only prevent
myTask from being recorded to that
log file on future scans. All other Tasks
recording to that log file will continue to
log as expected.
29
MANAGING TASKS
Running a Task
On occasion, a Task may want to be tested
to verify everything works according to its
setup. Pressing the Run Task button will
execute the Input and Output(s) assigned
to that Task.
Note that if a scan is already in progress,
the Task will be executed when the scan is
complete.
Deleting a Task
Individual Tasks can be removed from the
System 5000™ by simply selecting the
desired Task on the Manage Tasks screen
and pressing the Delete Task button. A
confirmation will appear, verifying this
should be done.
Deleting a Task removes the Input
from retrieving further measurements
and any Outputs that utilized this Task.
Any Custom Functions, Conditional
statements, or Basic Programs that
directly referred to this Task will need
to be manually updated. Outputs such
as Log Files or GOES Transmissions will
remove the deleted Task from their setup
and otherwise remain unchanged. This
action cannot be undone.
30
05 /
INPUTS
31
INPUTS
Input Properties Screen
Each Input has a respective Properties
screen associated with it. As every Input
is different in nature from another, the
Properties screens will differ from Input to
Input. All Input Properties screens share
some common options, however, that
apply to their respective Tasks.
Task
Shows the Task name associated with
this Input.
Type
Provides available options for when
this Input is run. Generally only the Timed Scan option will be available and is an interval at
which a new measurement will be retrieved. To modify the Scan Rate or scanning schedule,
press the Edit of Advanced (Adv) button next to the listed rate. Rates are in a 24-hour format of
HH:MM:SS.
Digital Input modes of Level and Event Counter have another Type available called Edge
Triggered. This Event-driven Type causes the System 5000™ to awaken when the chosen
Digital Edge rises or falls and runs all Outputs for the Edge Triggered Task.
Value
All Inputs have either a live, updating Value or a manually retrieved Value in the bottom
right corner of their screens. Manually retrieved Values (such as an SDI-12 Sensor) will have a
Test button next to the Value label that can be pressed to retrieve a new value. Shown Values
will have any Slopes, Offsets, or Custom Functions already applied to their measured value.
Math & Data Options
All Inputs (except Basic Programs) have additional options that can be configured through Math
& Data Options. See Chapter 4, “Setting Precision, Slopes, and Offsets”, “Calibrating Sensors”,
and “Custom Functions” for more detailed information.
32
Inputs
AC-In
Each Input has a respective Properties
screen associated with it. As every Input
is different in nature from another, the
Properties screens will differ from Input
to Input. All Input Properties screens
share some common options, however,
that apply to their respective Tasks.
The AC-In frequency input is normally
used for wind speed sensors but can be
used with any sensor that produces a
low level AC frequency output. The AC
signal is normally in the range of 0.15
volts peak to peak centered at 0.00 volts.
Though the Digital I/O ports also support
frequency readings, only the AC-In can accurately measure low level frequencies.
Frequency readings typically take a few seconds to accurately measure. To add a Slope or Offset
to the measured value, use Math & Data Options.
Analog In
The Analog In input Channels are
located on the lower second block of
the front panel. Surrounding the four
channels are two ground channels
(Agnd). The last port of the first block
contains the +5.00 volt switched
excitation.
The four generic analog input channels
are configured as single ended inputs
with a default range of 0.0 to 5.0 volts.
A 5.00 volt switched excitation is also
provided for sensors that require a
precision power reference. Differential
readings may also be taken using
Channels 1-2 or 3-4. The Analog In Properties screen allows multiple options to be specified
per Task, including the Channel(s) to use, number of samples to take, and whether an excitation
warmup should occur.
Channel
All four analog input Channels have a 0.0 to 5.0 Volt input range. As the internal A/D has
33
24-bits of resolution, low level output voltage (0.0 to 500 mV) is inherently supported
and accurately measured on all channels. Both single-ended and differential measurements
INPUTS
are available by selecting either a single channel or the latter paired channels (1-2 or 3-4).
Many analog sensors send back a voltage on a single line that is referenced to ground. These are
called single ended sensors and are the simplest to work with. A simple wind direction sensor
that uses a continuous turn potentiometer is a good example of a single ended sensor.
A differential sensor will have two signal lines referenced to each other, not to ground. A strain
gauge is an example of a differential sensor. The two signal lines would be connected to analog
channels 1 and 2 or 3 and 4 and the corresponding Channels would be selected. The reading
returned from the sensor (as noted by the Analog Value in the bottom left of the screen) is the
difference between the two analog inputs.
Number of Samples
This option allows the user to change the number of samples that are averaged from the analog
input when the analog channel is scanned. The user can change the number of samples to any
number between 1 and 1000. Due to the high 24-bit resolution of the A/D, fewer samples are
needed for an accurate reading compared to traditional A/Ds. Each measurement takes an
average of 0.0375 seconds. Thus if a large number of samples are selected, the scan process for
that particular analog channel will take longer. Generally only a few samples are necessary for an
extremely accurate reading.
Est. Time (sec)
The Estimated Time will be updated as the Number of Samples changes. This number is a simple
calculation of 0.0375 * Number of Samples.
5V Warmup (sec)
Some sensors may require the 5V excitation to supply power for a specified
period of time before a measurement should be taken. For these sensors, a warmup time in
seconds can be specified using this option. For example, if a 5V Warmup of 3 is defined, the
System 5000™ will wake up, turn the 5V Excitation on, wait for 3 seconds, and then retrieve the
measurement from the selected Channel.
To add a Slope, Offset, or Custom Function to the measured value, use Math & Data Options.
Basic Program (Input)
Basic Programs can be used as either Inputs, Outputs, or Network Programs. Basic Programs
available to be used as Inputs will be selectable from within the Select Input menus. If no Basic
programs have been installed or selected as Input programs, the Basic Programs group will not be
shown in the Select Input menu.
The image on pg.35 shows a Basic Program with the name H-3531 Flashlite that is being used as an
Input for a Task. If a Basic Program does not have a name declared, the program’s filename
34
(e.g.rs232Sensor.bas) will be used as the program name and title of the Properties screen.
Inputs
Program
The Basic Program can be viewed or
debugged using the View and Debug
buttons. It is a good idea to test (Debug)
each Basic program before enabling
scanning to verify the program will run
as expected.
Any special variables, known as
Symbols, within the Basic Program will
be listed in the Variable’s box. These
variables can be modified individually
for each Task by using the Edit Value
button, allowing the same Program to
be used in different circumstances, if
desired.
More information regarding Basic can be found in Chapter 7 of this manual as well as within the
Basic 5000 User Manual, downloadable from the waterlog.com web site.
If the Program saves a value to the calling Task, the Test button may be used to retrieve the
Value determined by the Program. If a value is not found, No Value will be displayed.
Math & Data Options are not available for use with Basic Programs.
Battery Voltage
The Battery Voltage retrieves the voltage
across the Power +12V and Ground (Gnd)
inputs located on the upper block of the
front panel.
Generally, a battery is connected to and
provides power to the System 5000™. As
a good battery is key to a healthy data
logging system, having access to this value
can be very beneficial. No extra properties
are available for the Battery Voltage,
however if more complex operations are
desired, the Math & Data Options can be
used.
35
INPUTS
Digital In
The Digital I/O Ports are located on the
lower first block of the front panel. The
first port of the block is the Digital ground
(Dgnd). As Inputs, the digital signal has
an internal pull up resistor of 47K Ohms.
This allows a switch closure to ground to
activate the input. It can also be driven
using normal logic levels.
Port(s)
Defines which port is currently being
measured and will be used as the Task
Value.
Mode
Defines the current mode of the Digital Input. Digital Inputs have four modes of operation: Level,
Frequency, Event Counter, and Quad Counter. Level and Event Counter Modes allow the Edge
Triggered (Event-driven)Type to be used.
Level
The default mode for a Digital Input is
Level. This Digital Value gives the current
state of the digital I/O pin. As an Input, the
value will be a 1 or a 0 meaning “On” or
“Off” respectively. If the pin value is a 1,
the input voltage will be approximately 3.5
volts or higher, (normally 5.0 volts). If the
pin value is a 0, the input voltage will be
approximately 0.8 volts or less, (normally
0.0 volts). The range between 0.8 and 3.5
is not defined and may be either a 1 or a 0.
This Mode could be used to test the status
of an external device, such as a motor. The
digital I/O pin would be used as the
source for data; a 1 would be measured if the motor was on, a 0 would be measured if the motor
was off.
36
Inputs
Frequency
The Digital ports may also be used
for normal frequency (non-low level)
measurements and support frequencies
up to 16KHz. Frequency readings typically
take a few seconds to accurately
measure the incoming signal.
Event Counter
The Event Counter mode is normally
used with rain gauge-type applications.
However, the counter can also be used
with any sensor that acts as a switch closure
or produces a 0 to 5 volt pulse. The Slope
(located under Math & Data Options) will
probably need to be adjusted based on
the application (0.01 is typical for rain
gauges, indicating 0.01 inches of rain). A
total count value is maintained until either
the System 5000™ is reset or the Value
itself is manually reset through this screen.
Count
Defines which edge to count. Falling indicates a count will be added when the voltage drops
from 5 to 0; Rising counts when the voltage raises from 0 to 5.
Counter Options
Allows the counter to be set to a certain value or reset to zero.
37
INPUTS
Quad Counter
Two Digital Input pins can be used together
for applications using a quadrature input.
Ports 1 and 2 or 3 and 4 can be used in
conjunction to simulate a quadrature
counter.
Counter Options
Allows the counter to be set to a certain
value or reset to zero.
Internal Temperature
The Internal Temperature Input measures
the temperature inside the System 5000™.
The temperature defaults to Celsius,
though can be altered with either the
Format option or by using a Custom
Function within the Math & Data Options.
Format
Defines the scale on which the
temperature measurement is based.
Modbus Master (Input)
Modbus Master can be utilized as both an Input and/or an Output.
Modbus Master Input enables the System 5000™ to act as a Modbus Master on a Modbus
network. The Input retrieves an external Modbus Slave value according to the specified register
setup and selected Port. The Modbus Slave register’s value can be retrieved using the Test button in
the bottom left of the screen. If any errors occur (e.g. communication fails, requested
register address is out of range, etc) an “N/A” will be returned. Retrieved values can be modified
using the Math & Data Options.
38
More information regarding Modbus can be found in Chapter 8 of this manual.
Inputs
Modbus Slave (Input)
Modbus Slave Input enables the System
5000™ to act as a Modbus Slave on
a Modbus network. The Input reads
from the designated internal register
and uses the register’s value as the
Task value, retrieving the latest value
on each scan. The designated register
should be written to from an external
Modbus Master. The most recent value
is shown in the bottom left of the screen.
Retrieved values can be modified using
the Math & Data Options.
More information regarding Modbus
can be found in Chapter 8 of this manual.
SDI-12 Sensor
The SDI-12 Sensor Input allows
measurement parameters to be
retrieved
from
standard
SDI-12
compatible sensors. Two SDI-12 Ports
are located on the upper block of the
front panel for ease of connecting
multiple SDI-12 sensors. Standard SDI12 sensors have a minimum of three
wires: +12V, Data, and Gnd.
The SDI-12 Sensor Input allows the
System 5000™ to communicate with and
retrieve measurement parameters from
a standard SDI-12 sensor. The options
on the screen combine to
retrieve the requested data. For example, in the above screen, a command of “0M” would first be
sent, the reply would be received and parsed, the necessary time would be delayed and then the
data values would be retrieved. In this case, the first sdi 12 parameter would be recorded. Due to the
possible long length of time needed for SDI-12 Measurements, the SDI-12 Value can be manually
retrieved via the Test button and does not continuously retrieve the data. Once a Test has been
started the measurement can be aborted by pressing the Abort button, which is shown once the Test
has begun.
Sensor Address
Defines the sensor address to query. Addresses can be any single digit number or letter.
Sensor addresses are case-sensitive, thus sensor H is different from sensor h. Most sensors 39
typically use a number for their address. Finding unknown sensor addresses as well as
changing current addresses can be done within the SDI-12 Transparent Mode.
INPUTS
Measurement CMD
Defines the measurement command to use when querying the SDI-12 Sensor. Available
commands are M, R, C, MC, RC, CC, and D with an optional number specified after the command
(e.g. M1, MC2, etc).
SDI-12 Parameter
Defines the parameter to record after receiving the measurement data. A value of 5, for example,
will return the fifth value received from the Data command after a standard Measure command.
All necessary waiting and available parameters will be interpreted and received by the System
5000™.
Transparent Mode
The built-in SDI-12 Transparent Mode, discussed more in Chapter 11, allows all SDI-12
communication (to/from the System 5000™ as well as from other sensors on the sdi-12 line) to
be seen. Pre-defined as well as custom/extended SDI-12 commands can be issued from within
the Transparent Mode.
User-Defined Task
The User-Defined Task can be used for
any general purpose. By default the value
will be zero. The Value can be changed
to a static number by adjusting the Slope
and Offset, or given a possibly changing
number based on a Custom Function. It
could be used to calculate a new, complex
value obtained by other Tasks. Or it
could be used, for example, as a simple
measurement counter by assigning a
Custom Function of RawValue + 1, telling
the Task value to increment every time it
is run.
The User-Defined Task could also be used as a generic placeholder for a value generated by
some later Basic Program. Basic Programs that retrieve and/or generate many values that may
want to be used in other Outputs (e.g. GOES Transmissions, Logging to Files, etc) need a place
to store those values. User-Defined Tasks provide the perfect positions for these values.
40
06 /
OUTPUTS
41
OUTPUTS
Output Properties Screen
Each Output has a respective Properties
screen associated with it. As every Output
is different in nature from another, the
Properties screens will differ from Output
to Output. All Output Properties screens
share some common options, however,
that apply to their respective Tasks.
Task
Shows the Task name associated with
this Input.
Type
Provides available options for when this Output is run. Generally the Run with Input and
Timed Rate options will be available and will specify the interval at which the retrieved
measurement will be processed by the Output. Run with Input, as its name infers, will run the
Output on the same schedule as the Input Scan Rate. The Timed Rate, however, allows a
different rate, typically a multiple of the Input Scan Rate, to be used. If the Timed Rate is faster
than the Input’s Scan Rate or on a different time interval, values may not be available for the
Output to use. To modify the Timed Rate, press the Edit button next to the listed rate. Rates are
in a 24-hour format of HH:MM:SS. Timed Rates can be useful, for example, with a Log To File
Output when processing functions (such as minimums and maximums) are being used. An Input
could be set at a 1-minute (00:01:00) Scan Rate with a Log To File Timed Rate set to 5-minutes
(00:05:00). In the Properties for the Log File, the Tasks could be given functions to avg, min, or
max the previous five (1-minute) values.
Most Outputs allow a Conditional statement that can be used to determine if the Output should
be run. If the resulting value is greater than zero, the Output will proceed. Otherwise, the Output
will not be run and the next Output or Task will be processed. The setup of a Conditional statement
is nearly identical to that of a Custom Function, minus the RawValue reading of the current Task
(as the measurement will have already been made and calculated at this stage).
Log To File
Measurements retrieved from Inputs can be stored in the internal memory of the System 5000™
through logging to the Log To File Output. Multiple log file configurations can be created,
allowing different sensors to be logged to different files. Data is recorded to log files after each
scan and are re-created if ever deleted or renamed. These log files can be easily viewed and/or
retrieved at any time via the Data File Manager on the Main Menu. As each log file
42
configuration is stored separately, every log file can be fully customized for its own purpose.
Various delimiters (e.g. comma separated, tab separated, etc) as well as file archiving/
Outputs
memory management options are available through the Advanced Logging Options of the Log File
Properties screens.
Whether desiring a new log file or using an existing one, setting up a Task to log its value can
either be done through the Add Output selection screen or through the System Setup - Inputs &
Outputs > Log File Configuration screen. The following sections will cover only setup through the
Add Output screens. More information regarding using the Log File Configuration screen can be
found in Chapter 12.
Log files can also be individually enabled or disabled for logging via the Log File Configuration
screen. Disabled log files will appear in red and have a strike through their name.
Creating a New Log File
To begin logging data, a new log file
configuration will need to be created.
From the Add Output screen, simply
select Log To File (New Log File) and press
the OK button to open the Log To File
Properties screen. This specific Output
will automatically generate a new log file
configuration named after the System
5000™’s Site ID and log the Date,
Time, and the Task’s value in a commadelimited format (csv). No further setup
or adjus™ents are needed as logging of
the Task value will begin once Scanning is
Enabled on the Main Menu.
Using an Existing Log File
Adding additional Tasks to existing log
file configurations is a simple process and
can be done through the Add Output
selection screen. From the Add Output
screen, simply select Log To File (filename)
with the appropriate log filename and
press the OK button to open the Log To
File
Properties
screen. This
will
automatically add the current Task to the
existing log file configuration. No further
steps are necessary for the Task value to
begin logging once Scanning
is Enabled from the Main Menu.
43
OUTPUTS
Log To File Properties
After selecting the Log To File Output, the
following Log To File Properties screen
will appear. The log file name and file size
will be displayed in the lower left box.
If the file has not been created yet (no
logging has occurred), the Size will remain
empty. The Add and Remove buttons are
available if an alternative log file is desired
for logging. Using the Remove button
will only remove the Task from the log
file configuration and will not remove the
configuration itself. When the Add button
is pressed, all available configurations will
be available, including the option for a
New Log File. To remove log file
configurations, the Log File Configuration screen found within the System Setup should be used. To
add a Task to multiple log file configurations, the Add Output button on the Edit Task screen should
be used.
The log file itself can be viewed by pressing the View button. The Data File Manager from the
Main Menu can also be used to access and view log files. The Edit button allows the specifics of
the Log File configuration to be edited and customized as shown below.
Configuring the Log File
The Log File Properties screen allows
the general setup of a log file to be
configured. Each log file has its own
configuration, independent from all other
log file configurations. The file name can
be changed, a simple preview can be
viewed, Tasks can be added or removed,
and more advanced logging options can
be altered from here.
File
Defines the current log file name. The
name can be changed by pressing the
Edit button and entering a new name.
Note that when a new name is entered, all future logging will be performed on a new log file
while the previously-named file will still exist. The log file extension (.csv or .txt) is determined by
44 the delimiter used within the file. The default delimiter is a comma, allowing the file to be easily
imported and viewed within
Outputs
a spreadsheet program. The extension may change if a new delimiter is specified within the
Advanced Logging Options.A general example of what the log file will look like can be seen by
pressing the Preview button.
Advanced Options
The Edit Options button allows access to more options available for each log file configuration.
The options include the addition of Task headers, the delimiter to use, and any file management
or archiving that is desired. These options are described in more detail in the Advanced Logging
Options section below.
The lower left area of the Log File Properties screen shows the current Tasks that will be logged,
their order, the rate of their logging, and any function that may be applied to their value.
Task Options
Tasks can be added, edited, and removed from the log file configuration with the options
provided here. Some options may be grayed out if a Task is not selected. Only selected Tasks
may be modified or deleted. Use the Add Task button to add an existing Task or the DATE or
TIME variables to a log file. The Remove Task button removes the selected Task from logging. Any
previously logged values will remain in the log file but new measurements will not be logged.
Task Priority
The priority of Tasks can be changed through use of the Move Up and Move Down buttons. The
order of the Tasks indicates the order in which they will be executed, from top to bottom. All
Task Inputs are run first, followed by all Task Outputs, both according to Task Priority. Move the
selected Task up one level. Move the selected Task down one level.
The Edit Task button allows additional processing functions to be performed on Task values.
The outcome of these functions do not affect the original Task values and only apply to the
values being logged.
Use
Most functions have a USE option defining the number of values that the selected function
should be performed on. If All is selected, all recorded values (up to the last 200) will be used
with the selected function. If Prev. n Measurements is selected (where n is any desired number),
the current value and previous n - 1 values are used. For example, if a running average of the
past hours worth of data is wanted and the Task is set to scan every 15 minutes, setting the USE
to Prev. 4 Measurements would properly accomplish this. If only the top of the hour should
compute the past hour’s average, setting the Log To File to a Timed Rate of an hour (01:00:00)
would achieve this.
45
OUTPUTS
The following Log File functions are available:
avg
Returns an averaged value of all values in the given range.
delta
Returns the difference between two values: the current Task value and the previous n
measurement, 1 being the previous measurement, 2 being two measurements previous,
and so on. For example, to record the change between the current scan value (x) and the
previous scan value (y), setting the Prev. n Measurements to 1 would yield the result of x
- y.
max
Returns the maximum value of all values in the given range.
min
Returns the minimum value of all values in the given range.
sum
Returns the summation of all values in the given range.
timofmin
Returns the date and timestamp of the minimum value of all values in the given range (e.g.
MM/DD/YYYY HH:MM:SS).
timeofmax
Returns the date and timestamp of the maximum value of all values in the given range (e.g.
MM/DD/YYYY HH:MM:SS).
intervalmin
Prints the date, timestamp, and minimum value in the previous output interval. Proper use of
this function requires the Output rate to be much larger than the Input rate. For example, if
the Input Scan Rate is set to every five minutes (00:05:00) and the Output Timed Rate is set
to every hour (01:00:00), at the end of each hour, a new line would be printed containing the
date, timestamp, and value of the minimum value found within the previous hour’s worth of
data.
intervalmax
46
Prints the date, timestamp, and maximum value in the previous output interval. Identical to
intervalmin, rather returning the maximum value. Please refer to the example given in the
above intervalmin function description.
Outputs
Advanced Logging Options
The Edit Options button on the Log
File Properties screen allows additional
options to be modified for each log file
configuration.
File
Defines the log file configuration that
is currently being edited.
Include Headers
If changes are made to the log file
configuration or a new log file is
created, Task headers are added to
the log file. If any functions are being
used, an additional line under the Task header will be added defining the functions as well.
Missing Data
By default, no data is stored in a log file column if data has not been retrieved during that
scan. For example, a column in the Log File could be used to calculate an hourly average of a
15-minute value. If the column doing the averaging only output once an hour, the other 15-minute
increments would be left empty. The Missing Data option enables those slots,
which would normally remain empty, to be filled with the given value or string.
Delimiter
Defines the delimiter used between values within the log file. The default comma delimiter
allows a common comma-separated format (csv) to be used. This enables the log file to be easily
viewed within a spreadsheet program. Other available delimiters include tabs and spaces.
File Management
If a lot of data is being recorded, files are simply growing too large too quickly, or to simply
manage the outpouring of data, the File Management options provide a simple solution for
individual log file configurations.
Archiving log files can be enabled on a file size basis. Each day the log file’s size is checked,
and if the size has exceeded the set limit, the current log file is archived (renamed with a .001
incrementing extension) and a new log file is begun. In this manner, log files will never exceed
the expected file size and log files will remain small and easily transferable. Log files can also
be quickly archived within the Data File Manager via the Archive button.
47
OUTPUTS
Used in conjunction with the Archive option, the Max Number of Archive Files allows only the
specified number of archived log files to exist on the System 5000™. Once the limit has been
reached, the oldest log file is removed and the process continues. This enables the system to
properly guard its internal memory as well as manage the potentially numerous log file
generation.
The Estimated File Size calculates the approximate amount of space the current log file will fill
over the space of a year. The Estimated Days to Fill Memory takes into account all current Log
Files and the amount of free space currently on the system.
GOES
The GOES Radio is capable of sending
data at regular timed intervals called
Timed Transmissions or Self Timed Mode,
and at random intervals called Random
Transmissions or Random Mode. Both
types of transmissions can be in operation
at the same time. The System 5000™ will
check if data is to be sent to the GOES
Radio data buffer after each scan interval.
If data is in the GOES Radio timed data
buffer, it will be transmitted at its normal
interval. Data in the random buffer will be
transmitted at a random time based on the
random transmit window.
Adding Tasks to a GOES setup can either be
done through the Add Output selection screen of an existing Task or through the System Setup
- Communications > GOES Configuration screen. The following sections will cover all aspects of
the GOES setup, with special consideration given to the Add Output screen options. The GOES
Configuration, as it is directly accessible from the GOES Output Properties screens, is explained in
full detail in this section as well.
From the Add Output screen, the GOES Self-Timed and GOES Random options are available.
Both GOES Output Properties screens are very similar. Adding Tasks to GOES transmissions
(whether Self-Timed or Random) is done within the respective Output Properties screens.
The rate of each GOES Self-Timed Output directly affects how much data will be sent with each
transmission. For example, if transmissions are scheduled for every hour, having an Output Rate
of 15 minutes (00:15:00) will allow the past four values (60/15 = 4) to be sent each transmission.
Changing the Output Rate to every 5 minutes (00:05:00) would allow the past 12 values (60/5 =
12). In the above screen, through the Task is scanning every minute (indicated by the Input
Rate), a much slower Timed Rate (such as 15 minutes) would be preferable to fit within the
allowed GOES transmit buffer. Timed Rates should always be a multiple of the Input Scan Rate.
48
Outputs
The GOES Random Output is not based
on a timed rate and thus has no timing
options. The Output simply runs after
each scan measuring the Task, using the
Transmit Condition statement set within
the Random Options to determine if a
Random transmission should be sent.
The remainder of the GOES Output
Properties screens share similar buttons
and labels.
Transmitting this Task
By default, the Task will not be added to
the GOES transmission until explicitly
told to do so through the GOES
Properties screens. The simplest way to
do this is by pressing the Add to Transmission button. Once the Task has been added and saved
as part of the GOES transmission, the label will change to Yes.
GOES Radio Mode
The current GOES mode is displayed here. If a mode is selected that does not allow the current
Task value to be transmitted, the mode will appear in red. For example, if the GOES Mode is set
to Random, no Self-Timed transmissions will be sent. Thus on the GOES Self-Timed Properties
screen, the Mode will appear as Random, highlighted in red. The Mode can be changed through
the GOES Configuration screen.
General GOES
Provides quick access to the GOES Configuration and specific Self-Timed or Random Options.
These are the same screens that appear in the GOES Configuration.
Self-Timed/Random Data
Provides quick access to the Data Settings and/or actual Data Setup for the GOES Self-Timed
and Random transmissions. These are the same screens that appear in the GOES Configuration.
Configuring the GOES Radio
The System 5000™ is used to program the GOES Radio setup options and to send data to the
Radio to be transmitted. The communication link between the System 5000™ and the GOES
Radio is through an RS-232 com port. Standard System 5000™ units can support the GOES Radio
on any RS-232 port. System 5000Plus™ units have the GOES Radio built-in and are connected via an
49
internal com port. Both Signal Engineering (SE-1200/Omnisat i.e. H-222-DASE) and
WaterLOG (H-2221) GOES Radios are supported by the System 5000™.
OUTPUTS
The setup and overall status of the
GOES Radio can be seen via the GOES
Configuration screen. The GOES Radio
must be properly set up and operational
before any transmissions will occur.
Radio Type
Defines the GOES Radio connected
to the System 5000™. Currently both
Signal Engineering OmniSat/SE-1200
and Design Analysis H-2221 radios
are supported. To select or change the
Radio Type, press the Edit button next
to the current label.
Port
Defines the port on which the current GOES Radio is connected. System 5000Plus™ units
have an internal GOES Radio and can use the GOES Port (Internal) as their selection. If the
radio is attached externally, the port that the radio is connected to should be selected. To select
or change the port, press the Edit button next to the current label.
Mode
Defines the GOES Radio mode of operation. This option should be turned on after all other
GOES options are set as desired. The system may not allow the radio to be set to a specified
mode if the given Mode’s options are not set properly. If this occurs, the Mode will revert to Off
and the Status message will indicate what needs to be set. Once the initial settings have been set
and the Mode has been chosen, changes to these settings can be made as desired. The Mode
does not need to be set to Off for changes to be saved to the radio.
Options for the GOES mode are as follows:
Off
The radio is disabled and no future transmissions will occur.
Self-Timed
The radio is set for Self-Timed transmissions only.
Random
The radio is set for Random Transmissions only.
50
Both
Both Self-Timed and Random Transmissions are enabled.
Outputs
Next Self-Timed Transmission
Displays the time of the next scheduled timed transmission.
Time to Next ST Transmission
Displays the time until the next scheduled timed transmission.
Status
Displays the current GOES status including whether the GOES Radio is responding or any errors
that may be present in the current setup. To force a re-evaluation of the current status, press the
Update Status function button. Choosing a different Mode will also force a Status update.
Address
This is the 8 character DCP (Data Collection Platform) address or ID assigned by NESDIS. This
is automatically transmitted with the data to the GOES satellite. The address must be in capital
letters and can be set by pressing the Edit button next to the label.
GOES Time
This option allows the user to set or check the time clock in the GOES Radio as well as synchronize
the System 5000™ time to that of the GOES Radio. This is a different clock than that used within
the System 5000™ data logger. This clock must be set to universal standard time, while the clock
in the data logger may be set to the local time or any other time desired.
GOES Radio Time
The GOES time clock in the radio should be set using its built-in GPS system. At initial power
up the radio will continuously try to acquire time from the GPS system in order to set the time.
Once time is set, the radio will try once a day for ½ hour to re-sync the time clock. If 7 days have
elapsed without a time sync, then the GPS receiver will stay powered up continuously trying to
re-sync again. If the GOES Time is not displayed or not incrementing every second as expected,
the radio has not acquired time from the GPS system. This is common at initial power up. The
radio will not transmit if the time has not been acquired initially or if it has been more than 7 days
since the last GPS time sync.
Enable GOES GPS
This box should always remain checked, indicating the Radio is using the time acquired by the
GPS system. The time can be manually set, however, and maintained by the System 5000™
though doing so is strongly discouraged as the GPS system is more accurate. To disable the GPS
from setting the time, uncheck this box and press OK to save the changes.
System 5000 Time
Displays the current time on the System 5000™.
51
OUTPUTS
Synchronize
Though set to (None) by default, the System 5000™ can be set to synchronize with the GOES time
due to the accuracy of the GPS system. A positive or negative Offset from the GOES time can also
be specified, if desired, to set a local time on the System 5000™.
GOES Self-Timed Options
Channel Number
Defines the Self-Timed Transmission channel number assigned by NOAA. The range for use with
the domestic satellites is 001 to 199 and represents a specific frequency for communicating with
the satellites. If the channel is an even number it is communicating with the western satellite. If
the channel number is odd it is communicating with the eastern satellite. Channels from 200 and
above are for international use.
Baud Rate
Defines the baud rate for Self-Timed transmissions. This may be different than the Random
transmission baud rate. Valid options are 100, 300 or 1200 baud. This will also be assigned by
NOAA.
Preamble
At the beginning of each transmission, a preamble signal is sent to the satellite. The preamble is
a carrier signal with no data modulation. This allows the satellite to lock on to the signal easier.
A short or long preamble is available, short being the default. Long preambles are only valid for
100 baud transmissions. On 300 and 1200 baud transmissions the preamble is always short. The
table below shows the time difference between the preambles.
Preamble Type
Total Preamble Time
Short
0.98 seconds
Long
7.3 seconds
Transmit Rate
Defines the interval at which data will be transmitted over the Self-Timed channel. The default
is a one hour rate (01:00:00). This along with the setting for the Transmit Time determine the
actual time that data will be transmitted. See the Transmit Time option below for an example. This
option also indirectly determines how much data will be sent each transmission. Use 00:00:00 for
a 24 hour transmit rate. The transmit rate is assigned by NOAA.
Transmit Time
This is a time offset for all timed transmissions based on the Transmit Rate.
52 This is also the time of the first transmission of the day relative to midnight. This offset time is
also assigned by NOAA and must be less than the Transmit Rate. This setting and the setting for
Outputs
the Transmit Rate determine the start of the transmit window. As an example, assume the
Transmit Rate is set to four hours (04:00:00) and the Transmit Time is set to 00:30:15. The
actual transmit times for a single day would then be 00:30:15, 04:30:15, 08:30:15, 12:30:15,
16:30:15, and 20:30:15. The duration of the transmission is determined by the amount of data
that is transmitted.
Window Length (sec)
Defines the length of time allowed to transmit data. The default is a 15 second window. Options
generally range from a 5 second to 1 minute window. The Window Length as assigned by NOAA.
The transmission may be set to start the transmission at the beginning of the window (default)
or to center the data transmission in the window. The Center Data option is available under the
Self-Timed Data Settings screen and should be set to Yes if centering is desired (default is No).
Self-Timed Data Settings and Data Setup can be accessed via the Settings and View/Edit buttons.
Self-Timed Data Settings
Data Layout
Data for a GOES transmission can have
a number of different layouts. Two
current options are available on the
System 5000: Default and Canada.
The Default layout is the same that
all WaterLOG data loggers use
(specifically the XL™ series). The
Canada layout is a bit more specific
and forces certain options to achieve
the final layout. Both layouts are
described in more detail below,
including examples, with the Data
Order option.
Data Format
Self-Timed transmissions can be either a SHEF (ASCII) or a Binary format. The SHEF format uses
plain ASCII text and is easily readable, but takes longer to transmit the same amount of data. On
the other hand, Binary data is transmitted quicker, but the file will need to be decoded before it
can be read. If more data needs to be transmitted within the specified window, the Binary format
may have to be used. For more details on the Binary format, please refer to the
Understanding Binary Data section later in this chapter.
SHEF (ASCII)
53
Send data in a readable, plain-text ASCII format. For example, 15.26 means just that, 15.26.
OUTPUTS
Pseudo-Binary
Send data using a 1-4 character coded sequence for each value. For example, 15.26 would
be represented as a 3-byte, 2-precision value would be @Wv. See the GOES Pseudo-Binary
Look Up Table later in this chapter for instructions on decoding these values. Binary data will
be preceded with the characters “BST” for binary scan ordered data transmissions or with
“BCT” for binary channel ordered data transmissions.
Send SHEF Headers
The system uses this option to see if SHEF codes are to be included in the data transmission.
SHEF stands for Standard Hydrometeorological Exchange Format. This is a documented set of
rules for coding of data in a form for both visual and computer recognition. The SHEF code is
typically a two character code that represents the data. For example, the standard SHEF code for
Stage data is HG, indicating the Height of the Gauge, or TA for ambient temperature. The SHEF
codes may be useful in decoding and although SHEF codes can be defined and transmitted, no
attempt was made to hold to the SHEF code format. Sending the SHEF code will add time to the
transmission so it may cut down on the amount of data able to be transmitted.
Data Sent First
Defines whether the Newest or Oldest data should be sent first, appearing at the top of the
transmission data. Some decode programs only accept the data in one format and not the other.
Data Order
In conjunction with the Data Layout, this option defines how the data will be presented. Regarding
the Default layout, the data will be sent based on each transmitted line representing a single scan
or each transmitted line representing a single channel or sensor.
Scan Order
Each line of data represents one scan and one value from each Task.
HG TA VB
18.34 22.78 12.45
18.76 22.45 12.44
18.97 22.15 12.45
19.43 22.02 12.45
SHEF headers turned on.
Stage, Temp, and Battery values in
each line.
Each line is a different scan at some
defined time interval.
Channel Order (Default)
Each line represents all the data from a single Task.
54
HG 18.34 18.76 18.97 19.43
TA 22.78 22.45 22.15 22.02
VB 12.45 12.44 12.45 12.45
Each line has all data from a single
Task. Each value in the line is scanned
at different times based on scan rate.
Outputs
If the Canada layout is chosen, Channel Order is forced, though a different style is used.
Channel Order (Canada)
Only a single continuous line of data is returned.
:HG 5 #15 18.34 18.76 18.97
19.43 :TA 5 #15 22.78 22.45
22.15 22.02 :VB 5 #15 12.45
12.44 12.45 12.45
Each Task begins with a colon (:)
followed by the SHEF header, the
minutes since the last scan, the scan
rate in minutes, followed by the
measured values.
Append Battery Scan
This option allows one battery reading to be appended to the data being transmitted. If the
WaterLOG H-2221 GOES Radio is being used, the lowest battery reading of either a current
battery measurement or the battery reading during the previous transmission (of the
loaded battery) will be used. Otherwise, the battery value is retrieved just prior to transmission.
Normal applications transmit 15 minute data yet battery values are generally not required
that often. Fifteen minute battery readings also take up transmit time that could be used for
other data values. Selecting ‘Yes’ to this option allows the user to still get a battery value for
each transmission, while shortening the transmit time and allowing other data values to be
transmitted instead.
Redundant Data Sets
Defines the number of extra data sets to send with each transmission. A data set is defined
as the data collected between transmissions. Setting this option to 0 would cause the next
transmission to contain only data collected since the last transmission. The default value is 1,
indicating that one set of extra or redundant data will be sent along with the new data. The
new data would be the data collected since the last transmission and the extra data set(s)
would be the data collected between the older transmissions in logical order. Sending
redundant data is a common practice with the GOES system, and allows the same data to be
transmitted more than once, protecting against lost transmissions.
Center Data
Defines whether the transmitted data is centered within the transmission window. The default
is to not center the data, which means the transmission will start at the beginning of
the window. If set to center the data in the window, the System 5000™ will calculate
approximately how long it would take to transmit the selected data and delay the start of the
transmission to center the data in the middle of the window. If enabled, the centering process
is done automatically, and the user should not add any time to the Transmit Time option in an
attempt to center the data.
55
OUTPUTS
Self-Timed Data Setup
The Data Setup screen is determined by
the data format selected within the Data
Settings screen. Two available formats are
available for transmissions, SHEF (ASCII)
and Pseudo-Binary.
Both screens share the majority of options
with only a few specifics detailed below.
Common to both are the following options:
Tx Buffer
Displays the approximate used and
total number of bytes available for the
transmission. The total number of
bytes is calculated from the baud rate,
window length, and preamble. If any
of these values change, the buffer size
will also change. The number of used
bytes will vary based upon the added
Tasks (their Rate and Format), data
layout, data format , as well as other
Data Settings such as Redundant Data
Sets, SHEF Headers, and whether a
Battery
Scan is going to be appended. If
the total buffer size is exceeded, the
used number will be highlighted
in red. Excess data is truncated to
the maximum allowed in order for a
transmission to still be sent and not
overlap another transmission (or trip
the failsafe).
Shef (ASCII)
Pseudo-Binary
Tx Preview
This option generates the actual data that would be used if a transmission were to occur at this
very moment and displays the results. Note that some data may be missing as the measurements
have yet to be taken.
Radio Buffer
This option shows the buffer on the GOES Radio. As the buffer of a radio is only filled on the
56 scan just prior to the transmission, the radio buffer will generally remain empty (as once the
transmission is sent, the buffer is cleared again). This option can be useful to verify information
Outputs
is actually reaching the GOES Radio. For example if scanning occurs every 15 minutes, the
Transmit Rate is set to every hour, and the Self-Timed Transmit Time is set to 00:22:15, the radio
buffer would be visible after the scanning at the 15 minute mark (e.g. 00:15:00) has completed
until the transmission is sent just after the 22nd minute. The radio buffer wouldn’t be filled again
until the end of the next hour’s 15 minute scan time (e.g. 01:15:00).
Task Options
Tasks may be added, edited, and removed from GOES transmissions with the options provided
here. Some options may be grayed out if a Task is not selected. Only selected Tasks may be
modified or removed.
Task Order
The ordering of Tasks can be changed
through use of the Move Up and Move
Down buttons. The order of the Tasks
indicates the order in which they will
appear in the GOES transmission.
Depending on the Data Format (SHEF
or Binary), one of the following Edit
Task Format screens will appear when
the Edit Task button is pressed. The
Edit ASCII Task Format screen allows
a desired format, SHEF Code and
Function to be chosen for the selected
Task. If the entered SHEF code does
not appear on the Data Setup screen,
the SHEF Headers option may need to
be enabled within Data Settings.
Left of the Decimal
Sets the number of digits to display to the left of the decimal. The user can choose a data display
format for each GOES data value transmitted. The format indicates how many digits should be
displayed on each side of the decimal point. The default is XX.XX which is 2 digits on each side
of the decimal point. This gives a range of -9.99 to 99.99. If the value is outside the range, then
the most significant digits are displayed and the decimal point is shifted as
needed. For example a value of 123.45 would be displayed as 123.4 if the XX.XX format was
used. Some GOES decoding programs must have data in a fixed format so it is important to
choose a format that fits the range of data expected for that column. Also choosing a format that
displays several digits like XXXX.XX will waste space and transmission time if the data for the
column never uses that many characters.
Right of the Decimal
Sets the number of digits to display to the right of the decimal.
57
OUTPUTS
Selected Format
Displays the format based on the selections of the above two options.
SHEF Code
Displays the SHEF code used for this
particular Task. Two character codes
are expected but not enforced. The
Use Task Name button simply places
the Task Name into the SHEF Code
field.
The Edit Binary Task Format screen
allows the number of bytes,
precision, sign mode, and function
to be chosen for the selected Task.
Bytes
Each data value is converted into a
Pseudo Binary format consisting of 1 to 4 bytes. Using more bytes allows a wider range and
precision, at the expense of using more space within the transmission window. Each byte in this
format uses 6 bits for data, one bit is always set to a 1, and one bit for parity. A single byte with
6 bits used for data gives a range of 0 to 63; a 4 byte value can have a range of 0 to 16777215.
Fine-tuning of a transmission can be found by properly assigning each Task only the number of
needed bytes. This will, of course, make the decoding process a bit more difficult as well.
Precision
Defines the number of digits to the right of the decimal point that should be preserved. For
example, a water level value in meters will still require millimeter resolution. Setting the precision
to 3 would allow this. On the other hand, if a Task measuring wind direction returns only whole
numbers, the number of digits needed would be zero.
Selected Range
Displays the available range of values given the selected Bytes and Precision.
Sign Mode
This option indicates if the values will be only positive values or if they may include negative
numbers. Signed numbers can be in two’s complement or signed magnitude format.
58
Outputs
Function
A function can be used to calculate a finer value for transmission. Available functions are the
same as those available to Log Files:
avg
Returns an averaged value of all values in the given range.
delta
Returns the difference between two values: the current Task value and the previous n
measurement, 1 being the previous measurement, 2 being two measurements previous,
and so on. For example, to record the change between the current scan value (x) and the
previous scan value (y), setting the Prev. n Measurements to 1 would yield the result of x - y.
max
Returns the maximum value of all values in the given range.
min
Returns the minimum value of all values in the given range.
sum
Returns the summation of all values in the given range.
timeofmin
Returns the date and timestamp of the minimum value of all values in the given range (e.g.
MM/DD/YYYY HH:MM:SS).
timeofmax
Returns the date and timestamp of the maximum value of all values in the given range (e.g.
MM/DD/YYYY HH:MM:SS).
intervalmin
Only available for the Canada layout. Follows the Canada formatting by printing a colon,
SHEF Header, the number of minutes since the minimum value, the output rate in minutes,
followed by the minimum value itself. Proper use of this function requires the Output rate to
be much larger than the Input rate. For example, the Input Scan Rate could be set to every five
minutes (00:05:00) and the Output Timed Rate is set to every hour (01:00:00), or whatever the
Transmit Rate may be.
intervalmax
Only available for the Canada layout. Follows the Canada formatting by printing a colon,
SHEF Header, the number of minutes since the maximum value, the output rate in minutes,
followed by the maximum value itself. Identical to intervalmin, rather returning the maximum
value. Please refer to the example given in the above intervalmin function description.
59
OUTPUTS
GOES Random Options
Channel Number
Defines the Random transmission
channel number. The range is 1 to 199
and represents a specific frequency
for communicating with the satellite.
The channel number will be assigned
by NOAA.
Baud Rate
Defines the baud rate for the random
transmissions and is assigned by
NOAA. Keep in mind this baud rate
may be different than the Self-Timed
transmission baud rate.
Transmit Window
Defines the window length used by the radio within which to generate a random time to transmit
the data. When data is placed in the random transmit buffer of the radio, that data will be
transmitted at some random time in the Transmit Window. For example, if a Transmit Window of
5 minutes is set (00:05:00), when data is sent to the random buffer, the transmission is randomly
scheduled at some time within the next 5 minutes. Be aware that if new information is added
to the Random window, it will overwrite any previous entries and may re-schedule the random
transmission. A smaller window than the Scan Rate will allow all Random transmissions to be
successfully sent and not overwritten or replaced.
Transmit Condition
This option displays the conditional statement used to determine if a random transmission should
be sent. This statement is normally a logical expression that evaluates to being true or false. For
example, “Analog1 > 4.5” would equate to true if the value for a Task named Analog1 measures
a value greater than 4.5 and would equate to false if it was less than or equal to 4.5. Logical
expressions return a value of 1 if true and 0 if false. If the conditional statement is true, a random
transmission will be scheduled.
The Transmit Condition will also evaluate as true for any value that is greater than 0.0 and false
for any value that is 0.0 or less. This allows for standard math expressions to also be used for the
Transmit Condition. For example, if a temperature probe was connected to an analog channel
that read in degrees F and was assigned to a Task named Probe, a math equation like “(Probe -32)
* -1” could be used to trigger a transmission any time the temperature was below 32 degrees F.
If the temperature is at or above freezing, the results of the equation would be zero or negative
60 and would be considered false, otherwise it would be positive and true.
Outputs
The conditional statement can be based on multiple values: (Analog1>4.5) & (RainFall> 0.05).
In this example the value for the Analog1 Task must be greater than 4.5 AND the RainFall Task
(probably a digital event counter) must be greater than 0.05. Another example would be
(Analog1>4.5) | (RainFall > 0.05). In this example the value for the Analog1 Task must be
greater than 4.5 OR the RainFall Task must be greater than 0.05 in order for the function to be
true, which would cause a random transmission.
The Transmit Condition is of the same format as Custom Functions and Conditional statements.
See Chapter 4 regarding Custom Functions for a complete understanding on how to enter, edit,
and evaluate the math and logic functions.
Transmit Random Data
This option causes the system to immediately send the data defined in the Random Data Options
menu. This may be useful for testing the system.
Random Data Setup
As all Binary transmissions use the PseudoBinary format, there is but a singular Data
Setup screen. All options are identical to
the Self-Timed Data Format screen when
using the Pseudo-Binary format.
For more details on the individual options
available on the Random Data Setup
screen, refer to the above explanations
regarding the Self-Timed Data Setup
using Pseudo-Binary data.
GOES Radio Diagnostics
The Diagnostic Menu is available once a
Radio Type and Port have been chosen. Depending on the Radio Type, the Diagnostics screens
may have different options available. These options can provide a good basis for troubleshooting
or general status information regarding the radio and its transmissions. The Results Window at the
bottom of the screen provides the output of the pressed button. Available on both radio types are
the following options:
Radio Status
Retrieves and displays the miscellaneous radio settings as reported from the radio. This
information includes the state of the GPS, Self-Timed and Random Transmission information,
the current Firmware Revision, as well as the current battery voltage and temperature of the
radio.
The battery voltage readings give a good indication of how the battery is holding up. Mainly 61
look at the difference between the voltage during the last transmission and one of the other
readings to see if there is a large difference.
OUTPUTS
The current temperature reading should be close to ambient but may be off by a few degrees.
The latitude and longitude at the site are listed if the GPS receiver is working and has acquired
the time and other GPS information.
There is general GPS information listing if the time has synced, when it synced, how many
missed syncs have occurred, etc.
The fail safe status is also listed on this screen and should always indicate it is ok.
Self-Test
The Self-Test option will either perform a Self-Test on the GOES Radio (H-2221) or show the most
recent Self-Test results (OmniSat/SE-1200). Self-Tests can take several minutes to complete. Radio
hardware including temperature, battery voltage, and flash (memory) will be checked through
these routines. There are several checksum or CRC tests here that return OK or an Error. If a CRC
test fails it may be best to call technical support to discuss the problems. There are also some
battery and temperature tests. The temperature test often fails and it is normal if the temperature
is not at room temperature. The temperature reading should be close to ambient temperature.
Send ST Carrier (90 sec)
This option is used to test the RF power output when the signal is not being modulated. This test
allows for the true power of the transmitter to be measured. This will run for 90 seconds or until
the Stop button is pressed.
Since the carrier is sent on the self-timed channel and is normally used as a local power test, it
should only be used when the unit is connected to a dummy load. Transmitting on this channel
while connected to an antenna will interfere with other users and other sites.
A couple of things to watch for is the power reading on the watt meter to see that it holds steady
and does not drop off in time as the test is used for a minute or more. The other thing to watch is
the battery voltage level at the radio to see that it does not drop off significantly also.
When using this option, it is recommended that Scanning is turned Off.
Send Random Tx
To test sending a random message, this option will send the message “This is a test message”
over the set Random Channel at the baud rate specified in the Random Options.
Specific to the H-2221 Diagnostics screen are the following options:
Config
62
The Config button retrieves the current transmitter settings collected from the GOES Radio.
This information includes all of the information set within the GOES menus on the System
5000.
Outputs
Last Tx Info
The Last Tx Info retrieves the status and conditions of the most recent transmission. This
information includes the battery voltage before, during, and after the transmission as well as
the transmission duration and power levels.
GPS
The GPS Info retrieves the status of the most recent GPS measurement. The response has
an entry which indicates the time the transmitter’s clock was last set to UTC. The latitude and
longitude are in degrees minutes seconds and the altitude is in meters. Based on the GPS
latitude and longitude, the transmitter calculates the theoretical azimuth and elevation angles
to use for the satellite antenna.
Failsafe
The Failsafe option allows the status of the Failsafe to be retrieved. If the Failsafe has
been tripped, the button will change to Reset and can be used to reset the status of the
Failsafe.
Note that only the H-2221 GOES Radio can perform a software Failsafe reset
GOES Miscellaneous
Understanding how GOES operates and the nuances of every setting can be difficult. The
following sections will hopefully provide a few more helpful hints and insights into the operations
and fundamentals of GOES operations. Common GOES Terms include:
Baud Rate
GOES data is transmitted from the DCP to the GOES satellite at a baud rate of 100, 300, or 1200
bits per second.
DAMS
Data Acquisition and Monitoring System.
DAPS
Data Collection System Automated Processing Subsystem.
DCP
Data Collection Platform. A data logger or data recorder system capable of gathering data from
different sensors and transmitting the data to the GOES satellite.
DCS
Data Collection System. See DCP.
63
OUTPUTS
DOMSAT
Domestic Communication Satellite. A commercial satellite used to rebroadcast GOES data.
DRGS
Direct Readout Ground Station A receiver capable of receiving data directly from the GOES
satellite.
DPS
Data Processing System.
GMT
Greenwich Mean Time. All DCPs are assigned a time slot in which they are allowed to transmit.
All DCPs must have an accurate time clock set to GMT in order to make sure they transmit only
during the assigned time slot.
GOES
Geostationary Operational Environmental Satellite. DCP or DCS systems transmit data to the
GOES satellite. There are two functional satellites used for DCP operations, both are at a fixed
position above the earth. One in the eastern sky and one in the western sky. This allows DCP
antennas to be aimed at a fixed point for optimal operation.
HDR
High Data Rate. Transmissions occurring at 300 and 1200 baud are considered to be high data
rate transmissions as much more data is transferred in shorter periods of time.
LRGS
Local Readout Ground Station A receiver capable of receiving data from the DOMSAT satellite.
NESDIS
National Environmental Satellite, Data, and Information Service.
NIST
National Institute for Standards and Technology.
NOAA
National Oceanic and A™ospheric Administration.
NWS
64
National Weather Service.
Outputs
PDT
Platform Description Table.
Note: Each DCP will have a PDT defined on a computer system at NOAA. If the table is not completely defined, then
when data is retrieved the error message “PDT RECORD IS NOT COMPLETE,” will appear. Part of this table describes
the Radio manufacture and model number.
Preamble
This is a carrier signal sent to the satellite before any data is sent. Only 100 baud transmissions
can send a Long Preamble.
Preamble Type
Total Preamble Time
Short Preamble
0.98 seconds
Long Preamble
7.3 seconds
SHEF Codes
A two character code that describes the DCP message data type. Common SHEF codes include:
HG = Height, River Stage
TA = Temperature, Air
VB = Voltage, Battery
Transmission Window
The scheduled time interval at which a DCP can transmit data in the Self-Timed mode. This is
normally a one-minute window for 100 baud transmissions. GOES Radios using the higher baud
rates may be assigned a shorter window.
UDT
User Description Table.
Understanding Binary Data
The Self-Timed pseudo-binary transmission and all Random transmission formats use a 6-bit per
byte pseudo binary format. The following shows the byte format:
1 Byte Value:
BIT 7
Parity
BIT 6
BIT 5
Always 1 DATA 5
BIT 4
DATA 4
BIT 3
DATA 4
BIT 2
DATA 2
BIT 1
DATA 1
BIT 0
DATA 0
3 Byte Value:
Byte 3
Byte 2
Byte 1
23
22 21 20 19 18 17 16 15
14 13
12 11
10 9
p
1
1
D D
10 9
D
8
D D D D D D P
17 16 15 14 13 12
D
11
8
7
6
5
4
3
2
1
0
D D P
7 6
1
D D D D D D
5 4 3 2 1 0
65
OUTPUTS
Bit 7 is used for parity and will be stripped off by the time the data is sent to the decoding software.
Bit 6 is always set to 1, forcing the data byte to always be a printable character in the ASCII table.
Valid characters along with their weighted values are listed below in the GOES Pseudo-Binary Lookup Table.
The GOES system supports 1, 2, 3, and 4 byte values with 6, 12, 18, and 24-bit precision respectfully.
The System 5000™ uses 3 bytes (18 bits), by default, for Task data values. The
appended battery voltage uses a single byte (6 bits). Date and time also use only one byte each
for seconds, minutes, hours, day, and month. However, date and time are seldom transmitted
through the GOES system, and if so, mainly for testing purposes.
The following table depicts the available ranges using 1-4 Bytes with 0-4 digits of Precision, also
noting the ranges if Signed Values are used (either Signed Magnitude or 2’s Complement) and
their respective resolutions. The default setting for binary data of 3 Bytes, 2 Precision for Signed
Values is bolded.
66
Data Format / Range Table
Signed Values = N
Signed Values = Y
Min
Max
Min
Max
0
63
-32
31
0
4095
-2048
2047
0
262143
-131072
131071
0
16777215
-8388608
8388607
Bytes
1
2
3
4
Precision
0
0
0
0
Precision
1
1
1
1
1
2
3
4
1
1
1
1
0.0
0.0
0.0
0.0
6.3
409.5
26214.3
1677721.5
-3.2
-204.8
-13107.2
-838860.8
3.1
204.7
13107.1
838860.7
0.1
0.1
0.1
0.1
1
2
3
4
2
2
2
2
0.00
0.00
0.00
0.00
0.63
40.95
2621.43
167772.15
-0.32
-20.48
-1310.72
-83886.08
0.31
20.47
1310.71
83886.07
0.01
0.01
0.01
0.01
1
2
3
4
3
3
3
3
0.000
0.000
0.000
0.000
0.063
4.095
262.143
16777.215
-0.032
-2.048
-131.072
-8388.608
0.031
2.047
131.071
8388.607
0.001
0.001
0.001
0.001
1
2
3
4
4
4
4
4
0.0000
0.0000
0.0000
0.0000
0.0063
0.4095
26.2143
1677.7215
-0.0032
-0.2048
-13.1072
-838.8608
0.0031
0.2047
13.1071
838.8607
0.0001
0.0001
0.0001
0.0001
Outputs
A GOES pseudo-binary byte is represented by a single ASCII printable character. All data values
(except battery voltage, time, and date) are made up using between one and four pseudo-binary
bytes. To decode a binary data value, the number of bytes used by the data value as well as the
sign mode (Signed-Magnitude, 2’s Complement, or Only Positive) must be known.
For Signed-Magnitude values, the weight of each pseudo-binary character can be determined by
using the look-up table below and identifying the column of the related character. To obtain the
original value, add the weights of all the characters.
For 4-byte signed values, if the value is greater than 8388607, subtract 8388608 from the value
and change the sign to negative.
For 3-byte signed values, if the value is greater than 131071, subtract 131072 from the value and
change the sign to negative.
For 2-byte signed values, if the value is greater than 2047, subtract 2048 from the value and change
the sign to negative.
For 1-byte signed values, if the value is greater than 31, subtract 32 from the value and change
the sign to negative.
Finally, divide the number by 10^Precision. Thus if 2 was chosen as the Precision, divide the
number by 100 (10^2), 3 would be 1000 (10^3), etc.
The following are 3-byte, 2 Precision Signed-Magnitude examples:
H in the left position = 32768
H^g = (32768 + 1920 + 39) = 34727 ^ in the middle position = 1920
g in the right position = 39
-------- Total = 34727
This is less than 131071 so just divide by 100.
Divide by 100. 34727 / 100 = 347.27 = final value.
r in the left position = 204800
rSx=(204800 + 1216 + 56) = 206072 S in the middle position = 1216
x in the right position = 56
----------- Total = 206072
This is greater than 131071 so subtract it from 131072.
206072 - 131072 = 75000
Then divide by 100 and change the sign. (-1) * 75000 / 100 = -750.00 = final value.
Appended battery values are encoded using a single byte. To decode the appended battery
voltage use the weighted value for the character from the right hand column and multiply it by
0.3124, then add 0.311.
67
OUTPUTS
For example, if the single character for the appended battery voltage is ‘h’, the weighted value of
the right most character column is 40. Thus 40 * 0.3124 + 0.311 = 12.81 volts.
Date and time are transmitted as 3 bytes each: one byte for date, one for month, one for year and
so on. An example of date and time values in binary follows, again using the right hand column
of the look up table.
CLHWxs C = 3 = month, March; W = 23 = Hours; L = 12 = Date, the 12th; H = 8 = Year, 2008.
x = 56 = minutes; s = 51 = seconds.
GOES Pseudo-Binary Look-up Table
68
PSEUDOBINARY
CHAR
4TH CHAR
FROM
RIGHT
3RD CHAR
FROM
RIGHT
2ND CHAR
FROM
RIGHT
RIGHT
MOST
CHAR
PSEUDOBINARY
CHAR
4TH CHAR
FROM
RIGHT
3RD CHAR
FROM
RIGHT
2ND CHAR
FROM
RIGHT
RIGHT
MOST
CHAR
@
0
0
0
0
`
8388608
131072
2048
32
A
262144
4096
64
1
a
8650752
135168
2112
33
B
524288
8192
128
2
b
8912896
139264
2176
34
C
786432
12288
192
3
c
9175040
143360
2240
35
D
1048576
16384
256
4
d
9437184
147456
2304
36
E
1310720
20480
320
5
e
9699328
151552
2368
37
F
1572864
24576
384
6
f
9961472
155648
2432
38
G
1835008
28672
448
7
g
10223616
159744
2496
39
H
2097152
32768
512
8
h
10485760
163840
2560
40
I
2359296
36864
576
9
i
10747904
167936
2624
41
J
2621440
40960
640
10
j
11010048
172032
2688
42
K
2883584
45056
704
11
k
11272192
176128
2752
43
L
3145728
49152
768
12
l
11534336
180224
2816
44
M
3407872
53248
832
13
m
11796480
184320
2880
45
N
3670016
57344
896
14
n
12058624
188416
2944
46
O
3932160
61440
960
15
o
12320768
192512
3008
47
P
4194304
65536
1024
16
p
12582912
196608
3072
48
Q
4456448
69632
1088
17
q
12845056
200704
3136
49
R
4718592
73728
1152
18
r
13107200
204800
3200
50
S
4980736
77824
1216
19
s
13369344
208896
3264
51
T
5242880
81920
1280
20
t
13631488
212992
3328
52
U
5505024
86016
1344
21
u
13893632
217088
3392
53
V
5767168
90112
1408
22
v
14155776
221184
3456
54
W
6029312
94208
1472
23
w
14417920
225280
3520
55
X
6291456
98304
1536
24
x
14680064
229376
3584
56
Y
6553600
102400
1600
25
y
14942208
233472
3648
57
Z
6815744
106496
1664
26
z
15204352
237568
3712
58
[
7077888
110592
1728
27
[
15466496
241664
3776
59
/
7340032
114688
1792
28
|
15728640
245760
3840
60
]
7602176
118784
1856
29
]
15990784
249856
3904
61
^
7864320
122880
1920
30
~
16252928
253952
3968
62
_
8126464
126976
1984
31
?
16515072
258048
4032
63
Outputs
69
OUTPUTS
70
Outputs
Deciphering Downlink Message Headers
At times a user must look at the raw data sent from the satellite to see if things are working
properly. The first part of the message is very important to understand as it may help identify
problems at a site. Below is an actual message sent from a site.
163708DE08078184903G51+1NN021EUB00023BCT@DZ@DY@Dc@Db@Dm@Dxj
Let’s break this down to understand it better. The first 8 characters are the transmitter ID or DCP
address. They are shown in bold below.
163708DE08078184903G51+1NN021EUB00023BCT@DZ@DY@Dc@Db@Dm@Dxj
The next two bytes are the year. In this case the 08 is for 2008.
163708DE08078184903G51+1NN021EUB00023BCT@DZ@DY@Dc@Db@Dm@Dxj
The next 3 bytes are the Julian day. In this case 078 is March 18th, on a leap year.
163708DE08078184903G51+1NN021EUB00023BCT@DZ@DY@Dc@Db@Dm@Dxj
The next 6 bytes is the time the transmission was received. This should be within the assigned
time window. In this transmission it was at 18 hours, 49 minutes and 03 seconds.
163708DE08078184903G51+1NN021EUB00023BCT@DZ@DY@Dc@Db@Dm@Dxj
The next byte indicates if the transmission was received properly; the G indicates Good. Other
possibilities are P for parity errors and ? for unknown errors.
163708DE08078184903G51+1NN021EUB00023BCT@DZ@DY@Dc@Db@Dm@Dxj
The next two bytes show the signal strength of the signal received at the satellite. In this case it
is 51 which is quite good. Numbers in the high forties are also good; lower forties is fair and 35
or less is surprising to see the transmission making it to the satellite.
163708DE08078184903G51+1NN021EUB00023BCT@DZ@DY@Dc@Db@Dm@Dxj
The next two bytes indicate if there is any frequency drift. A plus 0 is ideal indicating no drift.
In this case the +1 indicates a positive drift of 50 Hz from the center frequency. For each count,
1, 2, 3 etc it refers to 50 Hz per count of drift. A drift of 1 or 2 positive or negative is common.
163708DE08078184903G51+1NN021EUB00023BCT@DZ@DY@Dc@Db@Dm@Dxj
The next two bytes indicate modulation status. The NN indicates normal modulation index, and
normal modulation quality. The index may also report an H or L for high or low modulation
index. The quality may also report F or P for fair or poor quality.
163708DE08078184903G51+1NN021EUB00023BCT@DZ@DY@Dc@Db@Dm@Dxj
71
OUTPUTS
The next three bytes are the channel number. In this case 021 is channel 21. This is an odd
number which normally indicates it is transmitting to the eastern satellite (75 Degrees W). Even
channel numbers normally transmit to the western satellite (135 Degrees W).
163708DE08078184903G51+1NN021EUB00023BCT@DZ@DY@Dc@Db@Dm@Dxj
The next byte is a letter E or W indicating the eastern or western satellite. In this case the eastern
satellite received the transmission.
163708DE08078184903G51+1NN021EUB00023BCT@DZ@DY@Dc@Db@Dm@Dxj
The next two bytes are currently unused (TBD).
163708DE08078184903G51+1NN021EUB00023BCT@DZ@DY@Dc@Db@Dm@Dxj
The next few bytes indicate how many data bytes are in the transmission. In this case 00023 data
bytes were expected.
163708DE08078184903G51+1NN021EUB00023BCT@DZ@DY@Dc@Db@Dm@Dxj
This is the end of the header information added by the GOES system. Everything from this point
on is from the data logger and is normally data. The data could be decoded using the above
methods in the Understanding Binary Data section.
Also in this case it is easy to see this is a 100 baud transmission. This is because the data starts
immediately after the data byte count. A 300 or 1200 baud transmission will have one extra byte
after the byte count and before the start of data. This extra byte will always be one of four
possibilities, indicating the type of data and whether the unit successfully updated its time from a
GPS system since the last transmission. The possibilities are listed below.
72
Character
Comment
Space
ASCII Data, No time sync occurred since the
last transmission
Double Quote “
ASCII Data, Time sync occurred since the last
transmission
Single Quote ‘
Binary Data, No time sync occurred since the
last transmission
Lower Case b
Binary Data, Time sync occurred since the
last transmission
Outputs
Basic Program (Output)
Basic Programs can be used as either
Inputs, Outputs, or Network Programs.
Basic Programs available to be used as
Outputs will be selectable from within the
Add Output menus. If no Basic programs
have been installed or selected as Output
programs, the Basic Programs group will
not be shown in the Add Output menu.
The screen to the right shows a Basic
Program with the name DRGS (DAMS-NT)
that is being used as an Output for a Task.
If a Basic Program does not have a name
declared, the program’s filename (e.g.
drgs.bas) will be used as the program
name and title of the Properties screen.
Program
The Basic Program can be viewed or debugged using the View and Debug buttons. It
is a good idea to test (Debug) each Basic program before enabling scanning to verify the program
will run as expected.
Any special variables, known as Symbols, within the Basic Program will be listed in the
Variable’s box. These variables can be modified individually for each Task by using the Edit
Value button, allowing the same Program to be used in different circumstances, if desired.
More information regarding Basic can be found in Chapter 7 of this manual as well as within the
Basic 5000 User Manual, downloadable from the waterlog.com web site.
4-20mA Out
The 4-20mA Output is found at the end of
the bottom row of ports, next to the Analog
ground channel (Agnd) on the front panel
of the System 5000™. Using the 4-20mA
Output, the System 5000™ can be set up
to generate a current output simulating a
4-20mA sensor. The System 5000™ does
not actually generate the current in the
loop but controls the current in a loop
that is externally powered. The 4-20mA
connection points are optically isolated
from the rest of the circuitry.
73
OUTPUTS
Min
This is the minimum value to expect from the Task’s Input. For example, if a temperature probe
was being measured and had a range of -50 to +50 degrees, the Max level would be set to 50
and the Min level set to -50. With this setup, a temperature of -50 would cause a milliamp
output of 4.00 milliamps and +50 degrees would produce a 20.0 milliamp output.
Max
This is the maximum value to expect from the Task’s Input.
Note that as the range is enlarged the resolution of the output current is decreased, and the
opposite if the range is reduced. The resolution is calculated as:
(mA Output Range) / (Input Range) = mA per Input Unit Change.
In the above example, presuming the temperature probe produces only integer values:
(20 - 4) / (50 - (-50)) = 16/100 = 0.16mA per degree change.
The resolution of the output signal can also be calculated based on the resolution of the DAC
(digital to analog converter). As the DAC has a resolution of 16 bits, it is 1 part in 65536 (2^16),
allowing a very accurate current to be produced based on the measured Input.
Input Range / 65536 = Resolution
In this example: 100 / 65536 = 0.001526 degrees.
Auto-Update
The auto-update mode updates the current in the 4-20mA loop every 1.0 second. If Auto-Update
is turned Off, the current will only be updated when the 4-20mA Output is run (each scan).
Generally, this will only be an issue when external power is not maintained on the current loop.
Auto-Update is enabled by default.
4-20mA Output
Defines what the output current should be if it were measured with a current meter. This is based
on the value of the data source, the Max value and the Min value.
If a current meter is used to verify the output and it does not match this value, check the wiring
and voltage levels to verify they are ok. If the current meter reads zero milliamps, the wires
could be connected backwards or there is no power source for the loop. Remember that this
output controls the current in the loop but does not provide the power for the loop. An external
power source is required.
If the current displayed on a meter is in the range of 4 to 20 milliamps but is less than what is
displayed by this option, it may be the external power source is not big enough. In most cases a
12 volt battery will not be sufficient to power the loop; a 24 volt battery is required. This reading
and the actual current value may track at lower values but as the current approaches the 20.0
milliamp level the actual current as displayed on an external meter will start to drop off,
74 indicating the battery voltage is too low.
Outputs
Force Current (5 min)
This option allows for a specified current (4, 12, or 20mA) to be constantly applied to the loop
for up to 5 minutes. The Test can be stopped at any time after it has been started. This test can be
useful to verify everything is functioning as expected on the 4-20mA current loop.
Digital Out
The Digital I/O Ports are located on the
lower first block of the front panel.
Digital ports can be configured as either
Inputs or Outputs and will automatically
be configured based on how the System
5000™ is set up. If a pin is configured
as a Digital Out, the value will be a 1
or a 0 based on whether the Condition
evaluates as a true (greater than zero)
or false, “On” or “Off” respectively.
Logical Conditions, such as HG > 0,
are suggested, as they return a simple
true or false response. Calculations that
return a positive or negative number are
also allowed, evaluating any positive number as true and zero or less as false.
Be aware that though the Digital Output may be set to a 1 or a 0, the connected equipment may
prevent the Output from going to the desired state if it is causing too great a load on the output.
In this case the reported value matches the desired state and not the actual state.
If the Conditional Type is unchecked, the Output will always be run (as though the Condition
statement evaluated to true). The Digital Port will simply be set to 1 (High) when the Task Output is
run in this manner. The On For Scan Mode, described below, operates regardless of the Conditional
statement.
Port
Defines which port is currently being measured and will be used as the Task Value.
Value
Shows the current value of the selected port. Note that this value is only read when the screen is
loaded or a new Port is selected. To re-read the current value, press the Test button. To toggle the
current value of the selected Port (change from 1 to 0 or 0 to 1), press the Toggle button.
Mode
Three modes of operation are available for a digital output. Normal and Pulse run as standard
Task Outputs while On For Scan operates during the scanning process.
75
OUTPUTS
Normal
The selected Port will turn On (1) and Off (0) based on the Condition. The output will stay On
until the Condition returns false (non-positive). For example, if a pump is to be turned on when
the water level is greater than 10.0 feet, the user would set the Condition to “Stage>10.0”
(presuming the Task is named Stage). After the Input for Stage had been measured, the
Condition would be evaluated. If the Condition was true (Stage is greater than 10.0), the
Port would be set to 1 (High). The Port would stay High until the Condition evaluated to false
(Stage measures less than or equal to 10.0), at which time it will be set to 0 (Low).
Pulse
The selected Port will briefly turn On (1) for the given number of milliseconds if the Condition
evaluates to true. For example, if a warning horn is to sound when the water is above 9.0 feet,
the user would set the Condition to “Stage>9.0” (presuming the Task is named Stage). After the
Input for Stage had been measured, the Condition would be evaluated. If the Condition was
true (Stage is greater than 9.0), the Port would be set to 1 (High) for the specified number of
milliseconds. After the pulse time has elapsed, the Port would be set to 0 (Low), thus sounding
the horn for the desired number of milliseconds. The Output would pulse after each scan
when the water level was greater than 9.0 feet.
On For Scan
The selected Port will turn on at the beginning of each scan and delay the entire scanning
process for a time specified by setting the “I/O WarmUp Delay” option. After the warm up
delay, the normal scan process will continue. This would be used for applications that require
an external device to be turned on for every scan such as a motor or a pump. At the end of
the scan the output port will be turned off.
Modbus Master (Output)
Modbus Master can be utilized as both an
Input and/or an Output.
Modbus Master Output enables the
System 5000™ to act as a Modbus Master
on a Modbus network. The Output writes
to the designated external Modbus Slave
register according to the specified register
setup and selected Port.
More information regarding Modbus can
be found in Chapter 8 of this manual.
76
Outputs
Modbus Slave (Output)
Modbus Slave can be utilized as both an
Input and/or an Output.
Modbus Slave Output enables the System
5000™ to act as a Modbus Slave on a
Modbus network. The Output writes to the
designated internal register according to
the format specified and shown under the
Type column. The designated register can
be read by an external Modbus Master.
More information regarding Modbus can
be found in Chapter 8 of this manual.
Switched 12V Out
The Switched 12V Out Port is located
between the SDI-12 ports and Power
connectors on the front panel.
This Output will only appear in the Add
Output list if the Switched 12V mode is
set to Task-Selected within the System
Settings. By default, the Switched 12V
excitation is set to be always on. To save
power or have finer control over the port,
the Task-Selected option can be chosen
to determine the exact times the port will
be active. More information regarding
the Switched 12V modes can be found
in Chapter 10 under the System Settings
section.
Mode
The Switched 12V port can be set active based on a condition or simply set to turn on during that
scan period.
Normal
The excitation port will turn On and Off based on the Condition. The output will stay On until
the Condition returns false (non-positive). Logical Conditions, such as HG > 0, are suggested,
as they return a simple true or false response. Calculations that return a positive or negative
number are also allowed, evaluating any positive number as true and zero or less as false. 77
OUTPUTS
If the Conditional Type is unchecked, the Output will always be run (as though the Condition
statement evaluated to true). The excitation port will simply be set turned on when the Task
Output is run in this manner.
On For Scan
The excitation port will turn on at the beginning of each scan and delay the entire scanning
process for a time specified by setting the “WarmUp Delay” option. After the warm up delay,
the normal scan process will continue. This would be used for applications that require an
external device to be turned on for every scan such as a motor or a pump. At the end of the
scan the port will be turned off.
78
07 /
BASIC 5000
79
BASIC 5000
The System 5000™ contains a built-in BASIC interpreter (as of firmware version 1.2.0) allowing
for more complex operations on the data logger. Many traditional BASIC commands and features
have been combined with a new subset of operations to create the Basic 5000 language. Basic 5000
is thus able to provide a familiar BASIC base while also providing direct access to the hardware
and operations of the System 5000™. More information along with descriptions and examples of
available commands can be found through the Basic 5000 User Manual, downloadable from the
waterlog.com web site.
All Basic programs can be used as Task Inputs, Task Outputs, Network, and/or Serial programs.
If undefined within the program itself (see Advanced Programming with Symbols in the Basic
5000 User Manual), Basic programs will become available to all four methods upon installation
and are generally labeled after the program’s filename. Their use and appearance may be restricted
or modified via the by editing the Basic program as described below.
Basic Features
• Support for traditional BASIC constructs such as goto, gosub, and line numbers
• Both number and string variables, including single and multi-dimensional arrays
• Built-in string and variable processing functions
• Easy access to COM/Serial Ports using simple PRINT and INPUT commands
• Easy access to Log Files using simple PRINT and INPUT commands
• Structured programming commands including SWITCH-CASE statements, single and multiline IF-THEN statements and FOR, WHILE, REPEAT, and DO loops
• User-created subroutine/function support
• Ability to use a Basic program as either an Input or an Output for any Task; multiple Output
Basic programs are allowed on the same Task
• Ability to use a Basic program to communicate with incoming Network connections (e.g. host
simple web pages)
• No file size limit on Basic programs
• No limit on number of Basic programs on the system
• Easily transportable, programs appear as individual files in the Data File Manager
• Ability to perform measurements of any hardware on Inputs (Analog, Digital, etc) as well as
Outputs (4-20mA, Digital, etc)
• Ability to retrieve current and previously measured values of any Task
• Access to system variables including current date and time and all subsets
• Ability to perform complex math operations using built in trigonometric and logarithmic
functions
• Program customization on a per-Task basis
80
Basic 5000
Basic Program Management
All operations relating to installing and
setting up Basic 5000 programs are
performed within the Basic Program
Management screen, found under the
System Setup - Inputs & Outputs tab
Programs can be installed, viewed,
debugged, exported, and uninstalled
from the Basic Program Management
menu. Individual program options can
also be modified.
Installing a Basic 5000 Program
Basic 5000 programs can be easily
installed by pressing the Add New
Program function button on the Basic
Program Management screen. Simply
select a displayed program on the Basic
Program Install screen and press the
Install button. Programs must have a .bas
extension to be shown under the Basic
Program Install menu. Once a program
has been installed and/or set up, the
program will become available within the
respective Input, Output, and Listening
Port menus.
81
BASIC 5000
Editing Basic Program Options
Every installed Basic program has a few
options that can be edited or modified
to change its appearance and availability
within the System 5000™ menus. To access
the Basic Program I/O Options screen,
select the desired Basic program from the
Basic Program Management screen (found
within the System Setup - Inputs & Outputs
section) and press the Edit button.
Program
Lists the Basic program’s filename.
Name
Defines the name that the Basic Program will use when listed within the Input, Output, and
Network select menus. If no name is specified in the program code with a Symbol, the filename
will be used as the Program Name.
Group
Describes the group under which Basic Programs will be listed within the Input and Output select
menus. If no group is specified, the program will be listed under the Basic Programs group.
If an alternative group is specified, the Program will be listed under the given group name. A
special group of ‘None’ (case-sensitive) can be specified to force no group to be used and list the
program alongside other Inputs and Outputs. Note that the Listening Ports menu
groups all Basic Programs under the Basic Programs group.
Desc
If defined within the program, this label reveals a short description regarding the program’s use,
as defined by the Basic programmer.
Menus
The four checkboxes, Input, Output, Serial, and Network, determine where this program will
appear in the menus. For example, if only the Output and Network boxes are checked, this
Program will be available to use as either an Output or a Network Listening program, however
unavailable to be selected and used as an Input or Serial Listening program.
82
Basic 5000
Debugging a basic program
Basic Programs can be debugged by
pressing the Debug button available
through both the Basic Program
Management screen as well as Basic
Program Properties screens accessible
through editing any Task using a Basic
Program. Note that special Entry Points
within a program may cause it to be unable
to be debugged (as the debug program
won’t be able to test each Point). Entry
Points should only be added to a program
after the individual segments have been
tested.
Program
Lists the Basic Program’s filename. Below this label is a window revealing the actual Basic Program
with line numbers next to each line. More of the program can be displayed on the screen by
pressing the Toggle View button until only the Program is shown, filling the entire
screen area.
Variables / Output
Lists the current variables and their values being used within the Basic Program as well as any
output being printed from the program. Any errors will also appear in this window. This window
can also fill the entire screen by pressing the Toggle View button.
To Start debugging a Basic Program, press the Start Program button in the bottom left corner. A
syntax check is first performed to verify the program has been coded appropriately. If any
errors are found, they will be printed in the Variables/Output window. After the syntax check has
completed, the program will be ready to run and the first line will be highlighted.
To run only the highlighted line, press the Run Next Line button. To run until a future line, select
a line further down in the program and notice how the Run to Prog End button has changed to
Run to Line n where n is the selected line number. Pressing this button will run each line of the
program until the selected line is reached. Pressing the Run to Prog End button will run the Basic
Program until it has completed. To force quit a program at any time, press the Stop button in the
bottom left corner.
The Toggle View button alternates views of the windows shown, allowing each to entirely fill the
screen or be side by side within the screen.
83
08 /
84
MODBUS
Modbus
Modbus Overview
Modbus is an industry standard field bus for interconnecting Programmable Logic Controllers
(PLCs), intelligent sensors, and other devices. The System 5000™ can act as a Modbus Master
and/or Modbus Slave over the serial and network ports as of firmware version 1.4.2.
As a Modbus Master, the data logger can read and write registers on connected Modbus Slave
devices. As a Modbus Slave, the data logger can respond to Modbus Master read and write
requests by reporting and updating data values for any source that can normally be logged or
transmitted. All external Modbus Master requests return the most recent measured value of the
assigned Task.
Modbus supports communication over the RS-232 and Ethernet ports, supporting the RTU,
ASCII, and TCP Modbus protocols. Modbus Master also supports Modbus over TCP or RTU/IP.
Multiple Modbus setups can exist on multiple ports. Serial ports can be configured as needed,
allowing differing baud rates, data bits, parity, etc. Modbus Registers can also be configured to
accept and report a wide of value types.
Supported Function Codes
The System 5000™ supports the following Modbus functions:
Function Name
Read Coils
Read Discrete Inputs
Read Holding Registers
Read Input Register
Write Single Coil
Write Single Register
Write Multiple Coils
Write Multiple Registers
Function Code
0x01
0x02
0x03
0x04
0x05
0x06
0x0F
0x10
Configuring Modbus
A Modbus Master or Modbus Slave setup can be easily created or modified by selecting the
corresponding Modbus entry in a Task’s Input or Output select menu. The similarities between
the Master and Slave operations of Modbus allow the setup screens and processes to be very
similar.
Determining Modbus Master or Modbus Slave
Both Modbus Master and Modbus Slave devices can support read and write operations. For this
reason, Modbus Master and Modbus Slave options are available in both the Select Input and Add
Output menus of the Edit Task screen of the System 5000™.
85
MODBUS
The following definition should help in choosing which options to use:
The Modbus Master I/O should be used when the System 5000™ is expected to initiate
communication with other Modbus Slave devices on the network. Modbus Master Input
indicates a value will be read from a Modbus Slave, whereas Modbus Master Output
indicates a value will be written to a Modbus Slave.
The Modbus Slave I/O should be used when an external Modbus Master will be initiating
communication with the System 5000™, expecting a Modbus Slave. Modbus Slave Input
defines a virtual register that expects to be written by a Modbus Master, whereas Modbus
Slave Output defines a virtual register that expects to be read by a Modbus Master.
As Modbus Slave devices await requests from Modbus Masters, the System 5000™ Modbus
Slave setups can also be viewed and configured within the Listening Ports Setup menu of the
System Setup - Communications tab.
Creating a New Port
Modbus can communicate on any
serial or network port available on the
System 5000™. In order to do so, a
port needs to be set up first. Within the
Select Input and Add Output menus,
the Modbus Master/Slave (New Port)
will automatically assign a new port to
be used with Modbus. The port and
settings can be further configured on
the Modbus Properties screen after
the OK button is pressed.
86
Modbus
Using an Existing Port
Adding additional Tasks to existing
Modbus setups is a simple process
and can be done through the Select
Input/Add Output selection screens.
Simply select the desired Modbus
Master/Slave (port) and press the OK
button to open the Modbus Properties
screen.
Port Settings
Changing the port of a Modbus setup can be done via the Modbus Master/Slave Properties
screens, accessible from the Select Input/Add Output screens, as well as the Listening Ports
Setup screen for Slave setups. To change the port, press the Edit button next to the current Port.
To modify the settings of a Serial port, press the Settings button on the Modbus Master
Properties screen or the Edit button on the Edit Listening Port screen. Modbus Master setups can
also specify a connection timeout (in milliseconds) as well as a retry count for each register
request.
87
MODBUS
The Modbus Mode (ASCII or RTU) and Slave ID can be configured within the Serial Port Setup
screen. If a network port is selected, TCP mode will be used by default. For Modbus Master
setups, Modbus over TCP or RTU/IP can be used by checking the RTU/IP box.
Configuring Modbus Registers
After selecting a Modbus setup, the
Modbus
Master/Slave
Properties
screen will appear.The port and Modbus
registers are primarily displayed on the
Modbus Properties screens. Modbus
Slave setups allow additional Tasks to
be added or removed from the setup.
The Properties screen may contain a
few extra options dependent on where
the screen was accessed.
Modbus
registers
have
many
customizable options including the
register’s address, which table it table
it resides in, as well as the number
type. Modbus registers can be edited by pressing the corresponding Edit button.
Register Address
88
Defines the register(s) associated with the given Task. If a Task is an Input, the value found in
the given register(s) will be read each scan. If the Task is an Output, the value of the Task will
be written to the register(s) each scan.
Modbus
Register addresses begin numbering at 1. Some Modbus Masters and Slaves, however,
retrieve registers starting at address zero. An offset of one should be used in those cases. For
example, to retrieve the value at address zero of a PLC acting as a Modbus Slave, a Modbus
Master Input could be used by setting the register address to one.
Table
Defines which Modbus table the selected register is a part of. Only corresponding function
codes can retrieve registers from the selected table. Typically Holding Registers or Input
Registers are used for reading and writing values in Modbus. Multiple registers can be
assigned with these tables by changing the Number Type. Discrete Input and Coil can only
contain a 1 or 0 value and are generally associated with either a digital port or a true/false
condition.
Number Type
Determines the type and range of a given number. The Short number type is the default
Modbus type, using 1 Modbus register. Due to its limited range, the Long and Float types
are also available to store larger and more complex numbers and use two registers. The two
registers may be swapped by selecting the Inverse option. Short and Long store only whole
integer values (non-decimal) and can be unsigned, allowing only positive values, to enable a
greater range. Float stores a floating-point number. Binary types are only available for Discrete
Input and Coil types.
Number Range
Depending on the Number Type chosen, the number range will update, indicating what values
are supported with the given number type.
89
09 /
90
DATA FILE MANAGER
Data File Manager
File Operations
Accessible from the Main Menu of the
System 5000™, the Data File Manager
provides access to the internally stored
data as well to any connected SD cards or
USB thumb drives. The manager provides a
central location for downloading, viewing,
renaming, or deleting of System 5000™
data. System configuration files can also
be saved or loaded and Firmware Updates
are performed on this screen as well.
View
Allows the contents of the selected local
or remote file to be viewed.
Rename
Allows the selected local or remote file to be renamed.
Archive
Allows selected log files to be Archived. Archiving will rename the file with an incremental
extension beginning at 001. For example, the first archive of a log file named SiteID.csv would
be SiteID.csv.001. Archiving rules for individual log files apply, as specified under the Advanced
Logging Options, detailed in Chapter 6.
Delete
Deletes the selected local or remote file. If this is a log file, a new file will be created upon the
next scan. A prompt will confirm the deletion of any file.
Copy
Copies the selected file to the opposite destination. For example, if a Local file is selected, it will
be copied to the Remote location (either USB or SD). If a Remote file is selected, it will be copied
to the Local system (internal memory). If the selected file ends with either a .csv or .txt extension
(e.g. log files), a Copy Options screen will appear. The Copy Options screen allows a date to be
chosen from which only that date forward (if found) will be copied out of the file.
Reload
Reloads the contents on both the Local and Remote locations.
USB / SD
Specifies the Remote location to show with either the USB-A or SD card contents. Generally
an inserted card or drive will be automatically detected and read, however, the two options 91
can be manually switched between using the radio buttons. Note that only one USB device
(USB-A) can be read at a time.
DATA FILE MANAGER
Save Config/Load Config/Firmware Update
Performs the labeled operation. This button will change depending on the file selected. The
button will default to Save Config and allows the current system configuration to be saved, which
can then be loaded onto other System 5000™s, if desired. If a configuration file is chosen, the
button will change to Load Config. If a System 5000™ Firmware file is chosen, the button will
change to Firmware Update.
Archiving Log Files
The Archive button provides a quick and
easy method for allowing new data to be
stored in a fresh log file, while maintaining
the old data in older files. For example,
when returning to a site to retrieve the
collected data, after downloading the data
from the System 5000™, pressing the
Archive button will rename the existing log
file with an incrementing extension, SiteID.
csv.001 for example. When new data
measurements are retrieved, the original
file (SiteID.csv in this example) will be
created again and begin logging the data.
If the Archive button were pressed at
the next return to the site, the file would be renamed to SiteID.csv.002, with all new data being
again logged to a newly created SiteID.csv. Using the Archive button allows all new data to be
always logged to the same log file while still preserving the previously logged data. If any
Archiving options are enabled within the Advanced Logging Options, they will also apply here.
For more information relating to Advanced Logging Options, please refer to Chapter 6.
Saving/Loading System 5000™
Configurations
The configuration of a System 5000™
defines everything about what the platform
is set up to do. System settings and
configurations can be quickly duplicated
across multiple units as well as provide a
quick backup of multiple configurations.
92
Data File Manager
To save the current system configuration,
simply open the Data File Manager and
press the Save Config function button. All
system settings, Tasks, and any installed
Basic Programs will be saved as part of the
configuration.
To load a new configuration onto the
System 5000™, select a previously saved
configuration file and press the Load
Config function button. Note that all
system settings and created Tasks will be
overwritten with the new configuration
information. Local files (including Basic
programs) will not be removed by the new
configuration. The system will reboot to
finalize the loading process.
Updating System 5000™ Firmware
Frequent updates will become available
for the System 5000™ that will improve not
only the core functionality of the unit, but
also add extra features and improvements
to the system. Upgrading to new firmware
will not affect the current settings or
configuration of the System 5000™. Typical
upgrades will take between 5-10 minutes
to complete and are initiated through the
Data File Manager.
After a firmware upgrade file has been
downloaded (most likely from the waterlog.
com web site) and stored on
SD card or USB thumb drive, select the firmware file and press the Firmware Update function button.
The file will then be extracted and the contents verified to allow a clean upgrade to be performed.
Once the file contents have been verified, press the Update button to begin. Over the next period
of time the system will reboot and perform all necessary upgrades. When completed, the Main
Menu screen will appear and the system can be used again.
93
10 /
94
GENERAL SETUP
General Setup
General Setup Screen
The General Setup screen is the first of three
System Setup screens and provides access
to general system configuration settings
and information relating to the System
5000™. Available categories include
Date & Time, Diagnostics Menu, Help &
Documentation, Password Protection,
System Information, and System Settings.
Some sections may be familiar as portions
of these screens are fully accessible
through various menus and screens within
the System 5000™.
Each of the above areas are described in
more detail throughout this chapter. The
other System Setup screens, Communications and Inputs & Outputs, can be accessed by pressing
their associated tabs.
Date & Time
The Date & Time Setup screen allows the
system date, time, and date formatting to
be specified. To change the current date,
simply select the new desired day in the
calendar that is shown. Months and years
can be changed by pressing the arrows
surrounding each of their sections. If a
GOES transmitter is attached, the date and
time can be synchronized (with an optional
local offset) via the GOES GPS through
the GOES Time Setup screen, accessible
through the GOES Configuration.
Time
Shows the current or desired time. To change the current time, press the Edit button.
Date Format
Defines the date format used when referencing the date within the System 5000™ (e.g. within log
files). To choose a different format, press the Edit button.
95
GENERAL SETUP
Diagnostics Menu
The Diagnostics Menu provides quick and
effective way of testing the functionality of
various aspects of the System 5000™. If any
option cards are being utilized, additional
options will be available to test each of
the cards. The above screen depicts an
Analog/Digital Option Module
placed in Slot 1. To access any of the
Diagnostic screens, simply select the
desired option and press the Open
button. Note that as all Diagnostic screens
contain onscreen instructions, the Help &
Documentation button will be disabled. It
is also recommended that Scanning be
Disabled from the Main Menu before
entering any Diagnostic screen.
Analog & 4-20mA Testing
Live analog readings for each channel
as well as the current being supplied
to the 4-20mA loop can be evaluated
via the Analog/4-20mA Testing screen.
Analog values will be highlighted
briefly each time a new reading is
made.
Digital Testing
Live digital readings for each port,
including AC-In, as well as the power to
the 5 volt excitation can be evaluated
via the Digital Testing screen. Digital
values will be highlighted briefly each
time a new reading is made.
Digital
The Digital Self-Test verifies that each digital port can be properly set as an Input or Output
and the expected reading can be measured. Disconnect all digital sensors before performing
this test.
96
General Setup
Mainboard Testing
Live battery and internal temperature
readings, power to the switched 12 volt
excitation, SDI-12 line tests, audio, and
LED testing can be evaluated via the
Mainboard Testing screen.
Miscellaneous Testing
The date, time, real time clock (RTC)
alarm, View Status button, USB and SD
operations can be evaluated via the
Miscellaneous Testing screen. The RTC
enables the System 5000™ to properly
wake up and respond to scheduled
Scan Rates and is vital to proper
operations.
Serial Ports Testing
Proper communications through the
serial ports can be evaluated via the
Serial Port Testing screen. To test a serial
port, first attach a loopback connector,
then press the Test Port button. Without
a proper loopback connector, the
port will fail the tests. The loopback
connector should have pins 1, 4, 6, and
9 connected together, pins 7 and 8
connected together, and pins 2 and 3
connected together.
97
GENERAL SETUP
Help & Documentation
In the top right corner of all System
5000™ screens a Help icon is available
for information regarding the current
screen. All Help information is also readily
accessible via the Help & Documentation
screen within System Setup. To see the
documentation regarding a certain topic,
select the desired Help Topic and press
the View button.
As many screens contain similar properties
(e.g. all Task Inputs have a Scan Rate),
portions of documentation will be shared
between related topics. To return to the
Help Index press the Help Index function
button, or to return to the previous screen
press the Exit button.
Password Protection
Simple Password Protection is available on
the System 5000™. A single Administrative
Username/Password prompt can be
enabled to prevent any unwanted access
or changes being made.
Require Login
Disabled
by
default,
Password
Protection can be enabled by selecting
the Enabled radio button. To disable
password protection that has been
enabled, select the Disabled radio
button. When enabled, a Login screen
will appear upon boot-up and when
the display turns off, requesting the
Username and Password as indicated
under the Administrative Access.
Administrative Access
Defines the Username and Password to be used when logging into the System 5000™. The
Username and Password are case-sensitive and can be alphanumeric.
98
General Setup
Buttons/Connections Enabled Without Login
Two external options can be made available without entering a Username/Password if Enabled
by this section.
View Status
The View Status button on the front panel, when pressed, provides a quick view of the current
Tasks on the system as well as their last measurement times and values. New measurements
for Tasks can also be requested from this page using only the View Status button. This screen
is enabled by default even with the Password Protection active. This allows current Tasks
and values, as well as new measurements, to be seen by any who access the 5000, while
modifications to the system configuration are not available. Access to the View Status screen
can be disabled by selecting the Disabled radio button.
USB-B
The USB Device port (labeled as USB-B) on the System 5000™, when connected to a computer,
allows the data and log files existing on the system to be retrieved. A prompt on the display
asks whether the system should be mounted as an external drive on the connected computer
and requires the screen to be pressed to do so. This option is enabled by default but can be
disabled by selecting the Disabled radio button.
System Information
The System Information screen provides
access to general information regarding
the System 5000™ hardware and software.
Firmware versions and revisions, system
reboots, connected expansion cards, and
other information is included. Much of
the information can be beneficial when
troubleshooting. For example, the last
reboots of the system can be helpful in
determining if proper power is being
supplied, or if other potential problems
may be occurring within the system.
The Save Info function button allows the
information displayed within the window
to be saved as text file on the internal memory. This information will be useful when contacting
support for help with troubleshooting any unexpected issues occurring with the System 5000™.
99
GENERAL SETUP
System Settings
The System Settings screen provides
control over system-wide settings and
operations of the System 5000™.
Site ID
Identifies the current system and
should be a unique label when used
in conjunction with other data loggers.
The Site ID appears on the Main Menu
and is a part of every Log File header
section.
Default Error String
Used whenever a sensor is unable to be
measured or an error occurs while
performing measurements, calculations,
etc. Generally the error string is a number representation (such as -99.99 or -9999), however a
string or phrase could be used instead (such as ERROR).
Measurement History
Defines the number of values each Task stores in its volatile history. These values are primarily
used in computing averages, max/min values, etc over spans of time. The Preserve checkbox
moves these values from volatile to non-volatile memory, preserving the values across power
failures and reboots.
Switched 12V
Defines the mode of the SW’D +12V port on the front panel of the System 5000™. The Switched
+12 volt excitation is provided to power sensors, and by default, this port is always on. There are
sensors that only need to be powered when being measured. To save power consumption, this
port can be programmed to turn on only during scanning by selecting the On For Scan radio
button. A warmup delay may be defined that is initiated as the first action when the system awakes
for a scan. Once the warmup delay has passed, the running of Tasks will proceed. The port can
be turned off completely by choosing Off. For even finer control, the Task-Selected option can
be selected, allowing the Switched 12V Output to be available via the Add Output screen for
individual Tasks.
Restore System Defaults
It may become necessary or desirable to restore the System 5000™ to a functional initial state.
Any files stored within the internal memory as well as any installed Basic programs will not be
removed, but all Tasks and system settings will be removed and reset when the Restore button is
100 pressed. The system will reboot as part of the process.
General Setup
System-wide
Three options defining Tasks, timeouts, and cut-off levels, detailed below.
Global Task Options
The lower left button of the Manage Tasks
screen provides access to Global Task
Options. This screen allows new as well as
existing Tasks to have default values set
to a specified Scan Rate and/or Precision
(digits to the right of the decimal).
New Tasks
Default Scan Rate
Defines the scan rate assigned to new
Tasks. Existing Tasks will not be affected
by changing this value. The default
setting is 15 minutes (00:15:00).
Default Precision
Defines the precision (number of digits to the right of the decimal) assigned to new Tasks. Existing
Tasks will not be affected by changing this value. The default setting is 3 (e.g. 16.745).
Existing Tasks
Tasks Overview
Allows quick access to a simple overview of existing Tasks. The Overview shows current Tasks,
their Scan Rates, and their associated Inputs or Outputs.
Set all Input Scan Rates to
By checking this box, all existing Tasks will have their Scan Rates set to the given value. New Tasks
will use the value assigned to the Default Scan Rate.
Set all Input Precisions to
By checking this box, all existing Tasks will have their Precisions set to the given value. New Tasks
will use the value assigned to the Default Precision.
101
GENERAL SETUP
System Timeouts
The System Timeouts screen of System
Settings allows the display backlight and
system timeouts to be set for the System
5000™.
Backlight Timeout
Defines when the touchscreen display
will turn off. If None is selected, the
display will always remain on. If the
second option is selected, the display
will turn off after the desired number
of seconds has passed without any
touchscreen activity. This number
may be modified by pressing the Edit
button. Though the display can be set
to never timeout, it is recommended to allow the display to turn off to save on power consumption.
System Timeout
Defines the amount of time before the system will go to sleep after shutting off the touchscreen
display. If None is selected, the system will never go to sleep nor go into a low-power mode. If the
second option is selected, the system will go into a low-power mode after the desired number of
seconds has passed since the display turned off. This number may be modified by pressing the
Edit button. The System Timeout can be useful when set to None if the system is expecting traffic
on the Ethernet port. Listening ports and programs can only be run if the System is not in a lowpower mode (i.e. the Backlight can be off, but the System Timeout
must be set to None).
System Cut-offs
The System Cut-offs screen of System Settings allows the cut-off voltage and temperature levels
(operating ranges) to be set for the System 5000™.
Cut-off Voltage
Allows a minimum and maximum voltage range that must be met to continue normal operation.
Two separate voltage ranges can be specified for System 5000™ and GOES Radio operations.
The battery voltage level is retrieved and checked at the beginning of each scan period.
102
General Setup
System 5000™
If None is selected, all Tasks will
be run regardless of the measured
battery voltage level. If the second
option is selected, Tasks will only be
run when the voltage level is within
the given range. If the voltage level
is outside of the specified range,
the system will simply schedule the
next scan and re-measure when
that time arrives.
GOES Radio
If None is selected, all GOES
Transmissions will be scheduled
and run regardless of the measured
battery voltage level. If the second option is selected, GOES Transmissions will only be
scheduled and run when the voltage level is within the given range. If the voltage level is
outside of the specified range, the system will skip the current transmission scheduling and
re-measure on the next scan. Note that some GOES Radios have a built-in cut-off voltage
independent of this check.
Cut-off Temperature
Allows a minimum and maximum temperature range that must be met to continue normal
operation. If None is selected, all Tasks will be run regardless of the measured temperature. If the
second option is selected, Tasks will only be run when the measured temperature is within the
given range. If the temperature is outside of the specified range, the system will simply schedule
the next scan and re-measure when that time arrives. The temperature is retrieved and checked
at the beginning of each scan period.
103
11 /
104
SYSTEM SETUP COMMUNICATIONS
System Setup - Communications
Communications Screen
The Communications screen is the
second of three System Setup screens
and provides access to communication
settings including GOES, Ethernet, and
SDI-12 within the System 5000™. Available
categories include GOES Configuration,
Network
Listening
Ports,
Network
Setup, Remote Assistance, and SDI-12
Transparent Mode. Some sections may be
familiar as portions of these screens are
fully accessible through various menus
and screens within the System 5000™.
Each of the above areas are described in
more detail throughout this chapter. The
other System Setup screens, General Setup and Inputs & Outputs, can be accessed by pressing their
associated tabs.
Direct PC Connect
The Direct PC Connect screen enables the
System 5000™ to be quickly set up and
made ready to connect to a computer or
laptop. For detailed instructions on how to
connect a computer to the System 5000™,
please refer to Chapter 13, Connecting
with a PC.
GOES Configuration
The GOES Configuration screen allows
the general status and operations of an
attached GOES Radio to be seen and
configured. The GOES Radio must be
properly set up and operational before
any transmissions will occur. As the GOES
Configuration screen and all sections within are detailed in Chapter 6, please refer to the GOES
Output for more information on setting up, operating, and maintaining the GOES Radio.
105
SYSTEM SETUP - COMMUNICATIONS
Listening Ports Setup
The Listening Ports Setup screen allows
the network and serial ports on the System
5000™ to be configured to respond to
outside communication on those ports.
While the serial ports (COM 1, COM
2,etc) can wake up the System 5000™
and respond to incoming requests, the
network port (Ethernet 10/100 BaseT)
on the front panel can only respond to
incoming connections when the System
5000™ is not in its low-power sleep.
The left-most area shows the current
listening ports. As only one program can
run on each port, all listening ports much
be unique.
Port Options
Listening ports can be added, edited, and removed with the options provided here. Some options
may be grayed out if a Task is not selected. Only existing, selected Tasks may be
modified or removed.
Program Options
Some listening port programs can be configured to respond differently on a port by port basis.
For example, multiple ports could respond to Modbus requests with completely different data,
dependent on the port the request was received.
Ports may be individually Disabled or Enabled through the Disable Port/Enable Port function
button. A disabled Port will not respond to incoming requests and appear red with a strike
through its name.
Listening Port Programs
Many different types of programs are available to use to respond to incoming communications.
Modbus Slave, Basic Programs, or a VNC server can be chosen to communicate on a listening
port.
Modbus Slave can respond to Modbus Master requests on any specified port of the system.
106
Basic Programs can be useful for serial or network-based actions, such as emulating a DRGS
using the DAMS-NT protocol. Other programs could emulate simple web pages or provide Task
information or system statistics to requesting clients. Even other loggers could request and
retrieve information using a simple Basic script. Example commands and programs can be found
within the Basic 5000 User Manual, downloadable from the waterlog.com web site.
System Setup - Communications
The VNC Server provides direct access to the same menu system seen through the touchscreen
and thus enable remote communication, configuration, and data retrieval from the system via a
network connection. As the VNC Server also supports file transfers, remote Basic Programs
could be installed, firmware could be updated, or configuration files could be saved or loaded all
from a remote location. For more information regarding using the VNC Servers to remotely
connect to and manage the System 5000™, please refer to Chapter 13.
Configuring Network Listening Ports
Network Listening ports can respond
to incoming requests whenever the
System 5000™ is not in its low-power
sleep. The System Timeout can be
disabled in the System Settings to
prevent the System 5000™ from
entering its low-power sleep. Few
settings are needed to configure a
network port: the network port itself,
and the network mode/interface.
Mode
Most ports will use TCP as their
interface. UDP, if needed, can also
be selected.
Configuring Serial Listening Ports
Serial Listening ports can respond to
incoming requests at any time. Serial
ports have many options to configure
the port exactly as needed.
Mode
Displays the current serial port
setup. To modify the setup, press
the Edit button.
The following standard serial port
options can be customized: baud rate,
data bits, parity, stop bits, etc. Most
programs allow flow control as well as
transmit delays to be configured. If a
Modbus Slave program is selected, the Modbus Slave ID as well as mode (RTU or ASCII) will
become available as part of the Serial Port Setup.
107
SYSTEM SETUP - COMMUNICATIONS
Network Setup
The Network Setup screen allows simple
network settings to be defined allowing
network connectivity using the Ethernet
port on the front panel. The port can be
set up automatically via the network or
entered manually. For examples on how
to connect directly to the System 5000™
using a PC, please refer to Chapter 13.
Ethernet
Determines whether the Ethernet port
is powered on or off. The port will only
be enabled when the System 5000™ is
not in a low-power sleep. To have the
Ethernet port always remain on, the
System Timeout within System Settings will need to be set to the (None) option. The System
5000™ will use more power in this mode but will be able to respond to any incoming connections.
The Ethernet mode may also be set to Server (DHCP) to allow the System 5000™ to act as a
DHCP server, assigning IP addresses to any connected systems. This mode can be useful when
connecting a computer directly to the System 5000™, however should not be used when
connected to a network with another DHCP server.
IP Type
Specifies how the IP address will be set on the system. The IP Address is a unique identification
on a given network. If a DHCP server (e.g. a router) is running on the network, the Auto option
allows the Update button to automatically retrieve and set the System 5000™’s IP address, subnet
mask, and default gateway. If a static IP is needed (i.e. no DHCP server is available or a specific IP
is desired), the Manual radio button can be pressed to allow manual entries into the IP address,
subnet mask, and default gateway parameters. For proper settings to allow connecting directly
to a PC using the Ethernet port, see Chapter 13.
DNS (Nameservers)
Specifies how the DNS (Nameservers) will be set up. Nameservers allow the System 5000™ to
properly communicate with other devices on the same network. Similar to IP Type, if a DHCP
server is available, the Auto option can be used to dynamically retrieve the DNS information. If
manual entries are desired, the Manual radio button can be pressed and two DNS entries can be
entered.
108
System Setup - Communications
Remote Assistance
The Remote Assistance screen allows a
networked System 5000™ to share its
display with any VNC-listening host. If the
system is connected to a network that has
Internet access, for instance, the unit could
share its display with support personnel at
Design Analysis to more easily assist with
any questions or troubleshoot any issues
that may arise.
System 5000™ IP
Defines the current IP address
associated with the System 5000™. An
IP address is necessary for the Remote
Assistance option to operate correctly.
If an IP address is not shown, use Network Setup to first assign an IP address.
Host(s)
Defines the name of the host to which the connection request will be sent. Connection
requests are sent to port 5500 on the host computer. Pressing the Connect button will attempt to
initiate a connection to the specified Host.
SDI-12 Transparent Mode
The SDI-12 Transparent and Monitor Mode
enables the System 5000™ to not only
issue commands from the unit itself, but
also view all traffic on the SDI-12 lines. This
allows the System 5000™ to talk directly
with and test any SDI-12 sensors on the
line. All SDI-12 sensors must implement a
set of standard commands. These standard
commands can be sent to a sensor using a
single button press. Extended or additional
commands specific to each sensor may
also be sent to a sensor through the
Extended CMD mode accessed through
the function button.
Sensor Address
Defines the sensor address that will be prefixed on most SDI-12 commands issued. Sensor
addresses are case-sensitive and can be any alphanumeric character. If the address is unknown,
the Query Address buttons for a single sensor or Identify Sensors Test button can be used to 109
help identify the sensor’s address.
SYSTEM SETUP - COMMUNICATIONS
Change Address To
Sets the current sensor address to a new address. For example, if the existing Sensor Address was
0 and needed to be changed to 1, by pressing the Edit button next to this label, entering 1, and
pressing OK would issue an address change command of ‘0A1!’. The sensor would now respond
to address 1 rather than 0.
Query Address
Two options here provide generic querying of addresses on the SDI-12 line. If a single sensor
is connected, one or both of these commands (‘?!’ and ‘*!’) should trigger a response from the
SDI-12 sensor, returning the address of the sensor itself. If multiple sensors exist, a collision will
probably occur resulting in a garbled response.
Identify Sensors (0-9) / (A-Z)
Used to automatically search for SDI-12 sensors on the SDI-12 line. Identify (I!) requests will be
sent out for the selected range (0-9 or A-Z). The querying and any responses will be shown in the
above window. If a sensor is found, it will list its response to the ID command which should include
the manufacturers name, model number of the sensor, and version information. If two or more
sensors use the same address, a collision will probably occur resulting in a garbled response.
Send Acknowledge
Sends the sensor address followed by the ‘!’ terminator. The normal response is the sensor
address followed by a Carriage Return and Line Feed. If the sensor is not connected or does not
respond, no response will be shown in the above window. Refer to the sensor manufacturer for
proper response to the Acknowledge Command.
Identify
Sends the sensor address followed by ‘I!’, which is the standard SDI-12 identify command. The
normal response is the sensor address followed by general information about the sensor, such as
version number, manufacturer, etc. Refer to the sensor manufacturer for proper response to the
Identify Command.
Verify
Sends the sensor address followed by ‘V!’, which is the standard SDI-12 verify command. The
normal response is the amount of time and number of parameters that will be returned from
a subsequent Data command. When the verify information is ready, the sensor address will be
received. Pressing the D button to retrieve the data response will reveal the parameters generated
from the Verify command. Refer to the sensor manufacturer for proper response to the Verify
Command.
110
System Setup - Communications
Start Measurement
Sends the sensor address followed by ‘M!’ which is the standard SDI-12 measure command.
The response to this command is the time required to make the measurement and the number
of values that will be returned by the sensor. When the measurement information is ready, the
sensor address will be received. Pressing the D button to retrieve the data response will reveal
the parameters generated from the Measurement command. If a more complex measurement
command is needed (e.g. ‘M1!’), the Extended CMD mode will need to be used. See the sensor
manufacturer’s documentation for a description of the actual response for each sensor.
Retrieve Data Response
Sends the sensor address followed by ‘D0!’ which is the standard SDI-12 data retrieval command.
The command is used to retrieve data from the sensor following a measurement command or
other command that may take longer than a second to complete. Executing this command prior
to a completed sensor measurement will abort the previous measurement. If more parameters
are available after the response to the ‘D0!’ command, subsequent ‘D1!’, ‘D2!’, etc commands will
be automatically issued to retrieve all data values. Refer to the sensor manufacturer for proper
response to the Data Command.
Using Extended Commands
The Extended Commands screen allows
any custom SDI-12 commands to be sent,
including those specific to a single sensor
that may not be part of the standard SDI12 command set. Extended Commands
are sent exactly as entered followed by the
‘!’ terminator (if not specified). All SDI-12
communication can be seen in the above
window. Refer to the sensor manufacturer’s
documentation for proper responses to
the sent commands.
Extended Command
Defines the command to be sent when
the Send button is pressed. The trailing
‘!’ terminator is optional.
111
12 /
112
SYSTEM SETUP INPUTS & OUTPUTS
System Setup - Inputs & Outputs
Inputs & Outputs Screen
The Inputs & Outputs screen is the third of
three System Setup screens and provides
access to IO settings relating to Tasks
and their setup within the System 5000™.
Available categories include Basic Program
Management, Log File Configuration,
Tasks Overview, and View Status Screen.
Some sections may be familiar as portions
of these screens are fully accessible
through various menus and screens within
the System 5000™.
Each of the above areas are described in
more detail throughout this chapter. The
other System Setup screens, General Setup
and Communications, can be accessed by
pressing their associated tabs.
Basic Program Management
Once a Basic program has been installed,
as detailed in Chapter 7, it can be
viewed, edited, debugged, exported,
or uninstalled from the Basic Program
Management screen. In general, most
programs will not need much, if any,
editing performed. However fine tuning as
well as troubleshooting can be performed
to aide and ease the use of Basic programs
on the System 5000™.
Installed Basic programs are displayed
in the left box with their associated Type,
Program Name and Filename. The Type
can have up to three letters displayed, I, O,
and N, relating to where the program will be available: Input, Output, and Network respectively.
Program Options
Selected programs can have program options edited, the program itself debugged (or viewed via
the function button), the original program exported, or uninstalled if no longer needed. Exported
programs will appear as files on the Local system within the Data File Manager. Uninstalled
programs will simply be removed from the system.
113
SYSTEM SETUP - INPUTS & OUTPUTS
Log File Configuration
The Log File Configuration screen reveals
all log file configurations available on
the System 5000™ regardless of whether
they are being used by existing Tasks.
Configurations are completely separate
from log files themselves. A configuration
simply defines how data will be recorded
to a log file. If a log file configuration
is removed, the log file will remain,
however, all logging to that file will cease.
Configurations are typically created
automatically via the Log To File Output,
detailed in Chapter 6, and can only be
removed using this screen. Logging can
also be enabled or disabled for individual
configurations via the Disable/Enable Log
function button.
Config Options
New configurations can be created and selected configurations can be edited or removed
through the New, Edit, and Remove buttons. New configurations will contain the Date and Time
variables by default. Both the New and Edit buttons will open the Log File Properties screen,
explained in Chapter 6, allowing simple viewing or changes and updates to be made to the
configurations. The Remove button removes only the configuration, discontinuing further
logging to that file, but does not delete the actual file. Actual file operations can be accomplished
through the Data File Manager.
File Options
The actual Log File defined by the selected configuration can be viewed by pressing the View
button.
Tasks Overview
The Tasks Overview screen provides a succinct view of created Tasks, their related rates, and
their associated Input and Outputs. Extended information is also provided, including the Start
Time of a Task (typically the beginning of each day), as well as the Last Measurement and Value.
By default, only the Task names with their Scan Rates and Inputs are shown. To view the Outputs
associated with each Task, simply select the row of a Task and it will expand. To quickly Expand or
Collapse all Tasks, press the Expand All function button.
114
System Setup - Inputs & Outputs
This screen can be helpful in providing
a quick and simple look at the setup of
the System 5000™, the Tasks, and more
importantly the rates associated with each.
Note that Scan Offsets and Custom Task
Schedules are not noted (except for the
Start Time). This menu is also accessible
via the Global Task Options screen within
System Settings.
View Status Screen
The View Status screen shows the Tasks
on the System 5000™, each with their
most recent measurement date, time, and
value, as well as the next measurement
date and time. If new measurements are
desired for all listed Tasks, the Measure All
function button can be pressed to force
a measurement of all the Tasks. If only
a specific Task measurement is desired,
select the desired Task and press the
Measure Task function button (highlighting
a Task will cause the Measure All function
button to change to a Measure Task
function button). Updates to the values
will be shown as new measurements are
retrieved.
The View Status screen also appears when the View Status button on the front panel of the System
5000™ is pressed. Pressing and holding the View Status button for more than three seconds will
initiate the action specified by the function button. If no Tasks are selected and the Measure All
function button is shown, holding the View Status button will cause all of the Tasks to request a new
measurement. To select a Task, press and release the View Status button. Pressing the button again
will scroll through the Tasks. To measure a selected Task, simply highlight the desired Task, then hold
down the View Status button for roughly three seconds. After the last Task has been deselected, the
function button will scroll to a Sleep command. Holding the View Status
button will then shut off the display to the System 5000™, and subsequently enter its sleep
115
mode. Pressing the View Status button again will wake up the unit, if asleep, or rotate the function
button to the Measure All command, if already awake..
13 /
116
CONNECT WITH A PC
Connect With A PC
Direct PC Connect
The System 5000™ can be fully configured, maintained, and updated through use of the touchscreen
interface menus. Introduced in firmware version 1.4.0, these same menus can also be accessed when
a PC or other Java-enabled device is directly connected to the system by the bundled USB device
cable, an ethernet cable, or a serial cable attached to COM 1 or COM 2. All mentioned methods allow
the same display that exists on the unit to be seen on the attached computer by using a simple web
browser or VNC program, such as UltraVNC. File transfers to and from the System 5000™ are also
fully supported, enabling the latest data files to be retrieved or firmware upgrades to be uploaded.
Microsoft Windows XP is used in the examples below. Set up on all other Microsoft Windows
products are similar to those detailed.
Configuring the System 5000™
The Direct PC Connect screen,
accessible within the System Setup
- Communications menu, allows the
System 5000™ to be automatically
configured for direct access. To enable
a port for the Direct PC connect, simply
press on the checkbox of the desired
Type(s) and then press the OK button to
save the changes. As the touchscreen
interface menus are accessible through
a PC’s web browser, the associated
IP address of the selected Type is
displayed under the Status column
for future reference. More information
regarding each of the Types is detailed
in the following sections.
Configuring via Network (Ethernet) Port
The Ethernet port located on the front of the System 5000™ can provide the quickest set up for
direct or remote communication. Most computers, by default, obtain their IP address
automatically when connected to a network. By using the Direct PC Connect Ethernet option,
the System 5000™ can assign an IP address automatically to a connected PC and establish the
communication in one simple step. To enable this, check the Ethernet option on the Direct PC
Connect screen and press the OK button.
An icon in the system tray may appear (as shown below), indicating the network connection is
being set up. The network configuration can take up to 10 seconds to completely configure.
117
CONNECT WITH A PC
To test whether the IP address assignment was successful, simply open a web browser and enter
the IP address displayed on the Direct PC Setup page into the address bar and press Enter. Upon
success, the Java viewer will begin loading.
For further information regarding the Java-enabled menu system, please refer to the Using a
Web Browser section near the end of this chapter.
Note that the Ethernet port can only be powered when the System 5000™ is not in low-power
sleep. If the unit is sleeping or if the Ethernet has not been powered, the LEDs on the Ethernet
port will not be lit. If power is less of a concern, the low-power sleep mode can be disabled by
checking the Disable System Timeout box on the Direct PC Connect screen. Unlike the Ethernet
Port, the USB and Serial Port connection options can wake the system when in low-power sleep.
Connecting via USB or Serial (COM) Port
PCs intending to establish communication with the System 5000™ over a USB or Serial port
require a one-time setup in order to properly communicate. The USB device port can act in two
different modes: as a virtual serial port or as an external hard drive. Acting as a virtual serial port
requires a simple USB driver to be installed, while acting as an external hard drive requires no
special driver. The virtual serial port driver can be found on the internal drive of the System
5000™. Details on the virtual serial port driver are detailed below. If the Serial port is to be
used, the USB virtual serial port driver installation below can be skipped. Information on using
the USB port to act as an external hard drive can be found near the end of the chapter.
USB Virtual Serial Port Driver Installation
Two versions of the USB driver are
available: gserial.inf and gserial64.inf.
These files can be retrieved by pressing
the Drivers button on the Direct PC
Connect page to save the files to the
local drive of the System 5000™. The
files can then be downloaded and
placed on the PC either through the
Data File Manager on the Main Menu
(using a USB thumb drive or SD Card)
or by connecting to the USB Device
port and using the System 5000™ as
an external hard drive. The USB Device
Type must be selected (and saved by
clicking on the OK button) on the Direct
118
PC Connect screen before the driver installation can begin. After enabling the USB Device Type,
plug in the USB device cable that came bundled with the System 5000™ into the USB-B port and
the PC. The following screens should appear and walk through the driver installation process.
Select No, not this time and press the Next button.
Connect With A PC
Select Install from a list or specific
location (Advanced) and press the Next
button.
Check the Include this location in the
search: and press the Browse button.
Select the folder or location of the
driver files that were saved previously
and press the OK button. Then press
the Next button.
Once the driver has been found and
begins to be installed, a warning
message may appear. Press the
Continue Anyway to allow the driver to
be installed properly.
Once the driver has been installed,
press the Finish button to exit the driver
installation.
PC Networking Setup
In order to communicate with the System 5000™ using a serial port or USB port, a one-time
setup on the desired port needs to be performed to first have the port appear as a modem, and
second to set up Dial-up Networking to make the connection. Once these steps have been
completed, an icon can be placed on the Desktop of the PC to make future connections quick
and simple.
Before proceeding, verify the System 5000™ has been set up and configured as noted above and
the PC is connected to the System 5000™ by either a USB or serial cable. Note that a
119
null modem adapter is required for communication if a serial cable is being used.
CONNECT WITH A PC
To set up the COM port as a modem,
select the Start button > Control Panel >
Phone and Modem Options (in Classic
View).
Select the ‘Modems’ tab and press the
‘Add’ button.
Check the ‘Don’t detect my modem;
I will select it from a list.’ option and
press ‘Next’.
Select ‘(Standard Modem Types)’ from
the Manufacturer column.
Select ‘Standard 33600 bps Modem’
from the Models column and press
‘Next’.
Check the Selected Ports option and
select the COM port the System 5000™
is connected to.USB virtual serial ports
are typically the highest number COM
port. Press ‘Next’.
Once the modem installation has
completed, select the ‘Finish’ button.
120
Connect With A PC
The Phone and Modem Options
window will display the newly installed
Modem as well as the COM port it is
“attached to”.
Highlight the new modem and press
the Properties button.
Select the Modem tab and verify the
Maximum Port Speed is set to 115200.
If it is not, select 115200 from the drop
down list. Press OK to exit and OK again
to exit the Phone and Modem
Options screen.
To set up Dial-Up Networking, select
the Start button > Control Panel >
Network Connections (in Classic View)
Select ‘Create a new connection’ under
the Network Tasks menu on the left.
Press Next to begin the Dial-Up
Networking setup. Select the ‘Connect
to the network at my workplace’ option
and press the Next button.
121
CONNECT WITH A PC
Select the ‘Dial-up connection’ option
and press the ‘Next ‘button.
Optional: If you have multiple modems
installed on the computer, a prompt will
appear asking which Modem and COM
port should be used. If only one port is
set up as a Modem, this screen
will not appear. Select the modem
(Standard 33600 bps) and press the
‘Next’ button.
Type in the name of the connection (e.g.
System 5000™ Connection) and press
the ‘Next’ button.
Type in ‘5000’ as the phone number
and press the ‘Next’ button.
Select the ‘Add a shortcut to this
connection to my desktop’ and press
the ‘Finish’ button.
122
Connect With A PC
After
completing
the
Dial-Up
Networking
setup,
some
quick
changes to the connection need to
be configured. Press the ‘Properties’
button on the pop-up window.
Select the Options tab and de-select
Prompt for name and password,
certificate, etc. as well as the Prompt for
phone number Dialing options.
Select the ‘Networking’ tab, highlight
the ‘Internet Protocol (TCP/IP)’ option
and press the ‘Properties’ button.
Press the ‘Advanced’ button.
Uncheck the ‘Use default gateway on
remote network’ option. Press the ‘OK’
buttons (3 buttons) to save the changes.
The connection may automatically try
to connect at this point. If it does not,
simply double-click on the Desktop
icon to initiate a new connection to the
System 5000™. If connecting via the
USB Device port, a System 5000™
reboot may be required before connecting for the first time.
A pop-up in the system tray will indicate when the communication has been established. If any
problems occur (e.g. the connection does not connect properly) simply disconnect and reconnect
the cable and double-click the desktop connection icon again.
Serial ports will report 115.2 Kbps as their speed. USB connections may report 9.6 Kbps though
the speed is actually 115.2 Kbps as well.
Once connected, simply open a web browser and type in the address of the connected
port and press Enter. Upon success, the Java viewer will begin loading. For further
information regarding the Java-enabled menu system, please refer to the Using a Web
Browser section below.
123
CONNECT WITH A PC
Acting as an External USB Hard Drive
All System 5000™ units come bundled
with a USB data cable. Using this cable,
the System 5000™ can act as an external
hard drive to a connected computer,
allowing files to be directly transferred
between the two systems. Log files, system
configurations, and firmware updates
could all be transferred using this method.
To enable this mode on the System 5000™,
first attach the provided USB data cable
to the USB device port (USB-B) on the
System 5000™ and then to a USB port
on a computer. The following screen will
be displayed, noting that scanning will
be disabled while the System 5000™ is
operating as an external USB device.
Pressing the Yes button will stop scanning on the System 5000™ and mount the unit as an
external hard drive on the connected computer. The first time this occurs, a quick installation
will take place to allow proper connectivity.
If the above screen is not displayed, verify the Direct PC Connect USB Device option is disabled,
then disconnect and reconnect the USB cable. The USB device port can only function in one of
these modes at a time.
Once all proper connections have been set
up, the screen to the right will appear. The
System 5000™ will now be accessible as
though it were an external hard drive and
can be managed through a file manager
or explorer window on the computer. Files
can be copied to and from the System
5000™’s internal memory as desired.
When complete, the USB cable can either
be disconnected or the Force Disconnect
button on the screen can be pressed to
end the connection.
124
Connect With A PC
Using a Web Browser
Once the System 5000™ has been
properly configured and is connected by
either USB, Serial, or Ethernet, the touch
screen interface menus can be accessed
by any Java-equipped web browser. To
access the menu interface, simply open a
web browser and type in the IP address as
listed on the Direct PC Connect screen.
After entering the IP address and pressing
enter, a Java symbol should appear and
begin loading the applet. A warning
message, similar to that shown below,
will appear asking for permission to run
content from the System 5000™. Allowing
this option enables file transfers
to take place between the System 5000™ and the connecting computer.
If an empty box or red X is displayed, the Java client on the computer may need to be updated.
Please visit www.java.com to download and install the latest Java client.
The System 5000™ menu interface should appear once the Java process has finished loading.
Four buttons at the top of the Java window provide the ability to force Disconnect, change the
way the display is shown via Options, Refresh the screen, and transfer files.
Pressing the File Transfer button will open
the File Transfer window. Local files (files
that exist on the computer being used)
are shown in the left side windows. System
5000™ files are shown in the right side
window. Selected files may be copied to
and from the System 5000™ using the
Send and Receive buttons as well as
removed using the Delete File button. A
warning message will be displayed when
deleting a file to verify the desired action
is correct.
125
CONNECT WITH A PC
Using VNC
(Virtual Network Computing)
Many mobile devices may not support Java
but do have access to a VNC application.
These VNC programs may be used to
access and configure the System 5000™. If
a Direct PC Connect option is being used,
the same IP address can be specified using
port 180 to connect. An
example setup of the UltraVNC Viewer on
a PC is shown to the right.
Alternative ports can be used for connecting
by creating additional Listening Ports and
selecting the VNC Server program (not the
VNC Server (HTTP) option). File transfers
are only supported through the UltraVNC
compatible programs. Additional settings,
such as image quality and speed can be
modified through the VNC program itself.
126
14 /
MAINTENANCE &
TROUBLESHOOTING
127
MAINTENANCE&TROUBLESHOOTING
Maintenance
Sustained operation of the System 5000™
is generally maintenance-free. There are no
desiccants or serviceable parts to maintain.
The touchscreen interface, however, can
be calibrated for finer precision when
necessary.
Touchscreen Calibration
The touchscreen calibration menu can
be accessed by holding in the View
Status button while applying power to
the System 5000™. Continue to hold the
View Status button until the first
System 5000™ splash screen appears.
Within a few seconds, a simple
touchscreen calibration menu will
appear.
To re-calibrate the touchscreen, follow the onscreen prompts by pressing the center of the
crosshair displayed on the screen. A finer precision can be achieved by pressing each crosshair
for a few seconds, rather than a quick press. This allows more samples to be taken and a more
accurate averaging to take place.
When completed, the newly calibrated
settings can be tested.
If finer calibration settings are still
required, the calibration can be retried
by pressing the Retry Calibration button.
If the new settings are acceptable, press
the Exit and Restart button to reboot
the System 5000™ with the new
calibration settings.
128
Maintenance & Troubleshooting
Troubleshooting
It is unlikely that this manual will ever contain troubleshooting tips to cover every problem that will
be encountered. Feedback from customers is very valuable and greatly aids in the quest for constant
product enhancement. Please feel free to call us for technical assistance and also with solutions you
have found to past problems at 435-753-2212.
Our experience with pressure transducers has taught us a lot about the problems associated with
field installed equipment. The following list of problems and possible solutions will undoubtedly
grow with subsequent revisions of this manual and may be helpful to you.
General Data Collection
Intermittent Data:
1- Check power and ground connections. Moisture over time will oxidize and corrode connectors
and pins.
2- Verify power supply or battery voltage. As the power supply approaches the lower threshold
of the System 5000™ supply range, it may begin to miss readings intermittently.
3- Check the last system reset for a possible malfunction or clue to the problem.
Wrong or Erratic Data:
1- Check the sensor Properties screen for possible errors.
2- Verify slopes, offsets, or custom functions.
3- Check battery voltage and all connections.
SDI-12 Communications
No SDI-12 Response:
1- Verify power to the System 5000™.
2- Check all SDI-12 connections, including DATA and GND.
3- Check the pin out of the SDI-12 sensor for correct wiring.
4- Make sure all sensors have a unique address.
GOES Transmissions
GOES not transmitting:
1- Check power to the GOES Radio, do so under a load (e.g. a transmission).
2- See if the GOES time is correct, if it is stopped, it indicates power to the radio was lost,
stopping the clock. The radio will not transmit if the GOES clock is not running.
3- Check all antenna wires.
4- Check antenna alignment.
5- Use a power meter to measure the power output of the radio and the reflected power.
129
15 /
130
APPENDIX
Appendix
Appendix A: Specifications
Base Unit
Display
Type:
User Interface:
Speaker:
Push-to-read:
Event, Frequency, Quadrataure Input
Type:
4-inputs, switch closure or voltage pulse
Programmable rising or falling edge triggered
5.7", 1/4 VGA (320 x 240 pixels), TFT, color
Minimum Pulse Width:
5 mS (event & quadrature)
LED back light, with touch screen
Input Frequency: 16 KHz max
Graphical, with built in help menus.
Counter resolution: 32-bit
Graphical user interface also accessible remotely
via Ethernet, Serial or USB ports.
Quadrataure Output
Internal, for touchscreen key click and user interface
Type:
Synthesized quadrature encoder, 2-encoders
Pushbutton allows viewing measurement data without Outputs:
2-wire/encoder,
0-5V, 64Hz step rate
opening the cover.
AC Frequency Input
Real Time Clock
Accuracy:3.5ppm from -40° to +85°C
Battery:
Replaceable lithium cell
General
Processor:
32-bit, 192-MHz, ARM-9
SDRAM:
64-Mbytes
Operating System: LINUX
Data Storage
Data Logging:
Removable:
Format:
1Gbyte, expandable to 4Gbytes
Multi-Media \ Secure Digital (SD) Card,
(32Mbyte to 4Gbyte cards available)
Microsoft™ FAT file system
Type:
Input Range:
Input Amplitude:
Accuracy:± 0.1%
Resolution:
mV wind speed, dedicated input
1 to 10 KHz at ± 75mVolts or greater 1 to 15 KHz at ± 1 Volt or greater
± 5.0 V Max
1/10000 * Reading
Analog Input
Channels:
Four (4) single ended or two (2) differential
(each channel programable)
Resolution:24-bit
Accuracy:±0.05% FS
Input Range:
0 to 5 Volts (has built in transient protection)
GOES Radio
Interface
Works with external H-2221 GOES transmitter via RS-232 port or H5000+
USB Host:
Two (2) ports, full-speed (works with a thumb drive)
with built in H-2221 transmitter (see H-2221 specification for details).
USB Device:
One port, full-speed (appears as a mass storage device)
Power
Ethernet:RJ-45 10/100Base-T, IEEE 802.3
Input Voltage:
10.0 to 16.0 volts DC
RS-232:
Two (2) ports, 115.2Kbps, DB9, DTE, auto wake up
Input Current:
SDI-12:
Two (2) ea, 3-pin connectors, 1200 baud
Sleep: 6mA typical
(Master mode)
Active: 80 mA typ (measuring, display off)
+5V Excitation Output
Type:
Switched, programmable “warmup” time
Voltage:
5.00V, ratio metric with A/D
Accuracy:± 1.0 mV over load and temperature range
Current:
10mA max load
Switched +12 Output
Voltage:
Current:
Depends on battery voltage
1A max, protected with polyfuse
4-20 mA Output
Type:
2-wire, loop powered, optically isolated
Resolution:16-bits
Loop Voltage:
5.5V min, 35V max
Digital I/O
Channels:
Four (4) channels, independently configured for input
or output.
Internal 47K pullup resistor to 5.0V
Voltage:
0-5V (input & output)
Input Type:
Schmitt, hysteresis: 0.7V min, 1.1V max
Input Voltage
Positive going: 2.6V min, 3.3V max
Negative going: 1.8V min, 1.1V max
Output Voltage: Low: 0.5V max @ 24mA
High: 3.8V min @ -24mA
Active:
230 mA typ (measuring, display on)
Auto display shut-off after 3 minutes
Mechanical
Enclosure:
window
Size:
Weight:
Mounting:
Expansion Slots:
Connectors:
Corrosion resistant fiberglass with clear Lexan® 9.0 in. wide x 10.5 in. long x 6.3 in. deep
5.75 lbs (no option cards)
Hardware supplied for wall mounting
3 slots
Plug-in terminal strips (included)
Environment
Operating Range: -40° to +60° C
Storage Temperature:
-60° to +80° C
Humidity:
0-95% non-condensing
Warranty
The WATERLOG® H-5000™ is warranted against defects in materials
and workmanship for one year from date of shipment.
Note
Specifications subject to change without prior notice due to
ongoing commitment to product testing and improvement.
Last Update Nov 30, 2010
131
APPENDIX
Appendix B: Pressure Sensor Option Module Specifications
Pressure Sensor Module
(Model H-5000-01)
Accuracy
(Maximum percent of error in measurement)
Pressure: Less than or equal to 0.02% of full scale output (FSO)
over temperature range referenced to a straight line
stretched from zero PSI to maximum pressure
Temperature: Internal temperature ± 1EC over temperature range
Resolution
(Smallest change detectable in output signal)
Pressure: 1 part in 1,000,000 (0.0001%)
Temperature: 1 part in 1,000,000 (0.0001%)
Linearity
Less than 0.02% deviation from a straight line referenced to end points
Pressure Hysteresis
Less than 0.01% of FSO
Long-term Stability
Accuracy drift is less than ± 0.05% of FSO per year
Response Times
Pressure only: 10-second measurement sequence
Pressure & Temp.: 10-second measurement sequence
Temperature only: 5-second measurement sequence
Pressure Range Options
Pressure Depth Accuracy
0 to 15 PSI 0 to 34.60 ft. ± 0.007 ft.
0 to 30 PSI 0 to 69.20 ft. ± 0.014 ft.
Custom calibration ranges available from 15 to 100 PSI
Bubbler Control Port
Type: RS-485
Physical
Media Compatibility: Pressure Overload: Pressure Inlet: Atmospheric Reference: Options: 132
Non-corrosive dry gases only
Less than 2 times the rated pressure
1/8 in. NPT female fitting
Sintered bronze filter
Plumbing installation kit available (H-350-INS)
Appendix
Appendix C: Analog/Digital Option Module Specifications
Analog/Digital Expansion Module
(Model H-5000-02)
Analog Input
Channels:
Eight (8) single ended or four (4) differential
(each channel programable)
Resolution:24-bit
Accuracy:±0.05% FS
Input Range:
0 to 5 Volts (has built in transient protection)
+5V Excitation Output
Type:
Switched, programmable warmup time
Voltage: 5.00V, ratio metric with A/D
Accuracy:± 1.0 mV over load and temperature range
Current: 10mA max load
4-20 mA Output
Type:
2-wire, loop powered, optically isolated
Resolution:16-bits
Loop Voltage:
5.5V min, 35V max
Digital I/O
Channels:
Four (4) channels, independently
configured for input or output
Internal 47K pullup resistor to +5V
Voltage: 0-5V (input & output)
Input Type:
Schmitt, hysteresis: 0.7V min, 1.1V max
Input Voltage
Positive going: 2.6V min, 3.3V max
Negative going: 1.8V min, 1.1V max
Output Voltage: Low: 0.5V max @ 24mA
High: 3.8V min @ -24mA
Event, Frequency, Quadrataure Input
Type:
4-inputs, Switch closure or voltage pulse
Programmable rising or falling edge triggered
Minimum Pulse Width:
5 mS (event & quadrature)
Input Frequency: 16KHz max
Counter resolution:32-bit
Quadrataure Output
Type:
Outputs:
Synthesized quadrature encoder, 2-encoders
2-wire/encoder, 0-5V, 64Hz step rate
AC Frequency Input
Type:
mV wind speed, dedicated input
Input Range:
1 to 10 KHz at ± 75mVolts or greater
1 to 15 KHz at ± 1 Volt or greater
Input Amplitude: ± 5.0 V Max
Accuracy:± 0.1%
Resolution:
1/10000 * Reading
133
Xylem
1) The tissue in plants that brings water upward from the roots;
2) a leading global water technology company.
We’re 12,000 people unified in a common purpose: creating innovative solutions
to meet our world’s water needs. Developing new technologies that will improve
the way water is used, conserved, and re-used in the future is central to our work.
We move, treat, analyze, and return water to the environment, and we help people
use water efficiently, in their homes, buildings, factories and farms. In more than
150 countries, we have strong, long-standing relationships with customers who
know us for our powerful combination of leading product brands and applications
expertise, backed by a legacy of innovation.
For more information on how Xylem can help you, go to www.xyleminc.com
Xylem—WaterLOG
95 W 100 S, Suite 150
Logan, UT 84321
Tel +1.435.753.2212
Fax +1.435.753.7669
www.waterlog.com
System H-5000™ is a trademark of Xylem Inc. or one of its subsidiaries.
© 2014 Xylem, Inc. D33 0414


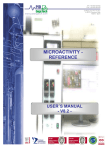


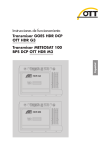


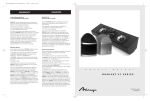


![LS5105 Document No 2 [PDF 1MB] - Australian Electoral Commission](http://vs1.manualzilla.com/store/data/005655823_1-2458abda02bbd8390d0ac9ba8bd86ac6-150x150.png)