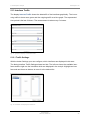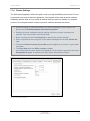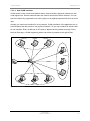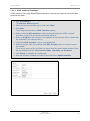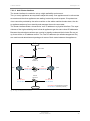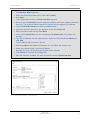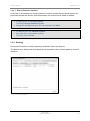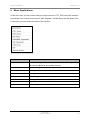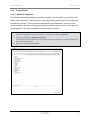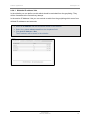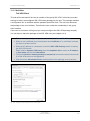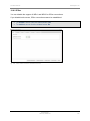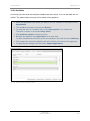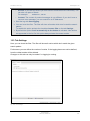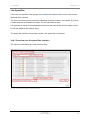
1
Securepoint 10 Securepoint Product Overview Securepoint 10 Product Overview This manual applies to the following products: VPN-Product Terra VPN-Gateway The Terra VPN-Gateway has less functions than the Securepoint UTM products. These limitations affect the functions of the applications proxies, virus scanner, spam filter and content filter. If you purchase the Terra VPN-Gateway, you can easily upgrade to the Securepoint UTM product with a registration key. At this yearly update costs are incurred. For further information contact our sales department: [email protected] UTM Products Terra UTM-Gateway Piranja RC100 RC200 RC300 RC310 RC400 RC410 Securepoint 10 for Modular Server Securepoint 10 for VMware All Securepoint UTM products have the full UTM function volume. Securepoint Security Solutions 2 Securepoint 10 Content Product Overview .............................................................................................................. 2 VPN-Product .................................................................................................................. 2 UTM Products ................................................................................................................ 2 1 Introduction ................................................................................................................11 Part 1 The Administration Interface ......................................................................... 12 2 The Appliances ..........................................................................................................13 3 Positioning the Appliance ...........................................................................................14 4 5 3.1 Piranja and RC 100 ............................................................................................14 3.2 RC 200 ...............................................................................................................15 3.3 RC 300 ...............................................................................................................15 3.4 RC 400 ...............................................................................................................16 Administration Interface .............................................................................................17 4.1 Connecting the Appliance ...................................................................................17 4.2 System Requirements for Client Computer .........................................................18 Securepoint Cockpit ...................................................................................................18 5.1 Navigation Bar ....................................................................................................19 5.2 License ...............................................................................................................19 5.3 System ...............................................................................................................20 5.4 Service Status ....................................................................................................21 5.5 Appliance ............................................................................................................23 5.6 Interfaces ............................................................................................................23 5.7 IPSec ..................................................................................................................24 5.8 Downloads ..........................................................................................................24 5.9 Spuva User .........................................................................................................24 5.10 SSH User............................................................................................................25 5.11 Web Interface User .............................................................................................25 5.12 DHCP Lease .......................................................................................................25 5.13 Interface Traffic ...................................................................................................26 Securepoint Security Solutions 3 Securepoint 10 6 5.13.1 Traffic Settings.............................................................................................26 5.13.2 Traffic Details und Traffic Zoom ...................................................................27 5.14 Show Help ..........................................................................................................28 5.15 Administrator IP ..................................................................................................28 5.16 Refresh ...............................................................................................................28 Menu Configuration ...................................................................................................29 6.1 7 Configuration Management .................................................................................30 6.1.1 Save Configuration ......................................................................................31 6.1.2 Import configuration .....................................................................................32 6.2 Reboot System ...................................................................................................32 6.3 Halt System ........................................................................................................32 6.4 Factory Defaults..................................................................................................32 6.5 Logout ................................................................................................................32 Menu Network............................................................................................................33 7.1 Server Properties ................................................................................................34 7.1.1 Server Settings ............................................................................................34 7.1.2 Administration ..............................................................................................35 7.1.3 Syslog..........................................................................................................36 7.1.4 SNMP ..........................................................................................................37 7.1.5 Monitor Agent (AmdoSoft v4 Agent) ............................................................38 7.1.6 Cluster Settings ...........................................................................................39 7.2 Network Configuration ........................................................................................40 7.2.1 Interfaces.....................................................................................................40 7.2.1.1 Add eth Interface......................................................................................42 7.2.1.2 Add VLAN Interface .................................................................................43 7.2.1.3 Add PPTP interface .................................................................................45 7.2.1.4 Add PPPoE Interface ...............................................................................46 7.2.1.5 VDSL Interface hinzufügen ......................................................................47 7.2.1.6 Add Cluster Interface ...............................................................................48 7.2.1.7 Edit or Delete an Interface .......................................................................50 7.2.2 Routing ........................................................................................................50 7.2.2.1 Edit or Delete Routes ...............................................................................51 7.2.2.2 Add Default Route....................................................................................51 Securepoint Security Solutions 4 Securepoint 10 7.2.2.3 Add Route ................................................................................................52 7.2.3 DSL Provider ...............................................................................................53 7.2.3.1 Edit or Delete DSL Provider .....................................................................53 7.2.3.2 DSL Provider create .................................................................................54 7.2.4 DynDNS ......................................................................................................55 7.2.4.1 Create or Edit a DynDNS Entry ................................................................56 7.2.4.2 Delete a DynDNS Entry ...........................................................................56 8 7.2.5 DHCP ..........................................................................................................57 7.2.6 DHCP Relay ................................................................................................58 7.3 Zones .................................................................................................................59 7.4 Network Tools .....................................................................................................60 7.4.1 Lookup.........................................................................................................60 7.4.2 Ping .............................................................................................................61 7.4.3 Routing Table ..............................................................................................62 Menu Firewall ............................................................................................................63 8.1 Portfilter ..............................................................................................................64 8.1.1 Create Rule .................................................................................................67 8.1.1.1 Infobox Function ......................................................................................68 8.1.1.2 Tab Time..................................................................................................69 8.1.1.3 Tab Description ........................................................................................69 8.1.2 Create Rule Group.......................................................................................70 8.1.3 Organize Rules and Groups ........................................................................71 8.2 Hide NAT ............................................................................................................72 8.3 Port Forwarding ..................................................................................................74 8.3.1 Port Forwarding ...........................................................................................75 8.3.2 Port Translation ...........................................................................................76 8.4 Services ..............................................................................................................77 8.4.1 Delete and Edit Services..............................................................................77 8.4.2 Services Information ....................................................................................78 8.4.3 Add service ..................................................................................................79 8.5 Service Groups ...................................................................................................80 8.5.1 Edit Existing Service Groups .......................................................................81 8.5.2 Create New Service Group ..........................................................................82 8.6 Network Objects .................................................................................................83 Securepoint Security Solutions 5 Securepoint 10 8.6.1 Network Object Information .........................................................................84 8.6.2 Add Host/Net ...............................................................................................85 8.6.3 Add VPN Host/Net .......................................................................................86 8.6.4 Add User .....................................................................................................86 8.6.5 Add Interface ...............................................................................................87 8.7 9 Network Groups ..................................................................................................88 8.7.1 Network Object Information .........................................................................89 8.7.2 Network Group Information ..........................................................................89 Menu Applications .....................................................................................................90 9.1 HTTP Proxy ........................................................................................................91 9.1.1 General........................................................................................................91 9.1.2 Virus scanning .............................................................................................93 9.1.3 URL Filter ....................................................................................................94 9.1.4 Block Extensions .........................................................................................96 9.1.5 Block Applications........................................................................................97 9.1.6 Content Filter ...............................................................................................98 9.1.6.1 Blacklist Categories .................................................................................98 9.1.6.2 Whitelist ...................................................................................................99 9.1.6.2.1 User ..................................................................................................99 9.1.6.2.2 IP Addresses ...................................................................................100 9.1.6.2.3 Websites .........................................................................................101 9.1.7 Bandwidth ..................................................................................................102 9.2 POP3 Proxy ......................................................................................................103 9.3 Mail Relay .........................................................................................................104 9.3.1 General......................................................................................................105 9.3.2 Relaying ....................................................................................................106 9.3.3 Mail Routing...............................................................................................108 9.3.4 Greylisting .................................................................................................110 9.3.4.1 Whitelist IP address / Net .......................................................................111 9.3.4.2 Whiteliste Domains ................................................................................112 9.3.4.3 Whitelist E-mail Recipients .....................................................................113 9.3.4.4 Whitelist E-mail Sender ..........................................................................113 9.3.5 Domain Mapping .......................................................................................114 9.3.6 Advanced ..................................................................................................115 9.3.6.1 Greeting Pause ......................................................................................116 Securepoint Security Solutions 6 Securepoint 10 9.3.6.2 Recipient flooding ..................................................................................116 9.3.6.3 Limit max number of recipients ..............................................................116 9.3.6.4 Limit connections ...................................................................................116 9.3.6.5 Rate Control...........................................................................................116 9.4 Spam Filter Properties ......................................................................................117 9.4.1 General......................................................................................................117 9.4.2 Attachment Filter .......................................................................................119 9.4.3 Virusscan ...................................................................................................121 9.4.4 SMTP Settings...........................................................................................122 9.4.5 SMTP Advanced ........................................................................................123 9.4.6 POP3 Settings ...........................................................................................124 9.5 VNC Repeater ..................................................................................................125 9.5.1 General......................................................................................................125 9.5.2 VNC Server ID ...........................................................................................126 9.5.3 VNC Server IP ...........................................................................................126 9.6 VoIP Proxy........................................................................................................127 9.6.1 General......................................................................................................127 9.6.2 Provider .....................................................................................................128 9.7 IDS ...................................................................................................................129 9.8 Nameserver ......................................................................................................130 9.9 Service Status ..................................................................................................131 10 Menu VPN ............................................................................................................132 10.1 IPSec Wizard ....................................................................................................133 10.1.1 Site-to Site .................................................................................................133 10.1.2 Site-to-End (Roadwarrior) ..........................................................................136 10.1.2.1 native IPSec .........................................................................................137 10.1.2.1.1 IKEv1.............................................................................................138 10.1.2.1.2 IKEv2.............................................................................................139 10.1.2.2 L2TP ....................................................................................................140 10.2 IPSec Globals ...................................................................................................142 10.2.1 General Settings ........................................................................................142 10.2.2 IKE V2 .......................................................................................................143 10.3 IPSec ................................................................................................................144 10.3.1 Edit Connection .........................................................................................144 Securepoint Security Solutions 7 Securepoint 10 10.3.1.1 Phase 1................................................................................................144 10.3.1.2 Phase 2................................................................................................146 10.4 L2TP .................................................................................................................147 10.5 PPTP ................................................................................................................149 10.6 SSL VPN ..........................................................................................................151 11 Menu Authentication.............................................................................................152 11.1 Users ................................................................................................................153 11.1.1 Add User Tab General ...............................................................................154 11.1.2 Add User Tab VPN ....................................................................................155 11.1.3 Add User Tab VPN Client ..........................................................................156 11.1.4 Add User Tab Spam Filter .........................................................................157 11.1.5 Add User Tab Extras .................................................................................158 11.1.6 Add User Tab WoL ....................................................................................159 11.2 External Authentication .....................................................................................160 11.2.1 Radius .......................................................................................................160 11.2.2 LDAP Server..............................................................................................161 11.2.3 Kerberos ....................................................................................................162 11.3 Certificates........................................................................................................163 11.3.1 Create CA ..................................................................................................164 11.3.2 Create Certificates .....................................................................................165 11.3.3 Import CA and Certificate...........................................................................166 11.3.4 Export CA and Certificate ..........................................................................166 11.3.5 Download SSL-VPN Client ........................................................................167 11.3.6 Delete CA and Certificate ..........................................................................168 11.3.7 Tab CRLs ..................................................................................................169 12 Menu Extras .........................................................................................................170 12.1 CLI ....................................................................................................................171 12.1.1 CLI Log ......................................................................................................171 12.1.2 CLI Send Command ..................................................................................172 12.2 Updates ............................................................................................................173 12.2.1 Update the Firewall ....................................................................................173 12.2.2 Update Virus Pattern Database .................................................................174 12.3 Changelog ........................................................................................................174 Securepoint Security Solutions 8 Securepoint 10 12.4 Registration ......................................................................................................175 12.5 Manage Cockpit ................................................................................................176 12.6 Advanced Settings ............................................................................................177 12.6.1 Buttons ......................................................................................................177 12.6.2 IPSec .........................................................................................................178 12.6.3 Portfilter .....................................................................................................179 12.6.4 Dialup ........................................................................................................180 12.6.5 Templates ..................................................................................................181 12.6.6 Variables ...................................................................................................182 12.6.7 Webserver .................................................................................................183 12.7 Refresh All ........................................................................................................184 12.8 Refresh Cockpit ................................................................................................184 13 Menu Live Log......................................................................................................185 13.1 Start Live Log ...................................................................................................186 13.2 Search function .................................................................................................186 13.3 Tab Settings .....................................................................................................187 13.4 Details of a Log Message .................................................................................188 13.5 Raw Data ..........................................................................................................189 13.6 Colored Labeling of the Service in the Live Log ................................................190 Part 2 User Interface.............................................................................................. 191 14 Login User Interface .............................................................................................192 14.1 The User Interface Sections..............................................................................193 14.2 Change Password ............................................................................................194 14.3 Download SSL-VPN Client ...............................................................................195 14.4 Spamfilter .........................................................................................................196 14.4.1 Overview over the spam filter interface ......................................................196 14.4.2 Columns of the Table.................................................................................198 14.4.3 Details of an E-mail....................................................................................199 14.4.4 Action on the Tab Ham ..............................................................................200 14.4.5 Action on the Tab Spam ............................................................................201 14.4.6 Actions on the Tab Trash ...........................................................................202 14.4.7 Tab Statistic ...............................................................................................203 Securepoint Security Solutions 9 Securepoint 10 14.4.7.1 Filter.....................................................................................................203 14.4.7.2 Tab General .........................................................................................204 14.4.7.3 Tab Virus .............................................................................................204 14.4.7.4 Tab Top Level Domain .........................................................................205 14.5 SPUVA Login ....................................................................................................206 14.6 Wake on LAN ...................................................................................................207 14.7 Download Section .............................................................................................208 15 Zone Concept of the Securepoint Firewall ............................................................209 Securepoint Security Solutions 10 1 Introduction Securepoint 10 1 Introduction The internet is an ubiquitous information and communication medium in our time. Often the computer or the network is permanent connected to the internet, because a lot of businesses are executed online. It is mostly disregarded that the internet must be seen as a security risk. This is especially critical, if confidential data are stored on the systems. The security of these data cannot be guaranteed. The information could be spied out or may be irrevocable lost by a computer virus. Software firewalls, which are installed on the computer, don’t meet requirements, because the dangerous programs are already in the net. A system is demanded, which is positioned between the internet and the local network, to guard the network against destructive programs and to control the communication with the internet. The Securepoint Unified Threat Management (UTM) offers a complete solution with comprehensive safety measures in respect of network-, web- and e-mail security. The appliance offers firewall-, IDS- and VPN-functionality, proxies, automatic virus scanning, web content- and spam-filtering, clustering, high availability und multipath routing functionality. It provides several authentication methods and encrypted access to the network. The combination of these functions in one system minimizes the administrative and integrative complexity in contrast to individual solutions. The appliance is administrated with a clearly structured web-interface. The Securepoint UTM solution is available as a pure software version or as sundry appliances which are especially adapted to the requests. The solutions vary from home office and small office networks to great company networks with several hundred computers. Securepoint Security Solutions 11 Securepoint 10 Part 1 The Administration Interface Securepoint Security Solutions 12 2 The Appliances Securepoint 10 2 The Appliances The firewall software is installed on hardware, which is especially designed for the purpose of network protection. The portfolio of Securepoint contains 7 appliances. The appliances are adapted to different network quantities and consequently the processing speed, the memory capacity, the disk space, the throughput rate and the numbers of interfaces of the machines vary. machine image user FW throughput VPN-throughput Piranja up to 5 100 Mbit/s 70 Mbit/s RC 100 10 to 25 100 Mbit/s 100 Mbit/s RC 200 25 to 50 400 Mbit/s 260 Mbit/s RC 300 50 to 100 1000 Mbit/s 700 Mbit/s RC 310 50 to 100 1000 Mbit/s 1000 Mbit/s RC 400 100 to 500 1000 Mbit/s 1000 Mbit/s RC 410 100 to 500 1000 Mbit/s 1000 Mbit/s machine Piranja CPU VIA C3 / Eden 533 RAM 1 GB MHz RC 100 VIA C7 1 GHz 1 GB HDD interfaces Compact Flash 3 x 10/100 512 MB Ethernet ports 80 GB 3 x 10/100 USB ports 1 1 Ethernet ports RC 200 Intel M 1,0 GHz 1 GB 80 GB 4 x 10/100/1000 5 Ethernet ports RC 300 Intel Core2 Duo 1 GB 80 GB E4500 2 x 2,2 GHz RC 310 Pentium D Xeon 5335 1 GB 2 x 80 GB Xeon 1,8 GHz 6 x 10/1000 4 Ethernet pPorts 2 GB 2 x 73 GB 1,8 GHz RC 410 4 Ethernet ports 2 x 3,4 GHz RC 400 6 x 10/1000 10 x 10/1000 4 Ethernet ports 2 GB 2 x 73 GB 10 x 10/1000 4 Ethernet ports Securepoint Security Solutions 13 3 Positioning the Appliance Securepoint 10 3 Positioning the Appliance In the network assembling the appliance is positioned behind the modem. If a network is actuated behind the appliance, a switch or hub must be set between the UTM and the network. If you only use one computer, you can conduct it directly to the appliance. Computer 1 Internet Modem Securepoint Appliance Switch Computer 2 Computer n fig. 1 position of the appliance in the network 3.1 Piranja and RC 100 The Piranja and the RC 100 appliances have 3 Ethernet ports (LAN 1 to LAN 3), one serial interface (D-Sub) and two USB ports. The three network ports are destined for different nets. The interface eth0 is reached through LAN 1and is designated for the external network (internet). LAN 2 represents the second interface eth1 and is designated for the internal network. The port LAN 3 uses the interface eth2 and is destined for a demilitarized zone (DMZ). It can also be used for a second internal network or a second external connection. fig. 2 rear view of the Piranja respectively of the RC 100 port interface net LAN 1 eth0 external (internet) LAN 2 eth1 internal LAN 3 eth2 DMZ Securepoint Security Solutions 14 3 Positioning the Appliance Securepoint 10 3.2 RC 200 The RC 200 has 4 LAN ports. The assignments of the first three ports are identical to the previous it described ones. The port LAN 4 is bounded to the interface eth3 und is for free disposal. You could connect another internal net, another DMZ or a second internet connection to this port. fig. 3 rear view of the Piranja respectively of the RC 100 port interface net LAN 1 eth0 external (internet) LAN 2 eth1 internal LAN 3 eth2 DMZ LAN 4 eth3 free disposal 3.3 RC 300 The RC 300 has 6 LAN ports. Contrary to smaller dimensioned appliances the ports are numbered serially from right to left. The ports at the machine are not labeled. Take the attribution from the figure. fig. 4 front view of the RC 300 (schematic) port interface net LAN 1 eth0 external (internet) LAN 2 eth1 internal LAN 3 eth2 DMZ LAN 4 eth3 free disposal LAN 5 eth4 free disposal LAN 6 eth5 free disposal Securepoint Security Solutions 15 3 Positioning the Appliance Securepoint 10 3.4 RC 400 This Appliance has 8 LAN ports. The sockets are arragned in two blocks of 4 connectors. The ports are numbered top down and from left to right. LAN 1 and LAN 3 are destined for the predefined networks. The ports in the machine are not labeled. Take the attribution from the figure. LAN 1 LAN 3 LAN 5 LAN 7 LAN 2 LAN 4 LAN 6 LAN 8 fig. 5 front view of the RC 400 (schematic) port interface net LAN 1 eth0 external (internet) LAN 2 eth1 internal LAN 3 eth2 DMZ LAN 4 eth3 free disposale LAN 5 eth4 free disposale LAN 6 eth5 free disposale LAN 7 eth6 free disposale LAN 8 eth7 free disposale Securepoint Security Solutions 16 4 Administration Interface Securepoint 10 4 Administration Interface 4.1 Connecting the Appliance You access the appliance with your browser on the IP address of the internal interface on the port 11115 using the https (SSL) protocol. The factory setting for the internal IP address is 192.168.175.1. The port 11115 cannot be changed. It is reserved for the administration. User name and password are set to the following by default. User name: admin Password: insecure Start your internet browser and insert the following value into the address field: https://192.168.175.1:11115/ If you have changed the IP address at the installation, replace the IP address 192.168.175.1 with the new one. The dialog LOGIN appears. fig. 6 Login dialog At the field Username insert admin. At the field Password insert insecure or the new password, if you change it during the installation process. After this click Login. You will be logged on to the system and the start screen appears. Note: Change your password as quickly as possible. Use the navigation bar icon Authentication, item Users. Use upper- and lowercase characters, numerals and special characters. Your password should be eight characters long. Securepoint Security Solutions 17 5 Securepoint Cockpit Securepoint 10 4.2 System Requirements for Client Computer Operating system: MS Windows XP and higher or Linux Processor: Pentium 4 with 1.8 GHz and higher or according Memory: 512 MB or more Browser: preferably MS Internet Explorer 7 and Mozilla Firefox 3 5 Securepoint Cockpit The first screen shown after login to the trusted area displays an overview of the hardware and services status. Besides it contains the navigation bar, information of the license, active connections and available downloads. This view is always open. All further configuration options and settings will be conducted in popup windows. After editing the settings, the popup windows will be closed and the cockpit in the background will be activated again. The lists in the cockpit can be closed to managie the display for your needs. fig. 7 cockpit overview Securepoint Security Solutions 18 5 Securepoint Cockpit Securepoint 10 5.1 Navigation Bar The navigation bar guides you to the different configuration categories. These categories are: configuration, network, firewall, applications, VPN, authentication, extras, live log Moving the mouse over the entry opens the respective dropdown menu. fig. 8 navigation bar of the cockpit 5.2 License In this area you have an overlook of the firewall software, updates and license. name description Firewall Type Name of the firewall software Version Version of the firewall software Licensed to Name, and if applicable, company of the license owner. License valid till Validation of the license The date is given in US American format: Last Virus Pattern update MM/DD/YYYY Time of the last virus pattern update. fig. 9 licence area Securepoint Security Solutions 19 5 Securepoint Cockpit Securepoint 10 5.3 System In this area the current system utilization and the number of active TCP / UDP connections are shown. name description CPU Utilization of the processor Type Type of processor RAM Utilization of the memory graphical and in percentage SWAP Utilization of the swap file graphical and in percentage Uptime How long the system is running since the last reboot. Current TCP Connections Number of current TCP connections Current UDP Connections Number of current UDP connections Start Configuration Name of the start configuration Running Configuration Name of the running configuration fig. 10 system status Securepoint Security Solutions 20 5 Securepoint Cockpit Securepoint 10 5.4 Service Status The table shows a list of all available services and their status. Next to the HTTP proxy, POP3 proxy and Mail Relay services is shown the state of the virus scanning. An active service is illustrated by a green circle. A grey circle shows that the service is inactive. service description SSH Server Secure Shell Allows an encrypted connection to the appliance. Mail Relay Service for sending e-mail. DNS Server Domain Name System Server Hostname to IP-address resolution POP3 Proxy Post Office Protocol Version 3 Proxy Establishes a connection to a POP3 server and tests the received e-mails for viruses and spam. HTTP Proxy Hypertext Transfer Protocol Proxy The proxy interconnects the client of the internal network with the server in the internet. It can block HTTP requests by means of content and it can test websites for viruses. VoIP Proxy Voice over IP Proxy Offers internet telephony. VNC Repeater Virtual Network Computing Offers to control a remote computer. DynDNS Client Dynamic Domain Name Services Client The client updates the current IP of the firewall by a DynDNS service. NTP Server Network Time Protocol Server Synchronizes all system clocks in the network. IDS Server Intrusion Detection System Server Protects the network against know intrusions L2TP Server Layer 2 Tunneling Protocol Server Offers VPN connections to the firewall by using the network protocol L2TP. PPTP Server Point To Point Tunneling Protocol Server Offers VPN connections to the firewall by using the network protocol PPTP. Securepoint Security Solutions 21 5 Securepoint Cockpit SPUVA Server Securepoint 10 Wortmann Security User Verification Agent Server Central user authentication Web Server Dynamic Host Configuration Protocol Server Allocates network configurations to the computer in the network (for example the IP-address). DHCP Server Internet Protocol Security Server Offers VPN connections to the firewall by using the IPSec protocol. IPSec Server Layer 2 Tunneling Protocol Server Offers VPN connections to the firewall by using the network protocol L2TP. SSL VPN Server Secure Socket Layer Virtual Private Network Server Offers SSL secured VPN connections to the firewall. IGMP Proxy Internet Group Management Protocol Offers the spreading of packets to multiple recipients. Virusscanner Virus scan service for POP3 and HTTP. CTASD Server Commtouch Anti Spam Daemon Service for spam identification from the company Commtouch. Kerberos The Kerberos authentication service authorizes the access of the HTTP proxy. Mailfilter Scans e-mails for spam and undesired attachments. SNMP Server Simple Network Monitoring Protocol Reads the values of interface traffic, processor- and memory utilization. Routing Server fig. 11 service status (part 1) Supports several routing protocols. fig. 12 service status (part 2) Securepoint Security Solutions 22 5 Securepoint Cockpit Securepoint 10 5.5 Appliance Displays the view of the appliance. The connected LAN ports are marked green. fig. 13 view of the appliance (for example a Piranja) 5.6 Interfaces In this area the interface in listed with the assigned IP-addresses and zones. Depending on the used appliance more interfaces (ethx) are shown. name description eth0 Ethernet adapter for connection to the internet. At the appliance indicated as LAN 1. eth1 Ethernet adapter for connection to the internal Network. At the appliance indicated as LAN 2. eth2 Ethernet adapter to attach a demilitarized zone (DMZ). At the appliance indicated as LAN 3. ppp0 A virtual interface to connect the firewall to the internet with PPPOE. Will be bound to eth0. tun0 Virtual interface for the SSL VPN. The internal address is set to 192.168.250.1 by default. fig. 14 status of interfaces Securepoint Security Solutions 23 5 Securepoint Cockpit Securepoint 10 5.7 IPSec The created IPSec connections and their usage are listed in this section. Ahead stands the name of the connection followed by the current usage. fig. 15 list and status of IPSec connections 5.8 Downloads In this table are listed, which files are available in the download section of the user interface. Furthermore the version and a short description are shown. The filename is a hyperlink which you can use to download the file directly. fig. 16 available downloads in the user interface 5.9 Spuva User This table lists the users and their IP address, which have signed in via SPUVA (Securepoint User VerificationAgent). The SPUVA gives users individual rights on computers in the DHCP environment. The user authenticates against SPUVA and gets an individual Security Policy for any workstation in the network. If the user changes his workplace, he will get the same Security Policy at the new workplace automatically. fig. 17 user barney is conneted via SPUVA Securepoint Security Solutions 24 5 Securepoint Cockpit Securepoint 10 5.10 SSH User This section shows, which user has connected the appliance via SSH (Secure Shell for example by the program PuTTY). Login name and IP address of the user are shown. Also the time of the login is listed. fig. 18 users, which are logged on via SSH 5.11 Web Interface User Shows a list of user, which are logged on the web interface. The login name and the IP address of the user are shown. Also the time of the login is listed. The table lists users at the administration interface and the user interface. fig. 19 users, which are logged on the administration or user interface 5.12 DHCP Lease The DHCP (Dynamic Host Configuration Protocol) server assigns dynamic IP addresses to the user of the internal network, if this service is activated. This IP address is reserved for the user for a defined time. In this section the reserved addresses are listed with the user name and the MAC address of the computer. The last column shows the status. A grey dot means that the user is offline. A green dot means that the user is currently logged on. The table always contains ten rows. If more DHCP addresses are stored, you can leaf through the pages with the arrow button at the bottom. fig. 20 stored DHCP addresses Securepoint Security Solutions 25 5 Securepoint Cockpit Securepoint 10 5.13 Interface Traffic The display Internet Traffic shows the data traffic of the interfaces graphically. The incomming traffic is shown as a green and the outgoing traffic as a blue graph. The represented time period is the last 24 hours. The measurement is taken every 5 minutes. fig. 21 graphical display of the data traffic 5.13.1 Traffic Settings With the button Settings your can configure, which interfaces are displayed in this area. The dialog Interface Traffic Settings shows two lists. The left one shows the available interfaces and the right one the interfaces which are displayed in the cockpit. Highlight an interface and use the arrow buttons to move it to the desired list. fig. 22 available and displayed interfaces Securepoint Security Solutions 26 5 Securepoint Cockpit Securepoint 10 5.13.2 Traffic Details und Traffic Zoom A click onto a diagram opens a new window, which shows the graph in higher resolution. It also shows details of the traffic. fig. 23 details of the data traffic of the interface eth1 You can enlarge a section of the graph by raising a selection rectangle in the lower diagram. You can reset the selection by clicking Reset Zoom. fig. 24 enlarged section Securepoint Security Solutions 27 5 Securepoint Cockpit Securepoint 10 5.14 Show Help In the title bar of the dialogs you can find a questionark symbol right beneath the close button. Press this symbol to open the help. The shown text comments the settings, which have to be set in the dialog. This function is context sensitive and only describes the relative dialog. fig. 25 help symbol in the title bar 5.15 Administrator IP At the bottom of the web browser window the user name and the IP-address of the logged on administrator are shown. A click on the double arrow in the lower left corner hides or shows the bar. fig. 26 name and IP-address of the logged on user fig. 27 hides or shows the data 5.16 Refresh At the right side of the navigation bar you will find the button Refresh Cockpit. With this button you can reload the website. fig. 28 reloads the cockpit Securepoint Security Solutions 28 6 Menu Configuration Securepoint 10 6 Menu Configuration All settings of the appliance are stored in a configuration file. Commands which are related to the configuration and basic system commands are deposited in the menu item configuration. fig. 29 dropdown menu of the menu item configuration name description Configuration The configuration management shows a list of all saved configuration management files. Here you can export, print or delete the configuration. Furthermore you can load and import configurations, set a start configuration or save current settings in a new file. Reboot System Stops the system and starts it again. Halt System Stops the system but doesn’t restart it. Factory Defaults Reset the appliance to factory settings. Logout Log out of the system. Securepoint Security Solutions 29 6 Menu Configuration Securepoint 10 6.1 Configuration Management All settings of the firewall are stored in a configuration file. The menu item Configuration management of the menu configuration shows a list of all saved configurations. Choose the menu configuration in the navigation bar and select the point Configuration management from the dropdown menu. The dialog Configurations appears. fig. 30 list of available configurations The start configuration is labled with an asterisk ahead of the configuration name. This configuration is loaded when the appliance is turned on (for example after reboot). The heart symbol labels the current running configuration. The signs behind the configuration names are buttons for functions which can be used for every configuration. The buttons Save as … and Import … are located below the list. button function description export Exports the configuration and saves it in DAT format. print Opens a browser window in which the configuration is shown in table format. This description can be printed or saved. start conf. Set the configuration to start configuration. load Loads the configuration. delete Deletes the configuration. description Opens a browser window in which a description of the configuration can be typed. Securepoint Security Solutions 30 6 Menu Configuration Securepoint 10 6.1.1 Save Configuration The settings made will be stored automatically in the current running configuration. You can also save the new settings in an existing configuration or in a new one. Click on the button Save as … . The dialog Save as … appears. Select an existing configuration from the dropdown box or enter a new name for the configuration. Click on Save. fig. 31 save the configuration Securepoint Security Solutions 31 6 Menu Configuration Securepoint 10 6.1.2 Import configuration You can import an existing configuration. The function requires that the external file must be saved in DAT format. Click on the button Import … . The dialog Import configuration … appears. Click on browse and select the designated file. After that click Import. The configuration will be stored on the application. fig. 32 import external configuration 6.2 Reboot System The second point of the dropdown menu restarts the appliance. After reboot the start configuration will be loaded. If no configuration is set as a start configuration, you have to set one before the reboot. 6.3 Halt System This point stops the system. The system will neither be rebooted nor new shuted down 6.4 Factory Defaults Reset the system to factory settings. Note: The reset will delete all configurations. 6.5 Logout Click on this button to log out of the system. The appearance of the administration interface will be stored for each user on every logout. Securepoint Security Solutions 32 7 Menu Network Securepoint 10 7 Menu Network Network settings like IP-addresses of the interfaces, DSL access data etc. are set here. Further on you can download updates and apply the license file in this section. fig. 33 dropdown menu of the menu item network name description Server Properties Appliance basic settings: Administrator IP-addresses, time zone and log server IP-address Network Configuration Network settings Setting of IP-addresses and subnets of interfaces, DSL connection, DynDNS service, routing and DHCP server Zone Configuration Assign interfaces to zones and create new zones. Network Tools Tools: Lookup, Ping and lists the routing table Securepoint Security Solutions 33 7 Menu Network Securepoint 10 7.1 Server Properties In this section basic settings for the appliance will be set. The dialog contains the tabs Server Settings, Administration, Syslog and Cluster Settings. 7.1.1 Server Settings On this tab you can set the appliance name, the Domain Name Service server and the Network Time Protocol server. Enter the domain name of the firewall into the field Servername. Enter the IP-address of the Domain Name Service server into the field Primary Nameserver. If you use a second name server enter its IP-address into the field Secondary Nameserver. Enter the IP-adress or the host name of a time server into the filed NTP Server and select your time zone in the dropdown box Timezone. You can limit the numbers of TCP/IP connections. The number must range between 16,000 and 2,000,000. Enter the number into the field Maximum number of active connections. Select from the dropdown box Last-Rule-Logging the protocol accuracy for dropped packets. fig. 34 tab Server Settings Securepoint Security Solutions 34 7 Menu Network Securepoint 10 7.1.2 Administration The administration access to the appliance is only allowed from the internal net by default. In this tab you can define which IP-addresses and subnets the appliance can be administrated from. To add an IP-address or a net, click the button Add Host/Net. The dialog Add Host/IP appears. Enter a host name or an IP-address. If you want to allow the access for a subnet, you have to use the bitcount notation. For example: 192.168.176.0/24 Click Add. You can delete entries in the list by clicking the trash can icon beneath the entry. fig. 35 tab Administration for external administration Securepoint Security Solutions 35 7 Menu Network Securepoint 10 7.1.3 Syslog In the portfilter of the appliance the administrator can define whether the use of a rule is logged and in which grade of accuracy. The logging data in Syslog format can be stored on a server. So you can analyse logging data at a later time. To add a server for protocol data click on Add Syslog Server. The dialog Add Syslog Server appears. Enter the IP-address or the host name into the input field and click Add. You can delete a server in the list by clicking the trash can icon beneath the entry. fig. 36 tab syslog of the Server Settings dialog Securepoint Security Solutions 36 7 Menu Network Securepoint 10 7.1.4 SNMP The Simple Network Management Protocol (SNMP) is a network protocol to control network devices centraly. With this protocol you can read the values of interface traffic, processorand memory utilization. The versions 1 and 2c are supported. The remote computer must be set as an authorized host to read the data. Furthermore a SNMP client and the SNMP service must be installed on the remote computer. The host must also know the Community String. Activate the SNMP Version, you want to support. You can support both versions at the same time. Set a keyword into the field Community String. Advice the remote user of this keyword. At the bottom of the section Enable access from networks enter an IP address you want to allow the access via SNMP. Select the wanted subnetmask and click Add network. The IP-address is appended to the table. To allow the access, you have to reate an according rule in the portfilter. fig. 37 tab SNMP Securepoint Security Solutions 37 7 Menu Network Securepoint 10 7.1.5 Monitor Agent (AmdoSoft v4 Agent) The Securepoint firewall can be monitored and maintained by the controller software of the company AmdoSoft Systems. The firewall connects to the registered AmdoSoft controller in the internal or external network. The controller software for the automatic monitoring has to be purchased from the company AmdoSoft Systems. It is no rule necessary for this data traffic. Go to the point Network on the navigationbar and click on the entry Server Properties in the dropdownmenu. In the dialog Server Properties switch to the tab Monitoring Agent. Enter the IP address of the computer where the AmdoSoft Controller software is installed into the the field b4 Conroller IP. Afterward click Save. fig. 38 tab Monitor Agent Securepoint Security Solutions 38 7 Menu Network Securepoint 10 7.1.6 Cluster Settings The Securepoint appliance offers the option to set up a high availability environment. For the environment you need at least two appliances. One firewall will be used as active machine (mMaster) and the other one (or more) as backup machine (slave) in standby. If a requisite service or the complete master crashes, the slave machine assumes the control. Define the range (in seconds) between the status messages of the master to the slave in the field Delay between advertisment packets. Decide how many messages may be missing, before the master is detected as crashed. Type the number in the second field. Enter a number into the field Cluster ID, to identify the cluster formation. Enter a keyword for the encryption of the status messages into the field Cluster Secret. The option Switch to master if possible sets the appliance as master if it goes back on stream. The Host Status can be offline, master or slave. If the status has the value master, the appliance can be made to spare with the button Downgrade to spare. A machine with slave status becomes the master. fig. 39 tab Cluster Settings Securepoint Security Solutions 39 7 Menu Network Securepoint 10 7.2 Network Configuration In this area the settings for the network have to be defined. This contains the IP-addresses of the several interfaces, entries in the routing table, access data of the internet service provider, maybe data of a dynamic address service and settings ot the DHCP server. 7.2.1 Interfaces The tab Interfaces shows a list of all available interfaces with the related IP-address and zone. fig. 40 list of available interfaces Securepoint Security Solutions 40 7 Menu Network Securepoint 10 The name of the interface is depending on it´s usage. Interfaces with the same name are numbered serially from 1 to n. usage labeling ethernet eth0, eth1, eth2, eth3, eth4 ... ethn virtual network eth0.0; eth0.1 … eth0.n .ethn.0; ethn.1… ethn.n (virtual address is bonded to real interface) ADSL and VDSL ppp0, ppp1… pppn high availability cluster0, cluster1, cluster2… clustern environment (virtual address is bonded to real interface) OpenVPN tun0, tun1, tun2… tunn (virtual interface) The minimum of three interfaces are ethernet interfaces with the name eth0, eth1 and eth2. Furthermore one virtual interface tun0 is predefined with the address 192.168.250.1 fig. 41 select the interface typ Securepoint Security Solutions 41 7 Menu Network Securepoint 10 7.2.1.1 Add eth Interface Click Add Interface. The Interface Wizard appears. Select the desired interface type (in this case eth). Click Next. The configuration window of eth Interface appears. In the section General you have to set the properties of the interface. The name of the interface is set automatically and cannot be changed. Enter the IP-address of the interface into the field IP. Select the subnet mask in the field Mask. If the DHCP server should assign an IP-address to this interface, activate the checkbox DHCP Client. You can define the maximum packet size in the field MTU (Maximum Transmission Unit). Usually you can leave the default value (1500). If the interface should answer to pings, activate the checkbox Allow Ping. Select the speed of the interface from the dropdown field Speed. In the right section select the zone of the interface and the related zone(s) and activate the relevant checkboxes. Complete the configuration with Finish. After the interface is added you have the press the button Update Interface. fig. 42 add eth interface - define settings Securepoint Security Solutions 42 7 Menu Network Securepoint 10 7.2.1.2 Add VLAN Interface VLAN means Virtual Local Area Network and is used to divide a physical network into serveral logical nets. Several networks kann be used to structure the whole intranet. You can split the network by organization into units, groups or by spatial properties like floor or buildings. Actually you need one interface for every network. VLAN interfaces of the appliance are virtual interfaces that are bound to one physical interface. So you can conduct all virtual LANs at one interface. Every VLAN has an ID, which is append at the packets as a tag. On the basis of thee tags, a VLAN supporting switch can direct to packets to the right VLAN. VLAN1 VLAN3 Switch Appliance VLAN2 fig. 43 VLAN formation Securepoint Security Solutions 43 7 Menu Network Securepoint 10 Click Add Interface. The Interface Wizard appears. Select the desired interface type (in this case VLAN). Click Next. The configuration window of VLAN Interface appears. Select in the field Interface to which physical Interface the VLAN interface should be bound to. Enter an ID for the interface in the field VLAN ID. Enter an IP and Mask the IP-address and the subnet mask of the VLAN network. Select if an IP-address will be assigned to the interface by the DHCP server. If so, activate the checkbox DHCP Client. Define the maximum size of a data packet and enter the value in the field MTU (Maximum Transmission Unit). In normal case you can leave the default value (1500). If the interface should answer pings, activate the checkbox Allow Ping. Select the speed of the interface from the dropdown field Speed. Select the zone of the interface and the related zones by activating the relevant checkboxes at the right side. Complete the configuration with Finish. After the interface is added you have to press the button Update Interface. fig. 44 add VLAN interface - set properties Securepoint Security Solutions 44 7 Menu Network Securepoint 10 7.2.1.3 Add PPTP interface A PPTP interface is used for connecting the internet by Point to Point Tunneling Protocol. This protocol is primarily used in Austria. Click Add Interface. The Interface Wizard appears. Select the desired interface type (in this case PPTP). Click Next. The configuration window of PPTP Interface appears. Select in the field Interface to which physical Interface the PPTP interface should be bound to. This should be the external interface. It will be replaced by the PPTP interface after completion. Enter an Local Ethernet IP Address and Mask the IP-address and the subnet mask of the interface. The field Modem IP Address expects the IP-address, which is assigned to you by the internet service provider. Select a provider from the dropdown field DSL-Provider, which is used to connect the internet. If you did not create a DSL provider yet, select the entry new and add a provider. Enter the required data into the fields Provider Name, Username and Password. Click Finish to complete the configuration. After the interface is added, you have to press the button Update Interface. fig. 45 add PPTP interface - set properties Securepoint Security Solutions 45 7 Menu Network Securepoint 10 7.2.1.4 Add PPPoE Interface A PPPoE interface is used for connecting the internet by Point to Point Protocol over Ethernet. This protocol is commony used in Germany. Click Add Interface. The Interface Wizard appears. Select the desired interface type (in this case PPPoE). Click Next. The configuration window of PPPoE Interface appears. Select in the field Interface to which physical Interface the PPPoE interface should be bound. This should be the external interface. It will be replaced by the ppp interface after completion. Select a provider from the dropdown field DSL-Provider, which is used to connect the internet. If you did not create a DSL provider yet, select the entry new to add a provider. Enter the required data into the fields Provider Name, Username and Password. Click Finish to complete the configuration. After the interface is added you have to press the button Update Interface. fig. 46 add PPPoE interface - set properties Securepoint Security Solutions 46 7 Menu Network Securepoint 10 7.2.1.5 VDSL Interface hinzufügen VDSL stands for Very High Speed Digital Subscriber Line and is an internet connection with great transfer rates. Click Add Interface. The Interface Wizard appears. Select the desired interface type (in this case VDSL). Click Next. The configuration window of VDSL Interface appears. Select in the field ETH Interface to which physical Interface the VDSL interface should be bound. This should be the external interface. Select a VLAN ID for the Interface. At completion an eth interface will be created with the selected ID (for example eth0.7). In the field VDSL-Interface a name is predetermined. Select a provider from the dropdown field DSL-Provider, which is used to connect the internet. If you did not create a DSL provider yet, select the entry new to add a provider. Enter the required data into the fields Provider Name, Username and Password. Click Finish to complete the configuration. After the interface is added you have to press the button Update Interface. fig. 47 add VDSL interface - set properties Securepoint Security Solutions 47 7 Menu Network Securepoint 10 7.2.1.6 Add Cluster Interface The cluster interface is needed to set up a high availability environment. Two (or more) appliances are required to adjust this setup. One appliance acts in active state as master and the other appliances are waiting in stand-by mode as spare. If important services cannot be provided by the active machine or the whole machine breaks down, the other appliance wakes op from stand-by and assumes the service as master. The cluster interface binds a virtual and a “real” IP-address to a physical interface. The especialness of the high availability bond is that all appliances get the same virtual IP-addresses. Because the redundant machines are running in standby mode and their cluster IPs are not up, there will be no IP-address conflict. The “real” IP-addreses (so called management IPs) are used to send advertisement packages in terms of their status between the appliances. internet DSL-modem eth0 10.0.0.1/24 10.0.0.2/24 eth0 10.0.0.3/24 10.0.0.2/24 switch A external net master eth2 192.168.13.1/24 192.168.13.2/24 eth2 192.168.13.3/24 192.168.13.2/24 spare switch C DMZ switch B internal net eth1 192.168.4.86/24 192.168.4.88/24 eth1 192.168.4.87/24 192.168.4.88/24 local net red IP-address à management IP (real IP) blue IP-address à cluster IP (virtual IP) fig. 48 high availibility environment Securepoint Security Solutions 48 7 Menu Network Securepoint 10 Click Add Interface. The Interface Wizard appears. Select the desired interface type (in this case Cluster). Click Next. The configuration window of Cluster Interface appears. Select in the field Interface to which physical Interface the cluster interface should be bound to. The physical interface persists to support the management IP-address. In the field Cluster-Interface a name is predetermined. Insert the virtual IP-address of the appliance in the field Cluster-IP. Enter the subnet mask into the field Mask. In the section Spare IPs enter the management IP-address(es) of the spare machine(s). Type the IP-address and the related subnet macks into the fields IP and Mask and click Add. The IP-address will be shown in the list. With the trashcan beneath the IP-address you can delete the relative entry. Select the related zones in the section Zones. Normally the zones of the physical interface will be adopted. Click Finish to complete the configuration. After the interface is added, you have to press the button Update Interface. fig. 49 add cluster interface - set properties Securepoint Security Solutions 49 7 Menu Network Securepoint 10 7.2.1.7 Edit or Delete an Interface In the lists of all interfaces on the tab Interfaces a wrench symbol and a trashcan symbol are positioned beneath the entries. With these buttons the entries can be edited or deleted. For editing click the wrench symbol. The dialog Change Interface appears. Change the settings and save the new properties with Save. For deleting click the trashcan symbol. Click Yes at the conformation prompt. The entry will be deleted. 7.2.2 Routing Routing entries define via which gateway a destination has to be reached. The default route defines that all destinations are reachable via the internal gateway (internal interface). fig. 50 list of routing entries Securepoint Security Solutions 50 7 Menu Network Securepoint 10 7.2.2.1 Edit or Delete Routes In the lists of all routing entries on the tab Routing a wrench symbol and a trashcan symbol are positioned beneath the entries. With these buttons the entries can be edited or deleted. For editing click the wrench symbol. The dialog Edit Route appears. Change the settings and save the new properties with Save. For deleting click the trashcan symbol. Click Yes at the confirmation prompt. The entry will be deleted. 7.2.2.2 Add Default Route Click Add default route. The dialog Add Default Route appears. Enter as Gateway the IP-address of the internal interface. The fields Destination Network and Destination Mask are predefined. The value Weighting defines the priority of the route. This statement is relevant if you use (two or more) internet connections (Multipath Routing). If the first route has the weighting 1 and the second one the weighting 2, the second route will be used twice as much as the first one. The weighting 5 and 10 have the same effect. fig. 51 add default route Securepoint Security Solutions 51 7 Menu Network Securepoint 10 7.2.2.3 Add Route Routes offer the possibility to find networks which are not directly connected to the appliance. To send a package to a network which is connected via a gateway (for example a router) to the appliance, the system must be informed about this. Otherwise the packages will be routed to the default gateway where they cannot be transmitted to the desired network. Switch to the tab Routing and click Add route. The dialog Add Route appears. Select in the field Type if the route applies to all networks and computers or just for several ones. For all select without Source. Otherwise select with Source and enter the IP-address and the subnet mask of the concerned network or host in the fields Source Network and Source Mask. Enter the Gateway, which should be used for reaching the destination network or destination host. In the fields Destination Network and Destination Mask enter the IP-address and the subnet mask of the destination. You can assign a weighting for the route in the field Weighting. fig. 52 general route fig. 53 route for defined sources Securepoint Security Solutions 52 7 Menu Network Securepoint 10 7.2.3 DSL Provider When connecting the internet using a DSL dialup mode, you have to enter the provider and your account data, so the appliance can connect to the internet by itself. fig. 54 list of DSL provider 7.2.3.1 Edit or Delete DSL Provider In the list of all saved DSL providers on the tab DSL Provider a wrench symbol and a trashcan symbol are positioned beneath the entries. With these buttons the entries can be edited or deleted. For editing click the wrench symbol. The dialog Edit DSL Provider appears. Change the settings and save the new properties with Save. For deleting click the trashcan symbol. Click Yes at the conformation promt. The entry will be deleted. Securepoint Security Solutions 53 7 Menu Network Securepoint 10 7.2.3.2 DSL Provider create Click the button Add DSL Provider. The dialog Add DSL Provider appears. Enter a name for the provider into the field Name. Type your login data into the field Login. Enter your password into the field Password and retype it in the field Confirm password. If you activate the checkbox Default Route a standard route will be set automatically. Select a time in the field Separation. At this time the appliances disconnect the internet connection. If you choose 0 the appliance does not force a disconnection. fig. 55 create DSL Provider Securepoint Security Solutions 54 7 Menu Network Securepoint 10 7.2.4 DynDNS If you don’t have a static IP address, but a dynamic one which is changing at every dial into the internet, you can use a DynDNS service for always being reachable with the same hostname. This is only required if you offer a service which should be reachable from the internet (for example web server, VPN connection) or if you want to administrate the firewall from the external net. If you use the DynDNS services the client transmits at every dial-in its current IP address to the DynDNS service provider. The current IP address is stored by the provider. The provider links your static hostname with your current IP address. In this way it is assured that your host is always available by the host name. The appliance transfers the current IP address to the DynDNS provider. You can create six interfaces These will be listed in the tab DynDNS. fig. 56 list of the external DNS update service for dynamical IP addresses Securepoint Security Solutions 55 7 Menu Network Securepoint 10 7.2.4.1 Create or Edit a DynDNS Entry To create a new entry or to edit an existing entry, click on the wrench symbol. The dialog Change DynDNS appears. Enter your domain name into the field Hostname Type your access data of your services provider into the fields Login and Password. Enter the address of the DynDNS server into the field Server. In the field MX enter the domain for the e-mail reception (for example securepoint.de). Select the interface which should be used for this connection from the field Interface (mostly a ppp interface). fig. 57 create a DynDNS entry 7.2.4.2 Delete a DynDNS Entry To delete a DynDNS Entry, click on the trashcan symbol beneath the relative entry. Confirm the security query with Yes. The DynDNS entry will be deleted. Securepoint Security Solutions 56 7 Menu Network Securepoint 10 7.2.5 DHCP The Dynamic Host Configuration Protocol can assign IP-addresses and other network settings to the clients. If you start a client of the internal network, the operating system of the client sends a query to the DHCP services of the server. The server transmits an available IP-address, the IP-addresses of the DNS server and of the default gateway to the client. If you don’t want to use this service, make no entries in this section and disable the client DHCP Server in the menu applications à Service Status. Enter the internal subnet into the field Local Subnet and the relating subnet mask into the field Netmask. Define the IP address range. The DHCP server will assign IP addresses to the clients from this range. The range must be a part of the local subnet. Consider that the first address (xxx.xxx.xxx.1) is mostly assigned to the default gateway. Hence it cannot be part of the DHCP address pool. Furthermore reserve a couple of IP addresses for computer and server which need static IP addresses to warrant the correct working of several services. Enter the lower limit of the range into the field DHCP-Pool start and the upper limit into the field DHCP-Pool end. Enter the standard gateway into the field Default Gateway. This is the IP address of the internal interface. Type the IP addresses of the DNS server into the fields Nameserver #1 and Nameserver #2. Type the IP addresses of the WINS server into the fields WINS Server #1 and WINS Server #2, if you use them. Store your settings with Save. fig. 58 settings for DHCP server Securepoint Security Solutions 57 7 Menu Network Securepoint 10 7.2.6 DHCP Relay The appliance can also be used as DHCP relay. In this case a central DHCP server distributes the DHCP information in the network. The appliance receives the broadcast querys and forwards them to the central DHCP server. The answers of the server will be returned to the clients by the DHCP relay. In this way the clients receive IP addresses and network information dynamically although the DHCP server stands in another subnet. In the section Interface define the interfaces from which net the DHCP queries should be received and to which they should be forwarded. Select the interface from the dropdownbox and click on Add Interface. Define the IP address of the central DHCP server in the list IP Addresses. Type the IP address into the field and click Add IP Address. Afterward click Save and Update Interfaces. Note: For this traffic no rules must be defiened. fig. 59 settings for DHCP Relay Securepoint Security Solutions 58 7 Menu Network Securepoint 10 7.3 Zones This dialog lists all arranged zones of the appliance and the allocated interfaces. The zones conduce to confine or connect interfaces and associated nets. The important zones are already set in factory. Every zone is available only once and can be allocated to just one interface. If you want to use interfaces in the same zone, you have to add a new zone. Type a name for the new zone in the field Name in the section Add Zone. Select an interface which should be allocated to the zone from the dropdown field Interface. Click Add Zone to save the settings. Note: If you want to change allocated interfaces, use the tab Interfaces in the menu Network à Network Configuration. fig. 60 dialog for adding and deleting zones To delete a zone, click on the trashcan symbol in the column of the related zone. Confirm the securety query with Yes. The zone will be deleted. Securepoint Security Solutions 59 7 Menu Network Securepoint 10 7.4 Network Tools The point Network Tools opens a dialog which offers three needful functions. These functions are often used in network engineering. Therefore they are implemented in the appliance. button meaning description lookup Detects IP addresses of a host. ping Detects if a computer is reachable in the network. routing table Shows the routing entries of the appliance. 7.4.1 Lookup The name of this function is deduced from the command “nslookup”. The function queries the nameserver which IP address belongs to a defined host name. This is called name resolution. The inversion search to detect the hostname of an IP address is not supported. Enter a hostname into the field Host name. Click on the icon Lookup. If the host is known all related IP addresses will be shown. fig. 61 looking for IP addresses Securepoint Security Solutions 60 7 Menu Network Securepoint 10 7.4.2 Ping A Ping checks if a defined computer is reachable in the IP network. The appliance is sending an ICMP echo-request to the computer, so-called Ping. The appliance expects an ICMP echo-reply as an answer (often called Pong). If the remote computer sends this answer, the computer is reachable. If the computer is not reachable the function shows the message undefined. The query also fails, if the computer is configured to not answer Pings. Enter a hostname or an IP address into the field Please enter a host. Click on the icon Ping. If the computer answers, the times the resond packages needed are shown and the average time of all packages.Furthermore the list shows how many packages are send, received and lost. If the host does not answer, the message undefined will be shown. fig. 62 result of a Ping Securepoint Security Solutions 61 7 Menu Network Securepoint 10 7.4.3 Routing Table The command Routing Table shows the routing table of the appliance. You don´t have to enter data. Click the button Routing Table. All entered routes will be listed. fig. 63 output of the routing table Securepoint Security Solutions 62 8 Menu Firewall Securepoint 10 8 Menu Firewall This menu item includes all functions for creating firewall rules. The entry Portfilter shows the system of rules. This section manages rights of all computers, computer groups, networks, users, user groups and devices. fig. 64 dropdown menu of the menu item firewall name description Portfilter Defines rules for access to networks and units. Hide NAT Dynamic Network Address Translation. The internal addresses will be translated to the external address. Port Forwarding Request from the internet to defined ports will be transmitted to defined internal or DMZ computers by the firewall. Services To define exact rules in the portfilter you use applicable services. In this section all services are listed with their used ports and protocols. You can edit them or add new ones. Service Groups Services which provide similar functions are subsumed to groups. Network Objects Network objects specify groups, users or computers. You can only define rules for created network objects. Network Groups Network objects are subsumed to device groups. Securepoint Security Solutions 63 8 Menu Firewall Securepoint 10 8.1 Portfilter The port filter is the main item of the firewall. Rules are defined in this section, which control the whole data traffic. The rules are editable in the properties networks, user, services, and time. You can define if traffic which matched with a created rule will be logged. By default, traffic will be stopped if no rule is set which allows the traffic. fig. 65 overview of all created rules Note: You can also define IP-Table rules in the category Advanced Settings (see chapter 12.6.5). On the tab Templates use the Application securepoint_firewall and the Template /etc/post_rules.sh. Securepoint Security Solutions 64 8 Menu Firewall Securepoint 10 A rule always has the following structure: Who (where from/which source) uses which service to access a defined destination. Then you have to decide if the activity is allowed (Accept), denied (Drop) or refused (Reject). With the action Drop the data packet will be discarded. The action Reject will transmit to the sender the error message “Destination unreachable”. You can log the traffic when it is matched by a rule. You can decide between three settings: o None à No logging. o Short à The first three packets of a new connection will be logged. After a minute the next three packets will be logged. o Long à All packets will be logged. The rule can be limited temporarity (days and time). A short description can be set. With the wrench symbol beneath the rule you can call a dialog for editing the rule. With the trashcan symbol beneath the rule you can delete the rule. Rules can be dissarranged by „Drag and Drop“. The order of the rules in the portfilter can be important because the rules will be processed in sequence (Once dropped packets cannot be accepted by a later rule.). Notice: To activate new rules you have to click the button Update Rule in the Portfilter Dialog. If you changed the order of the rules you have to update the rules also. Securepoint Security Solutions 65 8 Menu Firewall Securepoint 10 You can modify the view of the portfilter by using the filter function. This way you can find a desired rule fast. Click on Set Filter in the portfilter overview to open the dialog Set Filter. Activate the filter by selecting the entry On from the dropdown field Enable Filter. You can filter the entries of the portfilter by several criteria. The criteria are: Groups: Source Network Groups Shows all entries which have the given group as source. Destination Network Groups Shows all entries which have the given group as destination. Service Groups Shows all entries which use the given group as service. Objects and Services: Source Network Objects Shows all entries which have the given object as source. Destination Network Objects Shows all entries which have the given object as destination. Services Shows all entries which use the given service. Activate the desired filter criterion and select a filter word from the related dropdown box. Click Close. The set filter will be used for the firewall rules. fig. 66 filter firewall rules Securepoint Security Solutions 66 8 Menu Firewall Securepoint 10 8.1.1 Create Rule Click Appent Rule to append a new rule. The dialog Add Rule appears. The rule will be created on the tab General. Select in the field Source a source from the list. Select in the field Destination the destination from the list. Define in the field Service which service will be used. Choose in the field Action if the access should be accepted or denied. Select in the field Logging which logging mode should be used. In the field QoS (Quality of service) you can limit the bandwidth. At Rule Routing you can define which gateway should be used for packages of this rule. For example: IPSec connections must always communicate over the same interface. This setting is important if you use several internet connections. Note: For source and destination a network object must exist which defines the item exactly. If it doesn’t exist you have to create it. If the used service is not listed you can define a new one. fig. 67 create new rule - tab general Securepoint Security Solutions 67 8 Menu Firewall Securepoint 10 8.1.1.1 Infobox Function When the mouse cursor rolls over an entry in the list, an infobox appears which shows details of the entry. It shows which objects or services are elements of the related group. You can enable this function by deactivating the checkbox Disable Infobox. fig. 68 group elements with IP address and zone affiliation Securepoint Security Solutions 68 8 Menu Firewall Securepoint 10 8.1.1.2 Tab Time On the tab Time you can limit the validity period of a rule. If you do not set any limit, the rule is valid all the time. Click on the tab Time. Select a beginning time and an ending time for every day at which the rule should be limited. The top dropdown field belongs to the beginning time and the bottom dropdown field belongs to the ending time. fig. 69 add new rule - tab time 8.1.1.3 Tab Description On the tab Description you can enter an explanation for the rule. Click on the tab Description. Click into the text field and enter a description. Click Save to store the rule. fig. 70 add new rule - tab description Securepoint Security Solutions 69 8 Menu Firewall Securepoint 10 8.1.2 Create Rule Group You can subsume several rules to one group. If you unite several rules of one scope to one group you can arrange the portfilter clearly. Click on the button Append Group in the dialog Portfilter. The dialog Append Group appears. Enter a name for the new group in the field Groupname. Click on Add. The new will be added to the Portfilter at the bottom position. You can move the rule into the group via Drag & Drop. fig. 71 add rule group Securepoint Security Solutions 70 8 Menu Firewall Securepoint 10 8.1.3 Organize Rules and Groups The order of rules in the portfilter can have a big effect on the performance of the appliance because the rules are executed sequentially. If a packet passes through all rules of the portfilter and is dropped by the last rule, it could be more sensible to position the blocking rule at the top of the portfilter. Especially if this kind of packets come in often. You can not only move single rules but also rule groups and rules inside of a group. It is also possible to move rules from one group into another. For organizing the rule use “Drag & Drop” and the context menu which opens with a right mouse click. fig. 72 context menu of the portfilter dialog The context menu offers the possibility to create rules and groups at defined positions. So you don’t have to move them after creation. Switch the status of a highlighted rule by using the option Toggle Active. The option Toggle Group changes the status of all rules in a group. The context menu also includes the options Edit and Delete. In the second column of every row you will find the wrench- and the trashcan symbol for editing and deletion. Instrumental in managing the rule set are the options Open Groups and Close Groups. They open or close all groups in the list. The symbols in front of the groups open or close a single group. The green symbol with the two arrows presents a closed group. Click on it to open the group. The red symbol presents an open group. Click on it to close the group. Securepoint Security Solutions 71 8 Menu Firewall Securepoint 10 8.2 Hide NAT Private IP-addresses are not routed in the internet. Therefore outgoing packets must get the external IP of the firewall. The function Hide Nat realites this. The Source is the network or the computer, which IP will be replaced by the Hide NAT. Behind IP / Interface describes which IP-address the packets get instead of their own one. You can define an IP-address or an interface. If you use a dynamic IP, insert the DSL interface. The Destination must be set to declare, in which case the Hide NAT is to be used. Network objects are used for source and destination. To create Hide NAT rules, you maybe have to create network objects before. The option Include means that the Hide NAT will be used. The Exclude option means that the Hide NAT will not be used and so packets will be send with their original IP-address (for example in tunnel connections – IPSec, site-to-site). fig. 73 list of Hide NAT rules Securepoint Security Solutions 72 8 Menu Firewall Securepoint 10 Click on Add, to define a new Hide NAT rule. The dialog Add HideNat appears. Under Type you can choose between Include and Exclude. Under Source define which objects should be 'nated'. In this example the internal network. Under Interface set the interface which should be used. If you have a static IP-address, select eth0. If you use a dynamic IP-address, deploy the DSL interface ppp0. If the rule should be used for all destinations, select the entry any in the field Destination. Position defines the position in the Hide NAT rule table. The rules are executed sequential excepting the Exclude rules which are executed at first regardless of their position. fig. 74 create HideNAT rule Securepoint Security Solutions 73 8 Menu Firewall Securepoint 10 8.3 Port Forwarding The menu item Port Forwarding includes the functions Port Forwarding and Port Translation. Both functions define the destination of packages which reach the firewall at a defined port. Port Forwarding direct packages arriving at the defined port to a determined computer. Port Translation replaces the port of an ariving package with a self defined port. fig. 75 list of port forwarding and port translation rules Securepoint Security Solutions 74 8 Menu Firewall Securepoint 10 8.3.1 Port Forwarding Via Port Forwarding you can conduct inquiries, which are directed to a specified port, to a defined computer. For Example: You can conduct HTTP queries at port 80 directly to the web server. For this forwarding a network object must exist for the web server. Click Port Forwarding in the dropdown menu of the Firewall icon. The window Port Forwarding appears, which displays all forwarding rules. Click Add, to create a new forwarding. The dialog Add Port Forwarding appears. Select Port Forwarding as type. Under Source select from which network the query is coming. Under Interface define which interface is used by the query. For Destination select a network object to which the query should be forwarded. Under External Port select the service and hence the port, which should be used. Store your settings with Save. Note: A rule in the portfilter must be set, to allow the port forwarding. fig. 76 create port forwarding rule Securepoint Security Solutions 75 8 Menu Firewall Securepoint 10 8.3.2 Port Translation With port translation you can change default ports to self defined ports. Example: You want to run two web servers in the DMZ. But the default HTTP port 80 cannot be set twice. So you redirect the port to another one. For example 2080. Click Port Forwarding in the dropdown menu of the Firewall icon. The window Port Forwarding appears, which displays all forwarding rules. Click Add to create a new port translation rule. The dialog Add Port Forwarding appears. Select Port Translation as type. Under Source select, from which network the query is coming. Under Interface define, which interface is used by the query. For Destination select a network object to which the query should be forwarded. Under External Port select the service and hence the port, which should be used. Under Original Port select the port you want to redirect to. Store your settings with Save. Note: A rule in the portfilter must be set, to allow the port forwarding. fig. 77 create port translation rule Securepoint Security Solutions 76 8 Menu Firewall Securepoint 10 8.4 Services Services are used to specify the rules in the portfilter. Every service uses a certain protocol and port or a port range. This is listed in the section Services. The list contains a lot of services. You can add new services, edit and delete services. 8.4.1 Delete and Edit Services Click the trashcan symbol beneath the service to delete it. Confirm the security query with Yes. Click the wrench symbolbenaeth the service to edit it. Make modifications in the appearing dialog. Click Save. fig. 78 list of available services Securepoint Security Solutions 77 8 Menu Firewall Securepoint 10 8.4.2 Services Information The function Infobox shows information about services if the mouse cursor rolls over it. You can enable this function by unchecking the checkbox Disable Infobox. The infobox shows not only the name and the service group affiliation of the service but also if the service is used in a firewall rule. In this case the rule number and a summary of the rule are shown. fig. 79 infobox for services Securepoint Security Solutions 78 8 Menu Firewall Securepoint 10 8.4.3 Add service Click Add new Service. The dialog New Service appears. In the field Designation enter a name for the new service. In the field Protocol select a protocol from the list which is used by the service. If you choose the icmp protocol, you have to select an ICMP Control Message too. If the service uses a specified port, insert this port in the field Destination Port. If the service uses a port range, select Port Range at the field Type. Insert the start an end port of the range into the fields Port Range Start and Port Range End. Store the new service with Save. fig. 80 add service - single port fig. 81 add service - port range Securepoint Security Solutions 79 8 Menu Firewall Securepoint 10 8.5 Service Groups In the section service groups you can subsume several services into a group, delete services from existing groups or add services to existing groups. These groups can be used in the portfilter for rule creation. If the mouse cursor rolls over a service, an infobox can be displayed which shows the properties of the service. You can enable this feature by unchecking the checkbox Disable Infobox. fig. 82 infobox shows properties of a service You also can retrieve information of service groups. Select a service group from the dropdown box. Click on the information symbol An infobox appears. beneath the dropdown box. The infobox shows the name of the service group and if the group is used in a firewall rule. In this case the number and a summary of the rule are shown. fig. 83 infobox for a service group Securepoint Security Solutions 80 8 Menu Firewall Securepoint 10 8.5.1 Edit Existing Service Groups Select a group from the dropdown box in the section Service Groups. The services which are elements of the selected group are shown in the right table. You can add services by highlighting services in the left table. It could be helpful to disable the infobox. Click on the rightwards arrow button between the tables. The service will be move from the left table into the right table. Highlight a service you want to delete in the right table Click on the leftwards arrow button between the tables. The highlighted service will move from the right table to the left table. You can delete the whole group by a click on the trashcan symbol beneath the dropdown box. Confirm the Security Query with Yes. Note: Click on the button Update Rule to apply the service group changes to the rules of the portfilter. fig. 84 dialog service groups Securepoint Security Solutions 81 8 Menu Firewall Securepoint 10 8.5.2 Create New Service Group You can also subsume services in new service groups Click on the plus symbol in the section Service Groups. The dialog Add service group appears. Enter a name for the new service group and click Add. Select the just created service group from the dropdown box. The message No member in service group appears in the right table, because no service is added yet Add services to the new group like described in the previous article. fig. 85 enter name for the new service group Securepoint Security Solutions 82 8 Menu Firewall Securepoint 10 8.6 Network Objects Network objects describe certain computers, network groups, users, interfaces, VPNcomputers and –networks. With these network objects the rules in the portfilter can be defined exactly. Click the on the menu item Firewall in the navigation bar Click in the dropdown menu on the entry Network Objects. The window Network-Objects appears. In this window all available network objects are listed. The table can be ordered by the values of the separate columns. Behind the objects are buttons for editing and deleting the related object. You can add objects with the buttons at the bottom of the window. fig. 86 list of created network objects Securepoint Security Solutions 83 8 Menu Firewall Securepoint 10 8.6.1 Network Object Information The function Infobox shows information of a network object if the mouse cursor rolls over it. You can enable this function by unchecking the checkbox Disable Infobox. The infobox shows not only the name and the object group affiliation but also if the object is used in a firewall rule. In this case the numbers and a summary of the rules are shown. fig. 87 information of network objects Securepoint Security Solutions 84 8 Menu Firewall Securepoint 10 8.6.2 Add Host/Net To create a network object for a network or a computer use the following approach. Click Add Host/Net. The dialog Add Host/Net appears. Enter a name for the new object in the field Name. Under Type select whether you want to create an object for a network or for a computer. Host: Under IP Address enter the according IP-address of the computer. Under the dropdown field Zone select the zone which the computer is associated with. Network: Under IP Address enter the IP-address of the network. Select from the dropdown field Netmask the compatible netmask. Im the field Zone enter the zone of the network. Select which NAT IP should be used. Store your settings with Save. fig. 88 create an object for a computer fig. 89 create an object for a network Securepoint Security Solutions 85 8 Menu Firewall Securepoint 10 8.6.3 Add VPN Host/Net The creation of VPN objects isn’t very different from the creation of network and computer objects. Just other zones are available. Select the zone vpn-ipsec, vpn-ppp or vpn-openvpn against the VPN method you are using. fig. 90 create object for a VPN computer fig. 91 create an object for a VPN network 8.6.4 Add User You can also create network objects for users. This way you can set rules for several users. The only condition for this is that the users are SPUVA (Securepoint Security User Verification Agent) user and employ the agent to log onto the system. The user must be listed in the user administration under the menu item Authentication in the entry Users. Click Add User. The dialog Add User appears. Under Name enter a name for the object. Under Login select a SPUVA user. Under Zone select the according zone. Select which NAT IP should be used. Store your settings with Save. fig. 92 create an object for an user Securepoint Security Solutions 86 8 Menu Firewall Securepoint 10 8.6.5 Add Interface You can also add network objects for interfaces. You distinguish between interfaces with static and dynamic IP-addresses. Click Add Interface. The dialog Add Interface appears. Enter a name for the new object in the field Name. Under Type select StaticAddress or DynamicAddress. If you have chosen StaticAddress, you have to enter the static IP-address in the field IP Address. Under Zone select the zone of the interface. Store your settings with Save. fig. 93 object of interface with dynamic address fig. 94 object of interface with static address Securepoint Security Solutions 87 8 Menu Firewall Securepoint 10 8.7 Network Groups In this section you can subsume several network objects into groups. You can add new groups, edit and delete existing groups. Select an existing group from the dropdown field in the section Network Groups. Click the trashcan symbol for deleting the group. All included network objects will be deleted too. Click the plus symbol to create a new group. Enter a name for the new group and select an icon for the group. In the table Network Objects all available network objects are listed. In the table Network Group Member all network objects are listed which are elements of the selected network object group. You can add network objects to the selected group by highlighting objects in the left table and click on the rightwards arrow button. The selected network objects will be moved to the right table. You can delete network objects from the group by highlighting objects in the right table and click on the leftwards arrow button. The selected network objects will be removed from the right table. Note: Click on the button Update Rule to apply the network group changes to the rules of the portfilter. fig. 95 network groups dialog Securepoint Security Solutions 88 8 Menu Firewall Securepoint 10 8.7.1 Network Object Information The function Infobox shows information of the network object if the mouse cursor rolls over it. You can enable this function by unchecking the checkbox Disable Infobox. The infobox shows the name, IP address, subnet mask, zone and NAT IP. fig. 96 object information 8.7.2 Network Group Information You can also retrieve information of network groups. Select a network group from the dropdown box. Click on the information symbol The infobox appears. behind the dropdown box. The infobox shows the name of the network group and if the group is used in a firewall rule. In this case the numbers and a summary of the firewall rules are shown. fig. 97 infobox for a network group Securepoint Security Solutions 89 9 Menu Applications Securepoint 10 9 Menu Applications In this menu item you will find the settings of the proxies for HTTP, POP3 and VoIP and also the settings of the remote control service VNC Repeater, the Mail Relay and the Spam Filter. Furthermore you can switch the status of the services. fig. 98 dropdown menu applications name description HTTP Proxy General settings of the proxy. Furthermore virus scanning, filtering of internet addresses and website content. POP3 Proxy Spam filtering and virus scanning of e-mails. Mail Relay Settings of the mail server. Spamfilter Properties Settings of the spam filter. VNC Repeater Forwarding of remote control programs. VoIP Proxy Settings of the voice over IP proxy. IDS Signatures of the intrusion detection system. Service Status Activate and deactivate services. Securepoint Security Solutions 90 9 Menu Applications Securepoint 10 9.1 HTTP Proxy The HTTP proxy is set between the internal net and the internet. It analyzes content of internet sites, blocks suspicious websites and checks data for viruses. The client sends his query to the proxy. The proxy gets the data from the internet, analyses it and sends it to the client. The proxy acts as an exchange agent. For the client the proxy acts as a server. For the server in the internet the proxy acts as a client. 9.1.1 General On the tab General you can make basic settings for the Proxy. Setting up the port of the proxy. The default port is 8080. If you want to define the Outgoing Address enter the desired IP address. If you use another proxy, activate the checkbox Cascade. In this case enter the IP address of the other proxy in the field Parent Proxy and the port in the field Parent Proxy Port. Decide in which networks the proxy should be activated as a transparent proxy. Transparent means that the proxy isn’t visible for the user. You needn’t insert the proxy settings in the browser. The firewall conducts the packets to the proxy automatically. But if you don’t insert the proxy setting in the browser the user authentication fails and protocols like HTTPS and FTP must be activated by rules. Under Exceptions enter subnets and IP addresses which should be except from the proxy redirect. Source and destination addresses must be specified for these exceptions. Select an authentication mode. None à no authentication Local à authentication against the local user database Radius à authentication against a Radius server Active Directory à authentication at the AD of the network NTLM à authentication against the NT LAN manager Click the button Settings to define if all users or just a defined group are allowed to authenticate. If you want to limit uploads and downloads activate the checkbox Enable Size Limit. If you don’t want to limit the upload or the download, activate the relative radio button unlimited. The Anonymize Logging logs without user name and IP address. Securepoint Security Solutions 91 9 Menu Applications Securepoint 10 fig. 99 HTTP proxy settings - tab general When you define exception for HTTP proxy the relevant computers will access the internet directly, if an accordant rule exists. The exceptions must be defined by source and destination IP addresses. fig. 100 define exceptions for the HTTP proxy Securepoint Security Solutions 92 9 Menu Applications Securepoint 10 9.1.2 Virus scanning In this tab you can set which files and websites should be ignored by the virus scanner. You can deactivate the virus scanning by unchecking the checkbox Virus scanner. The left list shows file extentions, which are excluded by the virusscanning. You can edit the entry by clicking the wrench symbol. You can delete the entry by clicking the trashcan symbol. Enter a file extenstion leading by a dot in the field under the left table and click Add Extension to add an entry. The right list shows websites which are excluded by the virus scanner. You can edit the entry by clicking the wrench symbol. You can delete the entry by clicking the trashcan symbol. Enter a website in the field under the right table and click Add Website to add an entry. Host names like „www“ are not declared. fig. 101 HTTP proxy dialog - tab virus scanning Securepoint Security Solutions 93 9 Menu Applications Securepoint 10 9.1.3 URL Filter With the URL filter you can block the access to websites by defining the URL. The filter is adjustable by two lists. The blacklist contains URLs of blocked websites. The whitelist contains addresses of allowed websites. If you select an authentication mode on the tab General, websites on the blacklist are visible for authenticated users. If you want to use the blacklist for all users, activate the option Use lists with authentication. Switch to the tab URL Filter. Enable the filter by activating the checkbox URL Filter. Activate the option Use lists with authentication to block sites from the blacklist universally. You can edit the entries by clicking the related wrench symbol. You can delete the entries by clicking the related trashcan symbol. Add entries to the lists by entering an address into the field under the tables and click the button Add Blacklist or Add Whitelist. You can block or approve whole domains with all subpages. For blocking or approving defined websites enter the relatie URL. Furthermore you can block domains and approve subpages of this domain. For example: blacklist: time.com whitelist: time.com/business Just use top- and second-level-domains. For example: www.example.com becomes www.example.com/auctions becomes Securepoint Security Solutions example.com example.com/auctions 94 9 Menu Applications Securepoint 10 fig. 102 HTTP proxy dialog - tab URL filter Securepoint Security Solutions 95 9 Menu Applications Securepoint 10 9.1.4 Block Extensions On this tab you can define file extensions which will be blocked. Not only suffixes with three characters are supported. You can also block suffixes like jpeg or mpeg. Suffixes must be given with alleading dot. Enter the file extension in the field at the bottom of the window. Don’t forget the leading dot. For example: .mp3 Click on Add Extension. The extension is added to the list. To delete an extension from the list click on the trashcan symbol at the end of he related row. fig. 103 HTTP proxy - tab block extensions Securepoint Security Solutions 96 9 Menu Applications Securepoint 10 9.1.5 Block Applications On this tab you can define remote support programs and messaging programs which will be blocked. Note: These settings only work for the HTTP proxy. The programs could be executed via the rule set without using the HTTP proxy. Possibly you have to modify the rule set to prevent the communication of these programs. The applications are predefined. The section remote support includes the programs Temviewer and Netviewer. In the section messaging the most popular chat programs are predefined. You can also block messaging programs which are not listed with the option Block other IM. Select a program from the list. Activate the related checkbox to block the program. Click Save. fig. 104 block remote support and messaging programs Securepoint Security Solutions 97 9 Menu Applications Securepoint 10 9.1.6 Content Filter 9.1.6.1 Blacklist Categories The Content Filter blocks websites with defined content. You can select from several predefined content categories. The categories contain tags and keywords which are characteristic for respective content. The keywords are weighted by their directness. If the sum of keywords exceeds a defined limit (Naughtylesslimit) the website will be blocked. The higher the Naughtylesslimit, the more improbable is the blocking of a website. Select the categories you want to block. Activate the related checkbox. Define the threshold (Naughtylesslimit). Consider that a low threshold could block many sites which don´t meet conditions for the selected categories. Store your settings which Save. fig. 105 content filter of the HTTP proxy - tab blacklist categories Securepoint Security Solutions 98 9 Menu Applications Securepoint 10 9.1.6.2 Whitelist You can exclude users, IP-addresses and websites from the content filtering by the whitelist. 9.1.6.2.1 User Users who are listed in this table can call up websites without being limited by the content filter. Switch to the tab Whitelist. Select the tab Users. Enter the login name of the user who should be excluded from the content filtering. Click the button Add User. To delete a user from the list click the trashcan symbol in the related row. fig. 106 contentfilter of the HTTP proxy - section whitelist - tab user Securepoint Security Solutions 99 9 Menu Applications Securepoint 10 9.1.6.2.2 IP Addresses IP-addresses can be excluded from the content filtering as well. This only makes sense if the IP addresses are assigned statically. Switch to the tab IP Addresses. Enter the IP address which should be excluded from the content filtering. Click the button Add IP. To edit an entry click on the wrench symbol beneath the related entry. To delete an entry click on the trashcan symbol beneath the related entry. fig. 107 content filter of the HTTP proxy - section whitelist - tab IP addresses Securepoint Security Solutions 100 9 Menu Applications Securepoint 10 9.1.6.2.3 Websites In this section you can enter websites which will not be checked by the content filter. Just insert absolutely trustable websites. Some entries are factory-provided. Switch to the tab Websites. Enter addresses of websites which should be excluded by the content filtering. Click the button Add Website. To edit an entry click the wrench symbol beneath the related entry. To delete an entry click the trashcan symbol beneath the related entry. fig. 108 content filter of the HTTP proxy - section whitelist -tab websites Securepoint Security Solutions 101 9 Menu Applications Securepoint 10 9.1.7 Bandwidth You can limit the bandwidth globally or per host. Enable the bandwidth limitation by activating the checkbox Enable Bandwidth Control. Select a global limitation or a limitation per host. Activate the related radio button. Enter a global limit in kilobit per second in the field Global Bandwidth. Enter a host limit in kilobit per second in the field Bandwidth per Host. The host just gets this bandwidth even if the global bandwith is not reached yet. fig. 109 limit the bandwidth in the HTTP proxy Securepoint Security Solutions 102 9 Menu Applications Securepoint 10 9.2 POP3 Proxy The POP3 proxy acts as a POP3 server to the mail client and retrieves the e-mails from a mailserver in the internet. The e-mails are checked for viruses and spam and are send to the mail client. Select at Virusscanning the value On to activate the virus scanning. Select at Spamfilter the value On to activate the spam filter. Choose the net in which the Transparent Proxy should be activated. Store your settings with Save. fig. 110 set properties for the POP3 proxy Securepoint Security Solutions 103 9 Menu Applications Securepoint 10 9.3 Mail Relay In this section you set properties for the e-mail service. fig. 111 tabs of the mail relay Bezeichnung Erklärung General General settings for spam filter, virus scanner, e-mail administrator and maximum e-mail size. Relaying Allowed relaying hosts and domains. Mail Routing Defines which mail server supports which domain. Greylisting Mechanism against spam e-mails. Domain Mapping Changes the domain of e-mails. Advanced Settings for protecting the mailserver against attacks. Securepoint Security Solutions 104 9 Menu Applications Securepoint 10 9.3.1 General Set general setting of the mail relay and a Smarthost. A Smarthost must only be set, if e-mails should not be send directly by the appliance. Set the dropdown field Virusscanner to ON to scan e-mails for viruses. Set the dropdown field Spamfilter to ON to check the e-mails for spam. Enter the e-mail address of the e-mail administrator in the field Postmaster E-Mail Address. Limit the maximum size of an e-mail. Enter a value in kilobyte in the field Maximal EMail Size in KByte (maximum is 10.000.000 KByte). If you don’t want to limit the e-mail size set the value to 0 . If you want to use a Smarthost activate the checkbox Enable Smarthost. Enter the IP address or the host name of the external mail server in the field Smarthost. If the external mail server requires an authentication, activate the checkbox Enable Smarthost Authentication. Enter your user name and password into the fields Login and Password. Confirm the password in the field Confirm Password. fig. 112 general settings for the mail relay and the Smarthost Securepoint Security Solutions 105 9 Menu Applications Securepoint 10 9.3.2 Relaying On the tab relaying you deside how to deal with e-mails of recorded hosts and domains. E-mails which are directed to your domain should be relayed to your internal mail server. If the internal mail server also uses the firewall for sending e-mails you have to enter it´s IP address. You have the possibility to use relay blocking lists. In these lists computers are registered which are known for sending spam e-mails. With these lists, mailservers could be blocked which are listed misleadingly or their misuse was a long time ago. You can also enable SMTP authentication for local users. The selected certificates are used for encryption of the data traffic. fig. 113 relaying settings Securepoint Security Solutions 106 9 Menu Applications Securepoint 10 To add a domain, click Add Domain. The dialog Add Realy Domain appears. Enter a domain in the field Domain. Select None, To, From, Connect in the dropdown field Option. In the field Action choose between Relay (forward), Reject (block) and OK (accept). Click Add. To add a host, click Add Host. The dialog Add Host or IP Address appears. Enter a host name or an IP address into the field Host or IP Address. In the field Action choose between Relay, Reject and OK. Click Add. fig. 115 add IP address fig. 114 add domain Securepoint Security Solutions 107 9 Menu Applications Securepoint 10 9.3.3 Mail Routing The mail routing defines which mail server is responsilble for e-mail adresses in which domain. You can activate an e-mail validation against different databases or against a local file. Email to addresses which don´t exist will be directly rejected by the mail relay. To enable the e-mail validation, activate one checkbox Validate E-mail addresses against Mailserver with … . You can use the addresses of the LDAP directory or the SMTP server checks the existence of the addresses. Furthermore you can upload a file with e-mail addresses. The validation can be made against this file with the option Validate E-mail addresses against Mailserver with local file. The file contains one e-mail address per row. You can edit the file from here with the button Edit e-mail addresses. You also can download it with the button Download file. fig. 116 routing settings for the mail relay Securepoint Security Solutions 108 9 Menu Applications Securepoint 10 To assign e-mails of a domain to a defined mail server, click the button Add SMTP Routing. The dialog Add SMTP Routing appears. Enter a domain into the field Domain. Enter a host name or an IP address of the mail server into the field Mailserver. Click Add. fig. 117 add route for the mail relay Securepoint Security Solutions 109 9 Menu Applications Securepoint 10 9.3.4 Greylisting The greylisting controverts spam by rejecting e-mails with unknown combinations of sending mail server, address of the sender and address of the recipient. A spam mail server will not retry to deliver the mail. A normal mail server will do. When the mail comes the second time, the relay will accept it. Enable the greylisting by activating the checkbox Enable Greylisting. The mail relay stores the combination of server, sender and recipient automatically if the mail arrived a second time. Enter in the field Auto Whitelisting the number of days the combination should be stored. Define the time interval between the delivery attempts. Enter the number of minutes into the field Delaying. fig. 118 greylisting settings Securepoint Security Solutions 110 9 Menu Applications Securepoint 10 9.3.4.1 Whitelist IP address / Net In the whitelist you can define e-mails which should be excluded from the greylisting. They will be forwarded at the first delivery attempt. In the section IP Address / Net you can exclude e-mails from the greylisting which come from defined IP addresses and networks. Enter an IP address into the field at the bottom of the window. Select the related subnet mask from the dropdown field. Click Add IP Address / Net. The IP address will be saved in the whitelist. fig. 119 Whitelist - IP Addreses / Net Securepoint Security Solutions 111 9 Menu Applications Securepoint 10 9.3.4.2 Whiteliste Domains You also can exclude e-mails from the greylisting which comes from defined domains. The specifcatons are only made in second- and top-level domains. Enter a domain in the field at the bottom of the window. Click the button Add Domain. The domain will be saved in the whitelist. fig. 120 Whitelist - Domain Note: The domain isn’t the domain of the e-mail address, but the domain of the mail server which delivers the e-mail. Securepoint Security Solutions 112 9 Menu Applications Securepoint 10 9.3.4.3 Whitelist E-mail Recipients Exclude e-mails to defined recipients from the greylisting. Enter the e-mail address of a recipient into the field at the bottom of the window. Click Add E-mail Recipient. E-mails which are delivered to this recipient will be excluded from the greylisting. fig. 121 exclude e-mail recipients from the greylisting 9.3.4.4 Whitelist E-mail Sender Exclude e-mails from defined sender from the greylisting. Enter the e-mail address from a sender into the field at the bottom of the window. Click Add E-mail Sender. E-mails which are delivered from this sender will be excluded from the greylisting. fig. 122 exclude e-mail sender from the greylisting Securepoint Security Solutions 113 9 Menu Applications Securepoint 10 9.3.5 Domain Mapping This function replaces the domains of e-mail addresses. So the internal mail server must only be configured for one domain. For example: [email protected] becomes to [email protected] fig. 123 domain mapping settings To add a domain mapping rule, click the button Add Domain Mapping. The dialog Add Domain Mapping appears. Enter the domain of the incoming e-mail in Source Domain. Enter the new domain in Destination Domain. Click Add. fig. 124 add a domain mapping rule Securepoint Security Solutions 114 9 Menu Applications Securepoint 10 9.3.6 Advanced This section offers settings that protect the mail relay with a basic mechanism. fig. 125 protecting mechanism on the tab advanced Securepoint Security Solutions 115 9 Menu Applications Securepoint 10 9.3.6.1 Greeting Pause Mail servers send a Greeting Message to the sending mail server. An uncorrupted mail server will deliver more SMTP commands after it gets this message. Spam mail servers don’t wait for this message and deliver the mail immediately. The mail relay drops e-mails if the Greeting Message rule has been ignored. You can define mail servers that don’t have to wait for the Greeting Message. Use the Edit button beneath Define Exceptions and enter the IP address or the host name of the mail server. 9.3.6.2 Recipient flooding Refers to the sending of mails to a lot of recipients, at which the recipient addresses are composed randomly. After a defined number of failed delivery attempts a pause of 1 second will be made. This slows down the query of e-mail addresses and it will be inefficient for the address collector. 9.3.6.3 Limit max number of recipients Define a maximum number of recipients inside an e-mail. 9.3.6.4 Limit connections Limits the simultaneous connections to your firewall per second. You can define mail servers by IP address or host name which should be excluded from this limit. 9.3.6.5 Rate Control Limits the simultaneous connections from one server in a interval of one minute (default). Exceptions can be defined. You can define mail servers by IP address or host name which should be excluded from this limit. Securepoint Security Solutions 116 9 Menu Applications Securepoint 10 9.4 Spam Filter Properties The integrated Securepoint anti spam solution filters unrequested e-mails (spam). Therefore it uses a combination of different methods to detect as much undesired e-mails as possible. The Securepoint spam filter analyzes every e-mail on the basis of different criteria and classifies it as spam depending of the weighting. Assessment criteria are for example: obviously invalid sender address, known spam text passages, HTML content, future dated sender data and so on. 9.4.1 General Decide which spam filter mechanism you want to use. The automatic filter uses a spam filter module of the company Commtouch. The company services a consistently updated spam database. The incoming e-mails are checked against this database. The Bayes filter checks on the basis of classified/evaluated words, if an e-mail is spam or ham (desired mail). In order that the filter works properly, it must be trained by the spam administrator. The administrator has to resort the misclassified mail into spam and ham. Thereby the filter learns which words are typical for a spam e-mail. Securepoint Security Solutions 117 9 Menu Applications Securepoint 10 If you want to use the Commtouch module activate the checkbox Automatically Spam filtering. Activate the checkbox Bayes Filter to use this filter mechanism. Set values for the following settings. o Threshold value for spam mail: The calculated value lies in the range between 1 and 99. 1 shows a high probability for ham and 99 shows a high probability for spam. o Bias to define spam: Multiplier for words in the ham database. If there is much more spam than ham the values should be set to 1. Click Reset values to set the values back to default values. If the checkbox E-mail body invisible for the spam administrator is activated the spam administrator will only see the e-mail header in the spam filter interface. The content isn’t visible for him. Consider the respective privacy regulations if you uncheck this option. Define how long the e-mails should be saved on the appliance. Enter the number of days in the field Keep e-mails not longer than x days. fig. 126 settings for filter mechanism Securepoint Security Solutions 118 9 Menu Applications Securepoint 10 9.4.2 Attachment Filter You can block attachments from incoming and outgoing e-mails. The filter can check all attachments or you limit the checking of a special attachment. You can define attachments by extension or MIME (Multipurpose Internet Mail Extensions) type which is given in the e-mail header. Either Block all Attachments. You can exclude attachment by the Whitelist. Or Block specific Attachments. You have to define the attachments to be checked in the blacklist. This filter doesn’t block the e-mails. It just removes the attachments. If an attachment is removed, a message is inserted into the mail. You can edit this message in the field Edit Message. fig. 127 delete attachments from the e-mails Securepoint Security Solutions 119 9 Menu Applications Securepoint 10 You can write MIME types on your own (for example: audio/mp3) or you use predefined types. Switch to the tab MIME Types at the Whitelist or Blacklist section. Click the button Predefined. The dialog Add MIME Type appears. Select a type by activating a radio button. Choose a subtype from the relative dropdown list. Click Add. The MIME type will be added to the Whitelist or Blacklist. fig. 128 predefined MIME types Securepoint Security Solutions 120 9 Menu Applications Securepoint 10 9.4.3 Virusscan You can check incoming and outgoing e-mails for viruses. If a virus was found it will be deleted. The deleting of a virus from an e-mail will be indicated by a message in the e-mail. Activate Don’t scan specific Attachments to exclude attachments from the virus scan by a Whitelist. Use the Whitelist to define attachments which should not be scanned. You can specify them by file extension or by MIME type. You can write MIME types manually or select those from the predefined list (see previous article). fig. 129 exclude attachments from the virusscanning Securepoint Security Solutions 121 9 Menu Applications Securepoint 10 9.4.4 SMTP Settings In this section you can define, how to deal with e-mails that are identified as spam, include a virus or an undesired attachment. If you don’t want to block spam but mark it, activate the checkbox Don’t block spam just mark. You can edit the flag that is attached to the subject in the field Message in Subject. Decide if incoming or outgoing e-mails with a virus will be blocked or relayed with deleted virus. Select the according radio buttons. Decide if incoming or outgoing e-mails with undesired attachment will be blocked or relayed with deleted attachment. Select the according radio buttons. fig. 130 settings for identified e-mails Securepoint Security Solutions 122 9 Menu Applications Securepoint 10 9.4.5 SMTP Advanced In the advanced SMTP setting you can define a global Whitelist and a global Blacklist. The entries in the list could be an IP address, a domain or a host IP address / host name. E-mails from Whitelist entries will be relayed without checking. E-mails from Blacklist entries will be blocked without checking. Enter complete e-mail addresses on the tab E-Mail (Whitelist and Blacklist). Enter domains on the tab Domain (Whitelist and Blacklist). Enter host IP addresses or host names on the tab Host (Whitelist and Blacklist). fig. 131 global Whitelist and Blacklist Securepoint Security Solutions 123 9 Menu Applications Securepoint 10 9.4.6 POP3 Settings Here you can define settings for the POP3 e-mail retrieve service. You can check all mailboxes for viruses and undesired attachments or just specified mailboxes. The subject of spam e-mails will be tagged. Edit the tag in the field Edit message in subject when spam. Decide on the left side if all mailboxes should be scanned for viruses or just specified ones. If you select the option specific mailboxes, enter the user names whose mailboxes should be scanned. Decide on the right side if all mailboxes should be scanned for undesired attachments or just specified ones. If you select the option specific mailboxes, enter the user names whose mailboxes should be scanned. fig. 132 settings for POP3 service Securepoint Security Solutions 124 9 Menu Applications Securepoint 10 9.5 VNC Repeater Virtual Networking Computing (VNC) software can display the screen content of a remote computer on a local computer. The keyboard and mouse actions of the local computer are send to the remote computer. So you can work on the remote computer as though you work directly on it. The software is a client server application. The remote computer acts as the server and the local computer as the client. You have to enter the IP address or the hostname of the remote computer and the port of the VNC repeater application to allow the traffic through the firewall. 9.5.1 General Specify the ports which are used by the client (viewer) and the server. Enter the port of the local VNC repeater at the field VNC Viewer Port. Default setting is port 5900. Enter the port which is used by the remote VNC repeater at the field VNC Server Port. fig. 133 set ports Securepoint Security Solutions 125 9 Menu Applications Securepoint 10 9.5.2 VNC Server ID If the server connects the VNC proxy, an ID is assigned to the server. The client connects the server via the repeater and uses the ID to identify the Server. To add a Server ID type it into the field ID at the bottom of the dialog. Click Add. Click the trashcan symbol beneath an ID to delete it. fig. 134 tab VNC Server ID 9.5.3 VNC Server IP If the client initiates the connection, the VNC proxy forwards the query to the IP address of the server. To add a Server IP type it into the field IP at the bottom of the dialog. Click Add. Click the trashcan symbol beneath an IP to delete it. fig. 135 tab VNC Server IP Securepoint Security Solutions 126 9 Menu Applications Securepoint 10 9.6 VoIP Proxy The VoIP (Voice over IP) proxy offers packet based telephony over the internet. It supports SIP (Session Initiation Protocol) for initiation of a communication session and RTP (Real-Time Transport Protocol) for broadcasting the speech data. 9.6.1 General Select the interface which is used by the SIP client to connect the proxy with the dropdown box Inbound Interface. Select the interface which is used by the proxy to transfer the data to the internet from the dropdown box Outbound Interface. Select the port on which the proxy expects data in field SIP Port (default 5060). Adjust the RTP Port Range to the port range used by the client. Enter the Timeout of the SIP server of the provider. fig. 136 tab General of the VoIP Proxy dialog Securepoint Security Solutions 127 9 Menu Applications Securepoint 10 9.6.2 Provider Enter the data of the provider in this section. Enter the name of the provider in the field Domain. Enter the SIP proxy of the provider in the field Proxy. Select the SIP proxy port of the provider in the field Proxy Port (default 5060). fig. 137 tab Provider of VoIP Proxy dialog Securepoint Security Solutions 128 9 Menu Applications Securepoint 10 9.7 IDS The Intrusion Detection System (IDS) is a system to detect attacks in the network. The IDS analyzes all packets which pass the appliance. Suspicious activities will be logged by the IDS. The system checks the signature of every packet against known attack signatures which are stored in so called rules. Notice: Just activate rules which are applicable for your system. Otherwise the IDS stresses the system unnecessary. Select rules in the dialog IDS. Activate the relative checkbox. Store your settings with Save. The IDS service will be restarted. fig. 138 select the signature classes Securepoint Security Solutions 129 9 Menu Applications Securepoint 10 9.8 Nameserver You have the possibility to forward requests to the local nameserver to external nameservers. The replies of the external nameservers will be transmitted to the requesting application or the requesting service. Select the menu item applications from the navigationbar and click on nameserver in the dropdown menu. The dialog Nameserver appears. Enter the IP address of the external nameserver into the field at the bottom of the dialog. Click Add IP Address to apply the nameserver to the list. You can delete listed nameserver by using the thrashcan button. Click Save to store the settings and leave the dialog. fig. 139 add external nameserver Securepoint Security Solutions 130 9 Menu Applications Securepoint 10 9.9 Service Status In this section all services of the firewall are listed. The current state of every service is shown. You can start, stop or restart the system. If you use a high availability environment you can define which services are critical. This means, if the service crashes, the system will change to the spare machine. This setting is called Cluster Protection. An active service shows a green On button. An inactive service shows a red Off button. Start a service by clicking the button On in the related row. Stop a service by clicking the button Off in the related row. Restart a service by clicking the button Restart in the releted row. If you use a high availability environment set the Cluster Protection to On for services which should be available always. fig. 140 overview of the services, their states and their classification to critical services Securepoint Security Solutions 131 10 Menu VPN Securepoint 10 10 Menu VPN The Virtual Private Network (VPN) connects several computers or networks with the local network. This is realized by a tunneling connection through the internet. For the user the tunneling connection seems to be a normal network connection to the destination host. The VPN provides the user a virtual IP connection. The transmitted data packets are encrypted by the client and will be decrypted by the firewall and vice versa. For transmitting the data, several protocols are used. The methods are varying in degree of safety and complexity. fig. 141 dropdown menu VPN name description IPSec Wizard Assistant for creating IPSec VPN connections. IPSec Globals General settings for all IPSec connections. IPSec Editing and deleting of IPSec connections. L2TP Combination and enhancements of PPTP and L2F. Is supported by MS Windows. PPTP Point to Point Tunneling Protocol doesn’t use a comprehensive encryption. Is supported by MS Windows. SSL VPN Uses the TLS/SSL encryption protocol. Securepoint Security Solutions 132 10 Menu VPN Securepoint 10 10.1 IPSec Wizard The assistant for creating IPSec VPN connections guides you step by step through the several configuration points. You can choose between site-to-site or roadwarrior connection. A site-to-site connection interlinks two networks. For example: The local network of a central office with the local network of a branch. A roadwarrior connection binds one or more computers with the local network. For example: An outdoor staff connects with the laptop to the network of the central office. 10.1.1 Site-to Site Click in the VPN dropdown menu on the entry IPSec Wizard. The dialog IPSec Wizard à Create an IPSec connection appears. Select the VPN type Site to Site Connection work. à Connects your local network with a remote net- Click Next. fig. 142 select kind of connection Securepoint Security Solutions 133 10 Menu VPN Securepoint 10 Enter a name for the VPN Connection in the field Connection name. Enter the IP address or hostname of the remote network in the field Gateway. If you want to use a DynDNS service, activate the checkbox Hostname resolved by DynDNS. Click Next. fig. 143 define name and gateway You can decide between two authentication methods. Either use the preshared key (PSK) method or you use the authentication via certificate. The PSK is a password which is known by both connection partners. Preshared Key Method Select the radio button Preshared Key. Enter the preshared key (PSK). Decide which IKE (Internet Key Exchange) version you want to use and select the related radio button. Click Next. fig. 144 authentication via PSK and IKEv1 Securepoint Security Solutions 134 10 Menu VPN Securepoint 10 Certificate Method Mark the radio button x.509 Certificate and select a server certificate from the dropdown box. Decide which IKE (Internet Key Exchange) version you want to use and select the related radio button. Click Next. fig. 145 authentication via certificate and IKEv2 Now enter the networks which should be interlinked by the VPN connection. Under Local Network enter your local network. Select the according net mask at Local Mask. Under Destination Network enter the remote network. Enter the according net mask at Destination Mask. Activate the checkbox Automatically create firewall rules to create the firewall rules for the connection automatically. Click Finish to exit the assistant. fig. 146 enter interlinked subnets Securepoint Security Solutions 135 10 Menu VPN Securepoint 10 10.1.2 Site-to-End (Roadwarrior) Click in the VPN dropdown menu on the entry IPSec Wizard. The dialog IPSec Wizard à Create an IPSec connection appears. Select the VPN type Roadwarrior à One or several computers can connect to the local network. Click Next. fig. 147 select kind of connection Enter a name for the VPN connection in the field Connection name. Click Next. fig. 148 name of the connection Securepoint Security Solutions 136 10 Menu VPN Securepoint 10 You can set up the IPSec (Internet Protocol Security) connection with or without L2TP (Layer2 Tunneling Protocol). You need a separate client for native IPSec (without L2TP). The operating system Microsoft Windows 7 already includes a native IPSec client. 10.1.2.1 native IPSec Activate the radio button Native IPSec. Click Next. fig. 149 select native IPSec Choose between the authentication methods preshared key and certificate. Furthermore select the IKE version you want to use. If you choose preshared key activate the radio button Preshared Key and enter the key into the field beneath. If you choose certificate activate the radio button x.509 Certificate and select a server certificate from the dropdown box. Choose between IKEv1 and IKEv2 and activate the relative radio button. Click Next. fig. 150 authentication via certificate and IKEv2 Securepoint Security Solutions 137 10 Menu VPN Securepoint 10 10.1.2.1.1 IKEv1 If you selected IKEv1 you have to specify the local network and an IP address for the roadwarrior. Enter the network the roadwarrior connects to into the field Local Network. Select the related subnet mask from the dropdown box Local Mask. Enter an IP address from the subnet into the field Roadwarrior IP address. This IP will be assigned to the roadwarrior when it connects to the local network. If you want to set up the firewall rules automatically, activate the checkbox Automatically create firewall rules. Click Finish for exiting the wizard. fig. 151 settings IKEv1 Securepoint Security Solutions 138 10 Menu VPN Securepoint 10 10.1.2.1.2 IKEv2 If you selected IKEv2 you have to enter an individual IP address for the roadwarrior or a address pool. Enter the network the roadwarrior connects to into the field Local Network. Select the related subnet mask from the dropdown box Local Mask. Activate the radio button Single Roadwarrior IP address if you want to give access to just one roadwarrior and enter the IP address into the field beneath. If you want to give access to a couple of roadwarriors, activate the radio button Address Pool and enter the IP address of the address pool and the related subnet mask. An IP address out of this pool will be assigned to the roadwarrior if it connects to the network. If you want to set up the firewall rules automatically, activate the checkbox Automatically create firewall rules. Click Finish for exiting the wizard. fig. 152 settings IKEv2 Securepoint Security Solutions 139 10 Menu VPN Securepoint 10 10.1.2.2 L2TP L2TP combines the PPT protocol and the L2F protocol. Because L2TP has no authentication, integrity and encryption mechanism it is combined with IPSec. Activate the radio button IPSec Connection with L2TP. Click Next. fig. 153 select L2TP Select the authentication method. If you want to use a preshared key, activate the radio button Preshared Key and enter the key into the field beneath. If you want to use a certificate, activate the radio button x.509 Certificate and select a server certificate from the dropdown box. Click Next. fig. 154 select the authentication method Securepoint Security Solutions 140 10 Menu VPN Securepoint 10 Enter the address pool for the roadwarrior and the IP address of the DNS server. Enter the local IP address into the field Local L2TP IP address. Enter the IP address range into the fields L2TP address pool. Enter the IP addresses of the first and the second DNS servers into the fields Primary and Secondary nameserver. Click Next. fig. 155 define address pool and DNS server The last step offers the creation of L2TP users. If you don’t want to use this option click Finish and leave the wizard. Enter the user name of the new user into the field Login name. Enter the first name and the surname into the field Fullname. Assign a password to the user in the field Password and confirm it in the field Confirm Password. Click Finish to save the IPSec connection and the user. fig. 156 create L2TP user Securepoint Security Solutions 141 10 Menu VPN Securepoint 10 10.2 IPSec Globals Adjust general settings for all IPSec VPN connections. 10.2.1 General Settings On this tab you can activate the option NAT Traversal. This function prevents the manipulation of IPSec packets by address translation. This could occur if the mobile user uses NAT devices himself. fig. 157 option NAT Traversal Securepoint Security Solutions 142 10 Menu VPN Securepoint 10 10.2.2 IKE V2 The Internet Key Exchange (IKE) protocol is used for managing and exchange of IPSec keys. It arranges the connection establishment and the authentication of the communication partner. Furthermore it is responsible for the negotiation of the encryption parameters and the generation of the keys. The complexity of the protocol complicates the configuration of an IPSec connection, especially if you use different end devices. The new version of the IKE protocol (IKEv2) defangs this complexity. It allows a faster connection establishment and a more stable connection. By now this version is supported by several programs. It is implemented in Microsoft Windows 7 too. In this dialog the IP addresses of the Domain Name servers and the Windows Internet Name Service servers are specified. This will be forwarded to the remote stations. fig. 158 IKEv2 settings Securepoint Security Solutions 143 10 Menu VPN Securepoint 10 10.3 IPSec This point displays an overview of all native IPSec and L2TP connections. Here you can adjust the settings of the connections, delete, load, initiate and stop the connections. Furthermore the status of the connection is shown. 10.3.1 Edit Connection An IPSec connection is divided into two phases. The first phase negotiates the encryption method and the authentication. The Internet Key Exchange (IKE) protocol defines, in which way security parameters will be agreed and shared keys will be exchanged. The second phase creates new key material irrespective of the previous keys. So no one can gather the new key from the previous key. 10.3.1.1 Phase 1 In these settings the basic connection parameters are stored. name description tab General Local gateway ID ID of the appliance. If you use the interface ppp0/eth0 the firewall ID is the IP-address of the interface. You can insert the hostname as well (also the DynDNS name). Remote host/gateway remote VPN gateway or host (Name or IP-address) Remote host/gateway remote VPN gateway or host (Name or IP-address) ID Enter the certificate of the remote host, if the connection uses certificates for authentication. Authentication Shows which authentication method is used. Key (PSK) or certificate. Local key/ Local Certif- Depending on the authentication method, enter the local key icate (PSK) or the name of the certificate. Start automatically Activate only for site-to-site connections. Dead peer detection This functions recognizes, if the connection aborted unexpectedly. If an abort is recognized, the tunnel will be shut down completely to guarantee a new link connection. DynDNS name Mark this checkbox, if the remote host uses a DynDNS service. Securepoint Security Solutions 144 10 Menu VPN Securepoint 10 tab IKE Encryption Encryption method Authentication Authentication method Strict If this box is activated, the remote station must use the same settings for key and hash mode (regards phase 1 and phase 2). DH Group Key length of the Diffie Hellmann key. IKE life Duration of an IKE connection. The period can vary between 1 and 8 hours. Afterwards a new link connection is necessary for security reasons. This starts automatically. Keyingtries How many trials to initiate the connection (time lag 20 seconds). unlimited à unlimited trials three times à Three trials to initiate the connection. Securepoint Security Solutions 145 10 Menu VPN Securepoint 10 10.3.1.2 Phase 2 name description tab General Encryption Encryption method Authentication Authentication method PFS Perfect Forward Secrecy The new key material must be created irrespective of the previous keys. So no one can gather the new key from the previous key. Key life Duration of an IKE connection. The period can vary between 1 and 8 hours. Afterwards a new link connection is necessary for security reasons. This starts automatically. tab Native IPSec Local Net / Mask Local net which is connected with the remote net via VPN. Remote Net / Mask Remote net which is connected with the local net via VPN. tab L2TP L2TP Subnet local subnet for L2TP connections Only useable with L2TP connections with MS Windows Vista or MacOSX, if the client is positioned behind a router. tab Address Pool Local Net / Mask Local net which is connected with the remote net via VPN. Address Pool / Mask From this address pool an IP address will be assigned to the roadwarrior when connecting to the local net. Securepoint Security Solutions 146 10 Menu VPN Securepoint 10 10.4 L2TP In this section you can set the general setting for L2TP VPN connections. Click in the VPN dropdown menu L2TP. The dialog VPN L2TP appears. In the tab General you have to adjust basic settings. Enter the IP which should be used by the L2TP interface in the field Local L2TP IP. An explicit L2TP interface doesn’t exist. The entered IP address will be bound as a virtual address to the external interface. Under L2TP Address Pool adjust a L2TP address pool. This must be set in the same subnet as the L2TP IP address. The left field contains the start address and the right field the end address of the address pool. For the Maximum Transmission Unit (MTU) the default value 1300 should be retained. Under Authentication select the authentication mode. You can select from local authentication against the database of the appliance, authentication via a Radius server or via an Active Directory. Store your settings with Save. fig. 159 adjust IP address, address pool and authentication method Securepoint Security Solutions 147 10 Menu VPN Securepoint 10 In the tab NS/WINS enter the IP addresses of the name server and of the WINS-server (Windows Internet Name Service), if you use one. This will be forwarded to the L2TP network. Switch to the tab NS/WINS. Enter the IP-address of the primary and secondary Nameserver. Enter the IP-address of the primary and secondary WINS-server (if you use one). Store your settings with Save. fig. 160 define IP adresses of DNS and WINS servers Securepoint Security Solutions 148 10 Menu VPN Securepoint 10 10.5 PPTP The basic settings of VPN via PPTP are nearly identical to the settings of L2TP. The basic settings of the PPTP interface and address pool are set on the tab General. On the other tab enter the IP addresses of the name server and the WINS servers. Click in the VPN dropdown menu PPTP. The dialog VPN PPTP appears. In the tab General you have to adjust basic settings. Enter the IP which should be used by the PPTP interface in the field Local PPTP IP. An explicit PPTP interface doesn’t exist. The entered IP address will be bound as a virtual address to the external interface. Under PPTP Address Pool adjust a PPTP address pool. This must be set in the same subnet as the PPTP IP address. The left field contains the start address and the right field the end address of the address pool. For the Maximum Transmission Unit (MTU) the default value 1300 should be retained. You can select, if you want to use an authentication against a Radius server. Enable or disable the Radius Server Authentication by selecting On or Off. Store your settings with Save. fig. 161 adjust IP address, address pool and authentication Securepoint Security Solutions 149 10 Menu VPN Securepoint 10 In the tab NS/WINS enter the IP addresses of the name server and of the WINS-server (Windows Internet Name Service), if you use one. This will be forwarded to the PPTP network. Switch to the tab NS/WINS. Enter the IP-address of the primary and secondary Nameserver. Enter the IP-address of the primary and secondary WINS-server (if you use one). Store your settings with Save. fig. 162 define IP addresses of DNS and WINS servers Securepoint Security Solutions 150 10 Menu VPN Securepoint 10 10.6 SSL VPN In this section you can set the general setting for SSL encrypted VPN connections. Enter the desired IP which should be used by the virtual interface in the field SSL VPN IP. This VPN connection will be established over a separate virtual interface. The address pool depends on the IP address of the tun interface. If you change the IP address in this section, it will also change in the section network configuration. Enter the port of the SSL VPN in the field SSL VPN Port. The default port 1194 is already set. The SSL VPN uses the protocol udp. You can change the protocol to tcp. This is not recommended because a big overhead is produced. Select a server certificate from the dropdown box SSL VPN Certificate. This certificate has to be created with the option Server Authentication. This authenticates the appliance as a SSL VPN server. Store your settings with Save. fig. 163 adjust IP address, address pool and server certificate Securepoint Security Solutions 151 11 Menu Authentication Securepoint 10 11 Menu Authentication The user- and certificate administration is located in the section Authentication. Furthermore you can adjust the settings of external authentication methods here. fig. 164 dropdown menu authentication name description Users User administration for creating new users and editing existing users. Furthermore assigning group membership, password, etc. External Authen- Settings for external authentication via Radius- or LDAP-server. tication Certificates Certificate administration for creating new certificates. Also export and import methods are available. Securepoint Security Solutions 152 11 Menu Authentication Securepoint 10 11.1 Users The dropdown menu item Users displays a list with all existing users and their permissions in binary format. The users are listed in order of their creation. Existing users can be edited by clicking the wrench symbol or deleted by using the trashcan symbol. fig. 165 list of existing users When the mouse cursor moves over an user, an infobox appears, which shows the user permissions and assigned VPN IP addresses of the related user. You can activate this function by unchecking the checkbox Disable Infobox. fig. 166 user properties Securepoint Security Solutions 153 11 Menu Authentication Securepoint 10 11.1.1 Add User Tab General For adding a new user, open the window Users and click on the button Add. The dialog Add User appears. In the tab General you have to adjust basic settings. Under Login enter the name which the user uses for logging in. Under Name enter the real name of the user. Insert a password in the field Password and retype it in the field Confirm password. Activate the designated group memberships by marking the according checkboxes. It is allowed to check more than one box. fig. 167 general setting for a new user name binary description Firewall Admin 000000001 Administrator of the firewall VPN PPTP 000000010 PPTP VPN connection user VPN L2TP 000000100 L2TP VPN connection user Spam Filter User 000001000 Administrator of the spam filter SPUVA User 000010000 User authenticates via Securepoint User Verification Agent HTTP Proxy 000100000 HTTP proxy user User Interface 001000000 User of the firewall user interface SSL VPN 010000000 SSL VPN connection user SMTP Relay User 100000000 User of the SMTP mail relay Securepoint Security Solutions 154 11 Menu Authentication Securepoint 10 11.1.2 Add User Tab VPN If the new user is L2TP or PPTP VPN user, you can assign an IP address to the user for the VPN connection. The IP address must be contined in the address pool. If the new user utilizes SSL VPN, you have to set a SSL-VPN-IP-address on the tab VPN. Switch to the tab VPN. Assign an IP address which is used by the user in the L2TP or PPTP VPN tunnel. This statement is optional. Is the user SSL VPN user, a tunnel IP address must be set. This IP address must be an IP address of the subnet of the tun0 interface (default 192.168.250.xxx). The last part of the IP address must fulfill the following condition: a multiple of 4 minus 2. Formula: x = ( 4 * y ) – 2 Possible values for the last part of the IP address: {2; 6; 10; 14; …; 246; 250; 254} fig. 168 assign a VPN IP address Securepoint Security Solutions 155 11 Menu Authentication Securepoint 10 11.1.3 Add User Tab VPN Client This tab will be activated if the user is member of the group SSL VPN. In this tab you make settings to build a preconfigured SSL VPN client package for the user. The package includes a configuration file, a certificate and the portable OpenVPN client. The user can download the package in the user interface. Therefore the user needs the membership in the group User Interface. If the user isn’t member of this group you can preconfigure the SSL VPN package anyway. You just have to hand the package to the SSL VPN user (see chapter 14.3). To enable the preconfiguration, activate the checkbox Enable VPN Client. Select a user certificate from the dropdown box Certificate. If no certificate is shown, you have to create one first. Select an IP address or a hostname in the field SSL VPN Gateway which is used by the SSL VPN service. Either select a dynamic DNS entry from the dropdown box or enter an IP address or host name into the field Alternative. The option Redirect default gateway to remote site reroutes the whole internet traffic of the VPN user over the appliance. Click the button Download Client to download the client package as a zip archive. fig. 169 setting for preconfigured SSL VPN client Securepoint Security Solutions 156 11 Menu Authentication Securepoint 10 11.1.4 Add User Tab Spam Filter Is the user member of the group Spam Filter User, you can restrict the permissions to several e-mails-addresses or domains. You can add three entries. If you don’t enter any restriction, the user can access all e-mails Restriction to several e-mail-addresses must be set for the whole e-mail-address. For example: [email protected] Restriction to domains must be set with a leading “at” symbol. For example: @example.org Switch to the tab Spam Filter. Restrict the display of the spam filter interface to several e-mail-addresses or domains. These settings are only relevant for users, which are members of the group Spam Filter User. Activate the checkbox Show blocked attachments in Spam Filter to disable the possibility to display blocked attachments. fig. 170 restrict the display of the spam filter Securepoint Security Solutions 157 11 Menu Authentication Securepoint 10 11.1.5 Add User Tab Extras On this tab you can adjust the settings for the password. You decide if the user may change the password himself, if the password must contain numbers, special characters, lower- and uppercase letters and the minimal password length. The password can only be changed in the user interface. Switch to the tab Extras. If the user is allowed to change the password, check the checkbox User can change password. Select the Minimum password length. Decide which characters the password must contain: numbers special characters lower- and uppercase letters Store your settings with Save. fig. 171 password properties Securepoint Security Solutions 158 11 Menu Authentication Securepoint 10 11.1.6 Add User Tab WoL The abbreviation WoL stands for Wake on LAN. You can start start turned off computers over LAN. The mainboard and the network adapter must support ACPI to use this function. The option must set in the BIOS and in the network adapter settings. If this option is set for a user, the user can start listed computer over the user-interface. The membership UserInterface is required. Switch to the tab WoL. Activate the checkbox Enable WoL. Enter the name of the computer in to the first field below the list. Select the interface from the dropdownbox the computer is connected to. Enter the MAC address of the network adapter of the remote computer into the third field. The address must be given in double characters separated by a colon. Click Add. fig. 172 computer which can be started by the user Securepoint Security Solutions 159 11 Menu Authentication Securepoint 10 11.2 External Authentication For user authentication you can not only use the local database but also external authentication databases. The appliance offers checking against a Radius- or LDAP server. For the HTTP proxy you can also select authentication with the Kerberos service. 11.2.1 Radius Enter the access data for the Radius server on the tab Radius. Open the dialog External Authentication. On the tab Radius insert the data of the Radius server. Insert the hostname or the IP address of the server in the field IP address or host name. Under Mutual secret key insert the password and retype it in the field Confirm mutual secret key. Store your settings with Save. fig. 173 access data for the Radius server Securepoint Security Solutions 160 11 Menu Authentication Securepoint 10 11.2.2 LDAP Server For using a LDAP server follow the approach below. Open the dialog External Authentication. On the tab LDAP insert the data of the LDAP servers. Insert the host name or the IP address of the server in the field IP address or host name. Enter the server domain into the field Server Domain. Under User name insert your user name of the server. Under User password insert your password and retype it in the field Confirm user password. Store your settings with Save. fig. 174 acces data for the LDAP server If you use the LDAP authentication in combination with the services HTTP proxy or L2TP, you have to create new groups in the Active Directory (AD), and users, which may access the local net have to be members in these new groups. HTTP-Proxy à group in AD SecurepointHttp à group in AD SecurepointL2tp L2TP Securepoint Security Solutions 161 11 Menu Authentication Securepoint 10 11.2.3 Kerberos The Kerberos authentication service authorizes the access of the HTTP proxy. It not only authenticates the client to the server but also the server to the client. Switch to the tab Kerberos. Enter the LDAP group name of the group you want to give access into the field Workgroup. Enter the domain name of the realm used into the field Domain. Under AD Server enter the IP address of the computer which hosts the Kerberos service. Enter the IP address of the used DNS server into the field Primary Nameserver. Enter the administrator of the Kerberos server into the field User Enter the password of the Kerberos administrator into the field Password and retype it in the field Confirm Password. fig. 175 access data for the Kerberos server Securepoint Security Solutions 162 11 Menu Authentication Securepoint 10 11.3 Certificates The appliance uses certificates to authenticate users which connect via VPN. The certificate proves the users identity and contains a digital signature and statements about the owner. Certificates are signed by a Certification Authority (CA) to guarantee the genuineness of the certificate. Normally the CA is a third independent and trustable instance. You can create a CA yourself to sign the certificates you have generated. The signed certificates will be distributed to the users which connect to the local net via VPN. The signature assures that the certificates are created by the firewall and not by anybody else. For a complete authentication, not only the remote station needs a certificate but also the firewall itself. You have to create one certificate for the firewall and one certificate for each external user. You can import external certificates given in PEM format. You may also export local certificates in PEM format or as PKCS #12. The tab CA shows all existing Certification Authorities. The tab Certs shows all available certificates. The tab Revoked shows all invalid CAs and certificates. fig. 176 list of available CAs Securepoint Security Solutions 163 11 Menu Authentication Securepoint 10 11.3.1 Create CA At first you have to create a CA to sign created certificates. Click in the tab CA onto Add. The dialog Add Certificate appears. The fields Valid from and Valid until define the duration of validity of the CA. You can enter the date directly into the first field. Or click into the field and a calendar appears where you can select the date. The following three fields are reserved for the time (hour, minutes, and seconds). When the validation of the CA expires, all certificates which are signed with this CA will become invalid too. Enter a name for the CA into the field Name. Select your country identifier from the field Country. Enter your region into the field State. Enter the name of your city into the field City. Enter the name of your company into the field Organisation. Enter the department into the field Unit. Enter you e-mail address into the field E-mail. Click Save to create the CA. fig. 177 create CA Securepoint Security Solutions 164 11 Menu Authentication Securepoint 10 11.3.2 Create Certificates Click in the tab Cert onto Add. The dialog Add Certificate appears. The fields Valid from and Valid until define the duration of validity of the certificate. You can enter the date directly into the first field. Or click into the field and a calendar appears where you can select the date. The following three fields are reserved for the time (hour, minutes, and seconds). Enter a name for the certificate into the field Name. Select your country identifier from the field Country. Enter your region into the field State. Enter the name of your city into the field City. Enter the name of your company into the field Organisation. Enter the department into the field Unit. Enter you e-mail address into the field E-mail. Select the CA to sign the certificate with. Select an Alias optionally (You will need it under the operating system MacOS). Activate the checkbox Server Authentication if you want to create a server certificate. Click Save to create the certificate. fig. 178 create client certificate fig. 179 create server certificate Securepoint Security Solutions 165 11 Menu Authentication Securepoint 10 11.3.3 Import CA and Certificate You can import CA and certificates, if they are available in PEM file format. Switch to the corresponding tab (CA or Certs). Click Import and in the appearing dialog click Browse. Select the file you want to import from your file system. After that click Import. fig. 180 import dialog 11.3.4 Export CA and Certificate You also can export CAs and certificates. You may select between PEM file format and the encrypted format PKCS #12. You ought to consider that the appliance only imports the PEM file format. Switch to the corresponding tab (CA or Certs). At the end of every row you find the following icons: The left icon exports the certificate or the CA as PEM file format. The right icon exports the certificate or the CA as PKCS #12 (*.p12) format. Click on the favored icon and save the certificate or CA on your local file system. Securepoint Security Solutions 166 11 Menu Authentication Securepoint 10 11.3.5 Download SSL-VPN Client You can also download the preconfigured SSL VPN client from the tab Certs. An Icon in the row of every certificate offers the download of the zip archive. The archive includes the portable OpenVPN client, a preconfigured configuration, the CA and the relating cert. Switch to the tab Certs. Select the desired certificate and click on the following icon. The dialog OpenVPN–Client appears. It asks for settings to configure the OpenVPN configuration. Select a DynDNS Entry from the dropdown box. Or enter an IP address into the field Alternative. The option Redirect default gateway to remote site reroutes the whole internet traffic of the VPN user over the appliance. Click Save to start the download. fig. 181 settings for the OpenVPN client Securepoint Security Solutions 167 11 Menu Authentication Securepoint 10 11.3.6 Delete CA and Certificate You cannot delete the CA or certificates directly. You can only revoke them so they aren’t valid anymore. Revoked certificates are store as invalid, so nobody can use them for authentication anymore. Note: If you revoke a CA, all certificates which are signed with this CA, will be revoked too. Switch to the corresponding tab (CA or Certs). Click on the Trash Can symbol at the end of the row. Answer the security query with Yes. The CA or the certificate will get the status Revoked. The invalid files will be listed on the tab Revoked. fig. 182 revoked certificate in the tab Revoked Securepoint Security Solutions 168 11 Menu Authentication Securepoint 10 11.3.7 Tab CRLs On the tab CRLs the Certificate Revocation Lists are listed. These lists have the same name as the relating CA. If a certificate is revoked, it is stored in the CRL of the CA it is signed with. The lists can be exported. So other sites which are also use certificates of the appliance cab be informed of revoked certificates. Furthermore CRLs from other sites can be imported. This files must have the CRL format. Switch to the tab CRLs. All CRLs of self created CAs and imported CRLs are show on this tab. For export a CRL click the button with the disk symbol. The browser will open a dialog in which you can select the saving path. For import a CRL click the button with the label Import. Enter the whole path of the file into the appearing dialog or click Browse the search the file in the local system. Afterward click import. Importet CRLs can also be deleted. Click the button with the trashcan symbol to delete the relating CRL. Confirm the security question. fig. 183 tab CRLs Securepoint Security Solutions 169 12 Menu Extras Securepoint 10 12 Menu Extras In this section you will find options to customize the administration interface and functions for advanced users. fig. 184 dropdown menu extras name description CLI Command Line Interface Logging of the command line in- and output. Sending commands to the appliance. Update Firewall Update the firewall software and the virus database. Changelog Shows changes from one version to the previous version of the firewall software. Registration Upload the license file. Manage Cockpit Select the shown section windows and their positioning in the cockpit. Advanced Settings Opens a new browser window for configuration for experienced users. Refresh All Reads the configuration data of the firewall and reloads the cockpit. Refresh Cockpit Reloads the values of the cockpit. The button in the navigation bar offers the same function. Securepoint Security Solutions 170 12 Menu Extras Securepoint 10 12.1 CLI The command line interface (CLI) sends commands to the firewall software. Most functions of the administration interface are based on such commands. This section offers to log the in- and output of the CLI. Furthermore you can send commands directly to the firewall. 12.1.1 CLI Log On this tab you can activate the logging of the CLI in- and output. The logging is disabled by default. Send commands to the firewall are colored blue. Answers of the firewall are colored green. To enable the logging, activate the checkbox Enable CLI Log. The logging can always show the current entries. To enable this function activate the checkbox Enable autoscroll. fig. 185 CLI logging Securepoint Security Solutions 171 12 Menu Extras Securepoint 10 12.1.2 CLI Send Command In this tab you can send commands directly to the firewall. For this you have to use special CLI commands. For further information on these commands check the CLI reference which is available on the Securepoint website. Type the desired CLI command into the field CLI. Confirm the sending of the command with Send Command. The command and the answer of the firewall appear in the text window. fig. 186 send CLI command Securepoint Security Solutions 172 12 Menu Extras Securepoint 10 12.2 Updates You can update the firewall software and the virus pattern database at this menu item. The firewall will connect to the Securepoint Server and looks for new versions. Updates are only available with a valid license. fig. 187 dialog for updating firewall software and virus pattern database 12.2.1 Update the Firewall The version of the firewall software is given as a build number. First check if a newer version is available. An immediate update will not check the build number but rather updates the firewall with the same version number. The update stops all services and restarts the firewall. Therefore you should update the software only if a newer version is available. First click the button Check for Updates. The firewall checks the server for new versions. If the firewall answers that a new version is available, click Update. fig. 188 update firewall software Securepoint Security Solutions 173 12 Menu Extras Securepoint 10 12.2.2 Update Virus Pattern Database The virus scanner can be adapted immediately. If no newer version is available, the update will not be executed. If a new database is installed, the scanner will be restarted. The virus scanner checks every hour for updates automatically. Click Update. fig. 189 update virus pattern database 12.3 Changelog The function Changelog offers the possibility to show the changes of one version of the firewall software to the previous version. The published versions are listed in the dropdownbox. Go on the point Extras in the navigation bar and click the entry Changelog in the dropdownmenu. The dialog Changelog appears which shows the changes from the previous version to the actual version. To show changes of former versions, select the desired version from the dropdownbox and click Show. Note: Only changes form one version to the next version are shown. fig. 190 changes from one version to the next Securepoint Security Solutions 174 12 Menu Extras Securepoint 10 12.4 Registration Here you can upload your license file. If you don’t have a license yet, you can follow the hyperlink in the dialog to access the Securepoint website and register your appliance. Upload the license file like this: Click Browse and select the license file from your file system. Click Upload to upload the file. fig. 191 upload registration file Securepoint Security Solutions 175 12 Menu Extras Securepoint 10 12.5 Manage Cockpit This menu item offers the possibility to customize the cockpit. You can hide lists which are uninteresting for you. Furthermore you can position the lists to your needs. The dialog Manage Cockpit for user: x is divided into three sections. On the left the section Not displayed dialogs. Lists positioned here are not displayed. In the middle the section Display in Cockpit Left. Shown lists will be displayed on the left side of the cockpit. On the right the section Display in Cockpit Right. Shown lists will be displayed on the right side of the cockpit. You can move the list per Drag and Drop. You can manage the lists not only horizontally but also vertically. Store your settings with Save. fig. 192 customize the cockpit Securepoint Security Solutions 176 12 Menu Extras Securepoint 10 12.6 Advanced Settings This menu item opens a new browser window which offers settings for experienced users. You can for example edit the templates of all services and applications and read out the used variables. Note: Make only changes in this section if you know what you’re doing. An incorrect usage of these options can damag the correct functionality of the apliance or completely destroy the configuration. For these reasons following message is shown by opening the new browser window. fig. 193 warning by clicking menu item advanced settings 12.6.1 Buttons If you made changes in this section the changes will not take effect till you update the application, the interface or the rule. name description Update Applications Updates the applications and applies the changes. Update Interface Updates the interfaces and applies the changes. Update Rule Updates the rules and applies the changes. Save Config Stores the changes in the current configuration. Close Closes the browser window Advanced Settings. fig. 194 buttons in the window advanced settings Securepoint Security Solutions 177 12 Menu Extras Securepoint 10 12.6.2 IPSec You can disable the support of IKEv1 and IKEv2 for IPSec connections. If you disable both servers, IPSec connections cannot be established. To disable a server click the related button Off. To enable a server click the related button On. fig. 195 switch states of IKEv1 and IKEv2 servers Securepoint Security Solutions 178 12 Menu Extras Securepoint 10 12.6.3 Portfilter Make a setting for the allowance of IPSec connections. Activate the first checkbox to Accept all incoming IPSec. Activate the checkbox Allow related connections to allow iptables to accept all packets of existing connections per connection tracking. Store the settings with Save. For applying the rules immediately click the button Update Rules. fig. 196 edit portfilter settings Securepoint Security Solutions 179 12 Menu Extras Securepoint 10 12.6.4 Dialup LCP (Link Control Protocol) echo requests are used to control the existence of a connection. Several internet service providers don’t support this checking. For this you should disable the checking. To disable the checking deactivate the checkbox Support LCP Echo for PPPoE. Store your setting with Save. For applying the changes immediately click the button Update Interface. fig. 197 enable /disable the LCP echo request Securepoint Security Solutions 180 12 Menu Extras Securepoint 10 12.6.5 Templates On this tab you can edit all templates on the firewall. Select the application you want to edit from the dropdown list Applications. The firewall displays the depending templates in the dropdown field Templates. Select the template you want to edit from the dropdown box Templates. The template will be displayed in the section Template Content. Adjust the template for your needs. Store the changes with Save Template. For applying the changes immediately click the button Update Applications. fig. 198 edit template Securepoint Security Solutions 181 12 Menu Extras Securepoint 10 12.6.6 Variables On this tab you can show the template variables and their values. You can also add new variables. The added values just stay until a reboot of the appliance. Select the application from which you want to see the variables in the dropdown box Applications. The variables are shown in the window Entries. To show the value of a variable click on the loupe symbol in the related row. The value is shown in the window Entry Value Click trashcan symbol to delete the value. Beneath the dropdown box Applications is an entry field. To add a variable enter the name of the new variable in this field and click Add Entry. The changes are saved immediately and exist until the next reboot of the appliance. For applying the changes click the button Update Applications. fig. 199 show variables and their values Securepoint Security Solutions 182 12 Menu Extras Securepoint 10 12.6.7 Webserver On this tab you can change the port of the webserver for the user interface. By default the port of the webserver for SSL encrypted connections is 443. Enter the desired port into the field or use the arrow buttons to select the desired port. Store your changes with Save. For applying the changes click the button Update Applications. fig. 200 change the port of the webserver Securepoint Security Solutions 183 12 Menu Extras Securepoint 10 12.7 Refresh All This function reloads all data of the appliance and rebuilds the cockpit. So you can update data in the cockpit which are changed per CLI and not in the administration interface. 12.8 Refresh Cockpit This function reloads all data of the cockpit and rebuilds the cockpit. The button in the navigation bar has the same function. Securepoint Security Solutions 184 13 Menu Live Log Securepoint 10 13 Menu Live Log The Live Log shows the current log entries. For a clear view the entries are highlighted in different colors. Furthermore the logs can be filtered. name description Day Shows the day of occurrence. In the Live Logging the current date. Shows the protocol or the action additionally. Time Shows the time in hours, minutes and seconds. (hh:mm:ss) Service Shows which service is affected. Content Detailed log message. fig. 201 entries in the live log Securepoint Security Solutions 185 13 Menu Live Log Securepoint 10 13.1 Start Live Log When you enter the Live Log window the logging is out of action. You can also not enter any search pattern. To start the logging complete the following approach. Click on the icon Live Log in the navigation bar. A new browser window appears. Click the button Start logging at the right side above the table. The live logging starts. The text of the button turns to Stop logging. Click the button again to stop the logging. 13.2 Search function When you started the live logging, all events which are logged will be shown. If you look for something special, use the filter function. You find the filter function centered above the event table. The function works only, when the logging is active. Stop a running logging. Select a pattern from the dropdown box Filter pattern. o Time: Filters the entries by time. o Service: Filters the entries by service. o Content: Filters the entries by message text. Enter a search pattern into the right field. The search pattern is depended on the selected filter. o Time can be given in hours, minutes and seconds. Use colons as separators. For example: 13:16:09 ; 8:36:00 You can filter by hours and skip the minutes and the seconds. The entry must end with a colon. For example: 16: ; 9: You can filter by minutes and skip the hours and seconds. The entry must begin and end with a colon. For example: :27: ; :09:Service Securepoint Security Solutions 186 13 Menu Live Log Securepoint 10 o Service: If you filter by service you don’t have to know the service concretely. You can also use parts of words. For example: webserver ; server o Content: The content of protocol messages is very different. If you don’t know a concrete error message, you can search for an IP addresses. Start the log with Start logging. You can invert the filter. The filter will show all entries which don’t match the search pattern. To enable this option activate the checkbox Inverse filter on the tab Settings. By default the option Scroll automatically to the bottom is activated. New entries are appended to the list. So this option always shows the newest entries. 13.3 Tab Settings Here you can invert the filter. The filter will show all entries which don’t match the given search pattern. Furthermore you can define the number of entries. If the logging has more entries defined, here the oldest entries will be deleted. Changes on this tab can only be made if no logging is running. fig. 202 tab settings Securepoint Security Solutions 187 13 Menu Live Log Securepoint 10 13.4 Details of a Log Message If the automatic scrolling is disabled you can navigate through the log by the arrow keys on the keyboard. If you press the “enter“ key on a marked entry, a window with details of the log message is shown. This is also shown if you make a double click on an entry with the mouse. fig. 203 details of a log message Securepoint Security Solutions 188 13 Menu Live Log Securepoint 10 13.5 Raw Data Entries in the live log are conditioned Syslog messages. You can also display the Syslog messages. Click on the button Show raw data. The raw data of the current logging are shown. The logging is still running in the background. You can also download the raw data. Click on the button Download raw data. The data will be transferred in txt format. fig. 204 raw data of the log entries Securepoint Security Solutions 189 13 Menu Live Log Securepoint 10 13.6 Colored Labeling of the Service in the Live Log tag description Communication between Securepoint client and server Communication between dhcp-client and -server Communication dns; Domain Name Service; client <--> nameserver Communication dyndns-client <--> dyndns-provider Communication https-client <--> server or via https-proxy Communication http-client <--> server or via http-proxy Messages of the Intrusion Detection Systems Messages of the IPSec-service Messages of the L2TP-service Communication ntp; Network Time Protocol; ntp-client <--> server Communication pop3; Post Office Protocol 3client <--> server or pop3 via POP3 proxy Messages of the pppd-service Messages of the pptp-service Communication smtp Mail despatch Communication ssh; Secure Shell Protocol Messages by the virus scanner Communication VNC client <--> -server or via VNC-proxy Communication VoIP client <--> -server or via VoIP-proxy Interface-messages Alerts/warnings of the firewall and the IDS-system Drop; dropped data packages Accept; accepted data packages Reject; rejected data packages with the message Destination Unreachable Securepoint Security Solutions 190 Securepoint 10 Part 2 User Interface Securepoint Security Solutions 191 14 Login User Interface Securepoint 10 14 Login User Interface The user interface is useable for all users with the group membership User Interface in combination with Spam Filter Admin, SSL-VPN, SPUVA User or the possibility to change the password. The users can reach the user interface with their webbbroser over the IP address of the internal interface by using the HTTPS protocol. for example: https://192.168.175.1 If the users want to enter the user interface from outside the internal net (for example from the internet or the DMZ), the administrator has to create a firewall rule for reaching the internal interface from outside with the HTTPS protocol. Securepoint Security Solutions 192 14 The User Interface Sections Securepoint 10 14.1 The User Interface Sections The user interface has more sections. The user can access the sections depending on his group membership. fig. 205 login screen section description visible for groups Change Dialog to change the password. User Interface with possibility password Password length and characters to use accord- to change password (User ing to the settings in the user management. management à tab Extras) Shows all received e-mails and their classifica- User Interface with Spam tion into ham (desired e-mails) and spam (unde- Filter Admin Spam filter sired e-mails). Possibility for resorting of misclassified e-mails. Download ZIP archive which includes the portable SSL-VPN OpenVPN client, preconfigured configuration client file, CA and user certificate. SPUVA Login Central user authentication to login in to the sys- User Interface with SPUVA- tem. User Remote turn on the registered computers. User Interface with WoL Wake on Lan User Interface with SSL-VPN possibility Downloads Shows all downloadable applications and docu- User Interface ments on the appliance. Securepoint Security Solutions 193 14 Change Password Securepoint 10 14.2 Change Password This section is only visible for users which are authorized to change their password. Login in to the user interface. Click the button Change Password. The dialog Change Password appears. Enter your current password in the field Old Password. Enter your new password into the field New Password and retype it in the field Confirm Password. The password must meet the conditions which are shown in the section Password Restriction. Click Change Password. fig. 206 change password Securepoint Security Solutions 194 14 Download SSL-VPN Client Securepoint 10 14.3 Download SSL-VPN Client If the user is member of the groups User Interface and SSL-VPN and if the administrator has made settings for the VPN client for this user, he is able to download the SSL-VPN client in this section. Login in to the User Interface. Click on the button Download SSL-VPN Client to start the download. Select in the browser dialog the option Save File (or accordingly). The downloaded file is a packed ZIP archive including the portable OpenVPN client, a preconfigured configuration file and the needed certificates. fig. 207 save dialog of the Mozilla Firefox Decompress the ZIP archive and save the directory on your computer or on an USB flash drive. Open the directory. Doubleclick the file OpenVPNPortable.exe. The OpenVPN client starts. The OpenVPN client icon appears in the taskbar beneath the clock. Click it with the right mouse button. The context menu appears. Start the SSL-VPN connections by clicking Connect. fig. 208 context menu of the VPN client in the taskbar Securepoint Security Solutions 195 14 Spamfilter Securepoint 10 14.4 Spamfilter If the user is a member of the groups User Interface and Spam Filter User he can access the Spam filter interface The user can check which e-mails were classified as spam or ham by the system. If he finds e-mails which are misclassified as spam, he can mark them as ham. It is important to move not identified spam mails from the ham section into the spam section to train the adaptive filter (Bayes filter). The spam filter interface only shows e-mails, if the spam filter is activated. 14.4.1 Overview over the spam filter interface The mails are ordered by time (the newest at top). fig. 209 sections and functions of the spam filter Securepoint Security Solutions 196 14 Spamfilter Securepoint 10 Section Description 1 Tabs The display is divided in different sections. Ham shows identified desired e-mails. Spam shows identified undesired e-mails. Trash shows deleted e-Mails (deleted by the Spam Filter User). Statistics shows a diagram of ham and spam e-mails in dependence on the country of origin Click on the tabs to change the view. 2 Filter With the filter you can sort the list by: Sender, Recipient, Subject, Country, SMTP, POP3, Virus, Blocked For some criteria a pattern is needed. Insert the pattern in the input field. Execute the filter by clicking on Filter. You can reset the selection by clicking on Reset. 3 Navigation The display shows 10 entries per side. With the buttons back and next you can scroll through the pages. With the buttons first page and last page you can jump to the first or to the last side. 4 Action You can choose an action (mark as ham/spam, delete, irrevocable delete) for all checked e-mails (activated checkbox in the first column). With the action Select all e-mails you can check or uncheck all emails shown on this page. The action will be executed when you click on Execute. 5 Refresh With the button Refresh the page will be reloaded. Securepoint Security Solutions 197 14 Spamfilter Securepoint 10 14.4.2 Columns of the Table name description first column Activate the checkbox to mark the e-mail. Already marked e-mails will be unchecked if you click the checkbox again. Date Status Date and time of the e-mail. E-mail type (SMTP or POP3 ). Shows a symbol if the e-mail contains a virus. In the tab Spam is shown which filter has detected the e-mails as spam mail. Bayes filter Commtouch filter From Sender of the e-mail. To Recipient of the e-mail. Subject Subject of the e-mail. fig. 210 columns in the tab Ham Securepoint Security Solutions 198 14 Spamfilter Securepoint 10 14.4.3 Details of an E-mail The Spam Filter User can take a look at the content of an e-mail. The content and the attachments are only displayed if these options are activated in the spam filter settings. Otherwise only the e-mail header is shown. Note: Showing the content of an e-mail may violate the data privacy. Notice the data protection act of your state. Activate the detailed view with a doubleclick in the row of the desired e-mails. Attachment of the mail will be displayed as a hyperlink in the row at the bottom of the window. Click on the hyperlink to download the attachment. fig. 211 view of details Securepoint Security Solutions 199 14 Spamfilter Securepoint 10 14.4.4 Action on the Tab Ham You can execute the following actions on the e-mails: Mark selected e-mails as spam Marks the selected e-mails as spam and moves them to the tab Spam. Delete selected e-mails Moves the marked e-mails to the tab Trash. Resend selected e-mails Sends the marked e-mails again. Select all e-mails Marks all e-mails on this tab. Delete all e-mails Moves all e-mails on this tab to the tab Trash. Resend all e-mails Sends all e-mails on the tab again. fig. 212 actions on the tab Ham Securepoint Security Solutions 200 14 Spamfilter Securepoint 10 14.4.5 Action on the Tab Spam You can execute the following actions on the e-mails: Mark selected e-mails as ham Marks the selected e-mails as ham and moves them to the tab Ham. Delete selected e-mails Moves the marked e-mails to the tab Trash. Resend selected e-mails Sends the marked e-mails again. Mark all e-mails as ham Marks all e-mails on this tab as ham and moves them to the tab Ham. Delete all e-mails Moves all e-mails on this tab to the tab Trash. Resend all e-mails Sends all e-mails on the tab again. fig. 213 actions on the tab spam Securepoint Security Solutions 201 14 Spamfilter Securepoint 10 14.4.6 Actions on the Tab Trash You can execute the following actions on the e-mails: Mark selected e-mails as ham Marks the selected e-mails as ham and moves them to the tab Ham. Mark selected e-mails as spam Marks the selected e-mails as spam and moves them to the tab Spam. Delete selected e-mails permanent Deletes the marked e-mails irrevocably. Resend selected e-mails Sends the marked e-mails again. Mark all e-mails as ham Marks all e-mails on this tab as ham and moves them to the tab Ham. Mark all e-mails as spam Marks all e-mails on this tab as spam and moves them to the tab Spam. Delete all e-mails permanent Deletes the e-mails on this tab irrevocably. Resend all e-mails Sends all e-mails on the tab again. fig. 214 Actions on the tab trash Securepoint Security Solutions 202 14 Spamfilter Securepoint 10 14.4.7 Tab Statistic On this tab the ratio of spam and deleted e-mails to ham e-mails is shown graphically. Further diagrams show the numbers of mails depending on their origin. 14.4.7.1 Filter With the filter function above the diagram all statistics can be displayed for different time intervals. Select the interval from the dropdown box. Possible intervals are: o Today o Yesterday o Last week o Last month Click Refresh to reload the diagram. fig. 215 select intervall Securepoint Security Solutions 203 14 Spamfilter Securepoint 10 14.4.7.2 Tab General On this tab a diagram shows the total number of ham e-mails, spam e-mails and deleted emails. The blue lines clarify the total amount of every bar on the y-axis. The legend on the right side shows the numbers of every section and the percentage. fig. 216 tab general 14.4.7.3 Tab Virus On this tab a diagram shows the total number of virus infected e-mails. The blue lines clarify the total amount of every bar on the y-axis. The legend on the right side shows the numbers of every section and the percentage. fig. 217 tab virus Securepoint Security Solutions 204 14 Spamfilter Securepoint 10 14.4.7.4 Tab Top Level Domain On this tab a diagram shows from which state the e-mails are received. The statistic is split into ham e-mails, spam e-mails and deleted e-mails. fig. 218 tab top level domain Securepoint Security Solutions 205 14 SPUVA Login Securepoint 10 14.5 SPUVA Login The Securepoint User Verification Agent (SPUVA) gives users individual rights on computers in the DHCP environment. The user authenticates against SPUVA and gets an individual security policy for any workstation in the network. If the user changes his workplace, he will get the same security policy at the new workplace automatically. Login in to the user interface. Click on the button SPUVA Login. A new browser window appears in which a Java applet is starting. Confirm the security query for starting the applet. The java applet can only be executed if the Java Runtime Environment is installed. If it isn’t installed visit the website http://www.java.com . Enter your user name into the field User and your password into the field Password. Click Connect to login in to the system. If the login was successful, the button text changes to Disconnect. Click this button for Logout. You also logout from the system by closing the applet window. If the login wasn’t successful the text “Wrong username/password” appears. fig. 219 SPUVA login per Java applet Securepoint Security Solutions 206 14 Wake on LAN Securepoint 10 14.6 Wake on LAN This section is only visible for users which are authorized to use the Wake on LAN function. The user can start registered computers remotely. The user can access the remote computer if according rules are defined. This function must be supported by the comuter. The settings for this function are made in the BIOS or at the network adapter settings. Click on the button Wake on LAN in the User-Interface. The dialog Wake on Lan appears. Here are all computers listed which you allowed to start. Click on the button with the start symbol started. . The related computer will be fig. 220 start remote computer Securepoint Security Solutions 207 14 Download Section Securepoint 10 14.7 Download Section Every user who is member of the group User Interface can access the download section. The download section offers files and documents which are stored on the appliance. The hyperlink is positioned in the first column of the list. The second column contains the version of the file and the third column contains a short description of the file. Login in to the user interface. Click the button Download. Click on the hyperlink in the first column to start the download. Click on Save (or according) in the browser query. The download will begin. fig. 221 available donwloads Securepoint Security Solutions 208 15 Download Section Securepoint 10 15 Zone Concept of the Securepoint Firewall To every interface of the appliance one zone or several zones are assigned. For example: To the internal interface the zone internal is assigned and to the external interface the zone external is assigned. For the rule set of the firewall, the administrator has to create network objects (IP addresses or networks) and assign one zone to every network object. This action defines behind which interface a network object is positioned. A well known attack scenario on a router is to fake a sender IP address (IP Address Spoofing). If the attacker uses a sender address from the internal network and the packet is send from a wrong zone (for example: external) the packet will be dropped automatically on the basis of the zone concept. The administrator doesn’t have to create anti spoofing rules. Internet Zone: external FW zones: firewall-external; vpn_ipsec/ vpn-ppp Zone: DMZ1 FW zone: firewall-DMZ 1 FW zone: firewall-DMZ 2 - n Zone: DMZ2 to DMZn FW zone: firewall-internal Zone: internal fig. 222 zone concept of the Securepoint firewall Securepoint Security Solutions 209 15 Download Section Securepoint 10 The zone concept is designed in two parts: The firewall zones and the group zones. The firewall zones contain the zones: firewall-internal, firewall-external and firewall-dmz. These zones are provided for the interfaces of the appliance. A group zone is assigned to one firewall zone. For example: The group zone internal is assigned to the firewall zone firewall-internal with the internal interface. In the group zones computers and networks are positioned, which are connected with the firewall by the related interface. The VPN zones are provided for VPN computers and networks. These are assigned to the external interface too, but they are different from the devices of the zone external because they connect the appliance by a secure tunnel. Zones can only be assigned once. If you want to use two interfaces for the internal net, you have to create a new zone for the second internal net. Securepoint Security Solutions 210