1
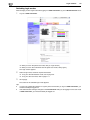
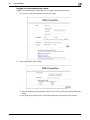
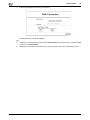
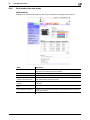
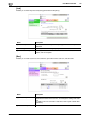
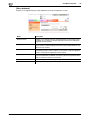
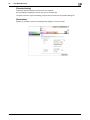
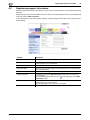
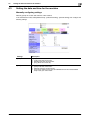
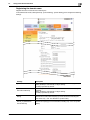
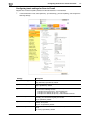
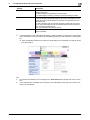
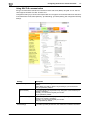
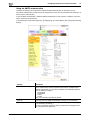
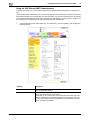
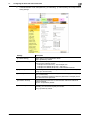
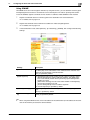
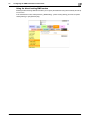
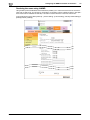
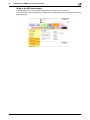
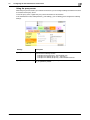
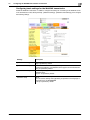
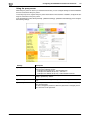
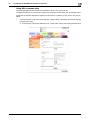
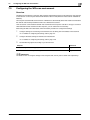
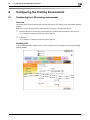
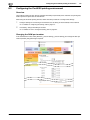
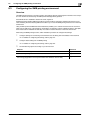
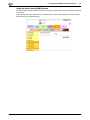
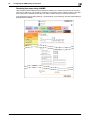
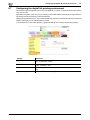
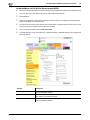
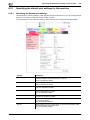
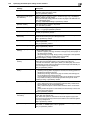
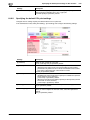
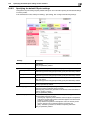
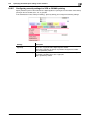
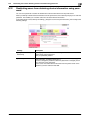
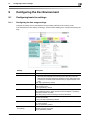
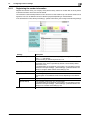
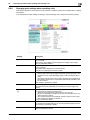
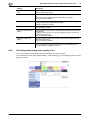
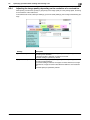
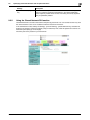
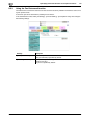
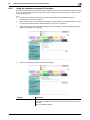
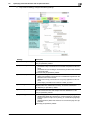
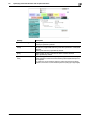
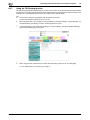
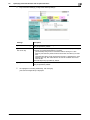
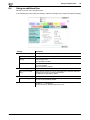
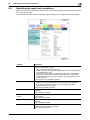
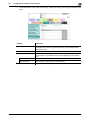
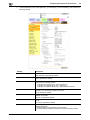
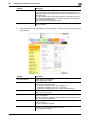
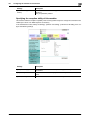
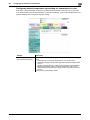
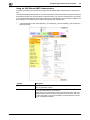
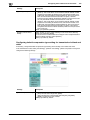
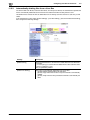
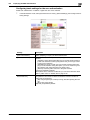
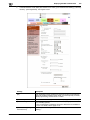
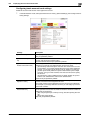
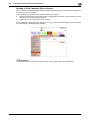
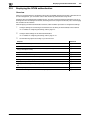
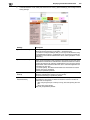
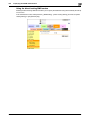
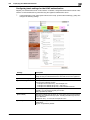
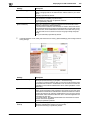
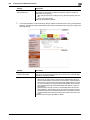
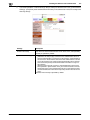
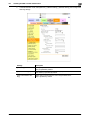
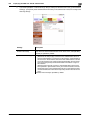
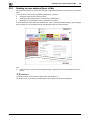
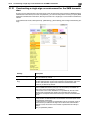
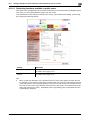
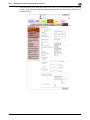
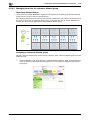
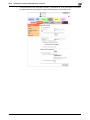
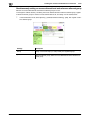
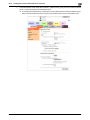
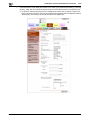
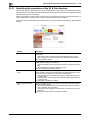
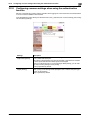
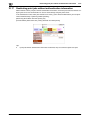
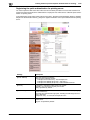
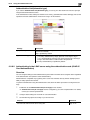
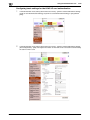
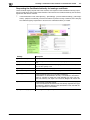
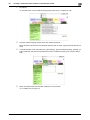
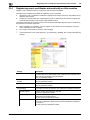
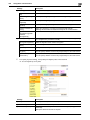
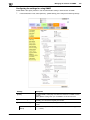
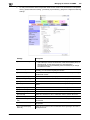
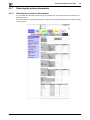
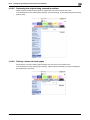
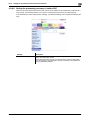
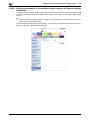
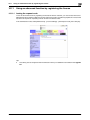
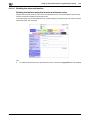
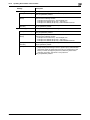
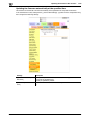
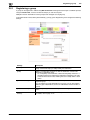
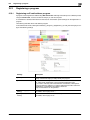
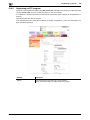
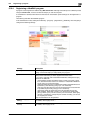
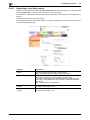
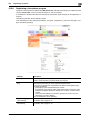
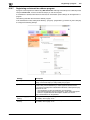
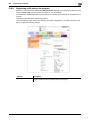
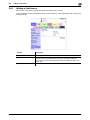
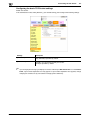
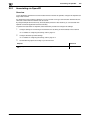
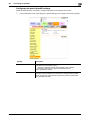
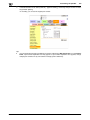
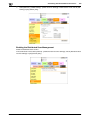
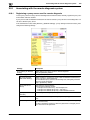
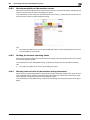
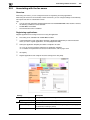
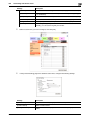
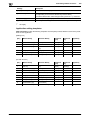
8.8
Configuring the NetWare printing environment
Settings
8
Description
[Print Server Name]
Enter a print server name to enable Pserver (using up to 63 characters, excluding /, \, :, ;, ,, *, [, ], <, >, |, +, =, ?, and .).
Enter the print server name registered in the NWadmin.
[Print Server Password]
If necessary, enter a print server password (using up to 63 characters).
[Polling Interval]
Set a job inquiry interval.
[1] sec. is specified by default.
[Bindery/NDS Setting]
[NDS] should be selected.
[NDS] is specified by default.
[NDS Context Name]
Enter an NDS context name for print server connection (using up to 191
characters, excluding /, \, :, ;, ,, *, [, ], <, >, |, +, =, ?, and .).
[NDS Tree Name]
Enter an NDS tree name for print server connection (using up to 63 characters, excluding /, \, :, ;, ,, *, [, ], <, >, |, +, =, ?, and .).
For NetWare 5.x/6 Novell Distributed Print Service (NDPS)
0
0
0
Before starting the NDPS setting, make sure that an NDPS broker and NDPS manager have already
been created and loaded.
Check that TCP/IP protocol is configured in the NetWare server.
Check that this machine starts and an IP address is assigned.
1
From the client, log in the NetWare file system with administrator authority.
2
Start NWAdmin.
3
Right-click the [Organization] and [Organization unit] containers for printer agent creation, and select
[NDPS Printer] from Create.
4
Enter a [NDPS Printer Name] in the [Printer Name] field.
5
Select [Create a New Printer Agent] in the [Printer Agent Source] field, and click [Create].
6
Confirm the printer agent name, and browse and register the NDPS manager in the [NDPS Manager
Name] field.
7
Set the [Gateway Types] to [Novell Printer Gateway], and register it.
8
In the [Configure Novell NDPS for Printer Agent] screen, set the Printer to [(None)] and the port hander
to [Novell Port Handler], and register the settings.
9
Set [Connection type] to [Remote (LPR on IP)], and register the setting.
10
For the host address, enter the IP address of this machine you have configured. Enter [Print] for the
printer name, then press [Finish].
Display the registration window of the printer driver.
11
On the registration window for the printer driver, select [(None)] for both OS and finish registration.
d-Color MF552/452/362/282/222
8-27


![User's Guide [Network Scan/Fax/Network Fax Operations]](http://vs1.manualzilla.com/store/data/006858172_1-5457135f625fcbd0fd36870e9109a5b2-150x150.png)