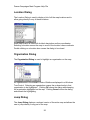
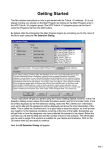
1
Panzer Campaigns Main Program Introduction This help file covers the features and functionality of the Main Program of the Panzer Campaigns series of games. All menus and dialogs associated with the Main Program are covered in this help file. For further information on the game system and editors, you should review the following help files: • Panzer Campaigns User Manual • Scenario Editor • Order Of Battle Editor This manual last updated: April 24, 2011 The Menus File Menu The File Menu is used to start new battles, save battles, and open existing battle files. Selecting New will display a File Open dialog so that a new battle can be started from a Scenario file. Note that Scenario files have the extension scn by default. Selecting Open will display a File Open dialog so that an existing battle can be opened. Note that Battle files have the extension btl by default. Selecting Save will cause the current battle to be saved to a Battle file. If the current battle does not already have a filename, you will be prompted with the File Save dialog to specify one. Note that the use of the Auto Save option from the Settings Menu greatly reduces the need to use this function. Selecting Save As will display a File Save dialog so that a new filename can be specified for the current battle. Use this function if you want to avoid overwriting an existing Battle file. Selecting File Selection will display the File Selection Dialog. Selecting Shapshot allows you to save a copy of the current battle screen to a Windows BMP graphics file. You will be prompted for the name of the file. Selecting Replay will display a File Open dialog so that a Replay file can be read and replayed. Replay files are created using the Record Battle option of the Mode Menu. By default Replay files have the extension btr. Selecting Exit will close the main program. If the current battle is unsaved, you will be prompted to save it. Turn Menu The Turn Menu is used to advance the current battle to the next turn. Note: when playing a game using the Manual Defensive Fire Optional Rule, the Turn Menu will become the Phase Menu and will advance the current battle to the next phase. 2 Panzer Campaigns Main Program Help File Selecting Next will advance the current battle to the next Turn. If the Auto Save option of the Settings Menu is set, then the battle will be saved before advancing the turn. If no filename has been specified for the current battle, this will also cause a File Save dialog to be displayed so that this filename can be entered. Note that since the Auto Save option saves the battle before advancing the turn, it is possible to back-up to the previous turn by using Open from the File Menu and opening the Battle file after declining to save the current battle. When the Turn or Phase is advanced, the Command Dialog is displayed indicating information about the battle to the current player. If you have any reinforcements that have arrived, but have not been placed, then advancing the turn will cause you to be prompted to place these reinforcements. Also, if you have any A/I Orders that have not been carried out for that turn, then advancing the turn will automatically cause them to be carried out. When playing Multi-Player Network play, only the Commander of each side can advance the turn. When any other player of that side selects Next, it will indicate that the player is ready to finish the turn by displaying the player name in red in the Multi-Player Dialog. Command Menu The Command Menu is used to perform certain functions on units such as changing Travel Mode or facing. Selecting To Top of Stack will move the currently selected units in the current Hot Spot to the top of the stack. Selecting To Bottom of Stack will move the currently selected units in the current Hot Spot to the bottom of the stack. Selecting Turn Clockwise will turn the currently selected units clockwise. Selecting Turn Counterclockwise will turn the currently selected units counterclockwise. Selecting Change Travel Mode will change the Travel Mode of the currently selected units. Selecting Change Rail Mode will change the Rail Mode of the currently selected units. 3 Selecting Save Movement Costs will preallocate enough Movement Points so the unit will not use so many Movement Points in movement that it will be unable to fire, or in the case of limbered towed artillery, unable to deploy. Doing this before moving a unit allows you to move the unit to the full extent of their available movement points knowing that you will still have enough Movement Points at the end of the movement to fire or unlimber. Selecting Toggle Digging-In will toggle the Digging-In status of the selected units. Digging-In is used to construct Improved Positions and Trenches. Selecting Damage Rail will cause the first selected unit to damage any rail lines in the current Hot Spot hex. Select Combine/Breakdown to combine the selected units into a single Combined Unit or to breakdown a Combined Unit into a subunit. Note: holding down the Alt key when selecting this option will cause all possible units in the current hex to be Combined regardless of which units you have selected. Selecting Recon Spotting requires that the Recon Spotting Optional Rule first be enabled. Then with one or more recon units selected, this command will attempt to spot enemy units within the Line-of-Sight of the selected units at the cost of 1/3 of the movement allowance of the units. The probability of spotting the enemy units will depend on the distance from the recon unit to the enemy unit, the terrain that the enemy unit is in, the strength of the recon unit, and its quality and fatigue. Note: Recon units are designated as such in the alternate Unit Box display. Selecting Go On Foot will convert selected Mechanized or Motorized Infantry units to the On Foot status where they will be treated as foot infantry. Selecting the Toggle Patrolling option will toggle the Patrolling state of the selected units. Selecting Remove From Map will remove the selected units from the map. This can only be done from a boundary hex on the map. This function is most often used in conjunction with Exit Objectives. Selecting Artillery Dialog causes the Artillery Dialog to be displayed. Selecting Air Mission is used when you want to conduct an Air Mission in the current Hot Spot hex. You will be prompted for the air unit to use for this mission. Air Missions can be combat missions that attempt to destroy enemy units in the Hot Spot hex, or recon missions using recon aircraft. Selecting Undo Last Movement will undo the last move made and return the units that were moved to their starting location. Note to avoid information leaks, this function is not available when Fog of War is in effect. 4 Panzer Campaigns Main Program Help File Engineer Menu The Engineer Menu is used to perform engineering functions such as mine clearing and building bridges. See the Engineers section of the Users Manual for more information. Selecting Bridge Operations will toggle the Bridge Operations status of selected Engineer units. Bridge Operations are initiated when the Engineer unit is adjacent to a River hexside or a full Water hex. You will be prompted for the River hexside or full Water hex the bridge is to be constructed on. Selecting Clear Mines or Rubble will toggle the Clearing Mines or Clearing Rubble status of the selected Engineer units. Note that all Engineer units can clear Rubble, but that only units flagged as Mine Clearing can clear Mines. Selecting Lay Mines will toggle the Laying Mines status of the selected Engineer units. Selecting Damage Bridge or AT Ditch will cause the selected Engineer units to attempt to damage an adjacent bridge or AT ditch. You will be prompted for the bridge or AT ditch to attempt to damage if there are multiple bridges or AT ditches. Selecting Abandon Bridge to cause the selected Engineer units to abandon a bridge built across an adjacent River hexside. The Engineer units will be unable to build another bridge for the duration of the scenario. Assault Menu The Assault Menu is used to perform functions relative to assault attacks against enemy hexes. Selecting Begin Assault will initiate an assault against the current Hot Spot hex. You would then add attacking units using the Add to Assault feature below. Alternatively, you can both define the target hex and add units to the assault using drag-and-drop by dragging the mouse from the hex containing the selected units to the target hex and releasing it. Selecting Clear Assault will reset any assault which has been partially setup but not yet resolved. Use this function when you change your mind about an assault and want to try something else. 5 Selecting Add to Assault will add the currently selected units to the current assault. Alternatively, you can add units to an assault using drag-and-drop by dragging the mouse from the hex containing the selected units to the target hex and releasing it. Selecting Resolve Assault will resolve the current melee and display the results. Selecting Show Odds will display the odds of the current assault which shows the advantage or disadvantage held by the attacking player. Units Menu The Units Menu is used to view and place reinforcements and to view other data associated with the current scenario. Selecting Scheduled displays the Scheduled Dialog which shows the reinforcements scheduled for the current battle. Selecting Arrived displays the Arrived Dialog so that units that have arrived as reinforcements can be placed on the map. Selecting Releases displays the Release Dialog so that Releases of Fixed units can be viewed. Selecting Air Availability displays the Air Availability Dialog which displays changes in air availability associated with the current scenario. Selecting Corps Attachments displays the Corps Attachment Dialog so that the Corps Attachments defined for the current side can be viewed, added, and deleted. Selecting Supply Variations displays the Supply Variation Dialog so that the Supply Variations defined for the current scenario can be viewed. Selecting Withdrawals displays the Withdrawal Dialog so that the Withdrawals associated with the current scenario can be viewed. Selecting Deception Units displays the Deception Unit Dialog so that Deception Units that exist in the current scenario can be deployed. 6 Panzer Campaigns Main Program Help File Selecting Strategies displays the Strategy Dialog so that any Reinforcement Strategies defined for the current scenario can be viewed. Info Menu The Info Menu is used to display summary information about the current scenario such as the strength of on-map units and the ownership of map objectives. Select Strength to display the Strength Dialog. This will show the total strength of all on-map units in the current scenario. Select Objectives to display the Objectives Dialog to see a complete list of all of the Objectives associated with the current scenario. Select Supply Sources to display the Supply Sources Dialog to see a complete list of all of the Supply Sources associated with the current scenario. Select Removed Units to see a list of units which have been removed from the map during the current turn. Selecting Victory displays the Victory Dialog showing the current Victory conditions. Selecting Last Command Report will redisplay the Command Dialog so that the last command report can be viewed. Selecting Weather will display a report showing the current weather conditions and visibility. If the Programmed Weather optional rule is in effect, then the weather forecast for tomorrow will be displayed. View Menu The View Menu is used to establish display settings such as the map display resolution and the display of various scenario on-map data such as objectives. 7 Select Units Off to hide the units that are currently on the map. This is used when you need to see map details that are hidden by the units. Select Unit Bases Off to hide the unit bases that are drawn in 3D graphics mode. Select Objectives to toggle the display of Objectives on the main map and also on the Jump Dialog. Select Supply Sources to toggle the display of Supply Sources on the map. Select Locations to display the Location Dialog. This displays a list of all the map locations. Select Full Screen Map to toggle the display of the Hex Info Area. When the Hex Info Area is hidden, more of the map is displayed. Select Map Contours to toggle the display of contours on the map that show elevation changes. This can be used to see elevation changes more clearly, especially in 3D graphics mode. Select Show Organization to display the Organization Dialog in order to display organizations on the map. Select Find Unit to display the Find Unit Dialog. Using this dialog, you can find any leader or unit that is currently on the map. Select Jump Dialog to display the Jump Dialog which enables you to quickly go to any location on the map. Select Divisional Markings to toggle the display of color bars on each counter indicating the Division or other higher level organization the unit is associated with. Select Special Markers On Top to toggle the display of special markers such as fortifications on top of the unit stack instead of underneath. Select A/I Orders to toggle the display of A/I Orders on the screen. If a particular organization is highlighted, then only the A/I Order for that organization is shown. Select Local Supply Values to toggle the display of Local Supply Values on the map. These values are described in the section on Supply in the Users Manual. Select Area Boundaries to toggle the display of area boundaries on the map as yellow lines. Note: this feature has not yet been implemented in a Panzer Campaigns game, but will be in a future release. Select Shade to display the Shade Submenu described below. Select Highlight to display the Highlight Submenu described below. Select 2D Magnified View (Hot Key 5) to display the map in magnified 2D graphics mode. 8 Panzer Campaigns Main Program Help File Select 2D Normal View (Hot Key 2) to display the map in normal size 2D graphics mode. Select 2D Zoom-Out View (Hot Key 1) to display the map in reduced size 2D graphics mode. Select 3D Normal View (Hot Key 4) to display the map in normal size 3D graphics mode. Select 3D Zoom-Out View (Hot Key 3) to display the map in reduced size 3D graphics mode. Normally the screen is recentered on the Hot Spot hex when you change zoom modes. If you hold down the Alt key when you change zoom modes, the screen will retain the current view. The Shade Submenu allows hexes on the map to be shaded according to certain criteria. Selecting a mode that has already been selected turns that mode off. Select Visible Hexes to shade all hexes that are not visible from the current Hot Spot hex. This option can also be invoked using the Visible Hexes button on the Toolbar. Select Reachable Hexes to shade all hexes that are beyond the movement range of the current selected unit. This option can also be invoked using the Reachable Hexes button on the Toolbar. Select Command Range to shade all hexes that are beyond the Command Range of the currently selected Headquarters unit. Select Target Hexes to shade all hexes that cannot be fired upon by the currently selected unit. As an alternative to Target Hexes, you could display Maximum Range to see how far a unit could fire. The difference between Target Hexes and Maximum range is determined by Line-of-Sight or the presence of a spotting unit for Artillery Indirect Fire. This is best seen in games where the Optional Rule "Indirect Fire and Air Strikes by Map" is not used. For HQ units, this option shows the Nominal Command Range of the unit. Select Air Strike Limits to shade all hexes that have reached their Air Strike Hex Limit for this player turn. Select Protected Hexes to shade all hexes that are within the protected range of future enemy reinforcements. The protected hexes feature is used to prevent reinforcements from being blocked and you should avoid moving into these protected hexes as your units may be Broken or eliminated when the reinforcements arrive. The Highlight Submenu displays a list of unit types and status values that may be selected to Highlight certain units on the map. Selecting any of these modes turns off any other highlighting mode that has been set. Selecting a mode that has already been set turns that mode off. 9 Select Fixed Units to Highlight units on the map which are currently Fixed. Select Spotted Units to highlight units on the map which are current Spotted by enemy units. Select Low on Ammo or Fuel to highlight units on the map that currently have reduced ammo or fuel. Select Units Using Movement Points to highlight units on the map that have Fired, Assaulted, Moved, or taken some other action using Movement Points, in the current turn. Select Disrupted or Broken Units to highlight units on the map that are currently Disrupted or Broken. Select Headquarters to highlight headquarter units on the map. Select Engineer Units to highlight Engineer, Mine Clearing, and Bridge Building units on the map. Select Detached Units to highlight units that started the turn beyond the Command Range of their commanding headquarters unit. Select High Fatigue Units to highlight units on the map that have a Fatigue value of 200 or more. Select Isolation Units to highlight units on the map that are Isolated . Select Non-Full Strength Units to highlight units on the map whose strength value is less then their nominal full-strength value. Select Single Use Units to highlight Single Use units on the map. Select Organization to highlight all units of the same organization as the top selected unit in the Hot Spot. For example, selecting an infantry unit in a Regiment and then choosing this Highlight option will cause all units in the same Regiment to be highlighted. Selecting a headquarters and then this option will cause all units under the command of the selected headquarters to be highlighted. Holding the Alt key while making this selection causes the next higher organization to be highlighted. When a unit capable of Indirect Fire is selected, then select Indirect Fire Spotters to highlight all units on the map that can act as spotters for fire from that unit. Select Road Stacking Limits to highlight all stacks of units on the map that exceed the Road Movement stacking limit. Select Commanded Units to highlight units that are under your command in Multi-Player Network play. A/I Menu The A/I Menu is used to control the Artificial Intelligence settings of the current battle. 10 Panzer Campaigns Main Program Help File Each side, Allied and Axis, can be set to one of four possible A/I settings. Select Manual to turn off all A/I for a side. This mode is used if you want to perform all of the movement and combat for the side. Select Automatic to turn on the A/I for a side. In this mode, the computer will perform all movement and combat for that side. Select Automatic with Fog-Of-War to establish Automatic A/I with Fog-Of-War for a side. Under this selection, enemy units not in your line-of-sight and other information about the enemy will not be displayed. Select Set Advantage to display the Advantage Dialog so that the Advantage value for the current battle can be viewed and possibly modified. Select Activate A/I to resume the A/I after it has been stopped. This is also used to resume A/I processing after a battle that was in the middle of an A/I controlled turn has been reopened. Note that attempting to advance the turning an A/I controlled turn will also cause the A/I to resume. Select Activate A/I Firing if you want the computer to perform firing operations automatically for you, but you do not want the computer to move your units. Select Activate A/I Movement to have any A/I Orders you have defined to be carried out. Note: if you have any A/I Orders, they are automatically carried out at the end of the turn. Select View/Delete A/I Orders to display the A/I Order Dialog so that A/I Orders can be reviewed and deleted if desired. Select Fast A/I Processing to toggle a mode where the A/I turn is performed as quickly as possible and with sound effects turned off. This setting is the same as the mode you get by pressing the F8 hot key. Mode Menu The Mode Menu is used to select special modes such as Network Play and Play-By-E-Mail (PBEM). 11 Select Direct-Play Host to initiate Network Play as the Host player. Select Direct-Play Caller to initiate Network Play as the Client player. See the section on Network Play in the User Manual for more information on this feature. Select Play by E-Mail to place the main program in a mode for Play-By-E-Mail (PBEM). See the section on Play-By-E-Mail in the User Manual for more information on this feature. Select Two-Player Hot Seat to place the main program in a mode where two people can play a game on the same computer with each playing under Fog of War. In this mode, the main program will prompt before changing sides so that the appropriate person can take their place at the computer while the other looks away. Select Record Battle to begin recording the turns of the current battle. You will be prompted with a File Save dialog to specify the filename of the recording. By default recorded battles are stored in files with the extension btr. After you are through recording a battle or portion of a battle, you can terminate the recording by reselecting the Record Battle option. Once you have recorded a battle, you can replay it by using the Replay feature of the File Menu. Note that when you replay a battle, the perspective of the replay is that of the opposing side. That is, if you replay a battle that has been played using Automatic A/I with Fog-Of-War, you will see the battle from the perspective of the computer player. A battle replay can be paused by pressing the Escape key and can be resumed by using the Restart Replay feature described below. Select New Encryption Key if you are the Caller in Network Play and you want to specify a new encryption key to be used for the current battle. Select Resync with Remote if you are using Network Play and you suspect that the two computers have become out of sync with respect to the current battle. The player that chooses this option will cause their copy of the battle to be copied to the other computer. Note: since the current implementation of Network Play uses Microsoft’s Direct Play technology, this feature should rarely be necessary. Select Restart Replay to restart a battle replay that has been paused through the use of the Escape key. Select Communication Dialog to redisplay the Comm Dialog if it has been closed. 12 Panzer Campaigns Main Program Help File If you are the Modem Host, then select Set Multi-Player Timer to display the Timer Dialog. This allows you to establish a timeout value during Network Play to ensure that everyone completes the phase in the specified number of minutes. After the specified number of minutes, the phase will automatically be advanced. To disable this feature, set the timeout value to 0. While the timer is running, the timeout status will be displayed in the Status Bar. When the there is still at least a minute left in the current phase. indicator is green there is less than 1 minute left. The When the indicator turns yellow indicator will turn red when control passes to the other side. When the there is less than 1 minute left in the opposing side’s indicator turns orange phase. Select Multi-Player Dialog… to display the Multi-Player Dialog. This is used to see who is participating in the current Network Play game and to see and change their current assignments. Select Scroll to View Enemy Action to toggle the setting that causes the window to scroll whenever an enemy unit moves, fires, or melees. This feature is on by default, but automatically turned off whenever there is more than one enemy player in Network Play. Settings Menu The Settings Menu is used to select certain settings that are saved when the main program is exited and restored the next time the main program is run. These options are stored in the Windows Registry. 13 Selecting the Introduction causes the main program to play the introduction including introduction video, and game cover art. Selecting the Prompt for Scenario option causes the main program to prompt you for a new scenario using the File Selection Dialog when the main program is run. Selecting the Beep on Error option causes the main program to generate a beeping sound whenever you perform an invalid operation. Selecting the Blink Hot Spot option causes the red outline in the Hot Spot hex to blink whenever the map is in a 2D graphics. Selecting the Smooth Scroll option causes the map to scroll smoothly from one part of the map to another whenever the Hot Spot is relocated. With this option turned off, the map display will immediately relocate resulting in faster operation. Selecting the Auto Scroll option puts the map in a mode where moving the mouse cursor to any edge of the screen will automatically scroll the map in that direction. When this option is turned off, normal Windows scroll bars are displayed when the map is larger than the screen area. Selecting the Wheel Zoom option will cause the map to zoom using the mouse wheel. Selecting the Sound Effects option causes the main program to play sound effects during combat. Selecting the Movement Sounds option causes the main program to play movement sounds when units are moving. Selecting the Background Sound option causes the main program to play background sounds during each player’s turn. Selecting the Graphical Unit Icons option causes graphical icons to be used in the display of 2D counters. With this option turned off, schematic icons are used. Selecting the Hex Outlines option causes outlines to be drawn around the hexes in both 2D and 3D graphics mode. Selecting the Auto Save option causes the main program to automatically save the current battle when the phase is advanced, except when the phase is under the control of Automatic A/I. Note that the battle is saved just prior to advancing the phase, so it is possible to reopen the battle file and restore the battle to the previous phase when the phase is inadvertently advanced. Selecting the Complete Toolbar option causes the main program to display all available buttons in the toolbar regardless of screen resolution. Under lower 14 Panzer Campaigns Main Program Help File screen resolutions, this will cause the toolbar to wrap thereby reducing the amount of space available to display the map. Selecting the Alternative Highlighting option causes Highlighted units to be displayed with a white outline instead of the normal red outline. Selecting the PBEM Encryption option causes the main program to prompt for and verify passwords associated with Play-By-E-Mail games. See the Design Notes in the User Manual for why this is not the default. Selecting the PBEM File No Save option in conjunction with the PBEM Encryption option will prevent PBEM games from being saved by the user during a turn. The intent of this is to prevent a player from replaying a turn and thereby obtaining an advantage. Selecting the Ask Before Advancing option causes the main program to prompt you before advancing the current turn or phase. Use this option if you find yourself inadvertently advancing the turn or phase by accident. Selecting the Continuous Action option causes the game to not stop during reports, but to continue after displaying the report for a moment. Selecting the Alt Label Style option causes labels on the map to be displayed with an alternative style that improves their appearance but with some reduced legibility. Selecting the 3D Counters option causes the program to display units on the map using counter graphics rather than unit graphics when the program is in a 3D view mode. Selecting the Alternative Scrolling option causes the program to use an alternative method for scrolling the map that may be slower, but may correct a video display problem that some users have. Selecting the On Map Results option causes the program to display combat results on the map rather than in a separate dialog box. This also results in the A/I not using a dialog box for reporting. To pause the A/I under this option, press the Escape key. Selecting Initial View displays the Initial View Submenu described below. Selecting Hex Info Area displays the Hex Info Area Submenu described below. Selecting Optional Rules causes the Optional Rules Dialog to be displayed so that Optional Rules for the current battle can be reviewed. The Initial View Submenu is used to establish the initial map view that is displayed when the main program is run. Selecting Last View causes the main program to come up in whatever map display mode it was last in. Selecting 2D Magnified View, 2D Normal View, 2D Zoom- 15 Out View, 3D Normal View, or 3D Zoom-Out View causes the main program to come up in that view. The Hex Info Area Submenu is used to determine the location of the Hex Info Area on the screen. Selecting Left, Right, Top, or Bottom causes the Hex Info Area to be displayed in the corresponding location on the screen. Help Menu The Help Menu is used to display various help and other information about the main program including this help file and copyright information. Select General Help to display this help file. Select Users Manual to display the User Manual help file. Select Campaign Notes to display the notes on the campaign. Select Parameter Data to display the Parameter Data Dialog which shows game values specific to the current scenario. Select About to display various information about the Main Program such as version and copyright. 16 Panzer Campaigns Main Program Help File The Dialogs Command Dialog The Command Dialog appears at the beginning of a player turn and reports information about the battle. The Command Dialog will display a report for the current side indicating changes that have occurred at the beginning of the turn or phase. When a report entry contains a hex location, then clicking on that report entry will scroll the map to that location. A/I Selection Dialog The A/I Selection Dialog is used to select the A/I settings for each side in a new battle and other values. 17 The A/I settings for the Allied and Axis sides correspond to the A/I settings described in the A/I Menu. The slider under the A/I settings is used to establish the Advantage for the new battle. Select Rules to display the Optional Rules Dialog so that the Optional Rules for the new battle can be established. Click on OK to begin the battle. New Scenario Dialog The New Scenario Dialog is used to establish starting conditions for twoplayer games such as Network Play and PBEM. Select either Allied or Axis for the Local Side. The other player will be the other side in the battle. If desired, select the Fog of War option. The Rules button will display the Optional Rules Dialog. Click on OK to begin the battle. Artillery Dialog The Artillery Dialog provides a convenient way to select and fire artillery batteries on the map. When the Manual Defensive Fire Optional Rule is in effect, the Artillery Dialog is only available during Fire Phases (the Defensive Fire Phase and Offensive Fire Phase). The Artillery Dialog displays a list of artillery batteries on the map for the current side. Batteries which are unable to fire in the current phase are not listed. The map location of each battery is listed with its name. Selecting Find 18 Panzer Campaigns Main Program Help File will cause the map to scroll to the location of the currently selected battery. An entry which is dimmed indicates a battery which currently has no possible target to fire at. As each entry in the list is selected, the units on the map which may be fired at by the battery are shown Highlighted. Clicking on a hex with the right mouse button will cause the battery to fire at this hex. If there is more than one target in the selected hex, this will cause the Target Dialog to be displayed. Target Dialog The Target Dialog is displayed whenever a hex that has more than one possible target is fired upon. Each potential target in the target hex is listed. Unless Fog of War is in effect, units which are low of ammo are displayed dimmed. Selecting a unit in the list and clicking on OK, or double clicking on a unit in the list, will close the dialog and resolve the fire against that unit. Clicking on Cancel will cancel the fire. Scheduled Dialog The Scheduled Dialog can be used to view the reinforcements defined for the current scenario. 19 The Scheduled Dialog displays a list of reinforcements scheduled to arrive in the current scenario. Each reinforcement entry has an arrival time, an arrival probability, and an arrival hex. Note if Fog of War is in effect, then the reinforcements of the opposing side are not shown. Further, the arrival probabilities of friendly reinforcements is not revealed. If the arrival probability is not 100%, then there is a chance the reinforcement will not arrive at the exact arrival time. At the arrival time, and on each subsequent turn if necessary, the arrival probability will be applied to the reinforcement until it is determined that the reinforcement has arrived. Clicking on a reinforcement scrolls the map to the arrival hex. When the arrival probability is followed by the word Daily, it indicates that the arrival of the reinforcement will only be checked once a day, at the same hour as the given date of the reinforcement. Each reinforcement in general consists of several units. Double clicking on a reinforcement entry displays a list of the individual units in that reinforcement. Arrived Dialog The Arrived Dialog is used to display units that have arrived as reinforcements and to place these units on the map. Selecting an entry in the list of arrived units and clicking OK will place the units on the map and close the dialog. Alternatively, double clicking on an entry will 20 Panzer Campaigns Main Program Help File place the units on the map and keep the dialog open if there are more units to place. The Arrived Dialog is automatically displayed whenever there are units that have arrived that have not been placed and the phase has been advanced. Clicking Cancel will close the dialog and advance the phase. Release Dialog The Release Dialog is used to view Releases defined for Fixed units. The Release Dialog displays a list of the Fixed unit releases in the current scenario. Each release shows a time, date, probability that the release will occur on that time and date, and the organization the release applies to. When the probability is followed by the letter T, it indicates that the release can also be triggered whenever a unit in the specified organization becomes Spotted. When an asterisk (*) precedes the release, it indicates that the release did not occur on the time and date specified. Selecting an entry in the list of Releases will Highlight the affected units on the map. Double clicking an entry or clicking OK will close the dialog and leave the units Highlighted. Clicking Cancel will close the dialog and remove the Highlighting. Strength Dialog The Strength Dialog is used to display the total strength of all units. 21 The strengths of all units of each side are displayed by the various levels, Army, Division, Brigade, etc. that make up each side. The strengths are listed in terms of men, guns, vehicles, airplanes, and ships. The strength totals include all on-map units, all units scheduled to arrive as reinforcements, and all air support. In addition, for each side the total Victory Points of all units is shown. When a particular side has Fog-of-War set, then no values associated with that side are displayed. Objectives Dialog The Objectives Dialog is used to display the current ownership and value of Objective Hexes. 22 Panzer Campaigns Main Program Help File Each Objective is listed together with its current owner, location, and value. Exit Objectives are shown with an X following their value. When Fog of War is in effect, the value of enemy Exit Objectives is displayed as ??. Supply Sources Dialog The Supply Sources Dialog is used to display a complete list of all of the Supply Sources associated with the current scenario and their owner. Each Supply Source on the map is listed with the owner, location, and value. Selecting a Supply Source will scroll the map to the Supply Source location. Double-clicking on a selection will also close the dialog. When a Supply Source in the list is preceded by an asterisk (*), it indicates that the Supply Source is not occupied by the owning side and is either in the Zone-of-Control of any enemy unit or is in an unpenetrated minefield. Victory Dialog The Victory Dialog is used to view the current victory conditions. 23 Each scenario has a First Side determined by the current scenario. Victory conditions are always calculated relative to that side resulting in a victory level for that side. The victory level for the other side is the opposite result. For example, if the Allied side is first and gets a Major Victory, then the Axis side suffers a Major Defeat, and so forth. The total number of Objective Points for the first side is displayed. For each side, the Losses of each side in terms of Men, Gun, Vehicle, Naval, and Air is listed together with the Point Loss corresponding to each type of loss. The point range associated with each victory level is displayed in the Victory Values field. The total points awarded to the First Side is based on the Objective Points held by that side, minus the Point Losses for that side, plus the Point Losses for the enemy side. This calculation results in the Total Points value. This value is compared to the Victory Values to determine the victory level. If the Total Points is less than the Major Defeat value, then the First Side suffers a Major Defeat. If the Total Points is greater than the Major Defeat value but less than the Minor Defeat value, then the First Side suffers a Minor Defeat. If the Total Points is greater than the Minor Defeat value but less than the Minor Victory level, then the battle has resulted in a Draw for both sides. If the Total Points is greater than the Minor Victory value, but less than the Major Victory level, then the First Side has won a Minor Victory. Finally, if the Total Points is greater than the Major Victory value, then the First Side has won a Major Victory. 24 Panzer Campaigns Main Program Help File Location Dialog The Location Dialog is used to display a list of all the map locations and to allow going directly to any of these locations. Each map location is listed with its label description and hex coordinates. Selecting a location causes the map to scroll to the location’s hex coordinate. Double clicking on a location also causes the dialog to be closed. Organization Dialog The Organization Dialog is used to highlight an organization on the map. All organizations in the scenario Order of Battle are displayed in a Windows Tree Control. Selecting an organization causes the on-board units in that organization to be Highlighted . Clicking OK closes the dialog while keeping the organization highlighted on the map. Clicking Cancel closes the dialog and cancels the highlighting. Jump Dialog The Jump Dialog displays a reduced version of the entire map and allows the user to jump directly to any part of the map. 25 The visible on-map units are displayed on the reduced map using blue squares for Allied units and red squares for Axis units. Minefields that are currently visible are shown on the map as small gray rectangles. The visible portion of the map is shown using a red rectangle. The current Hot Spot hex is shown as a red outline square. • When the Objectives option of the View Menu is set, then Objectives are shown as yellow squares. Clicking on the reduced map area causes the dialog to be closed and the regular map to scroll to the selected location. • When an organization is Highlighted on the map, then an oval is drawn on the Jump Dialog showing the approximate extent of that organization. Find Unit Dialog The Find Unit Dialog can be used to find any given unit or organization that is on the map. 26 Panzer Campaigns Main Program Help File Enter the name to be searched for in the Enter search field. Note: the search is case-sensitive so you must enter your name with the proper capitalization (Panzer not panzer for example). If you are confident that your search will produce a single result, you can hit return after typing the search name. Otherwise, click on the Search button. This will display a list of results in the Search results list. Select the result you want and click on OK, or double click on the result you want, to close the dialog and find the result. In the case of an organization, the organization will be Highlighted on the map. In the case of an individual unit, the map will be scrolled to the unit’s location on the map. Selection Dialog The Selection Dialog is useful when then Editor is in Full Screen mode (see the View Menu). The Selection Dialog allows the units in the current Hot Spot to be displayed and selected. The Selection Dialog is displayed by pressing the Space Bar. You can make extended selections in the list of units displayed using the normal Windows list selection features. For example, by holding down the Shift key and clicking with the left mouse button, you can select a range of units. By holding down the Control (Ctrl) key and clicking with the left mouse button, you can select arbitrary units. 27 Parameter Data Dialog The Parameter Data Dialog displays the Parameter Data associated with the current scenario. The Parameter Data Dialog consists of a text listing of the scenario values. The values are read from the PDT file corresponding to the current scenario. The Parameter Data values are: Time Parameters Dawn (or Daylight): The time of first light. Dusk (or Night): The time of sunset. Day Turn: The number of hours in a turn during daylight. Night Turn: The number of hours in a turn during night. Has Dawn and Dusk Turns: Determines if there are turns of reduced visibility at the beginning and end of the day. These turns are otherwise considered day turns, but visibility during these turns is half what it would be otherwise. Stacking Limits Road: The maximum number of men, or equivalent in men, that can move using Road Movement. Maximum: The maximum number of men, or equivalent in men, that can stack in a single hex. 28 Panzer Campaigns Main Program Help File Miscellaneous Foot Speed: The speed at which motorized and mechanized infantry moves when moving by foot. Infantry Defense: The default defense value of motorized and mechanized infantry when not in Travel Mode. Digging-In: The percentage chance that a unit which is Digging-In will be successful in any given turn. The probability is times 4 when the unit is constructing an Improved Hex, times 3 when the unit is a non-bridge engineer, and normal when the unit is constructing a Trench Hex. Bunker Prob: When non-zero, the percentage chance that a non-bridge engineer unit which is Digging-In will be able to create a Bunker Hex from a Trench Hex. Mine Prob: The percentage chance that a mine-laying engineer unit will construct a mine field in the current hex. Fatigue Recovery: The average fatigue recovery for a unit per turn. The recovery value is times 2 during night turns. Night Move Disruption: The percentage chance that a unit moving at night not by Rail Mode and not by Travel Mode using Road Movement will become Disrupted. Allied and Axis Air Availability: The percentage chance that an air unit that has conducted an air mission will become available on a given turn. Allied and Axis Air Interdiction: The base percentage chance that a unit from the other side will attacked with an air interdiction attack while moving. Interdiction Effect: The percentage applied to the attack value of air interdiction attacks. This is used to take into account the size of the air and ground units in the game to balance interdiction losses relative to general air strikes. Allied and Axis Air Interception: The percentage chance that an enemy air mission will be intercepted by the given side. Allied and Axis Rail Capacity: The total number of units from that side, regardless of the size of unit, that can be moving in Rail Movement in any one turn. Railroad Movement: The number of hexes a unit moving via Rail Movement can move in one turn. Infantry Strength Effectiveness: The effectiveness of infantry units is based on a calculation using the given values. Linear interpolation is used to calculate the effectiveness of infantry units from this value to 100% and from this value to 0%. Allied and Axis Unit Recovery: The average percentage recovery a unit will have based on its losses during any turn that it is eligible for loss recovery. Rubble Fire Value: This value is used to determine the probability that Indirect Fire and bombing attacks against a Village, Town, City, or 29 Industrial hex will result in Rubble. A file value against the hex of this value will have a 50% chance of creating Rubble in the hex. Refuel Percentage: The percent chance that a per-turn refuel test will have compared with a normal refuel test as described in the Supply section of the User Manual. Allied and Axis Dust Spotting: When this value is nonzero, then units which have moved outside of normal visibility may be spotted as unknown units based on a probability modified by this value. Allied and Axis Breakdown: When this value is nonzero, then units consisting of vehicles have a certain probability that they will lose strength while moving. The details of this are described in the Movement section of the User Manual. Allied and Axis Air Drop Loss: This value is used to modify the nominal losses from a parachute or glider reinforcement placement. Congestion Side: This is the side that is affected by Congestion markers on the map. If the side is Unknown, then both sides are affected. Expiration: This is the number of turns any given Congestion marker will affect movement when it is occupied by a unit of the Congestion Side. If the value is 0, then the Congestion marker is never removed. Allied and Axis Frozen Penalty: This is the penalty that is applied to the given size during Frozen turns as described in the Environment section of the User Manual. Invasion Side: This value is only used in scenarios with amphibious landings. It specifies a side that will suffer losses to units that arrive via amphibious reinforcements as described by the next two values. Invasion Percent: The percentage of units arriving by amphibious reinforcement that will suffer losses. Invasion Loss: The maximum loss of units arriving by amphibious reinforcement that suffer losses. Bridge Values Allied and Axis Bridge Values: the percentage chance that an Engineer unit building a bridge will complete the bridge in any given turn. The chance is proportionally lower when the Engineer unit has less than 100 men. Allied and Axis Pontoon Values: the minimum number of turns that building a Pontoon Bridge across a Water hex will take. If 0, then building Pontoon Bridges is not possible for that side. Light, Medium, and Heavy Bridge Strength: the defense values used for the corresponding bridges when an Engineer unit attempts bridge destruction. Wired Bridge Values: If present, then the Auto Wired Bridge feature is enabled. The side given is the side that the feature applies to. The small and large bridge values are the probabilities that small and full-hex wired 30 Panzer Campaigns Main Program Help File bridges will automatically be destroyed when a unit of the given side moves adjacent to the bridge (for small) or onto the bridge (for large). Air Limitation Visibility: under the Low Visibility Air Effects Optional Rule, these are the percentage of air units that will be available under the corresponding visibility ranges. Allied and Axis Air Strike Limit: if nonzero, then this value determines the maximum number of airplanes that can attack any one hex in a single player turn for that side. Artillery Values Allied and Axis Counterbattery: the percentage modifier applied to the normal rules for counterbattery spotting when units from the other side fire Indirect Fire. Allied and Axis Stockpiling: this is the percentage chance that an eligible artillery unit of the given side will become Stockpiled in any single turn. Allied and Axis Stockpiled Fire: this percentage modifier is applied to the fire value of a Stockpiled unit from that side when it fires. A value of 100% indicates no change to the fire value. Allied and Axis Artillery Set Up: this is the percentage chance that an indirect fire capable artillery unit of the given side will become Set Up and available for a fire mission after it has moved. This value only applies under the Artillery Set Up Optional Rule. Allied and Axis Indirect Mod: this modifier is applied to the fire value of a unit conducting Indirect Fire during the opposing turn (or the Defensive Fire Phase). Combat Values Fire Low and High Values: these values are used in determining combat losses from fire. Attacker Low and High Values: these values are used in determining combat losses to the attacker in an assault. Defender Low and High Values: these values are used in determining combat losses to the defender in an assault. Deception Values Allied and Axis Range: these values are used to determine the maximum range that Deception Units can be deployed. Allied and Axis Effect: these values are used to determine the effectiveness of Deception units in disrupting the movement of units of the other side.. 31 Allied and Axis Damage: these values are used to determine the effectiveness of Deception units in preventing Damage by the other side. Allied and Axis Detect: these values are used to determine the probability of a Deception unit of the given side being detected per turn. Terrain Elevations These are the elevations in meters assigned to various terrain types. Movement Cost: by Unit Class For each Unit Class, these values given the movement costs in points for each terrain type. The movement costs are divided into two groups: those for hex terrain and those for hexsides. When the movement cost for a particular hex terrain is given as 0, such as for Water, then it indicates that the unit cannot move into that terrain. The movement cost for a given hexside is the additional cost that hexside adds to the normal movement cost. When the movement cost for a particular hexside is given as –1, such as for Cliffs, then it indicates that the unit cannot move through that hexside. Movement Modifier: by Unit Class For each Unit Class, these values give the percentage modifier applied to movement by units of the given class under the given ground conditions. Movement Modifiers ZOC Movement Multiplier: this is used to multiply the normal movement cost when a unit moves from one enemy ZOC to another enemy ZOC. It reflects the increased cautiousness of the unit when making such a move. Movement Elevation Modifier: the additional movement cost applied when moving from one hex to a hex of higher elevation. Terrain and Hexside Combat Modifiers The percentage modifiers applied to fire values when fire is targeted into the given terrain, or through the given hexside. Combat Modifiers For fortifications, these are the percentage modifiers applied to fire against targets in the given fortification. In addition, for Pillboxes and Bunkers, the values given are the additional defense value applied to units defending in these fortifications. Elevation Modifier: the percentage modifier applied when the target unit of direct fire is at a higher elevation than the firing unit, given in terms of elevation increments, up to a maximum of 5 increments. 32 Panzer Campaigns Main Program Help File Range Effect: this is the modifier applied to direct fire at a range of 2 hexes. Art Hard Target Mod: this is a modifier to the fire value of artillery and heavy artillery when firing at a hard target at a range of 1. A/I Action Dialog The A/I Action Dialog is displayed as the A/I is taking action during a Turn under A/I Control. The dialog allows you to control the A/I while it is running. Click Step to have the A/I continue to the next step in its action. Click Run to have the A/I run continuously without stopping until the end of the Turn is reached. Once clicked, the Run button becomes the Pause button which is used to stop the A/I actions. Alternatively, to stop the A/I and close the dialog, you can click on the Cancel button or press the Escape (Esc) key. If you close the dialog, you should start the A/I again by selecting Activate A/I from the A/I Menu or the A/I button in the Toolbar. Multi-Player Dialog The Multi-Player Dialog is used to display the players that are currently participating in a Network Play game and their assignments. 33 The dialog shows a list of players on each side of the current battle. Next to each list is a display of that side’s organizations (when Fog-Of-War is in effect, you will not see the other side’s organizations). At the bottom of the dialog are four buttons used to manipulate the player lists and the assignments (Note: only the Modem host will have all four buttons enabled). The top player on each side is the Commander of that side. The Commander is responsible for making org assignments for the other players on their side and for advancing the phase. By default, the Commander is in control of all units on that side. The Commander can assign other players specific organizations by selecting the player from the list, selecting the organization from the organization display, and clicking the Assign button. The player’s color will appear next to the selected organization. This indicates that the player has control of every unit in that organization and in any sub-organization of that organization. The Commander can remove an assignment by selecting the organization and clicking the Deassign button. The Modem Host can promote a player from either side to be Commander by selecting the player and clicking the Promote button. The Modem Host can also switch the side of any player by selecting the player and clicking the Switch button. Only the Commander can advance the phase and place reinforcements. When any other player from a side selects Next Turn, it causes their name to be displayed in red in the player list indicating they are ready to advance the phase. 34 Panzer Campaigns Main Program Help File File Selection Dialog The File Selection Dialog is displayed when the main program is run if the Prompt for Scenario Option has been selected (see the Settings Menu ). The File Selection Dialog allows you to select the mode of play and associated game file. • Select New (by Name) to show the list of all scenarios sorted by filename. • Select New (by Length) to show the list of all scenarios sorted by number of turns. • Select Old (by Name) to show a list of previous battles sorted by filename. • Select Old (by Date) to show a list of previous battles sorted by date with the most recent files listed first. Select one of the given play modes such as Normal for play against the computer. Finally, select one of the displayed files either by double clicking on the filename, or selecting the filename and clicking on OK. Note: when Direct Play Caller is selected, no files are displayed since file selection is the responsibility of the Direct Play Host in this case. Select Delete after you have selected to list Old files to delete the selected file. 35 Optional Rules Dialog The Optional Rules Dialog is used to view and select the Optional Rules for a new battle. Optional Rules can be set at the beginning of a battle, but not changed once the battle has started. The Optional Rules selected in the Optional Rules Dialog are saved and become the subsequent default for new battles. Note: depending on which game in the Panzer Campaigns series is being played, some of these Optional Rules may be selected by default when the game is installed. After installation, the player is free to customize the settings. Click on the Default button to restore the Optional Rules setting to the default values for the game. Manual Defensive Fire – when this rule is selected, the game engine advances by phases: Movement Phase, Defensive Fire Phase, Offensive Fire Phase, and Assault Phase. See the section on Manual Defensive Fire in the User Manual for more information. Automatic Defensive Fire – this rule only applies to PBEM (Play-By-E-Mail) and Manual Defensive Fire. When selected, the computer will conduct the Defensive Fire Phase for the enemy side. This cuts in half the number of email transfers required to play a game using PBEM. Alternative Indirect Fire Resolution – when this rule is selected, Indirect Fire of non-mortar, non-heavy weapon units is conducted under different rules. First, each such Indirect Fire is doubled in fire value, but the cost of firing is 36 Panzer Campaigns Main Program Help File doubled. Second, such Indirect Fire is applied against all units in the target hex, proportional to their strength, instead of being applied against a single target unit. Alternative Air Strike Resolution – when this rule is selected, Air Strikes are applied against all units in the target hex, proportional to their strength, instead of being applied against a single target unit. Alternative Direct Fire Resolution – when this rule is selected, Direct Fire and Indirect Fire of mortar or heavy weapon units is conducted under different rules. Although a target may be selected, under this rule, if the target unit is not a Hard Target, then the resulting fire is dispersed and affects the other units in the target hex. Alternative Assault Resolution – when this rule is selected, the effective Assault value of a unit is calculated as a weighted average of its default Assault value and its Hard Attack value based on the proportion of the other side’s strength that is hard. For example, if all the other side’s strength is made up of Hard Targets, then the effective Assault value of the unit is the same as its Hard Attack value. If none of the other side’s strength is made up of Hard Targets, then the effective Assault value is the same as its default Assault value. Artillery Set Up – when this rule is selected, each artillery unit capable of Indirect fire may not be available after it has moved, depending on the value of the Artillery Set Up Parameter Data value for that side. Based on this value, the unit will then become available at some later time. For a detail discussion on this rule see the section on Supply in the Users Manual. Recon Spotting – when this rule is selected, the Recon Spotting entry in the Command Menu is enabled. This allows recon units to perform spotting of enemy units from a location at the cost of 1/3 the movement allowance of the unit. Virtual Supply Trucks – when this rule is selected, Local Supply Values are calculated at each hex at the beginning of the player turn according to the Virtual Supply Truck rules described in the section on Supply in the Users Manual. Optional Surrender – when this rule is selected, then Broken units which have been assaulted and have lost the assault, but have no valid retreat, are eliminated. Low Visibility Air Effects – when this rule is selected, the low visibility causes reduced air unit availability as described in the Air Power section of the Users Manual. Quality Fatigue Modifier – when this rule is selected, the Fatigue a unit gets from combat is modified as described in the Fatigue section of the Users Manual. Optional Fire Results – when this rule is selected, each combat fire result is calculated as the average of two normal fire results. This has the effect of reducing the variation in results. 37 Optional Assault Results – when this rule is selected, each assault result is calculated as the average of two normal assault results. This has the effect of reducing the variation in results. Locking Zones Of Control – when this rule is selected, it is not possible to move a unit from one enemy Zone-of-Control to another enemy Zone-ofControl. The purpose of this rule is to compensate for the inability to break down larger units into smaller ones so that continuous lines of defense can be constructed. Higher Fatigue Recovery – when this rule is selected, higher fatigue recovery rates are applied. Under this rule, units with Low Fatigue will have a fatigue recovery rate which is 3 times normal. Units with Medium Fatigue will have a fatigue recovery rate which is 2 times normal. Units with High Fatigue are not affected by this rule. Indirect Fire and Air Strikes By The Map – when this rule is selected, it is possible to target Indirect Fire and Air Strikes against any hex regardless of whether it is spotted by a friendly unit. However, when Indirect Fire is fired against a hex that is not spotted by a friendly unit, its fire value is quartered. Counterbattery Fire – when this rule is selected, there is a probability that units conducting Indirect Fire will be spotted by the enemy, even when there is no clear Line-Of-Sight to the firing unit. This probability is modified by Parameter Data (see the Parameter Data Dialog). Night Fatigue – with this rule is selected, units that are active during Night turns will accumulate fatigue. The amount of Fatigue accumulated is up half the amount a unit would normally recover during a Night turn. It does not matter how far a unit moves or how many movement points are expended. Even units with no Fatigue may gain some variable amount of Fatigue if they are active during Night turns under this rule. No Low Fuel Effects – with this rule is selected, no Low Fuel effects are used in the game and no units become Low On Fuel. This rule is useful if you are playing a one or two day tactical scenario and don’t want the operational level effects of Low Fuel to affect the battle. Explicit Supply – when this rule is selected and the current scenario has Supply Units defined, then the Explicit Supply rules apply as documented in the Supply section of the Users Manual. Programmed Weather – when this rule is selected and the optional file Weather.dat exists in the game folder, then the conditions and visibility will be determined according to the description in the Environment section of the Users Manual. Limited Air Recon – when this rule is selected, then enemy units spotted using air recon cannot be targeted for air or artillery attacks unless the enemy unit is also seen by a friendly ground unit that is eligible to spot for the attack (or by using a "By Map" attack, see above rule). Delayed Disruption Reporting - when this rule is selected, Disruption of enemy units (under Fog-of-War) as a result of combat is delayed until the next turn. 38 Panzer Campaigns Main Program Help File Air Mission Dialog The Air Mission Dialog is used to select an air unit for an air mission against the current Hot Spot hex. The Air Mission Dialog lists each air unit that is currently available for an air are air units such as fighters and mission. Units listed with a dark icon bombers capable of making an air combat mission against an enemy unit. Units listed with a hollow icon (and listed as RECON) are air recon units that are used to spot unknown enemy units. When an air unit is shown dim, it indicates that the air unit is subordinate to a ground organization, but no unit in that ground organization can spot the target hex. The number before the name of the airplane type indicates the number of aircraft in that unit. The three numbers (separated by slashes) following the name of the aircraft type are the hard-attack value, soft-attack value, and defense value of the aircraft type. • • • • • Selecting a non-RECON unit and clicking on OK will conduct an air combat mission against the current Hot Spot hex. Selecting a RECON unit and clicking on OK will conduct a reconnaissance air mission against the current Hot Spot hex. A unit designated with the word CARPET indicates a Heavy Bomber air unit that will use the Carpet Bombing rules described in the Users Manual. A unit designated with the words SINGLE USE indicates a Single Use air unit that does not become available again after it is used for an air mission. An air unit designated with the word NIGHT is a Night Flying unit that can only be used for air missions during Night turns. 39 Alternatively, double-clicking on an air unit will select it for the air mission and close the dialog. Air Availability Dialog The Air Availability Dialog is used to view the changes in air unit availability that are associated with the current scenario. The Air Availability Dialog lists each change in air unit availability associated with the current scenario. Each entry is listed according to side, the date of the change, and either the word AVAIL indicating that the change will cause the affected air units to become available, or NOAVAIL indicating that the change will cause the affected air units to become unavailable. When more than one air unit is affected by the change, the dots (…) are used to indicate this. Double-clicking on an entry causes a list of the air units affected to be listed. 40 Panzer Campaigns Main Program Help File Corps Attachment Dialog The Corps Attachment Dialog allows the current Corps Attachments defined for the current scenario to be viewed. The Corps Attachment Dialog list the Corps Attachments that have been defined for a particular side. Each attachment is listed in terms of the name of the organization being attached, followed by an arrow (->), and followed by the name of the parent organization. Selecting an entry and selecting the Delete button causes the attachment to be deleted. Selecting the Add button causes the Add Attachment Dialog to be displayed so that new attachments can be defined. Add Attachment Dialog The Add Attachment Dialog allows new Corps attachments to be defined. 41 The Add Attachment Dialog lists the organizations that may be attached and the possible parent organizations they may be attached to. Selecting an organization from the first list and an organization from the second defines an attachment. Selecting OK adds this attachment to the list of attachments for the current scenario. Supply Variation Dialog The Supply Variation Dialog is used to view the list of Supply Variations in the current scenario. The Supply Variation Dialog lists the Supply Variations in the current scenario showing • The side the variation is associated with • The percent probability that the variation will occur each day • ONE TIME if the variation can occur at most once during the scenario • The change the variation has on the supply level for the given side. • A Starting date unless the variation applies to the entire scenario. A/I Order Dialog The A/I Order Dialog is used to view and delete A/I Orders. 42 Panzer Campaigns Main Program Help File The A/I Order Dialog lists all the A/I Orders for the current side. Selecting an order will cause the order to be displayed on the map. Selecting the Delete button will cause the selected A/I Order to be deleted. Orders that are displayed using a heavy line are A/I Orders that have been added to the scenario using the Scenario Editor program rather than orders that have been created either dynamically by the A/I or through the use of manual A/I Orders by player. Withdrawal Dialog The Withdrawal Dialog is used to view any Withdrawals associated with the current scenario. The Withdrawal Dialog displays a list of the Withdrawals associated with the current scenario. Each Withdrawal shows a time, date, probability that the Withdrawal will occur on that time and date, and the organization the Withdrawal applies to. When an asterisk (*) precedes the Withdrawal, it indicates that the Withdrawal did not occur on the time and date specified. Selecting an entry in the list of Withdrawals will Highlight the affected units on the map. Double clicking an entry or clicking OK will close the dialog and leave the units Highlighted. Clicking Cancel will close the dialog and remove the Highlighting. 43 Deception Unit Dialog The Deception Unit Dialog is used to deploy Deception Units that may exist in the current scenario. The Deception Unit Dialog displays two lists of Deception Units. The top list represents Deception Units that are on the map as regular counters and the bottom list represents Deception Units that have been deployed. Deception Unit entries that start with an ‘X’ represent units that have moved or been deployed in the current turn and thus are not eligible to be deployed. To deploy or redeploy a Deception Unit, select a new hex on the map prior to displaying the Deception Unit Dialog. Then in the dialog, select the Deception Unit and click on the Deploy button. Alternatively, double-clicking on an entry will select that entry and deploy it. For more information on Deception Units, see the Deception Units entry in the User Manual. Hex Coordinate Dialog The Hex Coordinate Dialog is used to jump to a specific hex location on the map. 44 Panzer Campaigns Main Program Help File The Hex Coordinate Dialog allows you to enter the X and Y coordinate of the hex you want to go to. When you click on the OK button, the map will automatically scroll to those hex coordinates. Strategy Dialog The Strategy Dialog displays a list of Reinforcement Strategies defined for the current scenario. In the list of displayed Strategies, you can double-click on an entry to see the Operations associated with that Strategy. View Strategy Dialog The View Strategy Dialog displays a list of Operations associated with a Reinforcement Strategy. 45 In the list of displayed Operations, you can double-click on an entry to see the list of Reinforcements associated with that Strategy. If this dialog is displayed because the Strategy decision time value has been reached, then the Operation you select will be implemented and the reinforcements associated with that operation will become part of the current scenario. 46 Other Features Hex Info Area The Hex Info Area displays a list of the units in the Hot Spot hex and information about the terrain in that hex. By default, the Hex Info Area is displayed on the left hand side of the screen. However, this may be changed using the Settings Menu. Terrain Information The Terrain Box at the end of the unit list displays information about the current Hot Spot hex. The first line of the display describes the type of terrain (in this case Clear) and the percentage benefit a unit will receive when fired upon by virtue of that terrain. The second line of the text area shows the Elevation of the current hex in meters. The third line of the text area shows the current Visibility in hexes. The fourth line of the text area shows the Supply values of the Allied and Axis sides respectively. Two other conditions may apply to the current hex: • The hex may contain RUBBLE as a result of bombing or indirect fire. In this case, no road movement is possible through the hex and other movement costs are tripled. • The hex may be defined as being IMPASSIBLE. In this case, it has been defined to be out of bounds for movement in the current scenario. When the current Hot Spot is an Objective hex, then the Objective value of the hex is also shown. Note: Exit Objective hexes will have the word Exit on this line. When the current Hot Spot hex contains Mines or Fortifications, then this is also displayed in the Terrain Box. By default, these will be shown using uppercase names. When the word MINES appears in lowercase as in Mines, it indicates that the mines in that hex have been Penetrated. When the fortification name, such as IMPROVED, appears in lowercase as in Improved, it indicates that the fortification has been Vacated. 47 When the terrain in the current Hot Spot hex is frozen, then this is indicated by square brackets ([]) around the name of the terrain. Frozen Fields, Marsh, and Water are treated as Clear hexes, while Frozen Swamp is treated as Forest hexes. When the current hex contains a bridge over a water hex, three possible descriptions may be shown: • Bridge – the bridge is in good condition and can be used for movement. • WIRED – the bridge is in good condition, but has been wired for demolition. • DAMAGED – the bridge has been damaged and cannot be used for movement. Alternative Terrain Information Clicking on the Terrain Box with the right mouse button causes the display to change to the Alternative display. In this display, the text area changes to show a description of the various hex sides that are present in the hex. The names of the hex sides are arranged in a rough hexagonal pattern around the center of the text area showing the position of the hex side with respect to the hex. The value in the center of this display is the number of men, or equivalent strength, in the hex. If the letter X follows this number, then the number of men, or equivalent, in the hex exceeds the Road Movement stacking limitation. Unit Information The Hex Info area is filled with Unit Box displays. The number of these depends on your screen resolution. The Unit Box shows a representative picture of the unit, its name, its Strength (in men, vehicles, guns, etc.), its Movement value, its Morale, and its current Fatigue level (in values from 0 to 900). If the name is followed by three plus signs (+++), then it indicates that the unit is a Combined Unit. Other conditions associated with the unit are displayed as follows: • If the Strength value is displayed in Yellow, it indicates that the unit is at less than full strength. • If the Morale level is displayed in Yellow, it indicates that the unit’s morale is reduced for some reason such as fatigue or ammo level. • When the Movement value is displayed in Green, it indicates that the unit has expended Movement Points during that turn, but still has at least 2/3 of its original allowance left. 48 • • • • • • • • • When the Movement value is displayed in Yellow, it indicates that the unit still has 1/3 of its original allowance left. When the Movement value is displayed in Red, it indicates that the unit has less than 1/3 of its original allowance left. When the Movement value is followed by the letter T, it indicates that the unit is in Travel Mode. When the Movement Value is followed by the letter R, it indicates the unit is in Rail Mode. When the Movement value is surrounded with square brackets ([]), it indicates that the unit has set aside 1/3 of its movement allowance (see the Command Menu). When the Fatigue level is shown in Green, it indicates that the unit has Low Fatigue. When the Fatigue level is shown in Yellow, it indicates that the unit has Medium Fatigue. When the Fatigue level is shown in Red, it indicates the unit has High Fatigue. When the binoculars icon is shown in the unit picture, it indicates that the unit has been spotted by enemy units. When the unit has the word Facing appearing over its unit picture, then the unit has a defined direction that it can fire in. It can also fire in either of the two adjacent directions. For example, if the unit has Facing Up Right, then the unit can fire at targets in the Up Right direction and in addition, in the Up direction and the Down Right direction from the firing unit. Alternative Unit Information Clicking on a Unit Box with the right mouse button causes a pop-up window to appear showing the command hierarchy of the unit. From top to bottom, the window lists the unit’s component, the unit name, the unit’s organization, the next higher organization and so forth. In addition, in this mode, other values associated with the unit are displayed. • Following the word Hard are the attack value and range respectively that are used when the unit fires on a Hard Target. • Following the word Soft are the attack value and range respectively that are used when the unit fires on a Soft Target. • For Headquarters, the value following the word HQ indicates the Command Range of the unit. If this differs from the Nominal Command Range, then that is shown also (Actual/Nominal). 49 • • • • • The value following the word Assault is the assault attack value of the unit. The values following the word AA are the attack value and range respectively that are used when the unit fires Anti-Aircraft fire on enemy air strikes. The value following the word Defense is the defense value of the unit. When the Defense value is shown in Yellow, it indicates that this is a motorized or mechanized infantry unit that is currently on foot. The words Hard Target will appear when the unit is an armored target. This also applies to a soft target that is receiving the benefit of a bunker or pillbox. The Speed of the unit in kilometers per hour is also listed. When the Speed is shown in Yellow, it indicates that this is a motorized or mechanized infantry unit that is currently on foot. Other units with specialized functions will also have indications of this such as: • Indirect Fire, indicating the ability to fire indirectly. • Towed Guns, indicating that the unit must be in Travel Mode to move. • Mine Clear, indicating an ability to clear minefields. • Bridge Eng, indicating an ability to build Engineer Bridges. • Mine/Bridge, indicating both mine clearing and bridge building abilities. • Amphibious, indicating an ability to cross rivers and canals. • Rail Unit, indicating that the unit is restricted to traveling by Rail Mode. • Recon, indicating an ability to be used with the Recon Spotting Optional Rule . • Single Use, indicating that the unit can only be used for the current turn and then will be removed from the game. When an organization has been attached, then the name of the new superior organization is prefaced with the notation "=>" as shown in the picture. This example indicates that the 17th Panzer Division has been attached to the 46th Panzer Corps. 50 When there are more units in the Hot Spot hex than can be displayed in the available Unit Boxes, then scroll arrows that appear after the list of units can be used to scroll the Unit Boxes. When the left or top arrow is displayed in full color, there are units to the left or top of the displayed units and when the right or bottom arrow is displayed in full color, there are units to the right or bottom of the displayed units. In addition, the numbers which appear associated with each scroll arrow indicate the number of hidden units in the corresponding direction. Toolbar The main program has a Toolbar at the top of the main program window just under the Menu Bar. Note: depending on your screen resolution, only some of these buttons may be displayed on your screen. You need a screen width of at least 1024 before all of the buttons are displayed unless you have selected the Complete Toolbar Option. Note that most all of these buttons implement a menu selection and the command may be issued as a menu selection when the button is not displayed. Mode – toggles the main program between Move Mode and Fire Mode . New – start a new battle. Open - opens an existing battle file. Save - save current battle under existing filename or prompt for filename if none. Next – advance game to next turn or phase. Travel – toggle Travel Mode of selected units. Cost – preallocate firing cost for selected units. Digging-In – toggle Digging-In status of selected units. Artillery – display Artillery Dialog. Air Mission – call Air Mission on current Hot Spot hex. Combine/Breakdown – either combine the selected units into one 51 Combined Unit or breakdown a Combined Unit into a subunit. Note: holding down the Alt key when selecting this option will cause all possible units in the current hex to be Combined regardless of which units you have selected. Resolve – resolve current Assault. Arrived Units – display Arrived Dialog. A/I – activate A/I processing. Zoom-In – increase map display scale. Zoom-Out – decrease map display scale. Normally the screen is recentered on the Hot Spot hex when you change zoom modes. If you hold down the Alt key when you change zoom modes, the screen will retain the current view. Divisional Markings – display units with Divisional Markings. Units – toggle the display of units on the map. Bases – toggle the display of unit bases in 3D graphics mode. Objectives – toggle the display of Objectives on the map. Visible Hexes – toggle the display of hexes visible from the current Hot Spot hex. Reachable Hexes – toggle the display of hexes within the movement range of the selected unit. Contours – toggle the display of elevation contours on the map. Full-Screen – toggle the display of the full screen map display. Jump Dialog – display the Jump Dialog. Next Stack – advance the Hot Spot hex to the next stack to be considered in the current turn or phase. If you hold down the Alt key when invoking this function, it will advance the Hot Spot to the next unit that has not been active and select it. 52 Highlight Fixed – highlight Fixed units on the map. Highlight Spotted – highlight units on the map that are spotted by enemy units. Highlight Used – highlight units on the map that have used Movement Points in the current turn. Highlight Disrupted – highlight units on the map that are Disrupted or Broken. Highlight Low Ammo – highlight units on the map that are low on ammo. Highlight Organization - highlight all units in the same organization as the top selected unit. Holding the Alt key while pressing this button causes the next higher organization to be highlighted. Highlight Travel Mode - highlight all units in Travel Mode. General Help - display this help file. Status Bar The Status Bar is located at the bottom the main window and displays status information about the current battle. The Status Bar typically displays the current turn and date information together with the hex coordinates of the Hot Spot If the current turn is being played using A/I, then A/I Control will appear with the turn and date information. Day, Dusk, Dawn, and Night turns will be noted with the turn and date information as well. If you are playing a two-player game, then Local Control will be displayed in the Status Bar when the current turn is under your control, and Remote Control will be displayed when the current turn is under the control of your opponent. The Status Bar also displays a time of day graphical indicator showing a 24 hour period. Within this period: 53 • • • • Black areas indicate night turns. Gray areas indicate dusk and dawn turns. Light areas indicate day turns. The red outline indicates the current turn. If you make an error during play, the main program will beep (depending on the setting in the Settings Menu) and the error message will be displayed in the Status Bar. Otherwise, as you move the mouse cursor over Toolbar buttons and menu items, short descriptions of those commands will appear in the Status Bar. Hot Keys The following Hot Keys are supported in the main program. Note that these Hot Keys are defined as command accelerators of the main program main window and therefore the main window must have the keyboard focus for these to work (that is, the main window must have a highlighted title bar). Ctrl Key – toggle between Move Mode and Fire Mode. Shift Key - display the on-map labels while this key is pressed. Space Bar - display the Selection Dialog (useful in Full Screen mode). F1 - invoke General Help (display this help file). F2 – display Users Manual help file. F3 – display Campaign Notes help file. F4 – display Parameter Data values. F5 – slow the speed of the A/I processing. F6 – return A/I processing to normal speed. F7 – increase the speed of the A/I processing. F8 – put the A/I in the highest possible processing mode (use F6 to return to normal). A - invokes the Air Mission Dialog. B - move the selected units backward in the Hot Spot hex (Note: this only has a visible effect in the 3D graphics mode). D - selected unit(s) will begin Digging In. E - invokes the Artillery Dialog. F - move the selected units forward in the Hot Spot hex (Note: this only has a visible effect in the 3D graphics mode). 54 G – toggle display of valid target hexes of selected units. H – toggle display of maximum range of selected units. I - activates the AI. J - opens the Jump Map. K - displays the modified Command Range from a selected HQ. M – opens the Arrived Dialog. N - advance the Hot Spot to the next stack of units that have not been active this phase. If you hold down the Alt key when invoking this function, it will advance the Hot Spot to the next unit that has not been active and select it. If you hold down the Ctrl key, it will advance the Hot Spot to the next unit that is capable of firing. O - highlights the Organization for the selected unit. If an organization is currently selected and you hold down the Alt key when invoking this function, then the next higher organization is selected. P – display the Organization Dialog. Q – highlights HQ units on the map. R – toggle Rail Mode for selected units.. S - displays Visible hexes from the Hot Spot T - toggles Travel Mode for selected unit(s) U - undo the last movement (not available under Fog-of-War). V - display Divisional Markings. W – highlights Indirect Fire Spotters. X - remove the selected units from the map. Y – toggle display of Reachable Hexes. Z - toggles the full screen map display on and off. 1 - display the map in Zoom-Out 2D mode. 2 - display the map in Normal 2D mode. 3 - display the map in Zoom-Out 3D mode. 4 - display the map in Normal 3D mode. 5 - display the map in Magnified 2D mode. Normally the screen is recentered on the Hot Spot hex when you change zoom modes. If you hold down the Alt key when you change zoom modes, the screen will retain the current view. You can also use the mouse wheel to zoom in and out. The program will attempt to position the map to keep the hex you have the cursor over when this is done. Keypad 0 - change the formation of the selected units. 55 Keypad 1 - move the selected units down and to the left one hex. Keypad 2 - move the selected units down one hex. Keypad 3 - move the selected units down and to the right one hex. Keypad 4 - turn the selected units counterclockwise. Keypad 5 - turn the selected units about-face. Keypad 6 - turn the selected units clockwise. Keypad 7 - move the selected units up and to the left one hex. Keypad 8 - move the selected units up one hex. Keypad 9 - move the selected units up and to the right one hex. Delete - move the selected units counterclockwise. Page Down - move the selected units clockwise. Home - move the selected units forward in the Hot Spot hex (Note: this only has a visible effect in the 3D graphics mode). End - move the selected units backward in the Hot Spot hex (Note: this only has a visible effect in the 3D graphics mode. 56