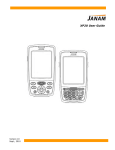
1
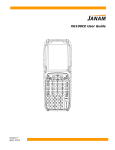
XM65 User Guide
Version 4
August, 2009
XM65 User Guide
Contents
i
Chapter 1: Introduction
About the Janam XM65
Hardware features
Specifications
Hardware overview
1-1
1-1
1-2
1-3
Chapter 2: Get Started
Unpack your Janam XM65
Recommended host computer configuration/requirements
Update your desktop software
Attach the hand strap
Install/charge the battery
Remove the battery from spare charging well
Turn on the XM65
Understanding the today screen
What do the status icons mean?
Reset the XM65
2-1
2-1
2-1
2-2
2-2
2-3
2-3
2-3
2-3
2-4
Chapter 3: Barcode Scanning
Demonstration and setup
Enable the ScanWedge feature
Unlock 2D scanning
Enable ScanCapture feature
3-1
3-2
3-2
3-3
Chapter 4: Set Up Your Janam XM65
Locate front panel controls
Locate back panel components
Tap versus click
Realign (or recalibrate) the screen
Overview of the today screen
Customize the today screen
Choose language and regional settings
Change the date and time display
Owner identification and password protection
Enter text or data
Backlight and brightness preferences
Battery power
Scrolling speed
Adjust volume
Enable sounds and notifications
Device name
Customize the start menu
Open applications
Remove applications
Keypad
Accessibility for people with disabilities
4-1
4-1
4-1
4-1
4-2
4-3
4-4
4-4
4-5
4-6
4-6
4-7
4-7
4-7
4-8
4-8
4-8
4-8
4-8
4-9
4-9
Chapter 5: Entering Information
Entering information on the XM65
Using the barcode scanner
Using the input panel (onscreen keyboard)
Keyboard shortcuts
Change the screen orientation
Using the onscreen keyboard
Using block recognizer
Using letter recognizer
Using transcriber
Import data
5-1
5-1
5-1
5-2
5-2
5-2
5-3
5-4
5-4
5-9
Chapter 6: Calendar, Contacts and Tasks
General information for all programs
Calendar
6-1
6-2
Janam Technologies LLC XM65 User Guide
Contacts
Tasks
Synchronize calendar, contacts and tasks
6-3
6-5
6-7
Chapter 7: Internet Explorer Mobile Options
Set internet options and viewing
Cookies and security settings
Favorites
Temporary internet files and history
Web files
Performance
7-1
7-1
7-2
7-2
7-2
7-3
Chapter 8: Messaging
Overview
Folders
Composing and sending
Download messages
Synchronizing Outlook email
Online address book
8-1
8-2
8-3
8-4
8-5
8-5
Chapter 9: Applications
Open and close programs
Explore files and folders
Calculator
Notes
Terminal services client
Search for a file or an item
Free up program memory
Get help for a program
9-1
9-1
9-1
9-2
9-4
9-5
9-5
9-5
Chapter 10: Microsoft Office Applications
Microsoft Office Mobile
Synchronizing documents, workbooks and notes
Notes
Overview of Word Mobile
Unsupported features in Word Mobile
Overview of PowerPoint Mobile
Overview of Excel Mobile
Unsupported features in Excel Mobile
Worksheets
Charts
10-1
10-2
10-2
10-3
10-3
10-5
10-7
10-10
10-12
10-13
Chapter 11: Exchange and Update Data Using ActiveSync
Create a user profile
Set up/delete a partnership
Partnership settings
11-1
11-2
11-4
Chapter 12: Wi-Fi Connectivity
Method 1
Method 2
12-2
12-2
Chapter 13: Bluetooth and Beam
Overview
Bluetooth partnerships
Bluetooth virtual COM ports overview
Beam Information
13-1
13-2
13-3
13-5
Chapter 14: Regulatory and Maintenance
Regulatory information
FCC and Canadian compliance
XM Series batch terminal
XM Series RF Terminals with 802.11b/g and/or Bluetooth
RF, regulatory and safety approvals
Care and cleaning of terminals
Waste electrical and electronic equipment (WEEE) information
Battery warning
General information
Operating instructions
14-1
14-1
14-2
14-2
14-3
14-3
14-3
14-4
14-4
14-4
Janam Technologies LLC ii
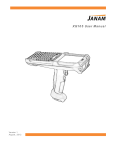
XM65 User Guide
1
Introduction
Janam’s XM65 is the Windows Mobile device that brings together power, performance and price advantage
like no other in its class. Small, light and fully rugged, the XM65 is the mobile computer that workers will
want to use. Advanced barcode scanning, robust WLAN communication and long battery life make it the
Windows Mobile solution that businesses will prefer. And its dazzlingly low price makes it easy to own.
About the Janam XM65
The XM65 is best-in-class, weighing less than 10 ounces
and featuring the Freescale™ MX21 processor, 64MB
SDRAM, 128MB NAND and a user accessible mini-SD card
slot as well as a color, quarter-VGA display, backlit numeric
keypad, WLAN and Bluetooth. The XM65 also meets IP54
sealing requirements and withstands multiple 4 foot/1.2
meter drops to concrete across a wide temperature range.
Purchase Considerations: •
•
•
•
•
•
Size = Small, light and pocketable Weight = Less than 10 ounces Speed = Fast Freescale MX21 processor Memory = Ample 64MB SDRAM, 128MB NAND Screen size = Full 3.5” color display Construction = Fully rugged Like all Janam products, the XM65 features integrated 1D
barcode scanning and built-in 2D barcode scanning capability. Janam’s 2D scanning solution enables users
to upgrade barcode scanning capability from 1D to 1D/2D on any device at any time with a simple
firmware upgrade. So regardless of the type of barcode used today, the XM65 offers the flexibility to adapt
as business needs change, without the need to invest in new hardware.
Hardware features
»
»
»
»
»
»
»
»
»
»
»
Microsoft® Windows Mobile® 5.0 Premium
High-performance barcode scanning
Small, light and truly pocketable
Backlit numeric keypad
Brilliant QVGA color display
Powerful computing performance
User-accessible mini-SD card slot
Wireless communication options (IEEE 802.11b/g and Bluetooth)
Sealed to IP54 standards
Withstands multiple 4 foot/1.2 meter drops to concrete across a wide temperature range
Full system of accessories
Janam Technologies LLC 1-1
XM65 User Guide
XM65 specifications
TECHNICAL
Operating System
Processor
Memory
Expansion
Battery
Backup Battery
Microsoft® Windows Mobile® 5.0 Premium
Freescale™ MX21-266MHz
64MB SDRAM 128MB NAND
User accessible mini-SD card slot
Swappable 3.7V 1880mAh rechargeable Li-ion
Rechargeable 20mAh Ni-MH
PHYSICAL
Dimensions
Weight
Keypad
Display Size
Display Type
Touch Panel
1.20” H x 3.11” W x 5.75” L / 30.5mm H x 79mm W x 146mm L
9.88oz / 280g
Backlit numeric keypad
2.17”W x 2.95”L / 55.0mm W x 75.0mm L
262K colors TFT QVGA (240x320)
Analog resistance type; stylus input
ENVIRONMENTAL
Operating Temp
Storage Temp
Humidity
Drop
Water & Dust
Vibration
Electro Static Discharge (ESD)
Sterilization
Ambient Light
14º to 122º F / -10º to 50ºC
-13º to 158ºF / -25º to 70ºC
5% to 90% RH (no condensation)
Multiple 4ft / 1.2m drops to concrete on all sides across a wide temperature range
IP54 Category II
0.03 G2/Hz from 20Hz to 2kHz; 1 hour random wave per axis
+/- 15kVDC air; +/- 8kVDC contact
76.9% to 81.4% concentration alcohol rub
450ft-candelas (artificial light); 8,000ft-candelas (sunlight)
INTERFACE FEATURES
Audio
Alerts
LED Indicators
Scan Triggers
DATA CAPTURE
Imager
1D Symbologies
2D Symbologies
DATA COMMUNICATION
IrDA
USB
WPAN
WLAN
Speaker and Microphone
Vibration, LED indicators, audio beep
Tri-color
Left, right, center buttons
1D/2D Adaptus® Imaging Technology; 752 x 480 pixel CMOS area imager
China Post, Codabar, Codablock F, Code 11, Code 16K, Code 32 Pharmaceutical (PARAF), Code 39,
Code 49, Code 93 and 93i, Code 128, EAN-8, EAN-13, Interleaved 2 of 5, ISBT 128, Matrix 2 of 5,
Korea Post, MSI, Plessey Code, PosiCode, Reduced Space Symbology (RSS-144, RSS Limited, RSS
Expanded), Straight 2 of 5 IATA (two-bar start/stop), Straight 2 of 5 Industrial (three-bar start/
stop), Telepen, Trioptic Code, UPC-A, UPC-A with Extended Coupon Code, UPC-E, UPC-E1
PDF417 (EAN-UCC Composite, MicroPDF417, PDF417, TCIF Linked Code 39, TLC39), 4-CB (4-State
Customer Barcode), Australian Post, Aztec Code, Aztec Mesas, British Post, Canadian Post, Data
Matrix, ID-tag (UPU 4-State), Japanese Post, KIX (Netherlands) Post, MaxiCode, OCR, Planet Code,
Postnet, QR Code
Standard v1.2 (up to 115,200bps)
v1.1 client (up to 12Mbps), OTG support
Bluetooth v1.2
IEEE 802.11b/g radio, 2.4GHz
ACCESSORIES
Single-Slot Cradle Kit
Four-Slot Cradle Kit
Modem Cradle Kit
Larger Capacity Battery
Magnetic Stripe Reader
SAFETY / REGULATORY
Safety
EMI
RF
Hazardous Locations
082109XM65s7
1-2
RFID Reader
Cable Cup
Vehicle Charger
Synching/Charging Cables
Battery Charger
Stylus 5-Pack
Stylus Tether
Nylon Holster
Adjustable Handstrap
Operating Case
UL60950-1, CSA C22.2 No. 60950-1-03, EN60950-1:2001+A11, GS, NOM
FCC Part 15 Subpart B, EN55022:1998+A1: 200+A2:2003, EN55024:1998+A1:2000+A2:2003,
ICES-003 Issue 4, AS/NZS CISPR 22:2004
FCC Part 15 Subpart C and Subpart B, EN300 328 v1.6.1 (2004-11), EN301 489-1 v1.6.1 (200509), EN301 489-17 v1.2.1 (2002-08), RSS 210 Issue 6, COFETEL
UL Listing (US and Canada) Class 1, Division 2, Groups A, B, C, D
Specifications subject to change.
Janam Technologies LLC XM65 User Guide
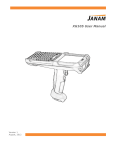
Hardware overview
Front view
Power on/off
Indicator
LED
Left
trigger Scan
trigger Home
Programmable Function Enter Alpha/numeric shift Connector Right
trigger Programmable Backspace Navigation Space Shift Bottom view
Top view
Barcode scan
window LCD Power on/off Syncing/charging
connector Janam Technologies LLC 1-3
XM65 User Guide
Back view
Hand strap
Stylus Speaker
IrDA window Stylus slot Battery Compartment Battery door Microphone
Battery screw Reset
1-4
Janam Technologies LLC XM65 User Guide
2
Get Started
Unpack your Janam XM65
Make sure you have the following:
» Janam XM65 handheld computer
» Janam authorized battery
» Hand strap and two screws to attach strap to device
» Charging accessory (ordered/packed separately) with one of the following kits:
•
Single-slot cradle kit
•
Four-slot cradle kit
•
USB syncing/charging cable with AC adapter
•
Serial syncing/charging cable with AC adapter
Recommended host computer configuration/requirements
The Janam XM Series Development Kit helps assist programmers with the development of applications for
Janam XM Series rugged barcode scanners running the Microsoft® Windows Mobile® 5.0 Premium operating
system. It contains all necessary details and instructions for developing applications that access Janam XM
Series libraries, including scanning, imaging and hardware utilities.
The development kit is designed for use with Microsoft® eMbedded Visual C++ 4.0 (SP4 or above) or
Microsoft Visual Studio 2005.
» IBM-compatible host computer with Pentium 450 MHz processor or higher
» Microsoft Windows XP Service Pack 2, Microsoft Windows 2000 Service Pack 4, Windows Server 2003
Service Pack 1 or Windows Vista
» 192 MB RAM (Recommended: 256 MB)
» Hard disk space:
• Without Microsoft Developer Network (MSDN): 1 GB on system drive and 2 GB on installation drive
• With MSDN: 1 GB on system drive; 3.8 GB on installation drive with a full installation of MSDN; and
GB on installation drive with a default installation of MSDN
» CD-ROM or DVD-ROM drive
» One available serial port
» Video minimum 800 x 600, 256 colors (Recommended: 1024 x 768, high color 16-bit)
» Microsoft mouse or compatible pointing device
2
Update your desktop software
Microsoft ActiveSync software is available at the Microsoft web site at http://www.microsoft.com.
Janam Technologies LLC 2-1
XM65 User Guide
Attach the hand strap
1.
2.
Align the holes at one end of the strap with the two holes on the back of the Janam XM65.
Using a screwdriver, insert the screws into the holes and turn clockwise.
Install the battery
IMPORTANT Battery Warning!
CAUTION: Use only Janam-approved batteries.
There is the risk of explosion if battery is replaced by an incorrect type.
Always dispose of used batteries according to the instructions.
1.
2.
3.
4.
To access the battery compartment, turn the locking-screw counterclockwise to open the latch and
remove battery cover.
Position the battery lift strap against the back of battery well, ensuring tab extension is on left side.
Place a Janam Lithium-ion rechargeable battery in and snap into place.
Replace the battery cover by positioning the top prongs first and sliding into place. Tighten locking
screw by turning clockwise.
To charge the battery:
LIMPORTANT
NOTE!
The main battery charges the backup battery in the XM65 series unit. When the main battery is fully charged, do not remove it from the unit for 24 hours. If the battery is removed during this period, the device cannot maintain any user data. To charge the battery using the USB syncing/charging cable or serial charging cable:
1. Connect the power supply to the USB syncing/charging cable or serial/syncing charging cable.
2. Connect snap-on end of USB syncing/charging cable or serial/syncing charging cable to bottom of
XM65, making sure the word TOP on the connector faces front.
3. Insert country-specific AC plug, and plug in the power supply.
4. The LED will illuminate to confirm connection (orange indicates charging, green indicates fully charged
and red indicates fault).
5. The battery is fully charged in approximately two hours.
To charge the battery using the single-slot or four-slot cradle:
1. Connect the power supply to the cradle.
2. Connect the line cord to the appropriate power supply.
3. Plug in the power supply.
4. Insert the XM65 into the cradle. Important note: Proper insertion is required to ensure connection. Be
sure to insert the device as follows:
•
Place the XM65 in cradle well (seating the device without trying to join connectors).
•
Tilt-rotate the XM65 forward (bringing the top end of the unit forward) as you apply downward
pressure to fully insert in cradle well, joining connectors.
5. The LED will illuminate to confirm connection (orange indicates charging, green indicates fully charged
and red indicates fault).
6. The battery is fully charged in approximately two hours.
2-2
Janam Technologies LLC XM65 User Guide
Remove the battery from spare battery charging well
Do not force-pull the battery from charging well. Follow these instructions to remove the battery:
1. While gently holding down with thumb, slip index finger down against the battery so that you feel the
edge where the battery meets the cradle.
2. Press down and forward with index finger to lift battery edge.
Turn on the XM65
The first time the device is turned on, calibrate the screen using the stylus.
The stylus is located on the back of the device. To calibrate, simply follow
the onscreen instructions and remember to save your settings.
Note: If your XM65 came pre-loaded with a custom software application, a
welcome utility may not appear. If this happens, follow the onscreen
instructions.
Connectivity
Understanding the today screen
Volume
Start
Battery level
Your XM65 mobile computer desktop includes the
following status indicator icons displayed at the top
and bottom of the screen and on the today screen.
More details about the status indicators on the today
screen are found in chapter 4, including customization
options.
USB socket
What do the status icons mean?
Indicator Meaning New email or text message (SMS) Indicator Battery level Sync error Low battery Bluetooth Battery charging Wi‐Fi ON No battery Wi‐Fi signal strength Meaning Pending alarm Janam Technologies LLC 2-3
XM65 User Guide
Reset the XM65
To soft reset:
In most situations, a soft reset restarts the device and saves all stored records and entries. However, any data
that has not been saved will be lost during a soft reset. To perform a soft reset, do the following:
1. Remove the battery door from the back of the unit.
2. Locate the reset button.
3. Using the stylus, press the reset button (one time).
4. Replace the battery door.
Or for ROM version 1.4.1 or later: Press and hold the Blue hard key. Press the power button until the
display is extinguished then release the Blue key.
To hard reset:
A hard reset removes all files and data in non-persistent storage (RAM device storage). Be sure that all data is
backed up before performing a hard reset. All data and files in persistent storage (\Application, \Platform and
SD card) will remain intact following a hard reset. To perform a hard reset, do the following:
1. Remove the battery door from the back of the unit.
2. Locate the reset button.
3. While holding the arrow-up key located on the front panel, right side of the computer, use the stylus to
press the reset button (once). Continue to hold the arrow-up key.
4. After the reset has occurred and the calibration screen appears on the screen, release the arrow-up key.
Or for ROM version 1.4.1 or later: Press and hold the Yellow hard key. Press the power button until the
display is extinguished then release the Yellow key.
LIMPORTANT
N O T E – B A T T E R Y D O O R ! XM65 mobile computers feature a battery door removal detection switch. This is designed to protect against data loss if the battery is removed during data collection or processing. The system will not fully operate when the battery cover is removed. As a result of this feature, XM65 devices auto‐matically create a safe state until the battery cover is secured, meaning a device will power‐down until the battery door is closed. It will then recall and resume from the user’s most recent screen when the battery door is fully in place. LIMPORTANT
N O T E – P O W E R -D O W N !
Power‐down: Upon performing a reset, you may find that the device automatically powers‐down shortly after the reset begins to take. This is a normal function of the battery door removal detection switch; the reset will hold. Simply secure the battery door and the XM65 device will resume activity at the last screen. While there is no technical reason to rush to secure the battery door, you may avoid the power‐down activity by quickly securing the battery door. Further information on the bootloader and ROM update procedures are available upon request.
2-4
Janam Technologies LLC XM65 User Guide
3
Barcode Scanning
The XM65 provides an easy migration path so that minimal application code changes are required for
barcode scanning applications.
Barcode scanning demonstration and setup
To run the demo:
1. Tap
> ScanDemo.
2. Three menus will appear (setup, OCR, options) on the top of the screen.
3. In the setup menu, select hardware test to review all the functions of
the scanner and determine if everything is working properly.
4. Select each item individually to verify that all hardware is working
properly.
5. Tap OK to return to the main demo.
6. Select setup > symbology config.
7. Tap enable all to let the scanner decide the best method of decoding
the barcode.
8. Tap OK to save.
Janam Technologies LLC
3-1
XM65 User Guide
9. Select scan.
Point the scanner at a barcode, and press any of the barcode scan
trigger buttons on the XM65. The results will display after a
successful scan.
Enable the ScanWedge feature
When the ScanWedge feature is enabled, data can be entered into the
specified application by opening the application on the handheld and
scanning a barcode.
1. Go to
> programs > ScanWedge.
2. Select enable from the ScanWedge menu.
3. Choose setup > symbology config from the top menu. You can then
select enable all to enable every type of barcode or manually select the
barcode symbologies you need.
4. Tap OK.
IMPORTANT
NOTE!
The ScanWedge function will be disabled if manual scanning is initiated either by a
command API or by using the Janam Barcode Test program.
Unlock 2D scanning
All of Janam’s mobile computers can be upgraded in the field to read both
1D and 2D barcodes with a simple firmware upgrade (Part Number 2D-XP1). With each upgrade, a key code is provided that unlocks 2D scanning capability on the device. To
purchase an upgrade for your XM65, contact your authorized Janam dealer.
You will need to provide the product imager ID number so the appropriate five-digit key code sequence
can be assigned. To access the imager ID number, follow these steps:
3-2
Janam Technologies LLC
XM65 User Guide
To get your imager ID number:
1. Tap
> settings > system > XM65 panel.
2. Select info.
The scanner ID info shows the unique number for each XM65 device.
After receiving your five-digit key code, follow these steps to enable 2D
scanning.
1. Go to
> settings > system.
2. Scroll down and tap XM65 panel icon on the bottom tabs.
3. Select scanner tab.
4. Enter your five-digit key code > unlock.
A successful unlock notification will appear.
5. Tap ok to close the screen.
IMPORTANT
NOTE!
Remember to keep a record of your five-digit key code. The
unlock code will be maintained in the unit’s system after a soft
reset, but it will need to be re-entered after a hard reset.
Enable ScanCapture feature
The ScanCapture demo enables you to capture normal images.
To take a single image:
1. Click single.
Janam Technologies LLC
3-3
XM65 User Guide
2.
3.
4.
5.
6.
A preview appears on the screen.
Click save.
Enter image’s name and select folder.
Click OK.
Below is the image that is captured.
To use continuous preview:
1. Click cont or continue button.
2. Click button again to stop preview.
3-4
Janam Technologies LLC
XM65 User Guide
4
Set up your Janam XM65
Locate front panel controls
Power button (on top of device). Pressing the power button turns the
handheld computer on (if it is off) and returns to the last screen that was
displayed. Press the power button to turn the handheld computer off.
Use the backlight to illuminate the screen in low-light conditions. Hold down the
power button for about two seconds to turn the backlight on and off.
Janam XM65 screen. Displays the applications and data stored in your handheld
computer. It is touch-sensitive and responds to the stylus.
Locate back panel components
Stylus channel. Holds the stylus. To use the stylus, remove it from the
channel, and hold it as you would a pen or pencil.
IR port. Uses infrared technology to transmit and receive data to and from
other handheld computers and to perform ActiveSync operations.
Reset button (located under battery cover). Under normal use, you should
not have to use the reset button.
USB/serial connector. Connects your handheld computer to a PC via a USB or
serial cable. You can also insert the XM65 into a Janam cradle.
Tap versus click
Tapping is the basic action used to execute tasks, so use the stylus to tap elements on your handheld
computer’s touch-sensitive screen. You can drag the stylus to select text, or use the stylus to drag the
slider of any scroll bar.
IMPORTANT
NOTE!
Always use the point of the stylus for tapping or making strokes on the handheld computer
screen. Do not use a pen, pencil or any other sharp object to write on the screen.
Realign (or recalibrate) the screen
The first time you start the Janam XM65 handheld computer, setup instructions will appear onscreen.
These instructions include a calibration screen or digitizer. Calibration aligns the internal circuitry of the
handheld computer with its touch-sensitive screen. Then, your handheld computer can detect the task you
want to perform whenever you tap an element on the screen. You can also recalibrate your screen at any
time.
Janam Technologies LLC
4-1
XM65 User Guide
To recalibrate (or realign) your screen:
1. Tap
> settings.
2. Select system on the tab at the bottom of the screen.
3. Select the screen icon > align screen, and follow the onscreen instructions, tapping the screen
where indicated.
Overview of the today screen
The today screen shows your upcoming appointments, active tasks,
wireless status and information about email messages. You can tap any
section of the today screen to open the program you need.
The today screen is also accessible by tapping
4-2
> settings > today.
Janam Technologies LLC
XM65 User Guide
Customize the today screen
Date / time
Connectivity
Owner information
Messaging
Tasks
Appointments
Security
Background
Calendar
Contacts
To choose a background / theme:
1. Tap
> settings > today.
2. On the appearance tab, select the desired theme for the background.
To add a custom background image:
IMPORTANT
NOTE!
Pictures can affect the readability of text on the today screen.
Select the use this picture as the background check box, and tap
browse to view a list of your picture files.
In folder, select the folder that contains the picture you want to use.
In type, select the file type of the picture.
Tap the file name of the picture you want to use.
Tap OK.
To copy pictures from your PC:
For more information on copying files from your PC to your device, see ActiveSync Help on your PC.
To select/change the order of appearance:
On the items tab, select the items you want to appear on the today
screen.
Change the order by tapping the item and then tap move up or move
down.
Janam Technologies LLC
4-3
XM65 User Guide
Change language and regional settings
Your Janam XM65 comes with a variety of regional, language and input
settings that are preset before your device is shipped. To change these
settings, follow the directions below.
WARNING: If you change to a language other than English, you
will have to perform a hard reset, which will erase all data on your
handheld computer. If you have data you need to save, perform an
ActiveSync operation before you change languages.
The style in which numbers, currency, dates and times are displayed is
specified in regional settings.
1. Tap
> settings > system tab > regional settings.
2. On the region tab, select your region and language.
3. Do one of the following:
On the time tab, select the time display options you want.
On the date tab, select the date display options your want.
4. To customize settings further, tap the appropriate tabs and select the desired options.
Change the date and time display
To set the time and date:
1.
2.
3.
4.
Tap
> settings > system tab > clock & alarms.
Select the correct time zone, and change the date or time.
Choose alarms tab to set regular reminders.
Choose more tab to add/remove the clock on the title bar in all programs.
Shortcut: To access clock &
alarms, tap on the date and
time area on the today screen,
if already displayed.
Note: During synchronization, the time on your device is updated with the time on your PC.
4-4
Janam Technologies LLC
XM65 User Guide
To set the time and date for a different location:
1. Tap
> settings > system tab > clock & alarms.
2. Tap visiting.
3. Select the correct time zone, and change the time or
date.
Tip: Select visiting to choose a different
time zone if you are travelling to another
location or frequently communicate with
someone in another time zone.
Owner identification and password protection
1. Tap
> settings > personal tab > owner information.
2. On the identification tab, enter your personal information.
To display owner information on the today screen:
1. Tap
> settings > personal tab > owner information.
2. On the options tab, select the identification information check box.
3. On the options tab, select the notes check box if you want additional text displayed, such as:
Reward if found.
4. On the notes tab, enter the additional text.
To protect your device with a password:
1. Tap
> settings > personal tab > lock.
Janam Technologies LLC
4-5
XM65 User Guide
2. Select the prompt if device unused for check box, and select the
option from the dropdown menu.
3. In the password type box, select the type of password you would like
to use – simple PIN or strong alphanumeric. Enter the password and,
if necessary, confirm the password.
4. On the hint tab, enter a phrase to help you remember your password.
The hint displays after the wrong password is entered four times.
5. Tap OK. You will be prompted to enter your password the next time
you turn on your Janam XM65.
IMPORTANT
NOTE!
Each time a wrong password is entered, the time the device takes to
respond will get longer and longer until the device appears to be not
responding. If you forget your password, you must reset your device.
To change your password:
1. Tap
> settings > personal tab > lock. Enter your current password.
2. In the password box, enter your new password.
3. On the hint tab, enter a phrase to help you remember your new password. The hint displays after the
wrong password is entered four times.
4. Tap OK.
Enter text or data
You can enter data into your Janam XM65 in several ways. For more details, see the entering information
in chapter 5.
Data Entry
Method
Barcode scanner
Use the 1D and 2D (optional) scanning feature to quickly and accurately capture text and
images.
Synchronizing
Use ActiveSync to exchange information between your PC and device.
Typing
Use input panel to enter typed text by tapping keys on the onscreen keyboard or by using
handwriting recognition software.
Writing
Use the stylus like a pen to write directly on the screen.
Drawing
Use the stylus like a pen to draw a picture directly on the screen.
Backlight and brightness preferences
To change backlight preferences:
1. Tap
> settings > system tab > backlight
settings.
2. Select battery and make your changes in the
dropdown menu.
3. Adjust the backlight intensity as necessary.
4. Select external, and make your selections from
the dropdown menu.
5. Adjust the backlight intensity as necessary.
6. Click OK.
4-6
Janam Technologies LLC
XM65 User Guide
Battery power
To make the battery last longer:
> settings > system tab > power.
1. Tap
2. On the advanced tab, specify when your device turns off to
conserve battery power. For optimum conservation, specify 3 minutes
or less.
3. Use the AC adapter to plug your device into external power whenever
possible.
4. Adjust the backlight settings as shown.
Scrolling speed
To adjust the speed for scrolling:
1. Tap
> settings > personal tab >
buttons > up/down control tab.
2. Do one of the following:
Under delay before first repeat,
move the slider to shorten or
lengthen the time that elapses
before scrolling begins.
To change the time it takes to scroll
from one item to the next, under
repeat rate, move the slider to
adjust the speed.
Adjust volume
1.
2.
3.
4.
Tap the
on the top command bar.
Move the indicator up or down to adjust volume.
Click off to turn volume off completely.
Click on the handheld’s background to close the popup.
Janam Technologies LLC
4-7
XM65 User Guide
Enable sounds and notifications
1. Tap or select the events and programs to
enable sounds.
2. Select the notifications tab to assign
notifications to specific events.
3. Select the event in the dropdown menu, tap
play sound checkbox and choose sound.
4. Click ok.
Device name
Your XM65 may already be named, which is used
to identify the device in the following situations:
Synchronizing with a PC
Connecting to a network
Restoring information from a backup
IMPORTANT
NOTE!
If you synchronize multiple devices with the same
PC, each device must have a unique name.
To change the device name:
1. Tap
> settings > system tab > about.
2. Tap the device ID tab.
3. Enter a name. The device name must begin with a letter, consist of letters from A to Z, numbers from
0 to 9, and cannot contain spaces. Use the underscore character to separate words.
Customize the start menu
1. Tap
> settings > personal tab > menus.
2. Select the check boxes of the items you want to appear in the start
menu (up to seven items).
Open applications
To open an application:
1. Tap
> programs.
2. Select the application you want to open.
Remove applications
To remove a program:
1.
2.
3.
4.
4-8
Go to
> settings > control panel.
Double-tap remove programs icon.
Select the program you want to delete, and click remove.
Click OK.
Janam Technologies LLC
XM65 User Guide
Keypad
To lock the keypad:
1. Tap
> today.
2. Tap device unlocked. The lock icon will change to a closed lock.
To unlock the keypad:
1. At the bottom of the today screen, tap unlock.
2. Tap unlock again.
Accessibility for people with disabilities
You can customize your device so that the screen and items on the screen are easier to see. You can also
choose how to be notified about events or actions with sounds, flashing lights, messages on the screen or
vibrations. The following features enable you to adjust the settings accordingly, based on your needs:
» Adjust the brightness of the backlight
» Increase or decrease the size of the text on the screen
» Use ClearType for screen text
» Adjust the volume for sounds
» Choose how to be notified about events or actions
» Customize the start menu
» Change the text input method
» Change the zoom level for entering text
» Increase the size of the keyboard keys
Janam Technologies LLC
4-9
XM65 User Guide
5
Entering Information
Entering information on the XM65
You can enter information in several ways, depending on the type of device you have and the program
you are using.
Type
How
Barcode scanning
Use the barcode scanning to capture data and images.
Typing
Use input panel to enter typed text by tapping keys on the onscreen keyboard or by
using handwriting recognition software.
Writing
Use the stylus like a pen to write directly on the screen.
Drawing
Use the stylus like a pen to draw a picture directly on the screen.
Synchronizing
Use ActiveSync to exchange information between your PC and device. For more
information on ActiveSync, see chapter 11.
Using the barcode scanner
You can also get data and images by scanning barcodes into the handheld computer. See chapter 3 for
more details.
Using the input panel (onscreen keyboard)
The input panel provides access to the various input methods available on your device.
By default, input panel appears on the menu bar as shown to the right. The icon indicates
which input method is currently selected. The input selector arrow opens a list of available
input methods.
To show or hide input panel, tap the input panel icon on the menu bar.
Icon
Indicates the selected input method is:
The onscreen keyboard.
Letter recognizer or block recognizer.
Transcriber (if available).
Janam Technologies LLC
5-1
XM65 User Guide
Keyboard shortcuts
When you use the onscreen keyboard, you can use shortcut keys as an alternative to menu commands
when working in programs on your device.
To
Tap
To
Tap
Copy the selected text
CTRL+C
Undo the last action
CTRL+Z
Cut the selected text
CTRL+X
Redo the last action
CTRL+Y
Paste the text
CTRL+V
Make the selected text bold
CTRL+B
Close a program
CTRL+Q
Make the selected text italic
CTRL+I
Open a new file
CTRL+N
Make the selected text underlined
CTRL+U
Change the screen orientation
1. Tap
> settings > system tab > screen.
2. On the general tab, tap the screen orientation you want, and tap OK.
Using the onscreen keyboard
To enter text:
You can enter text by tapping keys on the keyboard that is displayed on the screen. The onscreen
keyboard is available when text entry is possible.
1. In a program, tap the input selector arrow, and then keyboard.
2. Enter text by tapping keys on the onscreen keyboard.
To increase the size of the keyboard keys:
1. Tap the input selector arrow > options.
2. In the input method list, select keyboard > large keys.
3. Enlarge the keys even more by selecting the use gestures for the following keys check box. Fewer
keys will appear on the keyboard, but you can do gestures for space, backspace, enter and shift+key.
To change the zoom level for entering text:
1. Tap
> settings > personal tab > input.
2. Tap the options tab, and change the zoom level as desired.
3. Tap OK.
To use ClearType for screen text:
1. Tap
> settings > system tab > screen > ClearType tab.
2. Select the enable ClearType check box.
To increase or decrease the size of text on the screen:
1. Tap
> settings > system tab > screen > text size tab.
2. Move the slider to increase or decrease the text size.
5-2
Janam Technologies LLC
XM65 User Guide
To change word completion options:
1. Tap
> settings > personal tab > input.
2. Tap the word completion tab, select the suggest words when entering text check box, and
specify the settings.
3. Tap OK.
To turn on automatic scrolling:
You can change input settings so that as you enter text in a program, scrolling occurs automatically when
the text reaches the bottom of the screen.
> settings > input.
1. Tap
2. Tap the options tab, and select the scroll upon reaching the last line check box.
3. Tap OK.
To change input panels:
1. The standard alpha keyboard is the default.
2. For numeric, tap on 123 keyboard in the upper left corner of the main keyboard.
3. For international, tap on áü key in the lower left corner of the alpha keyboard.
Alpha
Numeric
International
Using block recognizer
Use a single stroke to write letters, numbers, symbols and punctuation, which are converted into typed
text. Block recognizer is available when text entry is possible.
To enter text using block recognizer:
1. From a program, tap the input selector arrow and then block recognizer.
2. Write characters, numbers and symbols in the designated writing area.
Enter letters by writing in the abc (left) area of the box.
Enter numbers by writing in the 123 (right) area of the box.
Enter symbols and punctuation by tapping in either area of the box
and then writing the desired character.
Janam Technologies LLC
TIP: For help with
writing characters with
block recognizer, tap the
question mark near the
writing area.
5-3
XM65 User Guide
Using letter recognizer
With letter recognizer, you can write individual letters, numbers and
punctuation and have them converted into typed text. It’s available when
text entry is possible.
TIP: For help with writing
characters with letter
recognizer, tap the question
mark near the writing area.
To enter text using letter recognizer:
1. From a program, tap the input selector arrow and then letter recognizer.
2. Write characters, numbers and symbols in the designated writing area.
Enter capital letters by writing in the ABC (left) area of the box.
Enter lower case letters by writing in the abc (middle) area of the box.
Enter numbers by writing in the 123 (right) area of the box.
Enter punctuation and symbols by tapping in either area of the box and then writing the
desired character.
Using transcriber
Transcriber works transparently in the background of programs that
accept user input, so you must have one of these programs open.
TIP: To turn transcriber
on and off, tap the
transcriber icon.
To start transcriber:
1. Start a program such as Word Mobile.
2. Tap the input panel icon at the bottom center of the screen and tap the input selector arrow.
3. Tap transcriber. The transcriber introductory screen appears.
To show or hide the transcriber toolbar:
The transcriber toolbar, which appears at the bottom of the screen when transcriber is open, provides
easy access to several tools – enter, space and backspace buttons, and left and right arrow buttons.
From a program, tap the transcriber icon at the bottom of the screen.
Tap
To
Open the options dialog box, where you can set options such as writing direction, text entry and shorthand.
Open letter shapes, where you can set your personal writing styles to maximize recognition.
Use the miniature keyboard to quickly enter numbers, punctuation and other symbols.
Change the character recognition mode.
a mode. This is the default for optimum handwriting recognition.
123 mode. Numbers and some letters are allowed and the calculator is activated.
A mode. All letters are automatically capitalized.
If you are in A or 123 mode, recognition returns automatically to the default mode once you lift the stylus.
Insert a space at the cursor.
Insert a paragraph return at the cursor.
Move the cursor one space to the left.
Move the cursor one space to the right.
Move the cursor one space back and erase any text.
Open the transcriber help.
5-4
Janam Technologies LLC
XM65 User Guide
To set transcriber startup options:
1. From a program, tap
on the transcriber toolbar.
2. On the quick settings tab, set any of the following options:
In recognition, tap the language transcriber recognizes.
In writing direction, tap the picture that most closely represents the angle at which you write on
your device. For example, if your writing slants to the left, tap the second option.
Select the intro screen check box to display the short introductory screen when transcriber first
opens.
Select the sound check box to turn on transcriber sounds.
To set transcriber text entry options:
1. From a program, tap
on the transcriber toolbar.
2. On the inking tab, set any of the following options:
Adjust the recognition delay slider.
Select the add space after check box to add a space after each word that transcriber recognizes.
Under pen, choose the line width and color for handwriting.
Tap match letter shapes to your writing to open the letter shapes feature where you can train
transcriber to recognize your handwriting.
To write with transcriber:
Transcriber allows you to write in cursive, print or a combination of both.
1. From a program, position the cursor where you want text to appear.
2. Use the stylus to write anywhere on the screen. The handwriting will be converted to text shortly
after you lift the stylus from the screen.
To use the transcriber calculator:
1. From a program, tap
on the transcriber toolbar until 123 is selected.
2. Write the equation. If you write 2+2=, transcriber returns 2+2=4.
To match letter shapes to handwriting:
1.
2.
3.
4.
From a program, tap
on the transcriber toolbar.
On the inking tab, tap match letter shapes to your writing.
At the bottom of the letter shapes screen, tap the character you want to explore.
At the top of the screen, double-tap the picture of this character.
The character slowly redraws, showing the handwriting sequence.
5. Tap how often you write the character in that way: often, rarely or never.
6. Click OK when you are finished.
To optimize handwriting recognition for transcriber:
If transcriber does not recognize your handwriting as accurately or quickly as you'd like, you can optimize
handwriting recognition.
Select the writing direction picture that best matches the slant of your handwriting.
Use letter shapes to eliminate letter shapes that you do not use or to learn methods of writing
characters that will make them easier for transcriber to recognize.
Try writing in another format. If you have been printing, try writing cursive, or if you have been
writing in both cursive and print, try printing alone.
Adjust the speed at which transcriber returns text after you write.
Add a user dictionary that contains special terms you may be using, such as medical or legal terms.
You can also verify that you are using your letter shapes user profile.
Janam Technologies LLC
5-5
XM65 User Guide
To edit text using transcriber:
1. From a program, draw a line across the text you want to edit. After you lift the stylus from the
screen, the line will disappear and the selected text will be highlighted.
2. Do either of the following:
Use gestures to capitalize letters or insert a space.
Use handwriting recognition alternates to quickly correct text and add words to the transcriber
dictionary.
To create a dictionary for transcriber:
1. On your PC, use a program such as notepad, and type each term you want to include in the dictionary
on a separate line.
2. When you are finished, on the file menu, click save as.
3. In the save as type box, select all files, and enter a name for the file using a .dct extension (for
example, mydictionary.dct).
To create shorthand for entering words:
1.
2.
3.
4.
5.
6.
From a program, tap
on the transcriber toolbar.
On the advanced tab, under shorthand, tap settings.
In the transcriber: shorthand dialog box, tap add.
Tap text expansion, and tap next.
Write the shorthand you want to use, then enter the replacement text to display.
Tap finish, then tap OK.
To use the transcriber keyboard
From a program, tap
on the transcriber
toolbar. The keyboard remains visible until you
tap the button again.
TIP: To reposition the keyboard, tap and hold the title bar
and drag to the desired location. With no text selected,
you can also open the keyboard by doing this gesture.
To create shorthand that will open a program:
1.
2.
3.
4.
5.
From a program, tap
on the transcriber toolbar.
On the advanced tab, under shorthand, tap settings.
In the transcriber: shorthand dialog box, tap add.
Tap run program, and tap next.
Write the shorthand text you want to use, then select the program you want transcriber to run when
you write the shorthand.
6. Tap finish, then tap OK.
IMPORTANT
NOTE!
The next time you write the shorthand text, the appropriate program will open.
To set up shorthand functions:
1.
2.
3.
4.
5.
6.
5-6
From a program, tap
on the transcriber toolbar.
On the advanced tab, under shorthand, tap settings.
In the transcriber: shorthand dialog box, tap add.
Tap function > next.
Write the shorthand you want to use and then tap the function the shorthand represents.
Tap finish, and tap OK.
Janam Technologies LLC
XM65 User Guide
To use handwriting recognition alternates:
1. From a program, draw a line across the word you want to correct or add to the dictionary.
After you lift the stylus, the line will disappear and the word will be highlighted.
2. Do the quick correct
gesture.
3. On the alternates menu, do one of the following:
To correct the selected word, tap the word you want to replace it with.
To add the selected word to the dictionary, tap add to dictionary.
To use gestures in transcriber:
Use quick strokes of the stylus to edit your text. Do the enter, space and tab gestures while writing text to
insert returns, spaces or tabs.
Do
To
Insert a paragraph return at the cursor.
The horizontal portion of the gesture must be at least two times longer than the vertical portion.
Insert a space at the cursor.
The horizontal portion of the gesture must be at least two times longer than the vertical portion.
Move the cursor one space back and erase any text.
Do the gesture by drawing a line from right to left.
Open the menu of alternate words if a word is selected or the onscreen Transcriber keyboard if no
text is selected.
Do the gesture by drawing a line straight down and back up.
Change the capitalization of a selected letter, word, or block of text.
Do the gesture by drawing a line straight up.
Undo the last action.
Do the gesture by drawing a line straight up and back down.
Copy the selected text.
Do the gesture by drawing a line from left to right and back.
Cut the selected text.
Do the gesture by drawing a line from right to left and back.
Paste copied or cut text.
Do the gesture by drawing a line from the lower left of the screen diagonally up toward the right and
back down to the right.
Insert a tab.
The horizontal portion of the gesture must be at least two times longer than the vertical portion.
TIP: You can also use the enter, space, and backspace buttons on the transcriber toolbar.
To match letter shapes to handwriting:
Use the letter shapes feature to match your handwriting to a series of letter shapes recognized by
transcriber or to learn methods of writing characters that transcriber will recognize more easily.
1. From a program, tap
on the transcriber toolbar.
2. On the inking tab, tap match letter shapes to your writing.
3. At the bottom of the letter shapes screen, tap the character you want to explore.
4. At the top of the screen, double-tap the picture of this character. The character slowly redraws,
showing the handwriting sequence.
Janam Technologies LLC
5-7
XM65 User Guide
5. Tap how often you write the character in that way: often, rarely or never.
6. Click OK when you are finished.
To save a letter shapes user profile:
You can save a user-specific letter shapes profile that you can open each time you use transcriber.
1.
2.
3.
4.
From a program, tap
on the transcriber toolbar.
Match the appropriate letter shapes to your handwriting.
When finished, tap file > save.
Enter a name for the user-specific letter shapes profile and select the type (.LSS is the default) and
location for the file.
5. Tap save.
IMPORTANT
NOTE!
To open a letter shapes profile, tap file > open > double-tap the profile.
To select a letter shapes user profile:
The transcriber letter shapes feature supports two profiles, master and guest. The master profile is not
affected by any changes made to the guest profile.
1. From a program, tap
on the transcriber toolbar.
2. Tap file and one of the following:
Master if you are the primary user.
Guest if you are not the primary user.
To add a dictionary to a device:
To
1.
2.
3.
add a dictionary to your device, the PC and the device must be connected and synchronized.
On the PC, open ActiveSync and click explore.
Copy the dictionary file (a file with a .dct extension) to the dictionaries folder on your device.
On the device, open a program and select transcriber as the input method. If the introductory screen
appears, tap OK to close it.
4. On the transcriber toolbar, tap
.
5. On the advanced tab, under dictionaries, tap settings.
6. In the transcriber: dictionaries list, select the check box next to the new dictionary, and tap OK.
The dictionary is now ready for use by transcriber.
To change the text input method:
Depending on your preference, you can use the onscreen
keyboard or a handwriting recognition feature such as
Block Recognizer, Letter Recognizer, and Transcriber to
enter text in programs.
TIP: You can also change the text input method
from within a program by tapping the input
selector arrow and tapping an input method.
> settings > personal tab > input.
1. Tap
2. On the input method tab, select block recognizer, letter recognizer or transcriber.
3. Tap OK.
5-8
Block recognizer
Use a single stroke to write letters, numbers, symbols, and punctuation which are then
converted into typed text. Do gestures to enter return and backspace.
Keyboard
Tap keys on the keyboard displayed on the screen to enter text.
Letter recognizer
Write individual letters, numbers, and punctuation which are converted into typed text.
Transcriber
Write in cursive, print or mixed handwriting (consisting of both cursive and print) and
convert your writing into typed text.
Janam Technologies LLC
XM65 User Guide
Import data
If you have data stored in computer applications such as spreadsheets and databases, or if you want to
import data from another device, you can transfer the data to your Janam XM65 handheld computer
without having to key it in manually. See chapter 11 for more details on how to transfer files and
applications.
Janam Technologies LLC
5-9
XM65 User Guide
6
Calendar, Contacts and Tasks
General information for all programs
Why use categories?
Use categories to group related contacts, tasks and appointments.
To create a category:
1. From the program, tap an existing item or create a new one.
2. Do one of the following:
For an existing item in calendar and tasks, tap edit > categories.
For an existing item in contacts, tap menu > edit > categories.
For a new item in calendar, contacts and tasks, tap categories.
3. Tap new, enter the category name and tap done. The new category is automatically assigned to the
item.
4. Tap OK.
IMPORTANT
NOTE!
Categories are shared between your appointments, contacts and tasks. A category will remain in
the list of shared categories as long as it is assigned to at least one appointment, contact or task.
To assign a category to an item:
1. From the program, tap the item you want a category assigned to.
2. Do one of the following:
In calendar and tasks, tap edit > categories.
In contacts, tap menu > edit > categories.
3. Select the category you want, and tap OK.
4. Tap OK.
To add a note to an item:
1. From the program, tap the item you want to add a note to. In calendar, you must be in agenda or day
view.
2. Do one of the following:
In calendar and tasks, tap edit > notes tab.
In contacts, tap menu > edit > notes tab.
3. Tap OK.
See additional information about notes at the end of this chapter.
Janam Technologies LLC
6-1
XM65 User Guide
Calendar
Use calendar to schedule and display your appointments on the today
screen. If you use Outlook on your PC, you can synchronize appointments
between your device and PC.
You can look at your appointments in day, week, month and agenda views.
For details, tap the appointment.
To schedule an appointment:
1. Tap
> calendar.
2. Tap menu > new appointment.
3. Enter information. To schedule an all-day event, in the all day box,
tap yes.
4. Tap OK.
To cancel an appointment:
5. Tap
> calendar.
6. Tap menu > delete.
IMPORTANT
TIP: To have the time entered
automatically in day view, tap the
time slot for the new appointment,
and tap menu > new appointment.
NOTE!
All-day events do not occupy blocks of time in calendar;
instead, they appear in banners at the top of the calendar.
To make an appointment or a task recurring:
1. From the program, tap the item you want to make
recurring.
2. Tap edit, and in the occurs box, tap a recurrence
pattern.
3. Tap OK.
TIP: Create your own recurrence pattern by
tapping edit > occurs > edit pattern. Follow
the steps in the wizard to customize how
frequently the appointment recurs as well as
when it ends.
To remove the recurrence from an appointment or a task:
1. From the program, tap the item from which you want to remove the recurrence.
2. Tap edit > no.
3. In the occurs box, tap edit pattern > remove recurrence > OK.
To set a reminder for an appointment:
1. From the program, tap the item you want to set a reminder for.
2. Tap edit, and in the reminder box, tap remind me. In calendar, the default reminder is set 15
minutes before an appointment.
3. Tap OK.
To choose how you are reminded:
1. Tap
> settings > personal tab > sounds & notifications.
2. On the sounds tab, choose how you want to be notified by selecting the appropriate check boxes.
3. On the notifications tab, in event, tap an event name and choose how you want to be notified by
selecting the appropriate check boxes – choose special sound, message or flashing light.
6-2
Janam Technologies LLC
XM65 User Guide
To change views in calendar:
1. Tap
> calendar.
2. Tap menu > view and select the view you want.
View
Agenda
Day
Week
Month
Year
See
Your current day's activities at a glance. Upcoming appointments are bold; past
appointments are dimmed.
Your schedule for a single day in a day-planner layout.
Free and busy times in time slots of 1/2 hour or 1 hour.
Your schedule for the whole week.
Your free and booked days for a month:
: morning appointment
: afternoon appointment
: morning and afternoon appointments
: all-day event with time not marked free
A calendar for the entire year.
IMPORTANT
NOTE!
In month view, a date will appear in red when the holiday
category is assigned to any appointment for that day.
To change the display of the work week:
You can customize your calendar so that a work week
starts on Sunday or Monday and has from five to seven
days.
1. Tap
> calendar.
2. Tap menu > options and do one or both of the
following:
TIPS: You can also change the view by
tapping agenda, day, week, month or year
on the menu bar. To see your appointments
for the current day, tap
> today.
To specify the first day of the week, in the 1st day of week box, tap Sunday or Monday.
To specify the number of days you want to appear in a work week, in the week view box, tap
5-day week, 6-day week or 7-day week.
3. Tap OK.
Contacts
To create a contact:
1. Tap
> contacts.
2. Tap new > enter the contact information.
3. Tap OK.
IMPORTANT
NOTE!
If your contact list has been filtered by a category when you create a
contact, that category is automatically assigned to the new contact.
Janam Technologies LLC
6-3
XM65 User Guide
To create a contact from an existing one:
1.
2.
3.
4.
5.
Tap
> contacts.
Tap and hold the contact you want to copy.
Tap copy contact.
Tap the copy of the contact > menu > edit.
Change the contact information as needed and tap OK.
To change contact information:
1.
2.
3.
4.
Tap
> contacts.
Tap the contact.
Tap menu > edit and enter the changes.
Tap OK.
To add a picture to contact information:
1.
2.
3.
4.
Tap
> contacts.
Tap the contact > menu > edit.
Tap picture.
Tap the picture to add.
To remove a picture from contact information:
1. Tap
> contacts.
2. Tap the contact > menu > edit.
3. Tap menu > remove picture.
To create a contact from a message:
1. From the open message, tap menu > save to contacts.
To copy a contact from a SIM to a device:
1. Tap
> contacts.
2. Tap the contact.
3. Tap menu > save to contacts.
To work with the contact list:
TIP: To display a greater number of
contacts, tap menu > options,
select the show contact names
only check box, and clear the show
alphabetical index check box.
1. Tap
> contacts.
2. In the contact list, do any of the following:
In name view, you can search for a contact by entering a name or number, or by using the
alphabetical index. To switch to name view, tap menu > view by > name.
To see a summary of information about a contact, tap the contact.
To see a list of available actions for a contact, tap and hold the contact.
To see a list of contacts employed by a specific company, tap menu > view by > company.
Then, tap the company name.
To send contact information:
1.
2.
3.
4.
5.
6-4
Tap
> contacts.
Select the contact.
Tap menu > send contact > text message.
Select the contact information >done.
In the new text message, enter the address > send.
Janam Technologies LLC
XM65 User Guide
To find a contact:
1. Tap
> contacts.
2. If you are not in name view, tap menu > view by > name.
3. Do one of the following:
Begin entering a name or phone number in the provided text box until the contact you want is
displayed. To show all contacts again, tap the text box and clear the text, or tap the arrow to the
right of the text box.
Use the alphabetical index displayed at the top of the contact list.
Filter the list by categories. In the contact list, tap menu > filter. Then, tap a category you've
assigned to a contact. To show all contacts again, select all contacts.
To send a message to a contact:
1.
2.
3.
4.
Tap
> contacts.
Tap the contact.
Tap the address.
Tap the account.
TIP: To quickly add a contact's address to a new
message, tap the To, Cc, or Bcc line, and tap menu >
add recipient. Tap the contact you want to send the
message to and choose the address if necessary.
Tasks
Use tasks to keep track of things you need to do. If you use Outlook on your PC,
you can synchronize tasks between your device and PC so that tasks you create or
update on your PC will also be updated on your device and vice versa.
Tip: To quickly see
the number of active
tasks you have,
tap
> today.
To create a task:
1. Tap
> programs > tasks.
2. Tap new, enter a subject for the task, and fill in information such as start and due dates.
3. When finished, tap OK.
IMPORTANT
NOTE!
An easy way to create a task is to copy an existing one. In the task list, select the task
you want to copy. Tap menu > edit > copy, and then tap menu > edit > paste.
Janam Technologies LLC
6-5
XM65 User Guide
To make a task recurring:
1. From the program, tap the item.
2. Tap edit, and in the occurs box, tap a recurrence pattern.
3. Tap OK.
To set the start and due date for a task:
1. Tap
> programs > tasks.
2. Tap the task you want to set start and due dates for.
3. Tap edit and do one or both of the following:
Tap starts to enter a start date for the task.
Tap due to enter a due date for the task.
4. Tap OK.
To set a reminder for an appointment or a task:
1. From the program, tap the item you want to set a reminder for.
2. Tap edit, and in the reminder box, tap remind me. The default reminder is set at 8:00 in the
morning on the day a task is due.
3. Tap OK.
IMPORTANT
NOTE!
To set a reminder for a task, you must first set a due date.
To change the priority of a task:
1.
2.
3.
4.
Tap
> programs > tasks.
Tap the task you want to change the priority for.
Tap edit and in the priority box, tap a priority level.
Tap OK.
TIP: To filter your tasks further,
tap menu > filter > active tasks
or completed tasks.
IMPORTANT
NOTE!
All new tasks are assigned a normal priority by default.
TIPS: You can easily create a short, to-do type task. Simply tap the tap here to add a new task box, enter a subject and
press ENTER. If the task entry box is not available, tap menu > options and select the show tasks entry bar check box.
To mark a task as private:
1. Tap
> programs > tasks.
2. Tap the task you want to mark as private.
3. Tap edit and in the sensitivity box, tap private.
4. Tap OK.
To remove the recurrence from a task:
1.
2.
3.
4.
6-6
Tap the task > edit.
In the occurs box, tap edit pattern.
Tap remove recurrence.
Tap OK.
Janam Technologies LLC
XM65 User Guide
To show start and due dates in the task list:
1.
2.
3.
4.
Tap
> programs > tasks.
Tap menu > options.
Select the show start and due dates check box.
Tap OK.
To locate a task:
1. Tap
> programs > tasks.
2. In the task list, do one of the following:
Sort the list. Tap menu > sort by and tap a sort option.
Filter the list by category. Tap menu > filter, and tap the category you want displayed.
Synchronize calendar, contacts and tasks
Calendar appointments, contacts, and tasks stored on your device can be synchronized with similar items
on your PC or Exchange Server. The items entered on one computer are copied to the other during
synchronization. Handwritten notes and drawings are saved as metafiles (pictures) when synchronizing
with your PC, but are removed when synchronizing with a server.
For more information on synchronization, see ActiveSync Help on the PC.
Janam Technologies LLC
6-7
XM65 User Guide
7
Internet Explorer Mobile Options
To use Internet Explorer:
1. Set up a connection to your ISP or corporate network by following the
instructions detailed in chapter 12.
2. Tap start > Internet Explorer to display the default page.
Set internet options and viewing
To choose a home page:
1. In Internet Explorer Mobile, tap menu >
tools > options > general tab.
2. Do one of the following:
TIPS: To go to your home
page, tap menu > home.
To use the displayed page as your home page, tap use current.
To use the default home page, tap use default.
To change the size of text on Web pages:
In Internet Explorer Mobile, tap menu > zoom, and tap the size you want.
To view a page in full screen mode:
In Internet Explorer Mobile, tap menu > view > full screen.
To change how Web pages fill the screen:
TIP: To exit full screen mode, tap and
hold anywhere on the screen, and
tap full screen to cancel the selection.
1. In Internet Explorer Mobile, tap menu > view.
2. Tap one of the following:
One column. Arranges the content into one column that is as wide as the screen.
Default. Maintains a layout similar to what you see on a desktop computer, but it makes items
smaller and arranges the content so that you can see most of it without having to scroll.
Desktop. Keeps the same layout and size as on a desktop computer, which will require both
horizontal and vertical scrolling.
Cookies and security settings
To change cookies and security settings:
1. In Internet Explorer Mobile, tap menu > tools > options >
security tab.
2. Select the check boxes for the options you want, and click OK.
Janam Technologies LLC
TIP: To prevent Internet Explorer
Mobile from accepting any cookies,
clear the allow cookies check box.
7-1
XM65 User Guide
Favorites
To add a favorite:
1. In Internet Explorer Mobile, go to the page you want to add.
2. Tap and hold the page, and tap add to favorites.
3. Confirm or change the name and select a folder for storing the favorite.
To add a folder in favorites:
1. In Internet Explorer Mobile, tap menu > favorites >add/delete tab.
2. Tap new folder > enter a folder name > add.
To delete a favorite or folder:
1. In Internet Explorer Mobile, tap favorites > add/delete tab.
2. Select the item you want to delete, and tap delete.
Temporary internet files and history
To delete temporary Internet files:
1. In Internet Explorer Mobile, tap menu > tools > options >
memory tab.
2. Tap delete files.
TIP: To change the number of days
that links are stored the history list,
change the number in the day(s) box.
To clear the history list:
1. In Internet Explorer Mobile, tap menu > tools > options > memory tab.
2. Tap clear history.
Web files
To download and save a file from the Web:
1.
2.
3.
4.
In Internet Explorer Mobile, go to the page that contains the file you want to save.
Tap file > save as.
In the name box, enter a new name for the file.
Do any of the following:
In the folder list, tap the folder where you want to save the file.
In the location list, select where you want to store the file: main memory.
5. Tap OK.
To copy text from a Web page:
1. In Internet Explorer Mobile, tap and hold the page > select all text.
2. Tap and hold the page > copy.
To save a picture from a Web page:
1. In Internet Explorer Mobile, tap and hold the picture > save image.
2. Do one of the following:
To save the picture in my pictures on your device, tap yes.
To save the picture in another location such as a storage card, tap save as.
7-2
Janam Technologies LLC
XM65 User Guide
Performance
To improve browser performance:
1. In Internet Explorer on your PC, on the tools menu, click internet options.
2. Click the advanced tab.
3. Under browsing, clear the use smooth scrolling check box.
Janam Technologies LLC
7-3
XM65 User Guide
8
Messaging
Overview
You can send and receive Outlook email, Internet email through an Internet service provider (ISP) and
text messages. You can also access email from work using a VPN connection. Email in the Outlook email
account is sent and received through synchronization with a PC using ActiveSync. Text messages are sent
and received through your wireless service provider using a phone number as the message address.
To set up an email account:
1.
2.
3.
4.
Tap
> messaging.
Tap menu > tools > new account.
Select other (POP3/IMAP) > next.
Enter your email address > next. Auto configuration attempts to
download necessary email server settings so that you do not need to
enter them manually.
5. When auto configuration has finished, tap next.
6. Enter your name > username > password.
If auto configuration is successful, your user name is already entered.
Tap next > finish or options to access additional settings
If auto configuration is unsuccessful or you have an account you access
using a VPN server connection, contact your ISP or network administrator
for the following information and enter it manually.
Setting
Description
User name
Enter the user name assigned to you by your ISP or network administrator. This is
often the first part of your email address, which appears before the at sign (@).
Password
Choose a strong password. You have the option to save your password.
Domain
Not required for an account with an ISP. May be required for a work account.
Account type
Select POP3 or IMAP4.
Account name
Enter a unique name for the account (work or home), which cannot be changed later.
Incoming mail server
Enter the name of your email server (POP3 or IMAP4).
Outgoing mail server
Enter the name of your outgoing email server (SMTP).
Require SSL connection
Select this to ensure you always receive email for this account using an SSL connection.
If your ISP does not support an SSL connection, you will not be able to connect.
Outgoing mail requires
authentication
Select this if your outgoing email server (SMTP) requires authentication.
Use separate settings
Select this if your outgoing email server requires a different user name and password
than the ones you entered before.
Janam Technologies LLC
8-1
XM65 User Guide
Setting
Description
Outgoing server settings:
User name
Enter your user name for the outgoing email server.
Password
Enter your password for the outgoing email server.
Domain
Enter the domain of the outgoing email server.
Require SSL for outgoing
mail
Select this to ensure you always send email from this account using an SSL
connection. If your ISP does not support an SSL connection, you will not be able to
send email.
TIPS:
You can set up several email accounts in addition to your Outlook email account.
However, you cannot add a new account while connected. Tap menu > stop
send/receive to disconnect.
To delete an email account:
1. Tap
> messaging.
2. Tap menu > tools > options.
3. Tap and hold the account name, and tap delete.
To change email download options:
1.
2.
3.
4.
5.
In the message list, tap menu > tools > options.
Select the email account.
Tap next until you reach server information.
Tap options.
Enter your changes on the next three screens, and tap
finish.
IMPORTANT
NOTE!
You cannot delete your text message account.
TIPS: To send and receive messages
automatically, tap connect and check
for messages and enter a time
interval. To change options for an
Outlook email account, tap
>
ActiveSync > menu > options.
Folders
To delete all messages and folders:
TIP: Default folders (drafts, outbox,
1. Tap
> messaging.
inbox, deleted items and sent items)
2. Tap menu > tools > clear. All messages and folders that are
cannot be renamed or deleted.
linked to the selected account are cleared, and memory is
expanded on the device without deleting messages on the
server. The next time you connect, the messages and folders are downloaded again.
To manage folders:
1. Tap menu > go to > select the account.
2. Tap menu > tools > manage folders.
3. Do one of the following:
To create a subfolder, tap and hold a folder > new.
To change the name of a folder, tap and hold the folder > rename.
To delete a folder and its contents, tap and hold the folder > delete.
To select a folder for synchronization in an Outlook email or IMAP4 account, select the check box
next to the folder.
8-2
Janam Technologies LLC
XM65 User Guide
Composing and sending messages
To compose and send a message:
1. In the message list, tap menu > go to, and select the account > new.
2. Enter the email address or text message address of one or more recipients, separating them with
a semicolon. To access addresses and phone numbers from contacts, tap to.
3. Enter your message. To quickly add common messages, tap menu > my text, and tap a desired
message.
4. To check the spelling, tap menu > spell check.
5. Tap send.
TIPS: To enter symbols, tap shift using the onscreen keyboard. To set the priority, tap menu > message
options. If you want to know when a text message is received, before sending the message, tap menu >
message options and then select request message delivery notification.
To add an attachment to a message:
1. In an open message, tap menu > insert and tap the item you want to attach: picture or file.
2. Select the file you want to attach. (Embedded objects cannot be attached to messages.)
To create or change a message signature:
1.
2.
3.
4.
5.
6.
7.
8.
TIP: You can use a
Tap
> messaging.
different signature with
Tap menu > tools > options.
each messaging account.
Tap accounts tab > signatures.
Select the account for which you want to create or change a signature.
Select the use signature with this account check box if it is not already selected.
Select the use when replying and forwarding check box if wanted.
Enter a signature in the box.
To stop using a signature, clear the use signature with this account check box.
To receive attachments:
You can also download attachments automatically with your
messages if you have an Outlook email or IMAP4 email account.
For Outlook email accounts:
1. Tap
> ActiveSync.
2. Tap menu > options.
3. Tap email > settings, and then select include file
attachments.
TIPS: Embedded images and
objects cannot be received as
attachments. An embedded
message can be viewed as an
attachment when using IMAP4 to
receive email. However, this
feature does not work if TNEF is
enabled so that you can receive
meeting requests.
For IMAP4 email accounts or VPN server connections:
1.
2.
3.
4.
5.
Tap
> messaging.
Tap menu > tools > options.
Tap the name of the IMAP4 account.
Tap next until you reach server information and tap options.
Tap next twice, and select get full copy of messages and when getting full copy, get
attachments.
Janam Technologies LLC
8-3
XM65 User Guide
To move a message:
1. In the message list, tap and hold the message. To select multiple messages, tap and drag. Then,
tap and hold the selected messages.
2. Tap move.
3. Select where you want to move the message and tap OK.
IMPORTANT
NOTE!
If you use a POP3 account and you move email messages to a folder you created, the link is broken between the
messages on the device and their copies on the email server. This means that you will no longer have access to
messages moved to folders created from anywhere except the device.
To receive meeting requests in email:
You can receive meeting requests if you receive your email messages through ActiveSync. When
connecting, the email server must be running Microsoft Exchange Server version 5.5 or later. However, to
receive meeting requests on Microsoft Exchange Server 5.5, do the following:
Ask your system administrator to activate rich text format (RTF) and TNEF support for your account.
o With TNEF enabled, you will not receive messages that are included in other messages as
attachments.
Change email download options if your account is not set up to receive attachments.
If the server is running Microsoft Exchange Server 2000 or later, you will automatically receive
meeting requests in your inbox.
After you are set up to receive meeting requests, do the following:
1. Open the meeting request.
2. Tap accept or menu > tentative or menu > decline.
To find a message:
1. Tap
> programs > search.
2. Enter the subject, sender's name, or message body text. If you have looked for this message before,
in the search for box, select the name from the list.
3. In type, tap messaging to narrow your search.
4. Tap search.
5. In the results list, tap the message you want to open.
To sort the message list:
1. In the message list, tap the sort list (labeled received by default) and select a sort option.
2. Select the option again to reverse the sort order (ascending to descending).
Download messages
To download messages from the server:
1. Tap menu > go to, and select the account.
2. Tap menu > send/receive.
TIPS: To read the entire message, tap menu >
download message while in the message window.
In the message list, tap and hold the message, and
then tap menu > download message.
TIPS: To delete a service, tap and hold the service, and tap delete. While synchronizing your Outlook email account,
disable any directory services you have installed by clearing the check name against this server check box. This helps
avoid getting error messages when messaging tries to verify names against the service that you are not connected to.
8-4
Janam Technologies LLC
XM65 User Guide
Synchronizing Outlook Email
When you synchronize Outlook email on the PC with your
device, email messages are synchronized as follows:
Messages in the inbox folder on your PC or Exchange
Server are copied to the inbox folder of the Outlook
email account on your device. You can also specify that
the subfolder synchronize as well.
Messages in the outbox folder on your device are
transferred to Exchange Server or Outlook and then
sent from those programs.
TIPS: To keep copies of sent messages, in the
messaging list, tap menu > tools > options >
message tab > keep copies of sent items in
sent folder check box. If your account is an
Outlook email or IMAP4 account, select the
sent items folder for synchronization. To do
this, tap menu > tools > manage folders and
select the check box next to the folder.
When you delete a message on your device, it's deleted from your PC or Exchange Server the next
time you synchronize.
The default sync settings are to synchronize messages from the last three days only, the first .5 KB of
each new message, and not to sync file attachments.
Online Address Book
To install an online address book:
TIPS: To send and receive messages
automatically, tap connect and check for
messages and enter a time interval. To change
1. If you are adding a new account, ask your network
administrator for the name of the directory service
options for an Outlook email account, tap
>
and the server.
ActiveSync > menu > options.
2. In the message list, tap menu > tools > options >
address tab.
3. In the in contacts, get email addresses from list, select which email address book to check in
contacts. Contacts will be checked first unless you select none.
4. If your email server is already listed, select the server's directory service check box and tap OK.
5. If your email service is not listed, tap add.
6. In the directory name and server boxes, enter the LDAP directory and server names.
7. If authentication is necessary, select the authentication is necessary on this server check box,
and enter your user name and password.
8. To have messaging check this service, select the check name against this server check box.
Janam Technologies LLC
8-5
XM65 User Guide
9
Applications
Open and close programs
You do not need to exit a program to open another or to conserve memory. The system manages memory
automatically.
Tap
> the program you want from the list.
If you don't see the program you want, tap
> programs.
Explore files and folders
File Explorer lets you browse the contents of folders on your device. The root folder on the device is
named my device. My device is similar to my computer on the PC and contains the my documents,
program files, temp, storage card and Windows folders.
TIP: The contents of a folder can
1. Tap
> programs > file explorer.
be sorted by name, date, size or
2. Tap the folder list (labeled my documents by default), and tap
type by tapping the sort by list
the folder you want to explore.
(labeled name by default).
3. To open an item, tap it.
4. Tap and hold the item to quickly delete, rename or copy.
5. Tap and drag to select multiple items, > then tap and hold the selected items > tap command.
Calculator
1. Tap
> programs > calculator.
To
Tap
Clear the current calculation/displayed number
C
Clear the last digit entered in a multi-digit entry
The back arrow to the
right of the entry box
Clear memory
MC
Calculate the reciprocal of a number
1/X
Perform operations with percentages
%
Calculate the square root of a number
The square root symbol (√)
Go from positive to negative and back
+/-
Janam Technologies LLC
9-1
XM65 User Guide
To work with numbers stored in calculator memory:
1. Tap
> programs > calculator.
2. Do any of the following:
Tap the box to the left of the entry box to store a number. An M will appear in the box.
Tap M+ to add the displayed number to the number already stored in memory.
Tap MR to display the number stored in memory.
Tap MC to clear the memory.
IMPORTANT
NOTE!
When you store a number in memory, it replaces the one that is currently stored.
Notes
Notes helps you to quickly capture thoughts, questions, reminders, to-do lists and meeting notes. You can
create handwritten and typed notes, record voice notes, convert handwritten notes to text for easy
readability and send notes to others.
Organizing notes
All of the notes you create will appear in one long list by default. A business folder and a personal folder
have already been created for you to use, but you can easily rename these folders or create new folders
and name them however you want.
To set the default input mode for notes:
1. Tap
> programs > notes.
2. In the note list, tap menu > options.
3. In the default mode box, tap one of the following:
Writing if you want to draw or enter handwritten text in a note.
Typing if you want to create a typed note.
4. Tap OK.
TIP: To insert the date in any
type of note, ensure that no
drawing is selected. Then,
tap and hold anywhere in
the note and tap insert date.
To write a note:
1.
2.
3.
4.
Tap
> programs > notes.
In the note list, tap new.
Write your text on the screen.
When finished, tap OK to return to the note list.
IMPORTANT
NOTE!
Writing must be selected as the default input mode.
ADDITIONAL NOTES: To select handwritten text, tap and hold next to the writing. As soon as dots
appear and before they form a complete circle, quickly drag across the writing. If a letter crosses three
ruled lines, it is treated as a drawing rather than text.
9-2
Janam Technologies LLC
XM65 User Guide
To type a note:
IMPORTANT
NOTE!
Writing must be selected as the default input mode.
1. Tap
> programs > notes.
2. In the note list, tap new.
3. Tap the input selector arrow next to the input method icon on the menu bar, tap the input method
> enter your text. If the input selector arrow is not displayed, tap the input method icon.
4. When finished, tap OK to return to the note list.
To draw in a note:
1. Tap
> programs > notes.
2. In the note list, tap new.
3. Draw on the screen, crossing at least three ruled lines. A selection box labeled drawing appears
around your drawing.
4. Tap OK.
IMPORTANT
NOTE!
Writing must be selected as the default input mode.
To convert a handwritten note to typed text:
1. Tap
> programs > notes.
2. Tap the written note.
3. Tap menu > tools > recognize.
TIP: To correct a conversion, tap and hold
the inaccurate word. Tap alternates, and
tap the correct word. If the correct word
is not shown, use input panel to tap
backspace and retype the word.
To search for a file or an item:
1. Tap
> programs > search.
2. In search for, enter the file name, word, or other information you want to search for.
If you have looked for this item before, tap the search for arrow and select the item from the list.
3. In type, select a data type to help narrow your search.
4. Tap search. The my documents folder and subfolders are searched.
5. In the results list, tap the item you want to open.
To send an item via email:
1.
2.
3.
4.
5.
First, you must set up messaging to send and receive messages.
From the program, select the item you want to send.
Tap menu > send.
Select the messaging account if necessary. A new message is created with the item attached.
Enter the address and subject > send. The message will be sent the next time you synchronize
your device.
Janam Technologies LLC
9-3
XM65 User Guide
Terminal services client
Using terminal services client, you can log on to a PC running terminal services or remote desktop and use
all of the programs available on that PC from your mobile device. For example, instead of running Word
Mobile, you can run the desktop computer version of Word and access all of the .doc files on that PC from
your device.
To connect to a remote server:
Before you try to connect to a remote server, ensure that you have a functioning connection. For more
information, see connect to the internet or connect to work.
1. Tap
> programs > terminal services client.
2. Do one of the following:
To connect to a server you have previously connected to, in recent servers, tap a server.
To connect to a new server, enter the server name in the server box.
3. Tap connect.
To disconnect and end a session:
1. In the PC window, tap start > shut down.
The shut down Windows dialog box appears.
2. Tap log off [username], and tap OK.
To improve browser performance:
Performance with Internet Explorer on the PC is improved by decreasing the time it takes for Web pages
to be refreshed.
1. In Internet Explorer on your PC, on the tools menu, click internet options.
2. Click the advanced tab.
3. Under browsing, clear the use smooth scrolling check box.
To improve display performance:
Display performance for terminal services client is improved by decreasing the time it takes for the screen
to be refreshed on the PC.
1. On your PC, click start, point to settings, click control panel, and then double-click display.
2. On the appearance tab, click effects.
3. Clear the use the following transition effects for menus and tooltips check box.
To navigate within terminal services client:
The contents of the window on the PC may be too wide to fit the
screen of your mobile device. You may see two sets of scroll bars
on your mobile device: one for scrolling the PC window contents,
and one for scrolling the terminal services client window.
To ensure that you are scrolling the PC window contents, use the
five directional buttons at the bottom of the terminal services
client window.
9-4
TIP: When using programs that have
been specifically sized for use with a
mobile device, you can select the limit
size of server desktop to fit on this
screen check box to better fit the
program on the device screen.
Janam Technologies LLC
XM65 User Guide
Search for a file or an item
1. Tap
> programs > search.
2. Enter the file name, word or other information in search for area. If you have looked for this item
before, tap the search for arrow and select the item from the list.
3. Select a data type in type to help narrow your search.
4. Tap search.
5. Tap the item you want to open in the results list.
Free up program memory
Stop programs you are not currently using.
Move e-mail attachments to a storage card.
Delete unnecessary files. Tap
delete.
> programs > file explorer. Tap and hold the file, and tap
Delete large files. To find your largest files, tap
larger than 64 KB, and tap search.
> programs > search. In the type list, tap
In Internet Explorer Mobile, delete temporary Internet files and clear history information.
Remove programs you no longer use.
Get help for a program
1. From the program, tap
> help.
2. To quickly find information, tap search and enter the word or item.
Janam Technologies LLC
9-5
XM65 User Guide
10
Microsoft Office Applications
Microsoft Office Mobile
To delete or rename a folder:
1. From the program file list, tap the folder list (labeled all folders by
default) and tap add/delete.
2. Tap the folder you want to delete and tap delete or rename.
3. Tap yes.
To create a folder:
1. From the program file list, tap the folder list (labeled all folders by
default), and tap add/delete.
2. Tap new and enter a name for the new folder.
3. Tap OK.
To locate a file:
1. From the program file list, do one of the following:
Sort the list. In the file list, tap the sort list (labeled name by
default), and tap a sort option.
Filter the list by folder. In the file list, tap the folder list
(labeled all folders by default). Then, tap the folder you want
displayed.
TIPS: To show all items in the
file list, tap all folders. You can
also find a note by searching
for a word located in a note.
To open a file:
1. Open a program, and in the file list, tap the file you want to open.
Open file explorer, navigate to the appropriate folder and tap the file you want to open.
From within an email message, tap the attached file you want to open.
IMPORTANT
NOTE!
If the Word document or Excel workbook was previously saved on a PC,
data and unsupported formatting may be lost when you save the file.
IMPORTANT
NOTE!
You can have only one document, workbook or note open at a time. When you open
a second item of the same type, the first one is saved and closed automatically.
To set the default template:
1. From the program file list, tap menu > options.
2. Do one of the following to select the template you want to use for all new items you create:
In Word and Notes, in the default template box, tap the template.
In Excel, in the template for new workbook box, tap the template.
3. Tap OK.
Janam Technologies LLC
10-1
XM65 User Guide
To find or replace text or data:
1. In a document or workbook, tap menu > edit > find/replace.
2. In find what, enter the text you want to find.
3. Select the appropriate search options.
Word and Excel select the first instance of the text in the document
and display buttons that allow you to find the next instance or replace
the text, as desired.
TIP: To limit your search to
specific cells in Excel, select
the cells before tapping menu
> edit > find/replace.
To move a file or note:
1.
2.
3.
4.
From the program file list, select the item you want to move.
Tap menu > rename/move.
In the folder box, tap the folder you want to move the item to.
Tap OK.
To zoom in or out:
In an open document, tap view > zoom, and change the zoom level as desired.
To send an item via email:
1.
2.
3.
4.
5.
From the program, select the item you want to send.
Tap menu > send.
Select the messaging account if necessary. A new message is created with the item attached.
Enter the address and subject, and tap send.
Note: Files are saved automatically before they are sent. If a Word document or Excel workbook was
created on a PC, unsupported content and formatting may be lost when the files are saved.
Synchronizing documents, workbooks and notes
You can synchronize any device files with your PC, including Word Mobile documents, Excel Mobile
workbooks and notes. To synchronize files, select the files information type for synchronization in
ActiveSync. The <device name> my documents folder is created on the desktop of your PC. Place all
files you want to synchronize with the device in this folder. Password-protected files cannot be
synchronized.
All Word Mobile files, Excel Mobile files and any .pwi (notes) files stored in the my documents folder and
its subfolders are synchronized with the PC. For more information on synchronization or file conversion,
see ActiveSync Help on the PC.
Notes
There are two ways to synchronize notes with your PC:
Using files synchronization, as described above, or
Using notes synchronization: select the notes information type for synchronization. All notes in my
documents and its subfolder on your device will appear in Outlook Notes on your PC. Handwritten text
or drawings in notes will appear on your PC as pictures. In addition, all notes in Outlook on the PC will
be synchronized and will appear in notes on the device.
10-2
Janam Technologies LLC
XM65 User Guide
Overview of Word Mobile
You can create and edit documents and templates in Word Mobile and save
them as .doc, .rtf, .txt and .dot files. You can edit Word documents and
templates created on your PC. You can also open and edit Pocket Word
(*.psw) documents; however if you edit a file, you will need to save it in
one of these formats.
When you close a newly created document, it is automatically named after
the first several words in the document and placed in the Word Mobile
document list. You can easily rename the document and move it to another
folder.
Unsupported features in Word Mobile
Word documents created on your PC can be opened and edited on your device. However, Word Mobile
does not fully support some features such as revision marks and password protection. Some data and
formatting may be lost when you save the document on your device.
The following features are not supported in Word Mobile.
Backgrounds. These are not displayed or saved by Word Mobile.
Bi-directional text. Indentations and alignment may be displayed and saved incorrectly.
Document protection. Word documents can be protected from unauthorized changes by using
Protect Document on the PC. Word Mobile does not support displaying files that have been protected
in this manner.
Metafiles. These are not retained by Word Mobile; instead, a graphical representation of the object
will be displayed.
Page borders. Lined page borders are supported; however, artistic page borders are not. The
graphics will be converted to lined borders.
Password-protected files. Word Mobile does not support opening password-protected documents.
You must first remove the password protection in Word on the PC to view the document on the device.
Shapes and text boxes. These are not displayed or saved by Word Mobile.
Smart tags. These are not displayed or saved by Word Mobile.
The following features are partially supported in Word Mobile.
Picture bullets. While regular bullets are supported, picture bullets are not displayed or saved by
Word Mobile.
Revision marks. These are not retained. When a document with revision marks is opened in Word
Mobile, the document will appear as though all revision marks have been accepted. When the
document is saved, revision marks will be lost.
Table styles. Some or all of the formatting defined in the style will be lost when a document is saved
by Word Mobile.
Underline styles. Underline styles not supported by Word Mobile are mapped to one of the four
supported styles: regular, dotted, wavy or thick/bold/wide.
Legacy Pocket Word files. You can open*.psw files in Word Mobile; however, if you edit a file, you
will need to save it in *.doc, *.rtf, *.txt, or *.dot format.
Janam Technologies LLC
10-3
XM65 User Guide
The following features are not supported on the device; however, they are retained in the file so that
when a file is opened on the PC again, they appear as expected.
Fonts and font sizes. Fonts not supported by the device are mapped to the closest font available,
although the original font will be listed on the device. When a document that has been edited in Word
Mobile is opened on the PC, text is displayed in the original font.
Footnotes, endnotes, headers, footers. These features are not displayed by Word Mobile, but they
are retained when a document is edited and saved on the device.
Lists. Indented lists are not displayed on the device in the same way they are displayed on the PC.
They are mapped to the closest indentation level supported by Word Mobile. However, the list
information is retained in the document, so when it is opened on a PC again, lists are displayed in
their original form.
Page breaks. Word Mobile does not display breaks between pages. However, all page breaks except
a break placed at the end of a document are retained in the document.
To check spelling in a document:
1. Tap and hold anywhere in the document, and tap spelling.
2. If the word is spelled incorrectly, tap the correct word in the list.
3. If the word is spelled correctly, tap ignore.
To format text in a document:
1.
2.
3.
4.
Select the text you want to format.
Tap and hold the text, and tap font.
Select the desired formatting options.
Tap OK.
To create a list in a document:
1. Select the text you want to add bullets or
numbering to.
2. Tap menu > format > paragraph.
3. In the list box, do one of the following:
To create a bulleted list, tap bulleted.
To create a numbered list, tap
numbered.
4. Tap OK.
TIPS: To check the spelling of specific text,
select it, tap and hold, and tap spelling.
To add a new word to the spelling
dictionary, simply tap add in the menu
containing the list of suggested words.
TIPS: You can also use the formatting toolbar to add bullets
or numbers to text. To show the toolbar, tap view > toolbar.
A check mark appears next to toolbar when the toolbar is
visible. You can also use the formatting toolbar to increase
or decrease the indentation in lists, align text and indent
paragraphs in a document.
To align text in a document:
1.
2.
3.
4.
Place the cursor in the text you want to align.
Tap menu > format > paragraph.
In the alignment box, tap left, right or center.
Tap OK.
IMPORTANT
NOTE!
You can also use the formatting toolbar to align text.
10-4
Janam Technologies LLC
XM65 User Guide
To indent paragraphs in a document:
1. Place the cursor in the paragraph you want to indent.
2. Tap menu > format > paragraph.
3. Under indentation, do one of the following:
Increase or decrease the number in the left box to change the left indentation of the entire
paragraph.
Increase or decrease the number in the right box to change the right indentation of the entire
paragraph.
Tap first line in the special box to indent the first line in the paragraph. Then, in the by box,
increase or decrease the size of the indentation.
Tap hanging in the special box to create a hanging indent. Then, in the by box, increase or
decrease the size of the indentation.
4. Tap OK.
To move or copy text in a document:
1. Select the text you want to move or copy.
2. Tap menu and do one of the following:
TIP: To select all text in a document,
tap menu > edit > select all.
Tap copy.
Tap cut.
3. Tap in the document to place the cursor where you want to paste the text.
4. Tap menu > paste.
IMPORTANT
NOTE!
Word Mobile does not support moving or copying pictures.
Overview of PowerPoint Mobile
With PowerPoint Mobile, you can open and view slide show presentations
created on your PC. Whether the presentation is opened from an email
message, downloaded from a file share or the Internet or obtained by
synchronizing with your PC, slide shows created in *.ppt and *.pps format
with PowerPoint '97 and later can be viewed on your device.
Many presentation elements built into the slide shows such as slide
transitions and animations will play back on the device. If the presentation
is set up as a timed slide show, one slide will advance to the next
automatically. Links to URLs are also supported.
PowerPoint features not supported on the device include:
Notes: notes written for slides will not be visible.
Rearranging or editing slides: PowerPoint Mobile is a viewer only.
File formats: Files created in *.ppt format earlier than PowerPoint '97 and HTML files in *.htm and
*.mht formats are not supported.
To start a slide show presentation:
1. Tap
> programs > PowerPoint Mobile.
2. In the presentation list, tap the slide show you want to view.
3. Tap the current slide to advance to the next slide.
If the presentation is set up as a timed slide show, slides will advance automatically.
Janam Technologies LLC
10-5
XM65 User Guide
To change the slideshow orientation:
1. Tap
Tap default to view the presentation in
the orientation that best fits the size
and shape of the device screen.
> programs > PowerPoint Mobile.
2. Open the presentation >
> show options.
3. Tap the orientation tab, and select the orientation you
want.
To navigate between slides:
1. Tap
TIP: Simply tap the current
slide to go to the next one.
> programs > PowerPoint Mobile.
2. Open the presentation you want to view, tap
tap the slide you want to view.
> go to slide, and
NOTES: If you have zoomed in to see a slide in more detail, you cannot navigate to another slide until
you zoom out.
To set slide show playback options:
1. Tap
> programs > PowerPoint Mobile.
2. Open the presentation >
> show options.
3. Tap playback > override playback options for all files check
box, and do any of the following:
Select the show without animation check box to turn off
builds and other animations.
TIP: To turn the presentation
into a continuously looping slide
show, select both the use
timings, if present and the loop
continuously check boxes.
Select the show without slide transition check box to prevent slide transitions from playing.
Select the use slide timings, if present check box to use the timings recorded with each slide in
a presentation.
Select the loop continuously check box to automatically advance to the first slide after the last
slide in a presentation.
4. Tap OK.
To stop a slide show presentation:
Tap
> end show.
To zoom in and out in a slide:
1. Tap
> zoom in.
2. Do one of the following:
Tap
to zoom in another level.
Tap
to zoom out.
Tap
to return to the slide show.
TIP: To view content that is not visible on
the device screen during zooming, simply
tap the slide and drag it up, down, or to
either side until the content is visible.
NOTE: If the presentation is set up as a timed slide show, the presentation will pause during zooming.
10-6
Janam Technologies LLC
XM65 User Guide
Overview of Excel Mobile
You can create and edit workbooks and templates on your device with
Excel Mobile.
View, edit and create charts and graphs, which can be embedded as
objects in a worksheet or placed on a separate worksheet.
Enter formulas and functions and then filter data to see the subset of
information you want.
Split panes to view different parts of a worksheet at the same time.
Freeze the top and left-most panes in a worksheet to keep row and
column labels or other data visible as you scroll through a sheet.
When you close a newly created workbook, it is automatically named and
placed in the Excel Mobile workbook list. You can easily rename the
workbook and move it to another folder.
TIP: Work in full-screen mode to see as much of your workbook as possible. Tap
view > zoom and select a percentage so that you can easily read the worksheet.
To adjust column widths and row heights:
1. Select the column or row.
2. Do one or both of the following:
Adjust the width by dragging the right border of the column heading if you selected
column(s), or.
Adjust the height by dragging the lower border in the row heading if you selected row(s).
3. Tap and hold the column or row > format cells > size to specify an exact column width and row
height.
To automatically calculate values:
1. Tap view > status bar.
2. Select the range of values you want to calculate. The AutoCalculate area, on the right side of the
status bar, contains a function and a value; for example: SUM=0.
3. Tap the AutoCalculate arrow > type of calculation. The result appears in the AutoCalculate area.
To automatically enter a sequence of values:
1. In an Excel Mobile workbook, select both the range containing
the data you want to reference and the adjacent
destination cells.
2. Tap menu > edit > fill.
3. In direction, tap the direction you want.
4. In fill type, tap series.
5. In series type, tap the type of series – autofill, date or
number.
6. If you selected date or number, in step value, select the increment.
7. Tap OK.
TIP: To preserve memory, fill is
limited to an area of 127 rows by 31
columns. To copy information into
more rows or columns, reduce the
amount of information copied at one
time and perform the fill procedure
multiple times.
NOTE: With autofill, you can quickly fill cells with repetitive data such as numbers or repeated text.
Autofill takes the content of the first cell in the selected row or column and copies it down or across the
rest of the selection.
Janam Technologies LLC
10-7
XM65 User Guide
To automatically add values:
1. Tap view > toolbar.
2. Tap the cell to insert the sum of the selected values.
3. On the toolbar, tap
.
=SUM() appears in the input box at the top of the workbook.
4. Drag the stylus across the range of cells you want to add.
The cells will not be highlighted, but the cell range in =SUM() is updated.
5. Tap enter on the keyboard. The sum appears in the selected cell.
To copy and paste data:
From one set of cells to another:
o Select both the range containing the data that you want to copy and the adjacent
destination cells.
o Tap edit > fill.
o From the direction list, tap the direction.
o In the fill type list, tap copy.
Paste only formulas, values or other options:
o Select the cells that you want to copy.
o Tap and hold the selected area, and tap copy.
o Select the destination cells.
o Tap and hold the selected area, and tap paste.
To delete cells, rows or columns:
1. In an Excel Mobile workbook, select one or more cells, rows or columns.
2. Tap and hold the selected area, and tap delete to remove rows and columns or delete cells.
3. If you are deleting a cell or range of cells, tap one of the following:
Shift cells left: Deletes the selected cell and moves all cells located right one column to the left.
Shift cells up: Deletes the selected cell and moves all cells located below up one row.
Entire row: Deletes the entire row and moves all rows located below up one row.
Entire column: Deletes the entire column and moves all columns located right one column to the
left.
NOTE: Excel Mobile keeps formulas up to date by adjusting references to the shifted cells to reflect their
new locations. However, a formula that refers to a deleted cell displays the #REF! error value.
To enter a formula:
1. Select the cell in which you want to enter a formula.
2. Begin the formula with an equal sign (=).
3. Enter values, cell references, name references, operators and functions as appropriate.
Example: =(B4/25)+100=Revenue-Expenses
4. Tap enter on the keyboard when finished.
To enter a value or text in a cell:
1. Tap the cell.
2. Enter the value or text and then tap enter.
The text is automatically left-aligned in the cell.
NOTE: To enter text, you may need to tap
10-8
to display input panel.
TIP: To quickly edit cell contents,
tap the cell and replace or edit
the text or value. To undo an edit,
tap menu > undo typing in x.
Janam Technologies LLC
XM65 User Guide
To filter data in a worksheet:
TIPS: To turn off AutoFilter, tap
1. Select a cell or range of cells that contains the information to
tools > AutoFilter. To display all
filter.
rows again, tap all in the filter list in
2. Tap menu > tools > AutoFilter. A dropdown arrow appears at
each of the selected columns.
the top of each selected column.
3. Tap the arrow to display a list of the data in the column.
4. Select a value (filter criterion) from the list to display only rows containing that value. Tap custom
to display the custom AutoFilter dialog box, where you can specify comparisons.
5. To further refine the displayed rows, repeat steps 3 and 4 as needed.
To fit rows and columns to data:
1. Select the rows or columns you want to automatically fit to their contents.
2. Double-tap the lower border of the row heading or the right border of the column heading.
To format numbers and text:
1. Select the cell or range of cells in which you want to format text.
2. Tap menu > format > cells.
3. Do one of the following:
On the number tab, select a numeric category and then specify the related formatting options.
On the font tab, select the desired text formatting options.
4. Tap OK.
To go to a cell or region:
1. Tap menu > edit > go to.
2. Do one of the following:
Enter the cell reference (e.g., C4) or defined name to go to a
specific cell.
Tap current region to go to the currently selected cell or
region.
3. Tap OK.
TIP: To go to a specific cell, you can
also enter the cell reference in the
name box and then tap enter.
NOTE: The current region is defined as the block of filled-in cells that includes the currently selected cell
or cells. The region extends in all directions to the first empty row or column.
To hide and display rows and columns:
To hide a row or column, tap a cell in the row or column you want to hide. Tap menu > format >
row or column, and tap hide.
To display a hidden row or column, select the cells which span the missing row or column, and then
tap menu > format > row or column > tap unhide.
To insert a function:
1.
2.
3.
4.
Tap menu > insert > function.
In the category list, tap a function category.
In the function list, tap a function.
Tap OK.
Janam Technologies LLC
TIP: To learn about a function, review the
information provided in the description
area below the function list.
10-9
XM65 User Guide
To insert cells, rows and columns:
1. Select the location where you want to insert cells, rows or columns.
2. Tap and hold the selected area, and tap insert to add rows and columns, or insert cells to add
cells.
3. Select how you want the cells, rows or columns inserted.
Shift cells right
Shift cells down
Entire row
Entire column
NOTE: Excel Mobile keeps formulas up to date by adjusting references to the shifted cells to reflect their
new locations.
To insert a symbol:
1. Tap a cell and place the insertion point
where you want to insert the symbol.
2. Tap menu > insert > symbol.
3. Tap the symbol you want (it will be enlarged
when you tap it), tap insert and then tap
enter on the keyboard.
TIPS: If you select a different font or subset, a different set
of symbols displays. To use Microsoft Wingdings or
Microsoft Webdings that are available on your PC, connect
your device to your PC and open ActiveSync. Copy the
Wingdings.ttf and Webdings.ttf files from the Font folder
on your PC to the My Windows Mobile Device
/Windows/Fonts folder in the ActiveSync window.
To name a cell or range:
1. In an Excel Mobile workbook, select the cell or range you
want to name.
2. Tap menu > insert > define name.
3. Enter the name and tap add.
4. Tap OK. The name appears in the name box at the top of
the worksheet.
TIPS: To delete a name, tap menu > insert >
define name, tap a cell name in the list and tap
delete. To paste the list of cell names and their
locations on the worksheet, tap paste list.
Unsupported features in Excel Mobile
Excel workbooks created on your PC can be opened and edited on your device. However, Excel Mobile
does not fully support some features such as formulas and cell comments. Some data and formatting may
be lost when you save the workbook on your device. Note the following considerations:
Alignment. Horizontal, vertical and wrap text attributes remain, but vertical text appears horizontal.
Borders. Appear as a single line.
Cell patterns. Patterns applied to cells are removed.
Fonts and font sizes. Unsupported fonts are mapped to the closest font available, and the original
font is listed on your device. When the workbook is opened in Excel on your PC again, the data
displays in the original font.
Number formats. Numbers formatted using the Microsoft Excel 97 conditional formatting feature are
displayed in number format.
Formulas and functions. If an Excel file contains a function that is not supported by Excel Mobile,
the function is removed and only the returned value of the function appears. The following formulas
are also converted to values: formulas entered as an array or containing an array argument, for
example, =SUM({1;2;3;4}); formulas containing external link references or an intersection range
reference; and formulas containing references past row 16384 are replaced with #REF!
Protection settings. Most worksheet and workbook protection features are disabled but not
removed. However, support for password protection has been removed, so these workbooks won’t
open unless the password protection on the PC file is removed and the file synchronized to the device.
10-10
Janam Technologies LLC
XM65 User Guide
Zoom settings. These are not retained.
Worksheet names. Names that reference worksheets within the same workbook are displayed
accurately, but names that refer to other workbooks, arrays, for example, ={1;2;3;4}, array formulas
or intersection ranges are removed from the name list. If a name is removed from the list, it is left in
formulas and functions, causing those formulas to be resolved as "#NAME?" All hidden names are not
hidden.
AutoFilter settings. Are removed. However, you can use the AutoFilter command in Excel Mobile to
perform similar functions. Use the unhide command to display the hidden rows.
Chart formatting. All charts will be saved the way they are shown in Excel Mobile. Unsupported chart
types are changed to one of these supported types: column, bar, line, pie, scatter and area.
Background colors, gridlines, data labels, trend lines, shadows, 3D effects, secondary axes and
logarithmic scales are turned off.
Worksheet features. The following features are not supported in Excel Mobile and are removed or
modified when a workbook is opened on the device: hidden sheets are not hidden; VBA modules,
macro sheets, and dialog sheets are removed and replaced with a place holder sheet; text boxes,
drawing objects, pictures, lists, conditional formats, and controls are removed; pivot table data is
converted to values.
To refer to a cell or range in a formula:
1. Begin entering a formula in a cell.
2. Tap the cell or select the range to set the reference.
3. Finish entering the formula and tap enter on the
keyboard.
TIPS: To refer to a cell in another worksheet
in your formula, enter the worksheet name
followed by an exclamation point (!) and the
cell, range or name reference.
Example: =Sheet1!Earnings
To sort data in a worksheet:
1.
2.
3.
4.
Select the range you want to sort.
Tap menu > tools > sort.
In sort by, select the first column you want to sort on.
The ascending check box is selected by default. For
descending order, tap to clear the check box.
5. Repeat steps 3 and 4 in the then by lists for additional
columns as needed.
6. To undo a sort, tap menu > undo sort.
To create a 3-D reference: in your formula,
specify two or more sheets in a workbook;
use a colon between the first and last
worksheet names.
Example: =SUM(Sheet2:Sheet6!$A$2:$C$5)
To switch to another worksheet:
1. In the middle of the status bar, tap the active worksheet's name (e.g., Sheet1).
If you don't see the status bar, tap view > status bar.
2. In the list of worksheets, tap the sheet you want to switch to.
To position data in a cell:
1. Select the cells you want to format.
2. Tap menu > format > cells.
3. On the align tab, do any of the following:
Select the wrap text check box to display multiple lines of text within a cell.
Tap the option you want to align text at the top, center or bottom of a cell in the vertical list.
To align text to the left, center, or right in a cell, in the horizontal list, tap the option you want.
Janam Technologies LLC
10-11
XM65 User Guide
To apply cell borders:
1. Select the cells.
2. Tap menu > format > cells.
3. On the borders tab, do any of the following:
TIP: To fill a cell or range of cells
with color, tap the arrow next to
fills and tap a color on the palette.
Under border, select the outline check box or select any of
the check boxes for individual lines.
To apply a different border line color, tap the arrow next to borders > tap a color on the palette.
To add a data series:
1.
2.
3.
4.
Open the chart.
Tap menu > format > chart.
On the series tab, tap new.
Enter a name and values for the series and tap OK.
To change data series names or legend text:
1.
2.
3.
4.
Open the chart.
Tap menu > format > chart.
On the series tab, select a series > edit.
In name, enter a new name for the data series > OK. The updated series name will appear in the
chart legend.
To change how a data series is displayed:
1.
2.
3.
4.
Open the chart.
Tap menu > format > chart.
On the series tab, tap the series you want to update > patterns.
Select the options you want.
Worksheets
To adjust the view of a worksheet:
To display and hide window elements such as column headings and scroll bars:
o Tap view > show and tap the elements you want displayed or hidden.
o A check mark appears next to the element when it is visible in the workbook.
To lock rows and columns so they remain visible while you scroll to see the rest of your data:
o Tap the cell where you want to freeze the panes.
o Tap view > freeze panes.
o Tap unfreeze panes to unlock the rows or columns.
To split the window into two scrollable areas:
o Tap split and then drag the split bar to a new location.
o To remove the split bar, tap remove split.
To see as much data on the screen as possible:
o Tap view > full screen.
o To return to the normal view, tap full screen again.
Zoom in on data:
o Tap zoom > percentage.
To insert a worksheet:
1.
2.
3.
4.
10-12
Tap menu > format > modify sheets.
Tap insert > enter a name > OK.
To move the new worksheet to the desired location in the workbook, tap move up or move down.
Tap OK.
Janam Technologies LLC
XM65 User Guide
To delete a worksheet:
1. In an Excel Mobile workbook, tap menu > format > modify sheets.
2. Select the worksheet you want to delete and tap delete.
3. Tap OK.
To rename a worksheet:
1.
2.
3.
4.
In an Excel Mobile workbook, tap menu > format > modify sheets.
Select the worksheet you want to rename.
Tap rename, enter a name for the worksheet, and tap OK.
Tap OK.
To move a worksheet:
1. Tap menu > format > modify sheets.
2. Select the worksheet > tap move up or move down.
3. Tap OK.
Charts
To
1.
2.
3.
add titles to a chart:
Open the chart.
Tap menu > format > chart.
On the titles tab, do any of the following:
In chart, enter a name.
In X axis or Y axis, enter a name.
To select a different chart type:
1. Open the chart.
2. Tap menu > format > chart.
3. On the type tab, tap the type of chart > OK.
To change the scale of a chart:
1. Open the chart.
2. Tap menu > format > chart.
3. On the scale tab, do any of the following:
Select the auto check box to use automatic minimum and maximum values for the axes
depending on the data present in the chart.
Type a different number in the minimum box and maximum box to change the number at
which the axis value starts and ends.
To create a chart:
1. Select the data to include in the chart.
2. Tap menu > insert > chart.
3. Follow the instructions in the chart wizard to:
choose a chart type;
confirm the data range;
choose the data layout;
add labels to the chart; and
insert the chart as a new sheet or as an object on the current worksheet.
4. Tap finish to create the chart.
Janam Technologies LLC
10-13
XM65 User Guide
To change the data series for a chart:
1.
2.
3.
4.
Open the chart.
Tap menu > format > chart.
On the series tab, select a series and tap edit.
In values, edit the range for the data series and tap OK.
To add a legend to a chart:
1. Open the chart.
2. Tap menu > format > chart.
3. On the titles tab, select the show legend check box, and tap the location for the legend to
appear.
10-14
Janam Technologies LLC
XM65 User Guide
11
Exchange and Update Data Using ActiveSync
ActiveSync technology lets you synchronize – exchange and update – data between one or more Janamconnected handheld computers and your PC using either a USB or serial cable. To synchronize data, you
must connect your Janam XM65 and PC directly, place your handheld computer in the cradle attached to
your computer, use a modem or use a network.
Create a user profile
You can create a user profile to load data into a Janam XM65 without associating that data with a user
name. If you didn’t set up a user profile in chapter 4, follow the instructions below.
To create a user profile:
1.
2.
3.
4.
Tap
> settings > control panel.
Choose owner.
Enter identification, notes and display information.
Tap OK to save changes.
Identification
Janam Technologies LLC
Notes
Display
11-1
XM65 User Guide
Set up/delete a partnership
There are two types of partnerships that you can create with
your Janam XM65. You can automatically synchronize the files
on your handheld device with your PC when you start your
device. Or you can establish a guest partnership and manually
copy the files you want to synchronize.
To set up a partnership to automatically sync files:
1. Connect your Janam XM65 to your PC.
2. On your PC, select start > programs > ActiveSync.
3. Click yes > next.
4. Select yes in the select number of partnerships screen.
5. Click next.
6. Select the files you want to sync between your mobile
device and your computer.
Note: when you select files, an additional screen
appears (shown below) with further information. Read
carefully before proceeding, because your files may be
converted.
7. Click the settings button in the select synchronization settings
screen (#6 above), and the screen at right will appear.
8. Add the files you want to sync with the files on your mobile device.
9. Click OK > next to continue the setup.
11-2
Janam Technologies LLC
XM65 User Guide
10. Your partnership setup is complete, and you may need to
accept the partnership on your Janam XM65.
11. The ActiveSync manager screen appears on your desktop. As the
automatic synchronization progresses, the status bar will fill and the
sync will be displayed in the status section.
To delete a partnership:
1. Go to file > delete partnership in the ActiveSync manager.
2. Click yes when confirmation screen appears.
3. You will need to re-establish the partnership when you
connect your Janam XM65 to your PC, or you will need to connect
as a guest.
To set up a guest partnership:
1.
2.
3.
4.
Connect your Janam XM65 to your PC.
On your PC, select start > programs > ActiveSync.
Click no > next.
You will be connected to your mobile device, and the guest
connection will appear, as shown.
5. You may also need to accept the partnership on your
Janam XM65.
6. Select tools > explore to manually copy the files on your handheld to
your desktop computer.
Janam Technologies LLC
11-3
XM65 User Guide
Windows Explorer will appear with the folders and files on your
mobile device.
7. Select the file or file(s) you want to move or copy.
8. Choose copy files and select destination folder on your
PC.
Partnership settings
To change partnership connection settings:
1. Click the ActiveSync icon in your Windows system tray
(bottom right corner of taskbar).
2. Choose file > connection settings from the ActiveSync
manager menu.
3. Make changes > OK.
11-4
Janam Technologies LLC
XM65 User Guide
12
Wi-Fi Connectivity
You can setup the Janam XM65 for Wi-Fi connectivity either manually or through automated rapid
provisioning tools. Please reference http://msdn.microsoft.com/en-us/library/aa455986.aspx for a new
feature added to Windows Mobile 5.0 called Wi-Fi Configuration Service Provider, or contact your Janam
sales representative regarding the fully automated rapid deployment utility MConfig at 1.800.JANAM.99.
IMPORTANT
NOTE!
The following setup information is provided for manual configuration.
To set up connectivity manually:
The Windows Mobile 5.0 default is to use a server-assigned IP address.
1. To view this setting or to assign a user-specific IP address to access the AR6000 WLAN adapter, tap
the Wi-Fi: Off text (setup screen 1).
2. Tap menu > Wi-Fi settings (setup screen 2).
3. Tap the network adapters tab at the bottom of the screen (see setup screen 3) > AR6000 WLAN
Adapter SD (setup screen 4).
4. Select use server-assigned IP address (setup screen 5).
Janam Technologies LLC
12-1
XM65 User Guide
To manually configure a WLAN profile and access a network, the radio must first be enabled. There are
two ways to enable the radio and setup a WLAN profile.
Method 1
To enable the radio:
1. Tap the Wi-Fi: Off text from the today screen to access the wireless manager.
2. From the wireless manager, tap and hold the Wi-Fi tab to enable or disable the radio.
Today screen
Wireless manager
To setup the WLAN profile:
1. Tap the menu text in the lower right hand corner of the wireless manager screen.
2. Select Wi-Fi settings.
Method 2
To enable the radio and setup the WLAN profile:
1. Tap
> settings > connections > wireless manager.
2. Tap menu > Wi-Fi settings.
12-2
TIP: You can also exit the wireless
manager and select the Wi-Fi icon
from the settings menu by choosing
the connections tab > Wi-Fi.
Janam Technologies LLC
XM65 User Guide
To configure a WLAN profile for WPA/PSK:
1. From the wireless manager, tap menu > Wi-Fi settings > add new.
2. Enter a network name (ESSID).
3. Select option from connects to dropdown menu – identify whether this profile will connect to your
work network or the internet over your ISP.
4. Select WPA-PSK, and enter the network key (up to 65 characters) > next.
To edit, remove or connect to the WLAN:
After you have completed the WLAN profile, your entry will be listed where you can tap and hold to
produce the dropdown menu that allows you to edit, remove or connect to the WLAN.
Janam Technologies LLC
12-3
XM65 User Guide
13
Bluetooth
Overview
Bluetooth is a short-range wireless communications technology. Devices with Bluetooth capabilities can
beam (exchange information) over a distance of about 10 meters (30 feet) without requiring a physical
connection.
Unlike infrared, you don't need to line up the devices to beam information with Bluetooth. You can even
beam information to a device in a different room, as long as it's within range.
You can use Bluetooth as follows:
•
Beam information, such as files, appointments, tasks and contact cards, between devices that have
Bluetooth capabilities.
•
Use a Bluetooth service. Once you connect to another device or computer using Bluetooth, you can
locate and use any of the services available on that device.
To turn Bluetooth on and off:
1. Tap
> settings > connections tab.
2. Tap Bluetooth.
3. Select or clear the turn on Bluetooth check box.
NOTE: By default, Bluetooth is turned off. If you turn
it on, and then turn off your device, Bluetooth also
turns off. When you turn on your device again,
Bluetooth turns on automatically.
To make a device visible:
Other devices with Bluetooth capabilities can detect your
device and attempt to beam information to it, establish a
partnership, or use a Bluetooth service.
1.
2.
3.
TIP: If you no longer want your device to
be visible, clear the make this device
visible to other devices check box.
Tap
> settings > connections tab.
Tap Bluetooth.
Select the turn on Bluetooth check box, and then select the make this device visible to other
devices check box.
Janam Technologies LLC 13-1
XM65 User Guide
Bluetooth partnerships
A partnership is a relationship that you create between your device and another device with Bluetooth
capabilities to help exchange information in a secure manner. Creating a partnership involves entering the
same Bluetooth passcode on both devices. Once a partnership is created, the devices need only have
Bluetooth turned on to exchange information; they do not need to be visible.
You need only create a partnership once between two devices. Then, the devices can exchange
information without your entering a passcode.
To accept a Bluetooth partnership:
1.
2.
3.
4.
5.
Ensure that your device is turned on, visible and within close range.
When prompted to accept a partnership with the device that is requesting the relationship, tap yes.
If a passcode is requested, enter an alphanumeric passcode between 0 and 16 characters in
passcode, and tap next. You must enter the same passcode that was entered on the device
requesting the partnership. Using a passcode provides enhanced security.
To give the partnership a more meaningful name, change the name of the device in name.
Tap finish.
To create a Bluetooth partnership:
You can create a partnership between your device and another device that has Bluetooth capabilities.
Once you do this, the devices must have Bluetooth turned on but don't need to be visible for you to beam
information between the two devices.
1. Ensure that the two devices are turned on, visible, and within close range.
2.
3.
4.
5.
6.
7.
8.
13-2
Tap
> settings > connections tab.
Tap Bluetooth > devices tab > add new device. Your device searches for other devices with
Bluetooth capabilities and displays them in the list.
Tap the name of the other device, and tap next.
In Passcode, if you want to use a passcode (recommended for enhanced security), enter a
alphanumeric passcode between 1 and 16 characters, and tap next. Otherwise, leave the passcode
blank, and tap next.
Enter the same passcode on the other device.
To give the partnership a more meaningful name, change the name of the device in name.
Tap finish.
Janam Technologies LLC XM65 User Guide
To delete a Bluetooth partnership:
1.
2.
3.
4.
Tap
> settings > connections tab.
Tap Bluetooth > devices tab.
Tap and hold the partnership you want to end.
Tap delete.
To rename a Bluetooth partnership:
You can give a more meaningful name to a Bluetooth partnership to help you recognize it when selecting
from a list of partnerships.
1.
2.
3.
4.
5.
Tap
> settings > connections tab.
Tap Bluetooth > devices tab.
Tap the partnership to rename.
In name, enter a new name for the partnership.
Tap finish.
Bluetooth beam
To receive a Bluetooth beam:
Your device will not detect and notify you of incoming infrared (IR) and Bluetooth beams unless you set it
up to do this.
1.
2.
3.
4.
> settings > connections tab > beam.
Tap
Select the receive all incoming beams check box.
Ensure that your device is turned on, visible and within close range of the device that is beaming the
information.
When prompted to receive an incoming beam, tap yes to receive the beamed information.
Bluetooth virtual COM ports overview
Some programs can connect only though a serial (COM) port. This can be true even if the device itself is
Bluetooth-enabled. To make it possible for such programs to use a Bluetooth connection, you must set up
a virtual COM port. Once created, this virtual port can be used like any other COM port. You can use a
virtual COM port for programs that, for example, connect to a GPS receiver, or to connect to a Bluetoothenabled printer.
Here are some examples of how to use incoming and outgoing virtual COM
ports.
Outgoing COM port: You have a program on your device that cannot use
Bluetooth directly but can print to a serial (COM) port. You can create a
Bluetooth partnership with a Bluetooth-enabled printer, and then set up an
outgoing COM port (for example, COM 1). The program can then send print
data to COM 1, which reaches the Bluetooth-enabled printer.
Incoming COM port: You have a Bluetooth-enabled GPS receiver, and
your device has a GPS tracking program that expects to receive GPS data
over a serial (COM) port. You can create a Bluetooth partnership with the
Bluetooth-enabled GPS receiver, and then set up an incoming COM port (for
example, COM 2). The GPS program can then send data to COM 2, which
reaches the GPS receiver.
Janam Technologies LLC 13-3
XM65 User Guide
Even if both your device and another Bluetooth-enabled device contain programs that need to use serial
ports to communicate, you can set up the appropriate virtual incoming and outgoing COM ports on each
device so that the programs can to use a Bluetooth connection to communicate.
To set up an incoming Bluetooth COM port:
1.
Make sure that your device is currently connected to the other device via Bluetooth.
2.
3.
4.
5.
Tap
> settings > connections tab.
Tap Bluetooth > COM ports tab.
Tap new incoming port.
Select a numbered COM port from the list. If the port cannot be created, it is in use. Select a different
numbered port.
To use this COM port to communicate only with devices with which your device has a Bluetooth
partnership, select the secure connection check box.
Tap finish.
6.
7.
To set up an outgoing Bluetooth COM port:
The list item new outgoing port will be available only if one or more Bluetooth-connected devices
supports serial (COM) connections.
1. Make sure that your device is currently connected to the other device via Bluetooth.
2.
3.
4.
5.
6.
7.
13-4
> settings > connections tab.
Tap
Tap Bluetooth > COM ports tab.
Tap new outgoing port.
Select a numbered COM port from the list. If the port cannot be created, it is in use. Select a different
numbered port.
To use this COM port to communicate only with devices with which your device has a Bluetooth
partnership, select the secure connection check box.
Tap finish.
Janam Technologies LLC XM65 User Guide
Beam Information
You can beam any file or application between Janam connected handheld devices using Bluetooth (see the
previous chapters for more information on Bluetooth beaming) or infrared (IR) connections. Beaming
distance to other connected devices may be different.
If you want your device to detect or receive beams, tap
select the receive all incoming beams check box.
> settings > connections tab > beam, and
If you are unable to beam information between two devices, try the following:
•
•
•
Transfer only one file or no more than 25 contact cards at a time.
When using IR, make sure nothing is between the two IR ports.
Adjust the room lighting or move to another location (some types of light interfere with beaming).
When using Bluetooth, if the device that you want to beam to doesn't appear in the list, make sure that
the device is turned on, visible and within close range of your device. Also, make sure that Bluetooth is
turned on.
In the calendar, contacts, notes, tasks, Excel Mobile, Word Mobile and PowerPoint Mobile programs, you
can beam files and information to other devices using Bluetooth or infrared.
To beam information:
1.
2.
3.
From the program, select the item you want to beam.
Tap menu > beam [type of item].
Do one of the following:
•
•
If using Bluetooth, tap the device to which you want to send the item.
If using infrared, align the infrared (IR) ports at close range until the target device name
appears, and then tap the device to which you want to send the item.
LIMPORTANT
NOTE!
Files are saved automatically before they are beamed. If a Word document or Excel workbook was created on a PC, unsupported content and formatting may be lost when the files are saved. To beam information using Bluetooth:
2.
3.
Tap
> settings > connections tab > beam.
Select the receive all incoming beams check box.
Janam Technologies LLC 13-5
XM65 User Guide
14
Regulatory and Maintenance
Regulatory information
© Copyright 2008 Janam Technologies LLC. All rights reserved.
XM Series, XM65, Janam and the Janam logo are trademarks of Janam Technologies LLC. Other product
and brand names may be trademarked or registered trademarks of their respective owners.
Janam Technologies LLC assumes no responsibility for any damage or loss resulting from the use of this
guide. Janam Technologies LLC assumes no responsibility for any loss or claims by third parties which may
arise through the use of this product. Janam Technologies LLC assumes no responsibility for any damage
or loss caused by deletion of data as a result of malfunction, dead battery or repairs. Be sure to make
backup copies of all important data on other media to protect against data loss.
IMPORTANT
NOTE!
Please read the end-user software license agreement with this product before
using the accompanying software program(s). Using any part of the software
indicates that you accept the terms of the end-user software license agreement.
For additional information, visit www.janam.com or call +1.877.JANAM.99.
The CE mark on the product indicates that the system has been tested to and conforms with the
provisions noted within the 89/336/EEC Electromagnetic Compatibility Directive.
For further information, please contact:
Janam Technologies; 100 Crossways Park West, Suite 105; Woodbury, NY 11797.
Janam Technologies shall not be liable for use of our product with equipment (i.e., power supplies,
personal computers, etc.) that is not CE marked and does not comply with the Low Voltage Directive.
FCC and Canadian compliance
XM Series mobile computers meet or exceed all applicable standards and have been manufactured to the
highest level of quality. To see the specific labels associated with RF terminals configurations, visit
www.janam.com. Warning: Changes or modifications to this unit not expressly approved by the party
responsible for compliance could void the user authority to operate the equipment.
Janam Technologies LLC
14-1
XM65 User Guide
XM Series batch terminal
Regulatory and safety approvals
Parameter
Specification
U.S.A.
FCC Part 15, Subpart B
Canada
ICES-003 Issue 4
European
EN55022:1998+A1: 2000+A2:2003
Community
EN55024:1998+A1: 2000+A2:2003
Australia
AS/NZS CISPR 22:2004
This Class B digital apparatus complies with the Canadian ICES-003.
Cet appareil numerique de la Class B est conforme a la norm NMB-003 du Canada.
Operation is subject to the following two conditions: (1) this device may not cause interference, and (2)
this device must accept any interference, including interference that may cause undesired operation of the
device.
L’utilisation de ce dispositif est autorisée seulement aux deux conditions suivantes : (1) il ne doit pas
produire de brouillage, et (2) l’utilisateur du dispositif doit être prêt à accepter tout brouillage
radioélectrique reçu, même si ce brouillage est susceptible de compromettre le fonctionnement du
dispositif.
XM Series RF Terminals with 802.11b/g and/or Bluetooth
RF, regulatory and safety approvals
Parameter
Specification
RF approvals
U.S.A.
FCC Part 15 Subpart B and Subpart C
Canada
RSS 210 Issue 6
This device complies with Part 15 of the FCC Rules. Operation is subject to the following two conditions:
(1) this device may not cause harmful interference; and (2) this device must accept any interference
received, including interference that may cause undesired operation.
This equipment has been tested and found to comply with the limits for a Class B digital device, pursuant
to Part 15 of the FCC Rules. These limits are designed to provide reasonable protection against harmful
interference in a residential installation. This equipment generates, uses and can radiate radio frequency
energy and, if not installed and used in accordance with the instructions, may cause harmful interference
to radio communications.
However, there is no guarantee that interference will not occur in a particular installation. If this
equipment does cause harmful interference to radio or television reception, which can be determined by
turning the equipment off and on, the user is encouraged to try to correct the interference by one or more
of the following measures:
Reorient or relocate the receiving antenna.
Increase the separation between the equipment and receiver.
Connect the equipment to an outlet on a circuit different from that to which the receiver is connected.
Consult the dealer or an experienced radio/TV technician for help.
If necessary, the user should consult the dealer or an experienced radio/television technician for additional
suggestions. The user may find the following booklet helpful: “Something about Interference.” This is
available at local FCC regional offices. Our company is not responsible for any radio or television
interference caused by unauthorized modifications of this equipment or the substitution or attachment of
14-2
Janam Technologies LLC
XM65 User Guide
connective cables and equipment other than those specified by our company. The correction is the
responsibility of the user. Use only shielded data cables with this system.
This device and its antenna must not be co-located or operating in conjunction with any other
antenna or transmitter. To maintain compliance with the FCC RF exposure guidelines for bodyworn operation, do not use accessories that contain metallic components other than what is
specified by the manufacturer.
This Class B digital apparatus complies with the Canadian ICES-003.
Cet appareil numerique de la Class B est conforme a la norm NMB-003 du Canada.
Operation is subject to the following two conditions: (1) this device may not cause interference, and
(2) this device must accept any interference, including interference that may cause undesired
operation of the device.
L’utilisation de ce dispositif est autorisée seulement aux deux conditions suivantes : (1) il ne doit pas
produire de brouillage, et (2) l’utilisateur du dispositif doit être prêt à accepter tout brouillage
radioélectrique reçu, même si ce brouillage est susceptible de compromettre le fonctionnement du
dispositif.
To prevent radio interference to the licensed service, this device is intended to be operated indoors and
away from windows to provide maximum shielding. Equipment (or its transmit antenna) that is installed
outdoors is subject to licensing.
RF, regulatory and safety approvals
Parameter
R&TTE
Australia
Specification
EN 300 328 v1.6.1 (2004-11)
EN 301 489-1 v1.6.1 (2005-09)
EN 301 489-17 v1.2.1 (2002-08)
EN 60950-1:2001+A11
EN 50371:2002
AS/NZS CISPR 22:2004
0979 in accordance with the Class II product requirements specified in
This product is marked with
the R&TTE Directive, 1999/5/EC. The equipment is intended for use throughout the European Community.
Care and cleaning of terminals
When needed, clean the image engine window and the LCD display with a clean, non-abrasive, lint-free
cloth. The terminal can be cleaned with a damp cloth.
Waste electrical and electronic equipment (WEEE) information
This product has required the extraction and use of natural resources for its production. It may contain
hazardous substances that could impact health and the environment, if not properly disposed.
In order to avoid the dissemination of those substances in our environment and to diminish the pressure
on the natural resources, we encourage you to use the appropriate take-back systems for product
disposal. Those systems will reuse or recycle most of the materials of the product you are disposing in a
sound way.
Janam Technologies LLC
14-3
XM65 User Guide
The crossed out wheeled bin symbol informs you that the product should not be disposed of
along with municipal waste and invites you to use the appropriate separate take-back systems
for product disposal.
If you need more information on the collection, reuse and recycling of these systems, please contact your
local region’s waste administration. You may also contact your supplier for more information on the
environmental performances of this product.
Battery Warning
CAUTION!
RISK OF EXPLOSION IF BATTERY IS REPLACED BY AN INCORRECT TYPE.
DISPOSE OF USED BATTERIES ACCORDING TO THE INSTRUCTIONS.
Use only Janam-approved batteries such as the BA-XP-1 and recharge batteries using only Janamapproved chargers. Use only easily accessible wall outlets that are reached with the length of the supplied
power cables.
The standard charger provides an easy and convenient way to charge the device. You can purchase the
charger through an authorized dealer. Visit Janam’s website www.janam.com for information.
The socket-outlet shall be installed near the equipment and shall be easily accessible.
General information
1. Before using the standard charger, read all instructions and warnings.
2. Please retain these instructions for future reference.
Warning
1. No user serviceable parts inside. Do not open the charger. The charger is not serviceable.
2. If found any damage or cracking on the enclosure of the charger, do not use the charger. This
charger shall be disposed of.
3. Do not short-circuit the output terminals of the charger.
4. The charger is for indoor use only. Do not expose the charger to moisture or place the charger at
location which could subject to water spillage.
5. The standard charger is designed for use with this barcode scanner only. Do not use this charger for
other purpose.
Operating instructions
1. Insert the output plug of the standard charger to the barcode scanner before plugging the charger
into the AC power socket outlet.
2. After use, always unplug the standard charger from the socket outlet.
3. Ensure that your local power supply system complies with the technical data of the standard charger.
14-4
Janam Technologies LLC