1
Agenda files
All the entries in your Agenda are stored in an Agenda file. You can have more than one
Agenda file on your Series 3a.
Reclaiming space - compressing Agenda files
When you delete or change an entry in an Agenda File, the original version of the entry
still takes up space in the file. You may therefore need to compress Agenda files
periodically to reclaim this unused space.
For Agenda files on the Internal disk or on RAM SSDs:
1. Select the 'Compress file' option on the 'File' menu.
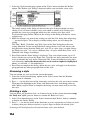
The size of your current Agenda file and the amount of space used by deleted entries
are displayed (in bytes).
2. Press Enter to compress the file. The message "Agenda compressed" is displayed
when the process is completed.
You cannot reclaim used disk space on a Flash SSD until you copy all of its files to
another disk, format the Flash SSD, and copy the files back. When you're doing this,
however, you should use 'Save as', to make a new (effectively compressed) copy of the
Agenda file. This is then the file to copy back to the formatted SSD.
For an Agenda file on a Flash SSD you can also get to 'Save as' via 'Compress file':
1. Select the 'Compress file' option. The same dialog is displayed showing you how
much the file would compress by, but with a message saying that you must use 'Save
as'. The Enter key is displayed with the text "Save as".
2. Press Enter, and the 'Save as' dialog appears automatically. Type a name for the new
file, and press Enter.
3. You may wish to exit the Agenda, go to the System screen and use its 'Delete file'
option to delete the old file, in case you were to use it by mistake.
You can make a new, "compressed" file in this way at any time, if you wish, as long
as you have enough disk space free for the new file.
Making new Agenda files
You can use the 'New file' option to create as many Agenda files as you like. For
example you might create two Agenda files, one for work and one for home. You can
create new Agenda files from the System screen, by first moving the highlight to the
Agenda icon, or from within another Agenda file:
1. Select the 'New file' option on the 'File' menu.
2. Type the name for the new file on the 'File: Name' line (maximum 8 characters).
3. On the 'Disk' line, select the disk that you want to create the file on. A message is
displayed, confirming the creation of the new file.
If you move to the System screen you will now see the names of two Agenda files
beneath the Agenda icon.
If you create the new file from inside the Agenda, or from the System screen while
another Agenda file is open, the new file will inherit the preference settings of the open
Agenda file. Only if no other Agenda file is open does the new file use the default
preference settings.
83