1
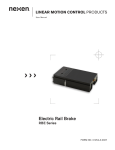
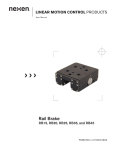
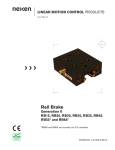
SERVICE BULLETIN
Return notification to repair BD Caliper Brakes supplied by Nexen
Group, Inc. (formerly Horton Industrial Products, Inc)
Product:
• BD Caliper Brakes; Spring Engaged
• BD Caliper Brakes; Air Engaged
Spring Engaged Brake
Problem: Defective Weld
The threaded tube/actuator welds are defective and could cause
the actuator to become separated from the threaded tube. If this
occurs, the actuator could be projected from the brake, under full
actuator force, causing serious harm or injury.
What must be done:
Replace the actuator portion of the brake with the new 2-port
actuator supplied for this purpose.
Danger: The Actuator Assembly (Item
11) is spring loaded under extreme
pressure. Do not remove the clamp
collar to disassemble the upper portion
from the lower portion. Please follow the
instructions listed below.
Disassembly
Manually release the Spring Actuator prior to disassembly.
1.
Apply a minimum of 85 psi hold-off air pressure to remove the
spring force on the brake arms, shoes and tap bolt.
2. Remove the plastic breather cap located at the top of the
Actuator (Item 11). Using a 9/16 socket wrench, turn the tap
bolt counterclockwise until the tap bolt is even with the top of
the actuator and loose. Approximately 40 turns.
Required items and tools:
1. Nexen User Manual
• L-20063
2. A new actuator
3. Spanner Wrench
4. Open End Wrench, 9/16
5. Socket Wrench Set
• 9/16 deep well socket
3. Shut off the air supply to the brake and disconnect the air
supply line.
4. Remove the Muffler (Item 13) and Pipe Plug/Adapter (Items 21
& 22). Retain for reuse.
5. Loosen the Spanner Nut on the threaded tube portion of the
actuator.
6. Turn the Actuator counterclockwise to remove it from the brake
arm.
7. Pull the Piston Rod (Item 10) out of the threaded tube, remove
the Spanner Nut and retain for reuse.
Old 3-Port Actuator
Install Pipe Plug
Put Air Pressure in Center
Port to Release Brake
Piston Rod
Plastic Breather Cap &
Filter -Open For Access
to “Tap Bolt”
Spanner Nut
Outboard Air Holes (Ports) Install MufflerPlug
Marked “Service” on Casting
Re-Assembly
1. Insert the Push Rod into the new Actuator tube and thread the
Spanner Nut onto the tube.
2. Check if the tap bolt on the new Actuator is loose.
3. Screw the new Actuator in the Brake Arm, turn the Actuator
clockwise until the end of the tube is approximately 1/16” from
the inside edge of the Arm.
4. Attach the air line to the Actuator’s center port labeled “Spring
Brake”.
NOTE: The Actuator may be rotated 360° for air line orientation.
Loosen the ring clamp bolt and rotate to the desired position. Tighten
the ring clamp to 15-20 ft-lbs.
New 2-Port Actuator
5. Install a Muffler Plug (Item 13) into one “Service” port and the
Pipe Plug/Adapter (Items 21& 22) into the other “Service” port.
6 Apply a minimum of 85 psi hold-off pressure to the Actuator.
7. Using a 9/16 socket wrench, turn the Tap Bolt clockwise and
tighten to 10-15 ft-lb torque.
8. Perform the Friction Facing Clearance Adjustment procedure
found in User Manual #L-20063
9. Tighten the Spanner Nut.
Center Port Marked “Spring Brake”
Manual Release “Tap Bolt”
Backed off & Loose
Two (2) Side Ports Marked Service
Air Engaged Brake
Disassembly
1. Loosen the Spanner Nut on the threaded
tube portion of the Actuator.
2. Shut off the air supply
3. Disconnect the air supply line.
4. Turn the Actuator counterclockwise to
remove it from the brake arm.
5 Pull the Push Rod out of the threaded tube, remove the Spanner
Nut and retain for reuse.
Re-Assembly
1. Insert the Push Rod into the new Actuator and thread the Spanner Nut onto the tube.
2. Screw the new Actuator into the brake Arm; turn the Actuator
clockwise until the end of the tube is approximately 1/16” from
the inside edge of the arm.
3. Attach the air supply line to the actuator port.
NOTE: The actuator may be rotated 360° for air line orientation.
Loosen the ring clamp bolt and rotate actuator to desired position.
Tighten ring clamp bolt to 15-20 ft-lbs.
4. Perform the Friction Facing Clearance Adjustment procedure
found in User Manual #L-20063
5. Tighten the Spanner Nut.
Nexen Group, Inc.
560 Oak Grove Parkway
Vadnais Heights, MN 55127
800.843.7445
Fax: 651.286.1099
www.nexengroup.com
ISO 9001 Certified
L-21076-E-1114