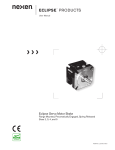
1
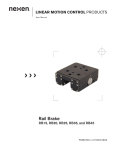
ECLIPSE PRODUCTS
User Manual
Eclipse Servomotor Brake
NEMA 23 Electric
FORM NO. L-21062-D-0509
(1)
FORM NO. L-21062-D-0509
In accordance with Nexen’s established policy of constant product improvement, the specifications contained in this
manual are subject to change without notice. Technical data listed in this manual are based on the latest information
available at the time of printing and are also subject to change without notice.
Technical Support:
800-843-7445
(651) 484-5900
www.nexengroup.com
DANGER
Read this manual carefully before installation and operation.
Follow Nexen’s instructions and integrate this unit into your
system with care. This unit should be installed, operated and
maintained by qualified personnel ONLY. Improper installation
can damage your system, cause injury or death. Comply with
all applicable codes.
This document is the original, non-translated, version.
Conformity Declaration: In accordance with Appendix II B of CE Machinery Directive (2006/42/EC):
A Declaration of Incorporation of Partly Completed Machinery evaluation for the applicable EU directives was
carried out for this product in accordance with the Machinery Directive. The declaration of incorporation is set
out in writing in a separate document and can be requested if required.
This machinery is incomplete and must not be put into service until the machinery into which it is to be
incorporated has been declared in conformity with the applicable provisions of the Directive.
Nexen Group, Inc.
560 Oak Grove Parkway
Vadnais Heights, Minnesota 55127
Copyright 2009 Nexen Group, Inc.
FORM NO. L-21062-D-0509
ISO 9001 Certified
(2)
Table Of Contents
General Specifications-------------------------------------------------------------------------------------------------------------------------4
General Safety Precautions------------------------------------------------------------------------------------------------------------------4
Installation onto Motor Shaft-----------------------------------------------------------------------------------------------------------------5
Installation Between Motor Shaft and a Gear Reducer--------------------------------------------------------------------------- 6
Installation of Electrical Connection-------------------------------------------------------------------------------------------------------7
Troubleshooting-----------------------------------------------------------------------------------------------------------------------------------7
General Dimensions-----------------------------------------------------------------------------------------------------------------------------8
Service Restrictions-----------------------------------------------------------------------------------------------------------------------------8
Warranty --------------------------------------------------------------------------------------------------------------------------------------------9
(3)
FORM NO. L-21062-D-0509
General SPECIFICATIONS
TABLE 1
Size
Min Holding
Torque
Max RPM
Torsional Rigidity
Inertia
Weight
23-3/8
0.45 Nm
(4.0 in-lbs)
5000
1308 Nm/Rad
(965 ft-lb/Rad)
0.87 kg-cm2
(7.7 x 10⁻⁵ in-lb-s2)
0.64 Kg
(1.42 lbs)
23-1/4
0.45 Nm
(4.0 in-lbs)
5000
349 Nm/Rad
(258 ft-lb/Rad)
0.78 Kg-cm2
(6.96 x 10⁻⁵ in-lb-s2)
0.60 Kg
(1.33 lbs)
TABLE 2
Specifications
Ambient Temperature:
4.5-45°C (40° - 113°F)
Power Supply:
24VDC ± 2%
Current:
0.40 Amp Continuous
Coil Resistance:
60-65 Ohms at 25°C
Recommended Fuse:
600mA, Voltage Rating >24VDC, Slow Blow
Recommended Transient Voltage Suppressor: Bidirectional TVS Zender Diode, Reverse
Standoff Voltage >43VDC, 500 Watt
General Safety Precautions
WARNING
Keep indoors. This product is
intended for indoor environments
only. Use of the brake outdoors
will damage components.
CAUTION
WARNING
Hot surface.
Do not touch.
The output shaft needs to be
enclosed either by gear reducer
or appropriate guarding. Failure
to guard could result in serious
bodily injury.
FORM NO. L-21062-D-0509
(4)
INSTALLATION
INSTALLATION ONTO MOTOR SHAFT
NOTE: Refer to Figures 1, 2, 3
Clamping
Collar
(Item 7)
1. Place the Clamping Collar (item 7) on the input
(female) end of the servo brake shaft, then slide the
Collar down the Shaft until it until it is firmly against
the shaft step.
2. Remove the Access Plug (Item 14) from the Input
Flange (Item 10). Rotate the Clamping Collar (item
7) and the Shaft (Item 1) until they are aligned with
the access hole. Then insert a hex key through the
access hole and engage the head of the cap screw.
Leave hex key in place while you perform the next two
steps.
Shaft
(Item 1)
FIGURE 1
CAUTION
Do not lubricate either the Clamping Collar
or the Shaft. Any lubricant on the contact
surfaces could result in torque transfer
failure. If necessary, clean the Shaft with
a non-petroleum based solvent, such as
isopropyl alcohool, then wipe dry before
assembly.
3. Slide the Motor Shaft into the input (female) end of
the Output Shaft (Item 1) until the Flanges of the
Motor and Brake come together.
FIGURE 2
4. Using four customer-supplied Socket Head Cap
Screws, bolt the Flanges together. Then tighten the
cap screws evenly.
5. Using the hex key used in Step 2, tighten the
cap screw in the Clamping Collar (Item 7) to the
recommended torque listed in Table 4.
CAUTION
Under-tightening the Collar may cause
slippage between the Motor and the Brake.
This can cause damage to the System,
Motor and/or Brake.
6. Reinstall the Access Plug (Item 14) in the access
hole in the Input Flange (Item 10).
FIGURE 3
7. Assemble the Gear Reducer or load to the output
end of the Brake Shaft.
DANGER
Support the load before
disengaging the brake. Failure
to support the load could result
in serious bodily injury.
(5)
FORM NO. L-21062-D-0509
INSTALLATION
INSTALLATION BETWEEN A MOTOR SHAFT AND A GEAR REDUCER
NOTE: Refer to Figure 4.
1. Mount the Servo Brake to the Motor Shaft by
performing steps 1-6 on page 5.
2. Insert the Output Shaft into the customer-supplied
gear reducer coupling.
3. Bolt the flanges together using customer-supplied
cap screws, washers and nuts. Before assembly,
apply a drop of Loctite® 242 (blue), or equivalent,
to the threads of each cap screw. Torque these cap
screws evenly (i.e., those in opposite corners) to the
recommended torques listed in Table 4.
Gear�
Reducer
4. Tighten the Coupling according to the instructions
supplied with the Gear Reducer.
FIGURE 4
5. Install any plugs or related items that are detailed in
the Gear Reducer instructions.
DANGER
Support the load before
disengaging the brake. Failure
to support the load could result
in serious bodily injury.
6. If the output shaft is not enclosed, proper guarding is
required.
WARNING
The output shaft needs to be
enclosed either by gear reducer
or appropriate guarding. Failure to
guard could result in serious bodily
injury.
FORM NO. L-21062-D-0509
(6)
INSTALLATION
INSTALLATION OF ELECTRICAL CONNECTION
1. Attach wire leads of Brake to a 24 V DC power
supply. This brake is not sensitive to the direction of
power through the unit. The brake leads are AWG
26 UL1429 wire.
Normally Open
Relay
2. Protect against high inductive switch-off peaks by
installing a Transient Voltage Suppressor device to
prolong contact life of switching device. See Table
2 for recommended device.
3. Suitable fusing should be added to circuit to protect
against damage from short circuits and ground fault
conditions. See Table 2 for recommended fuse
sizing.
Nexen
SBE
Brake
Fuse
+
-
Transient
Voltage
Supression
24V
DC
FIGURE 5 Typical Electrical Configuration
4. Figure 5 shows a recommended electrical
configuration providing a default to engaged
configuration.
5. Ensure a low resistance path between brake
chassis and earth ground.
6. Cycle the brake by applying power to the coil and
then removing it. If you hear an audible click each
time power is either applied or removed, the brake
is functioning correctly.
TROUBLESHOOTING
Problem
Failure of brake to
engage.
Failure of brake to
disengage.
Probable Cause
Solution
One or both ends of brake shaft may be
loose.
Check that both ends of brake shaft are
secured by either a collar or set screw;
unless both ends are tightened to the
required torque, the final drive will not
operate properly.
24V DC power may not be applied to the
brake.
Verify that 24V DC power is applied
to the brake.
Shorted or open coil (in the brake).
Use an ohmmeter to check for a coil
resistance of 60-65 ohms. Replace the
brake if the coil is shorted or open.
(7)
FORM NO. L-21062-D-0509
GENERAL DIMENSIONS
B
D
C
A
FIGURE 6
Note: Lettered dimensions are defined in Specifications Table 3.
TABLE 3
Brake Model
A
B
C
D
Size 23 - 1/4 in.
.2500
+.0000 in.
-.0005 in.
20.65 mm
.813 in.
.2500
+.0005 in.
-.0000 in.
23.2 mm
.91 in.
Size 23 - 3/8 in.
.3750
+.0000 in.
-.0005 in.
31.75 mm
1.25 in.
.3750
+.00005 in.
-.0000 in.
35.4 mm
1.39 in.
TABLE 4
Size
Recommended Seating Torque UNC (38-43 Rc)
6-32
34 in-lb
8-32
59 in-lb
10-24
77 in-lb
SERVICE RESTRICTIONS
Note: The servo Motor Brake assembly is designed for
extended service life. Due to this long product life, stored
spring energy, and internal component tolerance, Nexen
recommends that all service be performed by trained
personnel.
WARNING
Brake is spring loaded under
extreme pressure. Do not
disassemble.
Do not attempt to remove or dismantle any part of the Rail
Brake assembly. This product is spring loaded and under
pressure. If the product malfunctions, replace the unit or
contact Nexen.
FORM NO. L-21062-D-0509
(8)
WARRANTY
Warranties
Nexen warrants that the Products will be free from any defects in material or workmanship for a period of 12 months
from the date of shipment. NEXEN MAKES NO OTHER WARRANTY, EXPRESS OR IMPLIED, AND ALL IMPLIED
WARRANTIES, INCLUDING WITHOUT LIMITATION, IMPLIED WARRANTIES OF MERCHANTABILITY AND
FITNESS FOR A PARTICULAR PURPOSE ARE HEREBY DISCLAIMED. This warranty applies only if (a) the
Product has been installed, used and maintained in accordance with any applicable Nexen installation or maintenance
manual for the Product; (b) the alleged defect is not attributable to normal wear and tear; (c) the Product has not been
altered, misused or used for purposes other than those for which it was intended; and (d) Buyer has given written notice
of the alleged defect to Nexen, and delivered the allegedly defective Product to Nexen, within one year of the date of
shipment.
Exclusive Remedy
The exclusive remedy of the Buyer for any breach of the warranties set out above will be, at the sole discretion of Nexen,
a repair or replacement with new, serviceably used or reconditioned Product, or issuance of credit in the amount of the
purchase price paid to Nexen by the Buyer for the Products.
Limitation of Nexen’s Liability
TO THE EXTENT PERMITTED BY LAW NEXEN SHALL HAVE NO LIABILITY TO BUYER OR ANY OTHER PERSON
FOR INCIDENTAL DAMAGES, SPECIAL DAMAGES, CONSEQUENTIAL DAMAGES OR OTHER DAMAGES OF
ANY KIND OR NATURE WHATSOEVER, WHETHER ARISING OUT OF BREACH OF WARRANTY OR OTHER
BREACH OF CONTRACT, NEGLIGENCE OR OTHER TORT, OR OTHERWISE, EVEN IF NEXEN SHALL HAVE
BEEN ADVISED OF THE POSSIBILITY OR LIKELIHOOD OF SUCH POTENTIAL LOSS OR DAMAGE. For all of
the purposes hereof, the term “consequential damages” shall include lost profits, penalties, delay images, liquidated
damages or other damages and liabilities which Buyer shall be obligated to pay or which Buyer may incur based
upon, related to or arising out of its contracts with its customers or other third parties. In no event shall Nexen be
liable for any amount of damages in excess of amounts paid by Buyer for Products or services as to which a breach
of contract has been determined to exist. The parties expressly agree that the price for the Products and the services
was determined in consideration of the limitation on damages set forth herein and such limitation has been specifically
bargained for and constitutes an agreed allocation of risk which shall survive the determination of any court of competent
jurisdiction that any remedy herein fails of its essential purpose.
Limitation of Damages
In no event shall Nexen be liable for any consequential, indirect, incidental, or special damages of any nature whatsoever,
including without limitation, lost profits arising from the sale or use of the Products.
Warranty Claim Procedures
To make a claim under this warranty, the claimant must give written notice of the alleged defect to whom the Product
was purchased from and deliver the Product to same within one year of the date on which the alleged defect first
became apparent.
Nexen Group, Inc.
560 Oak Grove Parkway
Vadnais Heights, MN 55127
800.843.7445
Fax: 651.286.1099
www.nexengroup.com
ISO 9001 Certified
(9)
FORM NO. L-21062-D-0509