1
User Manual
Pro Install Hands-Free Car Kit for
Verizon® V860 - BARRAGE
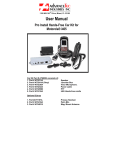
Car Kit Part # AT6810A consists of:
1. Part # AT8231A
2. Part # AT8255A
3. Part # AT8230A
4. Part # AT8232A
5. Part # AT9299B
6. Part # AT6312A
Speaker
Junction Box
Visor Microphone.
Power cable
PTT
V860 Hands-free cradle
Optional Extras
2. Part #AT7107A
4. Part # AT8410A
Privacy Handset
Palm Mic.
Before beginning the installation process, determine the best locations for the
mounting of the Mounting Bracket, Hand-free Cradle, Push To Talk (PTT) button, Visor
Microphone, Speaker and Junction Box.
2
Consider the following guideline when planning the installation:
• DO use all mounting hardware provided.
• DO ensure that cables are not placed under stress.
• DO follow proper + and - connections.
• DO crimp connectors securely.
• DO NOT attach components to any part of the vehicle that is not rigid or is
subject to excessive vibration.
• DO NOT install components in areas where rain or snow can easily get into
them, such as next to a vehicle window, which may be left open.
• DO NOT dress cables over sharp edges that could cause wear or tearing of
cable insulation.
• DO NOT install components in locations where they might interfere with the
vehicle operator or operating controls.
• DO NOT install the Hands-free Cradle where it will be difficult for the
operator to reach.
! WARNING
VEHICLES EQUIPPED WITH AIR BAGS
An air bag inflates with great force. DO NOT place objects, including communications
equipment, in the area over the air bag or in the air bag deployment area. If the
communication equipment is improperly installed and the air bag inflates, this could
cause serious injury.
It is recommended that the installation of the vehicle communication equipment be
performed by a professional installer/technician trained in the requirements for such
installations. An air bag's size, shape and deployment area can vary by vehicle make,
model, and front compartment configuration (for example, bench seat vs. bucket
seats). Contact the vehicle manufacturer's corporate headquarters, if necessary, for
specific air bag information for the vehicle make, model, and front compartment
configuration involved in your communication equipment installation.
Speaker Installation Detail Location
1. Mount the Speaker beneath the dashboard on the passenger's side of the vehicle,
out of the way of the passenger, or some other convenient location.
2. Do not mount the Speaker on the dashboard or the rear window shelf.
3. The Speaker should be located more than four feet from the Car Kit Cradle.
Installation Procedure
1. The Speaker includes a mounting bracket, permitting it to be mounted in a variety
of ways. Loosen the thumbscrews on the side of the speaker and using the
mounting bracket as a template, drill the necessary mounting holes and secure the
bracket with the self-tapping screws provided.
3
2. Position the Speaker on the mounting bracket and secure it by tightening the
thumbscrews. The mounting bracket is used to permanently mount the Speaker in
place while permitting it to be tilted to a desired angle.
Diagram 1
Installation
1. Mount the Junction Box beneath the dashboard on the passenger's side of the
vehicle or on the center side post between the front seats. It must be protected from
dirt and moisture and must be afforded adequate space for cooling. There must be
sufficient space to allow for connection of all cabling.
Diagram 2
2. Connect the Cradle Control Cable, the Speaker, Microphone, Power cable and
the PTT connectors to their respective corresponding connectors in the Junction
Box, as shown in Diagram 3 below.
Diagram 3
3. Route the cables out of the way to avoid physical or visual obstruction. Allow
sufficient slack in the cable to the PTT so that it does not interfere with the
movement of the gear lever.
Caution! The Hands-free unit should be used with a negative ground system only.
4
Installing the Power Cable
1. Route the black lead of the main power cable to convenient chassis ground and
the red lead to the positive supply voltage connection points. If it is necessary to
penetrate the firewall, use an existing opening.
2. If necessary, drill a new hole approximately 9/16” or 3.5cm in diameter. Make
sure that there is enough clearance on the opposite side. Insert a grommet into the
hole to prevent damage to the power cable.
3. Cut the black lead to the desired length.
4. If the connection is being made under the dash or in the vehicle cabin, connect
the black lead directly to the chassis of the vehicle..
Note! Do not connect the black lead to the negative (-) battery terminal.
The car could be damaged if there were a malfunction in the vehicle’s electrical
system.
5. Cut the red lead to the desired length. This lead will be connected such that it has
positive supply voltage at all times, even when the vehicle is turned off.
6. If the connection is being made under the dash or in the vehicle cabin, connect
the red lead to a positive supply voltage point.
7. If the connection is being made in the engine compartment or directly to the
battery, connect the in-line fuse holder between the red lead of the power cable and
the desired positive voltage connection point.
8. Route and connect the green lead to a convenient ignition switch supply point in
the vehicle.
Diagram 4
Stereo Mute
If the vehicle’s stereo system supports an external muting feature, route and
connects the orange wire to the car stereo system. Otherwise, the orange wire may
be left unconnected and cut off or tied out of the way.
NOTE! The Car Kit supports an “Entertainment Mute” function when connected to a
car stereo system that provides for external muting. This function is compatible with
systems that mute the audio output when the control line is connected to ground
Mounting the external vehicular Antenna
1. Mount an external vehicular antenna (to be purchased separately) using the
instructions provided with the manufacturer’s antenna kit.
5
2. Position the antenna, maintaining a separation distance of at least 8 inches (20
cms) between the antenna and the body of any user and nearby person, to assure
compliance with the U. S. FCC regulations on RF exposure.
3. Connect the coaxial antenna cable connector to the antenna cable connector
from the Clam Cradle
Mounting of the PTT - To the gear lever or flat surface
1. To attach the PTT to the gear lever, strap the PTT around the gear lever (see
diagram 4 using the Velcro strip attached, with the cord facing down.)
2. To attach the PTT to a flat surface, remove the 2 screws from the bottom of the
PTT, which holds the Velcro strip in place. Remove the strips and replace the small
plastic part that held the strips in place with the larger flat plastic part supplied with
the PTT. Screw the new plastic part in place.
Diagram 5
3. Plug the connector end of the PTT into the Junction Box and dress the surplus
cord out of the way so that it is not visually or physically obstructive.
Caution! Make sure there is sufficient slack in the cable to allow the free movement
of the gear lever without stretching the PTT cable.
The Microphone
Selecting the correct position for the microphone is vital for the successful
performance of the hands-free unit.
1. The Microphone should be mounted either on the sun visor directly above, and
facing, the driver or on the headliner just above.
NOTE! The square on the leading edge of the microphone must face directly
towards the driver
Diagram 6
6
2. To avoid visual or physical obstruction, route the microphone cable down inside
the door molding. Allow sufficient slack in the connector end of the cable to reach
the Junction Box.
3. Plug the connector side of the external microphone cord into the Junction Box as
shown in diagram 3 above
Note! The microphone should not be mounted near a window or in a spot where
road and ambient background noise would be substantially high
Inserting and removing handset from cradle
Press To
Release
Insert Side
Micro USB
Cable
t
Insert Side
Audio Cable
Align groove on
portable with ridge
on cradle
Diagram 8
1. Remove the rubber protective cover from the connector receptacle covering the
micro USB connector on the left side of the handset (handset facing you) and align
the micro USB connector at the end on the one cable from the back of the cradle
and insert the connector into the handset with the cable facing DOWN.
2. Remove the rubber protective cover from the connector receptacle covering the
audio connector on the right side of the handset (handset facing you) and align the
pin connector at the end of the other cable from the back of the cradle and insert the
connector into the handset with the cable facing UP.
3. Insert the handset into the cradle by aligning the groove at the bottom of the
handset with the ridge on the cradle and press the top of the handset back into the
Cradle as shown in Diagram 8 above until it snaps into place.
4. Turn the Handset on.
7
5. To remove the handset from the Cradle, press the release button on the top of
the cradle.
Car Kit Operating Procedure
Car Ignition connection
1. When the car ignition is ON, the Car Kit will stay on as long as the cables are
inserted into both sides on the handset.
2. When the ignition is turned OFF the Car Kit will turn OFF after 60 minutes.
3. Use of the PTT in the vehicle will turn on the Car Kit for 8 minutes, after which it
will turn off again.
Making a dispatch call
1. Dial the desired number on the handset’s key pad
2. Press and hold down the PTT button.
3. Speak towards the visor microphone.
4. Adjust the speaker volume using the handset's volume control
5. Incoming audio will be heard from the amplified speaker.
Making or receiving a hands-free telephone call
1. To receive an incoming hands-free telephone call, press the” SEND" key, any of
the number keys, the # or * key on the handset’s keypad or the PTT button for a
short period. A confirmation tone that the call has been answered will be heard
through the speaker NOTE: If the PTT button is pressed for more than 2 seconds it
will reject and end the call.
2. To make a hands-free telephone call, place the handset into the cradle and dial
the desired number on the handset's keypad and press the "SEND" key.
3. Adjust the speaker volume using the handset's volume control.
4. Incoming audio will be heard through the speaker.
Note: For best audio during an interconnect call set the volume level at 5 bars or
less.
Use of Optional Extra Privacy Handset or Palm Mic
AT7107A – Handset with Cradle
AT8410A – Palm Mic
8
Part # AT7107A – Privacy Handset with Cradle
1. To use the Privacy Handset, plug the connector on the end of the
coil cord into the corresponding receptacle on the Junction Box. See Diagram 3
2. An active call can be terminated and an incoming call can be rejected by pressing
the PTT button on the Privacy handset for more than 2 seconds.
3. To switch from an active call with the Privacy handset to hands-free operation,
place the Privacy handset into its cradle. Audio will then be routed to the speaker. If
the PTT is pressed for more than 2 seconds, it will terminate the call.
4. If the Privacy handset is not placed into its cradle, after the call is terminated, a
reminder tone will be heard through the speaker, one minute after all activity is
finished until the Privacy handset is returned to its handset.
Part # AT8410A – Palm Mic
1. To use a Palm Mic. plug the connector on the end of the coil cord of the Palm
Mic. into the corresponding RJ45 receptacle on Junction Box.
2. Once connected, the pressing of the switch on the Palm Mic. will deactivate the
Visor Mic. and activate the Palm Mic.
Call Waiting in both Hands-free mode and with Privacy handset
1. To answer an incoming call during an active call, press the PTT button for a short
period. This will put the current call on hold and answer the incoming call.
2. A short press on the PTT will toggle between the calls.
3. Pressing the PTT for more than 2 seconds will terminate the call.
Charging the battery
1. With the handset turned off, the car kit will charge the battery to 60% in
approximately 1 hour. The charge time will be longer if the handset is operational
during charge time.
2. For operator convenience, the handset’s backlight will remain on for ease of
viewing during low/no-light conditions.
NOTE! Batteries will charge within the temperature window of -10 C to +40 C (50 F
to 104 F). If the battery is outside the temperature window, no charge current will be
supplied to the battery.
Operating Specifications
Input voltage range:
Operating ambient:
11V dc to 32V dc
-30C to +60 C
1150 NW 163rd Drive, Miami, FL \33169
T: 305-623-3939 F: 305-623-3996