1
IQA Cryopreservation Panel Procedure
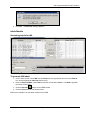
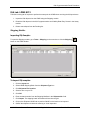
3. Select Received Date from the Type box and enter the received date into the ID box.
4. Click the arrow button to move the criteria into the query grid.
5. Click the Execute (
) button on the LDMS toolbar.
6. Select two aliquots from each blood donor by clicking on the rows to highlight them.
Note: Aliquots that were marked as Do Not Store in the Specimen Management module will
be highlighted in red.
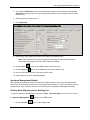
7. Click the Shipment Destination tab and select 213 University of Miami from the Lab box.
8. Select a contact from the Contact Person box.
9. Select a contact from the Contact @ Sending Lab box.
10. Click the Add (
) button on the LDMS toolbar to batch the shipment.
11. In the View Shipment screen, select your batch and click Manifest Report. If applicable, print the
Box Map Report.
12. Click on the Shipment QA/QC tab to perform QA/QC on the batch to be shipped.
13. QA/QC the shipment via barcode scanning or visual inspection. Click on the Save button on the
LDMS toolbar.
14. Click on the View Shipment tab, select your batch, and select LDMS Shipping Batch from the
Shipment Type box.
15. Click on the Ship button.
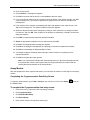
16. Click OK to continue or Cancel to view the Storage Report. A message box appears.
17. Click Yes to ship the batch.
18. Select the Shipping Box temperature and click OK.
19. Select your disk drive and click OK.
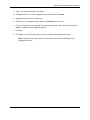
20. The success message appears.
21. Click OK and note the shipping batch number.
© 2012 Frontier Science Foundation
Page 8 of 12
Date Modified: 31 Jan 2012