1
5.1.4 Checking the operation
With the lock and strike installed and wiring
complete the door is closed to check the alignment
and operation. The key area for alignment is the
bolt pin; the pin is designed to touch the leading
edge of the strike plate hole to pull the door in, but
it cannot be allowed to touch the sides of the hole
as this will limit its unlocking ability. If its rubs or
touches the side of the strike plate hole, either the
lock or strike plate needs to be re-positioned.
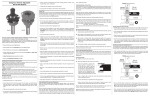
Clearance
Bolt pin
Clearance
The bolt pin touches the leading edge of
the strike plate hole but there needs to be
clearance around the sides of the hole.
5.2 Surface Installation
By using a YD30M housing, the lock and or strike plate can be surface mounted to the door or door frame
eliminating the need for cutting mortises. Housings are available with adhesive tape supplied for easy application to
glass doors in addition to having screw hole mounting points for wood and metal doors.
5.2.1 Securing the lock housing to wood
Before fitting the housing, determine exactly where
the wiring will enter the housing and drill one or two
8mm holes through the housing wall. Ensure the
holes are on the housing face that goes against
the wooden frame. Push the supplied grommet(s)
into the drilled hole(s). The two 10G Hex head selftapping screws supplied with the housing can then
be screwed into the wood but not tightened. The
two keyhole shaped cut outs in the housing fit over
these screw heads which are tightened with a ring
spanner once the housing is in place.
5.2.2 Wiring the lock
Wires are run from the power supply to the lock
through the drilled hole(s) in the housing. A
connection can be made to the supplied wire loom
which in turn plugs into the lock. The jumper needs
to be positioned for fail safe / fail secure
configuration as per the instructions on the lock
cover.
The Red, Black and Blue wires are essential
connections whilst the Violet and White are
optional. Detailed wiring instructions can be found
in Section 6.
© BQT Solutions (SEA) Pte Limited
Page 6