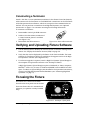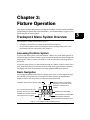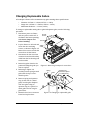
1
User Manual
© High End Systems, Inc. 2003, All Rights Reserved
Information and specifications in this document are subject to change without notice.
High End Systems, Inc. assumes no responsibility or liability for any errors or
inaccuracies that may appear in this manual.
Trademarks used in this text: High End Systems, WholeHog II, Dataflash, Intellabeam
and LithoPatterns are registered trademarks; and HandShake, Trackspot, the High End
Systems globe logo and the Hog logo are trademarks of High End Systems, Inc. or High
End Systems Europe Ltd. Belden is a registered trademark of Belden, Inc. Philips is a
registered trademark of Philips Lighting Company. ETL and C-ETL are registered
trademarks of Intertek Testing Services.
Other trademarks and trade names may be used in this document to refer to either the
entities claiming the marks and names or their products. High End Systems disclaims any
proprietary interest in trademarks and trade names owned by others.
TrackSpot®2 User Manual
P/N 60600224 Version 2.0 September, 2003
Trackspot®2 User Manual
i
Contacting High End Systems®
US and the Americas
Sales Department:
High End Systems, Inc.
2105 Gracy Farms Lane
Austin, TX 78758 USA
voice:
512.836.2242
fax:
512.837.5290
Customer Service:
High End Systems, Inc.
2105 Gracy Farms Lane
Austin, TX 78758 USA
voice:
800.890.8989
24-hour fax:
512.834.9195
24-hour voice mail: 512.837.3063 or 800.890.8989
U.S. New York
High End Systems, Inc. New York
311 W. 43rd Street, Ste 400
New York, NY 10036
voice:
210.957.6840
fax:
212.957.4466
U.S. Los Angeles:
High End Systems, Inc.
8200 Haskell Avenue
Van Nuys, CA 91406 US
voice:
818.947.0550
fax:
818.908.8975
Europe Headquarters: High End Systems Europe LTD.
53 Northfield Road
London W13
voice:
+44 20.8579.5665
fax:
+44 20.8579.8469
Singapore:
High End Systems Singapore Pte. Ltd.
1 Tannery Road 06-05
Cencon 1
Singapore 1334
voice:
+65 6742 8266
FAX:
+65 6743 9322
World Wide Web:
http://www.highend.com
ii
Trackspot®2 User Manual
Declaration of Conformity
according to ISO/IEC Guide 22 and EN45104
Manufacturer’s name:
Manufacturer’s address:
COEF SRL.
Via Albinatico, 80-82
51019 Ponte Buggianese (PT), Italy
Distributor’s name:
Distributor’s address:
High End Systems, Inc.
2105 Gracy Farms Lane
Austin, Texas 78758 USA
Declares that the product
Product Name:
Product Number:
Product Options:
TrackSpot® 2
TrackSpot 2
All
conforms to the following EEC directives:
73/23/EEC, as amended by 93/68/EEC
89/336/EEC, as amended by 92/31/EEC and 93/68/EEC
Equipment referred to in this declaration of conformity was first manufactured in compliance with the following standards in 2003:
Safety:
EN 60598-1: 1997
EN 60598-2-17: 1989
A1-A3: 1993
EMC:
EN 55015: 2001
EN 55103-1: 1998
EN55103-2: 1998
EN 55022: 1999, 2001 Class A ITE
FCC CRFR 47 Part 15
CNS-13438
EN 61000-3-2: 2002
EN 61000-3-3: 2002
EN 55024:1999
EN61000-4-2: 1995 Level 3 Class 2
EN61000-4-3: 1995 Level 2 (3V/m)
EN61000-4-4: 1995 Level 2 (1/.5kV)
EN61000-4-5: 1995 Level 3 (2/1kV)
EN61000-4-6: 1996 Level 2 (3Vrms)
EN61000-4-11:1994
USA, September 22, 2003
USA, Monday, September 29, 2003
Kenneth Stuart Hansen, Compliance Engineer
Trackspot®2 User Manual
iii
Product Modification Warning
High End Systems products are designed and manufactured to meet the requirements of
United States and International safety regulations. Modifications to the product could
affect safety and render the product non-compliant to relevant safety standards.
Mise En Garde Contre La Modification Du Produit
Les produits High End Systems sont conçus et fabriqués conformément aux exigences
des règlements internationaux de sécurité. Toute modification du produit peut entraîner
sa non conformité aux normes de sécurité en vigueur.
Produktmodifikationswarnung
Design und Herstellung von High End Systems entsprechen den Anforderungen der U.S.
Amerikanischen und internationalen Sicherheitsvorschriften. Abänderungen dieses
Produktes können dessen Sicherheit beeinträchtigen und unter Umständen gegen die
diesbezüglichen Sicherheitsnormen verstoßen.
Avvertenza Sulla Modifica Del Prodotto
I prodotti di High End Systems sono stati progettati e fabbricati per soddisfare i requisiti
delle normative di sicurezza statunitensi ed internazionali. Qualsiasi modifica al prodotto
potrebbe pregiudicare la sicurezza e rendere il prodotto non conforme agli standard di
sicurezza pertinenti.
Advertencia De Modificación Del Producto
Los productos de High End Systems están diseñados y fabricados para cumplir los
requisitos de las reglamentaciones de seguridad de los Estados Unidos e internacionales.
Las modificaciones al producto podrían afectar la seguridad y dejar al producto fuera de
conformidad con las normas de seguridad relevantes.
FCC Information
This equipment has been tested and found to comply with the limits for a Class A digital
device, pursuant to part 15 of the FCC rules. These limits are designed to provide
reasonable protection against harmful interference when the equipment is operated in a
commercial environment. This equipment generates, uses, and can radiate radio
frequency energy and, if not installed and used in accordance with the instruction
manual, may cause harmful interference to radio communications. Operation of this
equipment in a residential area is likely to cause harmful interference, in which case the
user will be required to correct the interference at his own expense.
iv
Trackspot®2 User Manual
Important Safety Information
Instructions pertaining to continued protection against fire, electric shock, exposure to
excessive ultraviolet (UV) radiation, and injury to persons are found in Appendix A.
Please read all instructions prior to assembling, mounting, and operating this equipment.
Important: Informations De Sécurité
Les instructions se rapportant à la protection permanente contre les incendies,
l’électrocution, l’exposition à un rayonnement ultraviolet (UV) excessif et aux blessures
corporelles se trouvent dans l’Annexe A.
Veuillez lire toutes les instructions avant d’assembler, de monter ou d’utiliser cet
équipement.
Wichtige Sicherheitshinweise
Sicherheitsanleitungen zum Schutz gegen Feuer, elektrischen Schlag, übermäßige UVStrahlung und Verletzung von Personen finden Sie in Anhang A.
Vor der Montage, dem Zusammenbau und der Intbetriebnahme dieses Geräts alle
Anleitungen sorgfältig durchlesen.
Informazioni Importanti Di Sicurezza
Le istruzioni sulla protezione da incendi, folgorazione, esposizione eccessiva a raggi
ultravioletti (UV) e infortuni sono contenute nell’appendice A.
Si prega di leggere tutte le istruzioni prima di assemblare, montare e azionare
l’apparecchiatura.
Informacion Importante De Seguridad
En el Apéndice A se encuentran instrucciones sobre protección continua contra incendios,
descarga eléctrica, exposición excesiva a radiación ultravioleta (UV) y lesiones
personales.
Lea, por favor, todas las instrucciones antes del ensamblaje, montaje y operación de este
equipo.
Trackspot®2 User Manual
v
Symbols
The following international caution and warning symbols appear in margins
throughout this manual to highlight messages.
Caution: This symbol appears adjacent to Caution messages. Not heeding
these messages could result in personal injury and/or damage to
equipment.
Warning: This symbol appears adjacent to high voltage warning messages.
Not heeding these messages could result in serious personal
injury.
This symbol indicates that a fire hazard is present. Not heeding these
messages could result in serious personal injury.
This symbol indicates that eye protection is required.
This symbol indicates an explosion hazard.
This symbol indicates the minimum distance to a lighted object, which in
this case, is 1 meter.
This symbol indicates a hot surface.
This symbol indicates that an object not be mounted on a flammable
surface
Warranty Information
Limited Warranty
Unless otherwise stated, your product is covered by a one year parts and labor
limited warranty. Dichroic filters and LithoPatterns® high resolution glass gobos are
not guaranteed against breakage or scratches to coating. It is the owner’s
responsibility to furnish receipts or invoices for verification of purchase, date, and
dealer or distributor. If purchase date cannot be provided, date of manufacture will
be used to determine warranty period.
Returning an Item Under Warranty for Repair
It is necessary to obtain a Return Material Authorization (RMA) number from your dealer
or point of purchase BEFORE any units are returned for repair. The manufacturer will
make the final determination as to whether or not the unit is covered by warranty. Lamps
are covered by the lamp manufacturer’s warranty.
vi
Trackspot®2 User Manual
Any Product unit or parts returned to High End Systems must be packaged in a suitable
manner to ensure the protection of such Product unit or parts, and such package shall be
clearly and prominently marked to indicate that the package contains returned Product
units or parts and with an RMA number. Accompany all returned Product units or parts
with a written explanation of the alleged problem or malfunction. Ship returned Product
units or parts to: 2105 Gracy Farms, Austin, TX 78758 USA.
Note: Freight Damage Claims are invalid for fixtures shipped in non-factory boxes
and packing materials.
Freight
All shipping will be paid by the purchaser. Items under warranty shall have return
shipping paid by the manufacturer only in the Continental United States. Under no
circumstances will freight collect shipments be accepted. Prepaid shipping does not
include rush expediting such as air freight. Air freight can be sent customer collect in the
Continental United States.
REPAIR OR REPLACEMENT AS PROVIDED FOR UNDER THIS WARRANTY IS THE
EXCLUSIVE REMEDY OF THE CONSUMER. HIGH END SYSTEMS, INC. MAKES NO
WARRANTIES, EXPRESS OR IMPLIED, WITH RESPECT TO ANY PRODUCT, AND
HIGH END SPECIFICALLY DISCLAIMS ANY WARRANTY OF MERCHANTABILITY OR
FITNESS FOR A PARTICULAR PURPOSE. HIGH END SHALL NOT BE LIABLE FOR
ANY INDIRECT, INCIDENTAL OR CONSEQUENTIAL DAMAGE, INCLUDING LOST
PROFITS, SUSTAINED OR INCURRED IN CONNECTION WITH ANY PRODUCT OR
CAUSED BY PRODUCT DEFECTS OR THE PARTIAL OR TOTAL FAILURE OF ANY
PRODUCT REGARDLESS OF THE FORM OF ACTION, WHETHER IN CONTRACT,
TORT (INCLUDING NEGLIGENCE), STRICT LIABILITY OR OTHERWISE, AND
WHETHER OR NOT SUCH DAMAGE WAS FORESEEN OR UNFORESEEN.
Warranty is void if the product is misused, damaged, modified in any way, or for
unauthorized repairs or parts. This warranty gives you specific legal rights, and you may
also have other rights which vary from state to state.
Trackspot®2 User Manual
vii
viii
Trackspot®2 User Manual
Table of Contents
Contacting High End Systems® .................................................................................................... ii
Product Modification Warning ......................................................................................................iv
FCC Information .............................................................................................................................iv
Important Safety Information .........................................................................................................v
Symbols ...........................................................................................................................................vi
Warranty Information....................................................................................................................vii
Chapter 1: Features and Specifications
Features ........................................................................................................................................ 1-1
Specifications ............................................................................................................................... 1-2
Mechanical ............................................................................................................................ 1-2
Electrical ................................................................................................................................ 1-2
Environmental Specifications: ............................................................................................. 1-3
Factory Installed Wheels ...................................................................................................... 1-3
Color Wheel.................................................................................................................... 1-3
Effects Wheel ................................................................................................................. 1-3
Gobo Wheel .................................................................................................................... 1-3
Replaceable gobos ......................................................................................................... 1-3
Optional Accessories ................................................................................................................... 1-4
Chapter 2:
Setup and Configuration
Unpacking the Fixture................................................................................................................. 2-1
Setting the Fixture Voltage ......................................................................................................... 2-2
Installing the Lamp in a New Fixture ......................................................................................... 2-3
Installing a Power Cord Cap ....................................................................................................... 2-4
Installing a Line Cord Cap - U.K. Only................................................................................ 2-4
Vatic Fitter Heads Information - Danmark ......................................................................... 2-5
Installing the Yoke ....................................................................................................................... 2-5
Powering On the Fixture ............................................................................................................. 2-6
Homing the Fixture...................................................................................................................... 2-6
Assigning a DMX Start Channel................................................................................................. 2-6
Mounting the Fixture................................................................................................................... 2-8
Standing the Fixture on a Stable Surface ........................................................................... 2-8
Truss Mounting ..................................................................................................................... 2-9
Linking the Fixtures................................................................................................................... 2-10
Data Cabling and Connectors ............................................................................................ 2-10
DMX Data Cables ........................................................................................................ 2-10
Cable Connectors......................................................................................................... 2-11
Setting up the Link ............................................................................................................. 2-11
Constructing a Terminator ................................................................................................. 2-12
Verifying and Uploading Fixture Software .............................................................................. 2-12
Focusing the Fixture .................................................................................................................. 2-12
Trackspot®2 User Manual
ix
Chapter 3: Fixture Operation
Trackspot 2 Menu System Overview .......................................................................................... 3-1
Accessing the Menu System................................................................................................. 3-1
Basic Navigation ................................................................................................................... 3-1
Menu Options ............................................................................................................................... 3-2
DMX Menu ............................................................................................................................ 3-2
Setting a DMX Start Channel ....................................................................................... 3-2
Test Menu .............................................................................................................................. 3-2
Set Menu................................................................................................................................ 3-3
Inverting Tilt (T/IN) ....................................................................................................... 3-3
Inverting Pan (P/IN)....................................................................................................... 3-3
Swapping Pan and Tilt (SWAP).................................................................................... 3-3
Setting Color Blink Mode (CBLK) and Gobo Blink Mode (GBLK) ............................ 3-4
Changing the Display Output (DSPL) .......................................................................... 3-4
Setting Protocol (CH98) ................................................................................................ 3-4
Color and Gobo Offset (OFFS) Menu.................................................................................. 3-5
Info Menu .............................................................................................................................. 3-5
Display Lamp Hours (L/HR).......................................................................................... 3-5
Reset Lamp Hours (L/RS).............................................................................................. 3-6
Display Fixture Hours (F/HR) ....................................................................................... 3-6
Display the Software Version (VER) ............................................................................ 3-6
Error Menu (ERR)................................................................................................................. 3-6
Trackspot 2 Menu Map......................................................................................................... 3-7
DMX Programming ..................................................................................................................... 3-9
Basics of DMX Control ......................................................................................................... 3-9
DMX Protocol........................................................................................................................ 3-9
Homing the Fixture Using a DMX Controller .................................................................... 3-9
Trackspot 2 DMX Protocol Table ...................................................................................... 3-10
Chapter 4:
Fixture Maintenance
Basic Troubleshooting ................................................................................................................. 4-1
Replacing Parts ............................................................................................................................ 4-2
Replacing Fuses .................................................................................................................... 4-3
Replacing the Lamp .............................................................................................................. 4-3
Optimizing the Lamp ............................................................................................................ 4-5
Cleaning Glass Components ................................................................................................ 4-5
Changing Replaceable Gobos .............................................................................................. 4-6
Appendix A Important Safety Information
x
Trackspot®2 User Manual
List of Figures
Trackspot 2 Physical Dimensions .............................................................................................. 1-2
Factory-installed wheels ............................................................................................................. 1-3
Removing access door. ............................................................................................................... 2-1
Setting fixture voltage and frequency ....................................................................................... 2-2
Removing lamp assembly ........................................................................................................... 2-3
Inserting lamp into base ............................................................................................................. 2-4
Trackspot 2 yoke ......................................................................................................................... 2-5
Trackspot 2 menu navigation buttons ....................................................................................... 2-7
Truss mounting ........................................................................................................................... 2-9
XLR 3-pin connector ................................................................................................................. 2-11
Linking Trackspot 2 fixtures .................................................................................................... 2-11
Data cable terminator ............................................................................................................... 2-12
Trackspot 2 front panel ............................................................................................................ 2-12
Trackspot 2 Menu display panel ................................................................................................ 3-1
Replacing fuses ........................................................................................................................... 4-3
Removing lamp assembly ........................................................................................................... 4-4
Removing lamp from base .......................................................................................................... 4-4
Optimizing the lamp ................................................................................................................... 4-5
Removing Trackspot 2 access door. .......................................................................................... 4-6
Changing a replaceable gobo ..................................................................................................... 4-6
Trackspot® 2 User Manual
xi
xii
Trackspot® 2 User Manual
Chapter 1:
1
Features and Specifications
Trackspot 2 is a moving-mirror automated luminaire designed
for a wide range of applications including clubs, corporate
events, hotel ballrooms, small theaters and tour productions.
It features a bright MSD250/2 source with a 2000 hour lamp life.
Three wheels offer a wide range of design possibilities. A
rotating gobo wheel has eight replaceable gobo positions and a
beam reduction template. A color wheel offers 11 colors and an
open position. An effects wheel includes 3- facet and 6-facet rotating prisms along
with frost and conversion filters to adjust color shades.
Features
•
MSD250/2 lamp. 2000 hour life
•
170° pan and 95° tilt
•
Color wheel with 11 colors, plus open position (for 12 total positions) and eight
possible half colors.
•
Gobo wheel with 8 rotating gobo positions plus open and beam reducing. Two
LithoPattern® high resolution glass gobos and six metal gobo patterns standard.
•
Effects wheel with two color conversion filters, static frost filter, and two rotating
prisms (3-facet and 6-facet).
•
Variable strobe including full optical dimming and fade to black
•
Manual focus
•
Menu system for easy DMX addressing and diagnostics
•
XYZ lamp adjust
•
9-channel DMX control is standard. Optional 8-Channel control (minus the Dim
channel) is selectable through menu system.
•
Full internal power factor correction
Trackspot®2 User Manual
Features and Specifications
1-1
Specifications
Mechanical
Height: 217mm (8.5 in)
Width (with yoke attached): 409mm (16.1in)
Depth (with yoke attached): 680mm (26.8 in)
Weight: 24kg (53lb)
663 mm
26.1 in
345 mm
13.6 in
409 mm
16.1 in
339 mm
13.4 in
66.8 mm
2.6 in
226 mm
8.9 in
217 mm
135 mm 8.5 in
5.3 in
183 mm
7.2 in
613 mm
24.1 in
35 mm
1.4 in
58 mm
2.3 in
680 mm
26.8 in
Figure 1-1 Trackspot 2 Physical Dimensions
Electrical
Voltage Range: 100V, 120V, 208V, 230V
Power Consumption: 375 watts
Fuses: AC in = 250V 4A slow blow (Littelfuse p/n 218004 or BUSSMANN GDC-4A)
Power Consumption:
100V, 50Hz @ 3.4A
100V, 60Hz @ 3.5A
1-2
120V, 50Hz @ 2.6A
120V, 60Hz @ 2.8A
Features and Specifications
208V, 50Hz @ 1.7A
208V, 60Hz @ 1.6A
230V, 50Hz @ 1.5A
230V, 60Hz @ 1.5A
Trackspot®2 User Manual
Environmental Specifications:
1
Max. ambient temperature 50°C (122°F)
Max. exterior surface temperature: 67°C (153°F)
Min. distance to flammable objects: 1 meter (3.28 ft)
Min. distance to lighted object: 1 meter (3.28 ft)
Factory Installed Wheels
UV
Violet
Trackspot 2 fixtures use a color wheel with
non-replaceable dichroic wedges at 11 positions
plus open. See Figure 1-2.
12 1 2
3
11
4
10
9
5
8
6
7
Aqua
Blue
Color Wheel
Open Yellow
Red
Dark
Pink
Dichroic Glass Thickness: 0.069 in ± 0.010 in
(1.1 mm ± 0.1mm)
Dark
Blue
Pink
Green
Orange
Cyan
Color Wheel
Effects Wheel
Positio
n
Description
1
Open
2
3-facet Prism
Material Replaceable
No
glass
3
Warm Correction
glass
No
4
Cool Correction
glass
No
5
6-facet prism
glass
No
6
Frost
glass
No
Gobo Wheel
Positio
n
1
2
3
4
5
6
7
8
9
10
Description
6 1 2
3
5
4
No
Effects Wheel
Material Replaceable
Open
Tunnel
Multicircle
Comet Wing
Bar
Beam Reducer
Triangle
Tunnel
Snake Eyes
Simmer
Stars
metal
metal
glass
metal
metal
No
Yes
Yes
Yes
Yes
No
metal
Yes
metal
glass
metal
Yes
Yes
Yes
Replaceable gobos
Diameter: 24.7mm ± 0.2mm (0.972 in ± .008in)
Trackspot®2 User Manual
10
1
2
9
3
8
4
7
6
5
Rotating Gobo Wheel
Figure 1-2 Factory-installed
wheels
Features and Specifications
1-3
Image size: 19.5mm ± 0.13mm (0.768in ± .005in)
Maximum thickness: = 1.1mm (.043in)
Optional Accessories
Part Description
Replacement Philips MSD250/2 lamp
Male 3-pin XLR terminator
Heavy duty 3-pin XLR cable (10’)
Heavy duty 3-pin XLR cable (25’)
Heavy duty 3-pin XLR cable (50’)
Heavy duty 3-pin XLR cable (100’)
Whole Hog® III Lighting Console
Upload Dongle
Galvanized safety cable
Cheeseborough clamp
Part Number
55030051
90404039
55050005
55050006
55050007
55050008
61020001
26040002
12040001
55040014
Note: Call High End Systems for information on standard or custom gobos
and effect glass for replaceable gobos (see “Contacting High End
Systems®” on page -ii.).
1-4
Features and Specifications
Trackspot®2 User Manual
Chapter 2:
Setup and Configuration
2
A Trackspot®2 fixture ships with the following items:
•
•
•
•
•
•
•
•
•
•
Trackspot 2 fixture
User Manual
Yoke
Two Yoke tightening knobs
Two Yoke bolts
Four thick washers (used between yoke and fixture, all holes)
Four thin washers (used between yoke and knob/bolt)
One power cord (plug molded for US)
One power cord (no cord cap)
Package with two 250V 4A slow blow fuses for use in fixtures set for 100V
operation ONLY.
Unpacking the Fixture
Unpack the Trackspot 2 fixture and verify
that it is undamaged. Inspect both the outside
of the fixture for physical damage and the
optical assembly for damage to glass
components.
To access the optical assembly:
Access screws
Fan
1. Lay the fixture on its back and locate the wire
door retaining screws, as shown in Figure
2-1. Remove the screws and lift the access
door off the fixture.
2. Disconnect the fan wire from the
connector board and set the door aside.
3. If there is no damage, continue with the
rest of the setup described in this chapter.
Figure 2-1 Removing access door.
4. If there is damage, notify both the shipping agent and the sales agent immediately.
Save the shipping carton and packing materials. The carton and packing materials
are specifically designed to protect the product during transport. High End Systems®
assumes no responsibility for products that are damaged during transport. Return a
product for repair in its original shipping carton and packing materials.
Trackspot®2 User Manual
Setup and Configuration
2-1
Before returning anything to the factory, call your High End Systems dealer/
distributor for a Return Material Authorization (RMA) number. The factory cannot
accept any goods shipped without an RMA number.
Setting the Fixture Voltage
Trackspot 2 ships from the factory set at 230V, 50Hz and offers voltage settings for
100V, 120V, 208V, and 230V at both 50 and 60Hz. Setting a new voltage requires
selecting both a voltage and a frequency setting.
Before you begin, note the following:
Warning:
This fixture is to be serviced by qualified service personnel only.
Disconnect power before servicing the fixture.
Replace fuses with specified type and rating only.
Refer to Figure 2-2 for setting fixture voltage and frequency.
A
C
230
208
120
100
0
0
60 Hz
50 Hz
B
D
Figure 2-2 Setting fixture voltage and frequency
To set the fixture voltage:
1.
The fixture must be switched OFF and disconnected from power.
2.
If the door is not off, lay the fixture on its back and locate the door retaining
screws, as shown in Figure 2-1 on page 2-1. Remove the screws and carefully lift
the access door off the fixture.
3.
Locate the connector board (A) and unplug fan wire from connector (B).
4.
Locate the 6-position terminal block (C) on the connector board. Leave the wire
to 0 VAC attached. Move the voltage wire to the appropriate terminal position.
2-2
Setup and Configuration
Trackspot®2 User Manual
To set the frequency:
1.
Locate the 50Hz and 60Hz frequency headers (D) on the connector board and
insert the frequency selection plug into the appropriate header.
2.
Reconnect fan wire to connector (B) and replace door.
2
Installing the Lamp in a New Fixture
The Trackspot 2 fixture ships without a lamp. Use the following procedure to install a
lamp in a new fixture. To replace a lamp, use the procedure in “Replacing the Lamp”
on page 4-3.
Warnings: Disconnect power before lamping or servicing.
An operating, unshielded MSD lamp emits ultraviolet and visible
(UV-vis) radiation which could damage eyes and skin. Whenever
you are working on or near an exposed lamp, wear protective eye
gear. Never look directly at the lamp while the lamp is on.
Hot lamp may be an explosion hazard. Do not open for five
minutes after switching off. Wear eye and hand protection when
re-lamping.
Equipment surfaces may reach temperatures up to 67° C (153° F).
Allow the fixture to cool before handling.
Caution:
This equipment is designed for use with a Philips® MSD250/2
short arc lamp only. Using any other type lamp may be hazardous
and will void the warranty.
To install a lamp in a new fixture:
1.
Perform this procedure before you
connect the fixture to power.
2.
Put on protective eye wear and
gloves.
3.
Access the lamp cap on the back
plate and, using a #2 philips-head
screwdriver, remove the two lamp
assembly screws.
4.
Pull the lamp assembly straight out
of the fixture as shown in Figure 2-3.
Lamp
assembly
screws
Socket
wires
Figure 2-3 Removing lamp assembly
5.
The lamp assembly is connected to the fixture by lamp socket wires. Support the
lamp assembly while inserting the lamp. Do not allow the lamp socket wires to
support the weight of the lamp assembly.
6.
Remove all packaging materials from the new lamp.
Trackspot®2 User Manual
Setup and Configuration
2-3
Caution: When handling the new lamp, avoid contact with the lamp glass. If
the lamp glass is soiled by oil or dirt from skin, gloves, etc., clean the
cold lamp glass with an alcohol wipe. A soiled lamp could overheat
and burst, causing damage to the fixture.
7.
Holding the new lamp by its ceramic base, gently press the
two base pins straight into the lamp socket (see Figure 2-4)
until the lamp is firmly seated.
8.
Insert the lamp assembly straight into the fixture.
Caution:
9.
Make sure the lamp socket wires are not
wrapped around the lamp or crimped while
reinserting the lamp assembly.
Orient the lamp cap text in the same direction as the
backplate text. Tighten the lamp assembly screws.
Figure 2-4 Inserting
lamp into base
10. After you have finished the setup described in this chapter, you will need to
optimize the lamp. See “Optimizing the Lamp” on page 4-5.
Installing a Power Cord Cap
Trackspot 2 fixtures ship with two power cords; one with a Standard NEMA 5-15
cord cap, and one without a cord cap. Different locations (even within the same
country) may require a different power cord cap to connect the fixture to a power
outlet.
Because of the variety of power cord caps used worldwide, High End Systems, Inc.
cannot make specific recommendations for the power cord cap.
Contact a local authority for the type of power cord cap needed. When installing the
power cord cap, note that the cores in the mains lead are colored in accordance with
the following code:
•
green and yellow = earth
•
blue = neutral
•
brown = live
Warning:
Class 1 equipment - This equipment must be earthed.
Installing a Line Cord Cap - U.K. Only
In the United Kingdom, the colours of the cores in the mains lead of this equipment
may not correspond with the colored markings identifying the terminals in the
fixture’s plug. Therefore, install a line cord cap in accordance with the following
code:
2-4
Setup and Configuration
Trackspot®2 User Manual
•
The core which is coloured green and yellow must be connected to the plug
terminal which is marked with the letter “E,” or by the earth symbol
, or
coloured green, or green and yellow.
•
The core which is coloured blue must be connected to the terminal which is
marked with the letter “N” or coloured black.
•
The core which is coloured brown must be connected to the terminal which is
marked with the letter “L” or coloured red.
Warning:
Class 1 equipment - This equipment must be earthed.
Vatic Fitter Heads Information - Danmark
Advarsel: Beskyttelse mod elektrisk chock.
Vigtigt!
Lederne med gul/groen isolation maa kun tilsluttes en klemme maerket
eller
Installing the Yoke
The Trackspot 2 fixture ships with a yoke used to mount the fixture to a truss or
stabilize a free-standing unit.
To mount the yoke to the fixture:
Allen screws
Note: When assembling the yoke, use
the thick washers between the
yoke and fixture and the thin
washers on the outside of the
yoke.
1.
2.
With a washer on each side of the
yoke, use a 6mm allen wrench to
attach one allen screw to each side
of the fixture (but do not fully
tighten it).
Thin
washers
Thick
washers
With a washer on each side of the
yoke manually screw one knob into Knobs
each side of the fixture. Do not fully
Figure 2-5 Trackspot 2 yoke
tighten the knobs.
To reposition the yoke, use a 6mm allen
wrench to loosen the allen screws on the side handles shown in Figure 2-5.
Tilt the fixture to the desired angle, then securely tighten the allen screws and knobs.
Trackspot®2 User Manual
Setup and Configuration
2-5
2
Powering On the Fixture
Caution:
Do not power on the fixture until verifying that the line cord cap
is suitable for the power source in your location.
Warning:
This equipment for connection to a branch circuit having a
maximum overload protection of 20 A.
Check that all of the following steps are completed before powering on the fixture:
•
The correct voltage and frequency settings for the power outlet you will be using
are selected, (see “Setting the Fixture Voltage” on page 2-2).
•
The appropriate power cord cap is installed as described in “Installing a Power
Cord Cap” on page 2-4.
•
A lamp has been installed in the fixture, (see “Installing the Lamp in a New
Fixture” on page 2-3).
•
The fan cable is connected and the access door is closed.
At this point it is safe to connect the fixture to power and turn the power switch ON.
Homing the Fixture
When the Trackspot 2 fixture is connected to an appropriately-rated power source
and the power switch is on, it automatically begins a homing procedure to verify that
the major functions of the fixture are oriented properly. The initial homing ends with
the display in the locked mode showing the current Start channel setting for the
fixture.
The menu system provides an option for re-homing the fixture. See “Trackspot 2
Menu System Overview” on page 3-1 for instructions on using the Menu system and
“Trackspot 2 Menu Map” on page 3-7 to locate the Home function.
Assigning a DMX Start Channel
The DMX start channel identifies each fixture on a link for the DMX controller.
There are 512 available channels on each DMX link. These 512 channels are divided
among all the devices on a particular link. The number of channels a fixture requires
is called the fixture’s channel range. Trackspot 2 fixtures require 8 or 9 consecutive
channels on the link depending on the protocol selected. The DMX start channel is
the first channel available to a fixture in its channel range.
The fixture’s channel range must not overlap any other device’s channel range on the
link. When two devices on the same DMX link have overlapping channel ranges, one
or both devices will be disabled or behave erratically.
2-6
Setup and Configuration
Trackspot®2 User Manual
Note:
The single exception to the non-overlapping rule is if you want the fixtures to
respond to controller commands in exactly the same way. In this case, the
fixtures must be the same type (for example, two Trackspot 2 fixtures) and
the fixtures must share the entire channel range.
2
Remember the following criteria when determining a valid start channel:
•
The Start channel is the number of the first channel in a consecutive block of
channels assigned to an individual fixture.
•
A fixture can be assigned the second block of DMX channels on a link without
physically being the second fixture on the link.
•
To avoid overlapping channels, place the start channel at the beginning of a
range of available channels large enough to accommodate that fixture type.
•
Every channel in the link does not need to be assigned.
•
The channel range required for a fixture type can change with custom fixtures.
Use the fixture’s menu system via the LED display and four menu navigation buttons
to assign a Start Channel. For more information regarding the display and using the
menu system, see “Basic Navigation” on page 3-1.
<ENTER> button stores a selected option
ENTER
MENU
<UP> arrow button scrolls to the
previous menu item or option
<DOWN> arrow button scrolls to
the next menu item or option
<MENU> button moves back to
the previous menu level. (Press
and hold to enter the menu
system)
Alphanumeric LED display
FAIL
DMX
Status LEDs
Figure 2-6 Trackspot 2 menu navigation buttons
To Address a fixture by assigning the start channel:
1.
Press and hold <Menu> until DMX appears on the LED display.
2.
Press <Enter>.
3.
Scroll to the desired DMX start channel (1-504 )
4.
Press <Enter>.
Note: If you are running standard protocol, nine consecutive channels are required
for each fixture, so the last valid Start channel for a Trackspot 2 fixture would
be Channel 504 on a 512-channel DMX link. The last valid Start channel for a
Trackspot 2 fixture running the reduced protocol (8-channel) is 505.
Trackspot®2 User Manual
Setup and Configuration
2-7
Mounting the Fixture
Mount Trackspot 2 fixture on the fixture’s handles using the yoke as a support, or in
any orientation suspended from a support system (such as a truss). Before mounting
the fixture:
•
Verify the input voltage you are using matches the fixture’s voltage selection
switches (see “Setting the Fixture Voltage” on page 2-2).
•
Heed the warnings below to guard against personal injury and damage to the
fixture.
Warning: This equipment for connection to a branch circuit having a
maximum overload protection of 20 A.
Class I Equipment - This fixture must be earthed.
Mount the fixtures and controllers in a location that is away from
direct heat and protected from moisture. Do not mount on a
flammable surface.
Maintain minimum distance of 1.0 meter (3.28 feet) from
combustible materials.
Observe minimum distance to lighted objects of 1.0 meter (3.28
feet). This means the fixture must be positioned at least 1 meter
away from the object it is illuminating.
Use a secondary safety cable when mounting this fixture.
Standing the Fixture on a Stable Surface
The fixture’s end handles are designed to support its weight but need to be used in
conjuction with the yoke as a third point of support to increase stability when
standing on a surface.
Observe the following guidelines when using the fixture in a free-standing
application:
•
The fixture must be located away from moving objects that could strike it and
cause it to become unbalanced.
•
The fixture must be mounted on a sturdy, stable surface.
•
Use right-angle Power- and XLR-connectors on rear of fixture when standing on
handles.
•
Use the yoke set at an angle to support the fixture in a free-standing application.
•
If the surface is above floor height, make sure you use safety cables as described
in the next section.
2-8
Setup and Configuration
Trackspot®2 User Manual
Truss Mounting
If you are mounting the fixture on a truss or another type of support, do all of the
following:
•
Verify the truss or support will handle the combined weight of all the devices on
the truss. Each Trackspot 2 fixture weighs 24kg (53lb).
•
High End Systems strongly recommends using safety cables to attached any of its
fixtures to a truss. You must supply your own safety cable and you must verify
the cable is capable of supporting the weight of the fixture. You can order
galvanized safety cables from your High End Systems dealer/distributor (see
“Optional Accessories” on page 1-5).
•
You must supply your own clamps to attach the fixture to the support. Verify that
the clamp(s) you use are capable of supporting the weight of the fixture. You can
order cheeseboroughs for a two-inch truss from your High End Systems dealer/
distributor (see “Optional Accessories” on page 1-5).
•
Make sure the fixture cannot be rotated all the way around (360o). Allowing the
fixture to rotate 360o could loosen the clamp mounting bolts.
Note: Because of the variety of conceivable lighting designs, you should consider the
procedure below as a suggested guideline only. High End Systems, Inc. cannot
make specific recommendations for your particular lighting design or venue.
To mount the fixture to a truss or another type of support:
•
Attach a suitable clamp through one of the holes on top of the yoke. If you are
attaching one clamp, use the middle hole on the yoke. If you are attaching 2
clamps per fixture, attach one clamp to each of the outer holes on the yoke. Use
two locking washers per clamp when attaching the clamp to the yoke.
•
Use two people to mount each fixture: one person to hold the fixture while it is
being secured in place, and one person to secure the fixture to its support and to
attach clamps and safety cables.
•
Always stand on a firm, stable surface when mounting a fixture to its support.
The fixture should be at a height where you can comfortably work on it, and
should either be resting on a stable surface or held in a stable manner. Do not
allow one person to both support and mount the fixture.
•
Tighten the clamp(s) firmly to the
yoke and to the support.
•
Loop one or more suitable safety cables cable
around the support and the yoke.
•
Loosen the knobs on each side of the
fixture to adjust the fixture’s tilt angle.
•
When you have the fixture in the
position you want, firmly tighten the
knobs and 6mm allen screws.
Safety
Clamp
Yoke
adjustment
knobs
Figure 2-7 Truss mounting
Trackspot®2 User Manual
Setup and Configuration
2-9
2
Linking the Fixtures
Trackspot 2 fixtures can be linked to other fixtures on a standard DMX 512 link to be
controlled by a DMX controller.
The number of fixtures on a link will be determined by the combined number of
channels required by all the fixtures. A Trackspot 2 fixture running standard
protocol requires 9 channels on a DMX 512 link. A Trackspot 2 fixture running
reduced protocol requires 8 channels.
Note: When connecting more than 32 fixtures to a link, use a DMX splitter. The 32
device limit complies with the EIA-485 standard. Connecting more than 32
devices per link without a DMX splitter will eventually deteriorate the digital
signal.
Controllers, serial data distributors, data line optoisolators, and any fixtures
using the RS-422 DMX standard of serial communications (including
Dataflash® AF1000 xenon strobes, and Intellabeam® fixtures) block software
uploads and crossloads on a link. Make sure to either put all of these devices
after the Trackspot 2 fixture on the link, or bypass these devices when
performing software uploads or crossloads.
Data Cabling and Connectors
To link one or more fixtures to a controller and/or to each other, obtain data cabling.
Cabling can be purchased from High End Systems (see “Optional Accessories” on
page 1-5) or constructed.
High End Systems recommends data-grade cable. Data-grade cable is designed to
carry a high-quality signal with less susceptibility to electromagnetic interference.
DMX Data Cables
Use Belden® 9842 or equivalent (meets specifications for EIA RS-485 applications)
data cables with the following characteristics:
•
Two twisted pairs (4-conductors) plus a shield
•
Maximum capacitance between conductors: <15 pF/ft.
•
Maximum capacitance between conductor and shield: 55 pF/ft.
•
Maximum resistance: 20
•
Nominal impedance: 120
2-10
Setup and Configuration
/1000 ft.
Trackspot®2 User Manual
Cable Connectors
Grounding lug (inside XLR shell)
Your cabling must have a
XLR shell
3-pin male XLR
connector on one end of
1 2
the cable and a
Common
negative
2 1
3
negative
(cable shield)
3
3-pin female XLR
(data
(data
complement)
connector on the other
complement)
positive
(data true)
end, (see Figure 2-8).
positive
Common
(cable shield)
(data true)
Test each cable with a
Female XLR Connector
Male XLR Connector
voltage/ohm meter
Figure 2-8 XLR 3-pin connector
(VOM) to verify correct
polarity and to make sure that the negative and positive pins are not grounded or
shorted to the shield or to each other.
Caution: Do not connect anything to the ground lug on the XLR connectors. Do
not connect or allow contact between the common (cable shield) and
the fixture’s chassis ground. Grounding the common could cause a
ground loop and/or erratic behavior.
Setting up the Link
To link one or more fixtures to a DMX controller as shown in Figure 2-9:
1.
Connect the male XLR connector of a DMX Data cable to the controller’s DMX
Data Out connector.
2.
Connect the Data cable’s female XLR connector to the Data In connector of the
first (or next) fixture on the DMX link.
3.
Continue linking the remaining fixtures connecting a cable from the Data Out
connector of each fixture to the Data In connector of the next fixture on the link.
4.
Connect a male terminator to the Data Out connector of the last fixture in the link.
Data Out
Data In
Data Out
Figure 2-9 Linking Trackspot 2 fixtures
Trackspot®2 User Manual
Terminate the
Data Out
connection of
the last fixture
on the link
Setup and Configuration
2-11
2
Constructing a Terminator
Install a 120 ohm, 1/4 watt (minimum) terminator in the fixture’s Data Out (female)
cable connector in the last fixture on each DMX link. A terminator on the last fixture
of the link prevents data reflection, which can corrupt the data communication on
the link. You can purchase a terminator from High End Systems, (see “Optional
Accessories” on page 1-5 or construct one using the following instructions.
To construct a terminator:
1.
Disassemble a male 3-pin XLR connector.
2.
Solder a 120 ohm resistor, minimum of
1/4 watt, between pins two and three
(see Figure 2-10)
3.
Reassemble the XLR connector
12
1
0W
2
3
Figure 2-10 Data cable terminator
Verifying and Uploading Fixture Software
1.
Use the menu system to identify the current version of software running on the
fixture. See “Display the Software Version (VER)” on page 3-6.
2.
Verify that the version displayed by the fixture is the latest available. The latest
software for Trackspot 2 fixtures is available in the support section of the High
End Systems® web site (www.highend.com).
3.
If a software upgrade is required, attach a High End Systems Upload Dongle to
the computer and upload the software to the Trackspot 2 fixture.
A High End Systems Upload Dongle requires a 386-based (or faster) computer,
MS DOS® version 3.3 (or later) or Windows 95/98/ME, and one MB of free disk
space. To obtain an Upload Dongle (with installation and operation instructions),
contact your High End Systems dealer/distributor (see “Contacting High End
Systems®” on page -ii).
Focusing the Fixture
The fixture has a manual focus knob
located on the front panel next to the lens.
Focus the fixture after it is mounted and
whenever you optimize a newly installed
lamp.
Figure 2-11 Trackspot 2 front panel
2-12
Setup and Configuration
Trackspot®2 User Manual
Chapter 3:
Fixture Operation
This chapter contains information on using the Trackspot 2 menu system and DMX
programming to operate and control the fixture. Use the Menu Map on page 3-7 for a
quick reference on menu options.
Trackspot 2 Menu System Overview
The Trackspot®2 menu system allows you to:
•
Configure your fixture for operation (discussed in Chapter 2)
•
Access fixture options such as homing the fixture, resetting lamp hours, and
performing self tests (discussed in this chapter).
Accessing the Menu System
To access the menu system, press and hold the <Menu> key until DM X appears on
the LED display. The menu system is protected against inadvertent menu changes by
requiring the <Menu> button to be held for a few seconds before allowing entry to
the menus.
To exit the menu system, you must keep pressing the <Menu> button to back out of
each menu level until you reach the top menu level. After approximately 2 minutes,
the display will revert to the fixture’s currently assigned DMX start channel.
Basic Navigation
The navigation buttons on the fixture’s display panel allow you to navigate through
the onboard menu system. As you navigate the menu system, the alphanumeric
display will show the menu items you select from the menu map.
<ENTER> button stores a selected option
ENTER
MENU
<UP> arrow button scrolls to the
previous menu item or option
<DOWN> arrow button scrolls to
the next menu item or option
<MENU> button moves back to
the previous menu level. (Press
and hold to enter the menu
system)
Alphanumeric LED display
FAIL
DMX
Red LED blinks to indicate DMX
data is being transmitted.
Yellow LED blinks to indicate an error.
Figure 3-1 Trackspot 2 Menu display panel.
®
Trackspot 2 User Manual
Fixture Operation
3-1
3
•
Press the <Up> and <Down> arrow buttons to move to the Menus and options.
The alphanumeric display will flash when a new option is selected and will stop
flashing when a new option is stored by pressing the <Enter> button.
Note: If you do not press the <Enter> button, the new option you selected will not be
stored.
•
If you have not pressed <Enter> pressing the <Menu> button returns you to the
previous menu without changing the value of an option.
Menu Options
The following sections describe the information and operations available under each
of the Level 1 Menus and include option selection examples.
DMX Menu
Use this Menu option to set the Start channel for the fixture. A Trackspot 2 fixture
running on a DMX512 link requires 9 consecutive channels for DMX control for
standard protocol or 8 consecutive channels for reduced protocol. Allowing for this
channel range, any Channel number between 1 and 504 would be a valid Start
Channel for a TrackSpot 2 fixture running set for standard protocol or between 1 and
505 for a fixture running reduced protocol.
Setting a DMX Start Channel
To Address a fixture by assigning the start channel:
1.
Press and hold <Menu> until D MX appears on the LED display.
2.
Press the <Enter> button to select.
3.
Use the arrow buttons to scroll to the desired DMX start channel (1- 504 ) for the
9-channel protocol option or (1-505 ) for the 8-channel protocol option.
4.
Press <Enter> to store the fixture Start Channel.
Test Menu
This Menu allows you Home the fixture and perform self tests on major fixture
functions. You can test ALL functions in sequence or the following specific functions:
Shutter
Color wheel spin
Gobo wheel spin
Gobo rotation on Gobo wheel
Effects wheel spin
Effects rotation on Effects wheel
Pan from 0° – 170°
Tilt from 0° – 95°
3-2
Fixture Operation
Trackspot®2 User Manual
Set Menu
The Set menu allows you to change individual factory options.
Inverting Tilt (T/IN)
This menu item inverts the direction of the tilt motor, to allow fixtures mounted
opposite each other vertically to respond to tilt movement commands in the same
direction.
3
To invert the direction of the fixture’s tilt motion:
1.
If you are not already in the Menu system, press and hold the <Menu> button
until DM X appears on the LED display.
2.
Using the <Up> and <Down> arrow buttons, scroll to the SE T menu and press
the <Enter> button to select.
3.
Using the <Up> and <Down> arrow buttons, scroll to the T/IN menu and press
the <Enter> button to select.
4.
Using the <Up> and <Down> arrow buttons, select the ON option to invert the
fixture’s tilt motion, or the OFF option to return the fixture’s tilt motion to normal
orientation. Press the <Enter> button to store the selection.
Inverting Pan (P/IN)
This menu item inverts the direction of the pan motor, to allow fixtures mounted
opposite each other horizontally to respond to pan movement commands in the same
direction.
To invert the direction of the fixture’s pan motion:
1.
If you are not already in the Menu system, press and hold the <Menu> button
until DM X appears on the LED display.
2.
Using the <Up> and <Down> arrow buttons, scroll to the SE T menu and press
the <Enter> button to select.
3.
Using the <Up> and <Down> arrow buttons, scroll to the P/I N menu and press
the <Enter> button to select.
4.
Using the <Up> and <Down> arrow buttons, select the ON option to invert the
fixture’s tilt motion, or the OFF option to return the fixture’s tilt motion to normal
orientation. Press the <Enter> button to store the selection.
Swapping Pan and Tilt (SWAP)
This menu option swaps the pan motor and tilt motor operation to allow fixtures
hung perpendicular to each other to respond to pan and tilt movement commands in
the same direction.
Trackspot®2 User Manual
Fixture Operation
3-3
To swap the fixture’s pan and tilt motion:
1.
If you are not already in the Menu system, press and hold the <Menu> button
until D MX appears on the LED display.
2.
Using the <Up> and <Down> arrow buttons, scroll to the S ET menu and press
the <Enter> button to select.
3.
Using the <Up> and <Down> arrow buttons, scroll to the S WAP menu and
press the <Enter> button to select.
4.
Using the <Up> and <Down> arrow buttons, select the ON option to invert the
fixture’s tilt motion, or the OFF option to return the fixture’s tilt motion to
normal orientation. Press the <Enter> button to store the selection.
Setting Color Blink Mode (CBLK) and Gobo Blink Mode (GBLK)
Setting the color wheel or Gobo wheel in Blink mode causes the shutters to close
between position changes so you don't see the wheel spinning. Once the wheel has
reached it's position, the shutters open up. The default setting is Blink mode OFF.
Changing the Display Output (DSPL)
This menu item allows you to turn the display ON or OFF and to set the LED display
orientation. The factory defaults are ON and Standard Orientation.
To change the display output and/or LED orientation:
1.
If you are not already in the Menu system, press and hold the <Menu> button
until D MX appears on the LED display.
2.
Using the <Up> and <Down> arrow buttons, scroll to the S ET menu and press
the <Enter> button to select.
3.
Using the <Up> and <Down> arrow buttons, scroll to the D SPL menu and
press the <Enter> button to select.
4.
Using the <Up> and <Down> arrow buttons, select any of the following
options:
ON sets the LED display to normal intensity
OFF turns the LED display off
STN D sets the LED display to the standard orientation
REV rotates the LED display 180°
Press the <Enter> button to store the selected option.
Note: If you set the LED display OFF, the LED display will be turned off only when
you exit the menu system.
Setting Protocol (CH98)
Use this menu to set the fixture to standard (CH 9 ) or reduced (CH 8 ) protocol. The
fixture ships with the Protocol set at 9-Channel Standard.
To set the Protocol:
3-4
Fixture Operation
Trackspot®2 User Manual
1.
If you are not already in the Menu system, press and hold the <Menu> button
until DM X appears on the LED display.
2.
Using the <Up> and <Down> arrow buttons, scroll to the SE T menu and press
the <Enter> button to select.
3.
Using the <Up> and <Down> arrow buttons, scroll to the CH 98 menu and
press the <Enter> button to select.
4.
Using the <Up> and <Down> arrow buttons, scroll to the CH 9 option for
reduced protocol or C H8 for standard protocol. Press the <Enter> button to
store the selection.
3
Color and Gobo Offset (OFFS) Menu
This menu gives you fine (60 step) control of the positioning for all colors and half
colors as well as gobo wheel positioning.
The Offset menu options are useful after you have installed a new wheel to ensure
accurate positioning.
To change the offset of a Color position:
1.
If you are not already in the Menu system, press and hold the <Menu> button
until DM X appears on the LED display.
2.
Using the <Up> and <Down> arrow buttons, scroll to the OFFS menu and press
the <Enter> button to select.
3.
Using the <Up> and <Down> arrow buttons, scroll to the COL menu and press
the <Enter> button to select.
4.
Using the <Up> and <Down> arrow buttons, scroll to the color position you
want from P1 -P20 (see “COL” on page 3-8 of the Trackspot 2 Menu Map) and
press the <Enter> button to select.
5.
Using the <Up> and <Down> arrow buttons, step between -29 and 29 . Press
the <Enter> button to store the selection.
Info Menu
The INFO menu allows you to display lamp, fixture and software information and
reset lamp hours.
Display Lamp Hours (L/HR)
Use this menu to track the number of hours the lamp has been operating since the
last reset. The display alternates between thousand hours and hours. The lamp life
rating for the Trackspot 2 MSD250/2 lamp is 2000 hours.
An error (LH RS ) is generated when the lamp hours reach 1900 hours to ensure
timely lamp replacement. The FAIL status LED on the front panel under the display
Trackspot®2 User Manual
Fixture Operation
3-5
will blink yellow to indicated the error is present but the lamp will not shut down
automatically.
Reset Lamp Hours (L/RS)
Use this menu option to reset the lamp hours to zero after you install a new lamp in
the fixture.
To reset lamp hours:
1.
If you are not already in the Menu system, press and hold the <Menu> button
until D MX appears on the LED display.
2.
Using the <Up> and <Down> arrow buttons, scroll to the IN FO menu and press
the <Enter> button to select.
3.
Using the <Up> and <Down> arrow buttons, scroll to the L /R S option and
press the <Enter> button. The LED display will read GO? with the question
mark flashing.
4.
Press <Enter> to reset the lamp hours to zero. The LED display will read L /R S.
Display Fixture Hours (F/HR)
Use this menu option to view the total number of hours the fixture has been
operating. The display alternates between thousand hours (KH) and hours (H).
Display the Software Version (VER)
To view the Software version currently running on the fixture:
1.
If you are not already in the Menu system, press and hold the <Menu> button
until D MX appears on the LED display.
2.
Using the <Up> and <Down> arrow buttons, scroll to the IN FO menu and press
the <Enter> button to select.
3.
Using the <Up> and <Down> arrow buttons, scroll to the VER option and press
the <Enter> button to select. The current version number will be displayed.
Check with the High End Systems Website (www.highend.com) to verify that this
is the latest version. If you need to install new software, see “Verifying and
Uploading Fixture Software” on page 2-12.
Error Menu (ERR)
This menu displays fixture errors to help troubleshoot operation problems. The
yellow Status LED labeled FAIL, (see “Trackspot 2 Menu display panel.” on page 3-1)
will indicate that an error message is currently being displayed. See “ERR” on page 38 of the Trackspot 2 Menu Map for a description of specific error messages.
To view Error messages:
1.
3-6
If you are not already in the Menu system, press and hold the <Menu> button
until D MX appears on the LED display.
Fixture Operation
Trackspot®2 User Manual
2.
Using the <Up> and <Down> arrow buttons, scroll to the IN FO menu and press
the <Enter> button to select.
3.
Using the <Up> and <Down> arrow buttons, scroll to the E RR option and press
the <Enter> button. Any current Errors will be displayed.
Trackspot 2 Menu Map
Level 1
Level 2
Level 3
DMX
HOME
TEST
SELF
T/IN
P/IN
SWAP
CBLK
SET
GBLK
DSPL
CH98
ALL
SHUT
COL
GOBO
RGOB
EFF
REFF
PAN
TILT
OFF
ON
OFF
ON
OFF
ON
OFF
ON
OFF
ON
ON
OFF
STND
REV
CH9
CH8
Trackspot®2 User Manual
Level 4
Description
3
Set DMX Start channel
Homes the fixture
Tests all functions in sequence
Shutter self test
Tests Color wheel spin
Test Gobo wheel spin
Test Gobo rotation
Test Effect wheel spin
Test Effect rotation
Test Pan motor function from 0° – 170°
Test Tilt function from 0° – 95°
Set Tilt Invert OFF (default)
Set Tilt Invert ON
Set Pan Invert OFF (default)
Set Pan Invert ON
Set Pan/Tilt Swap OFF (default)
Set Pan/Tilt Swap ON
Set Blink Mode on the Color wheel OFF (default)
Set Blink Mode on the Color wheel ON
Set Blink Mode on the Gobo wheel OFF (default)
Set Blink Mode on the Gobo wheel ON
Turns on display (default)
Turns off display
Sets LED display to Standard orientation (default)
Rotates LED display180° to Reverse orientation
Sets Protocol to 9-channel option (default)
Sets Protocol to 8-channel option
Fixture Operation
3-7
Level 1
Level 2
Level 3
–29 to +29 Open position adjustment
P2
–29 to +29 Open/Yellow position adjustment
P3
–29 to +29 Yellow position adjustment
–29 to +29 Yellow-Dark Blue position adjustment
–29 to +29 Dark Blue position adjustment
P6
COL
P7
P8
P9
OFFS
cont.
COL
cont.
GOBO
L/HR
INFO
L/RS
F/HR
VER
ERR
3-8
Description
P1
P4
P5
OFFS
Level 4
–29 to +29 Dark Blue/Pink position adjustment
–29 to +29 Pink position adjustment
–29 to +29 Green position adjustment
P10
P11
–29 to +29 Green/Orange position adjustment
–29 to +29 Orange position adjustment
–29 to +29 Orange/Cyan position adjustment
P12
–29 to +29 Cyan position adjustment
P13
P14
–29 to +29 Cyan/Dark Pink position adjustment
–29 to +29 Dark Pink position adjustment
P15
–29 to +29 Red position adjustment
P16
–29 to +29 Red/Blue position adjustment
P17
P18
P19
P20
–29 to +29
–29 to +29
–29 to +29
–29 to +29
P1
–29 to +29 Adjust Gobo wheel position
KH##
H###
GO?
KH##
H###
##.#
Blue position adjustment
Blue/Aqua position adjustment
Aqua position adjustment
UV Violet position adjustment
Show Lamp working hours since last reset. Display
alternates between thousands of hours and hours.
Reset Lamp working hours to zero
Show fixture working hours. Display alternates between
thousands of hours and hours.
Show fixture software version
E OK
EEPR
SHUT
COL
GOBO
RGOB
No Error
EEPROM failure
Malfunction of the SHUTTER motor
Malfunction of the COLOR motor/sensor
Malfunction of the GOBO wheel motor/sensor
Malfunction of the rotating GOBO motor/sensor
PAN
TILT
EFF
CHSM
LHRS
Malfunction of the PAN motor
Malfunction of the TILT motor
Malfunction of the EFFECT wheel motor/sensor
Checksum Setup not valid
Lamp working hours exceed 1900 hours
Fixture Operation
Trackspot®2 User Manual
DMX Programming
Basics of DMX Control
A Parameter is a fixture attribute that can be controlled to modify the light beam in
terms of color, beam quality and pattern, intensity, or focus (position). DMX
programming assigns a DMX value to each of the fixture’s parameters. A Cue
(sometimes referred to as a look or a scene) is one combination of parameter settings.
Cues are combined and timing is added to create shows.
DMX Protocol
Programming a fixture for a DMX link requires each parameter be assigned to a
specific DMX channel in the fixture’s channel range. Channel assignments are based
on the DMX protocol used. There are two protocol’s available for Trackspot 2
fixtures; 9-channel Standard, and 8-channel Reduced. The 8-channel Reduced
protocol omits the Dim channel included in the Standard protocol.
Parameters for each Channel are described in the Trackspot 2 DMX Protocol Table
on the following pages. DMX values are given in decimal, percentage and
hexadecimal units.
Homing the Fixture Using a DMX Controller
The fixture automatically homes when power is initially applied. You can rehome a
fixture at anytime from the menu system, see “HOME” on page 3-7 of the Menu Map.
You can also home the fixture using a DMX controller with the following procedure:
1.
Set Channel 1 to a DMX value of 0
2.
Simultaneously scroll the DMX values for Channels 2 and 3 from 0-255 and then
back to 0. The fixture will home.
Trackspot®2 User Manual
Fixture Operation
3-9
3
Trackspot 2 DMX Protocol Table
Chan
Parameter
Description
Shutter closed
1
SHUTTER
DIMMER
STROBE
2
COLOR
3-10
Dimmer setting from channels 9 value
Fade from Black (shutter closed) to White (open)
Fade from White (shutter open) to Black (closed)
Slow Ramp to open shutter / Snap closed
Medium Ramp to open shutter / Snap closed
Fast Ramp to open shutter / Snap closed
Shutter Snaps open / Slow ramp to closed
Shutter Snaps open / Medium ramp to closed
Shutter Snaps open / Fast ramp to closed
Slow Ramp to open /Ramp to closed
Medium ramp to open / Ramp to closed
Fast Ramp to open / Ramp to closed
Fast random strobe bursts
Medium random strobe bursts
Slow random strobe bursts
Strobe Speed adjustment
Shutter open
Open position 1
Yellow position 2
Dark Blue position 3
Pink position 4
Green position 5
Orange position 6
Cyan position 7
Dark Pink position 8
Red position 9
Blue position 10
Aqua position 11
UV Violet position 12
Open/Yellow position 1/2
Yellow-Dark Blue position 2/3
Dark Blue/Pink position 3/4
Green/Orange position 5/6
Orange/Cyan position 6/7
Cyan/Dark Pink position 7/8
Red/Blue position 9/10
Blue/Aqua position 10/11
Random full color fast
Random full color slow
Clockwise Rotation adjustment
Counter Clockwise Rotation adjustment
Fixture Operation
Value
(dec.)
Value
(%)
Value
(hex)
0-5
6-100
101-110
111-120
121-126
127-132
133-138
139-144
145-150
151-156
157-162
163-168
169-174
175-180
181-186
187-192
193-250
251-255
0-5
6-15
16-25
26-35
36-45
46-55
56-65
66-75
76-85
86-95
96-105
106-115
116-125
126-135
136-145
146-155
156-165
166-175
176-185
186-195
196-200
201-205
206-230
231-255
0-2
0-05
2-39
40-43
44-47
48-50
50-53
52-54
55-57
57-59
60-61
62-64
64-66
66-69
69-71
71-73
73-75
76-98
98-100
0-2
2-6
6-10
11-14
14-18
18-22
22-26
26-29
30-33
34-37
38-41
42-45
46-49
50-53
53-57
57-61
61-65
65-69
69-73
73-77
77-79
79-80
81-90
90-100
06-64
65-6E
6F-78
79-7E
7F-84
85-8A
8B-90
91-96
97-9C
9D-A2
A3-A8
A9-AE
AF-B4
B5-BA
BB-C0
C1-FA
FB-FF
0-05
06-0F
10-19
1A-23
24-2D
2E-37
38-41
42-4B
4C-55
56-5F
60-69
6A-73
74-7D
7E-87
88-91
92-9B
9C-A5
A6-AF
B0-B9
BA-C3
C4-C8
C9-CD
CE-E6
E7-FF
Trackspot®2 User Manual
Chan
3
4
5
6
7
8
9
Parameter
Description
OPEN
Beam Reducer
ROTATION MODE
GOBO Position 2
GOBO Position 3
GOBO Position 4
GOBO Position 5
GOBO Position 7
GOBO Position 8
GOBO Position 9
GOBO Position 10
POSITION MODE
GOBOS
GOBO Position 2
GOBO Position 3
GOBO Position 4
GOBO Position 5
Beam Reducer Position 6
GOBO Position 7
GOBO Position 8
GOBO Position 9
GOBOS Fast random
GOBOS Slow random
Clockwise Rotation adjustment
Counter Clockwise Rotation adjustment
Rotation Stop
From 0 to 540° GOBO positioning
GOBO
Clockwise GOBO Rotation adjustment
ROTATION
Counter Clockwise Gobo Rotation adjustment
OPEN
Prism 3 Facets
Prism 6 Facets
COLD Conversion Filter
WARM Conversion Filter
EFFECTS
Automatic Frost from 0 to 100%
Automatic Frost from 100% to 0
Manual Frost
Full FROST
Rotation Stop
PRISM
Clockwise Rotation
ROTATION
Counter Clockwise Rotation
PAN
Pan movement
TILT
Tilt movement
Dimmer
Closed
DIMMER*
(only in standard Dimmer Adjustment
protocol)
Dimmer OPEN
Value
(dec.)
Value
(%)
Value
(hex)
0-10
51-60
0-4
20-24
0-0A
33-3C
11-20
21-30
31-40
41-50
61-70
71-80
81-90
91-100
4-8
8-12
12-16
16-20
24-28
28-31
32-33
36-39
0B-14
15-1E
1F-28
29-32
3D-46
47-50
51-5A
5B-64
100-110
111-120
121-130
131-140
141-150
151-160
161-170
171-180
181-193
194-205
206-230
231-255
0-5
6-255
6-130
131-255
40-43
44-47
48-51
51-55
55-59
60-63
63-67
67-71
71-76
76-80
81-90
91-100
0-2
2-100
2-51
51-100
0-4
4-12
12-20
20-28
28-35
36-43
44-51
51-98
98-100
0-2
2-51
51-100
0-100
0-100
0-4
4-98
98-100
65-6E
6F-78
79-82
83-8C
8D-96
97-A0
A1-AA
AB-B4
B5-C1
C2-CD
CE-E6
E7-FF
00-05
06-FF
06-82
83-FF
0-0A
0B-1E
1F-32
33-46
47-5A
5B-6E
6F-82
83-FA
FB-FF
00-05
06-82
83-FF
00-FF
00-FF
00-0A
0B-FA
FB-FF
0-10
11-30
31-50
51-70
71-90
91-110
111-130
131-250
251-255
0-5
6-130
131-255
0-255
0-255
0-10
11-250
251-255
*Position CHANNEL 1 at a value between 6 and 100 in order to control DIMMER with this channel.
Trackspot®2 User Manual
Fixture Operation
3-11
3
3-12
Fixture Operation
Trackspot®2 User Manual
Chapter 4:
Fixture Maintenance
This chapter includes information on replacing parts, optimizing the lamp, cleaning
the fixture, and updating fixture software. Please note the warnings under each
heading before servicing your fixture.
Warning:
This fixture must be serviced by qualified personnel. The
information listed in this chapter is intended to assist qualified
personnel only.
4
Basic Troubleshooting
Use the following table to identify general fixture operation problems.
Problem
Probable Cause
Solution
Power is not connected and/or Connect power to the fixture and turn power
power switch is not ON.
switch on.
Fixture will not Fuses are bad.
switch ON.
Thermal switch is active
Lamp is bad
Fixture
The lamp is bad.
functions but
lamp does not The lamp is currently too hot
strike.
to strike.
Dust or grease affecting
Position sensor
Color, gobo or
effect selected Defective motor
doesn’t align
Electronic Board
properly
Color or gobo wheel is
misaligned.
Lamp is
dimmer
than other
Trackspot 2
fixtures.
The lamp is bad or old.
The wrong type of lamp is
installed.
Lamp is not optimized
Trackspot®2 User Manual
Check the input fuses (see “Replacing Fuses” on
page 4-3).
Wait for fixture to cool down.
Replace the lamp (see “Replacing the Lamp” on
page 4-3).
Replace the lamp (see “Replacing the Lamp” on
page 4-3).
Switch fixture OFF and allow 20 minutes for the
lamp to cool. Restart the fixture
Clean the internal glass components (see
“Cleaning Glass Components” on page 4-5.
Contact customer support (see “Contacting High
End Systems®” on page -ii).
Use menu system to adjust offset (see “Color and
Gobo Offset (OFFS) Menu” on page 3-5)
Replace lamp with the specified type (see
“Replacing the Lamp” on page 4-3).
See “Optimizing the Lamp” on page 4-5.
Fixture Maintenance
4-1
Problem
Probable Cause
The lamp is bad.
Lamp shuts off
The fixture has exceeded the
during
maximum temperature.
operation.
The lamp socket is loose and
causing arcing.
Fixture will not A sensor, driver, or motor is
home properly. faulty.
Solution
Replace the lamp (see “Replacing the Lamp” on
page 4-3).
Turn the power switch OFF and allow the fixture 5
to 10 minutes to cool, then restart the fixture.
Contact customer support (see “Contacting High
End Systems®” on page -ii).
Contact customer support (see “Contacting High
End Systems®” on page -ii).
The data cable is faulty.
Fixture does
not respond to
controller
commands or
produces
unexpected
results.
Pan or Tilt
position is off.
Test and replace the data cables as necessary.
Verify that a controller is connected to the link and
No controller is attached to the is generating output by sending commands to a
link or the controller is not
known working device. The DMX status LED
should be blinking red if DMX data is being
generating any output.
received by the fixture.
The fixture has an incorrect
Verify the DMX start channel does not overlap
DMX start channel.
another fixture’s DMX start channel (see).
The link was not terminated.
Terminate the link (see).
Home the fixture (see “Test Menu” on page 3-2 to
The pan and tilt is out of
Home the fixture using the menu system.)
home.
The LED display is set off.
Display is not
functioning.
The input fuses are bad.
The power cord is loose.
The logic board is bad.
Light output is
The optical path is dirty.
low or fuzzy.
Turn the LED display on (see “Changing the
Display Output (DSPL)” on page 3-4).
Check the input fuses (see “Replacing Fuses” on
page 4-3).
Re-seat the power cord and turn the fixture ON.
Contact High End Systems customer service (see
“Contacting High End Systems®” on page -ii).
Clean the internal glass components (see
“Cleaning Glass Components” on page 4-5.
Replacing Parts
Warnings: 1)Disconnect power and turn the power switch off before
servicing.
2)Replace fuses with the specified type and rating only.
3)Equipment surfaces may reach temperatures up to 67° C (153°F).
4) Allow the fixture to cool before handling.
4-2
Fixture Maintenance
Trackspot®2 User Manual
Replacing Fuses
To replace the fuses:
Fuse
tray tabs
1.
Disconnect power to the fixture and turn the
power switch OFF. If the fixture has been
operating, allow the fixture to cool before
handling.
2.
Locate the fuse tray under the power switch. channel
3.
Depress fuse tray tabs and pull tray from
fixture as shown in Figure 4-1.
4.
Remove and discard old fuses and replace
with two 250V, 4A, time-lag slow blow fuses
(High End System part number 90403017).
5.
Replace tray with channel toward bottom.
Fuse tray
4
Figure 4-1 Replacing fuses
Replacing the Lamp
Read and follow these warnings and cautions before replacing a lamp.
Warnings: Disconnect power and turn the power switch off before relamping or servicing.
An operating, unshielded MSD lamp emits ultraviolet and visible
(UV-vis) radiation which could damage eyes and skin. Whenever
you are working on or near an exposed lamp, wear protective eye
gear. Never look directly at the lamp while the lamp is on.
Hot lamp may be an explosion hazard. Do not open for five
minutes after switching off. Wear eye and hand protection when
re-lamping.
Equipment surfaces may reach temperatures up to 67° C (153° F).
Allow the fixture to cool before handling.
Caution:
This equipment is designed for use with a Philips® MSD250/2
short arc lamp only. Using any other type lamp may be hazardous
and will void the warranty.
Trackspot®2 User Manual
Fixture Maintenance
4-3
To re-install the lamp:
1.
Disconnect power to fixture and turn power switch off. If the fixture has been
operating, wait for the lamp to cool before handling.
2.
Put on protective eye wear and gloves.
3.
Using a philips-head screwdriver, remove the two lamp assembly screws.
4.
Pull the lamp assembly straight out of
the fixture.
5.
The lamp assembly is connected to the
fixture by lamp socket wires. Support
the lamp assembly while replacing the
lamp. Do not allow the lamp socket
wires to support the weight of the lamp
assembly.
6.
Holding the existing lamp by its ceramic
base, carefully pull the lamp straight out
of the lamp socket.
Caution:
7.
Figure 4-2 Removing lamp assembly
Do not squeeze the lamp glass while removing the existing lamp
from the socket. Lamp glass may shatter.
When handling the new lamp, avoid contact
with the lamp glass. If the lamp glass is
soiled by oil or dirt from skin, gloves, etc.,
clean the cold lamp glass with an alcohol
Figure 4-3 Removing
wipe. A soiled lamp could overheat and
lamp from base
burst, causing damage to the fixture.
Reinsert the lamp assembly straight into the fixture.
Caution:
9.
Socket
wires
Remove all packaging materials from the new lamp.
Holding the new lamp by its ceramic base, gently press the
two base pins into the lamp socket until the lamp is firmly
seated.
Caution:
8.
Lamp
assemb
screws
Make sure the lamp socket wires are not wrapped around the
lamp or crimped while reinserting the lamp assembly.
Tighten the lamp assembly screws.
10. Use the menu system to reset the lamp hours to zero so that you can track the
lamp life, see “Reset Lamp Hours (L/RS)” on page 3-6).
11. Optimize the new lamp as described in the next section.
4-4
Fixture Maintenance
Trackspot®2 User Manual
Optimizing the Lamp
You should optimize the lamp after you install or replace the lamp, or if you notice a
hot spot of brightness anywhere other than the center of the light beam.
To optimize the lamp:
1.
With the fixture ON and attached to a controller, set any litho-, color-, or effectwheel DMX values at 0 and Channel 1 (Shutter) DMX value at 255 to achieve an
open, white beam.
2.
Orient the fixture perpendicular to a flat,
white surface at least 10 feet (3 m) away.
3.
Make sure that the light beam is round
and not oval due to a keystone effect.
If necessary, adjust the pan and tilt
construct values.
4.
Adjust the manual focus screw on the
front panel next to the lens until the
edge of the light beam is sharp.
5.
Locate the three lamp adjust screws
shown in Figure 4-4.
6.
Look at the wall where the beam is projected and use the screws to adjust the
lamp’s position within the fixture until the beam is flat and symmetrical.
4
Lamp
adjust
screws
Figure 4-4 Optimizing the lamp
Cleaning Glass Components
Warnings: Disconnect power and turn power switch off before servicing.
Equipment surfaces may reach temperatures up to 67° C (153° F).
Allow the fixture to cool before handling.
Clean the color wheels, glass gobos and lenses using a mild glass cleaner (containing
no ammonia) and a soft, lint-free cotton cloth.
Trackspot®2 User Manual
Fixture Maintenance
4-5
Changing Replaceable Gobos
A Trackspot 2 fixture will accommodate any gobo meeting these specifications:
•
Diameter: 24.7mm ± 0.2mm (0.972 in ± .008in)
•
Image size: 19.5mm ± 0.13mm (0.768in ± .005in)
•
Maximum thickness: = 1.1mm (.043in)
To change a replaceable metal gobo or glass lithopattern gobo, use the following
procedure:
1.
Disconnect power to fixture
Access
screws
and turn power switch off. If
the fixture has been operating,
wait for the lamp to cool
Fan wire
before handling.
2.
Lay the fixture on its back and
Safety
locate the door retaining
cable
screws, as shown in Figure 4-5.
Remove the screws and lift the
access door off the fixture.
3.
Disconnect the fan wire from
connector board and the safety
cable from the fan housing and
set door aside.
4.
Rotate the gobo wheel to the
position holding the gobo you
wish to replace.
5.
Referring to Figure 4-6,
carefully loosen spring around
gobo with the tip of a nonmetallic probe.
6.
Remove spring and aperture
ring (in the case of a metal
gobo) and the gobo. Replace
with new gobo using an
aperture ring as a spacer for
metal gobos and no ring for
glass lithos.
7.
Reattach fan wire to connector
board and replace door.
4-6
Fixture Maintenance
Figure 4-5 Removing Trackspot 2 access door.
Spring
Gobo
Aperture ring
(used as a spacer
for metal gobos.)
Figure 4-6 Changing a replaceable gobo
Trackspot®2 User Manual
Appendix A
Important Safety Information
Warning: For Continued Protection Against Fire
1.
2.
3.
4.
5.
6.
This equipment is designed for use with a Philips MSD250/2 lamp only. Use of any other
type lamp may be hazardous and may void the warranty.
Do not mount on a flammable surface.
Maintain minimum distance of 1.0 meter (3.28 feet) from combustible materials.
Replace fuses only with the specified type and rating.
Observe minimum distance to lighted objects of 1.0 meter (3.28 feet).
This equipment for connection to branch circuit having a maximum overload protection
of 20 A.
Warning: For Continued Protection Against Electric Shock
1.
2.
3.
4.
5.
6.
If this equipment was received without a line cord plug, attach the appropriate line cord
plug according to the following code:
• brown–live
• blue–neutral
• green/yellow–earth
As the colours of the cores in the mains lead of this equipment may not correspond with
the coloured markings identifying the terminals in your plug, proceed as follows:
• the core which is coloured green and yellow must be connected to the terminal in the
plug which is marked with the letter E or by the earth symbol
, or coloured green
or green and yellow.
• the core which is coloured blue must be connected to the terminal which is marked
with the letter N or coloured black.
• The core which is coloured brown must be connected to the terminal which is marked
with the letter L or coloured red.
Class I equipment. This equipment must be earthed.
Equipment suitable for dry locations only. Do not expose this equipment to rain or
moisture.
Disconnect power before re-lamping or servicing.
Refer servicing to qualified personnel; no user serviceable parts inside.
Warning: For Continued Protection Against Exposure To Excessive Ultraviolet (UV)
Radiation
1.
2.
3.
Do not operate this equipment without complete lamp enclosure in place or if shields,
lenses, or ultraviolet screens are damaged.
Change shields, lenses, or ultraviolet screens if they have become visibly damaged to such
an extent that their effectiveness is impaired, for example by cracks or deep scratches.
Never look directly at the lamp while lamp is on.
Warning: For Continued Protection Against Injury To Persons
1.
2.
3.
4.
Use secondary safety cable when mounting this fixture.
Caution: hot lamp may be an explosion hazard. Do not open for 5 minutes after switching
off. Wear eye and hand protection when re-lamping.
Equipment surfaces may reach temperatures up to 67° C (153° F). Allow 5 minutes for
cooling before handling.
Change the lamp if it becomes damaged or thermally deformed.
Trackspot® 2 User Manual
Important Safety Information
A-1
A
Appendice A
Importantes Informations Sur La Sécurité
Mise En Garde: Pour Une Protection Permanente Contre Les Incendies
1.
2.
3.
4.
5.
6.
Cet appareil est conçu uniquement pour une lampe métallique à halogène Philips
MSD250/2. Son utilisation avec tout autre type de lampe peut être dangereuse et annuler
la garantie.
Ne pas monter les lampes sur une surface inflammable.
Maintenir à une distance minimum de 1.0 mètre de matières inflammables.
Ne remplacer les fusibles qu'avec des modèles et valeurs assignées recommandés.
Respecter une distance minimum de 1.0 mètre par rapport aux objets éclairés.
Cet appareil de connection au circuit comporte une protection contre les surcharges de 20 A.
Mise En Garde: Pour Une Protection Permanente Contre Les Chocs Électriques
1.
2.
3.
4.
5.
Si cet équipement est livré sans prise de cable, veuillez connecter la prise de cable
correcte selon le code suivant:
• marron - phase
• bleu - neutre
• vert/jaune - terre
Débrancher le courant avant de changer les lampes ou d'effectuer des réparations.
Cet équipement doit être uniquement utilisé dans des endroits secs. Ne pas l'exposer à la
pluie ou l'humidité.
À l'intérieur de l'équipement il n'y a pas de pièces remplaçables par l' utilisateur. Confiez
l'entretien à un personnel qualifié.
Equipement de Classe I. Cet équipement doit être mis à la terre.
Mise En Garde: Pour Une Protection Permanente Contre Des Expositions Excessives
Aux Rayons Ultra Violets (UV)
1.
2.
3.
Ne pas utiliser cet appareil si le boîtier de la lampe n'est pas complètement fixé ou si les
blindages, lentilles, ou écrans ultraviolets sont endommagés.
Changer les blindages ou les écrans ultraviolets s'ils sont visiblement endommagés au
point que leur efficacité aient été altérée, par exemple par des fissures ou de profondes
égratignures.
Ne jamais regarder directement la lampe quand celle ci est allumée.
Mise En Garde: Pour Une Protection Permanente Contre Les Blessures Corporelles
1.
2.
3.
4.
A-2
Lors de l'assemblage, utiliser un câble de sécurité secondaire.
AVERTISSEMENT: les lampes chaudes comportent un risque d'explosion. Après l'avoir
éteinte, attendre 5 minutes avant de la dégager. Lors du remplacement de la lampe, une
protection des yeux et des mains est requise.
Les surfaces de l'appareil peuvent atteindre des températures de 67 C. Laisser refroidir
pendant 5 minutes avant la manipulation.
Changer la lampe si elle est endommagée ou thermiquement déformée.
Important Safety Information
Trackspot® 2 User Manual
Anhang A
Wichtige Hinweise Für Ihre Sicherheit
Warnung: Zum Schutz Vor Brandgefahr
1.
2.
3.
4.
5.
6.
Dieses Gerät ist nur für den Gebrauch mit einer Philips MSD250/2, Metall-HalogenLampe mit GY 9.5-Sockel konzipiert. Der Gebrauch irgend eines anderen Lampentyps
könnte Sie gefährden und Ihre Garantie außer Kraft setzen.
Das Gerät nie auf einer feuergefährlichen Fläche montieren.
Stets einen Mindestabstand von 1.0 Meter zu brennbaren Materialien einhalten.
Zum Ersatz nur Sicherungen verwenden, die dem vorgeschriebenen Typ und Nennwert
entsprechen.
Einen Mindestabstand von 1.0 Meter zu den angestrahlten Objekten einhalten.
Dieses Gerät darf nur an eine Zweigleitung mit einem Überlastungsschutz von höchstens
20 A angeschlossen werden.
Warnung: Zum Schutz Gegen Gefährliche Körperströme
1.
2.
3.
4.
5.
Wenn dieses Gerät ohne einen Netzkabelstecker erhalten wurde, ist der entsprechende
Netzkabelstecker entsprechend dem folgenden Code anzubringen:
• Braun - Unter Spannung stehend
• Blau - Neutral
• Grün/Gelb - Erde
Vor dem Austauschen von Lampen oder vor Wartungsarbeiten stets den Netzstecker
ziehen.
Diese Geräte sind nur zum Einbau in trockenen Lagen bestimmt und müssen vor Regen
und Feuchtigkeit geschützt werden.
Servicearbeiten sollten nur von Fachpersonal ausgeführt werden. Das Gerät enthält keine
wartungsbedürftigen Teile.
Dieses Gerät gehört zur Klasse I. Dieses Gerät muß geerdet werden.
Warnung: Zum Schutz Gegen Übermässige Ultraviolett (UV)-Bestrahlung
1.
2.
3.
Benutzen Sie dieses Gerät nur, wenn das komplette Lampengehäuse fest eingebaut ist;
ebenfalls dürfen keine der Schutzabdeckungen, Linsen oder der UV-Schutz
Beschädigungen aufweisen.
Die Schutzabdeckungen, Linsen und der UV-Schutz müssen ausgewechselt werden,
wenn sie sichtlich dermaßen beschädigt sind, daß sie ihre Wirksamkeit einbüßen, z.B.
infolge von Rissen oder tiefen Kratzern.
Nie direkt in die eingeschaltete Lampe schauen.
Warnung: Zum Schutz Vor Verletzungen
1.
2.
3.
4.
Verwenden Sie bei der Installation des Beleuchtungskörpers ein zusätzliches
Sicherheitskabel.
VORSICHT: Bei einer heiße Lampe besteht Explosionsgefahr. Nach dem Abschalten der
Netzspannung sollten Sie etwa 5 Minuten warten, bevor Sie das Lampengehäuse öffnen.
Schützen Sie beim Auswechseln der Lampen Ihre Hände und tragen Sie eine
Schutzbrille.
Die Oberflächen des Gerätes können Temperaturen bis zu 67 C erreichen. Vor dem
Anfassen stets 5 Minuten lang abkühlen lassen.
Falls die Lampe beschädigt oder durch Wärmeeinwirkung verformt ist, muß sie
ausgewechselt werden.
Trackspot® 2 User Manual
Important Safety Information
A-3
A
Apéndice A
Información Importante De Seguridad
Advertencia: Para Protección Continua Contra Incendios
1.
2.
3.
4.
5.
6.
Este equipo está diseñado para utilizarse únicamente con la lámpara MSD250/2 y base
GY 9.5. El uso de cualquier otro tipo de lámpara puedá resultar peligroso, y puedá anular
la garantía.
No monte el equipo sobre una superficie inflamable.
Mantenga una distancia mínima de materiales combustibles de 1.0 metro.
Cambie los fusibles únicamente por otros que sean del tipo y la clasificación
especificadas.
Guarda una distancia mínima a objetos iluminados de 1.0 metro.
Este equipo debe conectarse a un circuito que tenga una protección máxima contra una
sobrecargas de 20 A.
Advertencia: Para La Protección Continua Contra Electrocuciones
1.
2.
3.
4.
5.
Si se recibió este equipo sin el conector de alimentacion, monte usted el conector correcto
según ia clave siguente:
•
moreno - vivo
•
azul - neutral
•
verde/amarillo - tierra
Desconecte el suministro de energía antes de cambiar lámparas o prestar servicio de
reparación.
Este equipo esta disenado para usarce en lugares secos no lo exponga a la lluvia o
humedad.
Derive el servicio de reparación de este equipo al personal calificado. El interior no
contiene repuestos que puedan ser reparados por el usuario.
Equipo de Clase I. Este equipo debe conectarse a tierra.
Advertencia: Para Protección Continua Contra La Exposición A Radiación Ultravioleta
(UV) Excesiva
1.
2.
3.
No opere este equipo sin tener colocada en su lugar la caja protectora completa de la
lámpara o bien, si el blindaje, los lentes o las pantallas ultravioletas están dañadas.
Cambie el blindaje, los lentes o las pantallas ultravioleta si nota una avería visible, a tal
grado que su eficacia se vea comprometida. Por ejemplo, en el caso de grietas o rayaduras
profundas.
Jamás mire directamente a la lámpara mientras ésta esté encendida.
Advertencia: Para Protección Continua Contra Lesiones Corporales
1.
2.
3.
4.
A-4
Almontareste sparato ulilize un cable de seguridad secundario.
Precaución: una lámpara caliente puede constituir un peligro de explosión. No la habra
por 5 minutos luego de haberla apagado. Lleve puestos, un protector ocular, y guantes al
cambiar lá lámparas.
Las superficies del equipo pueden alcanzar temperaturas máximas de 67° grados
centígrados. Deje que se enfríen por 5 minutos antes de tocarlas.
Cambie la lámpara si ésta se avería o deformada por acción térmica.
Important Safety Information
Trackspot® 2 User Manual
Appendice A
Importanti Informazioni Di Sicurezza
Avvertenza: Per Prevenire Incendi
1.
2.
3.
4.
5.
6.
Questa apparecchiatura è stata progettata per l'uso esclusivo con lampada a ioduri
metallici Philips MSD250/2, base GY 9.5. L'uso di qualsiasi altro tipo di lampada può
essere pericoloso e può annullare la garanzia.
Da non montare sopra una superficie infiammabile.
Mantenere l' apparecchio a un minimo di 1.0 metri (3.28 piedi) di distanza dai materiali
combustibili.
Sostituire i fusibili usando soltanto quelli del tipo e della taratura adatta.
Mantenere una distanza minima di 1.0 metri (3.28 piedi) dagli oggetti accesi.
Questa apparecchiatura e' da collegarsi ad un circuito con una protezione da sovraccarico
massima di 20 ampere.
Avvertenza: Per Prevenire Le Scosse Elettriche
1.
2.
3.
4.
5.
Se questa apparecchiatura è stata consegnata senza una spina del cavo di alimentazione,
collegare la spina appropriata del cavo di alimentazione in base ai seguenti codici:
• marrone - fase
• blu - neutro
• verde/giallo - terra
Disconnettere la corrente prima di cambiare la lampada o prima di eseguire qualsiasi
riparazione.
Questo apparecchio deve essere utilizzato in ambienti secchi. Non deve essere esposto a
pioggia o montato in luoghi umidi.
Per qualsiasi riparazione rivolgersi al personale specializzato. L' utente non deve riparare
nessuna parte dentro l' unita'.
Aparecchio di Classe I. Questa apparecchiatura deve essere messa a terra.
Avvertenza: Protezione Contro Le Radiazioni Dei Raggi Ultravioletti
Non usare questa apparecchiatura se il sistema di chiusura della lampada non e' completo o se
gli schermi, le lenti, o gli schermi ultravioletti si sono visibilmente danneggiati di maniera tale
che la loro efficacia sia stata ridotta --- ad esempio, se vi sono visibili spaccature o graffi
profondi. Mai guardare direttamente verso la lampada quando sia accesa.
Avvertenza: Per Non Ferire Ad Altre Persone
1.
2.
3.
4.
Montare questo apparecchio utilizzando il cavo secondario di sicurezza.
Avvertenza: la lampada calda potrebbe esplodere. Spegnerla per 5 minuti prima di
aprirla. Usare protezioni per le mani e per gli occhi prima di cambiare la lampada.
Le superfici della apparecchiatura possono arrivare a temperature di 67 gradi centrigradi
(153 gradi f). Aspettare 5 minuti prima di maneggiare.
Cambiare la lampada se si e' danneggia o se si e' deformata dal calore.
Trackspot® 2 User Manual
Important Safety Information
A-5
A
Vigtig Sikkerhedsinformation
Advarsel: Beskyttelse mod elektrisk chock.
VIGTIGT!
LEDEREN MED GUL/GROEN ISOLATION MAA KUN TILSLUTTES KLEMME MAERKET
ELLER
.
A-6
Important Safety Information
Trackspot® 2 User Manual