1
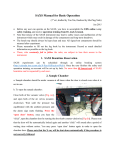
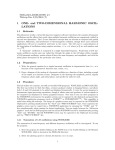
Beamline 4.2.2 Operating Instructions
the Molecular Biology Consortium
-http://mbc-als.org-latest version linkJuly 9, 2009
Contents
1 Remote Access
1.1 NX Client . . . . . . . . . . . .
1.1.1 The Connection Wizard
1.1.2 Advanced Configuration
1.1.3 Connect to Berkeley . .
.
.
.
.
.
.
.
.
.
.
.
.
.
.
.
.
.
.
.
.
.
.
.
.
.
.
.
.
.
.
.
.
.
.
.
.
.
.
.
.
.
.
.
.
.
.
.
.
.
.
.
.
.
.
.
.
.
.
.
.
.
.
.
.
.
.
.
.
.
.
.
.
.
.
.
.
.
.
.
.
.
.
.
.
.
.
.
.
.
.
.
.
.
.
.
.
.
.
.
.
.
.
.
.
.
.
.
.
.
.
.
.
.
.
.
.
.
.
.
.
.
.
.
.
.
.
.
.
3
3
3
4
5
2 Running the Beamline
2.1 Data Acquisition Monitor . .
2.2 Filters . . . . . . . . . . . . .
2.3 BLU-ICE . . . . . . . . . . .
2.3.1 The Robot Tab . . . .
Setup for Use . . . . .
Initialize . . . . . . . .
Mount a Crystal . . .
Center a Crystal . . .
Exchange or Dismount
2.3.2 The Collection Tab . .
Collect a Still-Image .
Collect a Dataset . . .
2.3.3 The Hutch Tab . . . .
Setting the Phi Angle
Setting the Slits . . .
2.3.4 The Setup Tab . . . .
Energy Changes . . .
2.4 Tune Optimize . . . . . . . .
Optimize Beam . . . .
When to Optimize . .
.
.
.
.
.
.
.
.
a
.
.
.
.
.
.
.
.
.
.
.
. . . . .
. . . . .
. . . . .
. . . . .
. . . . .
. . . . .
. . . . .
. . . . .
Crystal
. . . . .
. . . . .
. . . . .
. . . . .
. . . . .
. . . . .
. . . . .
. . . . .
. . . . .
. . . . .
. . . . .
.
.
.
.
.
.
.
.
.
.
.
.
.
.
.
.
.
.
.
.
.
.
.
.
.
.
.
.
.
.
.
.
.
.
.
.
.
.
.
.
.
.
.
.
.
.
.
.
.
.
.
.
.
.
.
.
.
.
.
.
.
.
.
.
.
.
.
.
.
.
.
.
.
.
.
.
.
.
.
.
.
.
.
.
.
.
.
.
.
.
.
.
.
.
.
.
.
.
.
.
.
.
.
.
.
.
.
.
.
.
.
.
.
.
.
.
.
.
.
.
.
.
.
.
.
.
.
.
.
.
.
.
.
.
.
.
.
.
.
.
.
.
.
.
.
.
.
.
.
.
.
.
.
.
.
.
.
.
.
.
.
.
.
.
.
.
.
.
.
.
.
.
.
.
.
.
.
.
.
.
.
.
.
.
.
.
.
.
.
.
.
.
.
.
.
.
.
.
.
.
.
.
.
.
.
.
.
.
.
.
.
.
.
.
.
.
.
.
.
.
.
.
.
.
.
.
.
.
.
.
.
.
.
.
.
.
.
.
.
.
.
.
.
.
.
.
.
.
.
.
.
.
.
.
.
.
.
.
.
.
.
.
.
.
.
.
.
.
.
.
.
.
.
.
.
.
.
.
.
.
.
.
.
.
.
.
.
.
.
.
.
.
.
.
.
.
.
.
.
.
.
.
.
.
.
.
.
.
.
.
.
.
.
.
.
.
.
.
.
.
.
.
.
.
.
.
.
.
.
.
.
.
.
.
.
.
.
.
.
.
.
.
.
.
.
.
.
.
.
.
.
.
.
.
.
.
.
.
.
.
.
.
.
.
.
.
.
.
.
.
.
.
.
.
.
.
.
.
.
.
.
.
.
.
.
.
.
.
.
.
.
.
.
.
.
.
.
.
.
.
.
.
.
.
.
.
.
.
.
.
.
.
.
.
.
.
.
.
.
.
.
.
.
.
.
.
.
.
.
.
.
.
.
.
.
.
.
.
.
.
.
.
.
.
.
.
.
.
.
.
.
.
.
.
.
.
.
.
.
.
.
.
.
.
.
.
.
.
.
.
.
.
.
.
.
.
.
.
.
.
.
.
.
.
.
.
.
.
.
.
.
.
.
.
.
.
.
.
.
.
.
.
.
.
.
.
.
.
.
.
.
.
.
.
.
.
.
.
.
.
.
.
.
.
.
.
.
.
.
.
.
.
.
.
.
.
.
.
.
.
.
.
.
.
.
.
.
.
.
.
.
.
.
.
.
.
.
.
.
.
.
.
.
.
.
.
.
.
.
.
.
.
.
.
.
.
.
.
.
.
.
.
.
.
.
.
.
.
.
.
.
.
.
.
.
.
.
.
.
.
6
7
7
8
9
9
9
10
11
11
12
12
13
14
14
15
16
17
18
18
18
3 Data Processing
3.1 Data Correction
3.2 d*TREK . . . . .
3.3 HKL2000 . . . .
3.4 MOSFLM . . . .
3.5 iMOSFLM . . . .
3.6 XDS . . . . . . .
.
.
.
.
.
.
.
.
.
.
.
.
.
.
.
.
.
.
.
.
.
.
.
.
.
.
.
.
.
.
.
.
.
.
.
.
.
.
.
.
.
.
.
.
.
.
.
.
.
.
.
.
.
.
.
.
.
.
.
.
.
.
.
.
.
.
.
.
.
.
.
.
.
.
.
.
.
.
.
.
.
.
.
.
.
.
.
.
.
.
.
.
.
.
.
.
.
.
.
.
.
.
.
.
.
.
.
.
.
.
.
.
.
.
.
.
.
.
.
.
.
.
.
.
.
.
.
.
.
.
.
.
.
.
.
.
.
.
.
.
.
.
.
.
.
.
.
.
.
.
.
.
.
.
.
.
.
.
.
.
.
.
.
.
.
.
.
.
.
.
.
.
.
.
.
.
.
.
.
.
.
.
.
.
.
.
.
.
.
.
.
.
19
19
19
20
20
20
20
.
.
.
.
.
.
.
.
.
.
.
.
.
.
.
.
.
.
.
.
.
.
.
.
.
.
.
.
.
.
.
.
.
.
.
.
.
.
.
.
.
.
.
.
.
.
.
.
.
.
.
.
.
.
.
.
.
.
.
.
.
.
.
.
.
.
.
.
.
.
.
.
.
.
.
.
.
.
1
List of Figures
1.1
1.2
1.3
1.4
1.5
NX
NX
NX
NX
NX
Client
Client
Client
Client
Client
–
–
–
–
–
Connection Wizard . .
Connection Wizard . .
Advanced Configuration
Custom Settings . . . .
Connect to Host . . . .
2.1
2.2
2.3
2.4
2.5
2.6
2.7
2.8
2.9
2.10
2.11
2.12
2.13
2.14
2.15
MBC USER . . . . . . . . . . . .
Remote Session . . . . . . . . . .
Filters . . . . . . . . . . . . . . .
BLU-ICE – Starting BLU-ICE .
BLU-ICE – 5 Functionality Tabs
BLU-ICE – Robot Tab . . . . .
BLU-ICE – Setup for Use . . . .
BLU-ICE – Pin Selector . . . . .
Center Widget . . . . . . . . . .
BLU-ICE – Collect Tab . . .
BLU-ICE – New Run . . . . . . .
BLU-ICE – Hutch Tab . . . . .
BLU-ICE – Setup Tab . . . . .
BLU-ICE – Tune Entries Table .
Tune Optimize . . . . . . . . . .
.
.
.
.
.
.
.
.
.
.
.
.
.
.
.
.
.
.
.
.
.
.
.
.
.
.
.
.
.
.
.
.
.
.
.
.
.
.
.
.
.
.
.
.
.
.
.
.
.
.
.
.
.
.
.
.
.
.
.
.
.
.
.
.
.
.
.
.
.
.
.
.
.
.
.
.
.
.
.
.
.
.
.
.
.
.
.
.
.
.
.
.
.
.
.
.
.
.
.
.
.
.
.
.
.
.
.
.
.
.
.
.
.
.
.
.
.
.
.
.
.
.
.
.
.
.
.
.
.
.
.
.
.
.
.
.
.
.
.
.
.
.
.
.
.
.
.
.
.
.
.
.
.
.
.
.
.
.
.
.
.
.
.
.
.
.
.
.
.
.
.
.
.
.
.
.
.
.
.
.
.
.
.
.
.
.
.
.
.
.
3
4
4
5
5
.
.
.
.
.
.
.
.
.
.
.
.
.
.
.
.
.
.
.
.
.
.
.
.
.
.
.
.
.
.
.
.
.
.
.
.
.
.
.
.
.
.
.
.
.
.
.
.
.
.
.
.
.
.
.
.
.
.
.
.
.
.
.
.
.
.
.
.
.
.
.
.
.
.
.
.
.
.
.
.
.
.
.
.
.
.
.
.
.
.
.
.
.
.
.
.
.
.
.
.
.
.
.
.
.
.
.
.
.
.
.
.
.
.
.
.
.
.
.
.
.
.
.
.
.
.
.
.
.
.
.
.
.
.
.
.
.
.
.
.
.
.
.
.
.
.
.
.
.
.
.
.
.
.
.
.
.
.
.
.
.
.
.
.
.
.
.
.
.
.
.
.
.
.
.
.
.
.
.
.
.
.
.
.
.
.
.
.
.
.
.
.
.
.
.
.
.
.
.
.
.
.
.
.
.
.
.
.
.
.
.
.
.
.
.
.
.
.
.
.
.
.
.
.
.
.
.
.
.
.
.
.
.
.
.
.
.
.
.
.
.
.
.
.
.
.
.
.
.
.
.
.
.
.
.
.
.
.
.
.
.
.
.
.
.
.
.
.
.
.
.
.
.
.
.
.
.
.
.
.
.
.
.
.
.
.
.
.
.
.
.
.
.
.
.
.
.
.
.
.
.
.
.
.
.
.
.
.
.
.
.
.
.
.
.
.
.
.
.
.
.
.
.
.
.
.
.
.
.
.
.
.
.
.
.
.
.
.
.
.
.
.
.
.
.
.
.
.
.
.
.
.
.
.
.
.
.
.
.
.
.
.
.
.
.
.
.
.
.
.
.
.
.
.
.
.
.
.
.
.
.
.
.
.
.
.
.
.
.
.
.
.
.
.
.
.
.
.
.
.
.
.
.
.
.
.
.
.
.
.
.
.
.
.
.
.
.
.
.
.
.
.
.
.
.
.
.
.
.
.
.
.
.
.
.
.
.
.
.
.
.
.
.
.
.
.
.
.
.
.
.
.
.
.
.
.
.
.
.
.
.
.
.
.
.
.
.
.
.
.
.
.
.
.
.
.
.
.
.
.
6
7
7
8
8
9
10
10
11
12
13
14
16
17
18
Chapter 1
Remote Access
1.1
NX Client
The NX Client runs graphical desktops and applications across network connections. We will be using it in
this capacity to remotely access the computer that pilots beamline 4.2.2.
• download the client: http://www.nomachine.com
• install the client for your OS
• use the Connection Wizard
1.1.1
The Connection Wizard
• Session: Name of your choosing
• Host: IP address will be emailed to you
• Port: 22
• choose Next >
Figure 1.1: NX Client – Connection Wizard
3
• Size: 1280 x 1024 (minimum)
• choose KDE desktop if it’s not the default
• choose Next >
• choose “Show Advanced Configuration”
Figure 1.2: NX Client – Connection Wizard
1.1.2
Advanced Configuration
If you are using the NX Client on Windows XP you may skip to subsection 1.1.3, as the Advanced Configuration options only apply to Linux and OSX operating systems.
• check Use custom settings
• press Settings…
Figure 1.3: NX Client – Advanced Configuration
4
• select Use plain X bitmaps
• save Advanced Configuration settings
Figure 1.4: NX Client – Custom Settings
1.1.3
Connect to Berkeley
• run the NX Client and login
• Welcome to Berkeley!
Figure 1.5: NX Client – Connect to Host
5
Chapter 2
Running the Beamline
The majority of beamline operations are controlled through the MBC User menu.
• right-click the Desktop
• choose Konsole
• type: user
• The MBC User menu loads
Figure 2.1: MBC USER
The Acquisition submenu has four tools for data collection: Data Acquisition Monitor, Filters, BLU-ICE,
and Tune Optimize. Figure 2.2 shows a remote desktop session with all four tools. Each section of this
chapter is dedicated to one of the tools, with sections ordered as they appear in the Acquisition submenu.
The Center Widget, which is also shown in Figure 2.2, is opened by typing center in a new Konsole and is
addressed in subsection 2.3.1 of BLU-ICE.
6
Figure 2.2: Remote Session
2.1
Data Acquisition Monitor
The Data Acquisition Monitor, also known as the Data Collection Monitor, is shown on the right side of
Figure 2.2. It provides real-time information on the status of data collection including: ccd status, detector
position, shutter open/close, path of last image taken and image name. Of note is a window that lists error
messages: if a new message goes into the box contact beamline support to continue.
2.2
Filters
The beamline filters are various metal foils which are used to attenuate the beam. The attenuation factor
of each is filter is energy dependent and the best way to determine the appropriate filter is to activate one
or more until the beam is attenuated the desired amount based on a snapshot.
Figure 2.3: Filters
7
2.3
BLU-ICE
BLU-ICE is a widely used graphical user interface for crystallography. According to BLU-ICE development
team, “the highly graphical BLU-ICE user interface simplifies sophisticated experimental protocols and
complex motor relationships, hides the complexities of the control and computer infrastructure, and allows
the user to concentrate on the problem at hand - the collection of diffraction data or the maintenance of a
beamline.”1 It is important to note, however, that beamline 4.2.2 runs on a customized version of BLU-ICE
that integrates with the EPICS control system. As such, the most relevant information for using BLU-ICE
at beamline 4.2.2 is contained within this document.
• choose Acquisition → Blu-Ice
Figure 2.4: BLU-ICE – Starting BLU-ICE
• notice the 5 functionality tabs
Figure 2.5: BLU-ICE – 5 Functionality Tabs
• choose the Robot tab
1 from
Introduction to BLU-ICE and DCS at http://smb.slac.stanford.edu/research/developments/blu-ice/intro.html
8
2.3.1
The Robot Tab
Figure 2.6: BLU-ICE – Robot Tab
Setup for Use
The Robot tab is used for mounting, centering, exchange, or dismounting of crystals. Prior to any use it
is important to wake the robot and put the goniometer, cryo-stream, beamstop and detector into mounting
position. These events are all triggered by the Setup for Use button.
Initialize
Initialize updates the status of BLU-ICE with the robot control computer and ensures all values are current.
As with all robot commands, initialization must be done after Setup for Use is pushed. It never hurts to
initialize, but it is absolutely necessary if one starts/restarts BLU-ICE with a crystal mounted.
9
1. press Automation → Setup for Use
2. press Robot Commands → Initialize
Figure 2.7: BLU-ICE – Setup for Use
Mount a Crystal
The Pin Selector field has 5 columns and 12 rows. Columns represent pucks in the robot’s dewar while
rows are pin-positions within each puck. Thus (4-2) indicates puck 4, pin-position 2.
• press Setup for Use
• press ! → home
• click the desired Pin in Pin Selector
• Next Pin will reflect the choice
• press Next Pin → Mount
• The robot begins the mounting procedure
– Do not press any buttons during the
execution of the command!
– A blue bar in the Robot Status →
“Busy” represents activity
– Mount is complete when the black border appears in the centering widget
Figure 2.8: BLU-ICE – Pin Selector
10
Center a Crystal
The crystal is mounted on a 6-stage goniometer.
• choose the High Res tab of the video feed
• open a new Konsole, type: center
• The Center Widget will open
– The left numerical column is requested position
– The right numerical column is actual position
– The upper quadrangle governs movement based on the
Omega angle; buttons are paired by row
* The four < and > buttons are directional movement
* The black border always halos “upward” ↑ movement
* The opposing button is “downward” ↓ movement
* The adjacent pair move orthogonal to the video screen
– The 0° 90° and 180° buttons rotate Omega to that angle
– The bottom pair of < and > buttons move “left” ← and
“right” → on the video feed
Figure 2.9: Center Widget
– The ! menu
* reset if the widget locks up
* home moves everything back to the mounting position
Exchange or Dismount a Crystal
• press Automation → Setup for Use
• press Centering Widget → ! → Home
• To Exchange
– choose the next pin to mount
– press Next Pin → Mount
– The robot begins the Dismount, Exchange, and Mount process
• To Dismount
– press Mounted Pin → Dismount
11
2.3.2
The Collection Tab
Figure 2.10: BLU-ICE – Collect Tab
The Collection Tab is basically divided in two. The left portion displays the current image while the right
portion is used to enter the collection values. The image display section will update each time a new image
is taken, and provides some rudimentary controls for viewing the image. The image capture section provides
all the controls and parameters necessary to collect either a still-image or a dataset.
Collect a Still-Image
• File Prefix: Name of your choosing
• Directory: E.g. /user1/awang/snap
• Mode1: 2x2 Fast (use default)
• Distance: As appropriate (150mm is a good starting point)
• Axis: gonio_omega (use default)
• Delta: Is for collection, these are true stills
• Time: Typically 1-3 sec. for starters
12
• Start: Frame Number | Omega Angle
– Example: 001 | 0.00
• Run Type:
– choose Dark + Still if you don’t have a dark image for that amount of time
– choose Still if the last image you took was for the same amount of time
• click Collect
Collect a Dataset
When collecting a dataset it is important to note
that you can only collect on Omega between 0 and
180°. If you need to collect more, collect the first
180° with Omega, flip the crystal 180° in Phi, and
collect with Omega between 0 and 180° again for
the back side.
• press the * Tab to create a new run
• Follow Collect a Still-Image, but notice
the availability of
End: Frame Number | Omega Angle
1. enter the Start: Frame | Omega
2. enter the End: Omega
3. End: Frame will auto-fill
• Dark Images are collected automatically
• click Collect
• click Reset if the run stops early
– When re-inputing the Frame Number
and Omega Angle subsequent to a reset, be sure not to press enter following
Figure 2.11: BLU-ICE – New Run
the Frame Number. Doing so will prevent BLU-ICE from properly resuming
the data collection. Only press enter
after inputing the Omega Angle.
13
2.3.3
The Hutch Tab
Figure 2.12: BLU-ICE – Hutch Tab
The hutch tab can be used to set detector distance, omega angle, phi angle and slits. The following are
instructions on the two most common uses: setting phi angle and slits width. Adjusting the phi angle is
often used to flip the crystal when collecting the second 180° of a 360° collection. Changing the slits opening
is often performed when the crystal is much smaller than the beam and one wishes to minimize air scatter.
Note that there is also a proportional loss of flux onto the sample.
Setting the Phi Angle
• choose Phi → angle from the drop-down
– e.g. 180 to shoot the backside of the crystal
• press Start
14
Setting the Slits
• in Beam Size
• Width: number
– between 0.05 mm and 0.70 mm
• press Start
• Height: number
– Positive between 0.05 mm and 1.00 mm
– NEVER enter a negative number!
• press Start
15
2.3.4
The Setup Tab
Figure 2.13: BLU-ICE – Setup Tab
Beamline 4.2.2 is unique at the ALS in that we use a sagittally focused 2nd crystal in our monochromator.
This provides a spot shape that can be focused on a large range of detector distances with the entire beam
hitting the focal point (usually the sample). A challenge during an energy change is keeping everything
optimized for spot shape and maximum flux. Specifically, the beam focus and roll is subject to anticlastic
bend and their values must be honed by staff on a somewhat regular basis. Once these values are entered,
they tend to remain stable during the normal course of a user’s beamtime.
In order to provide the maximum flexibility for the experimenter, we have devised a simple lookup table
which allows the user to choose specific energies for collection. Any energy from 5,500eV to 15,500eV can be
made available. Users that wish to change energies are encouraged to let staff know prior to beamtime so
that the lookup table and energies may be optimized during startup and tune.
16
Energy Changes
• choose View → Show Tune Entries
• the Tune Entries table appears
– the left column shows available energies
• click on the desired energy
• click the Hutch Tab
– click Automation → Optimize Beam
• click the Collect Tab
– click Run → Update
Figure 2.14: BLU-ICE – Tune Entries Table
– Energy: now reflects the change
17
2.4
Tune Optimize
Optimize Beam
Flux at the sample is maximized when the first and second crystals of the monochromator are parallel. To achieve this, we run a sequence called Optimize Beam from Hutch Tab → Automation →
Optimize Beam . The sequence works as follows:
1. The sample is moved out of the beam
2. The shutter opens and the scan begins
• Tune Optimize plots the beam intensity vs.
the second-crystal position
3. The scan completes and the shutter closes
4. The sample is returned to the original position
5. The tune motors are moved to maximum flux
6. If Tune Optimize doesn’t show a peak, click
Optimize Beam again
Figure 2.15: Tune Optimize
When to Optimize
Beam optimization may be done any time a run is not in progress. It was very popular after a beam fill when
the ALS was running in Decay Mode; however, Top-Off Mode keeps the optics at a constant temperature.
That said, it doesn’t hurt to optimize often. One popular practice is to start a beam optimization before
collecting a dataset, filling in collection values while the beam is optimizing. Collection may proceed once
optimization is complete.
18
Chapter 3
Data Processing
Data processing at beamline 4.2.2 can be done using:
• d*TREK
• HKL2000
• MOSFLM
• XDS
All of the above programs can process corrected images; d*TREK can also process raw images that it
corrects on the fly making it convenient to process while still collecting.
When processing data it is important to note that your processing directory must reside within your
home directory as data directories do not have write permissions for processing. Please create a processing
directory for the dataset you would like to work on.
3.1
Data Correction
• cp /scripts/correct.com to copy correct.com to your home directory
• edit correct.com for the month/year (e.g. aug09) and login name (see example script)
• run correct.com on a directory containing the data (this will correct all the contents of that directory)
– e.g. csh correct.com x2Bsure
3.2
d*TREK
• cd to the processing directory
• type dtdisplay /path/to/image (tab completion works wonders here)
– e.g. dtdisplay /user1/awesomeuser/snap/xtal_0_001
• alternately type dtdisplay then file → open and navigate to the image in the GUI
– select process → dtprocess from the display menu
• the user manual: http://pdfs.mbc-als.org/dtrek_overview99.pdf
19
3.3
HKL2000
• cd to the processing directory
• type HKL2000
• the user manual: http://www.hkl-xray.com/
3.4
MOSFLM
• cd to the processing directory
• cp /scripts/start.inp to current directory
• edit start.inp for image name and path
• type mosflm<start.inp
3.5
iMOSFLM
• cd to the processing directory
• type imosflm
• use GUI to open images and process
3.6
XDS
Information on installation and use of XDS: http://xds.mpimf-heidelberg.mpg.de/
20