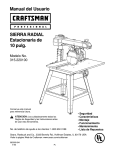
1
Opal Femtosecond Synchronously Pumped Optical Parametric Oscillator (SPPO) User’s Manual The Solid-State Laser Company 1335 Terra Bella Road Mountain View, CA 94043 Part Number 0000-234A, Rev. E September 2001 Preface This manual contains information you need to safely install, align, operate, maintain, and service your Opal® femtosecond synchronously pumped optical parametric oscillator (SPPO). The introductory chapter contains a brief description of the Opal and where it fits in with the Tsunami® family of products. The Opal is designed for use with the Tsunami mode-locked, Ti:sapphire laser, pumped by a Millennia® Xs solid state laser or argon ion laser. These are Class IV lasers and they, as well as the Opal, emit laser radiation that can permanently damage eyes and skin. The “Laser Safety” section contains information about these hazards and offers suggestions on how to safeguard against them. To minimize the risk of injury or expensive repairs, read this chapter and carefully follow these instructions. “Opal Description” contains a discussion of synchronously pumped optical parametric oscillators, and it provides a detailed description of the Opal. It concludes with system specifications and outline drawings. The middle chapters describe the Opal controls, indicators and connections, and guide you through its setup and installation, alignment, and operation. The last part of the manual covers maintenance and service. Included is a replacement parts list and a short troubleshooting guide. “Customer Service” contains a general warranty statement and explains how to request service should you ever need it. It includes a list of world-wide SpectraPhysics service centers you can call if you need help. The “Maintenance” section contains information you need to keep your Opal clean and operational on a day-to-day basis, whereas “Service and Repair” is intended to help you guide your Spectra-Physics field service engineer to the source of any problems. Do not attempt repairs yourself while the unit is still under warranty. Instead, report all problems to SpectraPhysics for warranty repair. This product has been tested and found to conform to “Directive 89/336/ EEC for Electromagnetic Compatibility.” Class A compliance was demonstrated for “EN 50081-2:1993 Emissions” and “EN 50082-1:1992 Immunity” as listed in the official Journal of the European Communities. It also meets the intent of “Directive 73/23/EEC for Low Voltage.” Class A compliance was demonstrated for “EN 61010-1:1993 Safety Requirements for Electrical Equipment for Measurement, Control and Laboratory use” and “EN 608251:1992 Radiation Safety for Laser Products.” Refer to the “EC Declaration of Conformity” in Chapter 2, “Laser Safety.” iii Opal fs Synchronously Pumped Optical Parametric Oscillator This equipment has been designed and tested to comply with the limits for a Class A digital device pursuant to Part 15 of the FCC Rules. Finally, if you encounter any difficulty with the content or style of this manual, please let us know. The last page is a form to aid in bringing such problems to our attention. Thank you for your purchase of Spectra-Physics instruments. iv Environmental Specifications CE Electrical Equipment Requirements For information regarding the equipment needed to provide the electrical service listed under “Service Requirements” at the end of Chapter 3, please refer to specification EN-309, “Plug, Outlet and Socket Couplers for Industrial Uses,” listed in the official Journal of the European Communities. Environmental Specifications The environmental conditions under which the laser system will function are listed below: Indoor use Altitude: up to 2000 m Temperatures: 10° C to 40° C Maximum relative humidity: 80% non-condensing for temperatures up to 31° C. Mains supply voltage: do not exceed ±10% of the nominal voltage Insulation category: II Pollution degree: 2 FCC Regulations This equipment has been tested and found to comply with the limits for a Class A digital device pursuant to Part 15 of the FCC Rules. These limits are designed to provide reasonable protection against harmful interference when the equipment is operated in a commercial environment. This equipment generates, uses and can radiate radio frequency energy and, if not installed and used in accordance with the instruction manual, may cause harmful interference to radio communications. Operation of this equipment in a residential area is likely to cause harmful interference in which case the user will be required to correct the interference at his own expense. Modifications to the laser system not expressly approved by SpectraPhysics could void your right to operate the equipment. v Table of Contents Preface . . . . . . . . . . . . . . . . . . . . . . . . . . . . . . . . . . . . . . . . . . . . . . . . . . . . . . . . . . . . . . iii Environmental Specifications. . . . . . . . . . . . . . . . . . . . . . . . . . . . . . . . . . . . . . . . . . . . v Warning Conventions . . . . . . . . . . . . . . . . . . . . . . . . . . . . . . . . . . . . . . . . . . . . . . . . . . xiii Standard Units . . . . . . . . . . . . . . . . . . . . . . . . . . . . . . . . . . . . . . . . . . . . . . . . . . . . . . . xv Unpacking and Inspection . . . . . . . . . . . . . . . . . . . . . . . . . . . . . . . . . . . . . . . . . . . . . . xvii Chapter 1: Introduction . . . . . . . . . . . . . . . . . . . . . . . . . . . . . . . . . . . . . . . . . . . . . . . . 1-1 The Opal® SPPO . . . . . . . . . . . . . . . . . . . . . . . . . . . . . . . . . . . . . . . . . . . . . . . . . . . . . . . . . . . . . . . . . 1-1 Patents . . . . . . . . . . . . . . . . . . . . . . . . . . . . . . . . . . . . . . . . . . . . . . . . . . . . . . . . . . . . . . . . . . . . . . . . . 1-2 Configurations . . . . . . . . . . . . . . . . . . . . . . . . . . . . . . . . . . . . . . . . . . . . . . . . . . . . . . . . . . . . . . . . . . . 1-3 Chapter 2: Laser Safety. . . . . . . . . . . . . . . . . . . . . . . . . . . . . . . . . . . . . . . . . . . . . . . . . 2-1 Precautions for the Safe Operation of Class IV-High Power Lasers and Accessories . . . . . . . . . . . . 2-1 Safety Devices . . . . . . . . . . . . . . . . . . . . . . . . . . . . . . . . . . . . . . . . . . . . . . . . . . . . . . . . . . . . . . . . . . . 2-3 Shutter Interlock . . . . . . . . . . . . . . . . . . . . . . . . . . . . . . . . . . . . . . . . . . . . . . . . . . . . . . . . . . . . . . . 2-3 Maintenance Required to Keep this Laser Product in Compliance with Center for Devices and Radiological Health (CDRH) Regulations . . . . . . . . . . . . . . . . . . . . . . . . . . . . . . . . . . . . . . . . 2-4 CE/CDRH Radiation Control Drawings . . . . . . . . . . . . . . . . . . . . . . . . . . . . . . . . . . . . . . . . . . . . . . . . . 2-5 Label Translations . . . . . . . . . . . . . . . . . . . . . . . . . . . . . . . . . . . . . . . . . . . . . . . . . . . . . . . . . . . . . 2-7 CE Declaration of Conformity (Emissions) . . . . . . . . . . . . . . . . . . . . . . . . . . . . . . . . . . . . . . . . . . . . . . 2-8 CE Declaration of Conformity (Low Voltage) . . . . . . . . . . . . . . . . . . . . . . . . . . . . . . . . . . . . . . . . . . . . 2-9 Sources for Additional Information . . . . . . . . . . . . . . . . . . . . . . . . . . . . . . . . . . . . . . . . . . . . . . . . . . . . 2-10 Laser Safety Standards . . . . . . . . . . . . . . . . . . . . . . . . . . . . . . . . . . . . . . . . . . . . . . . . . . . . . . . . . 2-10 Equipment and Training . . . . . . . . . . . . . . . . . . . . . . . . . . . . . . . . . . . . . . . . . . . . . . . . . . . . . . . . 2-11 Chapter 3: Opal Description . . . . . . . . . . . . . . . . . . . . . . . . . . . . . . . . . . . . . . . . . . . . . 3-1 OPOs . . . . . . . . . . . . . . . . . . . . . . . . . . . . . . . . . . . . . . . . . . . . . . . . . . . . . . . . . . . . . . . . . . . . . . . . . . 3-1 The Opal . . . . . . . . . . . . . . . . . . . . . . . . . . . . . . . . . . . . . . . . . . . . . . . . . . . . . . . . . . . . . . . . . . . . . . . 3-3 Wavelength Tuning Characteristics . . . . . . . . . . . . . . . . . . . . . . . . . . . . . . . . . . . . . . . . . . . . . . . . 3-4 Configuration . . . . . . . . . . . . . . . . . . . . . . . . . . . . . . . . . . . . . . . . . . . . . . . . . . . . . . . . . . . . . . . . . 3-5 The Opal Electronics Module . . . . . . . . . . . . . . . . . . . . . . . . . . . . . . . . . . . . . . . . . . . . . . . . . . . . 3-6 Purging the Cavity . . . . . . . . . . . . . . . . . . . . . . . . . . . . . . . . . . . . . . . . . . . . . . . . . . . . . . . . . . . . . 3-6 Opal Specifications . . . . . . . . . . . . . . . . . . . . . . . . . . . . . . . . . . . . . . . . . . . . . . . . . . . . . . . . . . . . . . . 3-8 Outline Drawings . . . . . . . . . . . . . . . . . . . . . . . . . . . . . . . . . . . . . . . . . . . . . . . . . . . . . . . . . . . . . . . . . 3-9 References . . . . . . . . . . . . . . . . . . . . . . . . . . . . . . . . . . . . . . . . . . . . . . . . . . . . . . . . . . . . . . . . . . 3-9 vii Opal fs Synchronously Pumped Optical Parametric Oscillator Chapter 4: Controls, Indicators and Connections . . . . . . . . . . . . . . . . . . . . . . . . . . . 4-1 Opal Head . . . . . . . . . . . . . . . . . . . . . . . . . . . . . . . . . . . . . . . . . . . . . . . . . . . . . . . . . . . . . . . . . . . . . .4-1 Input Bezel Connections . . . . . . . . . . . . . . . . . . . . . . . . . . . . . . . . . . . . . . . . . . . . . . . . . . . . . . . .4-2 Opto-Mechanical Controls . . . . . . . . . . . . . . . . . . . . . . . . . . . . . . . . . . . . . . . . . . . . . . . . . . . . . . .4-2 Opal Electronics Module . . . . . . . . . . . . . . . . . . . . . . . . . . . . . . . . . . . . . . . . . . . . . . . . . . . . . . . . . . . .4-5 Front Panel . . . . . . . . . . . . . . . . . . . . . . . . . . . . . . . . . . . . . . . . . . . . . . . . . . . . . . . . . . . . . . . . . . .4-5 Rear Panel . . . . . . . . . . . . . . . . . . . . . . . . . . . . . . . . . . . . . . . . . . . . . . . . . . . . . . . . . . . . . . . . . . .4-6 Chapter 5: Installation and Alignment. . . . . . . . . . . . . . . . . . . . . . . . . . . . . . . . . . . . . 5-1 Opal Installation . . . . . . . . . . . . . . . . . . . . . . . . . . . . . . . . . . . . . . . . . . . . . . . . . . . . . . . . . . . . . . . . . .5-1 Setting up the System . . . . . . . . . . . . . . . . . . . . . . . . . . . . . . . . . . . . . . . . . . . . . . . . . . . . . . . . . .5-2 Removing/Installing the LBO Crystal . . . . . . . . . . . . . . . . . . . . . . . . . . . . . . . . . . . . . . . . . . . . . . .5-3 Aligning the Opal Head . . . . . . . . . . . . . . . . . . . . . . . . . . . . . . . . . . . . . . . . . . . . . . . . . . . . . . . . .5-5 Attaching the Opal Purge Line . . . . . . . . . . . . . . . . . . . . . . . . . . . . . . . . . . . . . . . . . . . . . . . . . . . .5-7 Removing the Opal Purge Line . . . . . . . . . . . . . . . . . . . . . . . . . . . . . . . . . . . . . . . . . . . . . . . . . . .5-9 Opal Alignment—1.3 µm Optic Set . . . . . . . . . . . . . . . . . . . . . . . . . . . . . . . . . . . . . . . . . . . . . . . . . . . .5-9 Initial Set-up . . . . . . . . . . . . . . . . . . . . . . . . . . . . . . . . . . . . . . . . . . . . . . . . . . . . . . . . . . . . . . . . . .5-9 Aligning the Pump Beam . . . . . . . . . . . . . . . . . . . . . . . . . . . . . . . . . . . . . . . . . . . . . . . . . . . . . . . .5-11 Aligning the Opal Cavity . . . . . . . . . . . . . . . . . . . . . . . . . . . . . . . . . . . . . . . . . . . . . . . . . . . . . . . . .5-12 Alignment of Pr1 and Pr2 Prism Sequence . . . . . . . . . . . . . . . . . . . . . . . . . . . . . . . . . . . . . . . . . .5-14 Completing the Cavity Alignment . . . . . . . . . . . . . . . . . . . . . . . . . . . . . . . . . . . . . . . . . . . . . . . . . .5-15 Aligning the Beam to the Servo Wavelength Monitor Assembly . . . . . . . . . . . . . . . . . . . . . . . . . .5-16 Completing the Alignment . . . . . . . . . . . . . . . . . . . . . . . . . . . . . . . . . . . . . . . . . . . . . . . . . . . . . . .5-17 Opal Alignment—1.5 µm Optic Set . . . . . . . . . . . . . . . . . . . . . . . . . . . . . . . . . . . . . . . . . . . . . . . . . . . .5-19 Initial Set-up . . . . . . . . . . . . . . . . . . . . . . . . . . . . . . . . . . . . . . . . . . . . . . . . . . . . . . . . . . . . . . . . . .5-19 Aligning the Pump Beam . . . . . . . . . . . . . . . . . . . . . . . . . . . . . . . . . . . . . . . . . . . . . . . . . . . . . . . .5-20 Aligning the Opal Cavity . . . . . . . . . . . . . . . . . . . . . . . . . . . . . . . . . . . . . . . . . . . . . . . . . . . . . . . . .5-21 Completing the Cavity Alignment . . . . . . . . . . . . . . . . . . . . . . . . . . . . . . . . . . . . . . . . . . . . . . . . . .5-23 Aligning the Beam to the Servo Wavelength Monitor . . . . . . . . . . . . . . . . . . . . . . . . . . . . . . . . . . .5-24 Completing the Alignment . . . . . . . . . . . . . . . . . . . . . . . . . . . . . . . . . . . . . . . . . . . . . . . . . . . . . . .5-25 Converting from 1.3 to 1.5 µm . . . . . . . . . . . . . . . . . . . . . . . . . . . . . . . . . . . . . . . . . . . . . . . . . . . . . . .5-27 Converting from 1.5 to 1.3 µm . . . . . . . . . . . . . . . . . . . . . . . . . . . . . . . . . . . . . . . . . . . . . . . . . . . . . . .5-28 Chapter 6: Operation . . . . . . . . . . . . . . . . . . . . . . . . . . . . . . . . . . . . . . . . . . . . . . . . . . 6-1 General Operation . . . . . . . . . . . . . . . . . . . . . . . . . . . . . . . . . . . . . . . . . . . . . . . . . . . . . . . . . . . . . . . .6-1 Turning On the System . . . . . . . . . . . . . . . . . . . . . . . . . . . . . . . . . . . . . . . . . . . . . . . . . . . . . . . . .6-2 Resetting the Wavelength . . . . . . . . . . . . . . . . . . . . . . . . . . . . . . . . . . . . . . . . . . . . . . . . . . . . . . . .6-4 Turning Off the System . . . . . . . . . . . . . . . . . . . . . . . . . . . . . . . . . . . . . . . . . . . . . . . . . . . . . . . . .6-4 Purging the Opal . . . . . . . . . . . . . . . . . . . . . . . . . . . . . . . . . . . . . . . . . . . . . . . . . . . . . . . . . . . . . . . . . .6-5 Purge Turn-on . . . . . . . . . . . . . . . . . . . . . . . . . . . . . . . . . . . . . . . . . . . . . . . . . . . . . . . . . . . . . . . .6-6 Purge Turn-off . . . . . . . . . . . . . . . . . . . . . . . . . . . . . . . . . . . . . . . . . . . . . . . . . . . . . . . . . . . . . . . .6-6 The Front Panel Menu Control System . . . . . . . . . . . . . . . . . . . . . . . . . . . . . . . . . . . . . . . . . . . . . . . .6-6 The Menus . . . . . . . . . . . . . . . . . . . . . . . . . . . . . . . . . . . . . . . . . . . . . . . . . . . . . . . . . . . . . . . . . . . . . .6-7 Main Menu (MAIN) . . . . . . . . . . . . . . . . . . . . . . . . . . . . . . . . . . . . . . . . . . . . . . . . . . . . . . . . . . . . .6-9 Scan Menu (SCAN) . . . . . . . . . . . . . . . . . . . . . . . . . . . . . . . . . . . . . . . . . . . . . . . . . . . . . . . . . . . .6-10 Scan Status Menu (SCAN) . . . . . . . . . . . . . . . . . . . . . . . . . . . . . . . . . . . . . . . . . . . . . . . . . . . . . .6-11 Paused Scan Status Menu (SCAN) . . . . . . . . . . . . . . . . . . . . . . . . . . . . . . . . . . . . . . . . . . . . . . . .6-11 Remote Menu (REMOTE) . . . . . . . . . . . . . . . . . . . . . . . . . . . . . . . . . . . . . . . . . . . . . . . . . . . . . . .6-12 Adjust Temp Menu (ADJUST TEMPERATURE) . . . . . . . . . . . . . . . . . . . . . . . . . . . . . . . . . . . . .6-12 Clear Menu (ADJUST TEMPERATURE) . . . . . . . . . . . . . . . . . . . . . . . . . . . . . . . . . . . . . . . . . . . .6-14 Setup Menu (SETUP) . . . . . . . . . . . . . . . . . . . . . . . . . . . . . . . . . . . . . . . . . . . . . . . . . . . . . . . . . .6-15 Scan Length Menu (SETUP) . . . . . . . . . . . . . . . . . . . . . . . . . . . . . . . . . . . . . . . . . . . . . . . . . . . . .6-16 viii Table of Contents Scanning Coarse Length Menu (SETUP) . . . . . . . . . . . . . . . . . . . . . . . . . . . . . . . . . . . . . . . . . . . 6-16 Configure Menu (CONFIGURE) . . . . . . . . . . . . . . . . . . . . . . . . . . . . . . . . . . . . . . . . . . . . . . . . . . 6-17 Save/Recall Menu (CONFIGURATION) . . . . . . . . . . . . . . . . . . . . . . . . . . . . . . . . . . . . . . . . . . . . 6-17 Miscellaneous (CONFIGURATION) . . . . . . . . . . . . . . . . . . . . . . . . . . . . . . . . . . . . . . . . . . . . . . . 6-18 Diagnostics Menu (DIAGNOSTICS) . . . . . . . . . . . . . . . . . . . . . . . . . . . . . . . . . . . . . . . . . . . . . . . 6-19 Manual Control Menu (DIAGNOSTICS) . . . . . . . . . . . . . . . . . . . . . . . . . . . . . . . . . . . . . . . . . . . . 6-19 Scanning Coarse Length Menu (DIAGNOSTICS) . . . . . . . . . . . . . . . . . . . . . . . . . . . . . . . . . . . . . 6-21 Wavelength Calibration (DIAGNOSTICS) . . . . . . . . . . . . . . . . . . . . . . . . . . . . . . . . . . . . . . . . . . . 6-21 Chapter 7: Maintenance . . . . . . . . . . . . . . . . . . . . . . . . . . . . . . . . . . . . . . . . . . . . . . . . 7-1 Notes on the Cleaning of Laser Optics . . . . . . . . . . . . . . . . . . . . . . . . . . . . . . . . . . . . . . . . . . . . . . . . 7-1 Equipment Required: . . . . . . . . . . . . . . . . . . . . . . . . . . . . . . . . . . . . . . . . . . . . . . . . . . . . . . . . . . . 7-2 Removing and Cleaning Opal Optics . . . . . . . . . . . . . . . . . . . . . . . . . . . . . . . . . . . . . . . . . . . . . . . . . . 7-2 Standard Cleaning Procedures . . . . . . . . . . . . . . . . . . . . . . . . . . . . . . . . . . . . . . . . . . . . . . . . . . . . . . 7-3 General Procedure for Cleaning all Optics Except the Crystal . . . . . . . . . . . . . . . . . . . . . . . . . . . 7-4 General Procedure for Cleaning the Crystal . . . . . . . . . . . . . . . . . . . . . . . . . . . . . . . . . . . . . . . . . 7-6 Chapter 8: Service and Repair . . . . . . . . . . . . . . . . . . . . . . . . . . . . . . . . . . . . . . . . . . . 8-1 Troubleshooting Guide . . . . . . . . . . . . . . . . . . . . . . . . . . . . . . . . . . . . . . . . . . . . . . . . . . . . . . . . . . . . . 8-1 Replacement Parts . . . . . . . . . . . . . . . . . . . . . . . . . . . . . . . . . . . . . . . . . . . . . . . . . . . . . . . . . . . . . . . . 8-6 Chapter 9: Customer Service . . . . . . . . . . . . . . . . . . . . . . . . . . . . . . . . . . . . . . . . . . . . 9-1 Warranty . . . . . . . . . . . . . . . . . . . . . . . . . . . . . . . . . . . . . . . . . . . . . . . . . . . . . . . . . . . . . . . . . . . . . . . . 9-1 Return of the Instrument for Repair . . . . . . . . . . . . . . . . . . . . . . . . . . . . . . . . . . . . . . . . . . . . . . . . . . . 9-2 Service Centers . . . . . . . . . . . . . . . . . . . . . . . . . . . . . . . . . . . . . . . . . . . . . . . . . . . . . . . . . . . . . . . . . . 9-3 Appendix A: Setting the Line Voltage Switch . . . . . . . . . . . . . . . . . . . . . . . . . . . . . . . A-1 Appendix B: GVD Compensation . . . . . . . . . . . . . . . . . . . . . . . . . . . . . . . . . . . . . . . . . B-1 Introduction . . . . . . . . . . . . . . . . . . . . . . . . . . . . . . . . . . . . . . . . . . . . . . . . . . . . . . . . . . . . . . . . . . . . . B-1 The Autocorrelation Technique . . . . . . . . . . . . . . . . . . . . . . . . . . . . . . . . . . . . . . . . . . . . . . . . . . . . . . B-1 Measurement of Ultrashort Pulses . . . . . . . . . . . . . . . . . . . . . . . . . . . . . . . . . . . . . . . . . . . . . . . . B-1 Signal Interpretation . . . . . . . . . . . . . . . . . . . . . . . . . . . . . . . . . . . . . . . . . . . . . . . . . . . . . . . . . . . B-4 GVD Compensation in Measurement of Ultrashort Pulses . . . . . . . . . . . . . . . . . . . . . . . . . . . . . . . . . B-4 Calculating Pulse Broadening . . . . . . . . . . . . . . . . . . . . . . . . . . . . . . . . . . . . . . . . . . . . . . . . . . . . B-7 Appendix C: Servo Wavelength Calibration Procedure . . . . . . . . . . . . . . . . . . . . . . . C-1 Stepper Calibration Procedure . . . . . . . . . . . . . . . . . . . . . . . . . . . . . . . . . . . . . . . . . . . . . . . . . . . . . . . C-1 Appendix D: Replacing the PCMCIA Card Battery . . . . . . . . . . . . . . . . . . . . . . . . . . . D-1 Card Description/Replacement Battery List . . . . . . . . . . . . . . . . . . . . . . . . . . . . . . . . . . . . . . . . . . . . . D-1 Procedure . . . . . . . . . . . . . . . . . . . . . . . . . . . . . . . . . . . . . . . . . . . . . . . . . . . . . . . . . . . . . . . . . . . D-2 Appendix E: Using the Optional RS-232/IEEE-488 Interface . . . . . . . . . . . . . . . . . . . E-1 Scope . . . . . . . . . . . . . . . . . . . . . . . . . . . . . . . . . . . . . . . . . . . . . . . . . . . . . . . . . . . . . . . . . . . . . . . . . . E-1 Overview. . . . . . . . . . . . . . . . . . . . . . . . . . . . . . . . . . . . . . . . . . . . . . . . . . . . . . . . . . . . . . . . . . . . . E-1 Format and Syntax Rules . . . . . . . . . . . . . . . . . . . . . . . . . . . . . . . . . . . . . . . . . . . . . . . . . . . . . . . . . . . E-2 Commands . . . . . . . . . . . . . . . . . . . . . . . . . . . . . . . . . . . . . . . . . . . . . . . . . . . . . . . . . . . . . . . . . . . . . . E-2 Additional Commands Required by the IEEE 488.2 Standard . . . . . . . . . . . . . . . . . . . . . . . . . . . . E-4 Connections . . . . . . . . . . . . . . . . . . . . . . . . . . . . . . . . . . . . . . . . . . . . . . . . . . . . . . . . . . . . . . . . . . . . . E-6 ix Opal fs Synchronously Pumped Optical Parametric Oscillator List of Figures Figure 1-1: The Opal shown as part of a complete system. Included are a BeamLok 2080 pump laser, a Tsunami Lok-to-Clock pump laser, the Opal and the Opal Doubler. Also shown is the Model 409-08 autocorrelator. . . . . . . . . . . . . . . . . . . . . . . . . . . . . . . . . . . . . . .1-2 Figure 2-1: These CE and CDRH standard safety warning labels would be appropriate for use as entry warning signs (EN 60825-1, ANSI 4.3.10.1). . . . . . . . . . . . . . . . . . . . . . . . . . . . . . . .2-2 Figure 2-2: Folded Metal Beam Target . . . . . . . . . . . . . . . . . . . . . . . . . . . . . . . . . . . . . . . . . . . . . . . . .2-2 Figure 2-3: Laser Head Shutter Interlock . . . . . . . . . . . . . . . . . . . . . . . . . . . . . . . . . . . . . . . . . . . . . . .2-3 Figure 2-4: CE/CDRH Radiation Control Drawing . . . . . . . . . . . . . . . . . . . . . . . . . . . . . . . . . . . . . . . .2-5 Figure 2-5: CE/CDRH Warning Labels . . . . . . . . . . . . . . . . . . . . . . . . . . . . . . . . . . . . . . . . . . . . . . . . .2-6 Figure 3-1: A Typical Optical Parametric Oscillator Configuration . . . . . . . . . . . . . . . . . . . . . . . . . . . .3-2 Figure 3-2: Optical frequency three-wave conversion process . . . . . . . . . . . . . . . . . . . . . . . . . . . . . .3-2 Figure 3-3: Typical System Setup . . . . . . . . . . . . . . . . . . . . . . . . . . . . . . . . . . . . . . . . . . . . . . . . . . . .3-3 Figure 3-4: Signal and idler wavelengths are tuned by changing the temperature of the LBO crystal. 3-3 Figure 3-5: The Opal Tuning Curves . . . . . . . . . . . . . . . . . . . . . . . . . . . . . . . . . . . . . . . . . . . . . . . . . .3-4 Figure 3-6: Opal Cavity Beam Path . . . . . . . . . . . . . . . . . . . . . . . . . . . . . . . . . . . . . . . . . . . . . . . . . . .3-4 Figure 3-7: Wavelengths most affected by vapor absorption . . . . . . . . . . . . . . . . . . . . . . . . . . . . . . . .3-7 Figure 3-8: Outline Drawings. . . . . . . . . . . . . . . . . . . . . . . . . . . . . . . . . . . . . . . . . . . . . . . . . . . . . . . . .3-9 Figure 4-1: Opal Head Controls and Connections . . . . . . . . . . . . . . . . . . . . . . . . . . . . . . . . . . . . . . . .4-1 Figure 4-2: Opal Cavity Layout . . . . . . . . . . . . . . . . . . . . . . . . . . . . . . . . . . . . . . . . . . . . . . . . . . . . . . .4-2 Figure 4-3: Front Panel, Opal Electronics Module . . . . . . . . . . . . . . . . . . . . . . . . . . . . . . . . . . . . . . . .4-5 Figure 4-4: Rear Panel, Opal Electronics Module . . . . . . . . . . . . . . . . . . . . . . . . . . . . . . . . . . . . . . . .4-6 Figure 5-1: Opal system layout with a Tsunami Mode-Locked Ti:sapphire Laser and a Millennia Diode-Pumped Pump Laser. . . . . . . . . . . . . . . . . . . . . . . . . . . . . . . . . . . . . . . . . . . . . . .5-2 Figure 5-2: Opal Cavity Layout . . . . . . . . . . . . . . . . . . . . . . . . . . . . . . . . . . . . . . . . . . . . . . . . . . . . . . .5-7 Figure 5-3: Transmittance vs. wavelengths for water vapor in the Opal Signal wavelength range . . .5-8 Figure 5-4: M3 and M4 Spacing . . . . . . . . . . . . . . . . . . . . . . . . . . . . . . . . . . . . . . . . . . . . . . . . . . . . . .5-10 Figure 5-5: P4 and M4 Spacing . . . . . . . . . . . . . . . . . . . . . . . . . . . . . . . . . . . . . . . . . . . . . . . . . . . . . . .5-10 Figure 5-6: Figure “8” frequency-doubled blue beam. . . . . . . . . . . . . . . . . . . . . . . . . . . . . . . . . . . . . .5-12 Figure 5-7: Positioning the Signal beam horizontally on the grating. . . . . . . . . . . . . . . . . . . . . . . . . . .5-17 Figure 5-8: Visible Light Filter, Side View (Attaches to Signal Window). . . . . . . . . . . . . . . . . . . . . . . .5-17 Figure 6-1: Wavelengths most affected by vapor absorption. . . . . . . . . . . . . . . . . . . . . . . . . . . . . . . .6-5 Figure 6-2: Flowchart of the Opal electronics module menu system . . . . . . . . . . . . . . . . . . . . . . . . . .6-8 Figure 7-1: Drop and Drag Method. . . . . . . . . . . . . . . . . . . . . . . . . . . . . . . . . . . . . . . . . . . . . . . . . . . .7-4 Figure 7-2: Tissue Folded for Cleaning . . . . . . . . . . . . . . . . . . . . . . . . . . . . . . . . . . . . . . . . . . . . . . . .7-5 Figure A-1: Power Switch, Line Cord, and Voltage Selector Module . . . . . . . . . . . . . . . . . . . . . . . . . .A-1 Figure B-1: Interferometric (Collinear) Autocorrelation . . . . . . . . . . . . . . . . . . . . . . . . . . . . . . . . . . . . .B-2 Figure B-2: Background-free (Non-collinear) Autocorrelation . . . . . . . . . . . . . . . . . . . . . . . . . . . . . . .B-2 Figure B-3: The Model 409-08 Autocorrelator Optical Path. The beam paths are displaced by HRR1 and HRR2 in and out of the plane of the paper, so the configuration corresponds to the background-free method shown in Figure B-2. . . . . . . . . . . . . . . . . . . . . . . . .B-3 Figure B-4: Using two prisms to compensate for positive GVD. . . . . . . . . . . . . . . . . . . . . . . . . . . . . . .B-5 Figure B-5: Broadening Curve . . . . . . . . . . . . . . . . . . . . . . . . . . . . . . . . . . . . . . . . . . . . . . . . . . . . . . .B-8 Figure D-1: Three examples of PCMCIA cards. . . . . . . . . . . . . . . . . . . . . . . . . . . . . . . . . . . . . . . . . . .D-1 x Table of Contents List of Tables Table 2-1: Label Translations . . . . . . . . . . . . . . . . . . . . . . . . . . . . . . . . . . . . . . . . . . . . . . . . . . . . . . . . 2-7 Table 3-1: Opal Specifications . . . . . . . . . . . . . . . . . . . . . . . . . . . . . . . . . . . . . . . . . . . . . . . . . . . . . . . 3-8 Table 5-1: Typical Settings for Opal Output at 1.300 µm . . . . . . . . . . . . . . . . . . . . . . . . . . . . . . . . . . . 5-18 Table 5-2: Typical Settings for Opal Output at 1.500 µm . . . . . . . . . . . . . . . . . . . . . . . . . . . . . . . . . . . 5-26 Table 5-3: Optical List for 1.5 µm Operation . . . . . . . . . . . . . . . . . . . . . . . . . . . . . . . . . . . . . . . . . . . . 5-27 Table 5-4: Optics List for 1.3 µm Operation . . . . . . . . . . . . . . . . . . . . . . . . . . . . . . . . . . . . . . . . . . . . . 5-28 Table 6-1: Typical Settings for Several Opal Wavelengths . . . . . . . . . . . . . . . . . . . . . . . . . . . . . . . . . 6-3 Table 8-1: Opal Standard Mirrors . . . . . . . . . . . . . . . . . . . . . . . . . . . . . . . . . . . . . . . . . . . . . . . . . . . . . 8-6 Table 8-2: Opal Hardware. . . . . . . . . . . . . . . . . . . . . . . . . . . . . . . . . . . . . . . . . . . . . . . . . . . . . . . . . . . 8-6 Table 8-3: Tsunami Special Optics . . . . . . . . . . . . . . . . . . . . . . . . . . . . . . . . . . . . . . . . . . . . . . . . . . . . 8-6 Table A-1: Fuse Selection. . . . . . . . . . . . . . . . . . . . . . . . . . . . . . . . . . . . . . . . . . . . . . . . . . . . . . . . . . . A-2 Table B-1: Second-Order Autocorrelation Functions and Time-Bandwidth Products for Various Pulse Shape Models . . . . . . . . . . . . . . . . . . . . . . . . . . . . . . . . . . . . . . . . . . . . . . . . . . . . . B-4 Table B-2: Positive Dispersion Values @ 800 nm . . . . . . . . . . . . . . . . . . . . . . . . . . . . . . . . . . . . . . . . B-6 Table B-3: Negative Dispersion Values @ 800 nm . . . . . . . . . . . . . . . . . . . . . . . . . . . . . . . . . . . . . . . B-6 Table C-1: 1st Order Settings for Several Opal Wavelengths . . . . . . . . . . . . . . . . . . . . . . . . . . . . . . . C-3 Table E-1: RS-232-C Interface to a Standard 25-pin PC Com Port . . . . . . . . . . . . . . . . . . . . . . . . . . . E-6 Table E-2: RS-232-C Interface to a Standard 9-pin PC-AT Com Port . . . . . . . . . . . . . . . . . . . . . . . . . E-6 xi Opal fs Synchronously Pumped Optical Parametric Oscillator xii Warning Conventions The following warnings are used throughout this manual to draw your attention to situations or procedures that require extra attention. They warn of hazards to your health, damage to equipment, sensitive procedures, and exceptional circumstances. All messages are set apart by a thin line above and below the text as shown here. Danger! Laser radiation is present. Laser Radiation Danger! Condition or action may present a hazard to personal safety. Danger! Condition or action may present an electrical hazard to personal safety. Warning! Condition or action may cause damage to equipment. Warning! ESD Action may cause electrostatic discharge and cause damage to equipment. Caution! Condition or action may cause poor performance or error. Note Don't Touch! Eyewear Required Text describes exceptional circumstances or makes a special reference. Do not touch. Appropriate laser safety eyewear should be worn during this operation. Refer to the manual before operating or using this device. xiii Standard Units The following units, abbreviations, and prefixes are used in this SpectraPhysics manual: Quantity Unit Abbreviation mass kilogram kg length meter m second s hertz Hz newton N energy joule J power watt W electric current ampere A electric charge coulomb C electric potential volt V resistance ohm Ω inductance henry H magnetic flux weber Wb tesla T luminous intensity candela cd temperature celcius C pressure pascal Pa capacitance farad F angle radian rad time frequency force magnetic flux density Prefixes tera giga mega kilo 12 T deci 9 G centi 6 M mill 3 k micro (10 ) (10 ) (10 ) (10 ) d nano -2 c pico -3 m femto -6 µ atto (10-1) (10 ) (10 ) (10 ) (10-9) n -12 p -15 f -18 a (10 ) (10 ) (10 ) xv Unpacking and Inspection Unpacking Your Laser Your Opal® laser accessory was packed with great care and all containers were inspected prior to shipment: the Opal left Spectra-Physics in good condition. Upon receipt of your system, immediately inspect the out side of the shipping containers. If there is any major damage, such as holes in a box or cracked wooden frame members, insist that a representative of the carrier be present when you unpack the contents. Carefully inspect your system as you unpack it. If you notice any damage, such as dents, scratches or broken knobs, immediately notify the carrier and your Spectra-Physics sales representative. Keep the shipping containers. If you need to return the system for upgrade or service, the specially designed shipping containers assure adequate protection of your equipment. Spectra-Physics will only ship Spectra-Physics equipment in original containers; you will be charged for replacement containers. You will find the following items packed in an accessory kit included with the Opal head: • • • • • an Allen (hex) wrench tool kit, three foot clamps for mounting the Opal head, and this manual optics cleaning materials including a plastic hemostat, tweezers, and optical-grade lens tissue a tee fitting and gas tubing for purging the Opal infrared (ir) detector card a filter for a Spectra-Physics Model 409-08 autocorrelator that allows measurement of the signal pulse width (1.1 – 1.6 µm) In separate containers you will find: • • the Opal electronics module with an accessory kit containing connecting cables an Optics kit if a second set was ordered at the time you purchased your Opal xvii Chapter 1 Introduction The Opal® SPPO Optical parametric oscillators (OPOs) were first used in the mid-1960's as an alternative to dye lasers for generating coherent radiation tunable over a wide wavelength region. It is only recently, however, that they have become a practical reality with the advent of new, high-quality, nonlinear optical materials and high-power, mode-locked pump sources. Opal is the first femtosecond synchronously pumped optical parametric oscillator (SPPO) with the following features: • Ti:sapphire pumped • Temperature tuned • Fully automated cavity-length adjustment with active stabilization • Automated wavelength scanning and setup • Output power > 150 mW at 1.3 µm and 1.5 µm • Output pulse width < 130 fs • Synchronized Signal and Idler outputs with wavelength coverage from 1.1 to 2.6 µm The Opal extends the ease and convenience of your Tsunami® Ti:sapphire laser to an entirely new infrared wavelength range. The Opal is entirely solid state and uses no laser dyes or complex, cryogenically cooled crystals. It employs a lithium triborate (LBO) nonlinear optical crystal to generate new infrared frequencies, and is pumped by the output of the Tsunami mode-locked Ti:sapphire laser. The system comprises the Opal head and the Opal electronics control module. The Opal head is the same shape as, but a little longer than, the Tsunami laser head, and it is designed to be placed near the Tsunami output port. The electronics module has the same footprint as the Tsunami Model 3955 electronics module which allows the latter to be placed on top of it to conserve space. The Opal control electronics are microprocessor based, and system parameters and settings are displayed via a back-lit LCD screen on the front panel. Selection and control of these operating parameters are easily made via menus displayed on the screen. Buttons located below the screen are used to select menus appropriate to the task at hand. They are also used to select various fields (areas) within these menu. Once selected, the “up/ down” push buttons located to the right of the screen are used to increase or decrease the value of the selected field or to change the contents from a pre-selected list. 1-1 Opal fs Synchronously Pumped Optical Parametric Oscillator Figure 1-1: The Opal shown as part of a complete system. Included are a BeamLok 2080 pump laser, a Tsunami Lok-to-Clock pump laser, the Opal and the Opal Doubler. Also shown in the upper right corner is the Model 409-08 autocorrelator. The Opal accessories kit includes a single-plate birefringent filter and a special high transmission output coupler that are to be used in the Tsunami pump laser when it is used to pump the Opal. Together they provide the necessary output power and pulse width to pump the Opal optimally. Patents The Opal contains technology that is unique among synchronouslypumped optical parametric oscillators. This technology is covered by the following United States patents: 5,017,806 5,365,366 5,377,043 5,847,861 1-2 Introduction Configurations The Opal is available in two configurations: • Opal-1.3 µm, which provides a signal wavelength from 1.1 to 1.35 µm • Opal-1.5 µm, which provides a signal wavelength from 1.35 to 1.60 µm If you purchased any of the above configurations and require operation in another wavelength range, the following wavelength conversion sets are available: • Opal-1.3 to 1.5, which includes all the necessary optics to convert an Opal-1.3 to an Opal-1.5. • Opal-1.5 to 1.3, which includes all the necessary optics, mounts, prism assemblies, etc., to convert an Opal 1.5 to an Opal 1.3. In addition, your Opal can be purchased with the Opal-PPO, an option that includes optics, mounts, and a Brewster window to allow access to the Tsunami beam, which is reflected off the Opal LBO nonlinear crystal. The Opal-PPO provides over 250 mW of Tsunami output that can be extremely useful for diagnostics purposes or for use in pump-probe experiments. The Opal is supported with a full range of accessories that includes the Opal Doubler (for operation from 560 to 660 nm and from 690 to 790 nm) and the Model 409-08 autocorrelator. Please contact your local SpectraPhysics sales representative for more details. 1-3 Opal fs Synchronously Pumped Optical Parametric Oscillator 1-4 Chapter 2 Laser Safety The Opal®, Tsunami® and the Millennia® pump laser are Class IV— High Power Lasers that have output beams that are, by definition, safety and fire hazards. Take precautions to prevent exposure to direct and reflected beams. Even diffuse or specular reflections can cause severe skin or eye damage. Danger! Because the Opal and the Tsunami laser emit cw and short pulsed invisible infrared radiation, they are extremely dangerous to the eye. Infrared radiation passes easily through the cornea, which focuses it on the retina, where it can cause instantaneous permanent damage. Danger! Laser Radiation Precautions for the Safe Operation of Class IV-High Power Lasers and Accessories • • • • • • • • • Wear protective eyewear at all times; selection depends on the wave length and intensity of the radiation, the conditions of use, and the visual function required. Protective eyewear vendors are listed in the Laser Focus World, Lasers and Optronics, and Photonics Spectra buyer's guides. Consult the ANSI and ACGIH standards listed at the end of this section for guidance. Maintain a high ambient light level in the laser operation area. This keeps the eye's pupil constricted, thus reducing the possibility of eye damage. Keep the protective cover on Opal and the lasers at all times. Avoid looking at the output beam; even diffuse reflections are hazardous. Avoid wearing jewelry or other objects that may reflect or scatter the beam while using Opal or the lasers. Use an infrared detector or energy detector to verify the laser beam is off before working in front of the Opal or the pump lasers. Operate the lasers at the lowest beam intensity possible, given the requirements of the application. Expand the beam whenever possible to reduce beam power density. Avoid blocking the output beam or its reflection with any part of your body. 2-1 Opal fs Synchronously Pumped Optical Parametric Oscillator • Establish a controlled access area for laser operation. Limit access to those trained in the principles of laser safety. Post prominent warning signs near the laser operation area (Figure 21). Set up experiments so the laser beam is either above or below eye level. Provide enclosures for beam paths whenever possible. Set up shields to prevent specular reflections. Set up an energy absorbing target to capture the laser beam, preventing unnecessary reflections or scattering (Figure 2-2). • • • • • DANGER VISIBLE AND/OR INVISIBLE LASER RADIATION AVOID EYE OR SKIN EXPOSURE TO DIRECT OR SCATTERED RADIATION POWER, WAVELENGTH AND PULSE WIDTH DEPEND ON PUMP * SEE MANUAL OPTIONS AND LASER CONFIGURATION* CLASS IV LASER PRODUCT VISIBLE AND/OR INVISIBLE* LASER RADIATION AVOID EYE OR SKIN EXPOSURE TO DIRECT OR SCATTERED RADIATION CLASS 4 LASER PRODUCT POWER, WAVELENGTH(S) AND PULSE WIDTH DEPEND ON PUMP OPTIONS AND LASER CONFIGURATION. *SEE MANUAL 0451-8080 Figure 2-1: These CE and CDRH standard safety warning labels would be appropriate for use as entry warning signs (EN 60825-1, ANSI 4.3.10.1). Figure 2-2: Folded Metal Beam Target Caution! Use of controls or adjustments, or the performance of procedures other than those specified herein may result in hazardous radiation exposure. Follow the instructions contained in this manual, the Tsunami User's Manual, and the Millennia pump laser User's Manual for safe operation of the Opal system. At all times during operation, maintenance, or service of your Opal, avoid unnecessary exposure to laser or collateral radiation* that exceeds the accessible emission limits listed in “Performance Standards for Laser Products,” United States Code of Federal Regulations, 21CFR1040 10(d). * Any electronic product radiation, except laser radiation, emitted by a laser product as a result of, or necessary for, the operation of a laser incorporated into that product. 2-2 Laser Safety Safety Devices Shutter Interlock Because the energy to drive the process in Opal comes from another laser and not from an internal source (such as electrical discharge), the interlock differs slightly from that of solid-state or ion lasers. The Opal has a single shutter interlock that blocks the pump beam at the entrance to the housing to prevent lasing. When installed, the cover holds the shutter interlock open, for normal operation. When the cover is removed, the shutter closes automatically. Figure 2-3 shows the Opal shutter interlock. Input Shutter in Defeated, Open Position Input Bezel Figure 2-3: Laser Head Shutter Interlock Danger! Laser Radiation Operating Opal or the Tsunami laser with the cover removed may expose people to high voltages and high levels of ir radiation. It also increases the rate of optical surface contamination and defeats the purpose of the purgeable, sealed cavity. For both these reasons, operating the system with these covers removed is not recommended. The alignment procedures in this manual require internal adjustments while the laser beam is present. The interlock can be defeated to allow this. When the cover is removed and access to the beam is required, raise the red shutter lever to defeat the interlock and hold the shutter open. In this position, the red lever clearly shows the defeat status and prevents cover installation until the shutter lever is lowered to the closed position. 2-3 Opal fs Synchronously Pumped Optical Parametric Oscillator Maintenance Required to Keep this Laser Product in Compliance with Center for Devices and Radiological Health (CDRH) Regulations This section presents the maintenance required to keep this laser accessory product in compliance with CDRH Regulations. This laser accessory product complies with Title 21 of the United States Code of Federal Regulations, Chapter 1, Subchapter J, Parts 1040.10 and 1040.11, as applicable. To maintain compliance, verify the operation of all features listed below, either annually or whenever the product has been subjected to adverse environmental conditions (e.g., fire, flood, mechanical shock, spilled solvents). This maintenance is to be performed by the user, as outlined below. 1. Verify removing the cover closes the shutter, preventing the pump laser beam from entering the cavity. 2. Verify that, when the cover interlock is defeated, the defeat mechanism is clearly visible and prevents installation of the cover until disengaged. 3. Verify all labels listed in Figure 2-4: Opal Radiation Control Drawing are present and firmly affixed. 2-4 Laser Safety CE/CDRH Radiation Control Drawing 3 4 VIS *SEE IBL E LA AND/O SE AVO DIREID EYE R RAR INV CT OR DIA ISI CLA OR SKIN TIO BL POW SS SCA EXP E* ER, 4 TTE OSU N WID WAV LAS RED ER RAD RE TH DEP ELENGT PRO IATI TO AND END H(S) DUCON. LAS ON ER T PUM AND PUL EN6 CON P SE 0825 FIGU OPT -1:19 RAT IONS 94 ION. MAN UAL 7 0453 -9600 9 5 Input End 6 7 1 Opal 6 8 Output End 7 10 REPLACE THE BATTERY WITH THE SAME OR EQUIVALENT TYPE RECOMMENDED BY THE MANUFACTURER. DISPOSE OF USED BATTERIES ACCORDING TO THE MANUFACTURER'S INSTRUCTIONS. 115 WAVELENGTH PZT STABILIZED MONITOR Spectra-Physics POWER MONITOR TO OPAL HEAD MODEL NUMBER HEATER SERIAL NUMBER MADE 2 IN U.S.A. 115/230V~60/50Hz 5.0/3.0A 404-471 5 11 0451-7233 Opal Controller Back Panel Figure 2-4: CE/CDRH Radiation Control Drawing 2-5 Opal fs Synchronously Pumped Optical Parametric Oscillator CE/CDRH Warning Labels Spectra-Physics 1344 TERRA BELLA AVENUE MT. VIEW, CALIFORNIA 94039 Spectra-Physics MANUFACTURED: MONTH YEAR MODEL S/N MODEL NUMBER SERIAL NUMBER THIS LASER PRODUCT COMPLIES WITH 21 CFR 1040 AS APPLICABLE. MADE MADE IN U.S.A. Certification Label, OPAL (1) DANGER IN U.S.A. 404-471 Serial Number Label Controller (2) CAUTION V I S I B L E A N D I N V I S I B L E LASER RADIATION WHEN OPEN AND INTERLOCK DEFEATED AVOID EYE OR SKIN EXPOSURE TO DIRECT OR SCATTERED RADIATION* VISIBLE AND INVISIBLE HAZARDOUS ELECTROMAGNETIC RADIATION WHEN OPEN AND INTERLOCK DEFEATED* *SEE MANUAL *SEE MANUAL Caution-Interlocked Housing Label (4) Danger-Interlocked Housing Label (3) CE Certification Label (5) VISIBLE AND INVISIBLE* LASER RADIATION IS EMITTED FROM THIS APERTURE *SEE MANUAL AVOID EXPOSURE CDRH Aperture Label (6) CE Aperture Label (7) CE Caution Label (8) REPLACE THE BATTERY WITH THE SAME OR EQUIVALENT VISIBLE AND/OR INVISIBLE* LASER RADIATION TYPE RECOMMENDED BY THE MANUFACTURER. DISPOSE OF USED BATTERIES ACCORDING TO THE MANUFACTURER'S INSTRUCTIONS. AVOID EYE OR SKIN EXPOSURE TO DIRECT OR SCATTERED RADIATION. CLASS 4 LASER PRODUCT POWER, WAVELENGTH(S) AND PULSE WIDTH DEPEND ON PUMP OPTIONS AND LASER CONFIGURATION. EN60825-1:1994 *SEE MANUAL 0453-9600 CE Warning Label (9) Figure 2-5: CE/CDRH Warning Labels 2-6 Battery Replacement Label (10) 115/230V~60/50Hz 5.0/3.0A 0451-7233 Voltage/Current Rating Label (11) Laser Safety Label Translations For safety, the following translations are provided for non-English speaking personnel. The number in parenthesis in the first column corresponds to the label number listed on the previous page. Table 2-1: Label Translations Label # French German Spanish Dutch Danger Interlocked Housing Label (3) Attention- Rayonnement Laser visible et invisible en cas D’Ouverture et lorsque la securite est neutralisse; exposition dangereuse de l’oeil ou de la peau au rayonnement dirct ou diffus. Vorsicht; Austritt von sichtbarer un unsichtbarer Laserstruhlung, wenn Abdeckung geoffnet und Sicherhetisschalter uberbruckt; Bestrahlung von Auge oder Haut durch direkte oder Streustreustrahlung vermeiden. Peligro, al abrir y retirer el dispositivo de seguridad exist radiacion laser visible e invisible; evite que los ohos o la piel queden expuestos tanto a la radiacion dircta como a la dispersa. Gevaar; zichtbare en niet zichtbare laser-straling wanneer geopend en bij uitgeschakelde interlock; Vermijd blootstelling van oog of huid aan directe straling of weerkaatsingen daarvan. Caution Interlocked Housing Label (4) Attention. Rayonnement visible et invisible dangereux en cas d’ouverture et lorsque la sécurité est neutralisée. Achtung! Sichtbare und unsichtbare schädliche elektromagnetische Strahlung wenn Abdeckung geöffnet und Sicherheitsverriegelung überbrückt. Bedienungsanleitung beachten! Precaución, radiación peligrosa electromagnética visible e invisible con el dispositivo de seguridad abierto o con su indicación alterada. Let op. Zichtbare en onzichtbare gevaarlijke electromagnetische straling indien geopend en interlock overbrugd. CDRH Aperture Label (6) Ouverture Laser - Exposition Dangereuse - Un Rayonnement laser visible et invisible est emis par cette ouverture. Austritt von sichtbarer und unsictbarer Laserstrahlung; nicht dem Strahl aussetzen. Por esta abertura se emite radiacion laser visible e invisible; evite la exposicion. Vanuit dit apertuur wordt zichtbare en niet zichtbare laser-straling geemiteerd; vermijd blootstellilng. CE Warning Label (9) Rayonnement Laser Visible et Invisible en Cas D’Ouverture et lorsque la securite est neutralisee; exposition dangereuse de l’œil ou de la peau au rayonnement direct ou diffus. Laser de Classe 4. Puissance et longueurs D’onde dependant de la configuration et de la puissance de pompe. Gefahr! Sichtbare und unsichtbare Laserstrahlung! Bestrahlung von Auge oder Haut durch direkte oder Streustrahlung vermeiden! Laserklasse IV. Leistung, Wellenlänge und Pulsbreite sind abhängig von Pumpquelle und Laserkonfiguration. Bedienungsanleitung beachten! Al abrir y retirar el dispositivo de seguridad exist radiación laser visible e invisible; evite que los ojos o la piel queden expuestos tanto a la radiación directa como a la dispersa. Producto laser clase 4. Potencia, longitud de onda y anchura de pulso dependen de las opciones de bombeo y de la configuracion del laser. Gevaar! Zichtbare en onzichtbare laserstraling! Vermijd blootstelling van oog of huid aan directe straling of terugkaatsingen daarvan! Klas IV laser produkt. Vermogen, golflengte en pulsduur afhankelijk van pomp opties en laser konfiguratie. Battery Replacement Label (10) Remplacer la pile par le même modèle ou un modèle équivalent. Se débarasser des piles usagées conformément au recommandations du fabricant. Batterie nur durch gleichen oder baugleichen Typ gemäß Herstellerangaben ersetzen. Verbrauchyte Batterien ordnungsgemäß entsorgen. Reemplazar la batería con el mismo tipo, o equivalente, recomendado por el fabricante. Peligro. Deshacerse de las baterías usadas de acuerdo con las instrucciones del fabricante. Vervang batteryen door de zelfde, of door de fabrikant geadviseerde equivalente typen. Voer de gebruikte battereien af volgens de instructies van de fabrikant. 2-7 Opal fs Synchronously Pumped Optical Parametric Oscillator CE Declaration of Conformity We, Spectra-Physics, Inc. Scientific and Industrial Systems 1330 Terra Bella Avenue P.O. Box 7013 Mountain View, CA. 94039-7013 United States of America declare under sole responsibility that the: OPAL, cw/Pulsed Optical Parametric Oscillator with Controller, Manufactured after December 31, 1996 meet the intent of “Directive 89/336/EEC for Electromagnetic Compatibility.” Compliance was demonstrated (Class A) to the following specifications as listed in the official Journal of the European Communities: EN 50081-2:1993 Emissions: EN55011 Class A Radiated EN55011 Class A Conducted EN 50082-1:1992 Immunity: IEC 801-2 Electrostatic Discharge IEC 801-3 RF Radiated IEC 801-4 Fast Transients I, the undersigned, hereby declare that the equipment specified above conforms to the above Directives and Standards. Steve Sheng Vice President and General Manager Spectra-Physics, Inc. Scientific and Industrial Lasers February 21, 1997 2-8 Laser Safety EC Declaration of Conformity We, Spectra-Physics, Inc. Industrial and Scientific Lasers 1330 Terra Bella Avenue P.O. Box 7013 Mountain View, CA. 94039-7013 United States of America declare under sole responsibility that the OPAL, cw/Pulsed Optical Parametric Oscillator with Controller, meets the intent of “Directive 73/23/EEC, the Low Voltage directive.” Compliance was demonstrated to the following specifications as listed in the official Journal of the European Communities: EN 61010-1: 1993 Safety Requirements for Electrical Equipment for Measurement, Control and Laboratory use: EN 60825-1: 1993 Safety for Laser Products. I, the undersigned, hereby declare that the equipment specified above conforms to the above Directives and Standards. Steve Sheng Vice President and General Manager Spectra-Physics, Inc. Scientific and Industrial Lasers February 21, 1997 2-9 Opal fs Synchronously Pumped Optical Parametric Oscillator Sources for Additional Information The following are some sources for additional information on laser safety standards, safety equipment, and training. Laser Safety Standards Safe Use of Lasers (Z136.1: 1993) American National Standards Institute (ANSI) 11 West 42nd Street New York, NY 10036 Tel: (212) 642-4900 Occupational Safety and Health Administration (Publication 8.1-7) U. S. Department of Labor 200 Constitution Avenue N. W., Room N3647 Washington, DC 20210 Tel: (202) 693-1999 A Guide for Control of Laser Hazards American Conference of Governmental and Industrial Hygienists (ACGIH) 1330 Kemper Meadow Drive Cincinnati, OH 45240 Tel: (513) 742-2020 Laser Institute of America 13501 Ingenuity Drive, Suite 128 Orlando, FL 32826 Tel: (800) 345-2737 Internet: www.laserinstitute.org Compliance Engineering One Tech Drive Andover, MA 01810-2452 Tel: (310) 445-4200 International Electrotechnical Commission Journal of the European Communities EN60825-1 TR3 Ed.1.0—Laser Safety Measurement and Instrumentation IEC-309—Plug, Outlet and Socket Coupler for Industrial Uses Tel: +41 22-919-0211 Fax: +41 22-919-0300 Internet: [email protected] Cenelec European Committee for Electrotechnical Standardization Central Secretariat rue de Stassart 35 B-1050 Brussels Document Center 1504 Industrial Way, Unit 9 Belmont, CA 94002-4044 Tel: (415) 591-7600 2-10 Laser Safety Equipment and Training Laser Safety Guide Laser Institute of America 12424 Research Parkway, Suite 125 Orlando, FL 32826 Tel: (407) 380-1553 Laser Focus World Buyer's Guide Laser Focus World Penwell Publishing 10 Tara Blvd., 5th Floor Nashua, NH 03062 Tel: (603) 891-0123 Lasers and Optronics Buyer's Guide Lasers and Optronics Gordon Publications 301 Gibraltar Drive P.O. Box 650 Morris Plains, NJ 07950-0650 Tel: (973) 292-5100 Photonics Spectra Buyer's Guide Photonics Spectra Laurin Publications Berkshire Common PO Box 4949 Pittsfield, MA 01202-4949 Tel: (413) 499-0514 2-11 Opal fs Synchronously Pumped Optical Parametric Oscillator 2-12 Chapter 3 Opal Description OPOs Since the early 1990s, the mode-locked Ti:sapphire laser has become the system of choice for ultrafast laser applications. The Spectra-Physics Tsunami® mode-locked Ti:sapphire oscillator provides the most flexible commercial system with (i) wavelength coverage from 690 to 1080 nm, (ii) a pulse width range from < 50 fs to > 80 ps, (iii) average power up to 2 W, (iv) outstanding long-term stability, and (v) active length stabilization for synchronization with external rf sources or other mode-locked laser sources. However, many applications require access to wavelengths that are not directly covered by the fundamental Ti:sapphire output or through harmonic generation. Wavelength extension has generally been accomplished through two approaches: (i) amplification with white light continuum generation and/or optical parametric amplification, and (ii) a synchronously pumped optical parametric oscillator (SPPO). The former provides higher energies at lower repetition rates (typically µJ – mJ at kHz repetition rates), while the latter provides nJ pulse energies at repetition rates of about 80 MHz. The SPPO offers inherent synchronization at multiple wavelengths (useful for fs pump-probe measurements) and generally lower amplitude noise than that obtained from an amplified system. The optical parametric oscillator (OPO) shown in Figure 3-1 operates on a very different principle than that of a laser. A laser derives its gain from spontaneous and stimulated emission generated by transitions between different atomic or molecular states. These transitions have inherent line widths that govern the maximum tuning range of the laser (e.g., a dye laser tunes over a range of 30 – 40 nm per dye, while a Ti:sapphire laser tunes over a 300 nm range). In contrast, an OPO derives its gain from a nonlinear frequency conversion process which can provide wavelength tunability greater than 1000 nm. In an OPO, wavelength conversion is achieved through parametric down conversion in a nonlinear optical crystal (Figure 3-2). An input pump photon (ωp) is split into lower energy signal (ωs) and idler (ωi) photons, such that energy is conserved, i.e., ωp = ωs + ωi ( ωs > ωi ) [1] or in terms of wavelength, 1 1 1 ----- = ----- + ---λp λs λi [2] 3-1 Opal fs Synchronously Pumped Optical Parametric Oscillator Output Coupler Signal Output Pump Input Non-Linear Crystal High Reflector Idler Output Figure 3-1: A Typical Optical Parametric Oscillator Configuration ωidler ω 2ω ωpump ωsignal ω Second Harmonic Generation Parametric Down Conversion Figure 3-2: Optical frequency three-wave conversion process Momentum conservation, kp = ks + ki [3] is achieved by using a birefringent nonlinear crystal and by satisfying the phase-matching conditions: ηp ωp = ηs ωs + ηi ωi [4] where ηis the refractive index. The process requires crystals with a high second-order nonlinear susceptibility, and can be viewed as the inverse of second harmonic generation or sum frequency mixing. Parametric down conversion has much lower efficiency, however, since both signal and idler waves (as opposed to only the 2ω wave in second harmonic generation) must “build up” from quantum noise. Therefore, high conversion efficiencies in OPOs are generally attained by resonating the signal wave. Since gain is only available in the nonlinear crystal when the pump pulse is present, for fs OPOs it is necessary to use a synchronous pumping scheme (i.e., match the cavity length of 3-2 Description the OPO to that of the Ti:sapphire pump laser, so that the signal and pump pulses are always present in the nonlinear crystal at the same time). The pioneering work1 on fs SPPOs systems was done at Cornell University in the laboratory of Professor C. L Tang using angle-tuned potassium titanyl phosphate (KTP) as the nonlinear gain medium. More recently, other groups2-4 have demonstrated Ti:sapphire-pumped SPPOs. The Opal Spectra Physics5 developed the Opal®, a commercial fs SPPO designed to be pumped by the Tsunami mode-locked Ti:sapphire laser. Figure 3-3 shows a typical setup. Idler Opal Tsunami Millennia Signal Optional Residual Pump Beam Output Figure 3-3: Typical System Setup The Opal uses a 90° non-critically phased-matched, temperature-tuned, lithium triborate (LBO) nonlinear crystal as its gain medium. Although LBO has a lower nonlinear coefficient than other materials, it offers several advantages: (i) non-critical phase matching means a collinear pump and signal geometry that facilitates the initial alignment procedure; (ii) there is no spatial “walk-off” of the pump and signal beams (which favors a longer interaction length and higher gain); (iii) LBO exhibits lower group velocity mismatch (i.e., smaller temporal “walk-off” of the pump and signal beams) which allows the use of longer crystals for higher gain; (iv) it has low group velocity dispersion (GVD) which means that, over a large tuning range, sub-130 fs pulses can be achieved without the use of intracavity dispersion compensation; and (v) it can be automatically wavelength tuned, since this is accomplished by changing only the crystal temperature and cavity length (Figure 3-4). With respect to the latter, for comparison, the cavity of angletuned system must be realigned when the OPO is tuned over a large wavelength region. Wavelength (µm) 2.75 2.50 2.25 2.00 1.75 Degeneracy Point Idler 1.50 1.25 Signal 1.00 Temperature Figure 3-4: Signal and idler wavelengths are tuned by changing the temperature of the LBO crystal. 3-3 Opal fs Synchronously Pumped Optical Parametric Oscillator Wavelength Tuning Characteristics The Opal can be pumped at any wavelength between 720 and 850 nm with 2 W of average power and 100 fs pulse widths at a repetition rate of about 80 MHz. Typical output powers of the Opal for 2 W of pump power (at 750, 775 and 810 nm) are shown in Figure 3-5. The signal pulse width is typically less than 130 fs over this wavelength range (1.1 to 1.6 µm). This tuning range is accomplished using only two optics sets, 1.3 and 1.5 µm, and by temperature tuning the LBO crystal. A Ti:sapphire pump wavelength of 775 nm is used for the 1.18 to 1.34 µm signal wavelength range, while 750 nm is employed for shorter wavelengths. For the 1.3 µm optics set, it is necessary to employ the intracavity prism pair to achieve a net negative intracavity GVD to produce short, near transform-limited output pulses. Signal 400 350 Power (mW) 300 Idler 250 200 150 100 50 0 1.00 1.25 1.50 1.75 2.00 2.25 2.50 Wavelength (µm) Figure 3-5: The Opal Tuning Curves Control Electronics Idler Output PZT M7 Idler2 Waveplate M7P M5 P1 P3 PR2 Pump Input PR1 Servo Wavelength Monitor P2 M6P Idler1 P4 LBO M6 M4 M3 Lens P5 Beam Splitter Signal Output M1 Figure 3-6: Opal Cavity Beam Path 3-4 Motor-controlled Output Coupler M2 Residual Pump Output Description For the 1.35 to 1.60 µm signal wavelength region, 810 nm is used for the pump wavelength. Since the LBO crystal exhibits negative GVD in the signal wavelength range, it is not necessary to use prisms for the 1.5 µm optics set. Configuration The Opal cavity configuration is shown in Figure 3-6. The vertically polarized Ti:sapphire input pump beam first passes through a half waveplate, which can be used to rotate its plane of polarization. Several flat mirrors (P1, P2 and P3) then direct it to a focusing mirror (P4) where the pump beam is focused to about a 50 µm spot size in the Brewster-cut LBO crystal. The latter is mounted on a thermo-electric heater. The cavity consists of two focusing mirrors (M3 and M4) and a series of flat mirrors (M1, M2, M5 and M6, plus M7 or M6P and M7P) to extend the cavity to a length of about 1.87 m (for a 80 MHz repetition rate). The mirrors are highly reflective for the signal wavelengths and highly transmissive for both the pump and idler wavelengths. The output coupler (M1) is mounted on a motorized micrometer stage to allow adjustment of the coarse cavity length. One intracavity mirror (M5) is mounted on a piezo-electric transducer (PZT) for fine cavity length control. Both mirror positions are controlled by a microprocessor in the Opal electronics module. The idler and the residual pump light that passes through M3 is collimated by mirror Idler1 and directed through the idler output port via Idler2. Pump light that is reflected off the Brewster surface of the LBO crystal is directed through an optional residual pump output port by a flat high reflector and collimating lens. This option may not be available on your Opal (contact your Spectra-Physics sales representative if you require this option). GVD compensation is accomplished using two Brewster prisms, Pr1 and Pr2. When Pr1 is inserted into the intracavity beam path, the beam is steered to M6P and Pr2 and, finally, M7P. A servo system actively stabilizes the cavity length of the Opal and, thus, keeps the output wavelength fixed. (The output wavelength of an SPPO can drift as a result of cavity length changes in either the pump laser or the SPPO itself.) The servo system monitors the spectrum of the signal output pulse using a grating and a bi-cell photodetector. The difference between the input signals of the left and right halves of the bi-cell detector is the error signal used by the servo system to control the position of the fine cavity length control mirror. The mirror is correctly positioned when this difference is driven to zero. The output wavelength, as reported by the Opal electronics, is determined by the angle of the grating, which is mounted on a stepper motor and controlled through the microprocessor. 3-5 Opal fs Synchronously Pumped Optical Parametric Oscillator The Opal Electronics Module The Opal electronics module is designed for easy operation. The temperature of the LBO crystal and the entire servo system, including the cavity length adjustments, are microprocessor controlled. This allows for automated wavelength tuning and automated setup via a simple menu-driven program. In addition to the logic control functions, the module contains the crystal heater driver and sensing circuit, as well as drivers for the M5 PZTdriven mirror and the motor-controlled output coupler, M1. System parameters and settings are displayed via a back-lit LCD screen on the front panel. Selection and control of these operating parameters are made via a layered menu system. “Soft” push buttons located below the screen provide the user an interface through which the system can be easily controlled. The buttons are used to select and change system parameters (fields) that are displayed in the menu. “Up/down” push buttons located to the right of the screen increase or decrease the value of the selected field. The system parameters and functions displayed depend on which menu is selected at the time. Screens include menus for: • System set-up, save, and recall • Automated scan modes • Manual operation • Diagnostics Typical items displayed are settings for: • Optics set • Pump wavelength • Signal output wavelength • Idler output wavelength • Relative output power • M1 motor relative position • PZT relative position • Scan parameters • Crystal temperature • Grating position • Servo status • System offsets • RS-232 and IEEE-488 parameters Purging the Cavity The Opal is sealed so that it can be purged with nitrogen gas. Purging the cavity not only eliminates the typical problems associated with dust and airborne contamination, but also prevents tuning discontinuities caused by oxygen and water vapor. Purging of the latter is imperative for operation between 1.33 and 1.48 µm, and when operating below 1.18 µm (see Figure 3-7). The Model 3910 regulator/filter purge unit provided with the Tsunami laser can also be used to dry and filter bottled nitrogen gas for use in the Opal. 3-6 Description 1.0 Transmittance .9 .8 .7 1.100 1.200 1.300 1.400 1.500 1.600 Wavelength (µm) Figure 3-7: Wavelengths most affected by vapor absorption 3-7 Opal fs Synchronously Pumped Optical Parametric Oscillator Opal Specifications Table 3-1: Opal Specifications Output Characteristics Average Power2 Pulse Width 2,3 4,5 Tuning Range Repetition Rate (Nominal) Noise Opal Performance (Signal Output)1 1.3 µm with 775 nm pump 1.5 µm with 810 nm pump >150 mW >150 mW <130 fs <130 fs 1.10–1.35 µm 1.35–1.60 µm 6 Stability7 Spatial Mode Beam Diameter at 1/e2 points Beam Divergence, full angle Polarization 3-8 82 MHz <1% <5% TEM00 <2.0 mm <1.0 mrad Horizontal (>100:1) 1 Specifications subject to change without notice and only apply when pumped at 775 or 810 nm, 2 W, < 80 fs, by a Spectra-Physics Tsunami/Millennia® system. 2 Specifications apply to operation at wavelength noted with an appropriate pump wave length. 3 A sech2 pulse shape (0.65 deconvolution factor) is used to determine the pulse width. 4 Idler output wavelengths are also accessible at 1.4 – 2.25 µm and 1.63 – 2.00 µm, respectively. Power levels are typically 50% of the signal. 5 For operation below 1.18 µm, 750 nm pump or lower is required. 6 Rms, measured in a 10 Hz to 1 MHz bandwidth. 7 Percent power drift in any 1-hour period after an 1-hour warm-up and less than 3°C temperature change. Description Outline Drawings 12.24 (31.09) 5.29 (13.44) 3.60 (9.14) 1.50 (3.81) 36.00 (91.44) 8.50 (21.60) 7.62 (19.35) 4.43 (11.25) 1.13 (2.86) 2.15 4.00 (10.16) 8.00 (20.32) (5.46) 0.9 to 1.5 (2.3 to 3.8) 24.00 (60.96) 4.50 (11.43) 3.75 (9.53) OPAL (side view) OPAL (Input End) OPAL (Output End) 17.00 14.30 (43.18) (36.32) 5.25 (13.34) 0.81 Spectra-Physics (2.06) OPAL Electronics Module (Front View) OPAL Electronics Module (Side View) All dimensions in inches (cm) Figure 3-8: Outline Drawings References 1 2 3 4 5 D.C. Edelstein, E.S. Wachman, and C.L. Tang, Appl. Phys. Lett., 54:1728 (1989); E.S. Wachman, D.C. Edelstein, and C.L. Tang, Opt. Lett., 15:136 (1990); W.S. Pelouch, P.E. Powers, and C.L. Tang, Opt. Lett., 17:1070 (1992); P.E. Powers, S. Ramakrishna, C.L. Tang, and L.K. Cheng, Opt. Lett., 18:1171, (1993); P.E. Powers, C.L. Tang, and L.K. Cheng, Opt. Lett., 19:37 (1994); and P.E. Powers, C.L. Tang, and L.K. Cheng, Opt. Lett., 19:1439 (1994) Q. Fu, G. Mak, and H.M. van Driel, Opt. Lett., 17:1006 (1992). A. Nebel, C. Fallnich, R. Beigang, and R. Wallenstein, J. Opt. Soc. Am. B., 10:2195 (1993). T.J. Driscoll, G.M. Gale, and F. Hache, Opt. Commun., 110:638 (1994). J.D. Kafka, M.L. Watts, and J.W. Pieterse, CLEO, Vol. 11, OSA Tech. Digest Series (1993), CPD32, p. 69. 3-9 Opal fs Synchronously Pumped Optical Parametric Oscillator 3-10 Chapter 4 Control, Indicators and Connections This section defines the user controls, indicators and connections of the Opal® system, and it is divided into two main sections: the Opal Head and the Opal Electronics Module. Refer to Figure 4-1, Figure 4-3 and Figure 4-4. Opal Head Figure 4-1 shows the location of the controls and connections on the Opal head. Their functions are described on the following pages. M7 (1.5 µm End Mirror) Pr1 (1.3 µm Operation) Pr2 (1.3 µm Operation) M1 Output Coupler M7P (1.3 µm End Mirror) P1 (Pump MIrror) Pump Input Residual Pump Output (Opt.) Signal Output Idler Output Servo Connector Green Knob - Horizontal Adjust Blue Knob - Vertical Adjust Heater Controller Connector N2 Purge Input Connector N2 Purge Bleed Valve Figure 4-1: Opal Head Controls and Connections 4-1 Opal fs Synchronously Pumped Optical Parametric Oscillator Input Bezel Connections The input bezel connections attach to the Opal electronics module and to a nitrogen purge supply source, usually to a Model 3910 filter/drier unit. Purge bleeder valve—when open, allows more purge gas to flow through the Opal head when the system is first turned on. Once the unit is well purged, it is closed during operation to reduce nitrogen consumption. Purge inlet connector—allows clean, dry nitrogen gas to be input into the Opal from the Model 3910 (which is provided with the Tsunami laser). Heater controller connector—attaches to the HEATER connector on the Opal electronics rear panel. This circuit provides power and temperature sensing for the crystal heater. Servo connector (25-pin D-sub)—attaches to the TO OPAL HEAD connector on the Opal electronics rear panel via a ribbon cable. It provides signals and feedback for the PZT M5 mirror, the motor-driven M1 output coupler, and the wavelength servo system. Opto-Mechanical Controls Most of the mirror controls have vertical and horizontal adjustments. They are color-coded for identification: green for horizontal, blue for vertical. Pump beam waveplate—rotates the polarization state of the Ti:sapphire laser light and assists in the initial alignment of the Opal. The waveplate is rotated by turning its edge. It is manually slid in and out of the input pump beam using the small vertical lever. Pump beam mirror P1 —directs the input pump beam onto the center of pump beam mirror P2. Its vertical and horizontal adjustments are accessible from outside the Opal. Pump beam mirror P2 —directs the pump beam through iris I1 and onto the center of pump beam mirror P3. It has vertical and horizontal adjustments. Idler2 Idler Output M7P Pr2 M5 Waveplate Pr1 PZT P1 M7 I3 M6P Servo Wavelength Monitor Assy. I1 P3 M1 Output Coupler * M4 Figure 4-2: Opal Cavity Layout 4-2 RPB Lens M3 RPM Signal Output Beam Splitter Motor-controlled Mirror P2 P4 M6 Idler6 Aperture Input I 2 * Crystal Assembly M2 Residual Pump Port Output Controls, Indicators and Connections Iris I1 —facilitates in aligning the Opal pump beam. It has a lever to set the iris size. Do not move the mount from its factory-set position or you will be unable to properly align the system. Pump beam mirror P3 —directs the pump beam onto focus mirror P4. It has vertical and horizontal adjustments. Pump beam mirror P4 —directs and focuses the pump beam through cavity focus mirror M4 and into the LBO crystal. It has vertical and horizontal adjustments and a translational control for adjusting the beam focus in the crystal. A setscrew locks the translation dovetail stage in place. Cavity mirror M4 —focuses the cavity beam into the crystal then directs it onto cavity focus mirror M3. It also directs the cavity beam through iris I3 and onto the center of cavity mirror M5. It has vertical and horizontal controls for steering the cavity beam, and a translation control for focusing the cavity beam in the crystal. A setscrew locks the translation dovetail stage in place. LBO crystal—generates two new phase-matched frequencies (Signal and Idler) from a coherent pump source. These new frequencies are dependent on the temperature of the crystal (refer to Chapter 3). The crystal assembly contains a heater and temperature sensor assembly. It has a translation screw for moving the crystal horizontal to the beam to optimize conversion efficiency, and a setscrew to lock it in the selected location. Cavity mirror M3 —focuses the cavity beam into the crystal then directs it back onto cavity focus mirror M4. It also directs the cavity beam onto the center of cavity mirror M2. It has vertical and horizontal controls for steering the cavity beam and a translation control for focusing the cavity beam in the crystal. A setscrew locks the translation dovetail stage in place. Cavity mirror M2 —directs the cavity beam from M3 through iris I2, through the center of output coupler M1 and out the Signal output window. It has vertical and horizontal adjustments. Iris I2 —is one of two irises in the cavity to facilitate in aligning the Opal. It has a lever to set the iris size. Do not move the mount from its factory-set position or you will be unable to properly align the system. Output coupler (OC) M1 —is one of two cavity end mirrors. Whereas the high reflector reflects all light back into the cavity, the output coupler allows a small percentage to pass through as the output beam. M1 is a motor-driven mount that provides servo-driven coarse adjustment of the cavity length. Vertical and horizontal controls allow adjustment for optimized output power and mode quality. These controls are accessible when the cover is in place. Beam splitter—picks off a small amount of the beam and directs it to the servo wavelength monitor. The beam splitter has an horizontal adjustment only. Do not try to adjust it vertically. Warning! Do not try to adjust the vertical control of the beam splitter. Doing so will require a factory wavelength calibration. 4-3 Opal fs Synchronously Pumped Optical Parametric Oscillator Servo wavelength monitor—contains a stepper-driven grating and a bicell sensor. Using microprocessor control, this assembly monitors and sets the output wavelength by actively stabilizing the cavity length. The error signal for cavity length stabilization is provided by ratioing the signals from each half of the bi-cell. The output wavelength is measured by determining the angle through which the grating rotates in order to maximize the integrated bi-cell signal for the 0th order and 1st order diffracted beams. Iris I3 —is one of two irises in the cavity that facilitate in aligning the Opal. It has a lever to set the iris size. Do not move the mount from its factory-set position or you will be unable to properly align the system. Cavity fold mirror M5 —directs the cavity beam from M4 to the center of cavity fold mirror M6 for the 1.5 µm configuration, or through the apex of prism Pr1 for the 1.3 µm configuration. M5 is also the PZT-driven mirror. The PZT is driven by the electronics module and actively stabilizes the cavity length to maintain the synchronously pumped condition with the Tsunami and, thus, keep the output wavelength fixed. M5 has vertical and horizontal adjustments. Cavity fold mirror M6 —directs the cavity beam from M5 to the center of the high reflector, M7. It is always used in the 1.5 µm configuration, but only for initial alignment with the 1.3 µm optics. M6 has vertical and horizontal adjustments. High reflector (HR) M7 —is the high reflector cavity end mirror for the 1.5 µm configuration. It is used only for initial alignment with the 1.3 µm optics set. Its vertical and horizontal adjustments allow optimization of output power and mode quality. These controls are accessible when the cover is in place via a cutout in the cover. Cavity fold mirror M6P —directs the cavity beam from Pr1 to Pr2. It is employed only in the 1.3 µm configuration. M6P has vertical and horizontal adjustments. High reflector (HR) M7P —is the high reflector cavity end mirror for the 1.3 µm configuration. Its vertical and horizontal adjustments allow you to optimize output power and mode quality. These controls are accessible when the cover is in place. Prisms Pr1 and Pr2 —control overall group velocity dispersion (GVD) of the cavity to provide the shortest stable output pulse when the 1.3 µm optics set is installed. Micrometer controls on each mount move the prisms in and out of the intracavity beam. For 1.5 µm operation, the prisms are not used and Pr1 is moved completely out of the beam path. When used, Pr1 directs the cavity beam from M5 to M6P and Pr2 directs the cavity beam from M6P to high reflector M7P. Pr2 is used to optimize pulse width by varying the amount of glass inserted into the cavity. Idler focus mirror Idler1 —collimates the Idler and residual Ti:sapphire beams passing through focus mirror M3 and directs it toward Idler mirror Idler2. It has vertical and horizontal adjustments. Idler mirror Idler2 —directs the Idler and residual Ti:sapphire beams out the Idler output window. It has vertical and horizontal adjustments. 4-4 Controls, Indicators and Connections Residual pump mirror (RPM) —directs the residual Ti:sapphire pump beam reflected from the input surface of the LBO crystal through the focusing lens and out the Residual Pump Port Output window. It has vertical and horizontal adjustments. When absent, a beam block contains the residual beam. Residual pump beam focusing lens (RPB lens)—recollimates the residual pump beam as it passes out the Residual Pump Port Output window. To focus the beam, the lens is moved by loosening the Allen screw and manually moving the mount. Opal Electronics Module Front Panel Figure 4-3 shows the location of the various controls and indicators on the Opal electronics module front panel. Spectra-Physics LCD Display Soft Keys Up/Down Push Buttons Figure 4-3: Front Panel, Opal Electronics Module LCD screen—displays the menu-driven program. It shows the status of a variety of parameters, depending on the menu displayed, including: Signal or Idler wavelength, stepper count (grating position), motor position (in percent of total range), loop status (on/off), crystal temperature (in percent of total range), servo status, scan status, interface modes, selectable commands and field variables. Help menus are also displayed to provide assistance. Soft keys (5)—refers to the five push buttons below the display that are defined by the currently displayed menu. Press the buttons to select other submenus, to select data fields in the menu displayed or issue commands directly, such as “Run Scan Length” or “Save Setup.” Up/down push buttons—increase or decrease the value displayed in the selected field (e.g., crystal temperature, motor position, grating position, etc.). 4-5 Opal fs Synchronously Pumped Optical Parametric Oscillator Rear Panel Figure 4-4 shows the location of the various cables and switches on the Opal electronics rear panel. On/off power switch—turns on and off power to the electronics module. Power cord connector—provides connection for the power cord. On/Off Switch Power Cord Future Accessories Voltage Selector 115 WAVELENGTH PZT STABILIZED MONITOR POWER MONITOR TO OPAL HEAD HEATER Fan Wavelength Stabilized TTL Signal PZT Monitor Power Opal Head Signal Monitor Cable Heater Cable Figure 4-4: Rear Panel, Opal Electronics Module Voltage Selector Switch—provides selection between 115 and 220 Vac. Warning! Verify this switch is set to the proper position before turning on your system the first time. If not properly set, damage may occur to the electronics module and crystal heater. Such damage is not covered by your warranty. Use the following fuse values when you set the Opal electronics for your line voltage. Line Voltage Fuse Value 100 to 120 Vac 220 to 240 Vac 1 A slow blow 1/2 A slow blow connector (BNC)—provides a TTL-level signal to indicate that the wavelength selected has stabilized. A high-level signal indicates stable output; a low-level signal indicates an unstable signal. PZT MONITOR connector (BNC)—provides a buffered signal from the PZT driver circuit that can be used to determine intra-loop activity. WAVELENGTH STABILIZED 4-6 Controls, Indicators and Connections POWER MONITOR connector (BNC)—provides a buffered signal from the output power monitoring circuit that can be used to monitor the Opal output power level. TO OPAL HEAD connector (D-Sub)—provides connection for drive and feedback signal cable that attaches to the output bezel of the Opal head. HEATER connector—provides connection for the heater drive and feedback cable that attaches to the output bezel of the Opal head. The heater provides temperature control of the nonlinear crystal and, therefore, wavelength selection. 4-7 Opal fs Synchronously Pumped Optical Parametric Oscillator 4-8 Chapter 5 Installation and Alignment This chapter contains installation and alignment procedures for the Opal.® A Spectra-Physics service representative will perform the initial system alignment and cleaning at the time of installation. Thereafter, there should be little need to do a full alignment. The “Cavity Alignment” section is provided in the event either a gross misalignment has occurred or you need to convert from 1.3 to 1.5 µm operation, or vice versa. Allow only qualified personnel to align your system. All Opal system controls and connections are defined in Chapter 4, “Controls, Indicators and Connections.” Opal Installation Refer to your Millennia® User’s Manual and your Tsunami® User's Manual for information on setting up and operating those systems. Note The following installation procedures are provided for reference only; they are not intended as guides for the initial installation and set-up of your system. Please call your Spectra-Physics service representative to arrange an installation appointment, which is part of your purchase agreement. Allow only personnel qualified and authorized by SpectraPhysics to install and set up your system. You will be charged for repair of any damage incurred if you attempt to install the system yourself, and such action may void your warranty. Note The general alignment instructions below do not contain procedures for aligning the servo wavelength monitor system. This system is selfaligned when you initiate a scan from the Setup menu. If calibration of this system is required, refer to Appendix C, “Servo Wavelength Calibration Procedure.” We strongly recommend you do not alter the factory preset settings. Doing so might require a service call and such a call is not covered under your warranty. 5-1 Opal fs Synchronously Pumped Optical Parametric Oscillator Setting up the System Most of the tools, signal cables, and equipment you need to set up the Opal are in your accessory kit. 1. Place the Opal head 12 cm in front of the Tsunami laser head as shown in Figure 5-1, such that the input port is directly in line with the Tsunami output port. 2. Place the Opal electronics module in a convenient location. If it makes sense to stack the electronics modules, place the Model 3955 on top of the Opal electronics module (and on top of the Model 3930 if using a Lok-to-Clock Tsunami). The Opal electronics module should be within 2 m of the Opal head. 3. Connect the heater cable (5-pin connectors) between the heater controller connector on the Opal output bezel to the HEATER connector on the rear panel of the electronics module. 4. Connect the signal ribbon cable between the 25-pin D-sub connector on the Opal output bezel and the TO OPAL HEAD connector on the electronics module rear panel. 5. Attach the power cord to the electronics rear panel and verify the system is set for your line voltage. Also verify the correct fuse is installed. Refer to Appendix A, “Setting the Line Voltage Switch,” for information on selecting and setting both these items. Use the following fuse values when you set the Opal electronics for your line voltage. 6. Line Voltage Fuse Value 100 to 120 Vac 220 to 240 Vac 1 A slow blow ½ A slow blow Connect the power cord to your power source. Millennia DiodePumped Laser Tsunami Mode-Locked Ti:sapphire Laser Opal Optical Parametric Oscillator Figure 5-1: Opal system layout with a Tsunami Mode-Locked Ti:sapphire Laser and a Millennia Diode-Pumped Pump Laser. 5-2 Installation and Alignment Removing/Installing the LBO Crystal Skip this section if the crystal is already installed, but please read the warning statement below about safeguarding your expensive crystal from moisture damage. Warning! Due to the hygroscopic nature of the LBO crystal, you must keep the crystal contained in a dry environment at all times and minimize the exposure time to the environment, even during installation. Install the crystal and turn on the Opal electronics immediately to bring the crystal temperature above ambient, then leave the electronics on with the crystal temperature set at idle, even when the system is not used. This will keep the crystal at an elevated temperature and will prevent recrystallization which damages the crystal. If you must turn off the electronics, you must first remove the crystal from the unit and store it in the dry environment of a desiccated chamber. Crystal damage due to improper handling is not covered by your warranty. A service engineer from Spectra-Physics will install the crystal assembly into your system the first time and he will adjust its position for optimal output. Thereafter, you will need to note its position in the beam by making a small pencil mark on the cooling tower and dovetail slide so that, once removed, it can be reinstalled to this same position. This ensures that your system will meet specification time and time again without having to do a total realignment each time. The following sub-sections explain how to remove the crystal and reinstall it and how to optimize its position in the beam in the event the original location marker is erased. Before Removing the Crystal 1. 2. 3. 4. 5. 6. Remove the beam shield from behind the crystal, then mark the location of the reflected pump beam from the crystal surface. Verify the crystal is centered in the pump beam. a. Slide the waveplate into the Tsunami beam, then rotate it until you see the position of the Tsunami beam on the input and output face of the crystal. b. Readjust the crystal position so that the crystal is centered in the pump beam. Close the Opal shutter. Measure the distance from the front edge of the M4 mirror to the near edge of the crystal and write it down for use later when reinstalling the crystal. Square the long edge of the business card along the front face of the M4 mount and mark the location of the near edge (Brewster corner) of the LBO crystal. Measure the distance between M3 to M4 and M4 to P4 and write it down. 5-3 Opal fs Synchronously Pumped Optical Parametric Oscillator 7. Note the location of the crystal tower with regard to the dovetail base. Removing the Crystal Assembly 1. 2. 3. 4. 5. 6. 7. Adjust the Tsunami for about 200 mW of output power. Reduce iris I1 to a minimum. Verify the Opal shutter is closed. Loosen the locking setscrew with a 5/64 Allen driver. Back the crystal assembly away from the dovetail base until it comes free. Rotate the adjustment screw counterclockwise with a 3/32 Allen driver. Turn off the Opal electronics and disconnect the crystal cable. Place the crystal in a desiccated chamber such as the one in which it was shipped. Reinstalling the Crystal Assembly 1. Warning! In the following steps, exercise extreme caution when translating the crystal with the Tsunami beam present. Avoid contacting the focused beam with the thermoepoxy on the bottom of the crystal as well as with the temperature sensor on the side of the crystal. Contact with either of these will ablate material onto the crystal and will damage it. Such damage is not covered by your warranty. 2. 3. 4. 5. 6. 7. 8. 5-4 Install the new crystal assembly by pulling the assembly onto the dovetail base until it is at the same location as that noted in Step 7 of “Before Removing the Crystal” above. Connect the crystal cable and turn on the Opal electronics. Open the Opal shutter and use an ir viewer to verify the Tsunami beam is fully contained in the crystal. Still using the ir viewer, rotate the crystal until the reflected beam is at the same marked location noted in Step 1 of “Before Removing the Crystal.” Adjust M4 until the distance from near edge of the crystal to M4 is the same as that measured in Step 4 of “Before Removing the Crystal.” Readjust the spacing for M4 to M3 and M4 to P4 to match that measured in Step 6 of “Before Removing the Crystal.” Slide the waveplate into the beam and rotate it until you see the Tsunami beam on the input and output face of the crystal. If necessary, adjust the crystal position so that the crystal is centered in the beam. Install the beam shield behind the crystal. Installation and Alignment Adjusting the Crystal Temperature and Offset This process sets the crystal temperature to the factory setting. By first adjusting the table offset to obtain the correct temperature at the tested wavelength, a minimum amount of point offset can be retained. 1. Verify the current wavelength is the same as the test wavelength noted on the crystal test summary. If it is not the same, operate the Opal at the specified wavelength of the other set. 2. Go to the Setup menu and verify the installed optic set and the pump wavelength are correct. 3. Press the button under “Scan Length” and note the “Desired X’tal Temp,’ then abort immediately. 4. Set the temperature of the crystal to that noted in the previous step: 5. If the crystal is tested at 1.50 µm and you are operating at 1.30 µm, subtract 10% from the temperature value at 1.50 µm. If the crystal is tested at 1.30 µm and you are operating at 1.50 µm, add 10%. a. Go to the “Adjust Temp” menu and select the “Temp Table Shift,” then use the “Next Field” button to select the “Shift” field. b. Adjust the offset to change the temperature to the correct “Temperature (%)” required. The percentage difference can be calculated from the temperature noted in Step 3. 6. Follow the standard Opal alignment procedure. Aligning the Opal Head 1. Danger! Laser Radiation Turn on the Millennia pump laser. At the same time, turn on the Tsunami and the Opal electronics modules and allow them to warm up and stabilize for at least 15 minutes. The Millennia and Tsunami pump lasers are Class IV High Power Lasers. Always wear proper eye protection and follow the safety precautions in Chapter 2, “Laser Safety.” 2. 3. 4. Verify the output of the Millennia pump laser meets specifications for power and mode quality. Verify the standard optics set (720 – 850 nm) is installed in the Tsunami laser. (Refer to your Tsunami User's Manual for instructions on identifying and changing optics.) Optimize Tsunami output and verify laser output power is >2 W at 810, 775, and 750 nm. Also verify pulse width and wavelength range are within specifications. It has been demonstrated that the most stable performance of the Opal is obtained when it is pumped with over 2 W of 100 fs (about 9 nm of bandwidth) pulses from the mode-locked Tsunami laser. In order to do this, two modifications to the Tsunami are necessary: 5-5 Opal fs Synchronously Pumped Optical Parametric Oscillator a. Install the single-plate birefringent filter as the tuning element. This replaces the slit assembly. The filter is included in the Opal accessory kit. Refer to the sections on removing the slit assembly and installing the birefringent filter in your Tsunami User's Manual. b. Change the output coupler to the one supplied with the Opal accessory kit (refer to Table 8-3 in the “Replacement Parts” list at the end of Chapter 8). Refer to the “Changing Optics” procedure in your Tsunami User's Manual for directions on installing M10. 5. Reduce the Millennia laser output power to minimum. 6. Close the pump laser shutter. 7. Remove the Opal head cover. a. Pull outward on the bottom of the four cover latches until they snap. b. Press downward on the cover to release the pressure on the latches, then pull the top portion of the latch from the notch in the cover. c. Using the slotted finger grips at each end of the cover, remove the cover and set it aside. 8. Adjust the Opal head height. a. Loosen the locking nuts on the feet. They are tightened against the bottom of the base plate. b. Use a 5/32 Allen (hex) wrench to adjust the feet from the inside of the head. Adjust the feet so the baseplate is parallel to the table top and the center of the Signal and Idler output windows are about 14.5 cm above the table. 9. Open the pump laser shutter and increase its pump power so that the Tsunami output is just above threshold (minimum Tsunami power). 10. Align the Opal head to the Tsunami input pump beam. a. Close iris I1. b. Raise the Opal interlock shutter lever to the override position. Pull the red-capped lever to the vertical position. Danger! Laser Radiation Overriding the safety interlock shutter may expose the user to hazardous laser radiation. Be aware that invisible radiation is emitted from the output of the Tsunami laser as well as from various optical components in the Opal when the Opal cover is removed and its shutter is open. Always wear proper eye protection and follow the safety precautions in Chapter 2, “Laser Safety.” c. Position the Opal head so the pump beam passes unobstructed through the input window and strikes the center of pump mirror P1 (refer to Figure 5-2). d. If readjustment of the Opal feet are required, do it now. Verify the base plate is parallel to the table, then tighten the locking nut on each foot. 5-6 Installation and Alignment Idler2 Idler Output M7P Pr2 M5 Waveplate Pr1 PZT P1 M7 I3 M6P Servo Wavelength Monitor Assy. I1 P3 M1 Output Coupler * M4 RPB Lens Residual Pump Port Output M3 RPM Signal Output I 2 Beam Splitter Motor-controlled Mirror P2 P4 M6 Idler6 Aperture Input M2 * Crystal Assembly Figure 5-2: Opal Cavity Layout e. Keep P1 centered on the beam and move the Opal output end horizontally so that the head is roughly parallel to the beam. f. Close the pump laser shutter. g. Secure the Opal head to the table with the three foot-clamps provided. The clamps slide over the lower portion of each foot. This completes the installation of the Opal head. Attaching the Opal Purge Line If you are going to operate the Opal in a region where there is significant absorption due to water vapor (refer to Figure 5-3), you will need to purge the Opal. The Tsunami laser comes with a Model 3910 for this purpose. (Refer to your Tsunami User's Manual for installation instructions.) Because the wavelength regions that are affected by water vapor (or oxygen) absorption are different for the Tsunami and Opal, only one system requires purging at a time. For example, when operating the Tsunami in a region free of water or oxygen absorption (refer to your Tsunami User's Manual) and the Opal within a water absorption region, purging the Opal with nitrogen is more efficient when the purge line is disconnected from the Tsunami and connected directly to the Opal output bezel. To do this, simply remove the purge line from the bezel connector of one system and plug it into the other. However, the two systems can easily share output from the Model 3910 by simply splicing the T-connector (provided) into the output line and adding the second line and connector (also provided). Warning! Use the PTFE tubing provided with the Opal to purge it with dry nitrogen. PTFE does not introduce outgassed impurities into the cavity that may degrade system performance and/or damage optical coatings. 5-7 Opal fs Synchronously Pumped Optical Parametric Oscillator 1.0 Transmittance .9 .8 .7 1.100 1.200 1.300 1.400 1.500 1.600 Wavelength (µm) Figure 5-3: Transmittance vs. wavelengths for water vapor in the Opal Signal wavelength range To purge the Tsunami laser and the Opal at the same time, perform the following to insert the T-connector into the Model 3910 output purge line. 1. Use the 3.6 m PTFE purge line and tee provided in the accessory kit for this purpose. The tubing has a quick-disconnect connector on one end for attachment to the Opal. The other end is cut flush for pressing onto the T-connector. 2. Attach the purge line to the Opal output bezel by pressing the hose connector onto its mating connector until it snaps in place. 3. Cut the PTFE line between the Tsunami laser and the Model 3910 at a convenient location and insert the T-connector. To attach the tubing to the barbed T-connector, heat the tubing with a flameless heat source (heat gun), then quickly slide the tubing onto the barbed fitting while the tubing is still warm. Do not move the connection until it has cooled. 4. Attach the tubing from the Opal to the unused tee fitting. 5. Once the lines are installed, check for leaks. Refer to your Tsunami User's Manual for information on setting the purge for the Model 3910. 5-8 Installation and Alignment Warning! Always use dry, oil-free, Electronic Grade 5 (or better) nitrogen (99.999% pure) to prevent contamination of the system. Do not purge with nitrogen from a boil-off tank or other non-approved gas source. Do not connect to any source with a pressure greater than 67 kPa (10 psi) or damage to the Model 3910 filters will result. This completes the installation of the Opal purge line. Removing the Opal Purge Line To release the purge line from the Opal, press inward on the metal locking flange on the quick-disconnect while gently pulling on the hose. The quickdisconnect automatically shuts off the gas flow when disconnected. Opal Alignment—1.3 µm Optic Set The 1.3 µm optic set is used when the desired Signal output wavelength is between 1.1 and 1.35 µm. The alignment procedure is similar to that for the 1.5 µm set except that, after performing what is essentially a 1.5 µm alignment procedure with 1.3 µm optics installed, the cavity is realigned with prisms Pr1 and Pr2 installed and with M6P and M7P as the operating cavity mirrors. Prisms Pr1 and Pr2 are required since in the 1.1 to 1.35 µm wavelength region it is necessary to introduce some negative group velocity dispersion into the cavity to obtain near transform-limited output pulses. 775 nm is the optimum Tsunami pump wavelength for operation from 1.18 to 1.35 µm, 750 nm is the optimum pump wavelength for 1.10 to 1.18 µm. Warning! Unless expressly stated otherwise, perform the following procedures with Tsunami output power set to minimum. Initial Set-up 1. 2. Close the Opal shutter. Calculate the physical cavity length of the Tsunami laser. a. Set the Tsunami wavelength to 775 nm. b. Optimize the Tsunami output beam quality with 2 W of output power. Ensure the laser is mode-locked with a stable pulse train (refer to Tsunami manual). c. Adjust the pulse width to about 100 fs (i.e., such that the output pulse width has about 9 nm of bandwidth). d. Use a frequency counter to obtain the Tsunami repetition rate. This can be done conveniently by connecting the MONITOR output of the Model 3955 to a frequency counter. The effective cavity length is calculated using the following equation: L (meters) = 150/Rep Rate (MHz) where L is the effective cavity length. 5-9 Opal fs Synchronously Pumped Optical Parametric Oscillator Example: If the Tsunami repetition rate is 80.150 MHz, its effective cavity length L is 150 divided by 80.150, or 1.871 meters. Warning! The spacing between M3 and M4 is factory set and should never require realignment. Therefore, unless you are sure this spacing has been changed, DO NOT perform Steps 3 and 4. 3. 4. Space M3 and M4 111 mm apart as shown in Figure 5-4. Set the initial position of P4 81 mm from M4 as shown in Figure 5-5. M3 111 mm M4 Figure 5-4: M3 and M4 Spacing 81 mm M4 P4 Figure 5-5: P4 and M4 Spacing 5. 5-10 Set the cavity length of the Opal to match the cavity length of the Tsunami laser. a. From the Setup menu, initiate a Scan Length command. This ensures the software recognizes the polarity of the motor. b. Set M1 to the center of its range. Use the Manual Control menu and the up/down push buttons on the electronics module to set Motor to a 50% value. Refer to Chapter 4 for the menu flow chart and menu descriptions. c. Using a metric scale, measure the spacing between the front face of each tilt plate (not the mirror itself) for mirrors M1 –M2, M2 –M3, M3 – M4, M4 –M5, M5 –M6, and M6 –M7. d. Add the total distances. e. Add 98 mm to the total distance. The 98 mm compensates for the fact that the mirrors are recessed from the front face of each mount. It also includes the double-pass distance of the fold mirrors. Installation and Alignment f. Subtract the total measured distance of the Opal cavity length from that of the Tsunami laser (i.e., find the difference between the two). g. Loosen the two large Allen (hex) screws that secure the M1 mount to the base plate of the Opal, and slide the mount to the point where the Opal cavity length matches that of the Tsunami. If required, move the entire M1 mount to another set of mounting holes in the base plate. The holes are 2.54 cm apart. Aligning the Pump Beam Warning! To prevent damage to the crystal during this procedure, reduce Tsunami power to minimum while aligning the pump beam. Do not allow the focused beam from P4 to make contact with the temperature sensor (on the side of the crystal) or its bonding agent, or the heater/cooling unit (below the crystal). Even a low power focused beam may cause damage and/or deposit a film onto the crystal face. Also, the differential temperature resulting from focusing the beam near the crystal edges can cause the crystal to fracture. Crystal damage due to the above is not covered by your warranty. Use an ir viewer to align the pump beam. 1. Set the Tsunami pump power to minimum. 2. Open the Opal shutter and verify the Tsunami pump beam is centered on P1. If the beam is not centered on P1, refer to “Aligning the Opal Head” earlier in this chapter for instructions. 3. Adjust P1 horizontally and vertically to direct the pump beam onto the center of P2 4. Adjust P2 horizontally and vertically to direct the pump beam through the center of iris I1 and onto the center of P3. Close the iris a little to verify the beam is centered. Note the even ring around the opening when it is centered. If necessary, repeat these last steps, starting at Step 3, until this condition is achieved. 5. Adjust P3 horizontally and vertically to direct the pump beam onto the center of P4. 6. Adjust P4 to direct the pump beam through M4 and through the crystal so that it strikes the center of M3. If necessary, repeat Steps 5 and 6 until the pump beam goes through the crystal and is centered on the intracavity surfaces of M3 and M4. It may take several iterations of adjusting P4 and P3 and repositioning the pump beam to accomplish this. 7. Observe the beam entering the crystal. If you observe a bright spot on the surface of the crystal (a high scattering site due to a surface flaw or burn), translate the crystal slightly to an area that produces the least 5-11 Opal fs Synchronously Pumped Optical Parametric Oscillator amount of reflectance. The beam should be close to the center of the crystal. Do not move the beam near the edge of the crystal! a. Loosen the setscrew that locks the translation stage in place just enough so that the stage can be translated. If loosened too much, the stage becomes loose on the dove tail and alignment will become difficult. b. Adjust the translation screw to move the crystal to a new position. Take small steps, and be extremely careful when translating the crystal so that the focused beam does not fall on the crystal temperature sensor, the heater/cooler, or their bonding agents. c. Tighten the setscrew. 8. Tune the Tsunami laser to 830 nm, increase its output power to 2 W, and verify it is mode locked. 9. Open iris I1 all the way. 10. Slide the wave plate into the pump beam. 11. Rotate the wave plate until the reflected beam from the front surface of the crystal has minimum intensity. This corresponds to a p-polarization state of the Tsunami pump beam, i.e., the polarization of the Tsunami output has been rotated 90°. Aligning the Opal Cavity 1. 2. Place a white card midway between M3 and M2. You will see a reflected low-intensity pump beam with some frequency-doubled blue light on the card. Using the birefringent filter in the Tsunami, adjust the output wave length of the Tsunami laser slightly to maximize the amount of frequency-doubled light observed on the card. The frequency-doubled blue light is collinear with the Opal intracavity beam and can be used to align the Opal cavity. The beam appears as a figure “8” as shown in Figure 5-6. Figure "8." The waist defines the center of the beam. Figure 5-6: Figure “8” frequency-doubled blue beam. 3. 4. 5. 5-12 Remove the card, then adjust M3 vertically and horizontally to direct the blue beam to the center of the front face of M2. To increase the intensity of the second harmonic beam, remove the output coupler at M1 and replace it with the additional high reflector (provided in your optics kit). Less loss will aid in the initial alignment. Remember to close the shutter while changing optics. Adjust M2 to center the blue beam through iris I2 and onto the center of the front face of M1. Installation and Alignment 6. 7. 8. 9. 10. 11. 12. 13. 14. 15. 16. 17. 18. 19. Close I2 a little to verify the beam is centered. Iterate between adjustments of M3 and M2 to center the beam through I2 and onto M1. Adjust M1 vertically and horizontally to reflect the blue beam back through the center of iris I2, then fully open I2. Adjust M4 to direct the blue beam through iris I3 and onto the center of M5. Close I3 a little to verify the beam is centered. Once centered, open it fully. Verify the blue beam path is clear of prism Pr1. If it is not, use the micrometer to adjust prism Pr1 until it is out of the blue beam path. Adjust M5 to center the blue beam onto the center of M6. Adjust M6 to center the blue beam onto the center of high reflector M7. Adjust M7 to send the reflected beam back through the center of iris I3. a. Place a white card with a small hole (about 2 mm) in it midway between M6 and M7, and position it so that the blue light from M6 passes through the hole. Holding the card in place, adjust M7 so that the reflected light from M7 passes back through the hole in the card. b. Remove the card. c. Slightly close iris I3 and observe the rear side of I3. Using small increments, adjust M7 to center the reflected blue beam on the rear side of the iris. Open the iris fully when completed. Place the white card in front of M1 so that the initial blue beam from M2 passes through the small hole. Then adjust M7 to overlap the reflected blue beam from M7 on the hole in the card. Remove the white card. Slide the wave plate out of the pump beam. Set the Tsunami laser to 775 nm with 2 W of average power, and verify it is still mode locked. From the Setup menu, if 1.1–1.4 is not displayed for the 1.3 µm optics set, select the optics set field, then use the up/down buttons to select 1.1–1.4. From the Setup menu, if the pump input shown is not 775, select the pump beam field, then use the up/down buttons to select 775. From the Manual Control menu, select the Temp field and set the crystal temperature to 55%. Please heed the caution warning in the “Manual Control Menu” description (Chapter 4) when using this menu. Scan M1 to obtain a flash. a. From the Manual Control menu, select Motor on the same menu and press the down button to the right of the display to move M1 toward one end of its range. Watch for a flash. During translation, a flash of visible red or orange light should appear within the cavity. 5-13 Opal fs Synchronously Pumped Optical Parametric Oscillator b. If a flash is observed, move M1 back to the position that produced it and skip to Step 20. c. If no flash is observed by the time M1 has reached the end of its travel, translate it in the other direction until a flash is observed. At that time, move M1 back to the position that produced it and skip to Step 20. d. If the Opal fails to flash in either direction, re-measure the cavity length as outlined under “Initial Set-up” above, then repeat the entire alignment (Steps 1through 19). If still no flash is observed, refer to the troubleshooting guide in Chapter 8 or call your Spectra-Physics service representative. 20. Adjust M1 and M7 horizontally and vertically to optimize light intensity. A well-aligned cavity produces a small amount of green light mixed with the reddish-orange light most visible at M5. Alignment of Pr1 and Pr2 Prism Sequence Warning! When performing the procedure below, do not change the location of M7P, i.e., do not loosen its mounting screws. The position of this mirror assembly is permanently set at the factory and changing it might require a service call to relocate it. Such a call is not covered under your warranty. 1. 2. 3. 4. 5. 6. 5-14 Adjust the micrometer of Pr2 to position the translation stage in the center of its range. Pr2 will be used later to optimize pulse width. Adjust the micrometer of Pr1 until the prism begins to intersect the intracavity beam but does not stop the lasing action (i.e., it is partially in the beam). A portion of the intracavity beam will be directed onto M6P. Place the ir detector card provided in the accessory kit in front of M7P to observe the 1.3 µm beam, and adjust M6P vertically and horizon tally to direct the beam through Pr2 and onto the center of M7P. You will see a line of light on the detector card, and within that line you will see a spot that appears more intense. Position this spot in the center of M7P. Place the ir detector card 5 cm from Pr2 so the beam from Pr2 passes through a 2 mm hole in the card. To align M7P to the rest of the cavity, direct the reflected beam from M7P back through the hole in the card using the vertical and horizontal controls on M7P. Using the micrometer on Pr1, insert the prism into the beam until the beam is fully bisected. a. First, the main cavity (prism-free cavity) oscillation will stop, then, as you insert more glass in the beam path, oscillation will start in Installation and Alignment the secondary cavity. Continue to insert Pr1 until a visible flash is observed, then optimize Pr1 for sustained lasing action. b. If the Opal fails to flash in Step a, repeat Steps 4 and 5. Note: vertical alignment is easily verified by noting the position of the horizontal line on the card. c. Horizontal positioning is more difficult. It might be necessary to try several small turns (1/8 of a revolution) of the horizontal control to obtain horizontal alignment. After each adjustment, translate Pr1 through its range and look for the flash. If, after several attempts the Opal fails to flash, return Pr1 to the point where the main cavity oscillates, then repeat this procedure, starting at Step 2. Completing the Cavity Alignment 1. 2. Warning! Adjust M7P to optimize intracavity visible light generation. Close the shutter and replace the high reflector in M1 with the appropriate output coupler for the 1.3 µm wavelength. The 3-point registry in the optics holder ensures good resetability of the optic. Screw the optic holder in finger tight, but do not over-tighten. Open the shutter and readjust M1 vertically and horizontally slightly to re-establish lasing. Do not screw the optic holder too tight. Over tightening will, at minimum, distort the optic, and, at worst, chip it and possibly render it useless. Tighten only until slight resistance is felt. If the Opal oscillates again, skip to Step 8. If it fails to oscillate: 3. Translate M1 back and forth slightly using the Manual Control menu as you did before, and look for a flash on an ir detector card placed out side the Signal window. Total translation should be no more than 1 mm. If the Opal begins oscillating, skip to Step 8. If it fails to oscillate: 4. Place the ir detector card midway between M1 and M2 so it detects a small amount of the pump beam reflected from M2 and so the small hole in it allows part of it to pass through. 5. Adjust M1 horizontally and vertically to reflect this pump beam back through the hole in the card. 6. Remove the card and scan M1 as you did before and look for a flash. a. If you do not observe a flash, replace the output coupler with the high reflector, then reoptimize the cavity for maximum intracavity visible light generation. To do this, adjust M1, and M7P, and make small translational adjustments of M1 with the motor control. b. When intracavity visible light is maximized, repeat Steps 2 through 6. If a flash is still not observed, refer to the troubleshooting guide in Chapter 8 or call your Spectra-Physics service representative. 5-15 Opal fs Synchronously Pumped Optical Parametric Oscillator 7. Once you observe the flash, translate M1 slightly so you get sustained oscillation. 8. Place a power meter in front of the Signal output window. 9. Translate M1 slightly, back and forth, until you find the point for maximum output power. 10. Ensure the Tsunami laser is operating at 775 nm and repeat Steps 7 and 9 to maximize output power. 11. Maximize output power again by iterating horizontal and vertical adjustments of M1 and M7P. 12. Using an autocorrelator (such as the Model 409-08) to monitor the pulse, use the micrometer adjust on Pr2 to optimize pulse width and reoptimize output power as needed using Steps 9 and 11. Aligning the Beam to the Servo Wavelength Monitor Assembly 1. 2. 3. Caution! Do not use the Allen hex head adjustment of the beam splitter–this will destroy the factory wavelength calibration! 4. 5-16 Verify the Opal Signal beam is centered on output coupler M1. If required, small adjustments can be made to M3, M2, and M1 to center the beam on I2 and M1. With the Signal beam centered on the output coupler, the output beam should pass through the beam splitter and out the Signal output window. Optimize the Opal Signal output power. a. Iterate between adjusting the vertical and horizontal controls on M1 and high reflector M7P until maximum Signal output power is obtained. b. In addition, adjust the Opal cavity length via the motor position control in the Manual Control menu to maximize the Opal Signal output power. Use an ir detector to verify the Opal Signal beam is centered horizontally on the aperture hole of the Servo Wavelength Monitor Assembly (Figure 5-2). If necessary, reposition the servo housing, which is secured to the base plate by two ¼–20 button head screws. Using an ir detector, verify the Signal beam reflected from the front surface of the beam splitter is centered on the grating in the servo assembly. The beam spot should be positioned on the grating as shown in Figure 5-7. In order to see the spot on the grating, it may be necessary to manually rotate the grating using the Manual Control menu (refer to Chapter 4). If the beam spot is not centered as shown: a. Use the black adjustment knob on the beam splitter to center it horizontally. Installation and Alignment b. Center the beam vertically by making very small adjustments to M3, M2, and M1. Do not lose oscillation–use the Manual Control menu to adjust the position of M1 for maximum output power after each incremental adjustment. Beam Post Grating Figure 5-7: Positioning the Signal beam horizontally on the grating. 5. Verify any visible light contained in the output beam is blocked by the filter attached to the Signal output Brewster window (Figure 5-8). The filter is shipped in the accessory kit and must be installed before the Opal can be used the first time. Remove the two 2–56 x ¼ in. cap screws securing the Signal Brewster window to the Opal head, and install the filter assembly along with the window assembly to the output bezel using the longer 2–56 x ½ in. cap screws supplied. Slide the filter element under the clamping spring. Mounting Screws (2) Spring Filter Figure 5-8: Visible Light Filter, Side View (Attaches to Signal Window). Completing the Alignment 1. 2. Use the Manual Control menu to adjust the cavity length and crystal temperature for maximum output power. Perform one adjustment at a time. Adjust the focus of P4 to optimize the overlap of the pump beam with the cavity beam and, thus, maximize output power. a. Unlock the setscrew. b. Turn the translation screw on P4 slightly in one direction and note the change in output power. c. If it increased, continue to turn until power starts to drop. d. If it decreased, turn the screw in the opposite direction. e. When power is optimum, lock the P4 setscrew, then verify power remained optimum. 5-17 Opal fs Synchronously Pumped Optical Parametric Oscillator 3. 4. 5. 6. Replace the Opal cover. Make sure you do not bump any control knobs. From the Setup menu, verify the operating parameters are correct, i.e., the Tsunami pump wavelength and the Opal optics set is correctly selected, then run the Scan Length command. This will calibrate the wavelength and set the default crystal temperature to either the previously stored settings or to the factory programmed temperature offset. From the Main menu, adjust the output wavelength to 1.300 µm using the up/down keys. Use a monochromator to measure the output Signal wavelength. If the wavelength readout differs from your actual measured wavelength by more than ±3 nm perform the following. Otherwise, skip to Step 7. (For reference, Table 5-1 shows relative values for various system components for an Opal output of 1.300 µm.) Table 5-1: Typical Settings for Opal Output at 1.300 µm Opal Wavelength (µm) Pump Wavelength (nm) Nom. Grating Setting (steps) Nom. Crystal Temperature 1.300 775 2652 55% a. From the Diagnostic menu, press Cal. Wavelen to get to the Wavelength Calibration sub-menu. b. Select the Set actual wavelength field, then use the up/down push buttons to set it to the actual measured value. Caution! DO NOT change the Zeroth Order at value! c. Run Scan Length from the Setup menu again. d. Measure the actual wavelength again. If the wavelength shown is still off by more than ±3 nm, align the servo wavelength monitor at this time following the instructions in Appendix C. When complete, repeat this entire step, then continue. 7. Select Adj Temp from the Main menu, then select Temp Table Shift and adjust the temperature offset up and down to optimize Signal output power and stability. Optimum stability is achieved when Temp Table Offset is 0.5 to 1.0% below maximum power operation. This completes the alignment procedure for the 1.3 µm configuration. Go to Chapter 6, “Operation,” for instructions on day-to-day operation. 5-18 Installation and Alignment Opal Alignment—1.5 µm Optic Set The 1.5 µm optic set is used when the desired Signal wavelength output is between 1.35 and 1.6 µm. The alignment procedure for the 1.5 µm optics set uses a similar procedure to the 1.3 µm optic set, but it is not necessary to employ prisms Pr1 and Pr2 in the cavity. This is because the LBO crystal exhibits negative GVD in this wavelength region, and additional dispersion compensation is not required to obtain a near transform-limited output pulse. 810 nm is the optimum Tsunami pump wavelength for the 1.5 µm optics set. Warning! Unless expressly stated otherwise, perform the following procedures with Tsunami output power set to minimum. Initial Set-up 1. 2. Close the Opal shutter. Calculate the physical cavity length of the Tsunami laser. a. Set the Tsunami wavelength to 810 nm. b. Optimize the Tsunami output beam quality with 2 W of output power. Ensure the laser is mode-locked with a stable pulse train (refer to Tsunami manual). c. Adjust the pulse width to about 100 fs (i.e., such that the output pulse width has about 9 nm of bandwidth). d. Use a frequency counter to obtain the Tsunami repetition rate. This can be done conveniently by connecting the MONITOR output of the Model 3955 to a frequency counter. The effective cavity length is calculated using the following equation: L (meters) = 150/Rep Rate (MHz) [1] where L is the effective cavity length. Example: If the Tsunami repetition rate is 80.150 MHz, its effective cavity length L is 150 divided by 80.150, or 1.871 meters. Warning! The spacing between M3 and M4 is factory set and should never require realignment. Therefore, unless you are sure this spacing has been changed, DO NOT perform Steps 3 and 4. 3. 4. 5. Space M3 and M4 111 mm apart as shown in Figure 5-4. Set the initial position of P4 81 mm from M4 as shown in Figure 5-5. Set the cavity length of the Opal to match the cavity length of the Tsunami laser. 5-19 Opal fs Synchronously Pumped Optical Parametric Oscillator a. From the Setup menu, initiate a Scan Length command. This ensures the software recognizes the polarity of the motor. b. Set M1 to the center of its range. Use the Manual Control menu and the up/down push buttons on the electronics module to set Motor to a 50% value. Refer to Chapter 6 for the menu flow chart and menu descriptions. c. Using a metric scale, measure the spacing between the front face of each tilt plate (not the mirror itself) for mirrors M1 – M2, M2 – M3, M3 – M4, M4 – M5, M5 – M6, and M6 – M7. d. Add the total distances. e. Add 98 mm to the total distance. The 98 mm compensates for the fact that the mirrors are recessed from the front face of each mount. It also includes the double-pass distance of the fold mirrors. f. Subtract the total measured distance of the Opal cavity length from that of the Tsunami laser (i.e., find the difference between the two). g. Loosen the two large Allen (hex) screws that secure the M1 mount to the base plate of the Opal, and slide the mount to the point where the Opal cavity length matches that of the Tsunami. If required, move the entire M1 mount to another set of mounting holes in the base plate. The holes are 2.54 cm apart. Aligning the Pump Beam Warning! To prevent damage to the crystal during this procedure, reduce Tsunami power to minimum while aligning the pump beam. Do not allow the focused beam from P4 to make contact with the temperature sensor (on the side of the crystal) or its bonding agent, or the heater/cooling unit (below the crystal). Even a low power focused beam may cause damage and/or deposit a film onto the crystal face. Also, the differential temperature resulting from focusing the beam near the crystal edges can cause the crystal to fracture. Crystal damage due to the above is not covered by your warranty. Use an ir viewer to align the pump beam. 1. Set the Tsunami pump power to minimum. 2. Open the Opal shutter and verify the Tsunami pump beam is centered on P1. If the beam is not centered on P1, refer to “Aligning the Opal Head” earlier in this chapter for instructions. 3. Adjust P1 horizontally and vertically to direct the pump beam onto the center of P2 4. Adjust P2 horizontally and vertically to direct the pump beam through the center of iris I1 and onto the center of P3. 5-20 Installation and Alignment Close the iris a little to verify the beam is centered. Note the even ring around the opening when it is centered. If necessary, repeat these last steps, starting at Step 3, until this condition is achieved. 5. Adjust P3 horizontally and vertically to direct the pump beam onto the center of P4. 6. Adjust P4 to direct the pump beam through M4 and through the crystal so that it strikes the center of M3. If necessary, repeat Steps 5and 6 until the pump beam goes through M4, the crystal, and is centered on M3. It may take several iterations of adjusting P4 and P3 and repositioning the pump beam to accomplish this. 7. Observe the beam entering the crystal. If you observe a bright spot on the surface of the crystal (a high scattering site due to a surface flaw or burn), translate the crystal slightly to an area that produces the least amount of reflectance. Do not move the beam near the edge of the crystal! a. Loosen the setscrew that locks the translation stage in place just enough so that the stage can be translated. If loosened too much, the stage becomes loose on the dove tail and alignment will become difficult. b. Adjust the translation screw to move the crystal to a new position. Take small steps, and be extremely careful when translating the crystal so that the focused beam does not fall on the crystal temperature sensor, the heater/cooler, or their bonding agents. c. Tighten the setscrew. 8. Open iris I1 all the way. 9. Slide the wave plate into the pump beam. 10. Rotate the wave plate until the reflected beam from the front surface of the crystal has minimum intensity. This corresponds to a p-polarization state of the Tsunami pump beam, i.e., the polarization of the Tsunami output has been rotated 90°. Aligning the Opal Cavity 1. 2. 3. Place a white card midway between M3 and M2. You will see a reflected low-intensity pump beam with some frequency-doubled blue light on the card. Using the birefringent filter in the Tsunami, adjust the output wave length of the Tsunami laser slightly to maximize the amount of frequency-doubled light observed on the card. The frequency-doubled blue light is collinear with the Opal intracavity beam and can be used to align the Opal cavity. The beam appears as a figure “8” as shown in Figure 5-6. Remove the card, then adjust M3 vertically and horizontally to direct the blue beam to the center of the front face of M2. 5-21 Opal fs Synchronously Pumped Optical Parametric Oscillator 4. 5. 6. 7. 8. 9. 10. 11. 12. 13. 14. 15. 16. 17. 18. 5-22 To increase the intensity of the second harmonic beam, remove the output coupler at M1 and replace it with the additional high reflector (provided in your optics kit). Less loss will aid in the initial alignment. Remember to close the shutter while changing optics. Adjust M2 to center the blue beam through iris I2 and onto the center of the front face of M1. Close I2 a little to verify the beam is centered. Iterate between adjustments of M3 and M2 to center the beam through I2 and onto M1. Adjust M1 vertically and horizontally to reflect the blue beam back through the center of iris I2, then fully open I2. Adjust M4 to direct the blue beam through iris I3 and onto the center of M5. Close I3 a little to verify the beam is centered. Once centered, open it fully. Verify the blue beam path is clear of prism Pr1. If it is not, use the micrometer to adjust prism Pr1 until it is out of the blue beam path. Adjust M5 to center the blue beam onto the center of M6. Adjust M6 to center the blue beam onto the center of high reflector M7. Adjust M7 to send the reflected beam back through the center of iris I3. a. Place a white card with a small hole (about 2 mm) in it midway between M6 and M7, and position it so that the blue light from M6 passes through the hole. Holding the card in place, adjust M7 so that the reflected light from M7 passes back through the hole in the card. b. Remove the card. c. Slightly close iris I3 and observe the rear side of I3. Using small increments, adjust M7 to center the reflected blue beam on the rear side of the iris. Open the iris fully when completed. Place the white card in front of M1 so that the initial blue beam from M2 passes through the small hole. Then adjust M7 to overlap the reflected blue beam from M7 on the hole in the card. Remove the white card. Slide the wave plate out of the pump beam. Verify the Tsunami laser is set to 810 nm with 2 W of average power, and verify it is still mode locked. From the Setup menu, if 1.3 – 1.6 is not displayed for the 1.5 µm optics set, select the optics set field, then use the up/down buttons to select 1.3 – 1.6. From the Setup menu, if the pump input shown is not 810, select the pump beam field, then use the up/down buttons to select 810. From the Manual Control menu, select the Temp field and set the crystal temperature to 60%. Please heed the caution warning in the “Manual Control Menu” description (Chapter 4) regarding the use of the Manual Control menu. Installation and Alignment 19. Scan M1 to obtain a flash. a. From the Manual Control menu, select Motor on the same menu and press the down button to the right of the display to move M1 toward one end of its range. Watch for a flash. During translation, a flash of green or orange light should appear within the cavity. b. If a flash is observed, move M1 back to the position that produced it and skip to Step 20. c. If no flash is observed by the time M1 has reached the end of its travel, translate it in the other direction until a flash is observed. At that time, move M1 back to the position that produced it and skip to Step 20. d. If the Opal fails to flash in either direction, re-measure the cavity length as outlined under “Initial Set-up” above, then repeat the entire alignment (Steps 1 through 19). If still no flash is observed, refer to the troubleshooting guide in Chapter 8 or call your Spectra-Physics service representative. 20. Adjust M1 and M7 horizontally and vertically to optimize light intensity. A well-aligned cavity produces a small amount of green light that is most visible at M5. Completing the Cavity Alignment 1. Warning! Close the shutter and replace the high reflector in M1 with the appropriate output coupler for the 1.5 µm wavelength. The 3-point registry in the optics holder ensures good resetability of the optic. Screw the optic holder in finger tight, but do not over-tighten. Open the shutter and readjust M1 vertically and horizontally slightly to re-establish lasing. Do not screw the optics holder too tight. Over tightening will, at minimum, distort the optic, and, at worst, chip it and possibly render it useless. Tighten only until slight resistance is felt. If the Opal oscillates again, skip to Step 7. If it fails to oscillate: 2. Translate M1 back and forth slightly using the Manual Control menu as you did before, and look for a flash on an ir detector card placed outside the Signal window. Total translation should be no more than 1 mm. If the Opal begins oscillating, skip to Step 7. If it fails to oscillate: 3. Place the ir detector card midway between M1 and M2 so it detects a small amount of the pump beam reflected from M2 and so the small hole in it allows part of it to pass through. 4. Adjust M1 horizontally and vertically to reflect this pump beam back through the hole in the card. 5. Remove the card and scan M1 as you did before and look for a flash. 5-23 Opal fs Synchronously Pumped Optical Parametric Oscillator a. If you do not observe a flash, replace the output coupler with the high reflector, then reoptimize the cavity for maximum intracavity visible light generation. To do this, adjust M1, and M7, and make small translational adjustments of M1 with the motor control. b. When intracavity visible light is maximized, repeat Steps 1 through 5. If a flash is still not observed, refer to the troubleshooting guide in Chapter 8 or call your Spectra-Physics service representative. 6. Once you observe the flash, translate M1 slightly so you get sustained lasing action. 7. Place a power meter in front of the Signal output window. 8. Translate M1 slightly, back and forth, until you find the point for maximum output power. 9. Ensure the Tsunami laser is operating at 810 nm and repeat Steps 6 and 8 to maximize output power. 10. Maximize output power again by iterating horizontal and vertical adjustments of M1 and M7. 11. Use an autocorrelator (such as the Model 409-08) to monitor the output pulse width. Aligning the Beam to the Servo Wavelength Monitor 1. 2. 3. Caution! 5-24 Verify the Opal Signal beam is centered on output coupler M1. If required, small adjustments can be made to M3, M2, and M1 to center the beam on I2 and M1. With the Signal beam centered on the output coupler, the output beam should pass through the beam splitter and out the Signal output window. Optimize the Opal Signal output power. a. Iterate between adjusting the vertical and horizontal controls on M1 and high reflector M7 until maximum Signal output power is obtained. b. In addition, adjust the Opal cavity length via the motor position control in the Manual Control menu to maximize the Opal Signal output power. Use an ir detector to verify the Opal Signal beam is centered horizontally on the aperture hole of the Servo Wavelength Monitor Assembly. If necessary, reposition the servo housing, which is secured to the base plate by two 1/4–20 button head screws. Do not use the Allen hex head adjustment of the beam splitter—this will destroy the factory wavelength calibration! Installation and Alignment 4. 5. Using an ir detector, verify the Signal beam reflected from the front surface of the beam splitter is centered on the grating in the servo housing. The beam spot should be positioned on the grating as shown in Figure 5-7. In order to see the spot on the grating, it may be necessary to manually rotate the grating using the Manual Control menu (refer to Chapter 4). If the beam spot is not centered as shown: a. Use the black adjustment knob on the beam splitter to center it horizontally. b. Center the beam vertically by making very small adjustments to M3, M2, and M1. Do not lose oscillation—use the Manual Control menu to adjust the position of M1 for maximum output power after each incremental adjustment. Verify any visible light contained in the output beam is blocked by the filter attached to the Signal output Brewster window (Figure 5-8). The filter is shipped in the accessory kit and must be installed before the Opal can be used the first time. Remove the two 2–56 x ¼ in. cap screws securing the Signal Brewster window to the Opal head, and install the filter assembly along with the window assembly to the output bezel using the longer 2–56 x ½ in. cap screws supplied. Slide the filter element under the clamping spring. Completing the Alignment 1. 2. 3. 4. Use the Manual Control menu to adjust the cavity length and crystal temperature for maximum output power. Perform one adjustment at a time. Adjust the focus of P4 to optimize the overlap of the pump beam with the cavity beam and, thus, maximize output power. a. Loosen the setscrew. b. Turn the translation screw on P4 slightly in one direction and note the change in output power. c. If it increased, continue to turn until power starts to drop. d. If it decreased, turn the screw in the opposite direction. e. When power is optimum, lock the P4 setscrew, then verify power remained optimum. Replace the Opal cover. Make sure you do not bump any control knobs. From the Setup menu, verify the operating parameters are correct, i.e., the Tsunami pump wavelength and the Opal optics set is correctly selected, then run the Scan Length command. This will calibrate the wavelength and set the default crystal temperature to either the previously stored settings or to the factory programmed temperature offset. 5-25 Opal fs Synchronously Pumped Optical Parametric Oscillator 5. 6. From the Main menu, adjust the output wavelength to 1.500 µm using the up/down keys. Use a monochromator to measure the output Signal wavelength. If the wavelength readout differs from your actual measured wavelength by more than ±3 nm perform the following. Otherwise, skip to Step 7. (For reference, Table 5-2 shows relative values for various system components for an Opal output of 1.500 µm.) Table 5-2: Typical Settings for Opal Output at 1.500 µm Opal Wavelength (µm) Pump Wavelength (nm) Nom. Grating Setting (steps) Nom. Crystal Temperature 1.500 810 1596 64% a. From the Diagnostic menu, press Cal. Wavelen to get to the Wavelength Calibration sub-menu. b. Select the Set actual wavelength field, then use the up/down push buttons to set it to the actual measured value. Caution! DO NOT change the Zeroth Order at value! c. Run Scan Length from the Setup menu again. d. Measure the actual wavelength again. If the wavelength shown is still off by more than ±3 nm, align the servo wavelength monitor at this time following the instructions in Appendix C. When complete, repeat this entire step, then continue. 7. Select Adj Temp from the Main menu, then select Temp Table Shift and adjust the temperature offset up and down to optimize Signal output power and stability. Optimum stability is achieved when Temp Table Offset is 0.5 to 1.0% below maximum power operation. This completes the alignment procedure for the 1.5 µm configuration. Go to Chapter 6, “Operation,” for instructions on day-to-day operation. 5-26 Installation and Alignment Converting from 1.3 to 1.5 µm The following procedure allows you to change optics sets from 1.3 µm to 1.5 µm operation. 1. Close the Opal shutter. 2. Back Pr1 out of the beam path to allow an unobstructed beam path from M5 to M6. 3. Remove mirrors M1 through M7 and place them in their protective storage containers. (Do not remove M6P and M7P.) 4. Install the 1.5 µm optics listed in Table 5-3 into Opal. However, instead of putting the output coupler into M1, install the high reflector provided in the optics kit. This aids in alignment later. Table 5-3: Optical List for 1.5 µm Operation Optical Position Part Number Output Coupler M1 G0324-023 High Reflectors M1, M2, M6, M7 G0380-002 High Reflectors M3, M4 G0079-021 High Reflector M5 with PZT Assy. 0449-1850 5. Set the Tsunami pump laser to 810 nm at 2 W, and verify that it is mode locked. 6. Open the Opal shutter. 7. From the Setup menu, verify the Tsunami pump wavelength is set to 810 nm and the optics set is set to 1.3 – 1.6 µm, then run the Scan Length command. This will calibrate the wavelength and set the default crystal temperature to either the previously stored settings or to the factory programmed temperature offset. 8. Place the Opal wave plate into the Tsunami pump beam and rotate the wave plate to rotate the pump beam polarization 90°. 90° rotation is achieved when the reflection of the Tsunami beam from the front surface of the crystal exhibits an intensity minimum. 9. Align the Opal cavity according to the procedure outlined in “Opal Alignment—1.5 µm Optic Set: Aligning the Opal Cavity” earlier in this chapter. However, do not perform the final step to adjust the focus of P4. This completes the conversion to the 1.5 µm optics set. 5-27 Opal fs Synchronously Pumped Optical Parametric Oscillator Converting from 1.5 to 1.3 µm The following procedure allows you to change optics sets from 1.5 µm to 1.3 µm operation. 1. Close the Opal shutter. 2. Remove mirrors M1 through M7 and place them in their protective storage containers. 3. Install the 1.3 µm optics listed in Table 5-4 into Opal. However, instead of putting the output coupler into M1, install the additional high reflector provided in the optics kit. This aids in alignment later. Table 5-4: Optics List for 1.3 µm Operation Optical Position Part Number Output Coupler M1 G0324-022 High Reflectors M1, M2, M6, M7, M7P G0380-001 High Reflector M6P If not available in your kit use: High Reflectors M3, M4 G0380-003 G0380-001 High Reflector M5 with PZT Assy. 0449-1840 4. G0079-020 Set the Tsunami pump laser to 830 nm at 2 W, and verify that it is mode locked. 5. Open the Opal shutter. 6. Place the Opal wave plate into the Tsunami pump beam and rotate the wave plate to rotate the pump beam polarization 90°. 90° rotation is achieved when the reflection of the Tsunami beam from the front surface of the crystal exhibits an intensity minimum. 7. Align the Opal cavity according to the procedure outlined in “Opal Alignment—1.3 µm Optic Set: Aligning the Opal Cavity” earlier in this chapter. However, do not perform the final step to adjust the focus of P4. This completes the conversion to the 1.3 µm optics set. 5-28 Chapter 6 Warning! Operation The PCMCIA memory card in the Opal controller uses a 3 V disk battery to maintain the data stored in it. The expected lifetime of the battery is approximately 2–3 years, so it is prudent to change the battery every 2 years regardless of use. If the battery dies, the data is lost and a full system recalibration is required. Appendix D explains how to change the battery. General Operation Please read “The Menus” section starting on page 6-8 and familiarize yourself with the functions and controls of each menu. The menu descriptions are presented in a logical sequence according to the flow chart in Figure 62. Familiarize yourself with the system menu structure and its controls and parameters before attempting to run the Opal® for the first time. Only then, if you wish to operate the Opal remotely via the optional serial RS-232 or parallel IEEE-488 interface, familiarize yourself with the corresponding commands and queries listed in Appendix E, as well as the syntax structure that is used to send and receive these commands and queries. To avoid duplication, this section refers only to the front panel controls. Operating the system remotely is very similar. On a day-to-day basis, the Main menu is most frequently used. All Opal operating parameters used by the microprocessor-based controller are accessed through this menu. The other commonly used menu is the Adjust Temperature menu. It allows the operator to optimize Opal performance by changing the temperature of the lithium triborate (LBO) crystal, which adjusts the phase-matching conditions. Although the Opal has a manual mode of operation that provides independent control of the operating parameters, this mode should only be employed during the initial set up. Since the Opal is synchronously pumped by the Tsunami® laser, it is necessary to precisely match the cavity length of the Opal to that of the Tsunami. This is achieved using a computerized servo system that includes a motorized mirror mount at the output coupler M1 for coarse (long) cavity-length control and a piezo-electric transducer (PZT) driven mirror at M5 for rapid, but small, changes in cavity length. The servo system also ensures excellent long-term stability. Once the initial alignment of the Opal has been performed, day-to-day operation of the Opal is achieved by simply initiating a Tsunami/Opal cavity length match by issuing a Scan Length command to the servo system. The desired output wavelength can then be entered through the Main menu. 6-1 Opal fs Synchronously Pumped Optical Parametric Oscillator When the wavelength is selected, the computer calculates the appropriate temperature for the crystal based on the known Tsunami pump wavelength, and the Opal cavity length is automatically adjusted through the grating/bicell servo system. The servo system provides a measurement of the signal wavelength and is calibrated automatically by the Opal electronics module each time Scan Length is performed from the Setup menu during start-up. The Opal oscillator is designed for easy operation from the Opal electronics module. Day-to-day operation requires the Opal electronics module to be left on continuously and, when the system is not being used, placed in the idle mode to minimize drift and warm-up time and, more importantly, to keep the hygroscopic crystal hot and dry (refer to warning below). Warning! Due to the hygroscopic nature of the LBO crystal, you must keep the crystal contained in a dry environment at all times and minimize the exposure time to the environment, even during installation. Install the crystal and turn on the Opal electronics immediately to bring the crystal temperature above ambient, then leave the electronics on with the crystal temperature set at idle, even when the system is not used. This will keep the crystal at an elevated temperature and will prevent recrystallization. When the electronics must be turned off, you must remove the crystal from the unit and store it in the dry environment of a desiccated chamber. Crystal damage due to improper handling is not covered by your warranty. Turning On the System Under normal day-to-day operation the operator need only perform the following to use the system. 1. Turn on the Millennia® pump laser and allow it to warm up according to its user's manual. At the same time, turn on the Tsunami and Opal electronics modules (if not already on) and allow them to warm up and stabilize (at least 15 minutes). 2. If operating the Tsunami or the Opal in a region affected by oxygen or water absorption, purge the cavity of one or both systems. Refer to the Tsunami User's Manual for information on oxygen and water absorption regions that affect the performance of the Tsunami laser, and refer to Figure 6-1 in “Purging the Opal” on page 6-5 to find the regions that affect the Opal. Refer to Chapter 5, “Installation and Alignment: Attaching the Opal Purge Line” for information on installing a purge for the Opal. 3. Check the Tsunami laser for power and mode, and set it to a wavelength appropriate for driving the Opal at the chosen wavelength. Refer to the Tsunami user's manual and to Table 6-1 to set the Tsunami wavelength. 4. Adjust the Millennia output power to about 10 W. This should provide >2 W of power from the Tsunami. 6-2 Operation Table 6-1: Typical Settings for Several Opal Wavelengths Opal Wavelength (µm) Pump Wavelength (nm) Nom. Grating Setting (steps) Nom. Crystal Temperature 1.100 1.150 1.200 1.250 1.300 1.350 1.400 1.450 1.500 1.550 1.600 750 750 775 775 775 775 810 810 810 810 810 3673 3420 3166 2910 2652 2390 2128 1832 1596 1327 1055 66% 66% 85% 67% 53% 42% 76% 69% 64% 61% 59% 5. 6. 7. 8. Caution! Optimize Tsunami output power for 2 W and mode lock the laser. Set the Opal for normal operation. If the Opal is in idle mode, i.e., “Spectra-Physics” and its logo are displayed and the Main Menu soft key is available in the lower right-hand corner, return the Opal to normal operation by pressing the Main Menu soft key. Select the Setup menu and run Scan Length to establish oscillation and perform a quick calibration of the Opal. As a general rule, perform the initial scan at one of the high-power wavelengths where there is minimal water vapor absorption (e.g., for 1.3 µm optics, use 1.25 to 1.30 µm, and for the 1.5 µm optics use 1.50 to 1.55 µm). Use a monochromator to measure the Signal wavelength. If the wavelength shown on the Main menu is off by more than ±3 nm when compared to the measured value, perform a wavelength recalibration according to the following: a. From the Diagnostic menu, press Cal. Wavelen to get to the Wavelength Calibration sub-menu. b. Select the Set actual wavelength field, then use the up/down push buttons to set it to the actual measured value. DO NOT change the “Zeroth Order at” value! c. Run Scan Length from the Setup menu again. d. Measure the actual wavelength again. If the wavelength shown is still off by more than ±3 nm, align the servo wavelength monitor at this time following the instructions in Appendix C. When complete, repeat this step, then continue. 6-3 Opal fs Synchronously Pumped Optical Parametric Oscillator 9. To optimize the pulse width of the signal, use the Adjust Temp menu and make small temperature adjustments while monitoring the pulse width with an autocorrelator. If the 1.3 µm optic set is installed, use the micrometer adjust on prism Pr2 to vary the amount of prism glass in the intracavity beam. This adjusts the group velocity dispersion (GVD) of the Opal cavity. Use an autocorrelator to measure the pulse width. For information on GVD and how to compensate for it, refer to Appendix B. Resetting the Wavelength If the system has not been used for a long time or if alternate wavelength ranges are desired, it might be necessary to do one or more of the following: 1. Find the Tsunami/Opal cavity match point using the Scan Length function on the Setup menu. 2. Change the Tsunami pump wavelength. 3. Change the temperature of the crystal to optimize the performance at a given wavelength using the Adjust Temp menu. 4. Change optics sets to accommodate the desired Signal and Idler wavelength ranges. For this, Pr1 and Pr2 might need to be moved in or out of the beam, and the output coupler M1 might have to be adjusted to optimize cavity length. The latter is moved using the Manual Control menu. If you are changing optic sets, refer to Chapter 5, “Installation and Alignment: Converting from...” This completes the turn-on sequence. Turning Off the System To turn the system off, simply: 1. Set the Opal to idle mode from the Configure menu and leave the electronics on. 2. Turn off the Tsunami and Millennia pump lasers. Refer to their respective manuals. This completes the turn-off sequence. 6-4 Operation Purging the Opal The Opal is sealed so that it can be purged with nitrogen gas. Purging the cavity not only eliminates the typical problems associated with dust and contamination, but also prevents tuning discontinuities caused by oxygen and water vapor. Purging of the latter is imperative for operation between 1.33 and 1.48 µm, and when operating below 1.18 µm (Figure 6-1). The Model 3910 regulator/filter purge unit provided with the Tsunami laser can be used to dry and filter bottled nitrogen gas for use in the Opal as well. Because the wavelength regions that are affected by water vapor (or oxygen) absorption are different for the Tsunami and Opal, only one system requires purging at any one time. To do this, simply remove the purge line from the bezel connector of one system and plug it into the other. However, the two systems can easily share output from the Model 3910 by simply splicing the T-connector (provided) into the output line and adding the second line and connector (also provided). Information on connecting the Opal to this system is described in Chapter 5, “Installation and Alignment.” Refer to the Tsunami User's Manual for information regarding the Ti:sapphire wavelength regions affected by oxygen and water vapor. Due to the strength of the absorption lines shown in Figure 6-1, the moisture level within the cavity must be below 1000 ppm to allow problem-free output. For these wavelengths, we recommend using 99.999% pure, dry, oil-free, Electronic Grade 5 nitrogen. 1.0 Transmittance .9 .8 .7 1.100 1.200 1.300 1.400 1.500 1.600 Wavelength (µm) Figure 6-1: Wavelengths most affected by vapor absorption. 6-5 Opal fs Synchronously Pumped Optical Parametric Oscillator Purge Turn-on 1. 2. Verify the Opal cover is in place and clamped down, sealing the cavity. Verify the nitrogen tank output regulator is set to minimum, then turn on the nitrogen supply. 3. Set the bottle output regulator to limit pressure to less than 67 kPa (10 psi). 4. Open the Opal purge bleed valve (Figure 4-1) and leave it open for the first 2 hours of operation, then close it. 5. Use the Model 3910 flow control to set the nitrogen flow rate. For all wavelengths, set the starting purge rate to 0.3 m3/hr (10 SCFH) for at least 2 hours. Then, for operation below 1.18 µm or operation between 1.33 and 1.48 µm, reduce the purge rate to 0.17 m3/hr (6 SCFH) for the duration of the experiment; for all other wavelengths, set the purge to 0.014 m3/hr (0.5 SCFH) This completes the purge turn-on procedure. Purge Turn-off Turn off the nitrogen supply at the tank, then close the regulator valve on the Model 3910 purge unit. This completes the purge turn-off procedure. The Front Panel Menu Control System The electronics module contains an LCD display and seven front panel buttons that allow you to select functions, change values, match the Opal cavity to the Tsunami cavity, scan over a wavelength range, and otherwise control the Opal via a series of menus, not unlike the hypertext help screens common to personal computer applications. Seven major menu groups are used to control the Opal as listed below (also refer to Figure 6-2). Each menu is described in detail later in this chapter. The seven menu groups are: • Main • Scan • Remote • Adjust Temperature • Setup (system alignment) • Configure (system parameters) • Diagnostics Each menu can have up to five “soft” buttons at the bottom of the screen which correspond to the five push-buttons just below them. These buttons allow you to monitor the system, initiate setup and wavelength scans, change parameters, and run diagnostics. When a soft button is absent from the display, the associated push-button is disabled for that menu screen. 6-6 Operation When present, the Next Field soft key allows you to toggle (move) the indicator highlight box to place it around a field variable you wish to change (power level, crystal temperature, wavelength, M1 position, etc.). The up/ down push-buttons to the right of the screen allow you to modify the contents or value of the selected field. Changeable fields include: • Scan range • Signal and Idler wavelength setting • Absolute temperature setting • Temperature offset (table shift or single point offset) • Motor (M1) position • Loop on/off • Stepper count setting • Local/remote control selection and associated operating parameters • Optics set selection • Wavelength units (µm or cm-1) • 7 user-set and 3 fixed Opal operating configurations (Save/recall) The Menus This section describes the seven menu groups. Use the flowchart in Figure 6-2 as a guide. The screen menus are placed in functional groups and, to assist you, the menu descriptions are listed in the order in which they appear on-screen within their functional group. The screen name is listed first, followed by the group name (shown in parenthesis). The help screens and the system comment screens are not presented as they are self explanatory. When a box is displayed around a variable, the variable can be changed using the up/down arrows. To select a different variable, use the Next Field key to toggle to the variable you wish to change. A small, flashing, up/down arrow (↕ ) displayed in some menu screens indicates a process is in progress and the system is not stabilized. Wait until the flashing arrow disappears before continuing with the setup. 6-7 Opal fs Synchronously Pumped Optical Parametric Oscillator MAIN Main Menu 1.500 L 1.761µm Power Scan SCAN Scan Adj Remote Temp Ctrl REMOTE Remote SCAN Signal Idler from 1.300 2.149µm to 1.620 1.620µm step 0.001 µm dwell 0.5 sec 1 times Next Field PZT Setup Config CONFIGURE Configure 1.500 DIAGNOSTICS CONFIGURE 1.761µm Please select a Power PZT remote control mode Start Scan Main Menu RS232 IEEE 488 Local Ctrl Save/ Recal Misc. Diagnostics Go to Idle Main menu ADJUST TEMPERATURE Adjust Temp (Shift) Scan Status Scanning Signal from 1.300µm to 1.620µm SCAN # 1 1.300 2.149µm Moving to start Pause Scan Next Field Paused Scan Scanning Signal from 1.300µm to 1.620µm SCAN # 1 Resume Scan Power PZT Shift/ Point Save/Recall Signal: 1.500µm Idler : 1.761µm Temp Table Shift : 0.0% Clr All Offsets Help Main Menu Adjust Temp (Single Point) 1.300 2.149µm PAUSED Abort Scan Power PZT Next Field Shift/ Point Help DIAGNOSTICS Temperature: 57.5% Servo Setpoint:1.500 Motor Position: 50.2% Loop is ON Save/Recall configuration # 1 Save Recall Main menu Miscellaneous Signal: 1.500µm Idler : 1.761µm Single Point Offset: -6.1% Clr All Offsets Diagnostics Save/Recal Setup Main Menu Manual Cal. About Ctrl Wavelen Opal Main menu Manual Control Wavelength Units: µm RS232 IEEE 488 BAUD: 9600 Address: 15 # Bits: 8 Parity: None Stop Bits: 1 Next Field (2168cts) 88.2 Main Menu Power PZT Next Field steps/ µm Err Temp: 57.5% gtng:1.500µm Motor: 50.2% Loop is:ON Loop Scan On/Off Length Back SETUP Scanning Coarse Length Setup Clear CLEAR OFFSETS - clear all offsets in this optics set Point - clear only the offset at this wavelength All Clear All Warning Clear Ploint SCANNING COARSE LENGTH Scanning reverse.. SETUP Optics set: 1.3-1.6 810 nm pump assumed Check that Tsunami is at 810 nm Back Next Field Scan Length Full Align Abort Scan Main Menu Help Scan Length Cal Wavelength Preparing to scan length Desired xtal temp is 64.4% Actual temp is 47.9% Wavelength Calibration Set actual wavelength Then press 'Set Cal' key. Zeroth Order at: 9559 Abort Next Field 1.500 Set Cal Scanning Coarse Length SCANNING COARSE LENGTH Scanning reverse.. Abort Scan Scan was not successful Try full alignment Was scan successful? Yes No Figure 6-2: Flowchart of the Opal electronics module menu system 6-8 (any key to continue) Main menu Operation Main Menu (MAIN) 1.500 L 1.761µm Power Scan PZT Adj Remote Temp Ctrl Setup Config The Main menu is at the top of the menu structure and is displayed at startup immediately following the Spectra-Physics logo. It is the default screen for monitoring the system. It continuously displays Signal output power, the relative position of the PZT within its range, the Signal and Idler wavelength, and whether or not the servo is on and if the system is locked. From this menu you can reach all the other system functions. The Power bar graph on the left of the screen shows Signal output power. The position of the PZT relative to its full range, as shown in the PZT bar graph, indicates how well the servo is tracking. When the system is operating correctly, the small bar moves very slightly about the center position. The selected wavelength for the Signal and Idler are shown in the upper right box with the Signal wavelength shown as the larger number. After performing a successful scan from the Setup menu, an “L” will also be seen in this box to indicate the servo loop is on and the system is locked. Soft Keys: Scan —brings up the Scan menu where the system can be set to scan a set number of times through a wavelength region in incremental steps and stop (dwell) at each step. Remote Ctrl —brings up the Remote menu where the control interface is chosen: RS-232, IEEE-488, or LOCAL (default). Adj Temp —brings up the Adjust Temp menu where the temperature of the crystal is set for optimum performance (pulse width, stability, output power, etc.) Setup —brings up the Setup menu where the Opal optics set and Tsunami pump wavelength are chosen. Config —brings up the Configuration menu where often used settings are saved or recalled, system diagnostics can be run, or the overnight “idle mode” selected. 6-9 Opal fs Synchronously Pumped Optical Parametric Oscillator Scan Menu (SCAN) SCAN Signal Idler from 1.350 2.025µm 1.835µm to 1.450 step 0.001 µm dwell 0.5 sec 1 times Next Field Start Scan Main Menu The Scan menu reports to the Main menu. It allows the operator to scan a selected number of times through a wavelength region in selected incremental step size, and have the system stop (dwell) for a selected time period at each step. The display box shows the wavelength of the Signal and Idler output. Scans can be performed in either increasing or decreasing wavelength increments. However, because decreasing the Signal wavelength corresponds to increasing the temperature of the LBO crystal, this scan direction is recommended. As the system is scanning, a “↕ ” symbol flashes until it reaches the next stabilized wavelength. Once stabilized, the symbol disappears, and the WAVELENGTH STABILIZED signal on the electronics rear panel goes high to allow unattended data acquisition. The selectable field variables are the from and to Signal wavelengths (the corresponding Idler wavelengths are calculated from the Signal wavelengths), the step size (in µm or cm-1), the dwell time, and the number of times the scan is to be performed (times). Step size resolution is 1 nm, minimum dwell time increments are 0.1 s with a maximum of 99.9 s, and the maximum number of scans is 99. When scanning in wave numbers (cm-1), the smallest increment for the 1.5 µm optics set is 4 cm-1; for the 1.3 µm optics set, it is 5 cm-1. Soft Keys: Next Field —moves the highlight box surrounding the Signal from field to one of the other five fields so that the variable can be changed using the up/ down push-buttons. Start Scan —starts the scan process based on the parameters selected using Next Field. When the scan starts, the Scan Status menu is displayed to show the status of the scan. Main Menu —returns to the Main menu. 6-10 Operation Scan Status Menu (SCAN) Scanning Signal from 1.350µm to 1.450µm 1.360 2.003µm SCAN # 1 Pause Scan The Scan Status menu reports to the Scan menu. It displays the status of the scan, showing the Signal wavelength limits set in the Scan menu as well as the relative position of the scan within those limits. The box in the upper right displays the selected wavelength for the Signal and Idler. System status comments are displayed just below the box. Soft Keys: Pause Scan —pauses the scan and brings up the Paused Scan Status menu. Paused Scan Status Menu (SCAN) Scanning Signal from 1.350µm to 1.450µm SCAN # 1 Resume Scan 1.360 2.003µm PAUSED Abort Scan The Paused Scan Status menu reports to the Scan Status menu. It is just like the Scan Status menu except it shows the scan paused, and the soft keys change to allow the operator to either resume the scan or abort it. Abort the scan to change parameter settings once the scan has started. Soft Keys: Resume Scan —resumes the scan after a pause and returns to the Scan Status menu. Abort Scan —allows the operator to abort the scan and resume other functions via the Scan menu. From there, the scan parameters can be reset and another scan started, or the Main menu can be recalled. 6-11 Opal fs Synchronously Pumped Optical Parametric Oscillator Remote Menu (REMOTE) 1.500 1.761µm Power Please select a PZT remote control mode RS232 IEEE 488 Local Ctrl The Remote menu reports to the Main menu. It allows the control interface to be set to RS-232, IEEE-488, or LOCAL. The RS-232 and IEEE-488 interfaces are options and may not be available on your system. The system starts up with the LOCAL interface active but, by changing to either the RS232 serial or IEEE-488 parallel link, the system can be controlled from an external remote source. For more information on the optional interfaces, please call the factory. Soft Keys: RS-232 —selects the RS-232 serial interface as the control source. IEEE-488 —selects the IEEE-488 parallel interface as the control source. LOCAL —returns control to the front panel. Adjust Temp Menu (ADJUST TEMPERATURE) Power PZT Next Field Shift/ Point Signal: 1.500µm Idler : 1.761µm Temp Table Shift: 0.0% Clr All Offsets Help Main Menu Power PZT Next Field Shift/ Point Signal: 1.500µm Idler : 1.761µm Single Point Offset: -6.1% Clr All Offsets Help Main Menu The Adjust Temp menu reports to the Main menu. It provides two methods, Temp Table Shift and Single Point Offset, for optimizing Opal performance (pulse width, stability, output power, etc.) at a particular wavelength. To obtain different signal and idler output wavelengths, the phase matching conditions in the Opal are varied by changing the temperature of the LBO crystal. For a particular signal wavelength, the appropriate crystal temperature (measured as a percentage: 0 to 100%) is recalled from a stored set of theoretical phase-matching curves based upon the Tsunami pump wavelength specified in the Setup menu. However, since the exact temperature for optimum performance is also dependent upon several other factors, such as input angle of the pump wavelength, cavity alignment, etc., the temperature adjust option is provided. It is possible to either shift the entire temperature table or offset a single point in the table. Temp Table Shift —allows the operator to shift the entire table of stored temperatures. This adjustment produces the same temperature offset at every wavelength and can be applied to the original stored phase matching 6-12 Operation temperatures or to a set of temperatures which have been optimized under the single point offset procedure (see below). Also, once a single point offset procedure has been implemented, the temperature table shift option is useful to fine-tune the system for optimum performance on a day-to-day basis. Single Point Offset —allows the operator to optimize Opal performance at a particular wavelength or at several wavelengths. The change in temperature is displayed as an offset from the stored temperature and is applied only at the displayed wavelength. With any two offsets defined in this manner the system automatically interpolates the points in between. This allows facile acquisition of a table containing optimized single points. Note that the entered “optimized” points are denoted by an asterisk that follows the offset percent, while non-asterisk points are interpolated. End points for all wavelengths are considered asterisk points. New offset values become associated with the selected Signal wavelength displayed in the window and are used by the system until either the entire offset table is cleared using the Clear All soft button (under Clear Offsets), a single point(s) is/are cleared using the Clear Point soft button, or the system is turned off. Use the Save/Recall feature in the Configuration menu to save these values in a user-defined table for later use. Up to seven different userdefined tables can be saved and recalled in this manner, along with three system preset tables. Caution! If the table has not been saved using the Save/Recall function in the Configure menu, the user-modified offset table will be unrecoverable once the Clear All soft button is pushed under the Clear menu or the unit is turned off. To restore the table if it was not saved requires the operator to re-enter every offset, one at a time. To set an offset, first select the wavelength by selecting the Signal field using the Next Field soft button. (A box surrounds the field when it is selected.) Change to the wavelength of choice using the up/down buttons. Next, select the offset field, then select the Single Point Offset or Temp Table Shift function by pressing the Shift/Point soft button. Change the offset percent via the up/down buttons. Any increase or decrease in power resulting from a change in crystal temperature is shown in the Power bar graph. Note that it is normal for an increase in temperature to be more rapid than a decrease. A flashing arrow symbol (↕ ) in the box indicates the system has not stabilized. Allow the system to stabilize before continuing. The PZT bar graph indicates how well the servo is tracking. When the system is operating correctly, the small bar will move very slightly about the center position. To keep it in the center, the servo system moves the M1 mirror to compensate for large, slow changes in cavity length. The PZTmounted M5 moves quickly to respond to smaller, rapid changes. The box in the upper right corner of the screen shows the selected wavelength for the Signal and Idler. 6-13 Opal fs Synchronously Pumped Optical Parametric Oscillator Soft Keys: Next Field —moves the highlight box surrounding the Signal field to the Temp Table/Single Point Offset field and back again so that the wavelength or temperature variable can be changed using the up/down push-buttons. Shift/Point —allows the temperature setpoint to be changed by either shifting the entire table (all points are offset in the same direction by the same amount), or offsetting a single point in the table. Clear Offsets —brings up the Clear menu where either the working table of all temperature offsets or a single point can be cleared. Main Menu —returns to the Main menu. Clear Menu (ADJUST TEMPERATURE) CLEAR OFFSETS - clear all offsets in this optics set Point - clear only the offset at this wavelength All Clear All Clear Ploint Back The Clear menu reports to the Adjust Temp menu. It can be used to either clear the working table of all temperature offsets or clear a single point. Prior to clearing anything, verify the wavelength whose temperature offsets are to be cleared has indeed been selected on the previous menu. If clearing a single point, verify the correct point is selected. Caution! If the table has not been saved using the Save/Recall function in the Configure menu, the user-modified offset table will be unrecoverable once the Clear All soft button is pushed under the Clear menu or the unit is turned off. To restore the table if it was not saved requires the operator to re-enter every offset, one at a time. Soft Keys: Clear All —clears the entire working table of all temperature offsets and restores defined system values for the wavelength selected. When this button is pressed, a warning appears, informing the operator that the entire table is about to be erased. To restore the table if it has not been saved requires the operator to re-enter every offset one at a time. To save it, use the Save/Recall feature in the Configuration menu. Clear Point —clears the single temperature offset point selected in the previous menu and restores the defined value or an interpolated value for that point. Back —returns to the previous Adjust Temp menu. 6-14 Operation Setup Menu (SETUP) SETUP Optics set: 1.3-1.6 810 nm pump assumed Check that Tsunami is at 810 nm Next Field Full Align Scan Length Main Menu The Setup menu reports to the Main menu. Through it the optics set is specified and the pump wavelength is selected. Caution! The system assumes 810 nm is selected for the pump wavelength for the 1.5 µm (1.3 – 1.6 µm) optic set. If this assumption is incorrect, set this field to the correct wavelength or Opal will not operate as expected. The Optics set wavelength field is in µm, even if the general wavelength units are set to cm-1 via the Miscellaneous menu. The pump wavelength field is in nm and can be set in increments of 1 nm. System comments are displayed below these fields. Changeable variables are selected using the Next Field soft button, then changed by pressing the up/down push-buttons. The two choices are 1.3 – 1.6 when the 1.5 µm optics set is used, and 1.1 – 1.4 when the 1.3 µm optics set is used. The Full Align soft button brings up a series of help menus that step through a Tsunami and Opal mechanical alignment. A complete alignment procedure can be found in Chapter 5: “Installation and Alignment.” Soft-key push-button either bring up the previous help screen, the next screen, or return control to the Setup menu. The Scan Length soft button starts a scan and brings up the Scan Length menu where the scan search for the Tsunami/Opal cavity match point can be monitored (see the Scanning Coarse Length menu below). Note When changing optics, all operating parameters (temperature, scan, wavelength, etc.) which were being used are automatically stored and the operating parameters which were last used for the new optics set are automatically recalled. Soft Keys: Next Field —moves the highlight box between the various fields so the field variable can be changed using the up/down push-buttons. Full Align —brings up a series of help menus that step through an Opal mechanical alignment, then initiates a scan. Scan Length —brings up a menu that displays the status of the scan. Main Menu —returns to the Main menu. 6-15 Opal fs Synchronously Pumped Optical Parametric Oscillator Scan Length Menu (SETUP) Preparing to scan length Desired xtal temp is 63.6% Actual temp is 13.9% Abort The Scan Length menu reports to the Setup menu. When it appears, it displays a notice that the length scan is about to begin, and also shows the desired temperature and actual temperature of the crystal in percent of total range. Based on the Opal wavelength chosen in the Setup menu, the controller determines the proper temperature for the crystal. The Actual temp displayed changes until it reaches the desired temperature, then the system begins the cavity length scan. If the two temperatures already match or are very close, it may appear that this menu is skipped and the Scanning Coarse Length menu is immediately brought up. At this point, the scan begins and its progress is displayed. Soft Keys: Abort —stops the scan, and returns control to the Setup menu. Scanning Coarse Length Menu (SETUP) SCANNING COARSE LENGTH Scanning reverse.. Abort Scan The Scanning Coarse Length menu reports to the Scan Length menu. It dynamically displays a scan search for the Tsunami/Opal cavity match point, i.e., the point where the Opal cavity matches that of the Tsunami laser or where the round-trip time of the signal wavelength in the Opal cavity matches that of the pump wavelength in the Tsunami. If the scan is successful, i.e., the Opal flashes and oscillates, the scan stops immediately and the grating/bi-cell servo system is automatically calibrated. It calibrates the grating in the servo housing for the 0th order reference point and for the 1st order beam position based on the wavelength chosen. It then returns control to the Main menu. If the scan was not successful, a prompt is displayed requesting a full alignment be performed. Control is returned to the Setup menu. Soft Keys: Abort Scan —stops the scan and immediately returns control to either the Setup menu or the Manual Control menu. 6-16 Operation Configure Menu (CONFIGURE) CONFIGURE Save/ Recal Misc. Diagnostics Go to Idle Main menu The Configure menu reports to the Main menu and allows the operator to save and recall system settings, run Opal diagnostics, and set the Opal to Idle for overnight stand-by mode. Soft Keys: Save/Recall —brings up the Save/Recall menu where special setups can be saved or recalled. Misc. —brings up the Miscellaneous menu where the wavelength display units can be selected, or the parameters set for the optional RS-232 and IEEE-488 interfaces. Diagnostics —brings up the Diagnostics menu where the critical operating parameters are displayed and the system functions can be manually set. Go to Idle —places the system in standby mode for overnight shutdown. Main Menu —returns to the Main menu. Save/Recall Menu (CONFIGURATION) Save/Recall Setup Save/Recall configuration # 1 Save Recall Main menu The Save/Recall menu reports to the Configure menu. It allows special sets of scan parameters with optimized temperature offsets to be stored and retrieved. Use the up/down push-buttons to select the configuration memory address. The parameters stored at “0” are used when the system starts up; place your most often used configuration at this address. You can also save configurations in numbers “1” through “6”. Numbers 7 through 9 are saved as system read-only configurations. Memory 7 has the factory stored final test parameters for the 1.5 µm optics set with 810 nm pump. Memory 8 has the final test parameters for the 1.3 µm optics set with a 775 nm pump, and memory 9 has the final test parameters for the 1.3 µm optics set with a 750 nm pump. System comments are shown in the center of the screen. 6-17 Opal fs Synchronously Pumped Optical Parametric Oscillator Soft Keys: Save —stores one set of scan parameters with optimized temperature offsets for later use. The information is stored in the memory location designated by the number shown in the menu. The memory location is changed using the up/down push-buttons. Memory locations 0 through 6 are provided for use by the user. Recall —retrieves one set of scan parameters with optimized temperature offsets for later use. The information is retrieved from the memory location designated by the number in the box in the menu. The memory location is changed using the up/down push-buttons. Numbers 0 through 6 are for use by the user. Numbers 7 through 9 contain parameters stored at the factory. Main Menu —returns to the Main menu. Miscellaneous (CONFIGURATION) Wavelength Units: µm RS232 IEEE 488 BAUD: 9600 Address: 15 # Bits: 8 Parity: None Stop Bits: 1 Next Field Main Menu The Miscellaneous menu reports to the Configure menu. From here the wavelength display units (µm or cm-1) can be selected, as can the parameters for the optional RS-232 and IEEE-488 interfaces. Caution! When selecting to change between µm and cm-1 settings, a notice is presented that reminds you to save your current configuration (which also saves your offset information). If you fail to do this before switching from one wavelength unit to the other, any configuration changes made since the last save, including offsets, will be lost (see “Save/Recall menu”). Soft Keys: Next Field —moves the highlight box between the various fields so the field variable can be changed using the up/down push-buttons. Main Menu —returns to the Main menu. 6-18 Operation Diagnostics Menu (DIAGNOSTICS) DIAGNOSTICS Temperature: 57.5% Servo Setpoint:1.500 (2168cts) Motor Position: 50.2% Loop is ON Manual Cal. About Ctrl Wavelen Opal Main menu The Diagnostics menu reports to the Configure menu. It displays critical operating parameters and the system status. Through the Manual Control menu the operator can set the temperature of the crystal, set the wave length (grating angle) or step setting, set the M1 position, and turn the servo loop on and off. The About Opal sub-menu provides some system parameters and shows the system program revision level. Soft Keys: Manual Ctrl —brings up the Manual Control menu. Cal. Wavelen —brings up the Wavelength Calibration menu. About Opal —brings up a screen that shows the system program revision level that can be used for system tracking and troubleshooting purposes. Other system parameters are displayed as well. Main Menu —returns to the Main menu. Manual Control Menu (DIAGNOSTICS) 88.2 Caution! Power PZT Next Field steps/ µm Err Temp: 57.5% gtng:1.500µm Motor: 50.2% Loop is:ON Loop Scan On/Off Length Back The Manual Control menu is not intended for use in day-to-day operation. It is only intended for diagnostic purposes and for use during initial system alignment when access to the coarse motor control is required in order to move M1. The parameters displayed in this menu can be changed independently: they are no longer linked together under software control. Therefore, once changed, the system may not operate correctly when you return to normal operation. The Manual Control menu reports to the Diagnostics menu. From here, many system parameters can be modified to optimize the system and be monitored to determine the cause of any problems. Bar graphs display output power, the relative position of the PZT and the servo error signal (Err). Output power level is also displayed numerically next to the Power bar 6-19 Opal fs Synchronously Pumped Optical Parametric Oscillator graph. Parameter fields that can be changed using the Next Field soft key are: • crystal temperature (in percent of total range) • wavelength or step count grating angle (toggle) • M1 position, and • servo loop status (on or off). Temperature is expressed here as a percentage of total range (0 – 100%) and not as an offset as it is in the Adjust Temp menu. This way, small changes in temperature can be made in order to fine tune wavelength and power output. The steps/µm soft key toggles between displaying grating wavelength or stepper motor step count. Setting the stepper motor to a certain step count sets the grating at an angle corresponding to a particular wavelength. Setting the wavelength results in a system-calculated grating angle. When combined with the servo loop on/off control (off), the position of M1 can be modified to investigate the movement of the PZT or changes in the servo error signal. As from the Setup menu, an alignment scan can be initiated using the Scan Length soft key. However, from this menu, the crystal temperature is not automatically set to a value calculated for the selected wavelength. Instead, the values in the user-set fields are used. Soft Keys: Next Field —moves the highlight box between the various fields so the field variable can be changed using the up/down push-buttons. steps/µm —toggles the second field from grating wavelength display (default) to stepper motor step count. Use the up/down buttons to change the contents. Wavelength changes in steps of 0.001 µm, the stepper count changes in increments of 1 if the up/down buttons are pressed momentarily, or by 10 if held down (this is useful for large step changes). Loop On/Off —toggles the servo loop on (default) and off. Scan Length —brings up the Scanning Coarse Length menu once the scan has begun. It is displayed so its progress can be monitored. Back —returns control to the Diagnostics menu. If the loop is ON, there is output power, the grating is set to a position appropriate for the installed optic set, and the temperature that is set in the Manual Control menu will be interpreted as a single point offset upon return to the Diagnostics menu. If any of the three conditions are not true, the temperature setting will be ignored and the setting that existed prior to going to the Manual Control menu will be used. 6-20 Operation Scanning Coarse Length Menu (DIAGNOSTICS) SCANNING COARSE LENGTH Scanning reverse.. Abort Scan The Scanning Coarse Length menu reports to the Manual Control menu. It dynamically displays a scan search for the Tsunami/Opal cavity match point, i.e., the point where the Opal cavity matches that of the Tsunami laser or where the round-trip time of the signal pulse in the Opal cavity matches that of the pump pulse in the Tsunami. If the scan is successful, i.e., the Opal flashes and oscillates, the scan stops immediately. This scan differs from that available from the Setup menu in that there is no automatic calibration. Successful or not, you are returned to the Manual Control menu. Soft Keys: Abort Scan —stops the scan and immediately returns to the Manual Control menu. Wavelength Calibration (DIAGNOSTICS) Wavelength Calibration Set actual wavelength Then press 'Set Cal' key. Zeroth Order at: 9559 Next Field Set Cal 1.500 Main menu Modify the field values in this menu only when you are following the instructions for calibrating the servo wavelength monitor as outlined in Appendix C. This menu is not normally used. The Wavelength Calibration menu reports to the Diagnostics menu. Use this menu periodically to re-calibrate the wavelength monitor grating, or use it in conjunction with the directions given in Appendix C to perform a complete calibration. This procedure requires the use of an external monochromator to measure the output signal wavelength. To perform the recommended day-to-day calibration, simply run Scan Length from the Setup menu. This automatically re-calibrates the system for day-to-day use. Next Field —moves the highlight box between the Set actual wavelength field and the Zeroth Order at: field. Once selected, use the up/down pushbuttons to change the values. Set Cal —uses the values entered in this menu to calibrate the grating position. The new calibration is permanently stored in the system until changed by pressing this button again. Main Menu —returns to the Main menu. 6-21 Opal fs Synchronously Pumped Optical Parametric Oscillator 6-22 Chapter 7 Maintenance The condition of the laboratory environment and the amount of time the Opal® is operated affects its periodic maintenance schedule. The coated surfaces of the elements forming the cavity—the output coupler, high reflector, prisms, fold and focus mirrors—and crystal surfaces are easily contaminated. Do not allow smoking in the laboratory: the optics stay clean longer. Condensation due to excessive humidity can also contaminate optical surfaces. This is particularly true for the LBO crystal. If the head cover is left in place, there is little that must be done day-to-day to maintain the system. To create a dust-free environment, allow purging, and eliminate time-consuming maintenance, the Opal head is sealed. All controls required for day-to-day operation are accessible from the outside. The Model 3910 purge regulator/filter is provided as part of the Tsunami system to facilitate cavity purging: clean, dry, nitrogen gas keeps dust and moisture out of the Opal head. Therefore, the head cover should only be removed when absolutely necessary, e.g., when changing optic sets. It will be necessary to change the filters in the Model 3910 purge unit from time to time. Refer to your Tsunami® User's Manual. When you finally do need to clean the optics, follow the procedures below. Notes on the Cleaning of Laser Optics Laser optics are made by vacuum-depositing microthin layers of materials of varying indices of refraction onto glass or quartz substrates. If the surface is scratched to a depth as shallow as 0.01 mm (0.0004 in.), the operating efficiency of the optical coating can be reduced significantly and the coating can degrade. OPOs are oscillators that operate with gain margins of a few percent. Losses due to unclean optics, which might be negligible in ordinary optical systems, can disable the system. Dust on optical surfaces can cause loss of output power, damage to the optics or total failure. Cleanliness is essential, and you must apply laser optics maintenance techniques with extreme care and attention to detail. “Clean” is a relative description; nothing is ever perfectly clean and no cleaning operation can ever completely remove contaminants. Cleaning is a process of reducing objectionable materials to acceptable levels. 7-1 Opal fs Synchronously Pumped Optical Parametric Oscillator Equipment Required: • • • • • • • dry, filtered nitrogen or canned air rubber squeeze bulb optical-grade lens tissue spectrophotometric-grade methanol and/or acetone (for general optics) spectrophotometric-grade (HPLC) toluene or xylene (Aldrich Gold Label) for cleaning the crystal hemostats clean, lint-free finger cots or powderless latex gloves Removing and Cleaning Opal Optics Danger! Laser Radiation The Tsunami laser and its pump laser are Class IV High Power Lasers and, with the Opal, have output beams that emit high power laser radiation. By passing the safety interlock shutters on these systems, you can be exposed to hazardous radiation. Always wear proper eye protection and follow the safety precautions in Chapter 2, “Laser Safety.” For safety, always close the pump laser shutter when you change optics. Remove, clean, and install mirrors one at a time, in sequence, to avoid accidental exchanges and loss of alignment reference. After cleaning and replacing each mirror, open the pump laser shutter, and adjust the mirror vertically and horizontally for maximum output power, followed by an adjustment of M1 and M7 (1.5 µm configuration) or M7P (1.3 µm configuration) for maximum output power. Iterate your adjustment of M1 and M7 or M7P until no further increase in power is possible. Only then proceed to clean the next optic. Warning! Before attempting to clean the crystal surfaces, the electronics module must be turned off and the crystal allowed 5 minutes to cool to room temperature. Failure to do so will damage the crystal! Such damage is not covered by your warranty. Clean all optics, including the Brewster windows, crystal surfaces, prisms, and beam splitter. All mirrors are captured and held in place by a screw-in holder. Unscrew the holder and the mirror will come out with it. Take care not to touch the optical surface. The optic is retained by a small O-ring and is removed by simply pulling it straight out of the holder. In some cases, you do not have to remove the optic from its holder to clean it. 7-2 Maintenance Each optical element has a v-shaped arrow on its barrel. This arrow points to the coated surface that faces the intracavity beam. Also written on the barrel is the optic part number. If you need to verify the location of the optic in the Opal, refer to the part number list for each optic in Table 8-1 at the end of Chapter 8, “Service and Repair.” If your Opal unit becomes misaligned, refer to Chapter 5, “Installation and Alignment,” for alignment procedures. Standard Cleaning Procedures Follow the principles below whenever you clean any optical surface. • Clean only one element at a time, then realign that element for maximum output power. Do not remove the optic to clean it unless specifically told to do so. If optics are removed and replaced as a group, some might get swapped. At best, all reference points will be lost, making realignment extremely difficult. • Work in a clean environment and, whenever possible, over a soft, lintfree cloth or pad. • Wash your hands thoroughly with liquid detergent. Body oils and contaminants can render otherwise fastidious cleaning practices useless. • Always use clean, powderless and lint-free finger cots or gloves when handling optics and intracavity parts. Remember not to touch any contaminating surface while wearing gloves; you will transfer oils and acids onto the optics. • Use filtered dry nitrogen, canned air, or a rubber squeeze bulb to blow dust or lint from the optic surface before cleaning it with solvent; permanent damage can occur if dust scratches the glass or mirror coating. Do not use canned air to clean the crystal. A rapid change in temperature due to freon sputter can cause permanent damage to the crystal. Freon sputter is common if the can is not held vertically. Caution! • • Use spectroscopic-grade solvents to clean all optics except the crystal. Use spectrophotometric-grade hydrocarbon solvents to clean the crystal. Since cleaning simply dilutes contamination to the limit set by solvent impurities, solvents must be as pure as possible. Use solvents sparingly and leave as little on the surface as possible. As any solvent evaporates, it leaves impurities behind in proportion to its volume. Store all solvents in small glass bottles. Solvents collect moisture during prolonged exposure to air. Avoid storing solvents in bottles where a large volume of air is trapped above the solvent. 7-3 Opal fs Synchronously Pumped Optical Parametric Oscillator • • Caution! Use Kodak Lens Cleaning Paper™ (or equivalent photographic cleaning tissue) to clean optics. Use each piece of lens tissue only once; dirty tissue merely redistributes contamination—it does not remove it. Do not use lens tissue designated for cleaning eye glasses. Such tissue contains silicones. These molecules bind themselves to the optic coatings and can cause permanent damage. Also, do not use cotton swabs, e.g., Q-Tips™. Solvents dissolve the glue used to fasten the cotton to the stick, resulting in contaminated coatings. Only use photographic lens tissue to clean optical components. General Procedure for Cleaning all Optics Except the Crystal Warning! DO NOT USE THESE INSTRUCTIONS FOR CLEANING THE CRYSTAL! Refer to “General Procedures for Cleaning the Crystal” later in this chapter. With the exception of the prisms and Brewster windows, all optics must be removed from their mounts for cleaning. However, only mirrors M3, M4, the output coupler (OC), and the beam splitter must be removed from their holder to clean the second surface. 1. Use a squeeze bulb, dry nitrogen, or canned air to clean away any dust or grit before cleaning the optics with solvent. If using canned air, avoid tilting the can. This prevents freon from being sputtered onto the optic. 2. Clean the optic using the “drop and drag” method (Figure 7-1). Figure 7-1: Drop and Drag Method. 7-4 Maintenance 3. Don't Touch! a. Hold the optic horizontal with its coated surface up. Place a sheet of lens tissue over it and squeeze a drop or two of acetone or methanol onto it. b. Slowly draw the tissue across the surface to remove dissolved contaminants and to dry the surface. Pull the tissue slow enough so the solvent evaporation front follows the tissue, i.e., the solvent dries only after leaving the optic surface. For stubborn contaminants and to access hard-to-reach or awkward places (e.g. the Brewster windows), use a tissue in a hemostat to clean the optic. a. Fold a piece of tissue in half repeatedly until you have a pad about 1 cm square, and clamp it in a plastic hemostat (Figure 7-2). While folding, do not touch the surface of the tissue that will contact the optic, or you will contaminate the solvent. Figure 7-2: Tissue Folded for Cleaning b. If required, cut the paper with a solvent-cleaned tool to allow access to the optic. c. Saturate the tissue with acetone or methanol, shake off the excess, resaturate and shake again. Do not allow excess solvent to flow onto unwanted areas (such as optic adhesives and mounts). d. Wipe the surface in a single motion. Make sure that the hemostat does not touch the optic surface, or the coating may be scratched. 4. After placing the optic you just cleaned into the beam, inspect it using an ir viewer to verify the optic actually got cleaner, i.e., you did not replace one contaminant with another. This completes the general procedure for cleaning optics except for the crystal. 7-5 Opal fs Synchronously Pumped Optical Parametric Oscillator General Procedure for Cleaning the Crystal Clean the crystal only when you cannot obtain specified power (a) after cleaning all the other optics, (b) after performing the standard alignment procedure outlined in Chapter 6, “Operation: Turning On the System,” and (c) after translating the crystal so that the beam passes through a cleaner or undamaged area. Caution! Do not use canned air to clean the crystal. A rapid change in temperature due to freon sputter can cause permanent damage to the crystal. Freon sputter is common if the can is not held vertically. Warning! DO NOT CLEAN THE CRYSTAL UNLESS ABSOLUTELY NECESSARY! It can be destroyed if excess pressure is used. Also, DO NOT USE ACETONE OR METHANOL ON THE CRYSTAL! Use a spectrophotometric- grade hydrocarbon solvent such as toluene or xylene to clean the crystal. Do not allow the solvent to touch the mounting plate or it will destroy the glue holding the crystal to the mount. Such damage is not covered under your warranty. Do not remove the crystal for cleaning. Clean it in place. 1. Turn off power to the electronics module and wait about 5 minutes for the crystal to cool down. 2. Use a squeeze bulb or dry nitrogen to clean away any dust or grit. Proceed with cleaning the crystal with a spectrophotometric-grade solvent only if cleaning with air was not effective, or if the Opal output was not improved by translating the crystal to a new location. 3. Use a tissue in a hemostat to clean the crystal. a. Fold a piece of tissue in half repeatedly until you have a pad about 1 cm square, and clamp it in a plastic hemostat (Figure 7-2). Don't Touch! While folding, do not touch the surface of the tissue that will contact the optic, or you will contaminate the solvent. b. Saturate the tissue with toluene or xylene, shake off the excess, resaturate and shake again. Caution! Do not use excess solvent! The excess might penetrate below the crystal and dissolve the glue bonding the crystal to the mount. The glue can then migrate to the crystal surface and permanently damage it. c. Wipe the surface in a single motion and wait for the solvent to evaporate. Be sure that the hemostat does not scratch the crystal surface. This completes the general procedure for cleaning the crystal. 7-6 Chapter 8 Service and Repair This chapter contains a general troubleshooting guide for use by you, the user. It is provided to assist you in isolating some of the problems that might arise while using the system. A complete repair procedure is beyond the scope of this manual. For information concerning repair by SpectraPhysics, see Chapter 9, “Customer Service.” At the end of this chapter in Table 8-1 is a replacements parts list of all the components that can be replaced by you in the field. It includes a complete list of optics that are available for the Opal. Use this guide if Opal performance drops unexpectedly. If you try the following suggestions and are unable to bring your Opal performance up to specification, call your Spectra-Physics service representative for help. Danger! Laser Radiation These procedures may require you to adjust or replace optics while using the laser system at high power. For safety, close the Millennia pump laser shutter every time you change an optic or interfere with the cavity in any way, and only open it during alignment. Protect yourself with appropriate eyewear at all times. Troubleshooting Guide Symptom: No flash when Scan Length is initiated. Possible Causes Corrective Action Tsunami is not mode locked. Verify Tsunami is mode locked. Refer to the section on mode locking in the Tsunami User's Manual. Wrong pump wavelength is Set up wavelength detection device (monochromator) and tune the Tsunami selected for the desired Opal laser for the correct wavelength. Refer to the Table 6-1 in this manual to verify output. that the Tsunami pump wavelength is appropriate for your desired Opal wavelength. Low pump power. Allow the Millennia and Tsunami lasers to warm up about 10–15 min., then adjust both lasers for a 2 W output from the Tsunami. Incorrect Opal cavity length set. Verify cavity spacing is correct. Refer to Chapter 5, “Installation and Alignment: Opal Alignment...: Initial Setup,” for the optics set you are using (1.3 or 1.5 µm). Incorrect crystal temp. is Initiate a Scan Length from the Setup menu to determine the proper crystal selected. temperature. Verify the correct wavelength is set for the pump beam. Opal is misaligned. Refer to Chapter 5, “Installation and Alignment: Aligning the Opal Head,” and verify the Opal is correctly aligned to the Tsunami pump laser. If it is, refer to “Opal Alignment” for the optics set used (1.3 or 1.5 µm) and verify the correct optics are installed. 8-1 Opal fs Synchronously Pumped Optical Parametric Oscillator Symptom: No flash when Scan Length is initiated. Possible Causes Corrective Action Incorrect software parameters have been selected. Wave plate is in the beam. An iris is closed or there is an obstruction in the beam path, externally or internally. Verify the proper parameters have been selected in the Setup menu for the optics set used. Slide the wave plate out of the beam path. Verify all three irises are open, then verify there is nothing in the beam path (such as an alignment card), that all shutters are open and that nothing is blocking the pump beam. For the 1.5 µm optics (or for the first half of the 1.3 µm alignment), ensure Pr1 is completely backed out of the intracavity beam path. Verify the correct optics set is installed for the wavelength you intend to use. Refer to the Replacement Parts list table at the end of this chapter for a listing of optics and part numbers. Refer to Chapter 7, ”Maintenance,” for information on cleaning optics. Incorrect optics are installed. Optics/prisms are dirty. Symptom: Poor performance at a specific wavelength Possible Causes Corrective Action Temperature offsets are incorrect. Opal is not properly purged. Adjust the temperature offset from the Adjust Temp menu for optimum Opal performance. Refer to Chapter 6, “Operation: Purging the Opal,” for information on which wavelengths are greatly affected by oxygen and water vapor and on how to set the purge rate. If your system is not set up for purging, refer to Chapter 5, “Installation and Alignment: Attaching the Opal Purge Line,” for information on installing this line. Adjust Pr2 for optimum Opal performance (1.3 µm optics set only). Prism Pr2 is not optimized. Signal or idler is too close to degeneracy point. If operating the Opal at wavelengths other than those suggested, you might need to change the pump wavelength in order to move the Signal or Idler wavelength further away from the degeneracy point. Refer to Table 6-1. Symptom: Wavelength not calibrated Possible Causes Corrective Action Servo grating wavelength assembly is misaligned. Beam is not centered on the aperture to the servo wavelength grating assembly. Refer to Appendix C for information on calibrating the servo grating wavelength assembly. Verify the Signal beam is centered on the output coupler and horizontally centered on the aperture of the servo grating wavelength assembly. If it is not, use M2 and M1 to make the correction. Ensure the beam is centered on the bi-cell, adjust the horizontal control of the beam splitter if necessary (refer to “Aligning the Beam to the Servo Wavelength Monitor” in the 1.3 or 1.5 µm alignment sections in Chapter 5). Once the beam is centered, initiate a Scan Length from the Setup menu to allow the system to self-calibrate. 8-2 Service and Repair Symptom: Low Power Possible Causes Corrective Action Tsunami pulse is too narrow. Broaden the Tsunami pulse to ≈ 100 fs (about 9–10 nm FWHM of bandwidth). Allow the Millennia and Tsunami lasers to warm up about 10–15 min., then adjust both lasers for a 2 W output from the Tsunami. Adjust the temperature offset for higher power through the Adjust Temp menu. Slide the wave plate out of the beam path. Verify all three irises are open, then verify there is nothing in the beam path (such as an alignment card), that all shutters are open, and that nothing is blocking the pump beam. For the 1.5 µm optics (or for the first half of the 1.3 µm alignment), ensure Pr1 is completely backed out of the intracavity beam path. Refer to Chapter 7, “Maintenance,” for information on cleaning optics. Optimize the Tsunami laser. Refer to its user's manual regarding cw break through. Optimize the Tsunami laser for pump mode (TEM00). Small adjustments to the Tsunami M2 micrometer might be required. Low pump power. Temp. offsets set incorrectly. Wave plate is in the beam. An iris is closed or there is an obstruction in the beam path, externally or internally. Optics/prisms are dirty. cw breakthrough is coming from the Tsunami laser. Poor Tsunami pump mode. Opal is not properly purged. Pump wavelength is different than that stated in the Setup menu. Calibration was run at a different wavelength. Refer to Chapter 6, “Operation: Purging the Opal,” and for information on which wavelengths are greatly affected by oxygen and water vapor and on how to set the purge rate. If your system is not set up for purging, refer to Chapter 5, “Installation and Alignment: Attaching the Opal Purge Line” for information on installing this line. Set up a wavelength detection device (a monochromator) and tune the Tsunami laser for the correct wavelength. Refer to Table 6-1 to verify the Tsunami pump wavelength is appropriate for your desired Opal wavelength. Initiate a Scan Length from the Setup menu to allow the system to self-calibrate at the selected wavelength. Symptom: Problems with pulse width Possible Causes Corrective Action Temp. offsets are set incorrectly. Opal is not properly purged. Adjust the temperature offset from the Adjust Temp menu for optimum power, pulse width, pulse stability and/or pulse shape. Refer to Chapter 6, “Operation: Purging the Opal,” and for information on which wavelengths are greatly affected by oxygen and water vapor and on how to set the purge rate. If your system is not set up for purging, refer to Chapter 5, “Installation and Alignment: Attaching the Opal Purge Line” for information on installing this line. Adjust Pr2 for optimum pulse width. Incorrect dispersion (1.3 µm optics only). 8-3 Opal fs Synchronously Pumped Optical Parametric Oscillator Symptom: Opal Flashes but will not lock when Scan Length is initiated. Possible Causes Corrective Action Misaligned servo grating wave- Refer to Appendix C for information on calibrating the servo grating wave length assembly. length assembly. System has old software. Check your software rev. number in the Diagnostics: About Opal menu. It should be rev. 2.21 or newer. If not, call your Spectra-Physics representative. Incorrect software parameters Verify the proper parameters have been selected in the Setup menu for the have been selected. optics set used. Wrong optics set is installed for Verify the correct optics set is installed by checking the numbers against the wavelength you selected. those found in the Replacement Parts list found at the end of this chapter. Refer to Chapter 7, “Maintenance: Removing and Cleaning Opal Optics,” for directions on changing and identifying optics. Noisy pump laser. Adjust the Tsunami laser for optimum performance. Working in a region of low gain. Adjust the Opal wavelength a little closer to the degeneracy point (see Figure 3-4), then use the Setup menu to perform a Scan Length. Optimize output by adjusting M1 and M7 (or M7P), then tune for the desired wavelength. Opal not properly purged. Refer to Chapter 6, “Operation: Purging the Opal,” and Table 6-1 for information on which wavelengths are greatly affected by oxygen and water vapor and on how to set the purge rate. If your system is not set up for purging, refer to Chapter 5, “Installation and Alignment: Attaching the Opal Purge Line” for information on installing this line. Symptom: Long-term stability problems Possible Causes Feet are not secure on Opal and/or Tsunami. Routing mirrors drift. Corrective Action Verify both the Opal and Tsunami are clamped securely to the table and that the height adjust locking nuts on all the feet are tight. Verify the mirrors are properly seated inside the routing mirror assemblies and that the assemblies are securely fastened to the table. The Tsunami wavelength is This can be caused by a combination of the two previous conditions. Also drifting. check that the single-plate birefringent filter has been installed in the Tsunami. Temperature offset is close to a Reduce the temperature offset 1 or 2%. region of instability (Opal) Opal cavity is misaligned. Optimize Opal output by adjusting M1 and M7, and, if you have to, check the cavity alignment. Refer to Chapter 5, “Installation and Alignment.” Uncontrolled lab environment Check and correct for any conditions that might cause vibrations or perturbacauses external vibrations, per- tions of the optical table, e.g., air conditioning, fans or noisy water lines. Verturbations. ify there is little change in room temperature and humidity (≤5%). Also ensure there is not a direct flow of air from a register or air vent onto the table. Unstable pump power. Optimize Tsunami output for a TEM00 mode and stable output power. Refer to your Tsunami user's manual. 8-4 Service and Repair Symptom: Noisy Opal output. Possible Causes Corrective Action Incorrect temperature offset. Set the temperature offset for optimum Opal performance. Refer to Chapter 6, “Operation: Adjust Temp Menu,” for information on why and how to set the crystal offset temperature. Noisy Tsunami laser. Optimize the performance of the Tsunami laser. Refer to its user's manual. Noisy pump laser: purge rate is If you are purging the pump laser with nitrogen or an external purge pump, too high. you might need to reduce the flow rate. Refer to your pump laser user's manual for information on proper flow rates. Opal cavity is misaligned. Optimize Opal output by adjusting M1 and M7, and, if you have to, check the cavity alignment. Refer to Chapter 5, “Installation and Alignment.” The Opal or Tsunami Brewster Inspect the Brewster windows on the Opal and clean them if necessary. windows are dirty. Refer to the “Maintenance” chapter in the appropriate manual for cleaning information. Uncontrolled lab environment Check and correct for any conditions that might cause vibrations or perturbacauses external vibrations, per- tions of the optical table, e.g., air conditioning, fans or noisy water lines. Verturbations. ify there is little change in room temperature and/or the pump laser cooling water (≤1.0°C), and humidity (≤5%). Also ensure there is not a direct flow of air from a register or air vent onto the table. Dirty optics. Clean the optics. Refer to Chapter 7, “Maintenance,” for information on how and when to clean Opal optics. Refer to your Tsunami user's manual for information on how to clean its optics. cw breakthrough (Tsunami Use the prism dispersion compensation control to adjust Tsunami prisms Pr2 laser). and Pr3 to eliminate cw breakthrough. Refer to Appendix B in the Tsunami users manual for information on cw breakthrough. 8-5 Opal fs Synchronously Pumped Optical Parametric Oscillator Replacement Parts Table 8-1: Opal Standard Mirrors Description Location Coating Range Part Number Beam splitter Assembly, High Reflector PZT Signal Output M5 1.3–1.5 µm 1090–1370 nm G0020-000 0449-1840 Assembly, High Reflector PZT M5 1320–1600 nm 0449-1850 Assembly, Crystal – Mirror, Fold M 3, M 4 Uncoated, cut to Brewster's 0449-9200S angle 1090–1370 nm G0079-020 Mirror, Fold M 3, M 4 1320–1610 nm G0079-021 Mirror, Output 9% M1 1090–1370 nm G0324-022 Mirror, Output 6% M1 1320–1620 nm G0324-023 Mirror, High Reflector M2, M6, (M6P), M7, M7P 1090–1370 nm G0380-001 Mirror, High Reflector M2, M6, M7 1320–1620 nm G0380-002 Mirror, High Reflector M6P 1090–1365 nm G0380-003 Filter – 1–2 µm passband G0385-000 Table 8-2: Opal Hardware Description Part Number This Opal User's Manual Assembly, Brewster window Purge tubing kit Assembly, Idler 1 Assembly, Idler 2 Motor micrometer Opal software, rev. 2.21 (PCMCIA card) 0000-234A 0441-8110S 0447-1590 0450-2210 0450-2220 5401-1579 0450-7870 Table 8-3: Tsunami Special Optics Description Part Number Birefringent filter (single-plate) MIrror, Output Coupler 0434-8931 G0381-001 8-6 Chapter 9 Customer Service At Spectra-Physics, we take pride in the durability of our products. We place considerable emphasis on controlled manufacturing methods and quality control throughout the manufacturing process; nevertheless, even the finest precision instruments will need occasional service. We feel our instruments have excellent service records compared to competitive products, and we hope to demonstrate, in the long run, that we provide aboveaverage service to our customers—not only in providing the best equipment for the money, but in addition, service facilities that get your instrument repaired and back to you as soon as possible. Spectra-Physics maintains major service centers in the United States, Europe, and Japan. Additionally, there are field service offices in major United States cities. When calling for service inside the United States, dial our toll-free number: 1 (800) 456-2552. To phone for service in other countries, refer to the Service Centers listing located at the end of this section. Order replacement parts directly from Spectra-Physics. For ordering or shipping instructions, or for assistance of any kind, contact your nearest sales office or service center. You will need your instrument model and serial numbers available when you call. Service data or shipping instructions will be promptly supplied. To order optional items or other system components, or for general sales assistance, dial 1 (800) SPL-LASER in the United States, or 1 (650) 9612550 from anywhere else. Warranty This warranty supplements the warranty contained in the specific sales order. In the event of a conflict between documents, the terms and conditions of the sales order shall prevail. The Opal is protected by a 12-month warranty. All mechanical and optical parts and assemblies are unconditionally warranted to be free of defects in workmanship and material for one (1) year following delivery of the equipment to the F.O.B. point. Liability under this warranty is limited to repairing, replacing, or giving credit for the purchase price of any equipment that proves defective during the warranty period, provided prior authorization for such return has been given by an authorized representative of Spectra-Physics. Warranty repairs or replacement equipment is warranted only for the remaining unexpired portion of the original warranty period applicable to the repaired or replaced equipment. 9-1 Opal fs Synchronously Pumped Optical Parametric Oscillator This warranty does not apply to any instrument or component not manufactured by Spectra-Physics. When products manufactured by others are included in Spectra-Physics equipment, the original manufacturer's warranty is extended to Spectra-Physics customers. When products manufactured by others are used in conjunction with Spectra-Physics equipment, this warranty is extended only to the equipment manufactured by SpectraPhysics. Spectra-Physics will provide at its expense all parts and labor and one-way return shipping of the defective part or instrument (if required). This warranty does not apply to equipment or components that, upon inspection by Spectra-Physics, discloses to be defective or unworkable due to abuse, mishandling, misuse, alteration, negligence, improper installation, unauthorized modification, damage in transit, or other causes beyond Spectra-Physics' control. The above warranty is valid for units purchased and used in the United States only. Products with foreign destinations are subject to a warranty surcharge. Return of the Instrument for Repair Contact your nearest Spectra-Physics field sales office, service center, or local distributor for shipping instructions or an on-site service appointment. You are responsible for one-way shipment of the defective part or instrument to Spectra-Physics. We encourage you to use the original packing boxes to secure instruments during shipment. If shipping boxes have been lost or destroyed, we recommend you order new ones. Spectra-Physics will only return instruments in Spectra-Physics containers. Warning! 9-2 Always drain the cooling water from the head before shipping. Water expands as it freezes and will damage the unit. Even during warm spells or summer months, freezing may occur at high altitudes or in the cargo hold of aircraft. Such damage is excluded from your warranty coverage. Customer Service Service Centers Benelux Telephone: (31) 40 265 99 59 France Telephone: (33) 1-69 18 63 10 Germany and Export Countries* Spectra-Physics GmbH Guerickeweg 7 D-64291 Darmstadt Telephone: (49) 06151 708-0 Fax: (49) 06151 79102 Japan (East) Spectra-Physics KK East Regional Office Daiwa-Nakameguro Building 4-6-1 Nakameguro Meguro-ku, Tokyo 153 Telephone: (81) 3-3794-5511 Fax: (81) 3-3794-5510 Japan (West) Spectra-Physics KK West Regional Office Cygnes Building 2-19 Uchihirano-Cho Chuo-ku, Osaka Telephone: (81) 6-6941-7331 Fax: (81) 6-6941-2700 United Kingdom Telephone: (44) 1442-258100 United States and Export Countries** Spectra-Physics 1330 Terra Bella Avenue Mountain View, CA 94043 Telephone: (800) 456-2552 (Service) or (800) SPL-LASER (Sales) or (800) 775-5273 (Sales) or (650) 961-2550 (Operator) Fax: (650) 964-3584 e-mail: [email protected] [email protected] Internet: www.spectra-physics.com *And all European and Middle Eastern countries not included on this list. **And all non-European or Middle Eastern countries not included on this list. 9-3 Opal fs Synchronously Pumped Optical Parametric Oscillator 9-4 Appendix A Setting the Line Voltage Switch The line voltage switch, part of the power connector on the Opal electronics module, must match your local line voltage. The Opal electronics module is shipped from the factory with the line voltage selected for the location of intended use. If it is incorrect, you must change it prior to applying power to the system. The following directions are provided so you can make the change yourself. 1. Remove the cover plate/fuse block assembly to expose the voltage selector card. Refer to Figure A-1. Use a small screwdriver to gently pry off the cover plate. A slot is provided for screwdriver access. Power Switch Power Cord Connector Voltage Selector Card 0 1 0 2 2 0 4 2 0 Fuse Holder Bracket 0 0 0 2 2 0 2 0 2 2 0 2 120 V 4 240 V 1 0 1 0 0 2 1 0 4 2 1 2 0 0 0 110 V 2 220 V 1 0 2 1 0 4 1 0 2 2 100 V 120 V 220 V 240 V The four orientations of the voltage selector card. Figure A-1: Power Switch, Line Cord, and Voltage Selector Module 2. Remove the voltage selector card. The voltage selector card comprises a white plastic indicator pin and a small pc board about 2 cm (0.8 in.) square. Refer to Figure A-1. Using needle-nose pliers, gently grasp the pc board and remove it from the module. A side-to-side motion will assist in its removal. A-1 Opal fs Synchronously Pumped Optical Parametric Oscillator 3. 4. 5. Select the voltage. There are four voltage selections, one written on each edge of the pc board with a small arrow pointing to it. a. Measure your facility outlet voltage, then rotate the pc board until the edge with the measured voltage printed on it faces the inside of the module (arrow points into the module). b. Move the white indicator pin in the pc board slot so it points away from your selection and will protrude through the correct hole in the cover plate when the plate is replaced in Step 6. Replace the voltage selector card. Make sure the pc board seats properly for good electrical contact. Verify the correct fuse is installed. Remove the small screw holding the fuse block to the cover plate to access the fuse. Use the table below to determine the correct fuse size for your facility outlet voltage, then verify the correct one is installed. Table A-1: Fuse Selection 6. Line Voltage Fuse Value 100 to 120 Vac 220 to 240 Vac 1 A slow blow ½ A slow blow Snap the cover plate into place. If the indicator pin is not in the correct position, repeat Steps 3and 4. This completes the procedure for changing the voltage setting. A-2 Pulse Width Measurement and GVD Compensation Appendix B Introduction In this chapter we discuss how to measure pulses using an autocorrelator, as well as how to compensate for group velocity dispersion (GVD). The Autocorrelation Technique Measurement of Ultrashort Pulses An autocorrelator is the most common instrument used for measuring an ultrafast femtosecond (fs) or picosecond (ps) optical pulse. By using the speed of light to convert optical path lengths into temporal differences, we use the pulse to measure itself. The basic optical configuration is similar to that of a Michelson interferometer. An incoming pulse is split into two pulses of equal intensity and an adjustable optical delay is imparted to one. The two beams are then recombined within a nonlinear crystal for second harmonic generation. The efficiency of the second harmonic generation resulting from the interaction of the two beams is proportional to the degree of pulse overlap within the crystal. Monitoring the intensity of uv generation as a function of delay between the two pulses produces the autocorrelation function directly related to pulse width. Two types of autocorrelation configurations are possible. The first type, known as interferometric and shown in Figure B-1, recombines the two beams in a collinear fashion. This configuration results in an autocorrelation signal on top of a constant dc background, since the second harmonic generated by each beam independently is added to the autocorrelation signal. Alternatively, if the two beams are displaced from a common optical axis and then recombined in a noncollinear fashion (Figure B-2), the background is eliminated because the uv from the individual beams is separated spatially from the autocorrelator signal. This configuration is called “background-free” autocorrelation. B-1 Opal fs Synchronously Pumped Optical Parametric Oscillator Photomultiplier Tube uv Filter Non-linear Crystal Lens Beam Splitter Incoming Beam Mirror Adjustable Delay Mirror Figure B-1: Interferometric (Collinear) Autocorrelation Photomultiplier Tube uv Filter Frequency-doubled Autocorrelation Signal Non-linear Crystal Lens Retro Prism Beam Splitter Incoming Beam Adjustable Delay Retro Prism Figure B-2: Background-free (Non-collinear) Autocorrelation B-2 GVD Compensation The Spectra-Physics Model 409-08 scanning autocorrelator operates in a background-free configuration according to the principles of noncollinear autocorrelation. It allows the autocorrelator signal to be conveniently displayed on a high impedance oscilloscope, which provides the user with instantaneous feedback of laser performance. The optical path of the Model 409-08 is shown in Figure B-3. The Model 409-08 uses a rotating block of fused silica for varying the relative path lengths of both beam paths, and the scanning time base is calibrated by moving a calibration etalon of known thickness in and out of one of the beam paths. The Model 409-08 can be used over the wavelength range from 650 to 1600 nm and, by changing the rotating blocks, can be used to measure pulse widths from 25 ps to < 80 fs. HRR1 Calibration Etalon M2 HRR2 Rotating Block (Thin Block Shown) Alignment Beam Splitter Input M1 Main Beam Splitter PMT Lens UV Filter Xtal M3 M HRR Xtal PMT Alignment Iris Alignment Target Mirror Hollow Retro-reflector Non-linear Crystal Photomultiplier Tube Figure B-3: The Model 409-08 Autocorrelator Optical Path. The beam paths are displaced by in and out of the plane of the paper, so the configuration corresponds to the background-free method shown in Figure B-2. HRR1 and HRR2 B-3 Opal fs Synchronously Pumped Optical Parametric Oscillator Signal Interpretation In order to determine the actual pulse width from the displayed autocorrelation function, it is necessary to make an assumption about the pulse shape. Table B-1 shows the relationship between pulse width, ∆tp, and the autocorrelation function, ∆tac, for several pulse shapes. It also shows the time-bandwidth product, ∆tp @ ∆ν, for transform-limited pulses. Table B-1: Second-Order Autocorrelation Functions and Time-Bandwidth Products for Various Pulse Shape Models. Function I(t) ∆tp*/∆tAC** ∆tp∆n*** Square I(t) = 1; |t| ≤tp/2 0; |t| ≥tp/2 1 1 Diffraction Function I(t) = sin2 (t/∆tp) (t/∆tp) 0.751 0.886 Gaussian I(t) = exp–(4ln2) t2 ∆t2p 0.707 0.441 Hyperbolic Secant I(t) = sech2 (1.76t) ∆tp 0.648 0.315 I(t) = 0.500 0.221 0.413 0.142 Lorentzian Symmetric twosided exponential 1 1 + (4t2/∆t2p) I(t) = exp – (ln2)t ∆tp ∆tp (sec) is FWHM of intensity envelope of the pulse. ∆tAC (sec) is FWHM of autocorrelator function of the pulse. *** ∆tn (Hertz) is FWHM of the spectrum of the pulse. * ** GVD Compensation in Measurement of Ultrashort Pulses Because the pulses produced by the Tsunami® laser and the Opal® are extremely short (< 130 fs), pulse broadening in optical materials from group velocity dispersion, or GVD, makes true pulse width measurement difficult. Also, because the GVD of glass causes the pulse width to broaden, the pulse reaching an experimental sample after traveling through beam splitters, lenses, etc., may not be the same pulse that is measured by the autocorrelator. It is thus important to ensure that the measurement technique and the experimental incorporate the same amount of glass and introduce some GVD compensation if the shortest pulses are to be measured and delivered to a sample. Even before the pulse leaves the laser or the Opal, it travels through extra glass. For example, in a Tsunami laser, if we assume the pulse is at its shortest as it passes through the coating of the output coupler, it then travels through the output coupler substrate, the photodiode beam splitter and the output window. For the Tsunami laser, the total thickness of these optics is about 1.9 cm. Thus, a pulse that is 60 fs at the output coupler coating becomes 66 fs by the time it exits the laser. Include the glass of an autocorrelator and that in any experimental setup and the pulse can be broadened substantially. B-4 GVD Compensation Since most autocorrelators use beam splitters, a lens, and often a spinning block (as in the Spectra-Physics Model 409-08), the pulse is also broadened in the autocorrelator before it is measured. This means the pulse out of the Tsunami or Opal may be actually shorter than that indicated by direct measurement. Consequently, GVD must also be compensated for when using an autocorrelator. Since the sign of GVD in material is generally positive for the wavelengths produced by the Tsunami laser and the Opal, introducing negative GVD into the beam path compensates for the broadening effect of the material. Negative GVD can be introduced into a system with prism pairs, grating pairs, or a Gires-Tournois Interferometer (GTI). The prism pair provides the easiest, lowest loss means for compensating for the positive GVD of materials. A prism pair is used for this reason in the Opal 1.3 µm configuration. For the 1.5 µm configuration, it is not necessary to use the prism pair because the LBO nonlinear crystal actually has negative GVD in this wavelength range. To compensate for pulse broadening from materials, a simple setup using two high index (SF-10) prisms is all that is necessary. Figure B-4 shows the layout (top and side views) for an easily built pre-compensation unit. Prism 1 Input Beam Prism 2 Pick-off Mirror To Autocorrelator/ Experiment High Reflector Side View: Beam path shown for a particular frequency component of the pusle. Prism 2 Higher Frequency (Blue) Prism 1 Lower Frequency (Red) Direction in which to translate Prism 1 to add more positive GVD. Top View: Dispersion shown. Figure B-4: Using two prisms to compensate for positive GVD. B-5 Opal fs Synchronously Pumped Optical Parametric Oscillator The laser pulse travels through the first prism where different frequency components are spread in space. Then the broadened pulse travels through the second prism, strikes a high reflector, and reflects back along its original path—with one exception. The high reflector is slightly tilted in the plane perpendicular to the spectral spreading and causes the pulse to travel back through the prisms at a slightly different vertical height so that it can be picked off. After the beam returns through the first prism, it is reflected by another mirror to the autocorrelator and/or the experiment. This setup allows the higher frequencies (blue) to catch up with the lower frequencies (red). This is not intuitively obvious, since it appears that the higher frequencies actually travel a longer path length than the lower frequencies. However, it is the second derivative of the path with respect to wavelength, d2P/dλ2, that determines the sign of the GVD. Table B-2 and Table B-3 provide dispersion values at 800 nm for materials and grating prism pairs. Dispersion, Dω, is expressed in units fs2/cm of path length. Table B-2: Positive Dispersion Values @ 800 nm Material Dω(fs2/cm) Fused Silica BK-7 Ti:sapphire SF-10 300 450 580 1590 Table B-3: Negative Dispersion Values @ 800 nm System Dω(fs2/cm) SF-10 Brewster Prism pair, double pass BK-7 Brewster Prism pair, double pass –80.2 –12.8 –1500 Grating pair, 400 lines/cm @ 30° incidence angle, double pass Grating pair, 1000 lines/cm @ 30° incidence angle, double pass –10,000 The prisms are double passed to maintain the spatial profile of the beam. If only one pass through the prism is used, the output is spatially chirped. While the spacing of the prisms provides negative dispersion, the prism material actually adds more positive dispersion to the system. This can be used to our advantage to optimize a prism pre-compensator. For an initial setup based on your Tsunami and Opal and a Model 409-08 autocorrelator, set the prisms approximately 30 cm apart at Brewster's angle to the beam with the high reflector a few cm from the second prism. With this spacing, the prism pair should start with excess negative GVD. By moving the prism tips into the beam, we can balance the GVD for minimum pulse width. To do this, place the first prism on a translation stage that moves the prism in the direction of the bisector of the apex. This way, more glass can be pushed into the beam path without displacing the beam or changing its angular direction. This allows the negative GVD of the prism system to balance the positive GVD created by all the glass. By moving the B-6 GVD Compensation prism into the beam path and monitoring the pulse with a Model 409-08, the pulse should get narrower as dispersion is balanced. If a minimum cannot be found, adjust the prism spacing and search for the minimum again. Calculating Pulse Broadening Below are some simple formulae for calculating the effects of GVD and its compensation. B (broadening), is defined as the ratio of the output pulse width to the input pulse width where B = tout/tin. Consequently, knowing the input pulse width, B can be calculated so that tout = B·tin. A simple formula for calculating the broadening of a transform-limited Gaussian pulse by dispersive elements is: 1⁄ = t out ⁄ t in 2 2 = 1 + [ 7 ⋅ 68 ⋅ ( D ω ⋅ L ⁄ t in ) ] [1] where tin is the input pulse width in femtoseconds, and Dω is a dispersion value normalized for a given length and wavelength. Table B-2 gives positive GVD values for different materials at 800 nm. Table B-3 contains values for negative dispersion setups, prisms, and grating pairs for compensation at 800 nm. Using these values, B is calculated directly; we define S as: L S = D ω ⋅ ---2 t in [2] Using Figure B-5, you can relate the value of S to a value for the broadening B. When using this equation and graph, it is important to remember that the values of Dω are wavelength sensitive. For example, for BK-7 material, the difference from 800 nm to 880 nm is 17%. Therefore, it is important to use the correct value of Dω for the operational wavelength. Also, if there are several materials present, the values for dispersion must be added before calculating B. For example: D ω( tot ) L ω( tot ) = D ω( 1 ) L ω( 1 ) + D ω( 2 ) L ω( 2 ) + …D ω( n ) L ω( n ) [3] This provides a simple means for calculating the spacing between prisms necessary for compensation. B-7 Opal fs Synchronously Pumped Optical Parametric Oscillator Broadening (tout/tin) 6 5 4 3 2 1 0 0 0.1 0.2 0.3 0.4 0.5 0.6 0.7 0.8 0.9 1.0 1.1 1.2 1.3 1.4 1.5 1.6 1.7 1.8 1.9 2.0 S (Normalized Units) Figure B-5: Broadening Curve Example 1: Calculating pulse width measured by a Model 409-08 without pre-compensation. Assume an 800 nm pulse at the output coupler surface of a Tsunami laser is 55 fs long and transform limited. It passes through 1.9 cm of fused silica before exiting the Tsunami, and 0.25 cm of BK-7 glass and 0.26 cm of fused silica in the Model 409-08. D ω( tot ) L ω( tot ) = D ω( 1 ) L ω( 1 ) + D ω( 2 ) L ω( 2 ) = 300 ·1.9 + 300 · 0.26 + 450 · 0.25 = 760 fs2 Therefore S = 760(fs2)/(55 fs)2 = 0.251 Then, looking at our normalized curve (Figure B-5), S = 0.251, and B = 1.22, tout = 1.22 · tin = 67 fs. Example 2: Calculating the prism spacing necessary for pre-compensating the Model 409-08. Since dispersion is additive, it is only necessary to make the total dispersion equal to zero to eliminate all broadening effects. This allows a direct calculation of the required prism spacing without finding the actual broadening. Again, start with a 55 fs transform-limited, 800 nm pulse going through 2.16 cm of fused silica and 0.25 cm of BK-7. Also assume the use of an SF10 prism-pair pre-compensator where the beam passes through a total of 2 mm of prism tip per pass, or 8 mm total. The GVD for all parts of the system and the length for everything but the prism spacing are known. The length can be calculated by setting total GVD = 0. B-8 GVD Compensation D ω( tot ) L ω( tot ) = D ω( 1 ) L ω( 1 ) + D ω( 2 ) L ω( 2 ) + D ω( 3 ) L ω( 3 ) + D ω( 4 ) L ω( 4 ) = 0 = 300 · 2.16 + 450 · 0.25 + 0.8 · 1590 + L · (–80.2) = 0 Therefore L = 25.3 cm. Note: the spacing L is the distance between the two tips of a prism in a double-pass configuration, or the distance between the two tips in one leg of a four-prism sequence. The calculated L is shorter than recommended above, but since the material dispersion value of SF-10 prisms is so high, sliding just a bit more glass in will add a large amount of positive GVD, thereby balancing out the prism spacing. B-9 Opal fs Synchronously Pumped Optical Parametric Oscillator B-10 Appendix C Caution! Servo Wavelength Monitor Calibration Complete this calibration only when the actual wavelength differs from the displayed wavelength by more than ±3.0 nm after running Scan Length from the Setup menu. The latter is a day-to-day self-calibration routine, and we recommend you perform this routine each time you start up the Opal system. Note: the propagation of the output beam to the grating of the Servo Wavelength Monitor also affects wavelength calibration. In order to perform this calibration, the Opal must be lasing but not “locked,” i.e., the loop must be off. This procedure can be performed with either the 1.3 or 1.5 µm optic set installed as long as the system is set for the peak wavelength for that set, i.e., 1.3 or 1.5 µm respectively. Refer to Table C-1 at the end of this chapter for nominal operating parameters. Danger! Laser Radiation This procedure requires adjustment or replacement of optics while using the laser system at high power. For safety, close the Millennia pump laser shutter every time you change an optic or interfere with the cavity in any way, and only open it when you are aligning an optic. Protect your self with appropriate eyewear at all times. Stepper Calibration Procedure To implement the following procedure, the Opal must be operational with output at 1.3 or 1.5 µm (depending on the optics set installed). 1. Verify the settings on the Setup menu (in Chapter 6) are appropriate. Refer to Table C-1 at the end of this chapter for nominal operating parameters for pump wavelength and optic set range. a. Go to the Setup menu and select 1.1–1.4 if the 1.3 µm optics set is installed, or 1.3–1.6 if the 1.5 µm set is installed. b. From this same menu, set the assumed pump wavelength to 775 for the 1.3 µm optics set or 810 nm for the 1.5 µm optics set. 2. Verify the Tsunami is optimized with 2.0 W of output power at the selected wavelength, then use a monochromator to confirm the Tsunami output wavelength. 3. From the Manual Control menu, set Loop to OFF. C-1 Opal fs Synchronously Pumped Optical Parametric Oscillator 4. Use a monochromator to monitor the Signal wavelength and set its wavelength to the peak wavelength for the installed optic set (i.e., 1.300 µm or 1.500 µm). If necessary, adjust the Opal cavity length via the motor position control in the Manual Control menu to set the Opal to 1.300 µm for the 1.3 µm set and 1.500 µm for the 1.5 µm set. 5. Verify the Opal Signal beam is centered on output coupler M1. If required, small adjustments can be made to M3, M2, and M1 to center the beam on I2 and M1. 6. Optimize the Opal Signal output power. a. Iterate between adjusting the vertical and horizontal controls on M1 and high reflector M7 or M7P until maximum Signal output power is obtained. b. Again, adjust the Opal cavity length via the motor position control in the Manual Control menu to return the Opal Signal to the appropriate wavelength (1.3 or 1.5 µm). 7. Repeat Steps 5 and 6 until the beam is centered on M1, it is optimized and it remains at the appropriate wavelength. 8. Verify the Opal Signal beam is centered horizontally on the Servo Wavelength Monitor housing aperture. If necessary, reposition the servo housing, which is secured to the base plate by two 1/4 –20 in. button head screws. 9. From the Manual Control menu, set the grating (gtng) wavelength for steps, not wavelength, using the Step/µm push button. 10. Set the grating to the 0th order. a. Select gtng and use the up/down push buttons to set it to about 9500 steps. As the system moves toward this point and the 0th order is approached, the power bar graph should begin to maximize. b. At some point, the err bar will begin to move towards the center of the err bar display. When this happens, stop pressing the button so that the err bar remains in the center. The power graph should be at about the 50% mark. Record the gtng step number displayed. 11. Set the grating to the 1st order. Use the down push button to lower the grating number to the point where the power bar graph maximizes and the err bar once again centers. 12. Use the black knob on the beam splitter to adjust it horizontally to maximize the power bar graph. Caution! Do not use the Allen hex head adjustment of the beam splitter because this will destroy the factory wavelength calibration! 13. Repeat Steps 10 through 12 until the power bar graph is maximized. 14 Turn on the Loop. C-2 Servo Wavelength Monitor Calibration 15. Press the Back key to exit the Manual Control menu. 16. From the Diagnostics menu, select Cal. Wavelng. 17. Measure the actual operating wavelength of the Opal Signal output beam with the monochromator, then select the Set Actual Wavelength field and use the up/down push buttons to enter that measured value. 18. Select the Zeroth Order at field and enter the 0th order grating step number recorded in Step 10. 19. Press the Set Cal push button. The screen will go blank for a brief moment, and then return with the system calibrated using the new values. 20. Return to the Setup menu and perform a Scan Length. This will take a few moments. Note: Do not perform Scan Length from the Manual Control menu. No self-calibration is performed by this function in Manual Control. Use the Setup menu. When Scan Length is done, the system will return to the Main menu and the system will be locked and calibrated. You can now set the system for the wavelength you actually want to use. Table C-1 shows nominal grating and temperature settings for operating at several Opal Signal wavelengths. Table C-1: 1st Order Settings for Several Opal Wavelengths Opal Wavelength (µm) Pump Wavelength (nm) Grating Setting (steps) Nom. Crystal Temperature 1.200 1.300 1.400 1.500 775 775 810 810 3133 2651 2128 1596 85% 53% 76% 63% This completes the procedure for calibrating the servo wavelength monitor assembly. C-3 Opal fs Synchronously Pumped Optical Parametric Oscillator C-4 Appendix D Replacing the PCMCIA Card Battery The 512 kB PCMCIA memory card found in the Opal controller uses a small 3 V disk battery to maintain the data stored in it. The expected lifetime of the battery is approximately 2–3 years, so it is prudent to change the battery every 2 years regardless of use. If the battery dies, the data is lost, and a full system recalibration is required. The different brands of PCMCIA cards used in these systems are described below. Following this description is a procedure for changing the battery without losing the data. Determine which card you have, then read the procedure completely through, making sure you understand it before you begin. Card Insertion nic so na pa MELCARD MITSUBIS HI RD YC A 2 51 OR ME M 512 KB Write Protect Write Protect Screw Release Battery type BR2325 Positive side up Write Protect Screw Release Battery type BR2325 Positive side up Latch Release Battery type CR2025 Positive side up Figure D-1: Three examples of PCMCIA cards. Card Description/Replacement Battery List The following are the five types of 512 kB SRAM cards currently used. 3 volt batteries are used in all units, but the size and part numbers vary. Mitsubishi MF3513-LCDAT01 Silver with blue patch and white edge trim. Screw retains battery. Battery: BR2325 Epson Plain gray card with black edge trim. Latch retains battery. Battery: CR2025 D-1 Opal fs Synchronously Pumped Optical Parametric Oscillator Epson One side white, opposite side light blue. Latch retains battery. Battery: CR2025 Epson One side green/brown/copper, opposite side brown. Latch retains battery. Battery: BR2325 Panasonic BN-512HMC Gray and green with gray edge trim. Screw retains battery. Battery: BR2325 Procedure The idea is simple: leave the card in the controller and, with the controller on to provide power to the memory, replace the battery. Warning! While performing this procedure: • Do not turn off the power to the controller. • Do not remove the card. There are two types of battery holders. One type uses a small screw that secures the battery and holder in the card. The other type uses a sliding latch to secure the battery holder. Figure D-1 shows memory cards from Mitsubishi, Panasonic and Epson. Note: the Epson card shown is the most commonly used card and is the first Epson type listed above. It has no labeling. Caution! Note the write protect slide on each unit. Do not confuse this slide with the retaining latch on the Epson cards. These cards must NOT be write protected or the system will not operate properly. The Mitsubishi and Epson cards have battery holders which pull the battery out when they are removed. The Panasonic card simply has an end cap to keep it from falling out. The battery must be pulled out separately. Warning! The battery is not secured by the holder and will fall out of the holder as soon as it is no longer retained by the sides of the card. If it falls onto the controller motherboard, it can short traces or components and ruin the motherboard. Be very careful — hang onto the battery as you pull it out! 1. D-2 With the controller power on and the PCMCIA card in the unit, either loosen the screw (Mitsubishi or Panasonic) or slide the latch that retains the battery. Do not drop the screw on the motherboard! Replacing the PCMCIA Card Battery 2. Observe the polarity of the battery as you remove it (it is possible to install the battery backwards in the Panasonic card). There is a “+” sign on the battery on its positive side (the side without the seam). The “+” sign should face away from the front of the controller. 3. Install the new battery, observing its polarity. 4. Fasten the holder in place with the screw, or slide the retaining latch into place. 5. Place a piece of tape or Avery label on the PCMCIA card and mark on it the date of installation. Remember to replace the battery every 2 years. This completes the procedure for replacing batteries in the PCMCIA card. D-3 Opal fs Synchronously Pumped Optical Parametric Oscillator D-4 Appendix E Using the Optional RS-232/IEEE-488 Interface This appendix explains how to operate the Opal system from a remote source using either the optional RS-232 serial interface or the IEEE-488 parallel interface, the latter commonly referred to as the General Purpose Interface Bus, or GPIB. The IEEE-488 parallel interface is based on the "IEEE Standard Codes, Formats, Protocols, and Common Commands" specified in the ANSI/IEEE Standard 488.2-1987. The same commands are used whether you control the Opal using the RS-232 or IEEE-488 interface. The parallel interface is much faster than the serial interface, but at the control speeds required by the Opal system, either is acceptable. Note: not all systems have these optional interfaces installed. If the computer interface option is included in your system, a 25-pin D-sub serial connector and a 34-pin Centronics parallel connector will be present on the rear panel of the Opal controller. Scope This appendix describes how to install, set up and use these interfaces. Chapter 6, “The Menus: Remote Menu,” contains information on how to select one of these interfaces for remote control and provides you a means to return control to the controller front panel. The “Configure Menu: Misc.” allows you to set the address for the IEEE-488 interface and the baud rate for the RS-232 serial interface. Overview Two modes of control are available: local or remote. In local mode, the display and keys on the Opal controller front panel are used to read and enter parameters, initiate operations and monitor system status. In remote mode, a terminal or computer can be used to perform the same operations. In addition to the terminal or computer, an interface cable is required to connect the command source to the Opal controller (see Table E-1 and Table E-2 at the end of this chapter). Command messages are strings of ASCII characters the computer or terminal can send to the Opal controller where they are interpreted and implemented. These messages are organized into two categories: commands and queries. Commands direct the Opal to store a setup parameter or execute an operation, whereas queries interrogate the Opal for a stored parameter value or the status of an operation. Using these predefined command messages, a terminal can provide manual, interactive control of the system via the serial connection. Messages E-1 Opal fs Synchronously Pumped Optical Parametric Oscillator are sent from the terminal keyboard, and status responses are returned to the video monitor. A computer can also provide automatic control in addition to interactive control, and it can use either interface. For automatic control, a program designed by the user and based on the command and queries listed in this appendix can be run on the computer to step the controller through a sequence of operations. Format and Syntax Rules All commands and responses are in ASCII format. Commands to the Opal system must be terminated by an ASCII carriage return, line feed or both. All responses from the Opal are terminated by an ASCII line feed character. In the examples below, a carriage return is indicated by <CR>, and a line feed by <LF>. The syntax of the messages sent must conform exactly to the syntax of the examples shown in the next section on Command and Query Messages. Notice that all messages begin with a colon (:). A colon is also required between key words of the command string. For example, a typical transmission might look like: sent to the Opal ":read:wlen?<LF>" returned by the Opal "1.500<LF>" Commands The following list of remote commands and queries provide full control of the Opal system through either the RS-232 serial or IEEE-488 parallel interface. The Reference List is followed by complete definitions. Reference List :source:wlen:x.xxx :source:wlen? :source:wnum:xxxx :source:wnum? :source:toff:xx.x :source:toff? :read:power? :read:pzt? :read:temp? :read:wlen? :read:wnum? :scanlength :recall:x :save:x E-2 Sets desired signal wavelength in microns Reads desired signal wavelength in microns Reads desired signal wavelength in wave numbers Reads desired signal wavelength in wave numbers Sets the % temp. offset for the current operating point Reads % temp. offset for current operating point Reads current output power, 0 to 100% Reads current PZT position, 0 to 100 percent. Reads current crystal temperature, 0 to 100 percent Reads operating wavelength in microns Reads operating wavelength in wave numbers Same as pushing "Scan Length" button Recalls operating configurations Saves operating configurations Using the Optional RS-232/IEEE-488 Interface :SOURCE:WLEN:x.xxx<CR> —Set Wavelength Sets the desired signal wavelength in microns. The Opal will immediately begin moving toward the specified wavelength. Progress can be monitored with the :read:wlen? and *STB? commands. (This command is ignored if the Opal is in wavenumber mode.) :SOURCE:WLEN?<CR> —Read Wavelength Reads the desired signal wavelength in microns (also see ":read:wlen?") :SOURCE:WNUM:xxxx<CR> —Set Wave Number Sets the desired signal wavelength in wave numbers (cm-1) and immediately moves the Opal toward the specified wavelength. Progress can be monitored with the :read:wlen? and *STB? commands. (This command is ignored if the Opal is in microns mode.) :SOURCE:WNUM?<CR> —Read Wave Number Reads the desired signal wavelength in wave numbers (also see ":read:wnum?") :SOURCE:TOFF:xx.x<CR> —Set Temperature Offset Sets the percentage temperature offset for the current operating point. (This is a single point offset. The table shift cannot be changed via computer.) This command should only be given if the wavelength is stable (see the WLSET bit in the status byte). :SOURCE:TOFF?<CR> —Read Temperature Offset Reads the percentage temperature offset for the current operating point. (This is a single point offset. The table shift cannot be queried via computer.) :READ:POWER?<CR> —Read Output Power Reads the current output power, 0 to 100 percent. :READ:PZT?<CR> —Read PZT Position Reads the current PZT position, 0 to 100 percent. :READ:TEMP?<CR> —Read Crystal Temperature Reads the current crystal temperature, 0 to 100 percent. :READ:WLEN?<CR> —Read Wavelength Reads the operating wavelength, in microns. (This may be different than the value returned by the :source:wlen? query when the wavelength is not stable.) :READ:WNUM?<CR> —Read Wave Number Reads the operating wavelength, in wave numbers. (This may be different than the value returned by the :source:wnum? query when the wavelength is not stable.) E-3 Opal fs Synchronously Pumped Optical Parametric Oscillator :SCANLENGTH<CR> —Run Scan Length Same as pushing "Scan Length" button from the Laser Setup menu. A successful scan results in the LOOPON and WLSET bits being set in the status byte. Note During the "checking the calibration" phase of the scan length operation, the Opal system will not respond to commands/queries. :RECALL:x<CR> —Recall Operating Configuration Used to recall operating configurations (just like the Recall Configurations menu) :SAVE:x<CR> —Save Operating Configuration Used to save operating configurations (just like the Save Configurations menu) Additional Commands Required by the IEEE 488.2 Standard *CLS<CR> —Clear Status Command Clears the Event Status Register (ESR). *ESE:xxx<CR> —Standard Event Status Enable Command Sets the Event Status Enable (ESE) register. This is a mask on the bits in the event status register (ESR). The logical AND of the ESE and ESR registers is reported in bit 5 of the Status Byte (see *STB?). This register is initialized to zero. *ESE?<CR> —Standard Event Status Enable Query Reads the Event Status Enable (ESE) register. (See *ESE:xxx above.) Note This and all other registers are read/written using the <NR1 NUMERIC RESPONSE DATA> format. This means that values are ASCII strings like "0" and "255," not single bytes like 0x00 hex or 0xFF hex. *ESR?<CR> —Standard Event Status Register Query Reads and clears the Event Status Register (ESR). Bits are defined as follows: Bit Definition 7 PWRON—Power On Set when the electronics module power is first turned on. Will read “1” the first time, “0” on subsequent queries. URQ—User Request (always 0) CMDERR—command error The Opal couldn't interpret the command. 6 5 E-4 Using the Optional RS-232/IEEE-488 Interface 4 3 2 1 0 EXEERR—Execution error The Opal could not execute the command. For example, it cannot recall a setup which does not exist, or go to an out-of-range wavelength. DEVERR—device error (always 0) QRYERR—query error (always 0) RQSCTNL—request control (always 0) OPCMPL—operation complete (set by *OPC) Bits in the ESR are set by events. They are cleared only by reading the ESR with the *ESR? query. For example, if an invalid command is followed by a valid one, the CMDERR bit will remain set. *IDN?<CR> —Identification Query Returns an identification string, such as "Spectra Physics,Opal, 0,2.23<LF>". The last number is the software revision level. *OPC<CR> —Operation Complete Command Sets (1) the OPC bit of the Event Status Register (ESR) *OPC?<CR> —Operation Complete Query Returns a “1” to indicate that command interpretation was completed. *RST<CR> —Reset Command Loads stored configuration 0 and turns off the wavelength stabilization loop. *SRE:xxx<CR> —Service Request Enable Command Sets (1) the status byte mask register. *SRE?<CR> —Service Request Enable Query Reads the status byte mask register. *STB?<CR> —Read Status Byte Query Reads the status byte. Its bits are defined as: Bit 7 6 5 4 3 2 1 0 Definition (reserved) SRQ - Opal is requesting service ESR Summary Bit (this bit is one if the bit-wise AND of the ESR and the ESE is non-zero) (reserved) (reserved) WLSET - wavelength is settled LOOPON - the wavelength regulation loop is on (reserved) E-5 Opal fs Synchronously Pumped Optical Parametric Oscillator *TST?<CR> —Self-Test Query Returns a “1” to indicate success. (It does not actually run any internal tests on the Opal.) *WAI<CR> —Wait-to-Continue Command This is a no-operation (no-op) command. It is used to add wait states between readings or between a command and a read. It takes about 20 ms for a command to be implemented. Connections The following tables explain what kind of RS-232 cable to buy or create in order to connect the Opal to an IBM-PC or PC-AT compatible computer. Table E-1: RS-232-C Interface to a Standard 25-pin PC Com Port DTE Device RS-232-C communications Link* PC Computer DCE Device Opal 25-Pin Connector Standard 9-Wire Serial Interface Cable 25-Pin Connector 1 7 2 3 4 5 6 8 20 Protective Ground Signal Ground Transmitted Data Received Data Request To Send Clear To Send Data Set Ready Data Carrier Detect Data Terminal Ready 1 7 2 3 4 5 6 8 20 Table E-2: RS-232-C Interface to a Standard 9-pin PC-AT Com Port DTE Device RS-232-C communications Link* PC Computer DCE Device Opal 9-Pin Connector PC-AT 9 to 25 Pin Serial Interface Cable 25-Pin Connector shell 5 3 2 7 8 6 1 4 Protective Ground Signal Ground Transmitted Data Received Data Request To Send Clear To Send Data Set Ready Data Carrier Detect Data Terminal Ready 1 7 2 3 4 5 6 8 20 * Signals of the communications link are named with respect to the DTE device. E-6 Notes Notes-1 Opal fs Synchronously Pumped Optical Parametric Oscillator Notes-2 Notes Notes-3 Opal fs Synchronously Pumped Optical Parametric Oscillator Notes-4 Notes Notes-5 Opal fs Synchronously Pumped Optical Parametric Oscillator Notes-6 Report Form for Problems and Solutions We have provided this form to encourage you to tell us about any difficulties you have experienced in using your Spectra-Physics instrument or its manual—problems that did not require a formal call or letter to our service department, but that you feel should be remedied. We are always interested in improving our products and manuals, and we appreciate all suggestions. Thank you. From: Name Company or Institution Department Address Instrument Model Number Serial Number Problem: Suggested Solution(s): Mail To: FAX to: Spectra-Physics, Inc. ISL Quality Manager 1330 Terra Bella Avenue, M/S 15-50 Post Office Box 7013 Mountain View, CA 94039-7013 U.S.A. Attention: ISL Quality Manager (650) 961-7101 E-mail: [email protected] www.spectra-physics.com