1
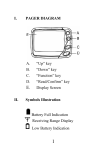
INDEX
1. PREFACE ...................................
2. PACKAGE INTRODUCTION ..........
2-1. Standard Package ..................
2-2. Optional Items ........................
3. INSTALLATION ...........................
3-1. AA Battery Installation .............
1
2
2
2
3
3
3-2. SIM Card Installation
(GSM Model Only) .................. 5
3-3. Li Battery Installation
(GSM Model Only) .................. 6
4. PAGER INTRODUCTION .............. 7
4-1. Key Introduction ..................... 7
4-2. Display Introduction ................12
4-3. Icon Introduction .....................14
5. TURNING ON THE PAGER ...........20
5-1. Manual Switch On .................. 20
5-2. Battery Power On .................. 20
6. SELF TEST .................................. 21
6-1. Self Test ............................... 21
7. TODAY ........................................ 22
7-1. Entering Today ...................... 22
7-2. Unread Message .................... 23
7-3. Today Message ...................... 24
7-4. Message Alarm ...................... 25
8. MESSAGE ................................... 26
8-1. Read Message ....................... 26
8-2. Message Acknowledgement
(GSM Model Only) .................. 32
8-3. Other Features ....................... 36
INDEX
9. EMERGENCY MESSAGE
(GSM MODEL ONLY) ................... 43
9-1. To Activate The Emergency
Message............................ 43
10. FUNCTION STATUS
45
10-1. Entering Function Status ..... 45
10-2. Function Enable /Disable
/Setting ............................. 46
11. SETTINGS ................................ 51
11-1. Profile ............................... 51
11-2. Time & Date....................... 52
11-3. Clock Alarm ....................... 56
11-4. On/ Off Duty ...................... 60
11-5. Alert Settings ..................... 62
11-6. Change Password .............. 70
11-7. LCD Contrast .................... 73
11-8. Volume Adjustment ........... 74
11-9. Backlight Setting ............... 75
11-10. Key Lock .......................... 76
11-11. Calendar .......................... 78
11-12. RF Test ........................... 80
11-13. Self-Program .................... 81
11-14. Information ....................... 85
12. OTHER INFORMATION .............. 87
12-1. Caring for Your Pager ........ 87
12-2. Clean Your Pager ............. 87
13. WARNING AND IMPORTANT
NOTES ...................................... 88
13-1. WARNING ....................... 88
13-2. IMPORTANT NOTES ........ 89
PREFACE
1. PREFACE
Unication would like to congratulate you for your choice of the E5 as
your communication tool. This user manual will provide you the
necessary information to get the optimum performance from your
pager. The E5 is a very versatile product and has the ability to satisfy
most communication requirements. We sincerely hope you enjoy
our brand-new E5 product.
This document is subject to changes without notice.The latest
electronic version of the user manual can be downloaded from
Unication official website: http: //www.unication.com/
1
PACKAGE
INTRODUCTION
2. PACKAGE INTRODUCTION
2-1. STANDARD PACKAGE
E5 standard package contains the following items:
E5 Pager
ITEMS
Holster
Type I
E5 Pager
User’S
Manual
Ni-HN
Rechargeable
Battery
AA
2-2. OPTIONAL ITEMS
The following are optional items :
ITEMS
2
External
Antenna
Mini USB
Holster Type II
Charger
AC Power
Adapter
Li battery
INSTALLATION
3. INSTALLATION
3-1. AA BATTERY INSTALLATION
The E5 is designed to operate with a single AA-size Ni-MH rechargeable
battery or an alkaline battery (LR6 is recommended).
See the diagram below for the battery door location.
TURN
1
PUSH
To insert or replace the battery, please remove battery door. Insert
one AA battery (Alkaline or rechargeable battery) into the battery
compartment.
ɁCaution: Observe battery polarity.
3
INSTALLATION
a. Loosen the screw by using a coin.
b. Using a coin to slide the battery door toward the outer edge.
c. Lift the battery door away from the housing and remove it.
d. Insert the battery into the battery compartment, taking note of the
positive (+) and negative (-) markings on the battery and the pager
housing.
※Caution:
For the first use, please keep the full charged battery stay in the pager
for more than 72 hours to fully charge the backup battery for message
retention.
4
PAGER
INTRODUCTION
3-2. SIM CARD INSTALLATION (GSM MODEL)
Before using the E5 GSM model, you have to install a GSM SIM
card, which is provided by your network service agent. Please
follow the below steps to install the SIM card.
a. Loose the 4 screws which are on the pager rear
housing.
b. Remove the pager rear housing.
c. Lift the SIM card holder.
d. Insert the GSM SIM card then place the SIM
card holder back.
e. Slide the SIM card holder forward to lock the
SIM card.
5
PAGER
INTRODUCTION
3-3. LI BATTERY INSTALLATION (GSM MODEL)
After install the GSM SIM card, please follow the
below steps to place the Li battery.
a. Plug the battery connector into the battery
connector.
b. Place the Li battery in the battery
component.
c. Place the rear housing back.
d. Screw the screws tightly.
6
PAGER
INTRODUCTION
4. PAGER INTRODUCTION
4-1. KEY INTRODUCTION
The E5 is available in 2 models. Please verify your model for the
proper key arrangement.
BASIC & GSM MODEL
FUNCTION STATUS KEY/
SOS BUTTON(GSM MODEL)
POWER KEY
MENU KEY
READ KEY
OK KEY
7
PAGER
INTRODUCTION
<1>POWER KEY
1. To turn on or turn off the pager.
When the pager is off, press POWER KEY for 2 seconds, the pager
will turn on.
When the pager is on, press POWER KEY for 2 seconds, a pager
off confirmation will pop up on the screen.
2. To return to stand by mode.
When operating any features, press
to return to stand by mode.
<2>MENU KEY
1. Press to display the main meun list.
All the main features that are activated in the PPS will be listed.
2. When “KEY LOCK” is activated and the pager is locked up, press
Menu Key to unlock the pager.
8
PAGER
INTRODUCTION
<3>READ KEY
is a short cut to read all the received messages.
1. If there are unread messages in the pager, press
to read the
messages directly.
2. If there is no unread message, you can also press
to enter
MESSAGE BOX.
3. When reading messages, press READ KEY to scroll through the
pages.
<4-1>FUNCTION STATUS KEY
is a shortcut to check the function status of the frequently used
features and to enable or disable the features.
You are allowed to view and change the settings of the following
features in Function Status
1. ALERT MODE
2.ON/ OFF DUTY
3. PROFILE
4. ALARM1~ALARM 5
9
PAGER
INTRODUCTION
<4-2>SOS Button (A programmable key of GSM model)
can be programmed as a SOS button. When “SOS Button is
enabled, press this key for 3 seconds, the emergency message will
be activated then sent to the designated destination via GSM or
GPRS.
※The Emergency Message can only be activated when the
pager has an active LCD screen i.e. standby or menu screen .
To operate Emergency from ECM condition , the screen must
first be made active with a short press of any key.
<5>OK KEY
1.For the feature settings, OK KEY is a confirmation key to confirm all the
settings.
2.When the pager is stand-by, OK KEY is to display the latest message
that received on the day when the pager is operated.
3.When reading message, OK KEY is to scroll through the pages.
10
PAGER
INTRODUCTION
<6>UP KEY
1. Press to move the cursor up.
2. When reading messages, press
to move to the last message.
<7>DOWN KEY
1. Press to move the cursor down.
2. When reading messages, press to move to the next message.
<8>LEFT KEY
Press to move the cursor on TOOL BAR left.
<9>RIGHT KEY
Press to move the cursor on TOOL BAR right.
11
PAGER
INTRODUCTION
4-2. DISPLAY INTRODUCTION
The E5 display is separated into 3 areas:
STATUS BAR
NEW MESSAGE
MAIN AREA
READ
TOOL BAR
4-2-1. STATUS BAR
STATUS BAR provides you the basic pager information, and
indicates the following features status:
a. Battery Capacity Indication.
b. Numbers of Unread Messages
c. ON/OFF DUTY Status
STATUS BAR
d. Alert Mode
TIME & DATE SETTING
e. Message Alarm Status
f. GSM Signal Strength (GSM MODEL
SAVE
ONLY)
g. RF Signal Strength
12
PAGER
INTRODUCTION
4-2-2. MAIN AREA
In stand by mode, MAIN AREA displays the following information:
a. Profile name.
b. Real Date & Time.
c. Clock Alarm status.
4-2-3. TOOL BAR
The Tool bar displays different features
with different function screens.
TIME & DATE SETTING
SAVE
TOOL BAR
You may move the cursor to each feature. A "Feature Description"
will be displayed on the selected feature to help you understand
its functionality.
13
PAGER
INTRODUCTION
4-3. ICON INTRODUCTION
1. Status Icons.
2. Tool Bar Icons.
4-3-1. STATUS BAR ICONS
STATUS BAR
TIME & DATE SETTING
SAVE
TOOL BAR
The level of RF signal strength.
RF Strength
There is no RF synchronization signal on the air.
14
PAGER
INTRODUCTION
:
15
PAGER
INTRODUCTION
ON/ OFF
DUTY STATUS
Off Duty.
On Duty.
Audible (Alert message alert settings).
Universal
Alert Status
Vibration (No alert except for priority call).
Silent (No alert and no vibration, except for priority call).
Message Alarm
Message Alarm is activated.
GSM Strength
Level of GSM signal Strength. (GSM Model Only)
16
PAGER
INTRODUCTION
4-3-2. TOOL BAR ICONS
TIME & DATE SETTING
SAVE
TOOL BAR
ICONs in MESSAGE BOX
READ
/
DELETE
/
LOCK/ UNLOCK
ZOOM IN
ZOOM OUT
DELETE ALL
MOVE TO NOTEBOOK
PAGE DOWN
MESSAGE ALARM
MESSAGE ACK
17
PAGER
INTRODUCTION
ICONs in MESSAGE BOX ( GSM Model Only)
RESPONSE ACK
FOLDER LIST
ADDRESS
ALERT MODE-VIB
THEN ALERT
ALERT TYPEGENERAL ALERT
ALERT
MODE-ALERT
ALERT MODE-VIB
AND ALERT
ALERT TYPEESCALATING ALERT
ALERT
MODE-SILENT
VIBRATION
MODE-REPEAT
BACKLIGHT COLOR
ALERT
MODE-CHIRP
VIBRATION
MODE-INTERVAL
ACK STATUS
ICONs in ALERT SETTING
ALERT MODEVIBRATION
18
PAGER
INTRODUCTION
ICONs in PAGER SETTINGS
/
ALARM ON/ OFF
TOGGLE
YEAR SETTING
MONTH SETTING
DATE SETTING
HOUR SETTING
TEN-MINUTE
SETTING
UNIT-MINUTE
SETTING
SOONZER
ACTIVATED TIME
VOLUME
ADJUSTMENT
ENTER
BACK
19
SELF TEST
5. TURNING ON THE PAGER
There are two ways to turn on your pager :
5-1. MANUAL SWITCH ON
a. When the E5 is off, press "POWER KEY"
for 2 seconds.
b. The E5 will turn on and generate a power-on
Unication
alert and vibration.
c. After not operating the pager for seconds , the
E5 will process to Standby mode. The activated profile will be
displayed on the screen.
5-2. BATTERY POWER ON
a. The E5 turns on automatically when inserting a battery.
20
TURNING
ON THE PAGER
6. SELF TEST
6-1. SELF TEST
When the E5 turns on, it automatically reverts to the “SELF TEST” to
determine if the pager is working normally.
a. The testing status and result will be displayed
on the screen.
b. If there is any error found, a warning will be
displayed on the pager screen. Please contact
a Unication representative agent for more
information.
21
TODAY
7. TODAY
TODAY is a folder which stores all the current day’s received
messages.
7-1. ENTERING TODAY
a. Press MENU KEY, the main menu will display.
and OK KEY to move and enter
b. Press
today.
ENTER
Ɂ In the TODAY screen, there are 3 sub-folders for you to check:
(1) TODAY UNREAD MESSAGE (2) TODAY MESSAGE
(3) MESSAGE ALARM
22
TODAY
7-2. UNREAD MESSAGE
a. After entering the TODAY screen, the cursor will stay on "UNREAD
MESSAGE". Press OK KEY to enter "UNREAD MESSAGE".
All the unread messages received today will be listed in chronological
order.
Ɂ The Message List will be displayed with
its folder name, source name and message
preview.
Ɂ The tool bar features are the same with
"READ MESSAGE".
ENTER
23
TODAY
7-3. TODAY MESSAGE
then OK KEY
a. In the "TODAY" screen, press
to select and enter " TODAY MESSAGE".
All the messages that received today will be
saved in this folder.
ENTER
Ɂ The MESSAGE LIST will be displayed with its folder name,
source name and message preview.
Ɂ The tool bar features are all the same with "READ MESSAGE".
24
TODAY
7-4. MESSAGE ALARM
The messages alarm that will be activated on the day then the pager
user is operating the pager, will be saved in this folder.
then OK KEY
a. In the "TODAY" screen, press
to select and enter " MESSAGE ALARM".
ϡ All the message-alarms that will be activated
today are listed in chronological order.!
ENTER
then OK KEY to select and enter the
b. Press
alarm that you want to look up.
7-4-1. MESSAGE ALARM
If a MESSAGE ALARM is selected, press OK to
display the selected message alarm. The message
content will be displayed on the screen. The TOOL
BAR features are the same with "MESSAGE
ALARM".
25
MESSAGE
8. MESSAGE
8-1. READ MESSAGE
a. When the E5 receive messages, the pager will generate a message
alert as an indication to remind the pager user that there is a new
message received.
There are two unread messages.
b. When “Auto Display” is enabled in the PPS, the
received message content will be displayed on the
LCD automatically.
c. Read the displayed new message via pressing OK
PROFILE 01
key or read key. If there is no any key pressed within
E5 BASIC TYPE
a default period, the message will be still taken as
unread message. The unread message alert will be
generated to remind the pager users.
d. If the “Auto Display” is enabled, the pager generates message alert
when it receives a new message. The messages will be stored in the
assigned folder. There are 3 ways to read the received messages:
26
MESSAGE
8-1-1. READ MESSAGES BY OK KEY
a. Press OK key to display the latest message.
b. If the message is more than one page, press OK to scroll through
the pages.
c. Press
to display the last or next message.
8-1-2. READ MESSAGES BY READ KEY
a. If there are unread messages, press the READ
KEY to read the unread message directly.
b. If there is no unread messages, you can also
press the READ KEY to display the folder list.
There are two unread messages.
PROFILE 01
E5 BASIC TYPE
27
MESSAGE
8-1-3. READ MESSAGES FROM MESSAGE BOX
a. Press MENU KEY to display the MAIN MENU
list. The cursor will stay on MESSAGE BOX.
b. Please press OK KEY to enter MESSAGE
BOX. All the programmed folders will display
on the screen.
c. Please press
to select the desired folder.
MAIN MENU
MESSAGE BOX
TODAY
FUNCTION STATUS
SETTINGS
Ɂ If there are unread messages, an UNREAD
FOLDER will be on the top of the folder list.
FOLDER LIST
<02>UNREAD
<03>FOLDER
<02>FOLDER
<05>FOLDER
ENTER
FOLDER
01
02
03
ENTER
28
MESSAGE
d. Press OK KEY to enter the selected folder.
All the received messages that are saved
in this folder will be listed in chronological
order.
UNREAD FOLDER
FOLDER 01/ SOURCE
02 / FIRE ALARM...
FOLDER 02/ SOURCE
01/ 101 BUILDING ...
READ
Ɂ The MESSAGE LIST will display with the
folder name, source name and message preview.
KEY then OK KEY to select and read the desired
e. Press
message.
29
MESSAGE
!
8-1-4.
MESSAGE PROTECT
For Message Protection purpose, when Message Protect is
activated in the Pager Programming Software, the read
messages are protected by pre-set password. You need to enter
the password to open the MESSAGE BOX.
a. Press MENU KEY, the feature list will display,
and the cursor will stay on "MESAGE BOX".
b. Please press OK KEY to enter MESSAGE
BOX.
c. "PASSWORD" screen will display.
to enter the password.
d. Press
30
ENTER PASSWORD
2 8 DIGITS
KEY FOR INPUT
MESSAGE
e. If the password is correct. The FOLDER LIST will
display on the screen.
f . If the password is incorrect, an "ERROR
WARNING" will display.
ENTER PASSWORD
2 8 DIGITS
KEY FOR INPUT
Ɂ If the password is incorrect for 3 times, the E5
will return to stand-by mode. Please follow the same steps to
read the messages.
31
MESSAGE
8-2. MESSAGE ACKNOWLEDGEMENT(ONLY FOR GSM MODEL)
E5 GSM Model provides four features for the
Message Confirmation:
1. RECEIVED ACK (Received Confirmation)
2. READ ACK(Read Confirmation)
3. RESPONSE ACK(Response Confirmation)
4. ACK (Confirmation) STATUS
8-2-1. RECEIVED ACK (Received Confirmation)
When a GSM Received ACK requested message is received, the
pager GSM module will be automatically activated, a GSM signaling
icon
will display on the status bar, the pager will then send out a
“RECEIVED ACK” automatically.
32
MESSAGE
After sending out the RECEIVED ACK, a “ACK SEND SUCCESS”
text will display on the LCD to indicate the “RECEIVED ACK”
transmission. After the message is sent, the GSM Module will turn
off and the GSM antenna icon will disappear.
8-2-2. READ ACK(Read Confirmation)
a. When a GSM Read ACK requested message is received, the
pager will automatically activate GSM module when the message
is read.
b. A GSM signaling icon
will display on the status bar and
“READ ACK” will be sent automatically.
c. After sending out the READ ACK, a “ACK SEND SUCCESS”
displays on the LCD to indicate the “READ ACK” transmission.
33
MESSAGE
8-2-3. RESPONSE ACK(Response Confirmation)
When a GSM RESPONSE ACK requested
message is received, the LCD will display “New
ACK MESSAGE”. On the tool bar, there will be an
“RESPONSE ACK” icon displays on the tool bar
for you to send out the SMS confirmation.
a. Press
to move the cursor to
“ RESPONSE ACK”.
b. Press OK to display the “Confirmation List”.
c. The cursor will stay on the first SMS option.
d. Press
to select the desired option.
e. Press OK to send the selected option.
“Sending ACK” indication will display on the LCD.
34
FOLDER 01/SOURCE02/
FIAE ALARM AND LIFE
SAFETY TRAINNG
COURSES.
RESPONSE ACK
ACK ITEM SELECT
ARRIVE IN 5 MINUTES
NOT AVAILABLE
SEND RESPONSE ACK
MESSAGE
8-2-4. ACK (Confirmation) STATUS
After sending the SMS confirmation,
ACK STATUS allows you to check
out the acknowledgement status to see if all
the acknowledgements are sent successfully.
ACK ITEM SELECT
ARRIVE IN 5 MINUTES
NOT AVAILABLE.
ACK STATUS
a. In Message Screen, press
to move the
cursor to
“ ACK STATUS”.
b. Press OK to display the “ACK STATUS”.
The status of sending the SMS
confirmation will be displayed on the
screen.
ACK STATUS
RECEIVE
READ
RESPONSE
WAIT
WAIT
WAIT
3
35
MESSAGE
8-3. OTHER FEATURES
While reading the messages, the E5 TOOL BAR will provides you
with the following features:
8-3-1. ZOOM IN/ OUT
To read the messages with larger character size, you may zoom in
the message.
a. Press
to move the cursor to "ZOOM IN".
b. Press OK KEY to confirm the setting. The
message that you are reading will display
with larger characters immediately.
c. At this moment, "ZOOM IN" feature will
change to "ZOOM OUT". You may directly
press OK KEY to zoom out the message.
The message will display as default setting.
36
FOLDER 01/SOURCE
02/FIRE ALARM
AND LIFE SAFETY
TRA I N I N G.
ZOOM OUT
MESSAGE
8-3-2. MESSAGE LOCK/ UNLOCK
If the message you are reading is very
important, you may lock this message to
protect.
a. Press
to move the cursor to "LOCK".
b. Press OK KEY to confirm the setting.
After locking the message, a icon will display.
FOLDER 01/SOURCE02/
FIRE ALARM AND LIFE
SAFETY TRAINING
COURSES.
LOCK
Ɂ When a message is locked, it is protected from deletion, unless
the "lock" is removed.
37
MESSAGE
8-3-3. MESSAGE ALARM
If the message you are reading is important and
you need to read it again at a certain time, you
can set up a message alarm. When the setting
time is up, the pager will alert and remind you to
read the message.
FOLDER 01/SOURCE02/
FIRE ALARM AND LIFE
SAFETY TRAINING
COURSES.
MESSAGE ALARM
8-3-3-1. ACTIVATE MESSAGE ALARM
a. On message screen, press
to move the cursor to
"MESSAGE ALARM".
b. Press OK KEY to enter " ALARM SETTING". The alarm setting
screen displays, and the cursor will stay on
"ACTIVATE ALARM".
to switch the message alarm "ON" or "OFF" to
c . Press
enable or disable the MESSAGE ALARM.
38
MESSAGE
8-3-3-2. ALARM TIME SETTING
a. Press
to move the cursor to "HOUR"
MESSAGE ALARM
then press
to switch the figures.
ALARM ON
b. Press
to move the cursor to " TEN’S
TIME 11 00
MINUTE" then press
to switch the
ALARM ON/OFF
figures.
c. Press
to move the cursor to " UNIT’S
MINUTE" then press
to switch the figures.
8-3-3-3. SAVE SETTINGS
a. After all the settings are completed, press
to "SAVE".
b.!Press OK KEY to confirm Alarm settings.
Ɂ!After the message alarm setting, this message will not
be able to be deleted till the alarm setting is removed.
39
MESSAGE
8-3-4. DELETE MESSAGE
While reading a message, you may delete
the message.
FOLDER 02/SOURCE02/
HOW ARE YOU TODAY IN
DELETE THIS MESSAGE?
to move the cursor to "DELETE
a. Press
MESSAGE".
YES
b. Press OK KEY to delete this message.
c . A confirmation window will display on the screen.
Press OK KEY to "YES" to confirm the deletion.
d. Press
to “NO” then OK KEY to cancel the deletion.
Ɂ After deleting a specific message, the next message will display
on the screen. If there is no more message in the reading folder,
the screen will display FOLDER LIST.
40
MESSAGE
8-3-5. DELETE ALL MESSAGES
You may delete all the messages in this folder:
to move the cursor to "DELETE
a. Press
ALL ".
b. Press OK KEY to delete all the messages.
c . A confirmation window will display on the
screen. Press the OK KEY and select "YES"
to confirm the deletion.
FOLDER 1
SOURCE02/FIRE
ALARM AND LIFE....
SOURCE 04/ FIRE
ALARM.....
DELETE ALL
Ɂ There is no "DELETE ALL " feature in "NOTEBOOK" folder.
41
MESSAGE
8-3-6. MOVE TO NOTEBOOK
After reading a message, if this message is
FOLDER 01/SOURCE02/
important, you can move this message to
FIRE ALARM AND LIFE
SAFETY TRAINING
NOTEBOOK FOLDER. The messages in the
COURSES.
NOTEBOOK FOLDER will not be auto - deleted
MOVE TO NOTEBOOK
when the pager text memory size is full:
a. Press
to move to "MOVE TO NOTEBOOK",
then press OK KEY to confirm the setting.
The selected message will be saved in NOTEBOOK.
8-3-7. BACK
After reading the messages, press BACK to return to Message List:
a. Press
to move the cursor to "BACK", then press OK KEY, the
screen will return to MESSAGE LIST.
42
MESSAGE
9. EMERGENCY MESSAGE (GSM MODEL ONLY)
For the security purpose , The E5 GSM Model provides Emergency
Message for the pager users to send out the preprogrammed
emergency message to the assigned GSM number or GPRS IP
address in case the pager users are in need for help.
9-1 TO ACTIVATE THE EMERGENCY MESSAGE
Function status key is a programmable key to be as a SOS button,
when SOS button is enabled in the PPS, pager user can send out an
emergency message via operating the pager.
※The Emergency Message can only be activated when the pager has
an active LCD screen i.e. standby or menu screen .
To operate Emergency from ECM condition , The screen must first be
made active with a short press of any key.
43
MESSAGE
a. Press the SOS button
for 3 seconds, a chirp alert will be
generated to remind the SOS button has been pressed.
b. A confirmation will be displayed on the LCD, press to “YES” then
press OK to confirm sending the emergency message.
c. When sending the emergency message is activated, “SENDING
EMERGENCY MESSAGE” will be displayed on the LCD.
The GSM antenna
will be displayed on the status bar.
d. When the emergency message is sent, the GSM module turns off.
44
FUNCTION
STATUS
10. FUNCTION STATUS
When SOS button is not enabled in the PPS,
is the
Function Status key for a quick view of the features’ status.
Function Status is a shortcut for you to view the status of frequently
used functions and a quick approach for you to change the settings.
The E5 provides 2 methods to enter FUNCTION STATUS.
10-1. ENTERING FUNCTION STATUS
10-1-1. PRESSING FUNCTION STATUS KEY TO ENTER
a. In stand by mode, you can simply press FUNCTION STATUS
KEY to enter FUNCTION STATUS directly.
10-1-2. ENTERING FROM MENU
a. Press MENU KEY, the MAIN MENU will display on the screen.
b. Press
to move to " FUNCTION STATUS".
c. Press OK KEY to enter the "FUNCTION STATUS" screen.
45
FUNCTION
STATUS
10-2. FUNCTION ENABLE/ DISABLE/ SETTINGS
10-2-1. ALERT MODE
a. After entering to the FUNCTION STATUS, the
FUNCTION STATUS
ALERT MODE
cursor will stay on ALERT MODE, and the
AUDIBLE
current status will also be displayed.
ON/OFF DUTY
ON
b. Press OK KEY to switch between alert modes.
ENTER
c. Current alert mode status will also be changed
while switching through the alert modes.
d. There are 3 alert modes: AUDIBLE0!VIBRATION0!SILENT.
e. After an alert mode is selected, the change will be automatically
saved.
f . If you would like to enter the full setting screens, please press
to move the tool cursor to "ENTER" then press OK.
ϡ The full setting operations of ALERT MODE is exactly same as
the operations in PAGER SETTINGS-Alert Settings.
46
FUNCTION
STATUS
10-2-2. ON/ OFF DUTY
a. After entering the FUNCTION STATUS,
FUNCTION STATUS
please press
KEY to move to
ALERT MODE
AUDIBLE
ON/OFF DUTY. The current status of
ON/OFF DUTY
ON
ON/OFF Duty will also be displayed.
BACK
b. Press OK KEY to switch between ON or
OFF.
c. Current duty status will also be changed while switching
through the status. Only ON and OFF are in switch.
d. After a duty mode is selected, the change will be automatically
saved.
e. If you would like to enter to the full setting screens, please press
to move tool cursor to "ENTER" and press OK.
ϡ The full setting operations of ON/ OFF DUTY is exactly same
as the operations in SETTINGS - ON/ OFF DUTY.
47
FUNCTION
STATUS
10-2-3. PROFILE
a. After entering the FUNCTION STATUS,
please press
KEY to move to PROFILE.
The current PROFILE in use will also be
displayed on the Profile item.
FUNCTION STATUS
ON/OFF DUTY
PROFILE
ON
FIRE CONTROL
TOGGLE
10-2-3-1. Operations for Single Profile:
a. When the cursor stays on “PROFILE”, press OK KEY to
switch profiles.
b. Current receiving mode status will also be changed while
switching through the profiles.
c. The profiles to choose are based on pre-programmed settings
in the Pager Programming Software.
d. After a profile is selected, the change will be automatically
saved.
48
FUNCTION
STATUS
e. If you would like to enter to the full setting screens,
please press
to move tool cursor to "ENTER" and press OK.
10-2-3-2.Operations for Multi-Profile:
When Multi-Profile is activated, the standby mode will display
with “Multi-Profile”. The Profile item listed in the Function Status
will be named with “Multi-Profile”. Then Function Status is only
for a quick approach to enter the “Profile” setting, but not allowed
to switch the default activated Profile through OK key.
a. If you would like to enter to the full setting screens, please
press
to move tool cursor to "ENTER" and press OK.
Ɂ The full setting operations of PROFILE is exactly same as the
operations in PAGER SETTINGS. Please refer to PAGER
SETTINGS-PROFILE.
49
FUNCTION
STATUS
10-2-4. CLOCK ALARM (5 Alarms)
a. After entering the FUNCTION STATUS, please
FUNCTION STATUS
press
to move to ALARM 01~05.
PROFILE NAME
SCAN
The current status of the selected alarm will
ALARM 01 08:30A
ON
also be displayed.
TOGGLE
b. Press OK KEY to switch ON or OFF.
c. Current status will also be changed while
switching.
d. After the status is selected, the change will be automatically saved.
e. If you would like to enter to the full setting screens,please press
to move tool cursor to "ENTER" and press OK KEY.
Ɂ The full setting operations of Alarm is exactly the same as the
operations in SETTINGS. Please refer to SETTINGS - ALARM.
50
SETTINGS
11. SETTINGS
There are more features you can activate in SETTINGS.
a. Press MENU KEY, the MAIN MENU will display
MAIN MENU
on the screen.
MESSAGE BOX
TODAY
b. Press
then OK KEY to move to SETTINGS.
FUNCTION STATUS
SETTINGS
11-1. PROFILE
ENTER
a. After entering SETTINGS, the cursor will stay
on PROFILE.
b. Press OK KEY, the PROFILE list will display. SETTINGS
PROFILE
TIME & DATE
c. Press
to select the profile that you want to
CLOCK ALARM
ON/OFF DUTY
activate.
ENTER
Ɂ When “Muliti-Profile” is activated, you are
allowed to activate more than one Profile.
d. Press
OK KEY to confirm the selection, a
will label with
the profile that you just selected.
51
FUNCTION
STATUS
e. Press
to move to "SAVE" and press OK KEY to save the setting.
11-2. TIME & DATE
a. After entering SETTINGS, please press
TIME & DATE
to move to TIME & DATE. Press OK KEY to
TIME & DATE
DATE FORMAT
enter TIME & DATE settings. In TIME &
DAYLIGHT SAVING
DATE SETTINGS, you may set up the TIME &
ENTER
DATE and display format of date.
11-2-1. TIME & DATE
a. Press OK KEY to enter TIME & DATE.
In TIME & DATE screen, the cursor will stop on
HOUR Setting.
b. Press
to adjust the figures on "HOUR
SETTING."
52
TIME & DATE
HOUR SETTING
SETTINGS
c. Press
d. Press
e. Press
f. Press
g. Press
h. Press
i. Press
j. Press
k. Press
l. Press
m.Press
to move the cursor to "MINUTE SETTING."
to adjust the "MINUTE SETTING."
to move the cursor to "HOUR FORMAT SETTING."
to adjust among the hour format options.
to move the cursor to "DAY SETTING."
to adjust the "DAY SETTING."
to move the cursor to "MONTH SETTING."
to adjust the "Month."
to move the cursor to "YEAR Setting."
to adjust the "YEAR".
to move the cursor to "SAVE" then press OK KEY to
save the settings.
53
SETTINGS
11-2-2. DATE FORMAT
In TIME & DATE screen, press then OK
KEY to enter DATE FORMAT.
a. Press
to select a specific format to display
the date.
b. Press OK KEY to confirm the selection.
c. Press
to move to "SAVE" and press OK
KEY to save the setting.
54
DATE FORMAT
HH : MM MM/DD/YYYY
HH : MM DD/MM/YYYY
HH : MM YYYY/MM/DD
TOGGLE
SETTINGS
11-2-3 DAYLIGHT SAVING
In TIME & DATE screen, press then OK
TIME & DATE
TIME & DATE
KEY to enter DAYLIGHT SAVING.
DATE FORMAT
DAYLIGHT SAVING
When enable DAYLIGHT SAVING , the real
time running of the pager timer will be
ENTER
automatically advanced one hour.
When disable DAYLIGHT SAVING,
the pager will automatically adjust the real time one hour back.
a. Press
to select enable or disable.
b. Press OK KEY to confirm the selection.
The real time will be automatically adjusted
after the selection.
DAYLIGHT SAVING
ON
OFF
TOGGLE
55
SETTINGS
11-3. CLOCK ALARM
The E5 provides 5 alarms for you to activate.
You are allowed to set up the specific time for
each alarm.
to move to
a. In SETTINGS screen, press
"CLOCK ALARM".
b. Press OK KEY to enter " CLOCK ALARM."
Ɂ The alarm list will display with alarm status
and alarm time.
c. Press
KEY to select a certain alarm.
d. Press OK KEY to enter the selected "ALARM."
56
SETTINGS
PROFILE
TIME & DATE
CLOCK ALARM
ON/OFF DUTY
ENTER
CLOCK ALARM
08 : 30
12 : 00
12 : 00
12 : 00
ENTER
SETTINGS
In ALARM setting screen, there are 4 settings to be set up:
11-3-1. ACTIVATE ALARM
a. Enter the ALARM setting screen, the cursor
will stay on the "ALARM."
b. Press
to switch the Alarm On or OFF
CLOCK ALARM 01:
ALARM
TIME
SNOOZER
ON
MIN
ALARM ON/OFF
11-3-2. ALARM TIME
a. Press
to move the cursor to "HOUR SETTING."
b. Press
to adjust the figure.
c. Press
to move the cursor to" TEN’S- MINUTE" then press
Key to adjust the figures.
d. Press
to move the cursor to " UNIT’S MINUTE" then press
Key to adjust the figures.
57
SETTINGS
11-3-3. CYCLE ALARM
a. Press
KEY to move the cursor to CYCLE
CLOCK ALARM CYCLE
SUNDAY
ALARM.
MONDAY
b. Press OK KEY to enter the cycle setting.
TUESDAY
WEDNESDAY
c. Press
to move the cursor to the specific
TOGGLE
cycle then press OK KEY to check the
selection. A
will label with the selected
option. (Multi - options)
d. Press
KEY to move the cursor to "SAVE" then press OK
KEY to confirm the settings. After saving the settings, the
screen will return to ALARM List.
58
SETTINGS
11-3-4. SNOOZER
a. Press
to move to "SNOOZER".
b. Press
to select among the options to enable the snoozer
and determine the interval time for activating the snoozer.
11-3-5. SAVE
a. Press
to move to "SAVE".
b. Press OK KEY to save the settings. There will be a "SAVED"
window displayed on the screen.
59
SETTINGS
11-4. ON/ OFF DUTY
When ON/ OFF DUTY is activated and the status is "OFF DUTY",
your pager receives messages but will not alert.
a. After entering SETTINGS, please press
to SETTINGS
PROFILE
TIME & DATE
"ON/ OFF DUTY".
CLOCK ALARM
b. Then press OK KEY to enter the settings screen. ON/OFF DUTY
ENTER
11-4-1. TO ACTIVATE "ON/ OFF DUTY"
Before adjusting the duty status, please
enable this feature.
a. In ON/ OFF DUTY screen, the cursor will stay
on "Enable/ Disable".
b. Press
to switch "ENABLE" or "DISABLE".
c. Press
to adjust “STATUS”.
60
ON/OFF DUTY
ACTIVE
ENABLE
STATUS ON
ON TIME
ACTIVE
SETTINGS
11-4-2. TO SWITCH DUTY STATUS "ON" OR "OFF"
a. Press
to switch the current status of duty "ON" or "OFF".
b. Press
to Scheduling Time Settings.
11-4-3. SCHEDULING TIME SETTINGS
a. Press
to Scheduling ON - Time Setting.
b. Press
to adjust Duty ON - Hour.
c. Then press OK KEY, the cursor will move to Duty ON - MINUTE.
d. Press
to adjust Duty ON - MINUTE.
e. Then press
to adjust Duty OFF - Hour.
f. Then press OK KEY, the cursor will move to Duty OFF - MINUTE.
g. Press
to adjust Duty OFF - MINUTE.
h. Press
to "SAVE". Press OK KEY to save the settings.
A "SAVED" window will display on the screen.
※ ON/OFF Duty status will switch automatically if this feature
is enabled. You may still adjust its status manually.(refer to 11-4-2).
61
SETTINGS
11-5. ALERT SETTINGS
In Alert Settings, there are 5 features for you to set up:
a. In "SETTINGS" screen, please press
to "ALERT SETTINGS".
b. Press OK KEY to enter "ALERT SETTING".
11-5-1. UNIVERSAL ALERT
SETTINGS
ALERT SETTING
a. In Alert Settings screen, the cursor will stay
CHANGE PASSWORD
LCD CONTRAST
on UNIVERSAL ALERT. Press OK KEY to
VOLUME
enter UNIVERSAL ALERT.
ENTER
b. There are three options: audible, vibration and
silent. Press
and OK KEY to select the ALERT STATUS. A "
ICON will display on the selected item.
62
"
SETTINGS
c. Press KEY to move to "SAVE" then press OK KEY to save the
setting. The ICON of ALERT STATUS will display on the STATUS
BAR.
11-5-2. MESSAGE ALERT
and OK
a. In Alert Settings screen, press
KEY to enter MESSAGE ALERT.
"MESSAGE ALERT" screen will display.
There are 6 items need to be set up :
ALERT SETTING
UNIVERSAL ALERT
MESSAGE ALERT
CALL REMINDER
OUT OF RANGE
ENTER
11-5-2-1. ADDRESS SETTING
a. After entering "ALERT SETTING", cursor will stay on
"ADDRESS"/!Press
to adjust the "ADDRESS".
Ɂ Only the address that are programmed to be adjustable will display.
63
SETTINGS
11-5-2-2. ALERT MODE SETTING
a. Press
to "ALERT MODE".
b. Press
to select the "ALERT MODE".
There are 6 modes for you to select:
1
3
5
2
alert mode
vibrate then alert mode 4
6
chirping mode
alert and vibrate mode
vibrate mode
silent mode
11-5-2-3. ALERT PATTERN SETTING
a. Press
to move to "ALERT PATTERN".
b. Press
to select "ALERT PATTERN".
There are 18 alert patterns for you to select.
64
SETTINGS
11-5-2-4. VIBRATION MODE SETTING
a. Press
to move to "VIBRATION MODE".
b. Press
to select the "VIBRATION MODE".
The options for this item are:
1
Continuous Vibration
2
Interval Vibration
MESSAGE ALERT
SOURCE PROMPT 1A
RIC
2A
19
OFF
ADDRESS
11-5-2-5. ALERT TYPE SETTING
a. Press
to move to "ALERT TYPE".
b. Press
to select the "ALERT TYPE".
The options for this item are:
1
General Alert
2
Escalating Alert
65
SETTINGS
11-5-2-6. BACKLIGHT SETTING
a. Press
to move to "BACKLIGHT".
b. Press
to adjust the "BACKLIGHT".
There are 7 backlight modes for you to select.
11-5-2-7. SAVE SETTINGS
a. Press
to "SAVE" then press OK KEY to save the setting.
A "SAVED" window will pop up and indicate the setting has been
saved.
66
SETTINGS
11-5-3. CALL REMINDER
a. In Alert Settings screen, press
and OK
ALERT SETTING
KEY to move and enter “CALL REMINDER”.
UNIVERSAL ALERT
MESSAGE ALERT
You may activate this feature in "CALL
CALL REMINDER
OUT OF RANGE
REMINDER" screen.
ENTER
b. Press
KEY and OK KEY to enter “CALL
REMINDER.”
11-5-3-1. TO ACTIVATE CALL REMINDER
a. After entering "CALL REMINDER", the cursor will stay on
“ON/ OFF”.
b. Press
to switch CALL REMINDER ON or OFF.
c. Press
KEY to "SAVE" then press OK KEY to save the settings.
A "SAVED" window will pop up and indicate the setting has been
saved.
67
SETTINGS
11-5-4. OUT OF RANGE SETTING
When this feature is activated, the pager
ALERT SETTING
automatically generates “Out of Range Alert”
UNIVERSAL ALERT
MESSAGE ALERT
when it receives no RF signaling for the
CALL REMINDER
OUT OF RANGE
pre-set period.
ENTER
to move
a. In Alert Settings screen, press
to"OUT OF RANGE".
b. Press OK KEY to enter “OUT OF RANGE".
to switch the status ON/ OFF.
c. Press
d. Press OK KEY to confirm the selection.
to "SAVE" then press OK KEY to save the setting.
e. Press
A "SAVED" window will pop up and indicate the setting has
been saved.
68
SETTINGS
11-5-5. KEY TONE SETTING
to move to “KEY
a. In Alert Settings, press
ALERT SETTING
TONE”.
MESSAGE ALERT
CALL REMINDER
b. Press OK KEY to enter “KEY TONE”.
OUT OF RANGE
KEY TONE
to switch the status ON/ OFF.
c. Press
ENTER
d. Press OK KEY to confirm the selection.
to “SAVE” then press OK KEY to
e. Press
save the setting.
A “SAVED” window will pop up and indicate the setting has
been saved.
69
SETTINGS
11-6. CHANGE PASSWORD
If the password feature is activated by pager
programming software, your pager will be
programmed with (a 2- 8 inputs) password for
message protection.
You may change the password yourself:
SETTINGS
ALERT SETTING
CHANGE PASSWORD
LCD CONTRAST
VOLUME
ENTER
a. In SETTINGS screen, press to move to "CHANGE PASSWORD",
then press OK KEY to enter this feature.
b. After entering the "CHANGE PASSWORD", there will be a
space for you to enter the pre - set password. The cursor will stay
on the first digit.
70
SETTINGS
11-6-1. CONFIRM PRE - SET PASSWORD
to enter the pre - set password.
a. Press
After entering the first input, the cursor will
automatically move to the second digit.
b. After entering the password, press OK KEY
to confirm the pre - set password. If the pre - set
password is correct, there will be a new screen
display and ask you to enter the new
password.
CHANGE PASSWORD
OLD PASSWORD INPUT
2 8 DIGITS
KEY FOR INPUT
Ɂ If the password you entered is incorrect, there will be a pop - up
window with "PASSWORD INCORRECT" and ask you to enter
the password again.
71
SETTINGS
11-6-2. CHANGE NEW PASSWORD
to enter the new password.
a. In new password screen, press
After entering the new password, press OK KEY to save the new
password. A confirmation window will pop up and ask you to
enter the new password again to confirm the new password.
to enter the new password again, then press OK KEY
b. Press
to confirm the new password. If the new password confirmation is
correct, the screen will return to SETTINGS.
Ɂ If the first confirmation is incorrect, you can enter the new password
2 more times. After 3 times incorrect inputs, you will need to start
over from confirming the pre - set password.
72
SETTINGS
11-7. LCD CONTRAST
a. In SETTINGS screen, press
to move to
LCD CONTRAST
"LCD CONTRAST". Then press OK KEY to
enter "LCD CONTRAST".
b. After entering "LCD CONTRAST",
SAVE
the cursor will stay on "Contrast Level".
Press
to adjust the "Contrast Level".
c. Press
to "SAVE".
d. Press OK KEY to save the setting.
Then the display contrast will display as your setting.
73
SETTINGS
11-8. VOLUME ADJUSTMENT
The E5 provides 4 volume levels for you to adjust.
a. In SETTINGS screen, press
to move to
VOLUME
"VOLUME".
b. Press OK KEY to enter "VOLUME".
The volume level will display on the screen.
SAVE
c. Press
to adjust the volume. The pager will
activate an alert with the adjusted volume
level.
d. Press
to "SAVE".
e. Press OK KEY to save the setting.
A "SAVED" window will pop up and indicate the setting has been
saved.
74
SETTINGS
11-9. BACKLIGHT SETTING
The backlight illuminates when the pager receives
BACKLIGHT
messages or any key is pressed in low - light
OFF
RED
environment.
GREEN
a. In SETTINGS screen, press
to
YELLOW
SAVE
"BACKLIGHT".
b. Press OK KEY to enter "BACKLIGHT".
c. Press
to move the cursor to select the backlight color.
d. Press OK KEY to confirm your selection.
e. Press
to "SAVE".
f . Press OK KEY to save the setting.
After the setting, the backlight you just set up will illuminate when
any key is pressed in low - light environment.
75
SETTINGS
11-10 KEY LOCK
The E5 provides KEY LOCK to lock on the
buttons to avoid any buttons are pressed by
accident.
SETTINGS
BACKLIGHT
KEY LOCK
CALENDAR
RF TEST
ENTER
11-10-1 Enable KEY LOCK
a. After entering SETTINGS, press
to move to
"KEY LOCK".
b. Press OK KEY to enter " KEY LOCK ", the cursor will stay on “ON”.
c. Press OK to enable the KEY LOCK.
If Key Lock is enabled when the pager is not operated for a period
of time, it will process to screen saving. All the buttons are locked,
except for OK key which is used to read the latest message.
76
SETTINGS
11-10-2 Disable KEY LOCK
a. If Key Lock is enabled, press
to “OFF”.
b. Press OK to disable the KEY LOCK.
11-10-3 Unlock the buttons.
When KEY LOCK is activated and any button
is pressed, a text indication will display and
remind you to press the MENU KEY for 3
seconds to unlock the buttons.
KEY LOCK
ON
OFF
SAVE
PRESS THE MENU KEY
FOR 3 SECONDS TO
UNLOCK.
UNLOCK
77
SETTINGS
11-11. CALENDAR
a. After entering SETTINGS, press
to move
to "CALENDAR".
b. Press OK KEY to enter "CALENDAR".
A calendar will display on the screen and the
cursor will stay on the current date.
c. Press
to move the cursor to the desired
date.
SETTINGS
BACKLIGHT
KEY LOCK
CALENDAR
RF TEST
ENTER
11-11-1. CHECK OUT THE CALENDAR WITH DIFFERENT "MONTH"
a. Press
to move to "Month".
b. Press
to adjust the Month.
The calendar will display the specific month as your adjust.
78
SETTINGS
11-11-2. CHECK OUT THE CALENDAR WITH DIFFERENT "YEAR“
a. Press
to move to "Year."dz
b. Press
adjust the Year.
2010
OCTOBER
The calendar will display the year as you
selected.
79
SETTINGS
11-12. RF TEST
The E5 provides an RF TEST for you to check if the pager is
located in good RF signal receiving area:
SETTINGS
a. In SETTINGS screen, press
to move to
BACKLIGHT
"RF TEST"
KEY LOCK
CALENDAR
b. Press OK KEY to start RF testing.
RF TEST
b-1. When RF Testing is enabled, the pager
ENTER
will turn on the speaker and start to detect
the RF signal.
If there is clear regular tones generated from the pager. It
means there is RF signal transmitting on the air, also the
pager is located in good signal receiving area.
b-2. If there is only white noise generated from the pager, the
pager may be located in low signal receiving area or out of
RF receiving range.
b-3. If there is no any noise heard, please contact with a Unication
agent for further examination.
80
SETTINGS
11-13. SELF - PROGRAMMING
The E5 provides the flexibility for you to add a
new frequency, receiving baud rate and capcode SETTINGS
CALENDAR
RF TEST
manually.
SELF PROGRAM
a. In SETTINGS screen, press
then OK Key
INFORMATION
to enter "SELF PROGRAM". "SELF
ENTER
PROGRAM" must be activated by
programming software. If your E5 doesn’t
support this feature, please contact with your supervisor.
b. In "SELF PROGRAM" mode, there are 5 settings for you to set up.
(1) FREQUENCY SETTING (2) BAUD RATE SETTING!!!!!
(3) CAPCODE NO.
(4) CAPCODE SETTING!!!!
(5) SAVE SETTINGS
Ɂ In order to receive the messages correctly, please make sure the
programming information is correct.
81
SETTINGS
11-13-1. FREQUENCY SETTING
After entering the "SELF PROGRAM", the
cursor will stay on "FREQUENCY".
There are 6 digits for you to adjust.
a. Press
to adjust the first digits.
b. Press to move to next digit.
!Ɂ!The frequency figures must be within the
band split that your pager provides.
11-13-2. BAUD RATE SETTING
a. After the FREQUENCY setting, press to
move to "BAUD RATE SETTING". There
are 3 (512dpsǵ1200dpsǵ2400dps) options.
b. Press to adjust the selection.
c. Press
to move to "CAPCOPDE NO."
82
SELF PROGRAM
FREQUENCY
BAUD RATE
ADDRESS NO
CAPCODE
FREQ. 10MHz
SELF PROGRAM
FREQUENCY
BAUD RATE
ADDRESS NO
CAPCODE
BAUDRATE
SETTINGS
11-13-3. CAPCODE NO. ADJUSTMENT
Pager will automatically number each capcode that
you want to set up.
a. Press
to select the CAPCODE that you want
to set up.
b. Press
to move to "CAPCODE SETTING"
11-13-4. CAPCODE SETTING
There are 7 digits for you to set up the new
capcode.
a. Press
to adjust the figures.
b. Press
to move the cursor to next digit.
SELF PROGRAM
FREQUENCY
BAUD RATE
ADDRESS NO
CAPCODE
ADDR NO
SELF PROGRAM
FREQUENCY
BAUD RATE
ADDRESS NO
CAPCODE
CAPECODE DIGIT 1ST
11-13-5. ADD MORE NEW CAPCODES
To add more than one new capcode:
a. After setting the first new capcode, press OK to save the first
added capcode.
83
SETTINGS
The cursor will move back ADDRESS No.
b. Press OK to add a new ADDRESS No.
c . Press
to move the cursor to
CAPCODE to set up the second capcode.
Follow the same steps to create more
capcodes.
SELF PROGRAM
FREQUENCY
BAUD RATE
ADDRESS NO
CAPCODE
ADDR NO
11-13-6. SAVE SETTING
a. Press
to "SAVE", then press OK KEY to save the settings.
After saving the settings, the pager will reboot.
Ɂ!The E5 will now switch to receive the messages from
self - programmed frequency. A new profile and new folder will be
activated, and the new profile name will display on stand by mode.
84
SETTINGS
11-14. INFORMATION
The INFORMATION provides the basic information of the E5 ,
includes the capacity of memory, remaining battery capacity, and
software version. Please follow the below steps for checking out
the required information.
a. In SETTINGS screen, press
to move to
SETTINGS
CALENDAR
" INFORMATION ".
RF TEST
b. Press OK KEY to enter INFORMATION screen. SELF PROGRAM
INFORMATION
c. There will be 3 types of information shown on
ENTER
the screen:
85
SETTINGS
1. TEXT MEMORY:
The percentage and status bar of occupied
text messages memory.
2. BATTERY:
The percentage and status INFORMATION
TEXT MEMORY:
bar of remaining battery
gauge for AA HI-MH battery. AA BATTERY:
3. LI BATTERY :
The percentage and status LI BATTERY:
bar of remaining battery
gauge for LI-battery.
d. To look up the pager software version by clicking the navigation
key,here are 4 information will be displayed:
1. FW: The pager firmware version.
2. SN: The pager software serial number.
3. IMEI No(GSM Model Only): The IMEI code of the GSM module.
4. GSM F/W(GSM Model Only):The firmware version of the GSM
module.
86
OTHER
INFORMATION
12. OTHER INFORMATION
12-1. CARE FOR YOUR PAGER
Do not subject your pager to extreme temperatures and moisture.
12-2. CLEAN YOUR PAGER
To clean the exterior of the housing, use a soft, non - abrasive cloth
moistened in a mild soap and water solution. Rinse the surface using
a second cloth moistened in clean water. Please do not immerse the
pager in water nor use any other cleaning solutions.
87
WARNING AND
IMPORTANT
NOTES
13. WARNING AND IMPORTANT NOTES
13-1 WARNING
E5 has been tested and found to comply with the limits for a Class B
digital device, pursuant to Part 15 of the FCC Rules. These limits are
designed to provide reasonable protection against harmful interference in a residential installation.
Please be aware of below important information:
Do not operate this product in a hazardous atmosphere.
Do not replace or charge batteries in hazardous atmosphere.
Do not disassemble this unit.
The term “IC:” before the radio certification number only signifies that
Industry Canada Technical specifications were met.
Operation is subject to the following two conditions: (1) this device
may not cause interference, and (2) this device must accept any
interference, including interference that may cause undesired
operation of the device.
88
WARNING AND
IMPORTANT
NOTES
Le présent appareil est conforme aux CNR d'Industrie Canada
applicables aux appareils radio exempts de licence. L'exploitation est
autorisée aux deux conditions suivantes : (1) l'appareil ne doit pas
produire de brouillage, et (2) l'utilisateur de l'appareil doit accepter tout
brouillage radioélectrique subi, même si le brouillage est susceptible
d'en compromettre le fonctionnement.
13-2 IMPORTANT NOTES
The changes or modifications not expressly approved by the party
responsible for compliance could void the user’s authority to operate
the equipment.
To comply with the FCC RF exposure compliance requirements, no
change to the antenna or the device is permitted. Any change to the
antenna or the device could result in the device exceeding the RF
exposure requirements and void user’s authority to operate the
89
WARNING AND
IMPORTANT
NOTES
device.
This device complies with part 15 of the FCC Rules. Operation is
subject to the following two conditions: (1) This device may not cause
harmful interference, and (2) this device must accept any interference
received, including interference that may cause undesired operation.
90
for more information please contact us at : [email protected]
T82RAP001C-R
Corporate Headquarter :
Unication Co., Ltd.
Tel. : +886-2-22999678
Address: 5F, No.6, Wu-Kung 5Rd.,
Hsinchuang District, New Taipei City, Taiwan.
E-mail: [email protected]
URL: www.uni.com.tw