1
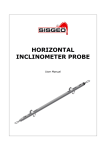
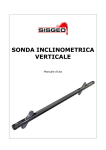
VERTICAL INCLINOMETER
PROBE
User Manual
Vertical Inclinometer Probe
INDEX
Introduction
Pag. 4
Description
Pag. 5
Taking measurements
Pag. 6
Data processing
Pag. 9
Troubleshooting
Pag. 12
Maintenance
Pag. 12
Appendix 1
Pag. 14
Appendix 2
Pag. 15
Information contained herein are property of SISGEO S.r.l. This document is subject to change without notification and is subject to be returned upon request. No part of this User’s Manual may
be reproduced in any form without SISGEO’s S.r.l. written permission.
SISGEO S.r.l.
Vertical Inclinometer Probe_EN_01_13
Pag. 2 of 15
Vertical Inclinometer Probe
Notes on the use of
product
For a safe and efficient use of the instrument, please read carefully the following instructions
before starting any operation.
Any use of the instrument other then the one described in this manual shall be considered at user’s full
responsibility.
The same applies for any unauthorized modifications.
In addition to the hereby listed standards, the user must comply with the provisions of the current
legislation on the matter of personal safety and health of persons in the workplace.
SISGEO is not responsible for any trouble, breakdowns, accidents etc.. due to the lack of knowledge and/or
confidence (or non-compliance with) with the requirements contained in this manual.
Check that the instrument has not been damaged during the transport.
Verify that the package includes all items as well as any requested optional accessories; if anything is
missing, please promptly contact the manufacturer.
The user must strictly follow all the operations described in this manual.
Maintenance or repair of the instrument is allowed only to authorized operators.
These operators must be physically and intellectually suitable.
For information about instrument or order spare parts request, please always specify data written on the
identification label.
When replacing parts, always use ORIGINAL SPARE PARTS.
The manufacturer reserves the right to make changes without prior notice for any technical or commercial
requests.
We’ll try anyway to keep the manuals updated in order to reflect product’s revisions/updates.
Symbols
This symbol will be used used to catch reader’s attention on the manual:
Pay special attention to the following instruction.
Identification
SISGEO S.r.l.
Instruments can be identified
•
From a production lot number (written on the Compliance Certificate)
•
From a serial number (s/n) engraved indelibly on the instrument
•
From a label on the instrument
•
From a label on the cable
Vertical Inclinometer Probe_EN_01_13
Pag. 3 of 15
Vertical Inclinometer Probe
Introduction
5
4
Vertical inclinometer probes are
used
to
measure
ground
displacements and deformations,
as well as structures .
They
are
used
mainly
in
landslides, embankments, dams,
open drillings, bridges’ piles,
restrain walls, piles, tunnels.
Inclinometer probe is a part of a
system which includes:
3
Aluminum or ABS Inclinometer
casing (1), circular section, with
four orthogonal grooves; it
follows deformations where is
installed;
Vertical inclinometer probe (2);
Inclinometer cable (3), to lower
deeply the probe and for
electrical connection to the
datalogger;
Datalogger (4), to receive/record
data from the probe and manage
it.
2
Moreover, we advise to use the
following accessories:
dummy probe, similar to the
inclinometer probe, but without
sensor. It allows to check the
accessibility of the inclinometer
casing;
1
spiralmeter, to measure the
spiral angle of inclinometer
casing’s grooves;
pulley and cable stop (5), used
to block the cable and as depth
reference.
calibration frame, to check the
inclinometer probe;
SISGEO S.r.l.
Vertical Inclinometer Probe_EN_01_13
Pag. 4 of 15
Vertical Inclinometer Probe
Description
5
Vertical inclinometer probe consists of:
1. An electrical connector with O-Ring ;
2. A stainless steel body with a biaxial force balance
servo-accelerometer
or
digitalized
MEMS
inclinometer, to measure
inclinations in two
orthogonal directions;
3. Two wheel assembly, at a distance of 50cm, to
slide along the grooves of the inclinometer casing;
4. A rubber cap at the bottom to limit any damage
due to accidental impacts.
6
Inclinometer cable (5) has a connector (6) to connect the
probe. The universal model, suitable both for servoaccelerometer and digital probes, is reinforced with a
stainless steel shield and cable to avoid torsions and
elongations. The inclinometer cable for the digital probe
has a kevlar core to avoid elongation and is lighter to
allow an easier handle.
On the cable’s outer sheath there are metal marks every
50cm. The first mark is 1m. far from the middle of wheels
assembly. Every 5m. a colored reference helps to identify
the depth (see Appendix 2).
3
2
O-Ring
1
Reference
point
Pulley and
cable stop
3
4
SISGEO S.r.l.
Vertical Inclinometer Probe_EN_01_13
Pag. 5 of 15
Vertical Inclinometer Probe
Taking
measurements
General
Channel A>0
Letter
A
Probe
Reference
wheels
(lower)
Inclinometer reading consists in a
survey, at regular steps, of the tilt of
the inclinometer casing compared to
the vertical.
The step is usually the same of the
wheels assembly interaxis or a
multiple.
The first reading is said “zero
reading” and is the reference reading
compared to which will be calculated
all
the
displacements
of
the
inclinometer’s casing; the following
readings
are
called
“exercise
readings”.
Inclinometer readings can be taken
on two or four grooves.
It is useful that zero reading is taken
on four grooves, because sometimes
a casing could deform, avoiding
probe’s readings, while the cross
grooves are still open.
Inclinometer’s casing grooves, once
installed, are identified with numbers
1-2-3-4, clockwise; the groove nr. 1
is the one closer to geographic north
or the one turned towards the
expected movement, or according to
some site’s references.
“Two grooves reading”, typical of
exercise readings, is the whole
measurements taken with reference
wheels in grooves 1 and 3.
Anyway, measures must always be
taken
matching
the
opposed
grooves.
”Four grooves reading” are the
measurements taken with reference
wheels in all four grooves.
A-
Reference
wheel (lower)
The designs shows the convention:
the lower wheels and letter A are the
probe’s reference. If you put the
probe on a flat surface and tilt it in
the arrows direction, channel A and
B (the 2 orthogonal axis) take
different signs.
B+
BA+
SISGEO S.r.l.
Vertical Inclinometer Probe_EN_01_13
Pag. 6 of 15
Vertical Inclinometer Probe
Before inserting the inclinometer probe in the casing, we advise to check casing’s
accessibility using the dummy probe, which has to slide along the casing with the
reference wheels put in all 4 grooves.
To carry out inclinometer measurements proceed as follows:
•
Remove the probe from carrying casing;
•
Check wheels assembly and wheels functionality;
•
Check the O-ring;
•
Keep the probe in vertical and on the ground and connect it to the
inclinometer cable paying attention to fit connector’s references. DON’T
TURN and DON’T STRAIN the connectors to avoid any irreparable damage;
•
Once the connectors are matched, screw manually the nut until is fully
locked. If well connected, the tightness is guaranteed up to 2MPa;
•
Insert the probe in the inclinometer casing with the reference wheels in
groove 1; if available, install the pulley and cable stop on the inclinometer
casing, and drop slowly the probe until it reaches the bottom;
•
Connect the datalogger to the inclinometer reel and switch it on. Be careful
to respect connectors polarity;
•
Wait 10-15 minutes to stabilize the temperature;
•
Lift up the probe until the first available mark is on the expected reference
point. Place very carefully the marks because, to have good results, their
position must never change. Using the pulley and cable stop, the block point
can be used as depth measure point;
•
Wait for the values, identified as A1&B1, to stabilize. In case you are using a
datalogger, record these values;
•
Lift up the probe, placing the next mark at the reference point according to
the step set;
•
Proceed in this way for the whole length of the casing.
•
Once ended with groove 1, pull out the measure probe from the casing;
•
Turn the probe of 180°, put it back in the casing with the reference wheels
in groove 3 and lower until it reaches the bottom;
•
Proceed as already explained for groove 1. In this case the values will be
identified as A3&B3.
You will have then, for each step, two inclination values for axis 1-3 (A1-A3) and
two values for axis 2-4 (B1-B3).
• Once ended the reading, disconnect the datalogger, unscrew the nut and
disconnect the probe from the inclinometer cable;
• Check the connectors (probe and cable): be sure that there is no humidity inside;
• Screw the protection caps;
• Clean carefully and dry the probe in its mechanical parts;
• Rewind carefully the inclinometer cable on the reel in order to avoid any torsion;
• Put back the probe in its carrying casing;
In case of four grooves reading, the described steps must be performed also with
the wheels in groove 2 (A2-B2) and then in groove 4 (A4-B4).
SISGEO S.r.l.
Vertical Inclinometer Probe_EN_01_13
Pag. 7 of 15
Vertical Inclinometer Probe
Advices:
•
•
•
•
•
•
•
•
SISGEO S.r.l.
Use always the same inclinometer system (probe-datalogger-cable) to
survey the casing.
Use the pulley and cable stop.
Pay attention to the reference point.
Switch on the datalogger 5-10 minutes before start measuring.
Wait until that the inclinometer system temperature is stabilized: could be
useful, in this case, to check the values shown from the datalogger.
When you move from a quote to the next one, record the data only when
the values are settled.
In case of wrong positioning, drop the probe to a lower quote and rewind it
until is blocked where requested.
Avoid pulls and excessive speed in the probes’ recovery.
Vertical Inclinometer Probe_EN_01_13
Pag. 8 of 15
Vertical Inclinometer Probe
Data
processing
Usually the data processing is made using a dedicated software (i.e. FIELDSISGEO’s INCLI2); see its manual for further details.
Below we are going to clarify basics notions for data processing.
SISGEO’s inclinometer probes have a constant k of 20000.
The values (digits) displayed from SISGEO’s datalogger are:
digits = (sinα) x (k)
Example:
Ch. A: 698(digits)
α= arcsin (698/20000) = 2°
To calculate the casing inclination at each quote proceed with the following formula:
Dbi
Di
Dai
αai
P
αbi
Dai = P × sin αai
Dbi = P × sin αbi
(
Di = Dai2 + Dbi2
SISGEO S.r.l.
Vertical Inclinometer Probe_EN_01_13
)
Pag. 9 of 15
Vertical Inclinometer Probe
where
Dai
,
Dbi= casing displacements at the generic quote, in the two orthogonal directions A and B
P = measurement step
sin
αa, sin αb = Casing inclination angles at the generic quote, at the two orthogonal directions A and B
Di = Casing displacement result at the generic quote
θ= Result deviation Azimuth of direction A and B, at the generic quote= arctg
Example:
At “i” quote we have the following values:
A1
A3
B1
B3
=
=
=
=
480
-506
270
-285
The inclination at the “i” quote is 14,39mm
Hints on checksum
The checksum is the algebraic half-sum of the measurements obtained on the
matched grooves 1-3 or 2-4.
It’s like an electric and mechanic “offset” of the inclinometer probe, and, as we’ll see
in the example, does not affect the final result: it is a sign of the well-functioning of
the inclinometer system and it’s important its regular check.
Checksum value can change in time, but, if the variation is not sudden (for example
between 2 subsequent readings), usually there is nothing to worry, and is not
necessary to contact SISGEO technical assistance.
Anyway, SISGEO advises a check of the inclinometer system for checksum values
higher than 25.
Checksum can be affected from deposits in the grooves, from inclinometer casing
dents and ovalization, from the wheel positioning near the coupling and also from
the differences between different Dataloggers.
Example:
inclination 2° , theoretical value =698 (digits) , A1= 713, A3=-683
checksum= (A1+A3)/2= 15
A1-checksum= 713-15=698; A3-checksum= -698-15=-698
Anyway, the value obtained from the matching measures at the end of the processing is:
Am= (A1-A3)/2= [713-(-683)]/2 = 698
SISGEO S.r.l.
Vertical Inclinometer Probe_EN_01_13
Pag. 10 of 15
Vertical Inclinometer Probe
To calculate the global displacement of the casing proceed with the following
formula:
n
D= ∑1 Di
D
Di+1
P
The
cumulative
displacement
calculation can be done:
•
“from the bottom”, when
the casing’s bottom is fixed
•
or “from the top”, when the
casing’s head is fixed.
Generally is used the calculation
from the bottom with landslides.
Di
Processing from the top is applied
when the head of the pile or wall is
fixed.
P
Di-1
P
SISGEO S.r.l.
Vertical Inclinometer Probe_EN_01_13
Pag. 11 of 15
Vertical Inclinometer Probe
Troubleshooting
Problem
Wrong
measure
Possible cause
Solution
Wrong or lost probe
configuration
Verify and correct Datalogger’s
parameters (see the manual)
Wrong choice of the
reference
Use the correct reference groove
Low battery voltage
Check the voltage on the display
and put in charge (see the
manual)
Low insulation
Measure the insulation between
the pins of probe connector and
the steel body. If less then 50
MΩ ,send back to Assistance
Damp in the connector
Dry it.
Verify the integrity of the "Oring"
One or more electric
wires are disconnected
Verify wiring in Appendix 1.
Send back to Assistance if the
disconnection is found.
Instable
measures
Excessive movement of
the wheels
Checksum
values
unsteady
Wheels out of grooves
Dirty casing
Maintainance
Verify wheels movement.
If necessary, send back in
Assistance.
Verify and insert correctly the
wheels in the grooves. Lower
the probe more slowly.
Clean the casing
Probe maintainance
Inclinometer probe is a precision instrument and has to be handled carefully,
avoiding accidental shocks both during the transport and the work.
Use the carrying case during the transport and the storage.
Clean the probe with water and lubricate, without using grease, the wheels spring.
Clean up the possible mud and dirt on the spring.
Take away the protection cap from the probe and inclinometer cable, clean and
eventually dry the connector and the thread.
Clean the connectors with cotton wads and alcohol.
Don’t use solvents or other products that can cause a damage.
The probe and the accessories have to be stored in a dry place.
If possible, store the probe always in vertical position.
To avoid condensation we advise to store probe and cable without protection cap;
they have to be put back on in case the instrument has to be moved.
Be careful during the unwind and rewind of the cable to avoid stretching and rolling
that can damage the cable.
When they are not in use, always protect the connectors with their caps.
To keep the system in perfect conditions we advise a maintenance check in our
laboratories once a year.
SISGEO S.r.l.
Vertical Inclinometer Probe_EN_01_13
Pag. 12 of 15
Vertical Inclinometer Probe
After-sales assistance on SISGEO’s product for calibrations, maintenance and
repairs, is performed by SISGEO’s service department.
The authorization of shipment shall be activated by RMA “Return Manufacturer
Authorization". Fill in the RMA module clicking on:
http://www.sisgeo.com/en/assistance/repairs/
Send back the instrument/equipment with the complete accessories, using suitable
packaging, or, even better, the original ones.
The shipping costs shall be covered by the sender.
Please return to the following address with suitable delivery document:
SISGEO S.r.l.
Via F.Serpero, 4/F1
20060 MASATE (MI)
On the delivery document is mandatory to indicate the RMA code received.
Technical assistance e-mail: [email protected]
SISGEO S.r.l.
Vertical Inclinometer Probe_EN_01_13
Pag. 13 of 15
Vertical Inclinometer Probe
Appendix 1
SERVO-ACCELEROMETER SYSTEM
Probe
Functions
Inclinomter cable
Conn. 6 pins
Female
Color
Conn. 7 pins Male
Panel
A
+Vcc
A
Orange
A
B
-Vcc
B
Grey
C
C
GND Alim.
C
Black
B
D
+ OUT Ch.A
D
Yellow
D
E
+ OUT Ch.B
E
Blue
E
F
GND MEASURE
F
Green
F
Shield
G
DIGITAL SYSTEM
Probe
Function
Inclinometer cable
Conn. 6 pins
Female
Color
Conn. 7 pins Male
Panel
A
+Vcc
A
Red
A
B
-Vcc
B
Black
C
C
N.C.
D
N.C.
E
RS485 A
E
White
E
F
RS485 B
F
Green
F
FLYING CABLE ECAV07V2
SISGEO S.r.l.
Female
Connector
(at the cable
pulley)
Male Connector
(to Datalogger)
A
A
B
B
C
C
D
D
E
E
F
F
G
G
Vertical Inclinometer Probe_EN_01_13
Pag. 14 of 15
Vertical Inclinometer Probe
Appendix 2
DEPHT QUOTE REFERENCES TABLE
METERS
5
10
15
20
25
30
35
40
45
50
55
60
65
70
75
80
85
90
95
100
105
110
115
120
125
130
135
140
145
150
155
160
165
170
175
180
185
190
195
200
SISGEO S.r.l.
GREEN
1
1
BLACK
1
1
1
1
1
1
1
2
2
1
1
1
1
1
1
1
1
1
1
1
1
1
2
2
1
1
1
1
1
1
1
1
1
1
1
1
1
2
2
1
1
1
1
1
1
WHITE
1
1
1
1
RED
1
1
1
Vertical Inclinometer Probe_EN_01_13
1
1
1
1
2
2
1
1
1
1
1
1
1
1
1
1
2
2
2
2
2
2
2
2
2
2
3
3
3
3
3
3
3
3
3
3
4
Pag. 15 of 15