1
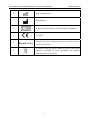
About this Manual
P/N: 01.54.456522-10
Release Date: September 2014
© Copyright EDAN INSTRUMENTS, INC. 2014. All rights reserved.
Statement
This manual will help you understand the operation and maintenance of the product better. It is
reminded that the product shall be used strictly complying with this manual. User’s operation
failing to comply with this manual may result in malfunction or accident for which EDAN
INSTRUMENTS, INC. (hereinafter called EDAN) can not be held liable.
EDAN owns the copyrights of this manual. Without prior written consent of EDAN, any
materials contained in this manual shall not be photocopied, reproduced or translated into other
languages.
Materials protected by the copyright law, including but not limited to confidential information
such as technical information and patent information are contained in this manual, the user shall
not disclose such information to any irrelevant third party.
The user shall understand that nothing in this manual grants him, expressly or implicitly, any
right or license to use any of the intellectual properties of EDAN.
EDAN holds the rights to modify, update, and ultimately explain this manual.
Responsibility of the Manufacturer
EDAN only considers itself responsible for any effect on safety, reliability and performance of
the equipment if:
Assembly operations, extensions, re-adjustments, modifications or repairs are carried out by
persons authorized by EDAN, and
The electrical installation of the relevant room complies with national standards, and
The instrument is used in accordance with the instructions for use.
Upon request, EDAN may provide, with compensation, necessary circuit diagrams, and other
information to help qualified technician to maintain and repair some parts, which EDAN may
define as user serviceable.
I
Terms Used in this Manual
This guide is designed to give key concepts on safety precautions.
WARNING
A WARNING label advises against certain actions or situations that could result in personal
injury or death.
CAUTION
A CAUTION label advises against actions or situations that could damage equipment, produce
inaccurate data, or invalidate a procedure.
NOTE
A NOTE provides useful information regarding a function or a procedure.
II
Table of Contents
1 Safety Guidance........................................................................................................................... 1
1.1 Indications for Use/Intended Use ........................................................................................ 1
1.2 Warnings and Cautions........................................................................................................ 1
1.2.1 Safety Warnings ........................................................................................................ 1
1.2.2 General Cautions ....................................................................................................... 2
1.3 List of Symbols ................................................................................................................... 2
2 Introduction ................................................................................................................................. 4
2.1 Features ............................................................................................................................... 4
2.2 System Running Environment ............................................................................................ 5
2.2.1 Requirements on the Hardware of the PC ................................................................. 5
2.2.2 Requirements on the Software of the PC .................................................................. 5
2.2.3 Power Requirements ................................................................................................. 6
2.2.4 Requirements on the Working Environment ............................................................. 6
3 Operation Instructions................................................................................................................ 7
3.1 Installing Smart ECG Viewer .............................................................................................. 7
3.2 Setting Database Connection .............................................................................................. 7
3.3 Logging into the Smart ECG Viewer Software................................................................... 8
3.4 Initialization Setup .............................................................................................................. 9
3.5 Importing ECG Data into the Data Manager Screen .......................................................... 9
3.5.1 Importing ECG Data from Hard Disk ....................................................................... 9
3.5.2 Receiving ECG Data from the Electrocardiograph ................................................. 10
3.5.2.1 Receiving ECG Data through the Net Port ................................................... 10
3.5.2.2 Receiving ECG Data through the Serial Port (Including Conversion of USB
Port into Serial Port).................................................................................................. 12
3.6 Exporting ECG Data from the Data Manager Screen ....................................................... 12
3.7 Processing Records ........................................................................................................... 13
3.7.1 Modifying Patient Records ..................................................................................... 14
3.7.2 Searching Patient Records....................................................................................... 15
3.7.3 Deleting Records ..................................................................................................... 16
3.7.4 Refreshing Patient Records ..................................................................................... 16
3.7.5 Assigning Examination Records to Another Patient ............................................... 16
3.8 Viewing Examination Status ............................................................................................. 17
3.9 Viewing Examination Records in the Auto Mode............................................................. 17
3.9.1 Viewing the Average Template................................................................................ 17
3.9.2 Viewing Auto Measurement Parameter................................................................... 19
3.9.3 Viewing the Waveform ............................................................................................ 20
III
3.9.4 Comparing Multiple ECG Records of a Patient ...................................................... 22
3.10 Viewing Diagnosis Information ...................................................................................... 24
3.10.1 Adding Diagnosis Information .............................................................................. 24
3.10.2 Editing Diagnosis Information .............................................................................. 25
3.11 Previewing and Printing Report ...................................................................................... 27
3.11.1 Viewing Report...................................................................................................... 27
3.11.2 Previewing Report ................................................................................................. 28
3.11.3 Configuring the Print Options ............................................................................... 30
3.11.4 Creating a PDF/JPG/BMP/TIF/PNG File ............................................................. 31
4 Processing Orders ..................................................................................................................... 32
4.1 Creating Orders ................................................................................................................. 33
4.1.1 Entering Patient Information Manually .................................................................. 33
4.1.2 Entering Patient Information by Using a Bar Code Reader .................................... 34
4.1.3 Entering Patient Information by Acquiring Orders ................................................. 34
4.2 Modifying Orders .............................................................................................................. 35
4.3 Deleting Orders ................................................................................................................. 35
4.4 Searching Orders ............................................................................................................... 36
4.5 Refreshing Orders ............................................................................................................. 37
4.6 Matching the Examination Records .................................................................................. 38
4.7 Receiving Data from the Electrocardiograph .................................................................... 39
5 Configuring the User Management ......................................................................................... 40
5.1 Creating New User (Only for Administrator) ................................................................... 40
5.2 Deleting a User (Only for Administrator) ......................................................................... 41
5.3 Modifying the Password ................................................................................................... 41
6 Configuring the System ............................................................................................................ 42
6.1 Basic Information Setup .................................................................................................... 42
6.2 Print Setup ......................................................................................................................... 45
6.3 Output File Setup .............................................................................................................. 47
6.4 GDT&DICOM Worklist Setup ......................................................................................... 48
6.5 Data Maintenance Setup ................................................................................................... 49
6.6 Other Setup........................................................................................................................ 51
6.7 Barcode Setup ................................................................................................................... 52
7 Maintenance............................................................................................................................... 54
8 Accessories ................................................................................................................................. 55
9 Warranty and Service ............................................................................................................... 56
9.1 Warranty ............................................................................................................................ 56
9.2 Contact Information .......................................................................................................... 56
IV
Smart ECG Viewer Data Management Software User Manual
Safety Guidance
1 Safety Guidance
This chapter provides important safety information related to the use of the Smart ECG Viewer
Data Management software.
1.1 Indications for Use/Intended Use
The Smart ECG Viewer Data Management Software is intended to store, display, analyze and
manage ECG data on a PC. The software is only intended to be used in hospitals or healthcare
facilities by doctors and trained healthcare professionals. Measurements and interpretive
statements provided by the software are offered to clinicians on an advisory basis only.
1.2 Warnings and Cautions
In order to use the software safely and effectively, and avoid the possibility of system failure,
firstly be familiar with the operation method of Windows, and read the user manual in detail and
be sure to be familiar with the proper operation method of the software.
Please pay more attention to the following warning and caution information.
1.2.1 Safety Warnings
WARNING
1. The system should be installed by qualified service engineers. Do not switch on the
power until all cables have been properly connected and verified.
2. The user should get professional training and read this manual in detail before using
the system.
3. This system is not intended for home use.
4. This system is not intended for treatment.
5. Do not move the main unit or the monitor while working.
6. Only accessories supplied or recommended by the manufacturer can be connected to
the system.
-1-
Smart ECG Viewer Data Management Software User Manual
Safety Guidance
1.2.2 General Cautions
CAUTION
1. Do not bend or press the CD.
2. Keep the CD away from direct sunlight and high temperature. Otherwise, the CD may
become deformed.
3. Do not touch the disk surface of the recorded side. If the surface becomes
contaminated with any foreign substance such as fingerprints, reading data may be
impossible.
4. Clean the CD with a disk cleaner. Do not use organic solvents such as acetone.
5. This CD-ROM disk is not an audio CD, and can not be played with an audio CD
player.
6. Avoid liquid splash and excessive temperature. The temperature must be kept
between 5 ºC and 40 ºC during operation.
7. Do not use the system in a dusty environment with bad ventilation or in the presence
of corrosive. Avoid vibration.
8. Do not handle the CD while smoking or eating.
9. Do not get the CD wet.
1.3 List of Symbols
No.
Symbol
Description
1
Caution
2
Consult Instructions for Use
3
Serial Number
-2-
Smart ECG Viewer Data Management Software User Manual
Safety Guidance
4
Date of Manufacture
5
Manufacturer
6
Authorized Representative in the European Community
7
CE Mark
8
Federal (U.S.) law restricts this device to sale by or on the
order of a physician.
9
It indicates that the device should be sent to the special
agencies according to local regulations for separate
collection after its useful life.
-3-
Smart ECG Viewer Data Management Software User Manual
Introduction
2 Introduction
The Smart ECG Viewer Data Management Software can store, display, analyze and manage ECG
data on a PC. It is one of the accessorial software of the electrocardiograph.
The Smart ECG Viewer Data Management Software (hereinafter called Smart ECG Viewer)
realizes many functions, including receiving, exporting and importing ECG data, managing order
and patient information, displaying and measuring ECG waves, comparing ECG average
templates and rhythm data, displaying and editing auto measurement parameters and auto
diagnosis results, printing ECG reports, rebuilding and backing up database, creating
DICOM/SCP/FDA-XML/PDF/JPG/BMP/TIF/PNG files and so on. Consequently, the time spent
on reading curves can be shortened, and the doctors’ workload can be reduced greatly. Besides,
the system manages the ECG data by using the database, and supports the search and the review
of the relative history data when necessary, which can assist doctors in making decisions.
2.1 Features
Features of Data Input:
♦ Support receiving ECG data through the serial port or the net port
♦ Support importing files or folders from the hard disk of the PC or the U disk
♦ Support receiving ECG data from a maximum of 10 electrocardiographs simultaneously
through the net
Features of Data Management:
♦ Supporting designating the current order information for the uploaded examination record
during data receiving
♦ Support creating and editing order information
♦ Support searching for orders through patient ID, request No., exam room, etc
♦ Support matching examination records with the corresponding orders through patient ID,
request No. and order index
Features of Data Management:
♦ Great capability of database for data storage and management, and more than 100
thousand examination records can be stored
♦ Support editing patient information and diagnosis results
♦ Support searching patient information through patient ID, name, time, etc
-4-
Smart ECG Viewer Data Management Software User Manual
Introduction
Features of Waveform Review and Analysis:
♦ Support viewing, magnifying and measuring ECG average templates
♦ Support displaying auto measurement results and diagnosis results
♦ Support viewing and editing rhythm waves of 12 lead
♦ Support comparing multiple examination records of a patient
Features of Data Output:
♦ Support customized display and print formats
♦ Support exporting ECG reports in DICOM/SCP/FDA-XML/PDF/JPG/BMP/TIF/PNG
format
2.2 System Running Environment
NOTE: If the PC is not purchased from our company, we will not be held responsible for
the maintenance of the PC hardware or the operating system.
2.2.1 Requirements on the Hardware of the PC
CPU:
Pentium P4 or Celeron D 310 or above
Main Board
The main board of Intel chipset is recommended
Hard Disk:
40G or above
System Memory (RAM):
256MB or above
Display:
17' TFT (Resolution: 1024*768, 1280*1024, 1366*768,
1440*900), 16 bit actual color, regular icon and font setup
Printer:
Others:
Color ink jet printer or laser printer of more than 600 dpi
Recommend HP2035, HP2010, CANON iP1980
CD-ROM of 24 × or above
2.2.2 Requirements on the Software of the PC
♦ Windows XP or Windows 7
♦ MSDE2000 (Microsoft SQL Server 2000 Desktop Engine) or Microsoft SQL Server 2005
Express
-5-
Smart ECG Viewer Data Management Software User Manual
2.2.3 Power Requirements
♦ Operating Voltage: 220V~
♦ Operating Frequency: 50Hz
2.2.4 Requirements on the Working Environment
♦ Environment Temperature: 5°C ~ 40°C
♦ Relative Humidity: 25% ∼ 80% (non-condensing)
♦ Atmospheric Pressure: 860hPa ∼ 1060hPa
-6-
Introduction
Smart ECG Viewer Data Management Software User Manual
Operation Instructions
3 Operation Instructions
3.1 Installing Smart ECG Viewer
Insert the installation CD into CD-ROM, and double-click on Setup.exe in the installation CD to
open the following window.
Figure 3-1 Installation Window
Click on the Install button to install Smart ECG Viewer. Click on the Next button continually
during installation.
After installing Smart ECG Viewer, click on the Install button in the installation window. Then
the Environment Detection window pops up. Check the installing status of all the components.
If the Environment Detection window shows that a certain component needs to be installed,
please install it manually.
For details on installing Smart ECG Viewer, please refer to Smart ECG Viewer Data Management
Software Installation Guide.
3.2 Setting Database Connection
After you insert the compatible Sentinel to the PC, click on
on the desktop to start the
system.
If you start up Smart ECG Viewer for the first time, the Database Connection Setting window
pops up.
-7-
Smart ECG Viewer Data Management Software User Manual
Operation Instructions
Click on the Test connection button. If the hint Fail in connection! appears, it means that the
server, user or password is not set correctly. Reset these items and click on the Test connection
button again. If the hint Succeed in connection, please save it! appears, it means that the
connection is successful. You can click on the Save button, and the Data Connection Setting
windowe will not appear when you run the system next time.
3.3 Logging into the Smart ECG Viewer Software
Enter the user name and the password in the Login dialogue box, and then click the OK button to
log into the system.
NOTE:
1. The initial user name is su and the initial password is su. The software can remember
the user name of the latest login. For details on managing the user name and the
password, please refer to Chapter 5, “Configuring the User Management”.
2. If you select Remember, you only need to click on the OK button for login next time.
-8-
Smart ECG Viewer Data Management Software User Manual
Operation Instructions
3.4 Initialization Setup
If you use the software for the first time, the First Startup Setting window pops up.
You can set Hospital Name, Time Format, Paper Direction and Data Path based on your
needs. Click on the OK button after setup, the system will enter the Data Manager screen
automatically (Figure3-2).
3.5 Importing ECG Data into the Data Manager Screen
3.5.1 Importing ECG Data from Hard Disk
Click on the Import button on the toolbar (Figure3-2), select the data to be imported, and then
click on the Select button to import the data.
-9-
Smart ECG Viewer Data Management Software User Manual
Operation Instructions
To import multiple examination records simultaneously, you can click on the first examination
record to be imported and press the Shift button on the keyboard, and then click on the last
examination record to be imported. You can also press the Ctrl button on the keyboard and then
select the examination records one by one. After selecting all the examination records to be
imported, click on the Select button to import all the examination records.
If the data to be imported exists on the Data Manager screen, the system will give a hint.
NOTE: Only ECG data in DAT format created by EDAN’s electrocardiograph can be
imported.
3.5.2 Receiving ECG Data from the Electrocardiograph
After login, the Smart ECG Viewer software monitors the net port and the serial port
automatically. If it receives data, the data list on the Data Management screen will be refreshed.
The new data will be on the top of the data list. For outputting files in various formats, please
refer to Section 6.3 “Output File Setup”.
You can choose to transmit ECG data through the net port or the serial port.
NOTE: We suggest you choose the net transmission, because the net transmission is
much quicker than the serial transmission.
3.5.2.1 Receiving ECG Data through the Net Port
1. Connect the PC to the electrocardiograph with an Ethernet cable recommended by the
manufacturer.
2. See the local IP of the Smart ECG Viewer software.
3. If the PC is connected to the 6-channel electrocardiograph or the 12-channel
electrocardiograph, set Transmission Mode of the electrocardiograph to Ethernet. If the PC is
connected to the 3-channel electrocardiograph, set AUTO TRANSFER of the
electrocardiograph to Net AUTO.
4. Set the remote IP of the electrocardiograph to the local IP of the Smart ECG Viewer software.
5. Set the first three numbers of the local IP of the electrocardiograph to the first three numbers
of the local IP of the Smart ECG Viewer software. The last number of the local IP of the
electrocardiograph can be set at random, but it can’t be the same as the last number of the
local IP of the Smart ECG Viewer software.
6. For the 6-channel electrocardiograph or the 12-channel electrocardiograph, set the first three
numbers of the gateway of the electrocardiograph to the first three numbers of the local IP of
the Smart ECG Viewer software. The last number of the gateway of the electrocardiograph
must be set to 1. For the 3-channel electrocardiograph, you do not need to set the gateway.
- 10 -
Smart ECG Viewer Data Management Software User Manual
Operation Instructions
For example, view the local IP of the Smart ECG Viewer software.
Set the transmission mode, local IP and remote IP of the electrocardiograph.
For 3-channel electrocardiograph:
SAVE OPTION
AUTO TRANSFER
LOCAL IP
REMOTE IP
:On
: Net AUTO
: 192.168.7.21
: 192.168.7.77
For 6-channel electrocardiograph or 12-channel electrocardiograph:
- 11 -
Smart ECG Viewer Data Management Software User Manual
Operation Instructions
3.5.2.2 Receiving ECG Data through the Serial Port (Including
Conversion of USB Port into Serial Port)
1. Connect the RS232 socket of the PC to the RS232 socket of the electrocardiograph with an
RS232 cable.
2. If the PC has no RS232 socket, connect the USB socket of the PC to the RS232 socket of the
electrocardiograph by using the RS232-USB assembly.
3. If the PC is connected to the 6-channel electrocardiograph or the 12-channel
electrocardiograph, set Transmission Mode of the electrocardiograph to UART. If the PC is
connected to the 3-channel electrocardiograph, set AUTO TRANSFER of the
electrocardiograph to UART AUTO.
4. The default serial port of the Smart ECG Viewer software is COM1. If the PC has a lot of
serial ports and you need another serial port to transmit the ECG data, you can select another
serial port on the System Setting window.
3.6 Exporting ECG Data from the Data Manager Screen
Select the data and click on the Export button on the toolbar (Figure3-2) to display the Report
Save window.
Assign the file name, saving path and export file format (SCP, DICOM, XML, PDF and JPG),
and then click on the OK button to export the data into the selected path.
NOTE: The format of filename is based on the settings you configure in the Output File
window. For details, please refer to Section 6.3 ”Output File Setup”.
If you select one patient record (including multiple examination records) and click on the OK
button, only one examination record of this record will be exported. Or, you can manually export
multiple examination records of this record.
If you select multiple patient records and click on the OK button, all the examination records of
these records will be exported.
If multiple data is exported with a same file name, they will be named by the exporting sequence.
For example, multiple data are exported with a same file name “Lily Green”, the exported data
will be named by “Lily Green”, “Lily Green-1”, “Lily Green-2” and so on.
- 12 -
Smart ECG Viewer Data Management Software User Manual
Operation Instructions
If you select SCP and Compress, the compressed SCP file will be exported.
NOTE: Only if the export file format is set to SCP, can the Compress check box be
displayed.
3.7 Processing Records
Toolbar
Main Menu
Patient Information List
Button Bar
Examination Record List
Figure 3-2 Data Manager Screen
- 13 -
Smart ECG Viewer Data Management Software User Manual
Operation Instructions
After you log into the system, the system will enter into the Data Manager screen by default
(Figure3-2). Click on one patient record in the patient information list, the related examination
records will be displayed in the examination record list.
If you select Examined Patients, only the examined patient records will be displayed in the
patient information list. Otherwise, all the patient records will be displayed.
Select a search item from the
pull-down list, and then all the patient records
which meet the search condition are listed in the patient information list.
3.7.1 Modifying Patient Records
Click on a patient record in the patient information list, and then click on the Modify button to
display the Patient Information window. Then you can modify the information of the patient in
the Patient Information window. If the patient has more than one record, the modification is
only for the selected record. Click on the OK button to save these modifications.
NOTE: Items of patient information can be selected in the Print Setting window. For
details, please refer to Section 6.2 “Print Setup”.
- 14 -
Smart ECG Viewer Data Management Software User Manual
Operation Instructions
3.7.2 Searching Patient Records
Click on the Search button on the Data Management screen to display the Search window, and
then enter the search conditions.
Click on the Stat button, the system will calculate the number of the patient records which meet
the requirements.
Click on the Search button, the patient records which meet the requirements will be displayed in
the patient information list. If you click on the Refresh button on the Data Manager screen, the
current patient records will be displayed.
NOTE:
1. User-defined 1/2 is available after it is set in the Basic Information window.
2. The items of ID, Name, Department, Diagnoses and Physician support fuzzy
search. If you enter “Lily” in the Name textbox, the patient records with the name of
“…Lily…” will be found.
3. You can set the unit of Age to Unknown, yr, mo., week, day or hr..
- 15 -
Smart ECG Viewer Data Management Software User Manual
Operation Instructions
3.7.3 Deleting Records
NOTE: The deletion of records is permanent, and you can’t restore the records deleted.
Please use this operation cautiously.
Click on a patient record in the patient information list, and then click on the Delete button to
delete the selected patient record. At the same time, all the examination records of the patient will
be deleted.
Or, you can click on the first patient record to be deleted and press the Shift button on the
keyboard, and then click on the last patient record to be deleted in the patient information list;
You can also press the Ctrl button on the keyboard and then select the patient records one by one.
After selecting all the patient records to be deleted, click on the Delete button to delete all the
selected patient records.
The operation methods of deleting examination records are similar to those of deleting patient
records. The deletion of an examination record cannot delete the corresponding patient
information.
3.7.4 Refreshing Patient Records
You click on the Refresh button on the Data Manager screen to display the current patient
records after searching or deleting patient records.
3.7.5 Assigning Examination Records to Another Patient
Click on an examination record in the examination information list, and click on the Assign
button to display the Assign… dialog box. Input a patient ID in the dialog box, and then click on
the OK button to assign the selected examination record to this patient.
The system supports assigning multiple examination records to another patient. The operation
methods of selecting several examination records concurrently are similar to those of selecting
several patient records concurrently.
NOTE: The examination record can be assigned to another examination record in a
different mode.
- 16 -
Smart ECG Viewer Data Management Software User Manual
Operation Instructions
3.8 Viewing Examination Status
You can view examination status in the examination record list.
Status of examination record in the auto mode includes Completed and Unconfirmed.
Status of examination record in the rhythm mode includes Completed only.
Completed status means you click on the Confirm button on the Average Template screen of the
examination record.
Unconfirmed status means you do not click on the Confirm button on the Average Template of
the examination record.
If you want to change the unconfirmed status to the completed status, you can double-click on
one record in the auto mode in the patient information list or examination information list, and
then click on the Average Template button to display the Average Template screen (Figure 3-3).
Click on the Confirm button on the Average Template screen, and then click on the Return
button on the toolbar to check the examination status on the Data Manager screen.
3.9 Viewing Examination Records in the Auto Mode
3.9.1 Viewing the Average Template
Access the Average Template screen of the examination record in the auto mode in the following
ways:
1.
Double-click on a patient record or an examination record on the Data Manager screen.
Or, click on a patient record or an examination record on the Data Manager screen, and then
click on the View button.
2.
Click on the Average Template button to display the Average Template screen.
- 17 -
Smart ECG Viewer Data Management Software User Manual
Main Menu
Operation Instructions
Toolbar
Average Template
10s Rhythm Data
Figure 3-3 Average Template Screen (with position marker)
Set
the
gain
and
the
speed
in
,
and
select
two
leads
to view the 10s rhythm data.
Click on the average template curve of one lead to be viewed, the Amplificatory Average
Template window (Figure 3-4) pops up.
Figure 3-4 Amplificatory Average Template Window (with position marker)
- 18 -
Smart ECG Viewer Data Management Software User Manual
1.
Click on
below a lead, the ECG wave of the selected lead will be added, and
changes into
2.
Click on
changes into
Operation Instructions
.
below a lead, the ECG wave of the selected lead will disappear, and
.
You can drag marker lines of P1, P2, Q, S, T1 and T2 in the Amplificatory Average Template
window.
Select Position Marker on the Average Template screen or in the Amplificatory Average
Template window, the start and end points of the P and QRS waves, and the end point of the T
wave will be displayed.
P1 is the start point of P wave, P2 is the end point of P wave, Q marks the position of Q point, S
marks the position of S point, T1 is the start point of T wave and T2 is the end point of T wave.
You can move these lines by dragging on the mouse and the mouse will turn to a hand pointer
when it is put on these marks. You can also use the arrow keys on the keyboard to move these
marks, and the corresponding parameter values will change.
Click on the
button to change it to
on the Average Template screen or in the
Amplificatory Average Template window. You can move the time axis by dragging on the mouse,
and the mouse will turn to a hand pointer when it is put on the axis. You can also use the arrow
keys on the keyboard to move the time axis.
3.9.2 Viewing Auto Measurement Parameter
Click on the Modify button on the Average Template screen (Figure 3-3) to make the
corresponding values changeable, enter the values manually in the corresponding textboxes, and
then click on the Accept button to confirm.
Click on the Detail button to display the Auto Measure Result window.
- 19 -
Smart ECG Viewer Data Management Software User Manual
Operation Instructions
1.
Click on the Preview button, configure the pop-up the Printer Setting window, and then
click on the OK button to preview the selected report.
2.
Click on the Print button, configure the pop-up Printer Setting window, and then click
on the OK button to print the selected report.
3.
Click on the Export Excel button to export an Excel file.
3.9.3 Viewing the Waveform
1.
Click on the Waveform button on the toolbar (Figure 3-3) to switch to the Waveform screen.
2.
Click on the three buttons
to switch among 3-lead per screen display, 6-lead
per screen display and 12-lead per screen display. You can also set the gain and the paper
speed on this screen.
3.
Click on the four buttons
to carry out the scrolling display of leads and
the moving display of time axis.
- 20 -
Smart ECG Viewer Data Management Software User Manual
3-lead per screen display:
6-lead per screen display:
- 21 -
Operation Instructions
Smart ECG Viewer Data Management Software User Manual
Operation Instructions
12-lead per screen display:
If sequence is set to Sequential in the Print Setting window (Figure 6-2) and Print Format is
set to 6*2 in the Print Select window (Figure 3-7), you can click on
or
to print
ECG data in previous 5 seconds or in following 5 seconds on the 12-lead per screen display.
3.9.4 Comparing Multiple ECG Records of a Patient
1.
Click on the Compare button on the toolbar (Figure 3-3) to switch to the Compare screen.
2.
Click on the Rhythm button on this screen, you can compare 10s rhythm data of multiple
ECG records, and the Rhythm button changes into the Average Template button.
- 22 -
Smart ECG Viewer Data Management Software User Manual
3.
Operation Instructions
Click on the Average Template button, you can compare mean data of multiple ECG records,
and the Average Template button changes into the Rhythm button.
- 23 -
Smart ECG Viewer Data Management Software User Manual
Operation Instructions
3.10 Viewing Diagnosis Information
3.10.1 Adding Diagnosis Information
For examination records in the auto mode:
♦ Enter your own diagnosis opinions in the Diagnosis Information textbox on the Average
Template screen, and then click on the Confirm button to confirm.
♦ Click on the Modify button on the Average Template screen, or click on the Diagnoses button
on the toolbar (Figure 3-3), click on the necessary information in the auto diagnosis tree and
click on the Add--> button to add the selected information into the diagnosis information
input field. Click on the OK button to confirm.
- 24 -
Smart ECG Viewer Data Management Software User Manual
Auto Diagnosis Tree
Operation Instructions
Diagnosis Information Input Field
For examination records in the rhythm mode:
Click on the Diagnoses button on the toolbar (Figure 3-6), click on the necessary information in
the auto diagnosis tree and click on the Add--> button to add the selected information into the
diagnosis information input field. Click on the OK button to confirm.
3.10.2 Editing Diagnosis Information
1.
Adding an item
Enter a diagnosis item, such as aa in the textbox, and then click on the Add button. The
added item will be displayed on the Diagnosis Information list.
- 25 -
Smart ECG Viewer Data Management Software User Manual
2.
Operation Instructions
Adding a subitem
Click on the item you want to add a subitem to, enter a diagnosis subitem, such as bb in the
textbox, and then click on the Add button. The added subitem will be displayed under aa.
3.
Deleting an item
Click on the item you want to delete on the Diagnosis Information list, and then click on
the Delete button to delete this item.
4.
Save the settings
Click on the Save button to save modifications.
- 26 -
Smart ECG Viewer Data Management Software User Manual
Operation Instructions
3.11 Previewing and Printing Report
3.11.1 Viewing Report
Access the View screen of the examination record in the auto mode in the following ways:
1.
Double-click on a patient record or an examination record on the Data Manager screen.
Or, click on a patient record or an examination record on the Data Manager screen, and then
click on the View button.
2.
Click on the Report View button to display the View screen.
Figure 3-5 View Screen of the Examination Record in the Auto Mode
Access the View screen of the examination record in the rhythm mode in the following ways:
1.
Double-click on a patient record or an examination record on the Data Manager screen.
2.
Or click on a patient record or an examination record on the Data Manager screen, and then
click on the View button.
- 27 -
Smart ECG Viewer Data Management Software User Manual
Operation Instructions
Figure 3-6 View Screen of the Examination Record in the Rhythm Mode
NOTE:
1. On the View screen of the examination records in the rhythm mode, the Print Format
and Rhythm Lead Select of the Print Optiions window (Figure 3-7) in the Setting
pull-down list are unavailable.
2. The View screen is only for reference. You can view the Preview screen to see the
final printing effect.
3.11.2 Previewing Report
Click on the Preview button on the toolbar (Figure 3-3 or Figure 3-6) to display the Preview
screen.
1. Click on Previous Page/Next Page to switch to the previous/next preview page.
2. Click on Zoom In/ Zoom Out to magnify/minify the preview page.
3. Click on Print to print the report.
4. Click on Close to close the normal ECG preview screen and return to the previous screen.
NOTE: The report title is in one line by default, you can also change the line to two lines.
Find the text named SmartECGViewer.ini in the installation CD of Smart ECG
Viewer, modify LineofTitle=0 to LineofTitle=1, and then save the text to change
the line to two lines.
- 28 -
Smart ECG Viewer Data Management Software User Manual
Effect pictures of report title are as shown below:
Report Title in One Line
Report Title in Two Lines
- 29 -
Operation Instructions
Smart ECG Viewer Data Management Software User Manual
Operation Instructions
3.11.3 Configuring the Print Options
Choose Setting -> Print Setting in the main menu (Figure 3-3 or Figure 3-6) to open the Print
Select window.
Figure 3-7 Print Options Window
1.
Selecting Rhythm Lead (Only for Auto Mode)
The rhythm lead can be one of 12 standard leads: I, II, III, aVR, aVL, aVF, V1, V2, V3, V4,
V5, or V6.
When Print Format is set to 3*4+1 or 6*2+1, the rhythm lead selected in Rhythm Lead 1
will be displayed and recorded. When the display format is set to 3*4+3, 3 rhythm leads
selected in Rhythm Lead 1, Rhythm Lead 2 and Rhythm Lead 3 will be displayed and
recorded.
NOTE: Two items of Rhythm 1/2/3 cannot be set to the same value.
2.
Setting Gain
You can set the limb gain, chest gain and rhythm gain.
3.
Setting Speed
You can set the page speed to 5mm/s, 10mm/s, 12.5mm/s, 25mm/s or 50mm/s.
4.
Setting Display Format (Only for Auto Mode)
You can set the display format to 12*1, 6*2, 3*4, 3*4+1, 3*4+3, 6*2+1 and Average
Template.
- 30 -
Smart ECG Viewer Data Management Software User Manual
Operation Instructions
3.11.4 Creating a PDF/JPG/BMP/TIF/PNG File
1. Click on the Report Save button on the toolbar (Figure 3-3 or Figure 3-6) to open the File
Output window.
2. Enter the file name. The default name is Patient ID-Exam Time.
3. Select the file type (PDF/JPG/BMP/TIF/PNG).
4. Click on the Browse key to choose the storage path or the network path.
5. Click on the OK key to begin to create a PDF/JPG/BMP/TIF/PNG file, and then the icon
is displayed in the bottom right corner of the desktop. After the file is created successfully, the
icon
will disappear and the hint information will be displayed.
NOTE: Creating a PDF/JPG/BMP/TIF/PNG file will cost some minutes, and you should
be patient to wait.
After the PDF/JPG/BMP/TIF/PNG file is created successfully, you can view it in the storage
path.
If you select Send on the File Output window, the report will be sent by email (outlook express)
when it is saved to the designated directory. During the saving and sending course, the system
will give the hint information.
NOTE:
1. In Windows XP system, only if OUTLOOK EXPRESS is installed, can the report be
sent by email.
2. In Windows 7 system, only if Windows live mail is installed, can the report be sent by
email.
- 31 -
Smart ECG Viewer Data Management Software User Manual
Processing Orders
4 Processing Orders
After you log into the system, click on the Order Info tab to open the Order Manager screen
(Figure 4-1).
Figure 4-1 Order Manager Screen
Click on an option on the Order Manager screen, such as Pat-ID, name, etc, and then all orders
will be arranged in sequence.
Select a search item from the
pull-down list, and then all orders which meet the
search condition will be displayed.
- 32 -
Smart ECG Viewer Data Management Software User Manual
Processing Orders
4.1 Creating Orders
Click on the New button on the Order Manager screen to display the Order Info Input window.
Select Exam after order, the system will make a data receiving automatically after you click on
the OK button in the Order Info Input window. For details, please refer to Section 4.7
“Receiving Data from the Electrocardiograph”.
4.1.1 Entering Patient Information Manually
NOTE: The Order Info Input window only displays the basic information of a patient, the
information of physician, technician, req.physician, department and exam room,
and these items should be selected in the Print Setting window. Before setting
them, these items in the Patient Information window are unavailable. For details,
please refer to Section 6.2 “Print Setup”.
Basic
Information
Including patient ID, name, sex, age
NOTE: In the Order Info Input window, patient ID is a must. You can
use the number generated by the system or input a number
manually. Patient ID can be a random character string
excluding ‘/’, ‘\’, ‘:’, ‘*’, ‘?’, ‘<’, ‘>’ and ‘|’.
Physician and Including information of physician, technician, Req. physician, exam room,
Department
department
Information
Input the information of physician or department in the corresponding
textboxes in the Patient Information window, and then click on the OK
button to confirm. Or,
1.
Click on the
pull-down list, and then click on the
Edit… button. Input the information of physician or department in the
Add textbox, and then click on the Add button.
- 33 -
Smart ECG Viewer Data Management Software User Manual
Processing Orders
2.
Click the information in List, and then click on the Delete or Modify
button to delete or modify the selected information of physician or
department.
3.
Click on the OK button in the Edit window to confirm.
4.1.2 Entering Patient Information by Using a Bar Code Reader
Operation procedures are as follows:
1.
Connect the bar code reader to the PC.
2.
Log into the Smart ECG Viewer software.
3.
Configure the bar code
For more detailed information about configuring the bar code, please refer to Section 6.7.
NOTE: If the two-dimensional bar code reader is used, you should install Symbol
COM Port Emulation Drive manually. For details, please refer to Smart ECG
Viewer Data Management Software Installation Guide.
4.
Click on the New button on the Order Manager screen to display the Order Info Input
window.
5.
Scan the patient’s bar code with the bar code reader, and then the patient information will
appear in the corresponding boxes.
Or, you can scan the Order Manager screen with the bar code reader, and then the patient
information will appear in the pop-up Order Info Input window.
NOTE:
1. Only bar code readers recommended by the manufacturer can be used.
2. Only the basic information of the patient can be scanned by the bar code reader.
4.1.3 Entering Patient Information by Acquiring Orders
Operation procedures are as follows:
1. Configure the GDT & DICOM Worklist Setting window.
For details, please refer to Section 6.4.
2. Select .001 in the GDT & DICOM Worklist Setting window, and then click on the Refresh
button on the Order Manager screen to load orders.
Or, Select Enable DICOM Worklist in the GDT & DICOM Worklist Setting window, and
then click on the New button on the Order Manager screen to display the Order Info Input
window. Enter manually or connect a bar code reader to enter the patient ID in the Pat-ID
textbox, click on the Acquire button, and then the related information will be displayed in the
corresponding textboxes.
- 34 -
Smart ECG Viewer Data Management Software User Manual
Processing Orders
4.2 Modifying Orders
Click on an order on the Order Manager screen, and then click on the Modify button to display
the Modify window. Modify the information in this window, and click on the OK button to
confirm.
The modified information will be refreshed on the Order Manager and the Data Manager
screens at the same time.
4.3 Deleting Orders
Click on one order to be deleted on the Order Manager screen, and click on the Delete button to
delete this record. If there is no related examination record of this order, the system will give a
pop-up dialog box to remind you whether to delete the related patient information.
- 35 -
Smart ECG Viewer Data Management Software User Manual
Processing Orders
If there is a related examination record of this order, you can only delete this order, the related
patient and examination records are still saved on the Data Manager screen.
Click on the first order to be deleted on the Order Manager screen, press the Shift key on the
keyboard, and then click on the last order to be deleted. Or, you can press the Ctrl key on the
keyboard, and then select the orders one by one. After selecting all the orders to be deleted, click
on the Delete button to delete all the orders selected.
4.4 Searching Orders
Click on the Search button on the Order Manager screen to display the Search window, select
the search items, and then enter the corresponding information.
- 36 -
Smart ECG Viewer Data Management Software User Manual
Processing Orders
Click on the Stat button in the Search window to calculate the number of the orders which meet
the requirements.
Click on the Search button on the Search window. Then the orders which meet the requirements
will be displayed on the Order Manager screen. Click on the Refresh button to display the current
orders on the Order Manager screen.
NOTE:
1. The items of Pat-ID, Request No., Name and Exam. Room support fuzzy search. If
you enter “Lily” in the Name textbox, the patient orders with the name of “…Lily…”
will be found.
2. You can set the unit of Age to Unknown, yr, mo., week, day or hr..
4.5 Refreshing Orders
You click on the Refresh button on the Order Manager screen to display the current orders after
searching or deleting orders. If .001 is selected in the GDT&DICOM Worklist Setting window,
you can click on the Refresh button to load orders to the Order Manager screen.
If Using Auto Refresh is selected, the system will refresh the Order Manager screen
automatically and display the refresh time.
You can set the time of the Order
List Refresh in the Basic Setting window. For details, refer to Section 6.1 “Basic Information
Setup”.
- 37 -
Smart ECG Viewer Data Management Software User Manual
Processing Orders
4.6 Matching the Examination Records
1.
Match the examination records automatically
Start up Smart ECG Viewer software, and then the system will detect whether ECG data is
being uploaded. You can examine or print the patient record on the electrocardiograph, and
then upload this examination record from the electrocardiograph to Smart ECG Viewer. The
system will match the examination record uploaded from the electrocardiograph with the
corresponding order on the Order Manager screen.
NOTE:
1) Smart ECG Viewer match the examination records with the corresponding orders
by the order matching way you set in the Basic Setting window.
2) When an order is matched successfully (if Order Matching Way is set to Pat-ID),
the order will disappear from the Order Manager screen, but appear in the patient
information list.
2.
Match the examination records manually
If the examination record fails to be matched with the corresponding order (short of matching
requirements), you can match the examination records manually.
The following conditions will cause matching failure:
1) You don’t set the order matching way;
2) No conditions meet the order matching way you set;
3) Multiple conditions meet the order matching way you set.
If the examination record fails to be matched with the corresponding order, the Manual Match
window pops up.
- 38 -
Smart ECG Viewer Data Management Software User Manual
Processing Orders
You can double click on one order inn the Manual Match screen or right click on one order and
then click on the Match button to match the examination record with the corresponding order
manually. The Manual Match window will be closed automatically after the examination record
is matched successfully.
NOTE:
1. If multiple conditions meet the order matching way you set, the orders in the same
condition will be displayed in the Matching Info List of the Manual Match window.
2. If no conditions meet the order matching way you set, all the orders will be display in
the Matching Info List of the Manual Match window.
4.7 Receiving Data from the Electrocardiograph
Click on one order on the Order Manager screen, and then click on the Receive button to make a
data receiving. The current order information can be designated to the examination record
uploaded from the electrocardiograph, and the following dialogue box (including name and
patient ID) will pop up during data receiving.
NOTE:
1. You can not close the Data Receiving dialog box during the process of data
receiving.
2. The function of data receiving can be used on one electrocardiograph.
- 39 -
Smart ECG Viewer Data Management Software User Manual
Configuring the User Management
5 Configuring the User Management
NOTE: After the system is installed, the default user su is an administrator. The
administrator can add, manage and delete ordinary users, but he can not delete
himself. When deleting ordinary users, the administrator should provide his own
password. Ordinary users have the right to modify their own passwords.
Choose Operation>User Setting from the main menu (Figure 3-2) to display the User Setting
dialog box, as the following figure shows.
Figure 5-1 User Setting Dialog Box
5.1 Creating New User (Only for Administrator)
If the current user is the administrator su,
1.
Click on the New button in the User Setting dialog box (Figure 5-1) to open the New User
dialog box.
2.
Enter a new user's information and click on the OK button, the new user can be added to the
system.
NOTE: The user name should be exclusive. If the input name is the same as the name
that has existed in the system, the hint will pop up to remind the administrator to
change the name.
- 40 -
Smart ECG Viewer Data Management Software User Manual
Configuring the User Management
5.2 Deleting a User (Only for Administrator)
If the current user is the administrator su,
1.
Select a user in the User Setting dialog box (Figure 5-1) and click on the Delete button to
display the Delete User dialog box.
2.
Input the password of the administrator su and click on the OK button.
5.3 Modifying the Password
1.
Select a user in the User Setting dialog box (Figure 5-1) and click on the Modify button to
display the Modify Password dialog box.
2.
Enter the old password of the selected user, the new password, confirm the new password
and click on the OK button.
- 41 -
Smart ECG Viewer Data Management Software User Manual
Configuring the System
6 Configuring the System
Click on the System Setting button on the toolbar (Figure 3-2) to display the System Setting
window.
After you modify some information in the System Setting window,
1.
Click on the OK button to save these modifications and exit.
2.
Or click on the Cancel button to cancel these modifications and exit.
6.1 Basic Information Setup
Click on the Basic Setting tab to display the Basic Setting window.
Figure 6-1 Basic Information Setup Window
1.
Entering the Hospital Information
Enter the hospital information in the Hospital Name textbox. The hospital information will
be displayed in the title of the printed report.
2.
Entering the Report Title
Enter the report title in the Report Title textbox, such as 12-lead ECG report. The report tile
you entered will be displayed in the title of the printed report.
3.
Entering the Report Remark
Enter the report remark in the Report Remark textbox, such as “for clinic reference only”.
The report remark will be displayed at the bottom right corner of the printed report.
- 42 -
Smart ECG Viewer Data Management Software User Manual
4.
Configuring the System
User-defined Settings
Fill the information in the User-Defined 1 or User-Defined 2 textbox, and click on the OK
button to confirm, the customized items will be displayed in the Modify and Search windows
of Data Manager screen, and the printed report.
For example, when you enter aa in the User-Defined 1 textbox, and enter bb in the
User-Defined 2 textbox in the Basic Setting window, the corresponding items in the Modify
window will be aa and bb respectively.
You can also enter the related information in the User-defined 1 (aa) and User-defined 2 (bb)
textboxes in the Modify window, the related information of the two items will be displayed
on the printed report.
- 43 -
Smart ECG Viewer Data Management Software User Manual
5.
Configuring the System
Specifying the Order List Refresh
The time of the Order List Refresh can be set to the value from 5 seconds to 600 seconds.
6.
Specifying the Default Display
Set Default Display to Waveform, Average Template or Report View.
When you view an examination record in the auto mode, the system will automatically enter
into the screen you set in Default Display.
When you view an examination record in the rhythm mode, the system will automatically
enter into the Viewing screen.
7.
Specifying the Serial Port
COM port of the serial port transmission can be set from COM1 to COM29.
8.
Specifying the Order Matching Way
Set Order Matching Way to None, Pat-ID, Request No. or Order index.
♦ Select None, the examination record will not match the patient order. ID of the
examination record uploaded from the electrocardiograph must be the same as the patient
ID of the order on the Order Manager screen.
♦ Select Pat-ID, the examination record will match the patient order by patient ID. ID of the
examination record uploaded from the electrocardiograph must be the same as the patient
ID of the order on the Order Manager screen. If the examination record matches the
corresponding order successfully, a new examination record with a request No. will be
displayed on the Order Manager screen.
♦ Select Request No., the examination record will match the patient order by request No..
ID of the examination record uploaded from the electrocardiograph must be the same as
the request No. of the order on the Order Manager screen. If the examination record
matches the corresponding order successfully, a new examination record with a request No.
will be displayed on the Order Manager screen.
♦ Select Order Index, the examination record will match the patient order by order index.
Order index is created by the system and it is a unique number to distinguish different
orders with a same patient ID. ID of the examination record uploaded from the
electrocardiograph must be the same as the order index of the corresponding order on the
Order Manager screen. If the examination record matches the patient order successfully, a
new examination record with an order index will be displayed on the Order Manager
screen.
9.
Specifying the Data Saving Path
Click on the … button and choose the storage path or the network path.
- 44 -
Smart ECG Viewer Data Management Software User Manual
Configuring the System
6.2 Print Setup
Click on the Print Setting tab on the System Setting window.
Figure 6-2 Print Setup Window
1.
Choosing Patient Information to be Printed
Select the item displayed in the Order Info Input window, the Modify Order Info window,
the Modify window, the Search window and the report printed out.
Select First Name/Last Name, the Name textbox will change into the First Name and Last
Name textboxes.
Select D.O.B, the D.O.B textbox appears and the Age textbox becomes unavailable.
NOTE: Pacemaker checkbox appears in the Modify window after it is selected in the
Print Setting window. Select Pacemaker in the Modify window, and the
Pacemaker information will be displayed on the report printed out.
2.
Choosing Diagnosis Information to be Printed
Select the diagnosis item displayed on the preview screen and in the report printed out.
NOTE: Position Mark should be selected together with Average template, because
the position mark is only used to mark the position of ECG waves in the
average template.
- 45 -
Smart ECG Viewer Data Management Software User Manual
3.
Configuring the System
Defining Printing Format
♦ Set Sequence to sequential or synchronous.
Select sequential, the lead group is printed one by one in a certain sequence. The start
time of a lead group is just the end time of the previous lead group.
Select synchronous, all leads are printed simultaneously. The start time of each group is
the same.
♦ Set Report Hint to Confirmed by or Unconfirmed by.
♦ Set Paper Size to A4, B5 or Letter.
♦ Set Paper Directory to landscape or portrait.
♦ Set Lead sequence to Standard or Cabrera, and the lead groups are displayed or printed
in the corresponding sequence listed in the following table.
Lead Sequence
Lead Sequence
Lead group 1
Standard
І, II, Ш
Cabrera
aVL, І, -aVR
Lead group 2
aVR, aVL, aVF
II, aVF, Ш
Lead group 3
Lead group 4
V1, V2, V3
V4, V5, V6
V1, V2, V3
V4, V5, V6
♦ Set Baseline to Auto, Horizontal or Off.
Select Auto, the baseline will be adjusted automatically.
♦ Select Color Print, the report will be printed in color.
NOTE: If a black-and-white printer is used, we recommend you not select Color
Print. Otherwise, it will affect the printing quality.
♦ Select Background grid, the background grid will be printed in the report.
♦ Select AGC, the chest and limb gains will be adjusted automatically, and Baseline is
automatically set to Auto
- 46 -
Smart ECG Viewer Data Management Software User Manual
Configuring the System
6.3 Output File Setup
Figure 6-3 Output File Setup Window
1.
File Naming
Each field of File Name includes ID, Name, ExamTime, Age and Sex items.
Deselect Modify File Naming, File name is set to Exam Time-ID by default.
Select Modify File Naming, you can also modify the file name manually, such as
Name-ID-Exam Time.
NOTE: Select at least one item as a file name when you select Modify File Naming.
2.
Setting SCP
Select Using compress, the system will automatically output SCP files in data compression.
Select Auto output while transmitting (SCP), the system will automatically output SCP
files after transmitting.
Select Output SCP when Confirm is pressed, the system will automatically output SCP files
when the Confirm button is pressed on the Average Template screen.
3.
Setting PDF/JPG/BMP
Select Output PDF when Confirm is pressed, the system will automatically output PDF
files when the Confirm button is pressed on the Average Template screen.
Select Output JPG when Confirm is pressed, the system will automatically output JPG files
when the Confirm button is pressed on the Average Template screen.
- 47 -
Smart ECG Viewer Data Management Software User Manual
Configuring the System
Select Output BMP when Confirm is pressed, the system will automatically output BMP
files when the Confirm button is pressed on the Average Template screen
4.
Setting FDA-XML
Select Auto output while transmitting (FDA-XML), the system will automatically output
FDA-XML files after transmitting.
Select Output FDA-XML when Confirm is pressed, the system will automatically output
FDA-XML files when the Confirm button is pressed on the Average Template screen.
5.
Setting DICOM
Select Auto output while transmitting (DICOM), the system will automatically output
DICOM files after transmitting.
Select Output DICOM when Confirm is pressed, the system will automatically output
DICOM files when the Confirm button is pressed on the Average Template screen.
NOTE:
1) SCP, FDA-XML and DICOM files can be exported automatically during the
transmission process through the net port.
2) SCP file can be exported automatically during the transmission process through
the serial port.
6.
Setting File Saving Path
Click on the … button to assign the output path.
6.4 GDT&DICOM Worklist Setup
Figure 6-4 GDT&DICOM Worklist Setup Window
- 48 -
Smart ECG Viewer Data Management Software User Manual
1.
Configuring the System
Enabling GDT
Select Enable GDT and GDT to enable GDT features.
Select Enable GDT and .001 to enable order features.
Click on the … button, and then appoint the path to exchange files with EDP.
Fill in the Input file name textbox to set command file name assigned by EDP to Smart ECG
Viewer.
Fill in the Output file name textbox to set data file name that is used by Smart ECG Viewer
to transmit the result data to EDP.
Enter ECG ID to set GDT ID assigned to the system which will be entered in field 8315 or
8316 in the GDT protocol.
Enter EDP ID to set GDT ID of the EDP system which will be entered in field 8315 or 8316
in the GDT protocol.
2.
Enabling DICOM Worklist
Select DICOM Worklist to enable DICOM Worklist features.
Set Server IP, Server Port and AE Title to the server IP, server port and AE title of DICOM
Worklist.
6.5 Data Maintenance Setup
Figure 6-5 Data Maintenance Window
- 49 -
Smart ECG Viewer Data Management Software User Manual
1.
Configuring the System
Database Rebuild
You can rebuild the database to avoid disconnection from the database because of damaged
data files. Click on the Rebuild Database button, click on … button in the Database-rebuild
Setting window to select the path, and then click on the OK button to rebuild database.
2.
Database Backup
You can also make a backup to avoid your data files being damaged or missing.
Set Reminded Period to None, 7 days, 14 days, 30 days or User Defined….
When you set Select Reminded Period to User Defined…, you can define the backup period
manually.
Click on the Begin backup button to display the Backup Setting window.
♦ Click on the … button to assign the backup path.
♦ Select Select Time to back up the data files during the set time range.
♦ Deselect Select Time to back up all the data files.
♦ Click on the OK button in the Backup Setting window, the system will begin backup.
The system will back up the data files for the latest time if you do not change the path.
- 50 -
Smart ECG Viewer Data Management Software User Manual
Configuring the System
6.6 Other Setup
Figure 6-6 Other Setup Window
1.
Setting Grid Color
You can set the colors of the background, waves, grid (5mm), grid (1mm), mark and text.
Double-click on the color block to display the Color window, and then you can select your
favorite color.
Click on the Default button to restore the default colors.
2.
Setting Grid and Wave Width
You can adjust Wave Width, Grid Width (5mm) and Grid Width (1mm) of report by using
the up or down arrow. The adjustable range is: 1~5.
NOTE: The width may vary with the type of printer.
3.
Setting System Password
Click on the Set Password button, enter the same password twice in the System Password
Setting window, and then click on the OK button to set the system password.
After a successful password setting, you should have a correct password to enter the System
Setting window.
4.
Setting Time Format
Select a format to set the system time format.
- 51 -
Smart ECG Viewer Data Management Software User Manual
Configuring the System
6.7 Barcode Setup
Figure 6-7 Barcode Setup Window
Select Enable Barcode to enable barcode features.
Enter the start and end addresses, the male and female codes and the device port, and then click
on the OK button confirm.
If you use the bar code reader for the first time, you should scan the barcode below.
NOTE:
1. Only bar code readers recommended by the manufacturer can be used.
2. You can make related settings only for two-dimensional bar code readers in the
Barcode Setting window.
- 52 -
Smart ECG Viewer Data Management Software User Manual
Configuring the System
If the bar code reader cannot be automatically detected, you can make related settings as the
following procedures show:
1.
Connect the bar code reader to the PC
2.
Click on start, right-click on My Computer, and then select Manage in the pop-up menu to
display the Computer Management screen.
3.
Click on Device Manager on the Computer Management screen, and then click on
Human Interface Devices to view port information.
4.
In the Barcode Setting window, set Device to the port you view on the Computer
Management screen, and then click on the OK button to confirm.
5.
Restart the Smart ECG Viewer software.
- 53 -
Smart ECG Viewer Data Management Software User Manual
Maintenance
7 Maintenance
You should be familiar with all the operation methods of this system. Read this user manual in
detail, and don't use this system before understanding the whole operation process.
The Smart ECG Viewer Data Management Software just needs simple maintenance during the
operation process. But only the right operation method can guarantee the system's long-time and
steady working. So you must comply with the notice and maintenance presented by the
manufacturer strictly.
WARNING
Turn off the power before cleaning.
CAUTION
Avoid pouring liquid on the equipment while cleaning, and do not immerse any parts of
the equipment into any liquid.
Maintenance of the Main Unit and the Monitor
1)
Keep the main unit and the monitor clean. The main unit case can be cleaned with a soft
cloth dampened with water. If necessary, use a mild detergent but carefully remove any
residue. Use water very sparingly to prevent liquid from seeping into the equipment.
2)
The main unit and the monitor should be placed in a dry and well-ventilated place. Avoid
placing them in a dusty and humid environment. The air path for cooling the system should
be kept well ventilated.
Maintenance of the CD
1)
Do not bend or press the CD.
2)
Clean the CD with a disk cleaner. Do not use organic solvents such as acetone.
3)
Do not handle the CD while smoking or eating.
4)
Keep the CD away from direct sunlight and high temperature. Otherwise, the CD may
become deformed.
5)
Do not get the CD wet.
6)
Do not touch the disk surface of the recorded side. If the surface becomes contaminated with
any foreign substance such as fingerprints, reading data may be impossible.
- 54 -
Smart ECG Viewer Data Management Software User Manual
Accessories
8 Accessories
WARNING
Only accessories supplied by the manufacturer can be used. Or else, the performance
can not be guaranteed.
Table 8-1 Standard Accessory List
Part number
Accessory
02.01.047227
Softdog/USB
01.18.047228
Softdog/LPT
11.13.20096
Net Cable
11.13.20117
Serial Cable
Table 8-2 Optional Accessory List
Part number
Accessory
01.18.052267
Bar Code Reader Z-3152SR(U)
11.23.068003
Bar Code Reader LAB 1000
The Smart ECG Viewer Data Management Software and accessories are available by contacting
the manufacturer or your local distributor.
- 55 -
Smart ECG Viewer Data Management Software User Manual
Warranty and Service
9 Warranty and Service
9.1 Warranty
EDAN warrants that EDAN’s products meet the labeled specifications of the products and will be
free from defects in materials and workmanship that occur within warranty period. The warranty
period begins on the date the products are shipped to distributors.
The warranty is void in cases of:
a) damage caused by handling during shipping.
b) subsequent damage caused by improper use or maintenance.
c) damage caused by alteration or repair by anyone not authorized by EDAN.
d) damage caused by accidents.
e) replacement or removal of serial number label and manufacture label.
If a product covered by this warranty is determined to be defective because of defective materials,
components, or workmanship, and the warranty claim is made within the warranty period, EDAN
will, at its discretion, repair or replace the defective part(s) free of charge. EDAN will not provide
a substitute product for use when the defective product is being repaired.
9.2 Contact Information
If you have any question about maintenance, technical specifications or malfunctions of devices,
contact your local distributor.
Alternatively, you can send an email to EDAN service department at: [email protected].
- 56 -