1
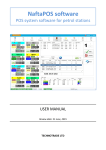
Programming Guide
0100127-01 Rev. A
WebPort 500/2001/4001
Catalog Numbers WP05201 Ethernet Gateway
WP21202 IP Router, PSTN Modem
WP21205 IP Router, GSM/GPRS Modem
WP41201 e-SCADA module, Ethernet Only
WP41202 e-SCADA module, PSTN Modem
WP41205 e-SCADA module, GSM/GPRS Modem
WebPort Programming Guide
Ver 1.0
5.31.2005
Basic Program and Custom Web Page Tutorial
1
2
3
4
Purpose ......................................................................................1
Prerequisites...............................................................................1
Application specifications ...........................................................2
How far can we go without programming ...................................3
4.1 Level monitoring ............................................................................ 3
4.2 Setting the Tank_Level tag in the WebPort .................................... 3
4.3 Setting the tag’s visualisation according to the user’s rights ......... 8
4.3.1 Creating a group with tags the user can only view .............................. 8
4.3.2 Setting the tag’s visibility according to the newly created “User” page8
4.3.3 creating a user account ....................................................................... 9
4.4 Alarm notification..........................................................................10
4.5 Conclusion.....................................................................................12
5 Programming the WebPort ....................................................... 13
5.1 Programming the application ........................................................13
5.1.1
5.1.2
5.1.3
5.1.4
5.1.5
Basic overview ...................................................................................13
Variables ............................................................................................15
Using tags ..........................................................................................17
Init & Cyclic Sections .........................................................................18
Using Timer ........................................................................................20
5.2.1
5.2.2
5.2.3
5.2.4
5.2.5
5.2.6
Detailed Design specifications (without Visualisation) .......................21
Overflow security ...............................................................................21
Scheduled actions ..............................................................................22
Auto fill function.................................................................................23
Custom report of activities .................................................................24
Simulation ..........................................................................................27
5.2 Whole Application .........................................................................21
6 User Interface........................................................................... 28
6.1 Simple text page ...........................................................................28
6.2 Forms to act on WebPort...............................................................29
6.2.1
6.2.2
6.2.3
6.2.4
Update Tag value ...............................................................................29
Acknowledge Tag Alarm .....................................................................30
Execute WebPort script ......................................................................31
Dynamically built WebPages ..............................................................33
6.3.1
6.3.2
6.3.3
6.3.4
6.3.5
Tank level animation ..........................................................................36
Extract application related events from Events.txt file .......................37
Java Applet ........................................................................................38
Tank Monitor: Global page..................................................................39
InSite ViewON ...................................................................................40
6.3 Graphical WebPages......................................................................35
WebPort Programming Guide
Ver 1.0
5.31.2005
Basic Program and Custom Web Page Tutorial
7 Tips and Tricks.......................................................................... 41
7.1 Universal dashboard with Instant Values ......................................41
7.2 Direct import in Excel ....................................................................42
WebPort Programming Guide
Ver 1.0
5.31.2005
Basic Program and Custom Web Page Tutorial
1 Purpose
The purpose is to show how you can quickly set up a little project by using WebPort.
You will find in this Tutorial a complete, step-by-step design of a typical WebPort application. Four main “How-To” are
detailed in this Guide:
• How-to set up a project by means of the built-in WebPort functions.
• How-to power up the application by using the Basic script.
• How-to build custom Web pages in order to display your application in live.
• How-to extract data from the WebPort to perform off-line process/display on your computer.
In addition, you will find in this Guide methods to nicely display live and off-line WebPort data on the Internet.
To make it short, this Guide’s main aim is to help you launching your applications quickly, and even by using the
application in this Guide as a start point for your next design.
2 Prerequisites
We assume you are familiar with WebPort, that means you are able to connect to it, to navigate in its various menus and
to create Tags on it.
If not the case, we recommend you to read the document named “WebPort Getting Started”, that you can find on the
Spectrum Controls Web site at the following address:
http://www.spectrumcontrols.com/WebPort_powered_by_eWON.htm
in order to learn the basic WebPort knowledge prior to take up with the current Guide.
The WebPort that has been used to create the application that are illustrated in this Guide is a WebPort 4001 with
firmware version 4.1.
Older firmware versions (such as 3.5 or 3.8) can be used too, but don’t forget that versions 4.xx provide some useful new
Basic functions.
You don’t need any particular hardware to reproduce the steps that are described in this Guide: all the measures can be
simulated on the WebPort itself.
A basic knowledge of HTML language, Web forms and javascript is required if you plan to build dynamic web applications.
Page 1
WebPort Programming Guide
Basic Program and Custom Web Page Tutorial
3 Application specifications
The purpose is to build a tank monitoring
application.
Our virtual customer needs to:
• Monitor the level and the temperature of his
tank.
• View the historic of the tank level.
• Be warned when the level is low.
• Automate the tank filling.
• Get statistics and reports about the tank’s
events.
• Monitor the use of the filling and outlet
faucets.
• Perform the telecontrol operations.
Such an application will allow you to set up a lot of
powerful advanced WebPort features that can be used
on a daily basis in the industrial field, in order to
straighten security and productivity.
Page 2
Ver 1.0
5.31.2005
WebPort Programming Guide
Ver 1.0
5.31.2005
Basic Program and Custom Web Page Tutorial
4 How far can we go without programming
You can perform almost the whole application by using the WebPort’s built-in functions!
4.1 Level monitoring
4.2 Setting the Tank_Level tag in the WebPort
No real tank level probe is required to show the WebPort behavior, the WebPort memory tag can be used to simulate it.
Let’s assume that the level probe returns a value in %.
The user wants to visualize each of the tank level’s variation with a good accuracy.
To achieve this, we will configure the WebPort tag in order for it to record the value on deadband (to catch the rapid
variations) AND on a fixed time interval (to view the slow variations).
Select the Configuration/Tag Setup menu, and click on the Create New Tag (like first selected) link.
The parameters that need to be filled-in are illustrated in the table below:
Tag Name
Tank_Level
Tag Description
Level of the Tank
Server Name
MEM
Type
Analog
✓ (checked)
Historical Logging Enabled
Logging Deadband
2
Logging Interval
3600
Table 1: Tank_Level Tag’s configuration
You can leave the other parameters to their default value.
By just configuring one tag, you can:
• Visualize the instantaneous level value
• Get historical data that logs the slow and rapid level variations
Note:
Logging deadband and Interval can be used at the same time.
Warning: The Logging deadband feature could be dangerous if improperly used.
Pay attention not to set a deadband value that is lower than the noise of the probe!
You could entirely saturate the WebPort’s cyclic flash memory with just a noise and you could consequently
lose useful data!
Page 3
WebPort Programming Guide
Ver 1.0
5.31.2005
Basic Program and Custom Web Page Tutorial
The historical data can be viewed as a graph in the ViewIO page. Select the checkbox on the left side of the tag and click
on the Show Graph for selection link.
Figure 1: Tank_Level Tag’s historical data viewed as graph
Page 4
WebPort Programming Guide
Ver 1.0
5.31.2005
Basic Program and Custom Web Page Tutorial
If you “play” with the value of this Tank_Level tag, you can download its historical data file (IRC_Tank_Level.txt) from the
File Transfer menu. Open it and you will obtain data such as shown below:
Figure 2: Tank_Level tag historical data logged
You can view, in yellow, the power up of the WebPort. The first row has its IsInitValue to 1.
The orange rows show the values that have been logged due to deadband configuration. These data are not evenly
spaced in time. For demonstration, since 14:11:17, I modify the value of the Tank_Level tag with steps of 1 and you can
see that WebPort has logged value every two steps (according the deadband value of 2).
You can check, in green, that WebPort has logged the values of the Tag every hour (every xx:15:32), respecting the time
interval configuration that have been set to 3600 seconds.
Page 5
WebPort Programming Guide
Ver 1.0
5.31.2005
Basic Program and Custom Web Page Tutorial
Viewed on a XY graph, we clearly see that we have mixed data (logged from deadband AND logged from time interval).
These data are stored in the non-volatile memory from the WebPort, in order to be used for data logging purpose.
Figure 3: Tag’s historical data viewed on a XY graph
If you need temporary logging for direct use when you are on line on your WebPort, you can use the Real Time Logging
feature. This logging uses the RAM memory to store the data.
You need to set the following configuration to enable Real Time Logging for the tag:
Real Time Logging enabled
✓ (checked)
Time Span
900 seconds
Logging Interval
5 seconds
Table 2: Real Time Logging configuration
The only recording method using RAM is with fixed time step. In the above config, WebPort will store data every 5 seconds,
and the buffer length is set to 900 seconds (thus 180 points). This Real Time buffer is cyclic, as for the historical file.
Page 6
WebPort Programming Guide
Basic Program and Custom Web Page Tutorial
In the View I/O Page, you can visualize the Real Time data graph by clicking on the graph icon
Figure 4: Real Time data graph
Page 7
:
Ver 1.0
5.31.2005
WebPort Programming Guide
Ver 1.0
5.31.2005
Basic Program and Custom Web Page Tutorial
4.3 Setting the tag’s visualisation according to the user’s rights
By default, you can see the View I/O page to visualize your logged data. However, it can be necessary to protect some
tag’s configuration by restricting the final user’s rights to tag’s visualisation.
4.3.1 Creating a group with tags the user can only view
WebPort can group tags in “pages” (Configuration menu/Pages List):
Figure 5: user’s Pages list configuration
Type “User” in the User Page 2 field, then validate by clicking on the Update button to create the user’s page.
4.3.2 Setting the tag’s visibility according to the newly created “User” page
Select “User” in the Page: combo box from the tag’s configuration page, then validate by clicking on the Add/Update
Only button:
Figure 6: setting the page for the tag
Don’t forget to move all the other tags in the “System” page, because the “Default” page is allways allowed for all the
users.
Page 8
WebPort Programming Guide
Ver 1.0
5.31.2005
Basic Program and Custom Web Page Tutorial
4.3.3 Creating a user account
Click on the Create New User link from the Configuration/Users Setup page, then fill-in the First Name, Last Name,
User Login and Password fields with “user”. Unselect all the Rights area checkboxes except for the View IO one, and
select “User” in the Tag Page... and User Directory allowed... combo boxes:
Figure 7: creation of the new user who is granted to only visualize the tags in the defined page and directory
If you now login with the newly created account (user/user), you will see a limited view from the WebPort website:
Figure 8: tag’s visualisation according to the limited “user” user’s rights
The user is only allowed to view the Tags from the “User” page (only one tag in our example). The Configuration menu is
still visible, but cannot be accessed by the “user” user. If you click on this link, you will be warned you have not access to
this menu. You will find out the same behavior if you attempt to modify the value of the tag.
Page 9
WebPort Programming Guide
Ver 1.0
5.31.2005
Basic Program and Custom Web Page Tutorial
4.4 Alarm notification
The customer needs to be warned when the tank’s level goes below a defined threshold to plan the tank’s filling. For this
we set an alarm that sends en Email when triggered (Tag Setup page/”Tank_Level” tag/Alarm Setup):
Alarm enabled
✓ (checked)
Alarm Level Low
20%
Alarm Level High
110%
Auto acknowledge
✓ (checked)
Table 3: tag’s alarm setup
On the Alarm Notification for tag: Tank_Level page:
EMail upon
✓ ALM and END (checked)
eMail TO
Customer’s Email address
Table 4: tag’s alarm notification setup
You can leave the other parameters unchanged. Those settings enable you:
• To be advised by eMail when the level goes low.
• To be advised by eMail when the level returns to a normal state.
Note: The 110% of the Alarm Level High is unreachable, due to the Level Probe range of 0-100%. It is a
simple way to disable an alarm boundary.
Page 10
WebPort Programming Guide
Ver 1.0
5.31.2005
Basic Program and Custom Web Page Tutorial
When the Tank_Level value goes down the low level threshold defined to 20%, an eMail such as the one below is sent to the addressee
who has been set in the eMail TO field from the Alarm Notification page.
When the tank’s filling occurs and the level steps over the 20% threshold, the alarm then returns to normal state (RTN), due to the Auto
acknowledge parameter that has been checked, alarm is automatically acknowledged and thus ended.
Note that you have 2 alarm levels in the Tag’s configuration. That means you can configure 4 alarm levels (2 low and 2 high). You will
receive an eMail each time the level steps over any of the defined thresholds.
Page 11
WebPort Programming Guide
Basic Program and Custom Web Page Tutorial
4.5 Conclusion
The table below summarizes the features that are available by just configuring the WebPort’s built-in features:
Built-in features
Programmation required
• Monitor the level and temperature of a Tank
(by means of tags)
• View the historical data for the level
(by means of graphs and tag files)
• Be warned if the level is low
(by means of eMails or SMS on alarms)
• Get some statistics and reports
(by means of tag files)
• Monitor the use of the filling and outlet faucets
(by recording the faucets tags)
• Perform telecontrol
• Automate the filling of the tank
Table 5: tag’s alarm setup
Page 12
Ver 1.0
5.31.2005
WebPort Programming Guide
Ver 1.0
5.31.2005
Basic Program and Custom Web Page Tutorial
5 Programming the WebPort
Even if the WebPort embeds a lot of built-in functions, some programmation is necessary if you want to customize the
way your data will be published, or ie. if you want to monitor or handle a specific behavior on an industrial device.
5.1 Programming the application
The WebPort programming is done with the Basic language; the syntax of all the WebPort’s available Basic functions is
explained in the WebPort User Guide, which you can find on the Spectrum Controls web site at the following address:
http://www.spectrumcontrols.com/WebPort_powered_by_eWON.htm
The goal of this tutorial is to guide your first steps with the WebPort programming rules.
5.1.1 Basic overview
The Basic program is interpreted by the WebPort kernel and has a low priority by comparison with other threads (such as
IO server process, Web Server process, communication process,...).
That means, by opposition with the automation world, the process time is not deterministic!
Don’t worry about the execution speed, the CPU of the WebPort is powerful enough but the execution time can vary, due to
other WebPort tasks that are executed in the same time (ie: a minimal cyclic_section will be executed between 100 and 500
times per second, depending on the other active WebPort tasks).
A WebPort program is composed of several sections. There are 2 special sections, named the init_section and the
cyclic_section:
• The init_section is executed only once when the program starts. When the init_section ends, the cyclic_section
then starts.
• The cyclic_section is executed continuously.
You can also edit the WebPort program outside of the WebPort. All the program sections are in a text file called
“program.bas”.
This file is on the root directory of WebPort when accessed by FTP. Simply download it and open it with your favorite text
editor.
Put the “program.bas” file back on the WebPort with FTP and it will be active.
Page 13
WebPort Programming Guide
Basic Program and Custom Web Page Tutorial
You can also edit the program through the WebPort web interface.
Figure 9: Cyclic Section code (handling the tank’s faucets behavior)
Figure 10: program output in WebPort’s Script Control window
Page 14
Ver 1.0
5.31.2005
WebPort Programming Guide
Ver 1.0
5.31.2005
Basic Program and Custom Web Page Tutorial
5.1.2 Variables
Integer:
Syntax: A%
a is a letter from “a” to “z”. The name of the variable is followed by the “%” character to indicate that it
is an integer variable.
An integer variable can contain an integer number (from -2147483648 to + 2147483647).
A%=10
B%=A%+20
Real:
Syntax: var_name
A real variable can be defined with any name, except for reserved words like functions names.
Var_name can be built with any alphabetic letter (case insensitive), number and underscore.
Var_name must begin with a letter. Real number range is -3.4 1038 to 3.4 1038.
MyVar=12.36
MyVar=AnotherVar*2.5
Real Array:
Syntax: DIM A(size1[,size2[,size3[,...]]])
a is the name of the created array variable, its name contains one character (from “a” to “z”). Size1 is
the number of real for the first dimension. Size2, Size3 are optional and are present if the array must
have 2, 3, 4,... dimensions. The number of dimensions is only limited by the Basic memory size.
Index of array begins at 1.
Dim B(20)
B(1)=12.5
DIM C(2,20)
C(1,1)=11.3
C(2,20)=22.4
The array “A(..)” and the real number “A” can exist at the same time and are two different things!
String:
Syntax: A$
a is a letter from “a” to “z”. The name of the variable is followed by the “$” letter to indicate that it is a
string. A string can contain any number of characters. Its size is modified each time the content of the
variable is modified too.
A$=”this is a string”
We extract a substring with the keyword “TO”
B$=A$(6 to 9)
:rem B$ holds “is a”
We can know the length of a string by means of the “LEN” function.
A$=LEN(A$)
Page 15
WebPort Programming Guide
Ver 1.0
5.31.2005
Basic Program and Custom Web Page Tutorial
Array of characters:
Syntax: DIM A$(size1[,size2[,size3[,...]]])
a$ is the name of the created array of characters, its name only contains one active character from “a”
until “z”. Size1 is the number of characters for the first dimension. Size2, Size3 are optional and are
present if the array must have 2, 3, ... dimensions.
The array is initialized with space characters (ascii code=32).
Dim B$(4,80)
B$(1,1)=”T”
You can access the last dimension like a “fixed length string”.
B$(2)=”Bravo”
Print B$(2)
returns the 80 characters from the row:
“Bravo___75 spaces___”
The string A$ and the array of characters “A$()” can exist at the same time and are two different things!
A$=”hello world”
DIM A$(4,80)
A$(1)=”good morning”
Print LEN(A$)
Print LEN(A$(1))
will return 11
will return 80 (the length of the defined row)
A good method to avoid confusion is not to use string and character array with the same label.
Page 16
WebPort Programming Guide
Basic Program and Custom Web Page Tutorial
5.1.3 Using tags
The simplest way to access tags in Basic language is by using the “@” character.
Syntax: TagName@
If your tag has the name Tank_Level, you can use it in Basic such as follows:
Tank_Level@=12.5
MyBasicVar=Tank_Level@+5
if (Tank_Level@ > 95) then
Print “Upper level reached”
endif
This instruction means “assign the value
of tag Tank_Level to the Basic variable
Tank_Level”.
Tank_Level=Tank_Level@
Tank_Level and Tank_Level@ are two different variables!
Another way to access tags is by using the SETIO and GETIO Basic functions.
SETIO “Tank_Level”,12.5
MyBasicVar=GETIO “Tank_Level”
MyBasicVar=MyBasicVar+5
if ((GETIO “Tank_Level”) > 95) then
Print “Upper level reached”
endif
There is less risk of confusion in this case
between the tag and the Basic variable.
Tank_Level=GETIO “Tank_Level”
The main advantage of the SETIO/GETIO functions is the ability of using a string variable to access the tag.
For i%=1 to 5
A$=”MyTag”+str$(i%)
Total=Total+GETIO A$
Next i%
Page 17
Ver 1.0
5.31.2005
WebPort Programming Guide
Ver 1.0
5.31.2005
Basic Program and Custom Web Page Tutorial
5.1.4 Init & Cyclic Sections
Init_Section:
This section will be the first to be executed and will be executed only once.
You can place all your initialization tasks in this section.
At the end of the Init_Section, the Cyclic_Section is automatically executed.
Cyclic_Section:
If you want some tasks to be done repetitively, you can place them in the Cyclic_Section from the
program. A typical simple program (program.bas) could look like follows:
Rem --- WebPort start section: Init Section
The code with no background color is hidden in
the WebPort’s web interface.
ewon_init_section:
Rem --- WebPort user (start)
Print time$;” start program”
Prints a message in the Script Control panel to
visualize the output
Rem --- WebPort user (end)
End
Rem --- WebPort end section: Init Section
Rem --- WebPort start section: Cyclic Section
ewon_cyclic_section:
Rem --- WebPort user (start)
If ((Tank_Level@>98) And (Input_Faucet@=1)) Then
Input_Faucet@ = 0
Logevent "Close Input_Faucet"
print time$;" close Input"
Endif
Rem --- WebPort user (end)
End
Rem --- WebPort end section: Cyclic Section
Page 18
Here, for example, you want to protect your tank
against overflow, by automatically closing the
input faucet when the level steps over a predefined boundary.
WebPort Programming Guide
Ver 1.0
5.31.2005
Basic Program and Custom Web Page Tutorial
It’s very important to understand well how the program runs.
The WebPort has a FIFO (first in, first out) stack where it places the BASIC tasks to process. When you activate the RUN
button, WebPort pushes a “goto ewon_init_section” and a “goto ewon_cyclic_section” in the FIFO.
Then, the WebPort processes all the instructions of the Init_Section until it meets an END command. Once the END
command is reached, WebPort pops the current FIFO task and processes the next one; in our case, the next one is the
Cyclic_Section. Thus, WebPort processes all the instructions of the Cyclic_section until meeting an END command.
When WebPort pops the Cyclic_Section, it automatically pushes another “goto ewon_cyclic_section” in the FIFO to
ensure the cyclic behavior.
When you use Basic events (such as onTimer, onAlarm, onChange, onStatus, onPPP, onSMS), each of those events
pushes
a “goto event_handler” in the Basic FIFO.
Thus, every event is processed in the order of appearance, and not when it occurs!
If you program an infinite loop in a section, the FIFO never pops this section and then you never process the other
events!
Below is a short example that illustrates the above explained worst case:
• We have a cyclic_section with a processing duration of 10 seconds (a bad one).
• And we have a timer set to 3 seconds. ( ONTIMER 1,”goto do_timer1”: TSET 1,3 )
The live of FIFO looks like this:
8:00:00
Push “goto init_section”
Only defining the timer
Start at 8:00:00 during 0s
8:00:00
Push “goto cyclic_section”
Do a lot of things
Start at 8:00:00 during 10s
8:00:03
Push “goto do_timer1”
Only prints a message
Start at 8:00:10 during 0s
8:00:06
Push “goto do_timer1”
Start at 8:00:10 during 0s
8:00:09
Push “goto do_timer1”
Start at 8:00:10 during 0s
8:00:10
Push “goto cyclic_section”
Start at 8:00:10 during 10s
8:00:12
Push “goto do_timer1”
Start at 8:00:20 during 0s
8:00:15
Push “goto do_timer1”
Start at 8:00:20 during 0s
8:00:18
Push “goto do_timer1”
Start at 8:00:20 during 0s
8:00:20
Push “goto cyclic_section”
Start at 8:00:20 during 10s
This example shows clearly that the time at which the actions are processed could be very different from the time at which
the matching events appear! (If you don’t program your application correctly).
Page 19
WebPort Programming Guide
Basic Program and Custom Web Page Tutorial
5.1.5 Using Timer
If you need to clock some task, you can use the 4 timers of the Basic.
The same program with a verification of the level every 5 seconds will look like this:
Rem --- WebPort start section: Init Section
ewon_init_section:
Rem --- WebPort user (start)
Print time$;" start program"
Defines the event handler of the
Timer 1
Setup timer 1 at 5 sec
Effective End of the Init_Section
Ontimer 1,"goto CheckLevel"
Tset 1,5
End
CheckLevel:
If ((Tank_Level@>98) And (Input_Faucet@=1)) Then
Input_Faucet@ = 0
print time$;" close Input"
Endif
End
Rem --- WebPort user (end)
End
Rem --- WebPort end section: Init Section
Rem --- WebPort start section: Cyclic Section
ewon_cyclic_section:
Rem --- WebPort user (start)
Rem --- WebPort user (end)
End
Rem --- WebPort end section: Cyclic Section
Label used by the goto command
End of the CheckLevel block
Cyclic is empty
Timer limitations:
• Only 4 timers available
• Minimal time tick is 1 sec
Page 20
Ver 1.0
5.31.2005
WebPort Programming Guide
Ver 1.0
5.31.2005
Basic Program and Custom Web Page Tutorial
5.2 Whole Application
5.2.1 Detailed Design specifications (without Visualisation)
• Overflow security:
The Input_Faucet is closed automatically when the level goes above 98%.
• Scheduled actions:
Every hour, the Output_Faucet is opened during a fixed time.
• Auto fill function:
The application should automatically re fill the tank when the level goes under the level of 30%.
• Custom report of activities:
The application should build a file containing only the open/close actions of the two faucets.
The file should be directly readable by Excel.
5.2.2 Overflow security
The Input_Faucet is closed automatically when the level exceeds 98%.
This action must obviously be processed as quickly as possible. That is the reason why we enter the code at the
beginning of the Cyclic_Section.
The code will be as following:
If ((Tank_Level@>98) And (Input_Faucet@=1)) Then
Input_Faucet@ = 0
print time$;" close Input"
Endif
We use the PRINT instruction for information purpose. This will display in the ScriptControl area a line such as follows:
”31/03/2005 14:15:55 close Input”
You can see the special variable time$ that holds the current date&time.
There are only two special variables:
• time$: returns the current date&time in string format (DD/MM/YYYY hh:mm:ss)
• memory: returns the available Basic memory space as integer value
Page 21
WebPort Programming Guide
Ver 1.0
5.31.2005
Basic Program and Custom Web Page Tutorial
5.2.3 Scheduled actions
Every hour, the Output_Faucet is opened during a fixed time.
A good practice is to group procedures in several sections that you create with the New Section button in the
EditScriptPage.
We place the procedure in a new section named “Application”:
ScheduledActions:
Gosub Scheduled_Output
End
We place here all the scheduled actions called by timer
Calls the procedure with a Gosub
End of the timer process
Scheduled_Output:
Label of the procedure begins line and is ended by
colon “:”
A$ = time$
Extracts the current hour. Transforms the String to
Numeric with VAL
CurrentHour = val(A$(12 to 13))
if (CurrentHour<>LastHour) then
LastHour = CurrentHour
Output_Faucet@=1
ontimer 4,"goto Close_Output"
tset 4,15
logevent "Open Output_Faucet: hourly scheduled"
Opens the Faucet
Uses a timer to let the faucet open during 15 sec
Starts timer
Prints a message in the ScriptControl area (informative
purpose)
print time$;" open Output"
endif
return
End of the gosub
Close_Output:
Output_Faucet@=0
Label
After 15sec, we can close the Faucet
And we stop the timer (unless we close the Faucet
every 15sec)
tset 4,0
logevent "Close Ouptut_Faucet: Hourly scheduled"
print time$;" close Output"
end
And we can place in the Init_Section the following code:
A$ = time$
LastHour = val(A$(12 to 13))
ontimer 1,"goto ScheduledActions"
tset 1,10
Initializes the LastHour variable
Defines the EventsHandler
Start of timer. This will call the procedure every 10 seconds.
Page 22
WebPort Programming Guide
Basic Program and Custom Web Page Tutorial
5.2.4 Auto fill function
The application should automatically re fill the tank when the level goes under the level of 30%.
The protection against overflow will close the faucet.
• In the Application_Section
ScheduledActions:
Gosub Scheduled_Output
Add the AutoFill procedure to the
ScheduledActions
Gosub AutoFill
End
AutoFill:
If ((AutoFill=0) and (Tank_Level@<30)) then
AutoFill=1
Input_Faucet@=1
Logevent “Autofill: start”
Print time$;” Autofill: start”
Endif
Return
Open the input faucet
• In the Init_Section, we need to add:
AutoFill=0
• In the Cyclic_Section, we need to update the Overflow protection with:
If ((Tank_Level@>98) And (Input_Faucet@=1)) Then
Input_Faucet@ = 0
AutoFill=0
print time$;" close Input"
Endif
Page 23
Clear the Flag
Ver 1.0
5.31.2005
WebPort Programming Guide
Ver 1.0
5.31.2005
Basic Program and Custom Web Page Tutorial
5.2.5 Custom report of activities
The application should build a file containing only the open/close actions of the two faucets.
The file should be directly readable by using Excel.
We already saw that we can log some application events in the WebPort events.txt file with the instructions Logevent.
But these messages are mixed with all the other WebPort messages.
With the web interface of the WebPort, you can filter these Application messages with the Event Class combo box.
The main advantage of using the logevent instruction is that WebPort files are circular.
You don’t need to watch the length of the file; you always view the last events.
But if you need to export only these messages or if the format is different, you need to build your own LogFile.
LogFile:
open "file:/usr/Logfile.txt" for text append as 1
put 1,time$;Z$
close 1
return
Page 24
Open the file in TEXT mode and APPEND mode
Write the time and the message
Don’t forget to close the file
WebPort Programming Guide
Ver 1.0
5.31.2005
Basic Program and Custom Web Page Tutorial
You can use this procedure in your code with:
Z$=”my message”: gosub LogFile
In the /USR directory of WebPort, you will find a file named “Logfile.txt” and holding:
"11/02/2005 10:35:33";"My message"
"11/02/2005 10:36:42";"My message"
"11/02/2005 10:37:12";"This is a message in my LogFile"
"11/02/2005 10:38:33";"Message 2"
"11/02/2005 10:40:20";"Message 3"
…
You can see that WebPort automatically formats text file as CSV file. Strings are surrounded by double-quotes (“), items
are separated by semicolons (;) and numeric values are not surrounded by double-quotes.
You can build complex file with mixing numerical and string items.
i% = 12
A$ = “column3”
Pressure = 15.25
Put 1,”column1”; i%;A$;Pressure;26.3;”column6”
Will write:
"column1";12;"column3";15.25;26.30;"column6"
Keep in mind that your file size grows and that the place in WebPort /USR directory is limited (1 or 3 MB)! You need to
clear the file at regular intervals with the Basic instruction “ERASE”.
If you want to receive an eMail every morning with the activities of the previous day, you could do the following:
SendReport:
Calls the SendReport in the ScheduledAction procedure
A$ = time$
CurrentDay = val(A$(1 to 2))
if (CurrentDay<>LastDay) then
Catches the day boundary
LastDay=CurrentDay
sendmail "[email protected]","","Daily activities","[$dtUF$uf/Logfile.txt]"
endif
return
Sends an eMail with the LogFile included in body of message
(see manual for exhaustive explanations about
Export Blocks Descriptors*: ‘[$dt…]’)
* An Export Block Descriptor is a string of characters describing the WebPort data to export with a precise syntax.
Typically, the Export Block Descriptor will answer the following questions:
• What WebPort data to export (Event log, Historical logging, etc.)?
• How to format the data to export (Binary, Text, Html table, Graphic)?
• From what time?
• To what time?
• What Tag is concerned?
Page 25
WebPort Programming Guide
Ver 1.0
5.31.2005
Basic Program and Custom Web Page Tutorial
You will get an eMail such as this one:
Be cautious if you want to empty the file just after the SendMail. Don’t use the following syntax:
sendmail "[email protected]","","Daily activities","[$dtUF$uf/Logfile.txt]"
erase "/usr/Logfile.txt"
You will receive an empty eMail!
The reason is, when you use SendMail function, it is placed in a “queue of actions” that are processed independently from
the execution of the Basic program. Then, with the above procedure, you clear the file before it’s actually sent!
The WebPort really processes the export block (reading the file) when it processes the SendMail.
To avoid this, you need to wait the end of the SendMail before clearing the file.
You achieve that with using the OnStatus event handler in addition with ActionID and EvtInfo system info.
Set event handler (placed in the Init_Section)
onstatus "goto ProcessAction"
…
sendmail "[email protected]","","Dailyactivities","[$dtUF$uf/Logfile.txt]"
SendReport_ID = Getsys PRG,"ACTIONID"
When you send the eMail
Immediately get the ID of the Action and store it
…
At each change in ALL queued actions, you
enter here
Firstly, get the ID of the action that changes
ProcessAction:
y% = Getsys PRG,"EVTINFO"
Print Time$;" evtinfo ";y%
If (y%=SendReport_ID) Then
Setsys PRG,"ACTIONID",y%
y% = Getsys PRG,"ACTIONSTAT"
Print Time$;" actionstat ";y%
If (y%=0) Then
rem Send report is done with success
rem We can clear the Logfile
erase "/usr/Logfile.txt"
print time$;" Logfile cleared"
Endif
Endif
End
Check if it’s your sendmail
Get the status of your ACTIONID
If Status is ‘done’
That means that we are safe to clear the log file
clear the Logfile
Page 26
WebPort Programming Guide
Basic Program and Custom Web Page Tutorial
5.2.6 Simulation
Now that our application is functioning fine, we would like to play with it!
To achieve that, let’s add the following section to simulate the Tank:
Rem --- WebPort start section: Simulation
Rem --- WebPort user (start)
Simulation:
if (Input_Faucet@=1) then
if Input_Faucet is opened then
Tank_level@ = Tank_level@ + 1
Fill in the Tank
endif
if (Output_Faucet@=1) then
Tank_Level@ = Tank_Level@ - 0.5
endif
if Output_Faucet is opened then
Drain off the Tank
end
Rem --- WebPort user (end)
End
Rem --- WebPort end section: Simulation
ontimer 2,"goto simulation"
tset 2,1
Add the call to simulation ‘Thread’ in Init_Section
Now, if you run the Program, you can:
• View the level of the Tank
• Act on the Output_Faucet (and view the tank level decreasing)
• Act on the Input_Faucet (and view the tank level increasing)
• See the automatic fill in
• Receive a report every day relating the activities of the Tank
Page 27
Ver 1.0
5.31.2005
WebPort Programming Guide
Ver 1.0
5.31.2005
Basic Program and Custom Web Page Tutorial
6 User Interface
The following user Web pages shows several ways of performing WebPort data integration.
WebPort WebServer supports Server Side Include (SSI) functions, when the client browser requests a page from the
WebPort. If this page has a “.shtm” extension, the eWON will parse the page to replace all the occurrences of
<%#_____%> tags by an object (TagValue, table, file, images).
Only the .shtm files will be parsed by WebPort, the other files, with extension .htm, .html, .gif, … are sent without any
processing from WebPort.
6.1 Simple text page
The page below shows a simple way to view Tag Values (See /usr/Page1.shtm):
When WebPort needs to send a web page with extension “.shtm”, it parses the HTML code to replace all SSI tags by a
value, a table, a text or a link to an image.
The page is refreshed only when requested from Internet Explorer (By using the Refresh button or F5 key).
More exhaustive informations about Web User Page are in the WebPort User Manual.
Page 28
WebPort Programming Guide
Basic Program and Custom Web Page Tutorial
6.2 Forms to act on WebPort
You need to use forms to perform actions on WebPort.
6.2.1 Update Tag value
See /usr/Page2.shtm
Page 29
Ver 1.0
5.31.2005
WebPort Programming Guide
Ver 1.0
5.31.2005
Basic Program and Custom Web Page Tutorial
To update Tag values on WebPort, you need to use the UpdateTagForm to send information from your computer to
WebPort. This form has the following format:
Where to post the form
Returned page after
processing
Working on Tank_Level tag
<form method="POST" action="/rcgi.bin/UpdateTagForm">
<input type="hidden" name="ResultPageOk" value="/usr/Page2.shtm">
<input type="hidden" name="TagName1" value="Tank_Level">
Tank level:
<input type="text" name="TagValue1" size="4" value="<%#TagSSI,Tank_Level%>">
New value of the Tag
<br>
Working on Tank_Pressure
tag
<input type="hidden" name="TagName2" value="Tank_Pressure">
Tank Pressure:
<input type="text" name="TagValue2" size="4" value="<%#TagSSI,Tank_Pressure%>">
<br>
<%TagSSI,__%> place the
current value in the text box
Submit the form
Where post the form
Returned page after
processing
<input type="submit" name="Submit" value="Submit">
</form>
This form is the basis of the 7 forms shown on the WebPage2.shtm file, but you can use your HTML knowledge to
improve the page behavior.
By default, web pages are not refreshed continually, so you need to update your page manually
(Refresh button or F5).
If you need AutoRefresh behavior, you can add <meta http-equiv="refresh" content="5"> in the Head on the page.
You can use the <ExeSSI,____%> syntax (Server Side Included) in your code. All the Basic WebPort instructions placed
inside this tag will be processed by the WebPort before the sending the page to your Internet Explorer.
<%#ExeSSI,if Output_Faucet@=0 then print #0,"selected"; endif%>
All on one line
<%#ExeSSI,
Presented like this, it’s more clear
if Output_Faucet@=0 then
print #0,"selected";
To print text in the web page before the send.
endif
This allows you to dynamically build your page.
%>
Each <%ExeSSI,___%> can be compared to a little procedure that must be processed in the Basic Queue!
Therefore, this Web Basic Code is pushed on the Queue and processed when its turn comes!
6.2.2 Acknowledge Tag Alarm
You can build custom web pages to acknowledge tag’ alarms.
You need to use the same UpdateTagForm with TagValue=”ack” instead of TagValue=”25”.
By default, WebPort records the acknowledge action as performed by the Administrator user, but you can define it in the
form: TagValue=”ack,guest”, where “guest” is a valid WebPort login.
Page 30
WebPort Programming Guide
Ver 1.0
5.31.2005
Basic Program and Custom Web Page Tutorial
6.2.3 Execute WebPort script
You can execute some BASIC instructions from the web page.
See /usr/Page3.shtm
To execute script on WebPort, you need to use the ExeScriptForm to send the commands to WebPort.
This form has the following format:
<form method="POST" action="/rcgi.bin/ExeScriptForm">
Where to post the form
<input type="hidden" name="ResultPageOk" value="/usr/Page3.shtm">
Page returned after processing
<input type="hidden" name="Command1" value="Output_Faucet@=1">
First command to send: Output_Faucet@=1
<input type="hidden" name="Command2" value="Print ‘hello’ ">
Second command to send: Print ‘hello’
<input type="hidden" name="Command3" value="Print ‘hello’: Output_Faucet@=1">
Multiple instructions executed atomically
<input type="submit" name="Submit" value="Submit">
Submit the form
</form>
Page 31
WebPort Programming Guide
Ver 1.0
5.31.2005
Basic Program and Custom Web Page Tutorial
The 2 first commands in the example above will be pushed in the Basic Queue separately. If you need that these 2
commands are executed together, you need to place the 2 instructions inside the same Command (as showed in
Command3)
You surely noticed that a BASIC string can be surrounded by double quotes (“) OR single quotes (‘). This method is
frequently used in webpage coding, due to the fact that all html parameters are string (and they are already
surrounded by ““).
Therefore, in WebPort you can choose the way you surround your strings and place ‘ or “ inside them.
A$= “Hello I’m back”
is valid
A$= ‘The string holds “hello” and it is OK
is valid
Page 32
WebPort Programming Guide
Ver 1.0
5.31.2005
Basic Program and Custom Web Page Tutorial
6.2.4 Dynamically built Web Pages
You can build your web page dynamically thanks to the <%#ExeSSI,___%> syntax, and you can even use context
variables.
See /usr/Page4.shtm
<%#ExeSSI,
rem here, we are in Basic
print #0,"This message is dynamic"
print #0,"Current eWON time is: ";time$
print #0,"<br>"
for i%=1 to 5
print #0,"line ";i%
next i%
for i%=1 to 5
print #0,"line ";i%;
next i%
%>
Basic instructions for the generation of the output above
Note that a html <br> (line break) is added at the end of each
output of PRINT #0,”text”
You need to add a semi-colon (;) at the end of PRINT to avoid
this <br> addition.
output of PRINT #0,”text”
Page 33
WebPort Programming Guide
Ver 1.0
5.31.2005
Basic Program and Custom Web Page Tutorial
Web page context variables
On WebPort, each web page has its own context. Its time life is transitory; it lives only during the period of web page
creation.
Context variables are of string type, lowercase named and are post fixed by a ‘!’.
Ex: mystring! = “this is a string”
This variable is only useful inside of the web page and can be output with the <%#VarSSI,____%> syntax.
We recommend, if possible, to use one ExeSSI at the beginning of the page to prepare context variable and to include it
among the html code with VarSSI.
Other variables defined in the Basic program are GLOBAL, in web page too!
If you modify a global variable (i.e.: i%, A$,…) inside the web page, it is modified for the program too!
<%#ExeSSI,
rem here, we are in Basic
firstmessage! = "This message is contextual"
ewontime! = time$
rem do basic stuff
%>
<HTML>
<BODY>
Don’t forget to use only lowercase in variable name
“WebPort said to you: This message is contextual”
WebPort said to you: <%#VarSSI,firstmessage%>
The time of WebPort is <%#VarSSI,ewontime%>
</BODY></HTML>
If you add parameters in the URL of the WebPort user web page with extension .shtm just like forms do, these parameters
are automatically converted in context variables and thus can be used inside ExeSSI.
If you send to WebPort: http://10.0.0.71/usr/contextpage.shtm?name=Smith&first=John and the contextpage.shtm is:
<HTML>
<BODY>
My name is <%#VarSSI,name%>
And my firstname is
<%#VarSSI,first%>
</BODY>
</HTML>
Output will be:
My name is Smith
And my firstname is John
Page 34
WebPort Programming Guide
Ver 1.0
5.31.2005
Basic Program and Custom Web Page Tutorial
6.3 Graphical WebPages
In the web world, there are a lot of ways to build graphical web pages:
• Arrange images pieces in table
• Include images in layers or frames
• DHTML: a lot of javascript
• Use Java Applet
• Use SVG (Scalable Vector Graphic)
• Include ActiveX (Windows world)
• Make animation in Flash
• use Insite | viewON
•…
All these methods to improve your web page can be used because they are external to WebPort.
WebPort has the technical tools (TagSSI, ExeSSI,…) to be included in all your web creations.
Some are more complex than others but beautiful web pages always require a little work.
There is no better way for that purpose or another, you will choose the way the more comfortable for you. If you are a C
programmer, you will be comfortable with Java Script and Java Applet. If you are Web developper, you will be attracted by
layers, table and Flash.
You find here some examples to inspire you.
All these examples are in separated subdirectories of /USR in the WebPort configuration package.
Page 35
WebPort Programming Guide
Ver 1.0
5.31.2005
Basic Program and Custom Web Page Tutorial
6.3.1 Tank level animation
I need to show the image of a tank and adapt the level
according to the value of the matching WebPort Tag.
This page is the /usr/TankMonitor/Tank.shtm page.
It's composed only with images organized in a html table.
The level (in blue) is a one blue pixel image resized
by a little javascript code.
As we see above, a simple way to refresh the displayed values on
the page is to re load the web page. But this action re load all
things, the whole page, all the images, … and have an unpleasant
blink of the page.
To minimized this blinking effect on the whole page, I dissociate
the static page (things that doesn't change) from the dynamic
page (things that change).
The inside of the tank is an <IFRAME> (Included Frame) which is
configured to self-reload every 5 seconds.
Pay attention to the fact that only the IFRAME is refreshed at regular intervals.
If you place an indicator on a place that is not refreshed, you could obtain a strange result, such as the one illustrated on
the image below, in which the level value indicated below “Level” (40,5%) does not match the level value indicated in the
tank’s figure (98,5%):
Page 36
WebPort Programming Guide
Ver 1.0
5.31.2005
Basic Program and Custom Web Page Tutorial
6.3.2 Extract application related events from Events.txt file
I record all my application related actions in the Events.txt file and I need to display it on a user web page.
But my logs are lost among all the WebPort events.
I want to extract my events, reverse the order (make newer first) and format the text the way I want.
See /usr/Report/Report.shtm
Thanks to Javascript, I include the entire file into
the web page and thus I am able to:
Just by using the <%#ParamSSi,___%> tag, we
have no control:
• Parse it to extract only the events I need
• re order...
• display it in the format I want
• On which events to visualize (we can
only control by their date)
• On the way the data are formatted
This file extraction is interesting because it is completely independent from the Basic application. The Events file is
included in the web page before transmission and processing (parsing, filtering, formatting) are handled by
Javascript on the client computer.
Nevertheless, the drawback to this technique is that even if you only display three or four events, the WHOLE events
file is passed to your Internet browser. The events.txt file is hidden, but if you right click in your browser and choose
View Source, you then will see ALL the events.txt file. If you pass through a modem, the process could be rather
slown “to view only 4 events”.
If the size of the transmitted data is determinant, you need to process the file before transmission is done, that
means, on the WebPort. You can achieve that by programming it in Basic but it is rather tricky; you can also choose
not to use the events.txt file and save the application events in a separated file (that contains only your events) but
this file is not circular.
However, a heavy Basic process could notably slow down your Application (because Basic procedures cannot be
interrupted by another Basic task). That means that an apparently passive User action could disturb the behavior of
your main Application.
Always keep in mind that all Basic tasks are pushed in the basic queue and are processed just one after the other.
Page 37
WebPort Programming Guide
Ver 1.0
5.31.2005
Basic Program and Custom Web Page Tutorial
6.3.3 Java Applet
A Java Applet can be considered to be a little program that is included in your web page. This Applet allows you to
achieve powerful tasks but in this case a lot of programmation is required.
For example, I want a digital display with a good refresh rate but I want to share my communication resources.
For that, I develop a little Applet that reads the Tag’s value with ModbusTCP protocol.
See /usr/Java/Java.htm
You may have noticed that the file extension is .htm and not .shtm like for the previous examples. That means that this
web page is only sent to client browser without any processing!
The above screenshot displays the value of the Tank_Level WebPort tag (which is bound in ModbusTCP).
Don’t forget to enable the ModbusTCP Tag visibility setting, set Register to 1 and check the consider as float
checkbox in the Tank_Level tag setup page.
This Applet opens a TCP socket between the client browser and WebPort, and requests only the value of the tag at a
specified rate (750 msec in that case).
You can mix two techniques (Java and Form) to obtain a very dynamic page.
If you open the Output_Faucet, you will see the value decreasing.
(see /usr/Java/Java2.shtm)
This solution is more complex to build but it is the far most powerful one.
Page 38
WebPort Programming Guide
Ver 1.0
5.31.2005
Basic Program and Custom Web Page Tutorial
6.3.4 Tank Monitor: Global page
See /usr/TankMonitor/TankMonitor.shtm
This could be the Web page of our application.
You monitor the level of the tank, you can play with the two faucets and you view the list of the last 2 hours of events.
This page include 4 <IFRAME> and one Java Applet.
The tank_bargraph is refreshed every 5 seconds, the Java Applet follows the level every 750 msec and the events_list is
reloaded every 30 seconds.
It looks clean.
Page 39
WebPort Programming Guide
Basic Program and Custom Web Page Tutorial
6.3.5 InSite/ViewON
InSite | ViewON is a Human-Machine Interface (HMI) dedicated for WebPort (only for WebPort 4001).
This is an ACT’L/Spectrum Controls product which allows you to quickly build complex graphical interfaces.
Our Tank application could look like as follows with InSite | ViewON:
Page 40
Ver 1.0
5.31.2005
WebPort Programming Guide
Ver 1.0
5.31.2005
Basic Program and Custom Web Page Tutorial
7 Tips and Tricks
We have seen the main techniques to make a beautiful WebPort application, but there are some others things very useful.
7.1 Universal dashboard with Instant Values
You need a web page showing all the current Tag values. You can build a web page holding a <%#TagSSI,__%> for each
tag defined in WebPort.
But, what do you think about a web page that shows you all WebPort tags and that self-adapts when you add a tag in the
WebPort?
Seems a good idea, isn’t it?
See /usr/Tips/UniversalDashboard.shtm
This webpage only reformats the WebPort file inst_val.txt.
"TagId";"TagName";"Value";"AlStatus";"AlType"
1;"Tank_Level";38.500000;0;0
2;"Input_Faucet";0.000000;0;0
3;"Output_Faucet";0.000000;0;0
4;"Tank_Temperature";20.000000;0;0
5;"Tank_Pressure";5.000000;0;0
6;"Air_Valve";0.000000;0;0
11;"Input_Faucet_Bypass";0.000000;0;0
The inst_val.txt file can be used to set Tags value.You can create your inst_val.txt -like file.
Put with FTP to WebPort root folder
"TagName";"Value"
"Tank_Level";40.5
And WebPort will process the file and modify Tag value.
Page 41
WebPort Programming Guide
Ver 1.0
5.31.2005
Basic Program and Custom Web Page Tutorial
7.2 Direct import in Excel
Do you know the "Web Query" function of Excel?
It allows you to directly import your WebPort data in Excel.
The Web Query of Excel feature finds automatically any table in your web page. The simplest way to import WebPort data in Excel is to
create a web page containing only a table with the data you want (see /usr/Excel/Excel.shtm) and do the following:
1. Find the New Web Query menu
2. Type the link to your data page
3. Select the table you want to import (with little arrow)
4. Validate with Import button
And your data are in your Excel spreadsheet:
Page 42
WebPort Programming Guide
Basic Program and Custom Web Page Tutorial
Page 43
Ver 1.0
5.31.2005
WebPort Programming Guide
Basic Program and Custom Web Page Tutorial
You can play with it. You can even set an automatic refresh rate (right click on the table and choose Data Range
Properties).
Page 44
Ver 1.0
5.31.2005
Getting Technical
Assistance
Note that your module contains electronic components which are susceptible to damage
from electrostatic discharge (ESD). An electrostatic charge can accumulate on the surface
of ordinary plastic wrapping or cushioning material. In the unlikely event that the
module should need to be returned to Spectrum Controls, please ensure that the
unit is enclosed in approved ESD packaging (such as static-shielding / metallized
bag or black conductive container). Spectrum Controls reserves the right to void the
warranty on any unit that is improperly packaged for shipment.
For further information or assistance, please contact your local distributor, or call
Spectrum Controls technical support at:
USA: 425-746-9481
Declaration of
Conformity
Available upon request.
Programming Guide 0100127-01 Rev. A
©2006, Spectrum Controls, Inc. All rights reserved. Specifications subject to change
without notice. All trademarks are the property of their respective owners.
Corporate Headquarters
Spectrum Controls, Inc.
P.O. Box 5533
Bellevue, WA 98006 USA
Fax: 425-641-9473
Tel: 425-746-9481
Website: www.spectrumcontrols.com
Email: [email protected]
Programming Guide 0100127-01 Rev. A