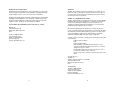
1
User Manual
PowerLink*
Control Unit for
PowerLink* 3 control unit models:
100-PL3D - North America
100-PL3DCE - Continental Europe
PowerLink* 2 control unit models:
100-PL3AUS - Australia
100-PL3UK - United Kingdom
100-PL3J - Japan
© 2001 AbleNet, Inc.
* Registered in the U. S. Patent and Trademark Office.
PN900-80066 Rev. C 6/01
TM
AbleNet Tools for Independence
AbleNet designs and manufactures tools for independence, products and
services that allow people with severe disabilities to participate more fully
in daily activities at home, school, work and in their communities.
AbleNet products help children and adults communicate and control electrical
and battery-operated appliances, toys and devices. AbleNet also provides
workshops, written materials, and information that supports and assists
families, teachers, therapists and care providers worldwide.
For information about AbleNet products and services, contact:
AbleNet, Inc.
1081 Tenth Avenue SE
Minneapolis, MN 55414-1312
USA
Guarantee
AbleNet offers a 30-day, money-back guarantee if our products do not
meet your needs or expectations. Products must be in new condition to
honor this service. Please follow our repair/return policy when sending
products back under our guarantee.
AbleNet, Inc. Repair/Return Information
AbleNet corded switches are warranted for three years; all other AbleNet
manufactured products are warranted for one full year from the date of
purchase. If documentation identifying the date of purchase is not
supplied, the warranty period will be determined as one year from the
manufacturer date stamped inside the product.
All products under warranty are repaired free of charge. Products no
longer covered by warranty may be repaired for a nominal fee. All repairs
are warranted for 90 days. Before returning a product for repair, please
contact an AbleNet customer service representative for the Return
Authorization Number (RA#) and repair charge, if applicable.
Toll Free: 1-800-322-0956
(US and Canada only)
Telephone: 612-379-0956
Fax: 612-379-9143
Internet: www.ablenetinc.com
To return a product for refund or repair, please indicate the following with
your product(s):
• Name and phone number
• RA#
• Return shipping address
• Brief description of problem (what the product is or isn’t
doing along with what has already been done to correct the
problem) or reason for return.
• Documentation that shows the purchase date (i.e., copy of
packing slip, purchase order, or invoice).
• Check, money order, or purchase order for the amount of the
repair.
Send the above to:
AbleNet, Inc.
Attention: Repair - Reference: (your RA#)
1081 Tenth Avenue SE
Minneapolis, MN 55414-1312
USA
To contact us:
Toll Free: 1-800-322-0956
(US and Canada only)
Telephone: 612-379-0956
Fax: 612-379-9143
Internet: www.ablenetinc.com
2
11
3. Keep the floor clear of cords to avoid trips and falls, and to prevent
the control unit or a connected appliance from being pulled to the
floor. Position all cords near the wall. Always keep cords out of
the reach of children.
Introduction
The AbleNet PowerLink control unit allows switch operation of electrical
appliances. The PowerLink includes several features that make it useful for
all individuals with severe disabilities.
4. Unplug the control unit and fold the electrical cord into its carrying
strap when not in use to prevent it from being pulled or dropped
from a table accidentally.
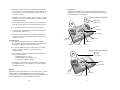
Diagram 1: PowerLink* 3 Control Unit
100-PL3DCE
Single outlet only
5. Do not immerse the PowerLink control unit or any appliances in
water. Do not place them in a location where they may get wet.
Outlet 2
6. Do not open the PowerLink control unit to expose its interior.
Upper knob
7. To prevent injury, unplug the appliance(s) before opening the lid
to a blender or food processor.
Indicator light
8. To prevent accidental activation of an appliance via the AirLink
cordless switch, unplug the appliance from the PowerLink control
unit when not in use.
100-PL3D
Care and Storage
1. If cleaning is required, disconnect the PowerLink control unit
from the wall outlet; disconnect the appliances and switches from
the PowerLink. Wipe the surface with a damp cloth.
Switch jack 2
Duplex outlet
IR receiver
Outlet 1
Switch jack 1
Lower knob
2. Do not lift the PowerLink control unit by the power cord. When
storing or packing for transport, wrap the control unit in
protective padding.
Diagram 2: PowerLink*2 Control Unit
100-PL3AUS
100-PL3UK
single outlet only
3. The PowerLink control unit should be used under the following
environmental conditions:
- a temperature of 15° C to 35° C
- a relative humidity of not more than 75%
- an air pressure of 75kPa to 106 kPa
Upper knob
4. A PowerLink control unit may be left connected to a frequently
used appliance for the user’s convenience; however, unplug the
switch when not in use.
Warranty
AbleNet offers a three-year warranty on corded switches and a one-year
limited warranty on all other AbleNet products (including the AirLink
cordless switch); other manufacturers’ products carry each manufacturer’s
warranty. Warranties in full text are available upon request.
10
Indicator light
100-PLJ
duplex
outlet
IR receiver
Switch jack
Lower knob
3
All PowerLink control units include:
- Four modes of control to meet the needs of the user in every situation.
- A low profile and rounded corners for enhanced safety.
The PowerLink* 2 control units include:
- A sturdy carrying handle to gather and secure the power cord, keeping it
out of the way.
- Infrared remote capabilities. The AirLink cordless switch (sold separately)
provides cordless control of electrical appliances via the PowerLink control unit without a switch cord connection.
- 220V models (100-PL2AUS, UK) allow up to 2400 watts capacity.
- 100V models (100-PL3J) allow up to 1700 watts capacity.
The PowerLink* 3 versions also include:
- 120V models (100-PL3D) two duplex outlets to allow choice-making
activities with a variety of appliances, up to a total of 1700 watts per side.
- 220V models (100-PL3DCE) two outlets to allow choice-making activities
with a variety of appliances, up to a total of 2400 watts per side.
- The option of connecting two switches which provides choice-making
opportunities. Any switch with a 1/8 inch (3.5 mm) mono plug or adapter
may be used.
Selecting a Mode of Control
All PowerLink control units offer four types of appliance control: Direct
mode; Timed Seconds mode; Timed Minutes mode; and Latch mode.
Direct
The direct mode keeps the appliance(s) on only while the switch is
activated. It is often preferred for the first-time switch user.
To select, turn the upper knob (Diagram 1 or 2) to the Direct position.
The lower knob is not used in this mode. The appliance will turn on only
while the switch is activated.
Timed Seconds
The Timed Seconds mode allows the appliance to run for a preset amount
of time, from one to 60 seconds, with a single activation. This mode is
ideal for quicker activities like sharpening a pencil with an electric
sharpener.
To select, turn the upper knob to the Timed (seconds) S position, and
the lower knob to the number of seconds you wish the appliance to remain
on. When the time has expired, the control unit will turn off the appliance
even if the user is still holding down the switch.
4
Trouble Shooting Tips
If the equipment fails to operate after you have read the instructions, follow
the suggestions listed below. If the problem persists, please call AbleNet
Customer Service at 1-800-322-0956 (US and Canada).
1. Check all cord and jack connections to make sure they are firmly
in place.
- Is the control unit plugged into the wall outlet?
- Is the appliance cord plugged into the control unit?
- Is the switch plugged into the control unit? AirLink cordless
switch: Is there a clear line of sight between the AirLink and the
PowerLink? Are the AirLink and the PowerLink within 20 feet?
Does the AirLink have batteries properly installed in it?
2. Make sure that ON/OFF switch on the appliance(s) is turned ON.
If the appliance has a pressure-sensitive switch (e.g., coffee
grinder), tape the switch in the ON position.
3. Be sure the upper and lower knobs show the type of control and
length of time you want to use.
4. Plug the appliance directly into the wall outlet to be sure the outlet
and the appliance are working.
If you’ve connected an appliance and it’s not turning on, try the following:
1. Plug the appliance into the wall outlet, turn on the appliance,
then unplug it from the wall outlet. After 10 minutes, plug it in
again. If the appliance comes on without anyone reactivating its
ON/OFF switch, it will operate with the PowerLink control unit.
2. Check the switch by plugging it into another system.
3. Check the PowerLink control unit by plugging it into an outlet and
connecting a single switch and appliance (you know are working) to
the control unit.
For Your Safety
1. Read the instructions for all appliances and devices before using
them with the PowerLink control unit.
2. Use caution when placing any appliance near a user (especially
appliances that have moving parts or that generate heat, such
as mixers and light bulbs).
9
Setting Up for Choice-Making Activities
(models 100-PL3D and 100-PL3DCE):
Any mode of control may be used in choice-making. When one appliance
has been activated, the other will not function until the first one is turned off
(Latch and Direct modes) or until the preset time has elapsed (Timed
Seconds or Timed Minutes modes).
1. Plug your appliance or devices into the control unit outlets, at
least one appliance per side.
2. Plug your switch into the switch jack. The switch must have a
1/8 inch (3.5 mm) mono plug or adapter (pigtail adapters sold
separately).
3. Plug the control unit into a grounded electrical outlet. (Use a
grounding adapter if electrical supply mains are not grounded).
4. Turn the ON/OFF switch on your appliance to the ON or PLAY
position.
5. Select a mode of control.
6. Activate a switch and the corresponding appliance will turn on.
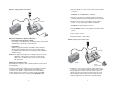
Diagram 5: Setting Up for
Choice-Making Activities
Appliance 2
Timed Minutes
The Timed Minutes mode allows the appliance to run for a preset amount
of time, from one to 60 minutes, with a single activation. This mode is ideal
for lengthier activities like playing an electric piano.
To select, turn the upper knob to the Timed (minutes) M position, and the
lower knob to the number of minutes you wish the appliance to remain on.
When the time has expired, the control unit will turn off the appliance even
if the user is still holding down the switch.
* Note: If you do not want to wait for the set time to expire, turn the upper
knob to any other mode of control and the appliance will shut off.
Latch
One activation of the switch turns the appliance ON; the second activation
turns it OFF. Use the Latch mode when you want an appliance (such as a
lamp) to remain on for an extended length of time.
To select, turn the upper knob to the Latch
position. The lower knob
is not used in this mode. The appliance will turn on when the switch is
activated, and turn off when it is activated again.
Setting Up with a Corded Switch (all models)
1. Plug your appliance(s) or device(s) into the outlet on the
PowerLink control unit.
PowerLink* 3: use either Outlet 1 or Outlet 2.
2. Plug your switch into the switch jack. The switch must have a
1/8 inch (3.5 mm) mono plug or adapter (pigtail adapters sold
separately).
PowerLink* 3: plug your switch into the switch jack, 1 or 2
(corresponding to Outlet 1 or Outlet 2).
3. Plug the control unit into a grounded electrical outlet. (Use a
grounding adapter if electrical supply mains are not grounded).
Appliance 1
Switch 2
PowerLink
4. Turn the ON/OFF switch on your appliance to the ON or PLAY
position.
** For an appliance with a pressure-sensitive ON/OFF switch, tape the
switch in the ON position.
Switch 1
** Note: Two AirLink cordless switches, two corded switches or a
combination of an Airlink cordless switch and a corded switch may be
used in a choice-making activity. Each AirLink cordless switch should
be set to correspond to one outlet (e.g., switch 1 set to Outlet 1,
switch 2 to Outlet 2 ; Diagram 5).
8
5. Select a mode of control.
6. Activate the switch.
5
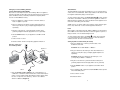
Diagram 3: Setting Up with a Corded Switch
1. Plug your appliance or device into the outlet on the PowerLink
control unit.
PowerLink* 3: use either Outlet 1 or Outlet 2.
2. Plug the control unit into a grounded electrical outlet. (Use a
grounding adapter if electrical supply mains are not grounded).
PowerLink
3. Move the selector switch on the AirLink cordless switch to
position 1 or 2 (corresponding to Outlet 1 or Outlet 2).
PowerLink* 2: set the AirLink to position 1.
4. Turn the ON/OFF switch on your appliance to the ON or PLAY
position.
5. Select a mode of control.
Appliance
Switch
Outlets and Simultaneous Appliance Operation
** PowerLink* 3 and PowerLink* 2 Japan:
If two appliances are plugged into one duplex outlet, they will operate
simultaneously in the mode of control selected.
6. Activate the AirLink cordless switch.
Diagram 4: Setting Up for Cordless Control
** PowerLink* 3:
Appliances plugged into Outlet 1 and Outlet 2 at the same time
will not operate simultaneously, even if corresponding switches
are activated at the same time. (See Setting Up for Choice-Making
Activities section).
PowerLink
Caution! Two appliances plugged into one duplex outlet cannot exceed
1700 watts combined. Never connect two heat-producing
appliances to one duplex outlet, such as a popcorn popper
and a hair dryer.
Setting Up for Cordless Control
The PowerLink is designed to work only with the AirLink cordless switch
(sold separately).
The AirLink cordless switch enables the user to operate the PowerLink
control unit from a distance of approximately 20 feet without any
connecting cords. Similar to a television remote control, the AirLink
cordless switch must be in direct line of sight to the IR receiver
on the PowerLink control unit to operate properly (Diagram 4).
6
Appliance
AirLink
cordless switch
** PowerLink* 3 control units: Two AirLink cordless switches may
be used for a choice-making activity with PowerLink* 3 models.
Plug the appliances into the control unit outlets, at least one
appliance per side, then follow steps 2 through 6, above. Be
sure the AirLink’s selector switch position corresponds to the
outlet and appliance(s) you want each to operate (step #3).
7