1
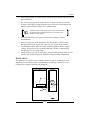
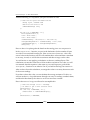
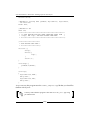
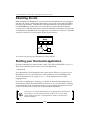
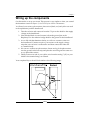
Chapter 1
Currently, there are several board models on the market ranging in size and
components. For example, the Lilly Pad allows enthusiasts to attach an Arduino
board to clothing for electronic textile-based projects. These boards support a wide
range of "shields" – Arduino compatible electronic boards that can be plugged into
it and expand its functionality. One particular extension has been the introduction
of Ethernet shields and wireless Xbee devices to allow communication with home
networks and the Web.
The benefit of the Arduino for amateur enthusiasts has been that little or no
knowledge of how electronics are soldered together is required to use the pre-built
shields. However, as the user becomes more comfortable with the technology, he/
she can progress to building his/her own projects using the numerous kits and
sensors available on the market.
This easy adoption has helped to contribute to the number of websites and books
dedicated to home automation projects using the technology.
In this book, we will not be using one of the Arduino microcontroller boards, the
Raspberry Pi will fulfill this role. However we will be using the Raspberry Pi to
Arduino shield. This will allow us to connect shields and other components to
the Raspberry Pi and control them via the Arduino programming language.
Raspberry Pi to Arduino shield connection
bridge
For our project, the particular Raspberry Pi to Arduino shield we will be using is
produced by Cooking Hacks, an offshoot of the Libelium wireless communications
company based in Spain.
Their website can be found at http://www.cooking-hacks.com.
The Cooking Hacks shield is connected to the Raspberry Pi's GPIO pins, and with
the inclusion of the arduPi software, you will be able to communicate between your
electronic devices, the Raspberry Pi's operating system, and web-based projects.
Let's take a quick look at the shield and its components.
Shield specifications
The Raspberry Pi to Arduino shield is a credit card sized electronics board that
mimics an Arduino microcontroller in its layout. The Raspberry Pi connector is
under the board, and the top of the board contains typical pins and connectors
you would find on an Arduino board such as the Uno.
[ 13 ]