1
Version 1.0 Initial Public Release Build 327
User Manual
Copyright Notice
© 2007-2011 CartyStudios Corporation. All rights reserved. Information presented in this manual is subject to
change without prior notice and does not represent a commitment on the part of CartyStudios Corporation.
All Company and product names mentioned in the manual are trademarks of their respective owners.
Table of Contents
Features and Overview .......................................................................................................... 3
System Requirements ............................................................................................................ 4
Installation ............................................................................................................................ 4
Software Activation ............................................................................................................... 5
Getting Started ...................................................................................................................... 6
Step 1: Creating an account Profile ........................................................................................ 6
Step 2: Creating Accounts ...................................................................................................... 8
Settings Section ..................................................................................................................... 9
Automatic Account Creation ................................................................................................ 10
Software Parts Explained ..................................................................................................... 11
Adding a New Article ........................................................................................................... 13
Editing an Article ................................................................................................................. 15
Adding New Sites ................................................................................................................ 16
Automatic Updates.............................................................................................................. 17
Technical Support ................................................................................................................ 17
Features and Overview
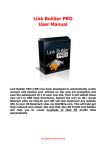
Article Submitter Plus by NiCK Carty, takes article marketing to a whole new level. This software
allows you to get started in 3 easy steps and can submit unique variations of your article to over
400 sites literally at the push of a button.
Using multi thread technology, the software works at an incredibly powerful speed and can
create accounts or submit articles simultaneously to multiple sites.
The software can post to sites running on the following platforms: WordPress, Article Friendly,
Article Friendly Ultimate, Article Dashboard, Article Beach and Article MS. Out of the box, it is
preloaded with 500 websites to submit your articles and on an average, you will always get over
400+ successful submission for every article of yours.
You can also add you own list of websites running on the above mentioned platform and it can
handle it easily. In case if you want us to add support for different platforms, please contact our
support team and we shall try to get it arranged for you.
The software is intelligently designed to select the relevant categories for your articles based on
the keywords you provide so almost everything is automated to the core.
The software has a build in scheduler so you can drip feed the submissions too. And there is a
detailed reporting module which gives you all the information on submission as well as links to
the published articles.
The software integrates with Death by Captcha’ automatic captcha solving service and you
need to have an account there which is just $7 per 5000 captcha. This should be enough to get
you started as the Captcha is mostly required during the account creation process only.
Other features include integration with The Best Spinner and Spin Rewriter to generate spintax
automatically at the push of a button.
There is also an auto updater included within the software so when we publish a new version, it
can automatically update on its own.
System Requirements
The software can work on all versions of Windows starting from XP.
Hardware wise, 1 GB RAM and processor speeds over 1 GHz should be sufficient.
Most importantly, the software requires a good Internet connection to work with.
Installation
The application is distributed as a Windows Installer package (.msi file)
You can always download the latest version from here and open this file on your Windows PC
to begin installation, just like you would do with any other software.
Once you open the Installer package on your
Windows PC, you shall see the installer open
as in the image shown to the right.
Press the Next button and you will then be
prompted with the location to install the
software.
By default, it will choose:
C:\Users\UserName\AppData\Roaming\
Leave it unchanged as the folder is usually
writable and not protected by Windows. Or you could install to some drive other than C: if you
wish to. And once done, press the Next button and it should continue with installation.
Further steps should be self-explanatory and once the installation is over, the software will
automatically create a shortcut to the software on your Desktop so you can access it from there
easily at any time.
Software Activation
The very first time when you open the software right after installation, you will be presented
with an activation screen that looks like in the image below:
Please fill in the username/email address and password received right after purchase and press
the green Activate button. You need to activate the software just once after every install and
that’s it!
In case if you have forgotten your username or password, please email our support team.
Getting Started
Upon successful activation, the software will proceed to the Welcome Screen if you’re opening
it for the first time and it looks like in the image below:
As you can see, it allows you to get started in just 3 easy steps!
Step 1: Creating an account Profile
The article directory websites require you to register or create an account with them before
you can submit articles. The software can register on all the websites for you automatically.
Before you begin, make sure you have created an email account and have it ready. Most article
directory websites will not allow Gmail, Yahoo, Hotmail or any free email providers. So the
software will allow only email accounts within your domain, created using cPanel.
Simply fill in all the details as shown in the image below:
Description for each field is also added below the image.
Profile Name:
A unique name to identify this profile, example: My Profile or Your Name
First Name and Last Name:
You don’t have to enter your real names. Just enter some random name and make sure they
will be unique by adding a couple of random alphabets in the end. For example, if you were to
enter the first and last name as Kevin Hunter, it would be better to add as KevinHY HunterGR.
User Name:
Best option is to add your First name and Last name together and do not include any numbers
here as many sites will not allow it. Example, if your first name and last name were KevinHY and
Hunter GR, you could enter the username and KevinHunterGRY or something unique.
Password:
You can enter anything here. Just make sure it is about 8 characters long.
Email ID:
As mentioned previously, use only cPanel created email account here.
Server name is usually mail.your-domain-name.com
Delete Mails on Server:
Make sure this option is checked so the emails are deleted on server after downloading them to
prevent them downloading again. Although the software can remember already downloaded
emails and won’t re-download the same email again, it is still better to delete them as you no
longer need them.
And for the same reason, it is advised to create an email account just for using with this
software as cPanel email accounts should always be free to create.
So once all the profile detailed are entered, press on the green ‘Verify’ button and the software
will check if the settings entered are all correct and if it could login to the mail account.
Following which, you can proceed to next step.
Step 2: Creating Accounts
All of the article directories require you to resolve a Captcha before you could create an
account with them. This software can automatically solve the Captcha code with help of Death
by Captcha who are the cheapest Captcha resolving service by far. Make sure you get an
account with them and it is just $6.95 for 5000 Captcha which should be more than enough.
IMPORTANT: The software communicates with Death by Captcha servers using DeCaptcher API
so you need to enable it in your account. You can do it here!
Once done, back in the software, click on the link that says ‘Click here to enter..’ as shown in
the above image and it will open up the settings screen as shown in the image below, where
you can enter your Death by Captcha User name and Password.
Settings Section
The settings screen looks like in the image below and can also be access from the software’ Top
Menu bar under Tools link.
Spinner Settings:
This is a totally optional setting and you may not need it always.
The software can automatically spin the articles before submitting, if you have entered the
article with spin-tax in the format {a|b|c}
But if you want to generate the spin-tax automatically, the software can do that with help of
The Best Spinner or Spin Rewriter. Both are affiliate links and I won’t say you really need them.
Best option would be to manually spin the articles but it is a painful task if you wish to do.
Max Threads:
Article Submitter Plus uses advanced multi-threading technology to create accounts or submit
articles simultaneously to multiple sites. By default, it is set to 20 sites which should be a decent
number but if your CPU can handle it, you can raise the bar but it isn’t recommended usually.
Once all the settings are verified, you can press the green ‘Save Settings’ button to get back to
the Welcome screen and proceed to create accounts by clicking on the blue button:
Automatic Account Creation
Once all the above steps are complete, the software will load the main window where it will
select all the article directory sites and proceeds to create accounts on them.
Once account creation is complete, it will proceed to download the emails automatically and
process them by clicking on the activation link.
Finally, it will verify the login information to confirm if the account creation has completed
successfully. The entire process should take anywhere between 30-45 minutes and you can
take a break while it does as the process is completely automated and no intervention is
required on your part!
Finally, when the account creation is fully complete, you may proceed to add articles and
submit them. Detailed instructions are given in this document.
Software Parts Explained
1. Top Menu
Contains links to access different modules of the software. You can add a new profile or article
under the ‘New’ menu. Tools menu will give access to the Settings section as well as the
module to Add new directory sites for advanced users.
2. Info Pane
Give you brief information on the total number of sites available to submit. This section also has
hyperlinks to quickly select all the articles or the ones highlighted. And on the right corner, you
can see the total number of currently selected sites.
3. Articles Pane
This section will contain all your articles which can be grouped under your desired name.
Typically useful when you want to group the articles under a particular site name or so. Helps in
keeping things organized as overtime you may have too many articles added.
4. Sites Section
This is the core section of the software which contains all the sites as well as the articles under
them. Next to each site, you can see the type of the website and the account status along with
username, passwords and sorts.
Status column displays a number which corresponds to the accounts status. 1 means Account
has been created, 2 suggests the account has been activated, 3 suggest the article has been
submitted and 4 suggest the article has been published and the software has found the link.
The progress column also reports on the status of current work that is being done on the site.
Towards the left of each site, you can find ‘+’ buttons which when clicked will expand the row
and show the articles added under them along with their submission status.
You can right click on any row and choose to visit the article directory website. When you right
click on the article row, it will point you to the published article if a link is available.
5. Add Article Button
Clicking on this button will allow you to add a new article. If you wish to edit an article, simply
right click on the article name listed on the articles pane.
6. Control Section
This area contains all the important buttons that allows you to Create accounts (Signup),
download and process emails (Inbox), verify logins (Login), submit articles (Submit), find
published links (Find Links) and display submission reports (Reports).
To the right side, you can see a progress bar which becomes active if any process is running.
Also, a small link to cancel the current running process will become visible underneath the
progress bar when the software is working on something such as creating accounts or
submitting articles.
Adding a New Article
You can access the add new article screen either by clicking on the ‘Add New Article’ button
available right below the article pane or from the top Menu under ‘New’ menu link.
Most of the fields are self-explanatory. All fields can accept spin-tax in the format {a|b|c}
except the title. If you would like to spin the title as well, add the title with spin-tax in the field
that says ‘Spin Title’
Note: All fields are plain text fields which means, you are allowed to add HTML tags and they
will be sent to the article directories as is. Try not to add HTML tags other than <b>, <strong> or
<b>, <ul>, <li>. You can add links using <a href> tags.
For best results, we would suggest adding 1 link in the body text and 1 in the resource field.
Don’t add more than 2 links and try to add articles having a minimum of 500 words for best
results. These are actually not the limitations of software but on the article directory sites.
Once you have entered all the fields, click on the green ‘Preview Article’ button and it will take
you to the Preview page where you can just have a look at the entire article.
Further, press on the same green button to proceed to site selection.
Here you can select all the sites where you want the articles to be published. Usually, you
would select all the sites and this can be done with a small hyperlink at the top.
Once all the sites have been selected, choose whether you want to submit the article instantly
or drip feed over a period of time using the built-in auto scheduler.
Instant Submission:
Choosing this option will not submit all the articles instantly. It will just add the articles under all
the above selected sites and from the software’ main window, you would need to select the
article first on the left article pane to load the articles under sites and then select (highlight) all
the sites where you want the article to be published and finally hit the submit button.
Drip Feed:
Using this method, the article will be added to the scheduler and the scheduler will run every
day to check if the article has to be submitted and proceed to submit.
You can still override this and submit to sites instantly by manually selecting the sites and
pressing the submit button as you would do on the instant submission method and this won’t
conflict with the scheduler as it is intelligently designed to post only to those sites where the
article has not been published already!
Editing an Article
To edit an already article, simple right click on the article name displayed on the articles pane
and select ‘Edit Article’ option.
This will open up the same Add article screen but with your article pre-loaded for modification.
The site selection pane will now be empty or will only have the sites under which the articles
have never been added before.
Adding New Sites
You can access this screen from the top menu, under ‘Tools’ link.
Although the software comes pre-loaded with over 500 sites to submit your articles and get
backlinks from, you could also add your own list of sites if they run on any of the following
platform: Article Friendly, Article Friendly Ultimate, Article Beach, Article MS, Article Dashboard
and WordPress.
Simply enter the list of sites on the above text box as one site per line and press the green
‘Check sites’ button. The software will then verify each one of the site for its type and if a match
is found, it will be available for importing. You could either import to an individual profile or to
all of the profiles.
Automatic Updates
The software can update on its own when a new version has been published.
Our developers are constantly at work in adding more features and sites to the software and
whenever we publish an update, you will be presented with an automatic update screen that
looks like in the image below.
.
Simply click on the green ‘Update Now’ button to begin the update process and it should
complete in less than 5 minutes depending upon your internet connectivity speeds.
Technical Support
We have a dedicated support staff to handle your queries and we also have a public community
forum where you can participate to learn more ideas or to share your thoughts.
Email Support: Owner[at]CartyStudios.com
Community: http://www.webmagnates.org/community/
We would love to hear your feedback and suggestions. Simply send us an email and we will
surely respond back with the best possible words
Cheers,
NiCK Carty..
.
.